New article
Recently updated
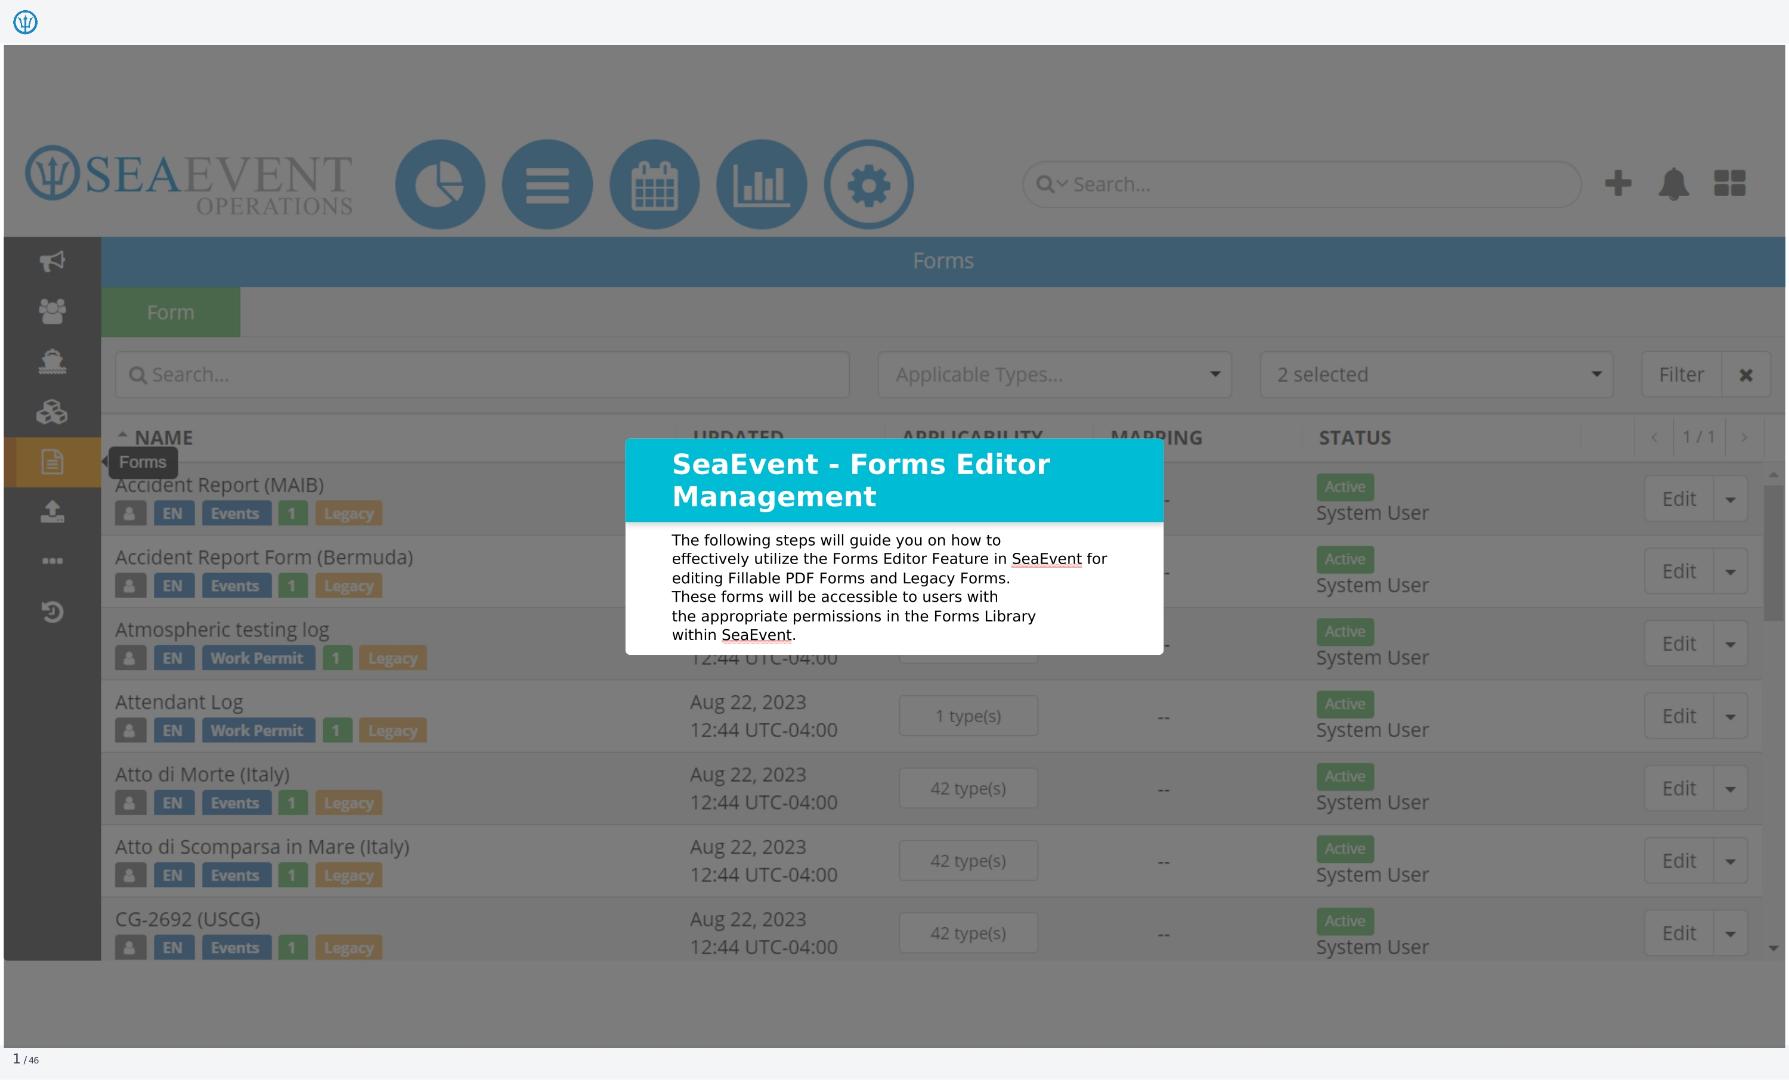
Forms Editor Management in Ideagen Maritime Management

This walkthrough guides you through the Ideagen Maritime Management Forms Editor Management process, detailing how to effectively utilize the feature for editing Fillable PDF Forms and Legacy Forms. These forms will be accessible to users with the appropriate permissions in the Forms Library within Ideagen Maritime Management.
1. Forms
This screen displays the forms available within Ideagen Maritime Management. You can search, filter, and manage these forms. The table lists each form's name, applicability, mapping status, and current status. You can also edit each form directly from this screen.
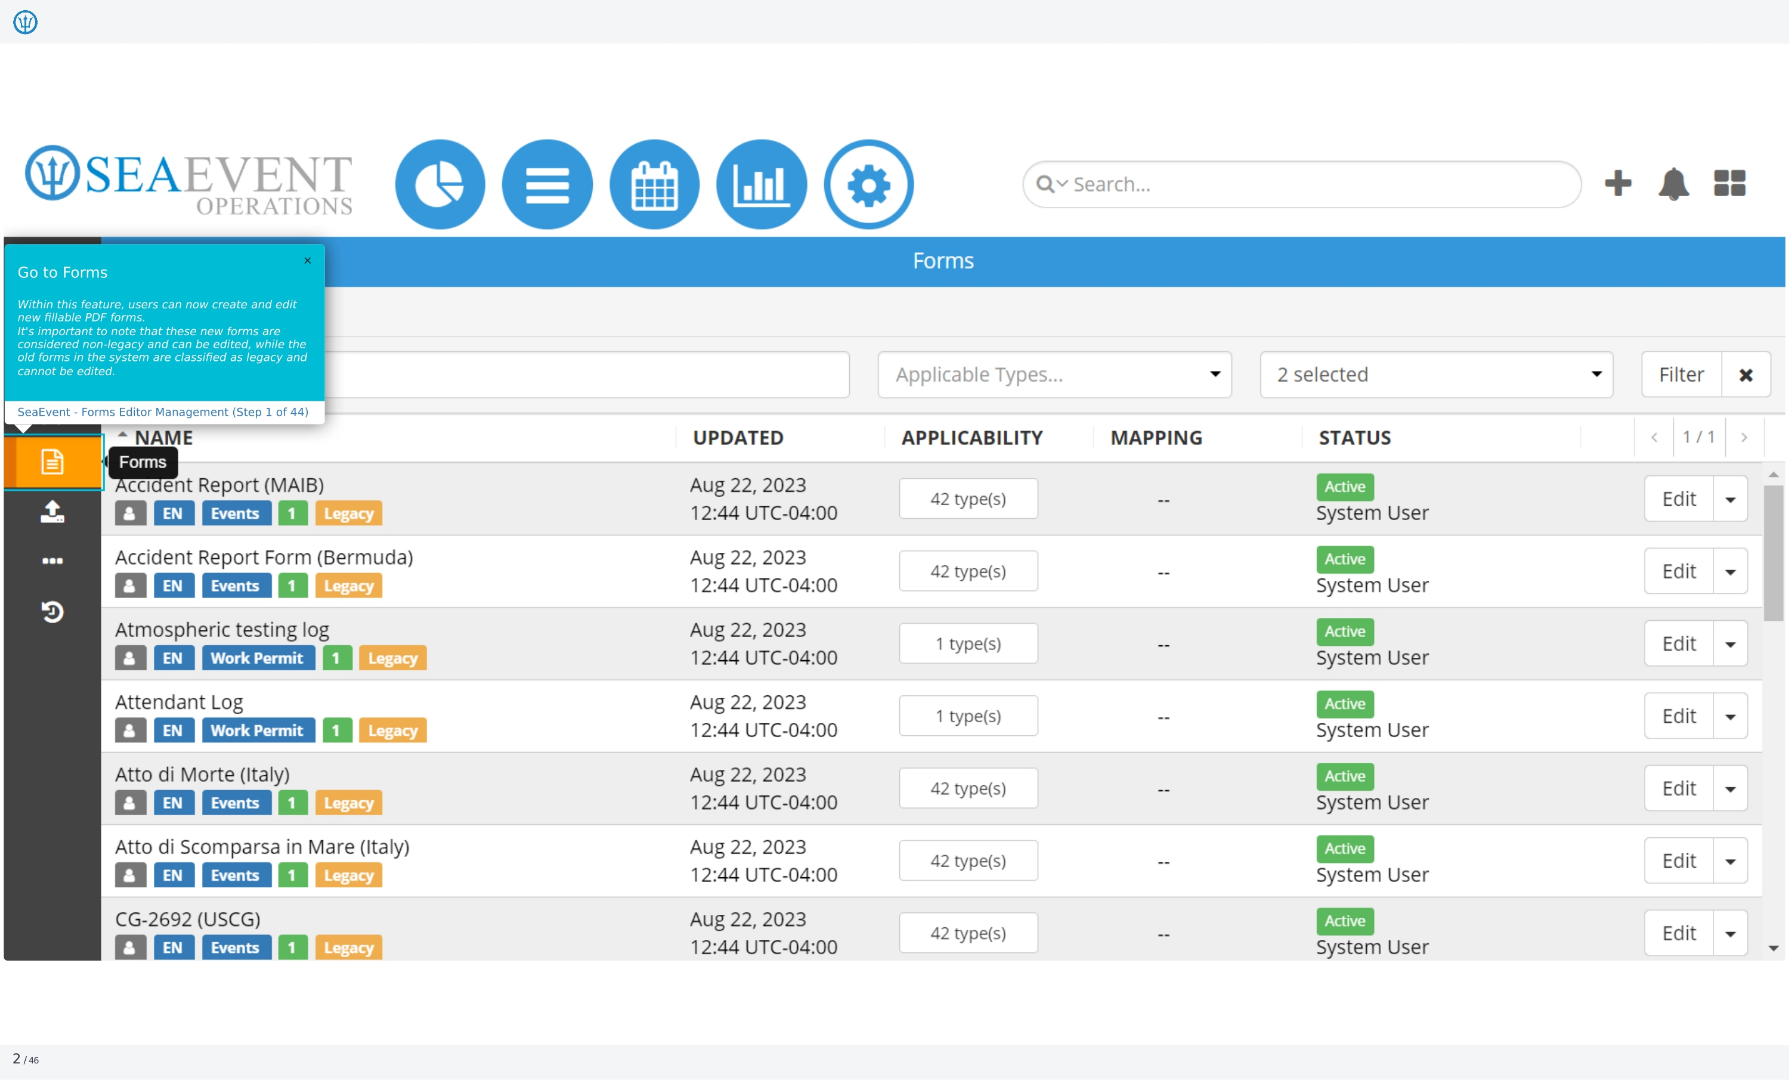
2. Go to Forms
Within this feature, users can now create and edit new fillable PDF forms. It's important to note that these new forms are considered non-legacy and can be edited, while the old forms in the system are classified as legacy and cannot be edited.
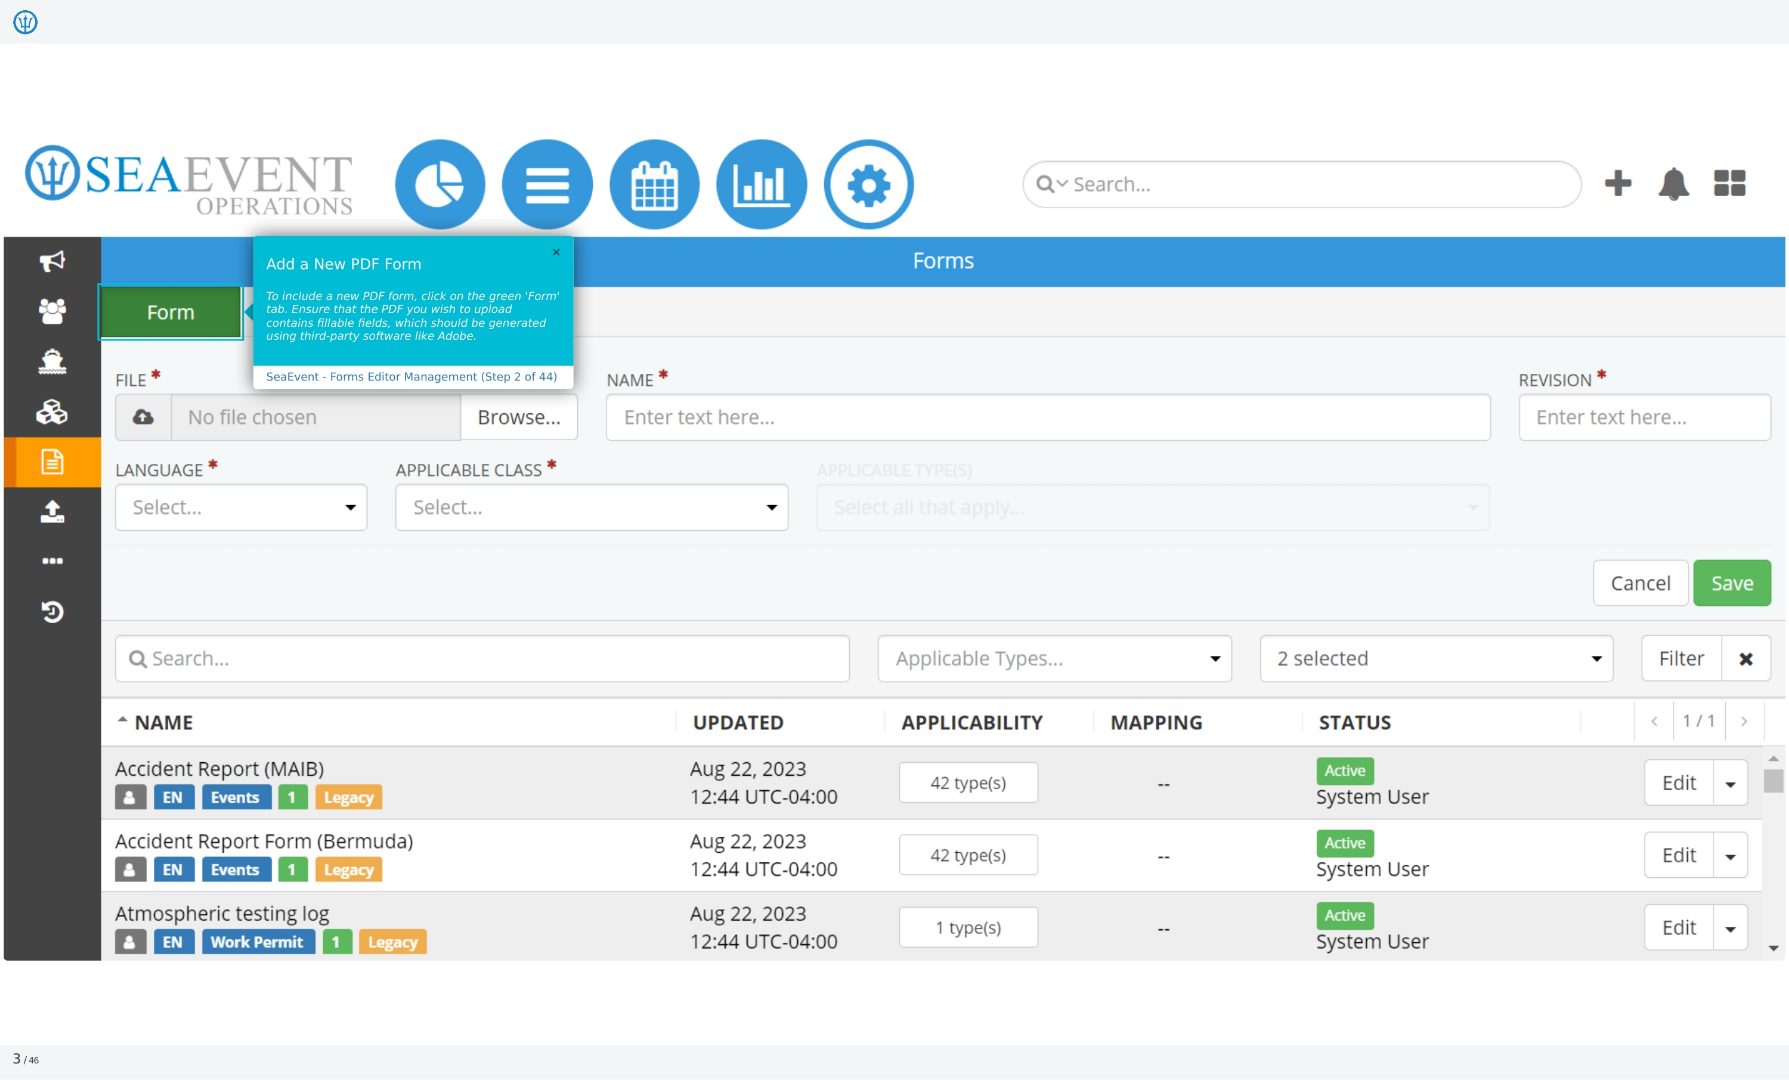
3. Add a New PDF Form
To include a new PDF form, click on the green 'Form' tab. Ensure that the PDF you wish to upload contains fillable fields, which should be generated using third-party software like Adobe. You will need to provide a name, language, applicable class, and revision for the form.
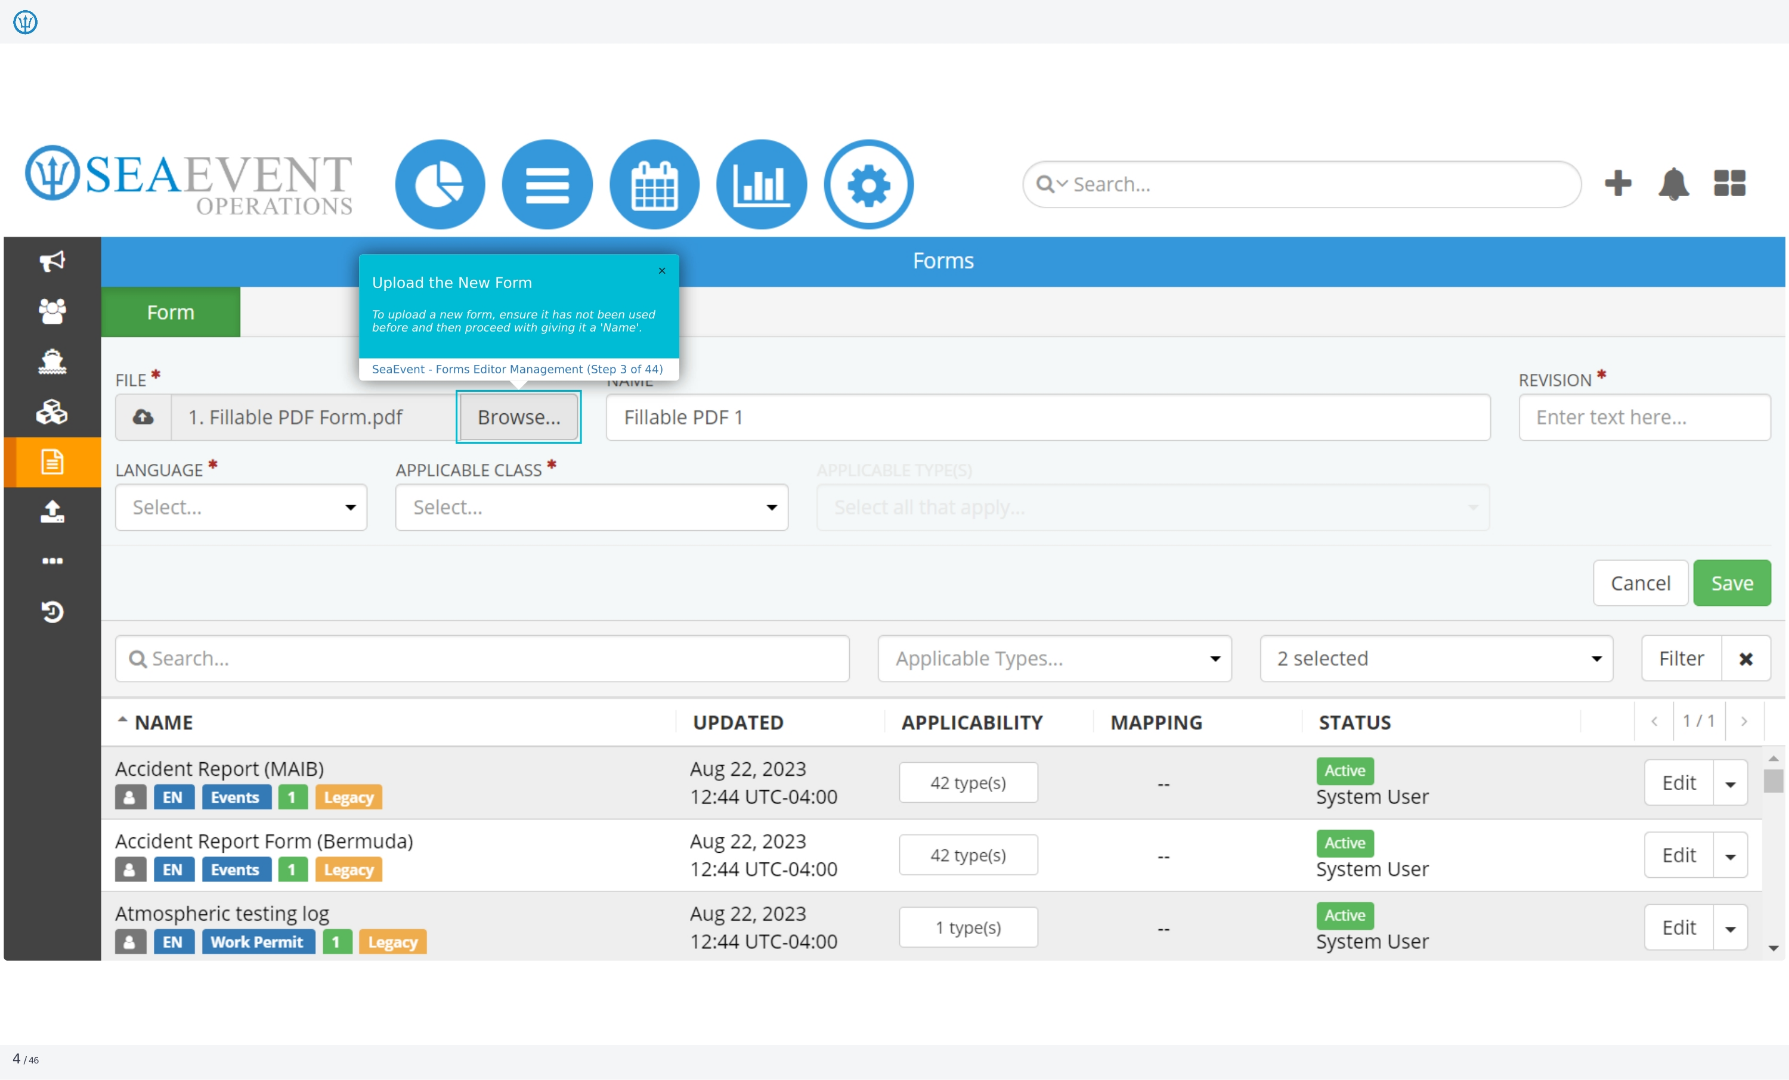
4. Upload the New Form
To upload a new form, ensure it has not been used before and then proceed with giving it a 'Name'. You will need to select the PDF file from your computer. The file name will then be displayed. You can then proceed to the next step.
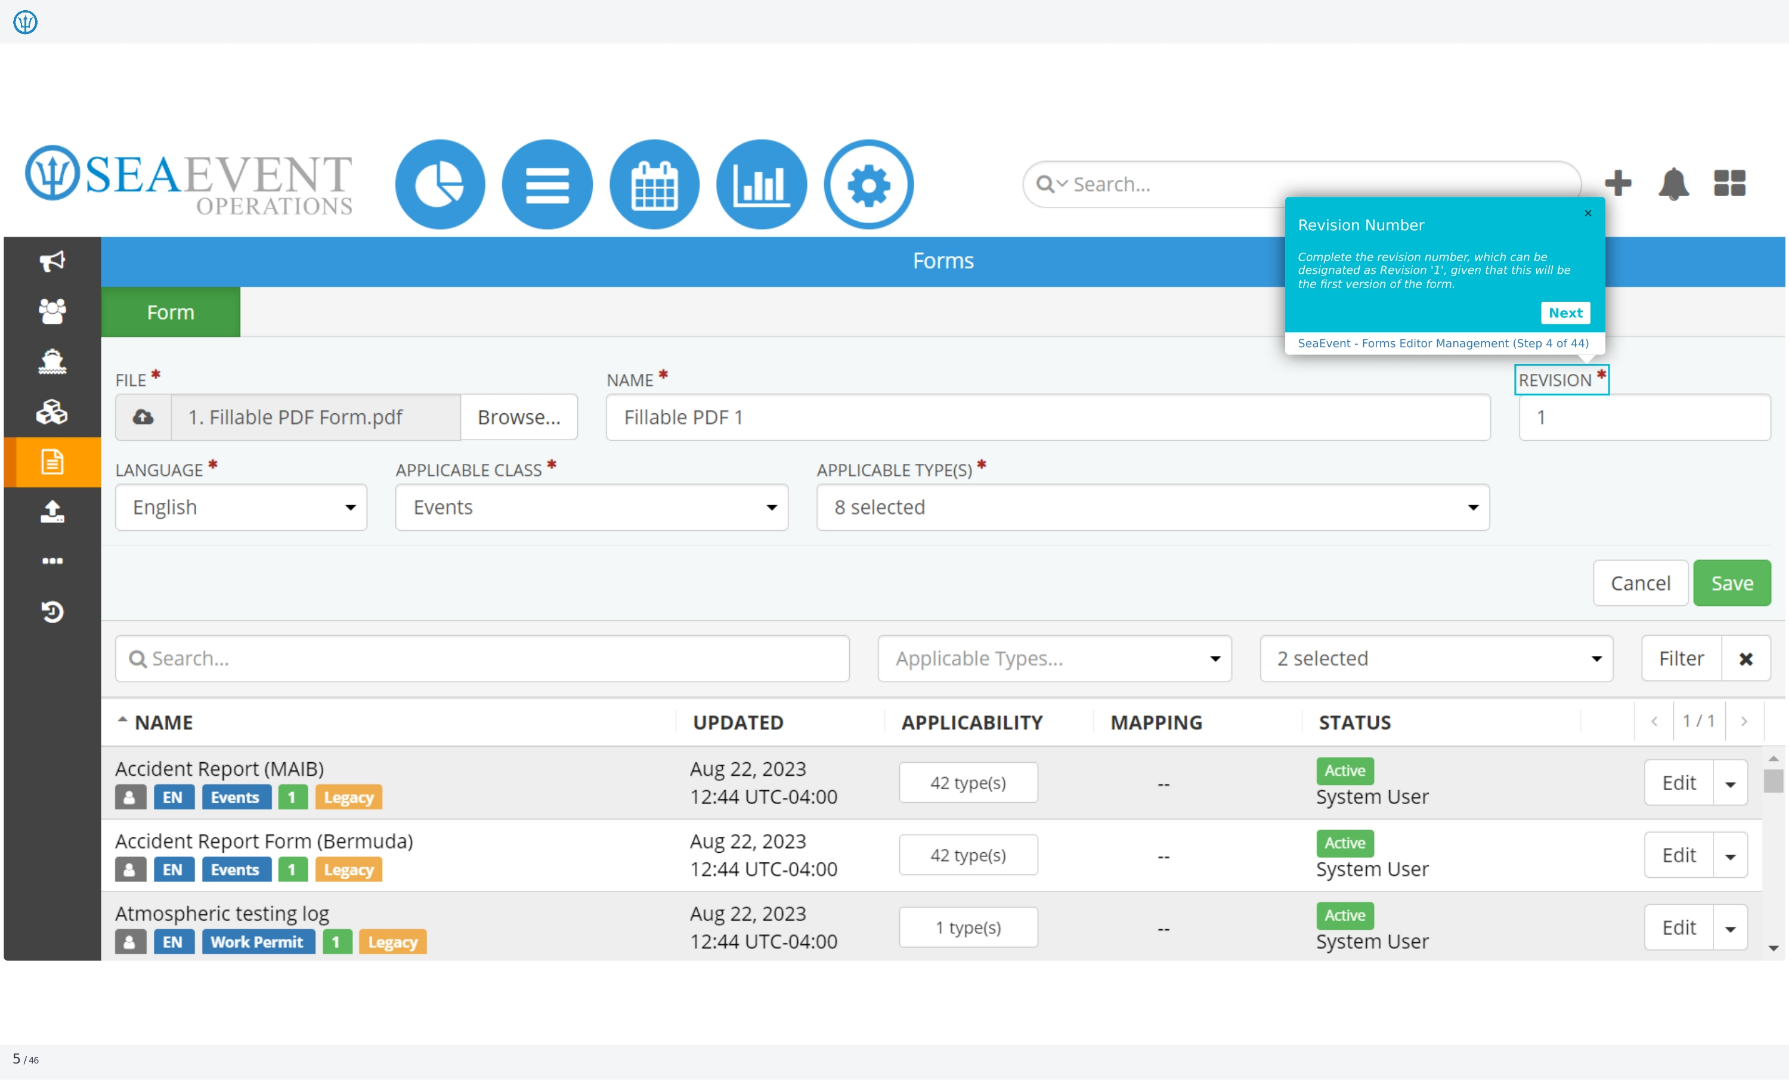
5. Revision Number
Complete the revision number, which can be designated as Revision '1', given that this will be the first version of the form. This helps track changes and updates to the form over time. Click next to continue.
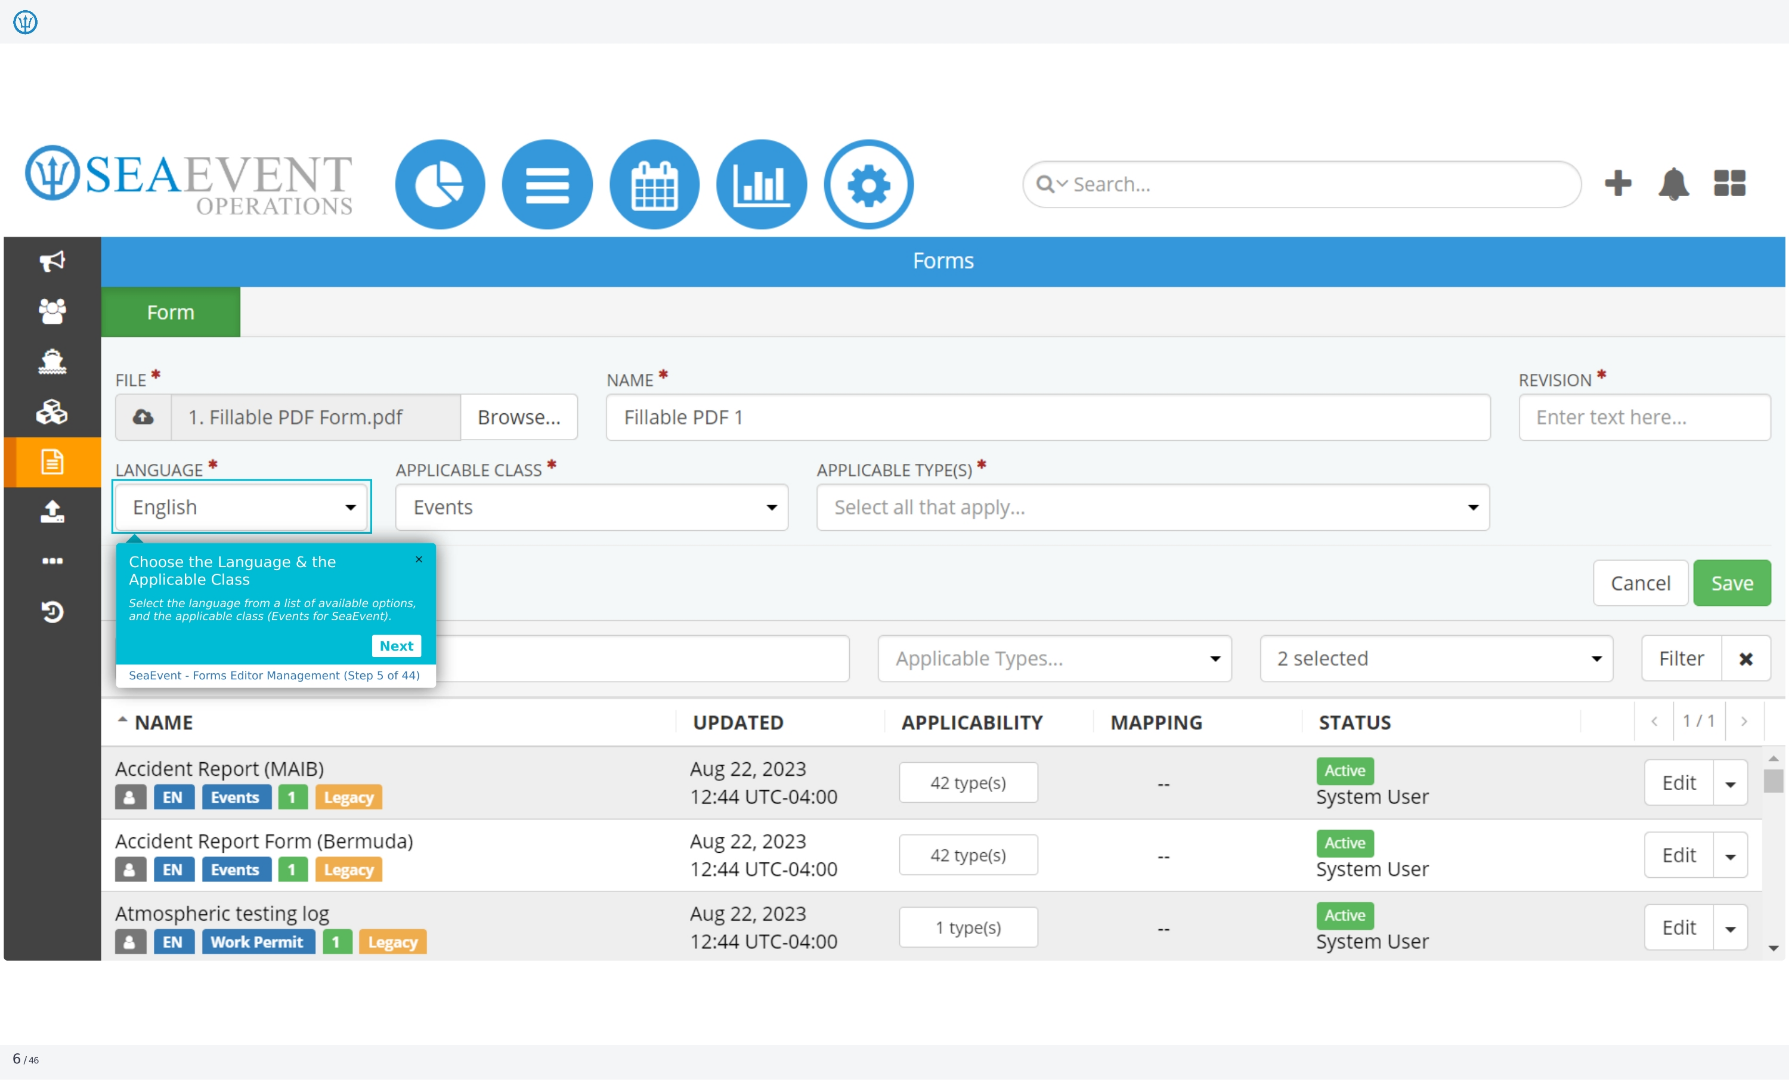
6. Choose the Language & the Applicable Class
Select the language from a list of available options, and the applicable class, which is Events for Ideagen Maritime Management. This ensures the form is correctly categorized and used in the appropriate context within the system. Click next to continue.
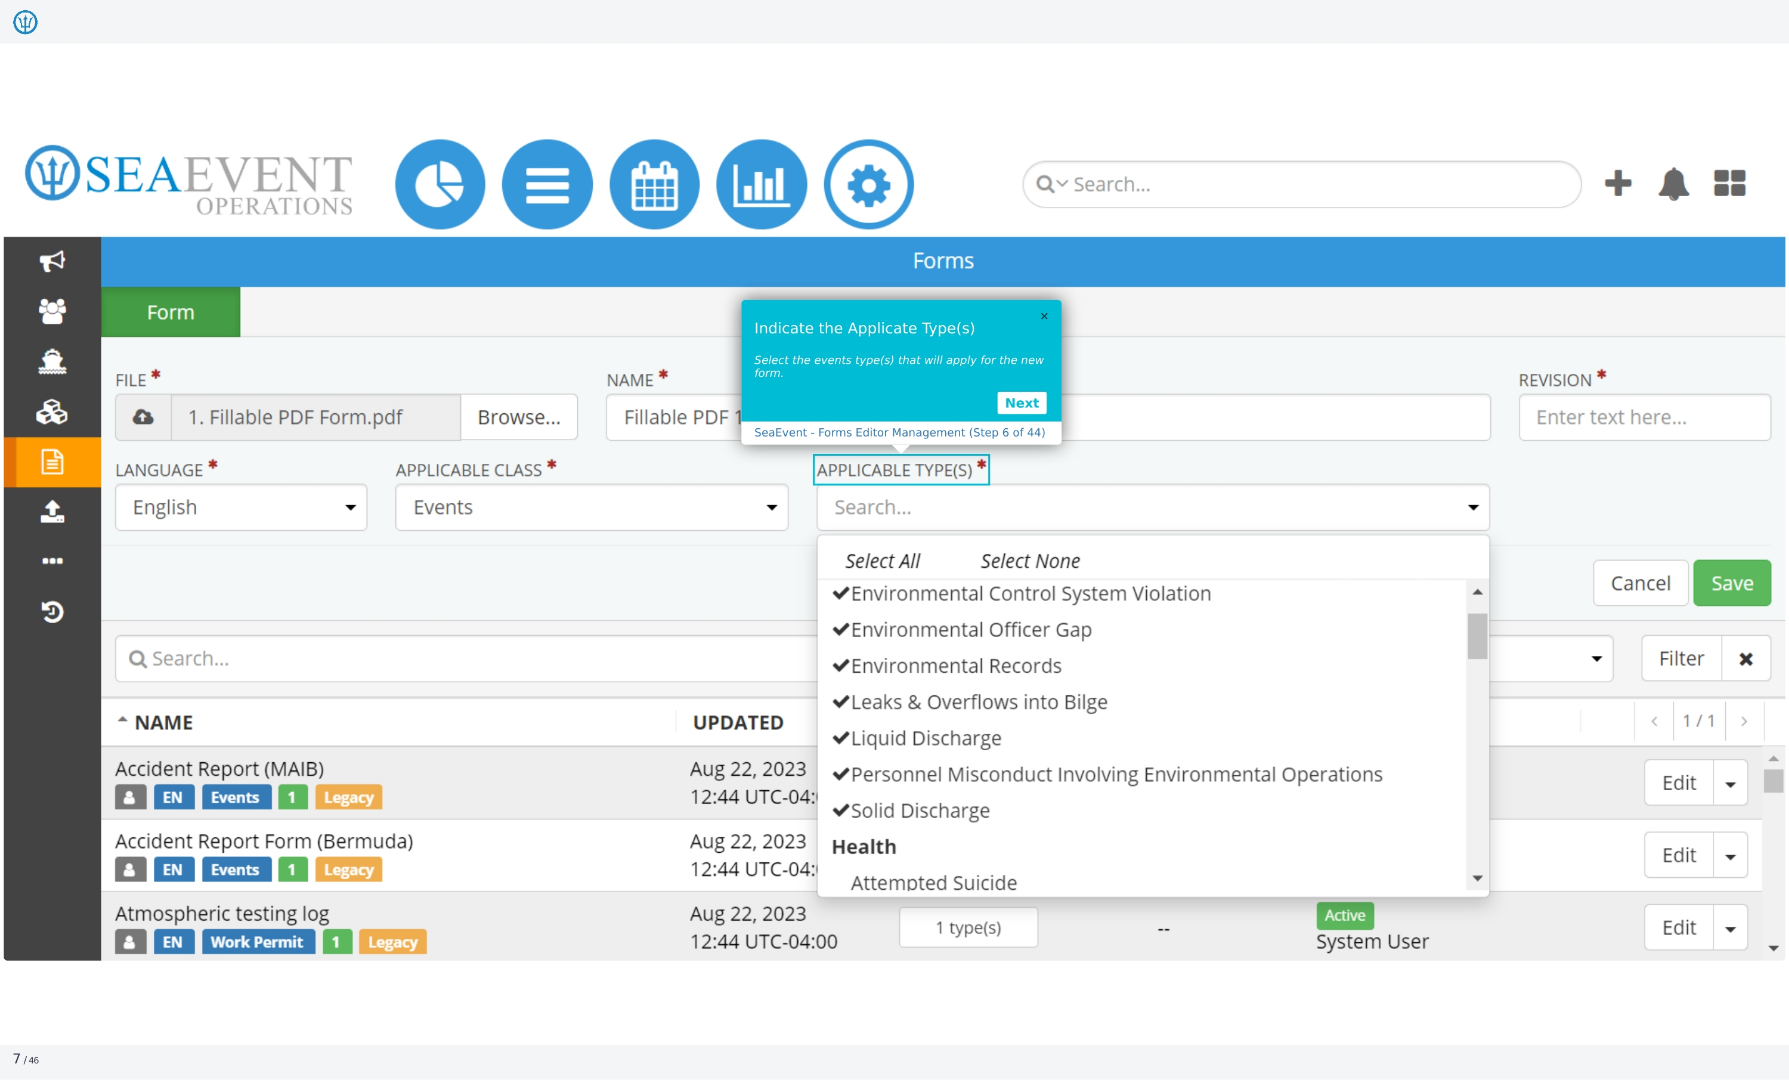
7. Indicate the Applicable Type(s)
Select the events type(s) that will apply for the new form. This allows you to specify which types of events the form should be used for, such as environmental control system violations, environmental officer gaps, or health-related incidents. Click next to continue.
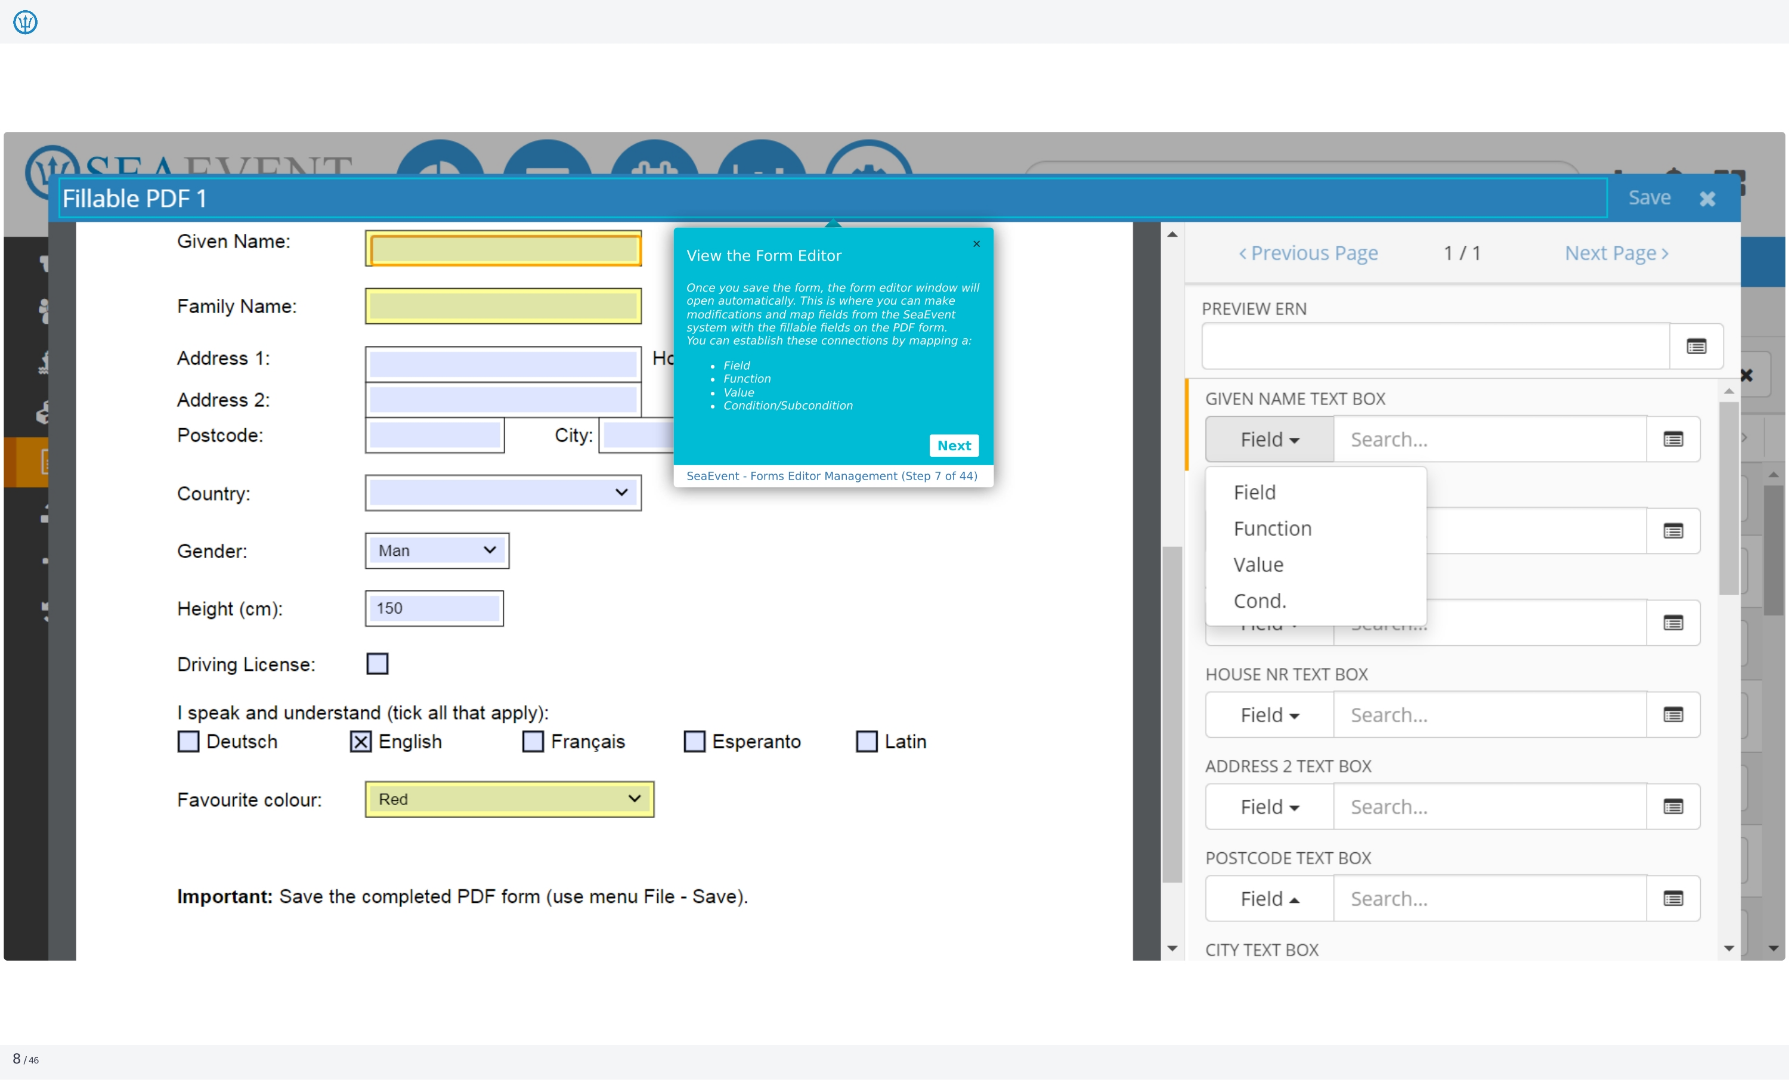
8. View the Form Editor
Once you save the form, the form editor window will open automatically. This is where you can make modifications and map fields from the Ideagen Maritime Management system with the fillable fields on the PDF form. You can establish these connections by mapping a field, function, value, or condition/subcondition.
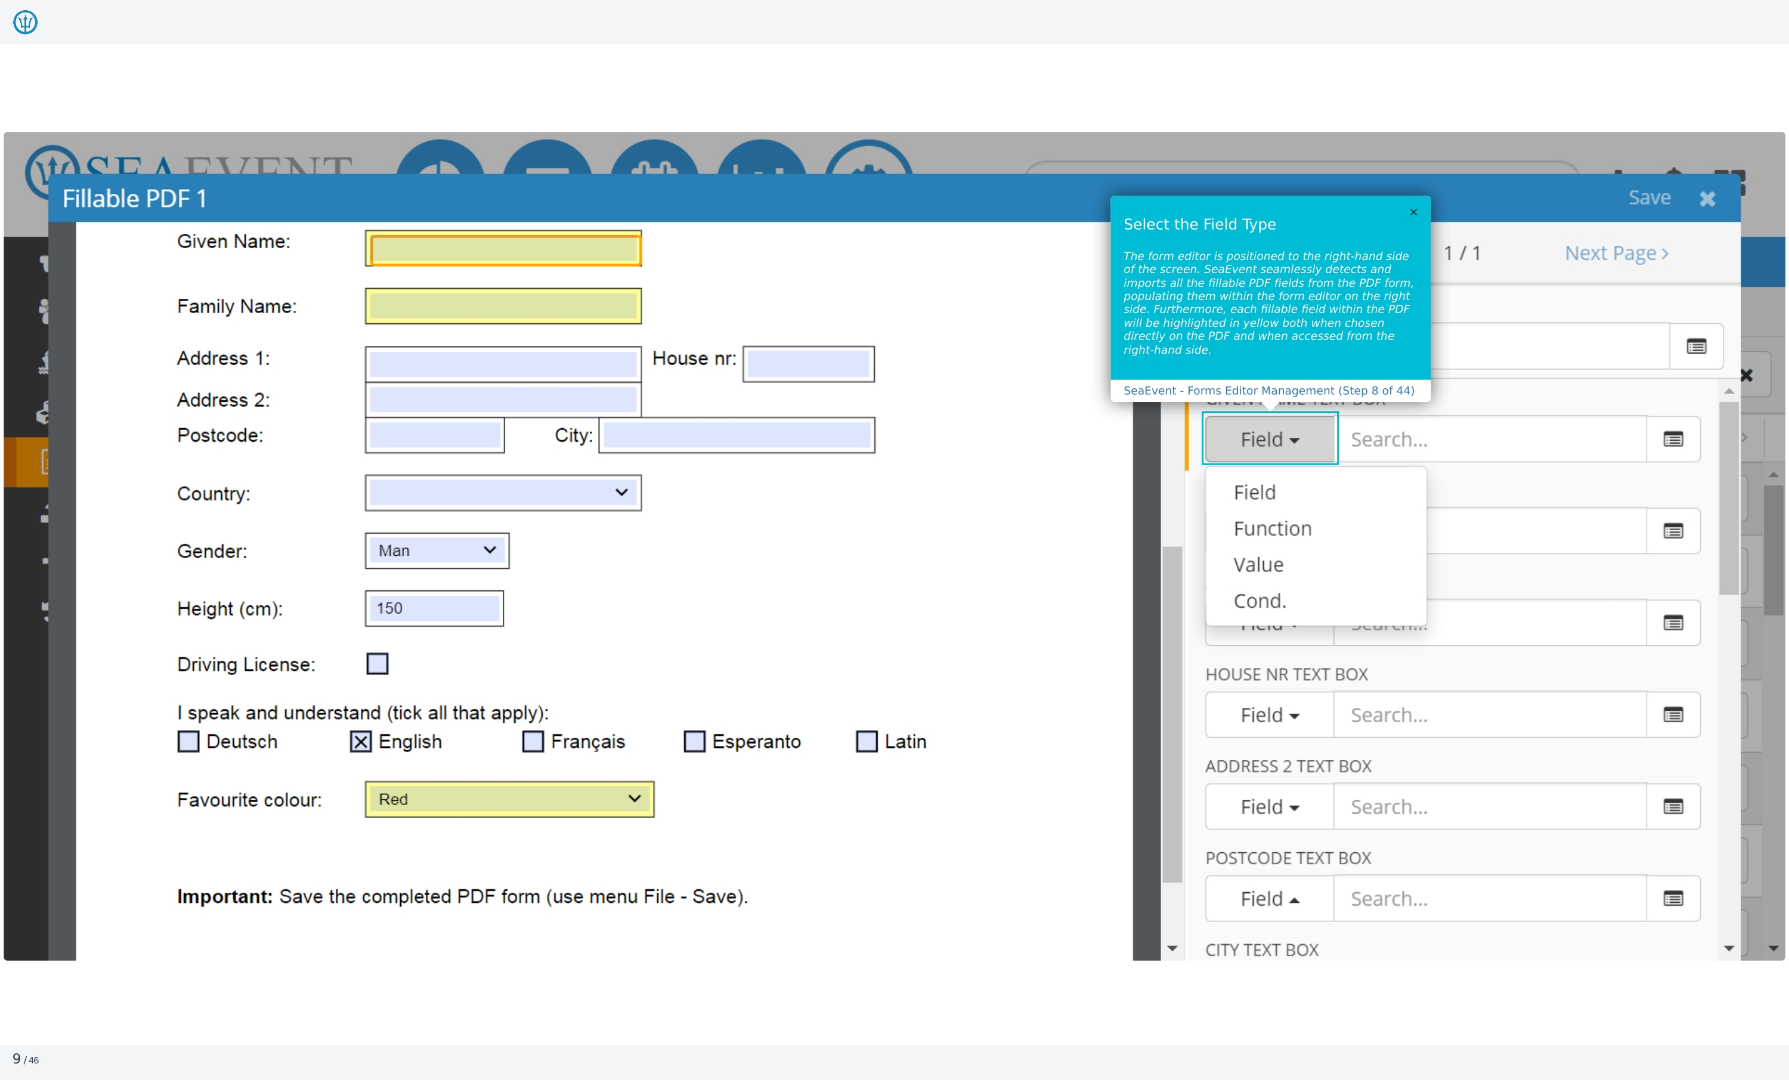
9. Select the Field Type
The form editor is positioned to the right-hand side of the screen. Ideagen Maritime Management seamlessly detects and imports all the fillable PDF fields from the PDF form, populating them within the form editor on the right side. Furthermore, each fillable field within the PDF will be highlighted in yellow both when chosen directly on the PDF and when accessed from the right-hand side.
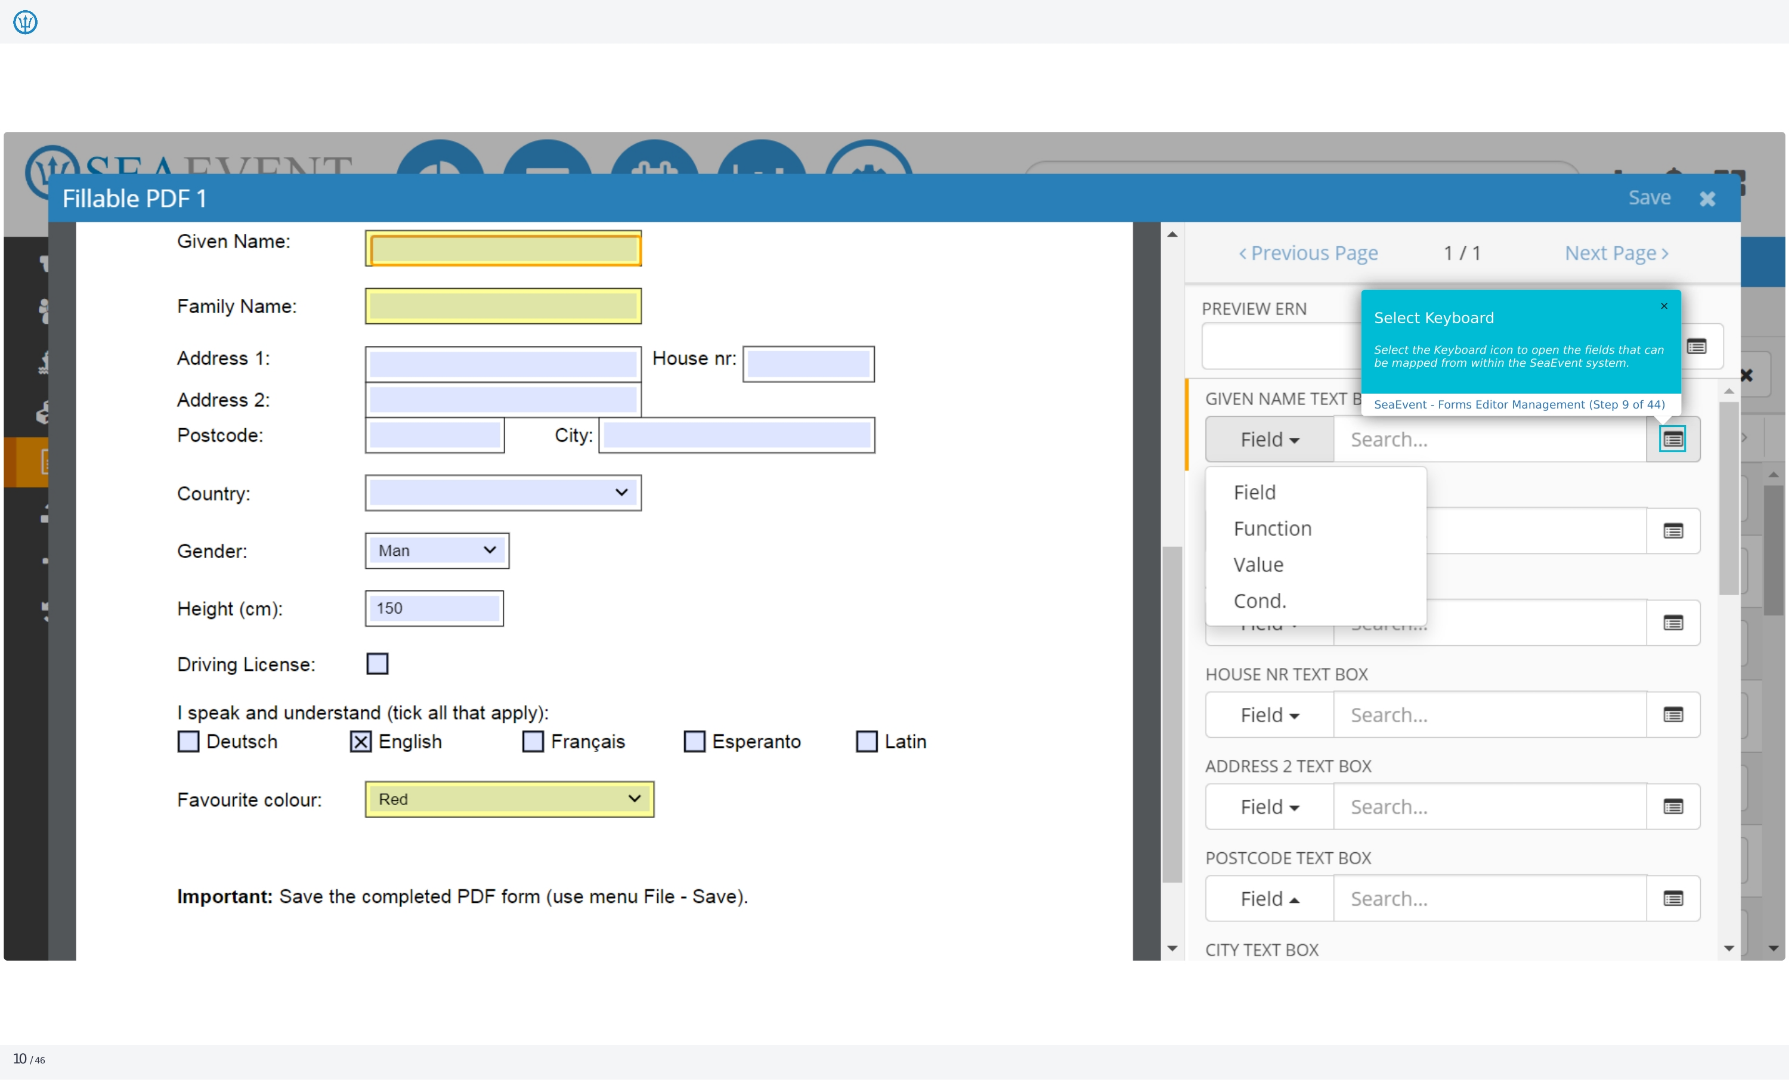
10. Select Keyboard
Select the Keyboard icon to open the fields that can be mapped from within the Ideagen Maritime Management system. This allows you to link specific data points from Ideagen Maritime Management to the corresponding fields in the PDF form, ensuring accurate and efficient data entry.
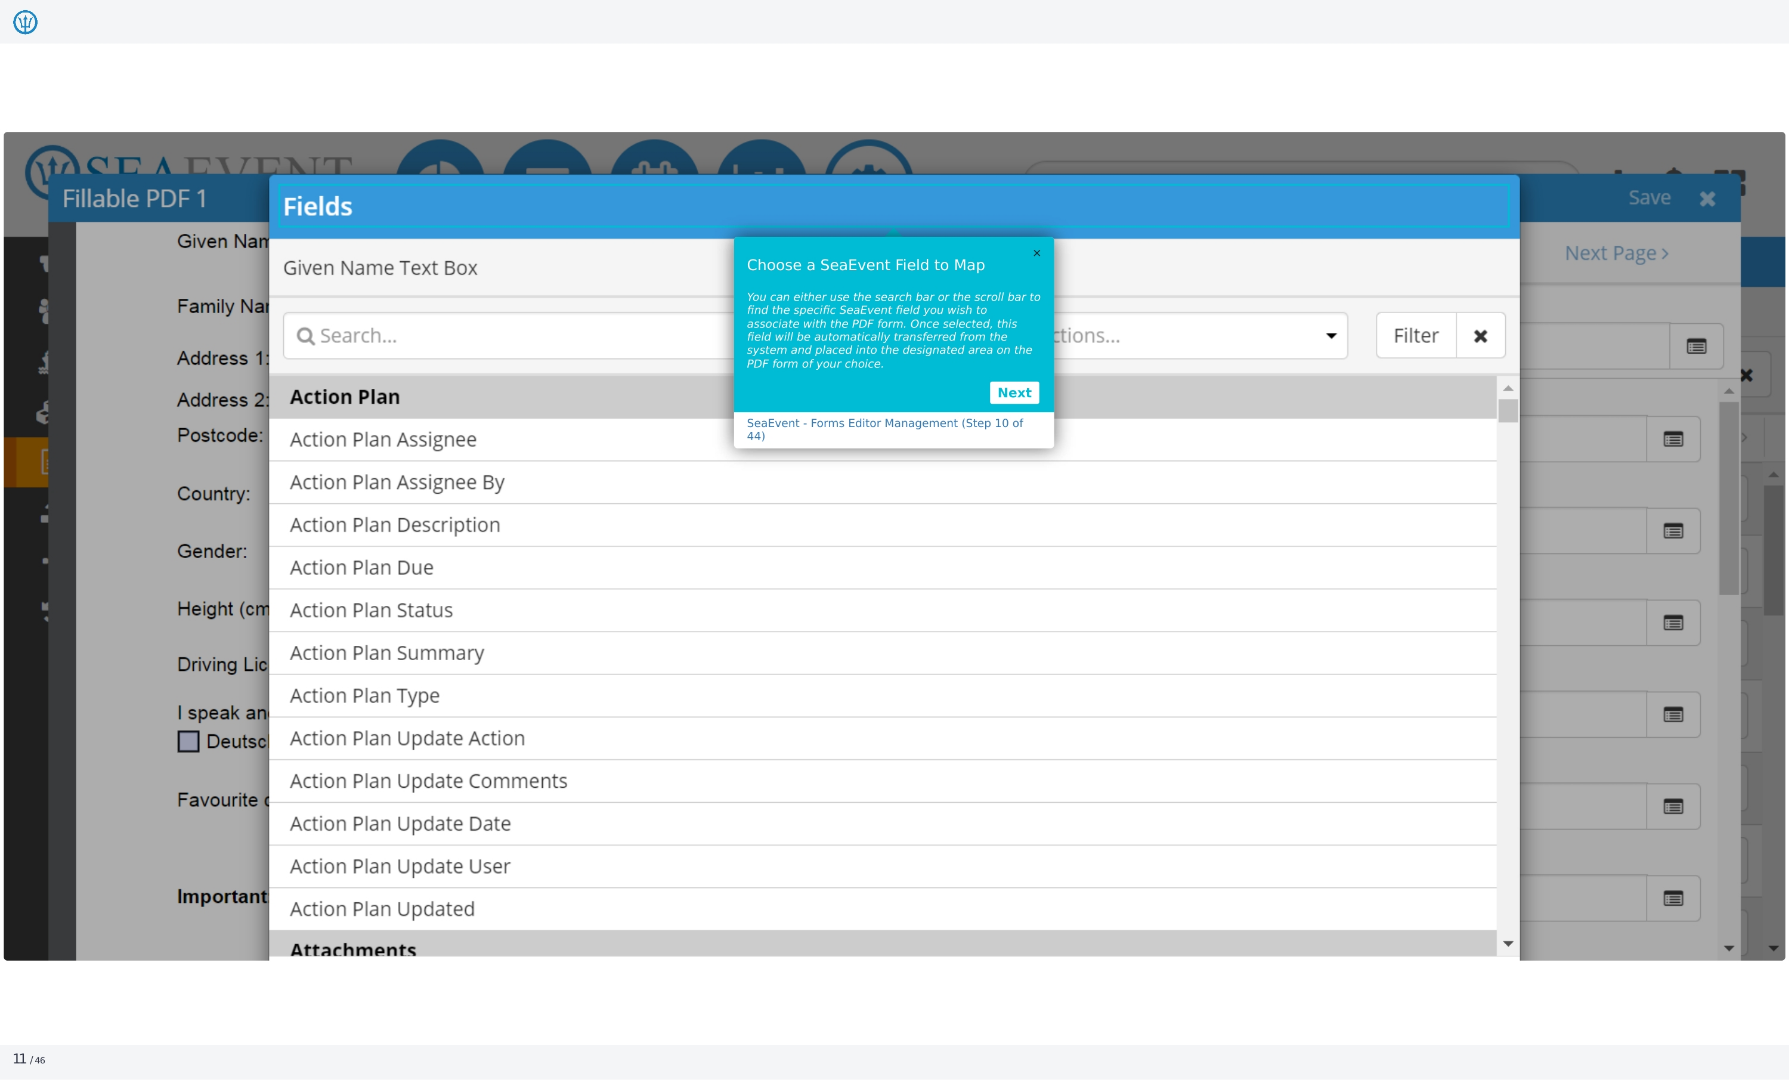
11. Choose a Ideagen Maritime Management Field to Map
You can either use the search bar or the scroll bar to find the specific Ideagen Maritime Management field you wish to associate with the PDF form. Once selected, this field will be automatically transferred from the system and placed into the designated area on the PDF form of your choice.
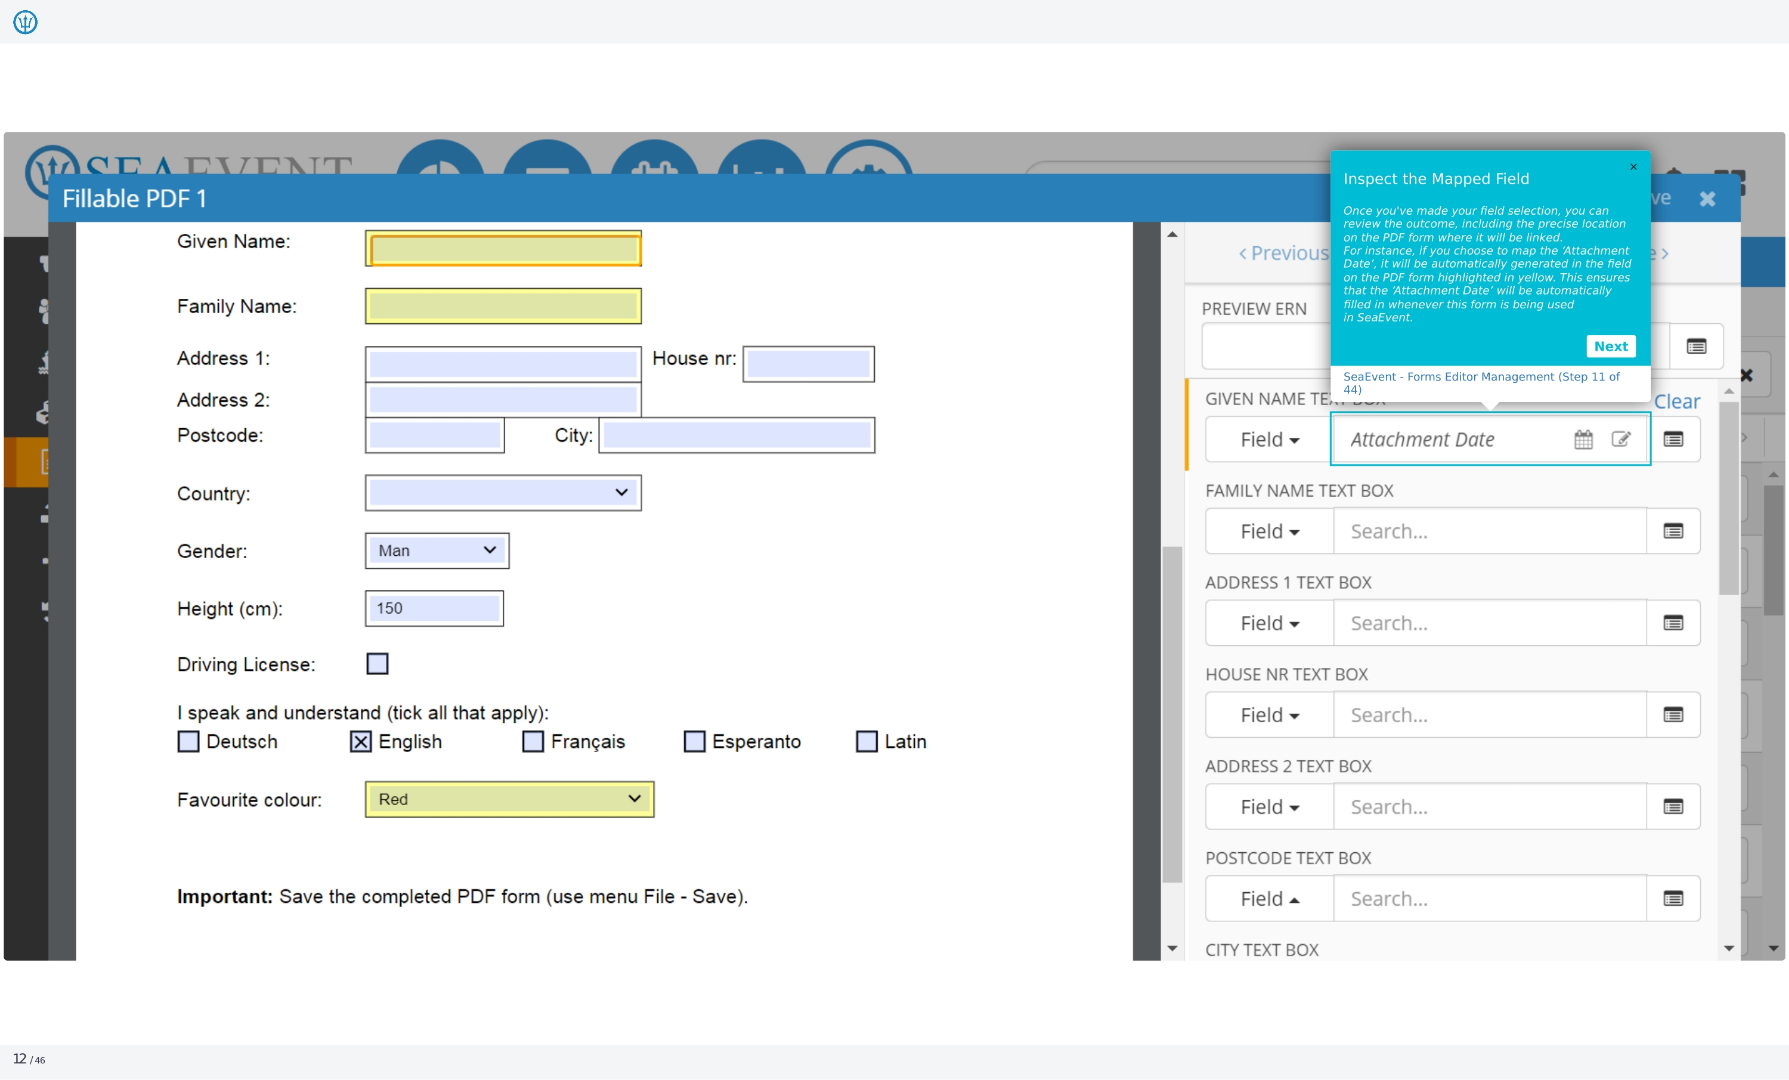
12. Inspect the Mapped Field
Once you've made your field selection, you can review the outcome, including the precise location on the PDF form where it will be linked. For instance, if you choose to map the 'Attachment Date', it will be automatically generated in the field on the PDF form highlighted in yellow. This ensures that the 'Attachment Date' will be automatically filled in whenever this form is being used in Ideagen Maritime Management.
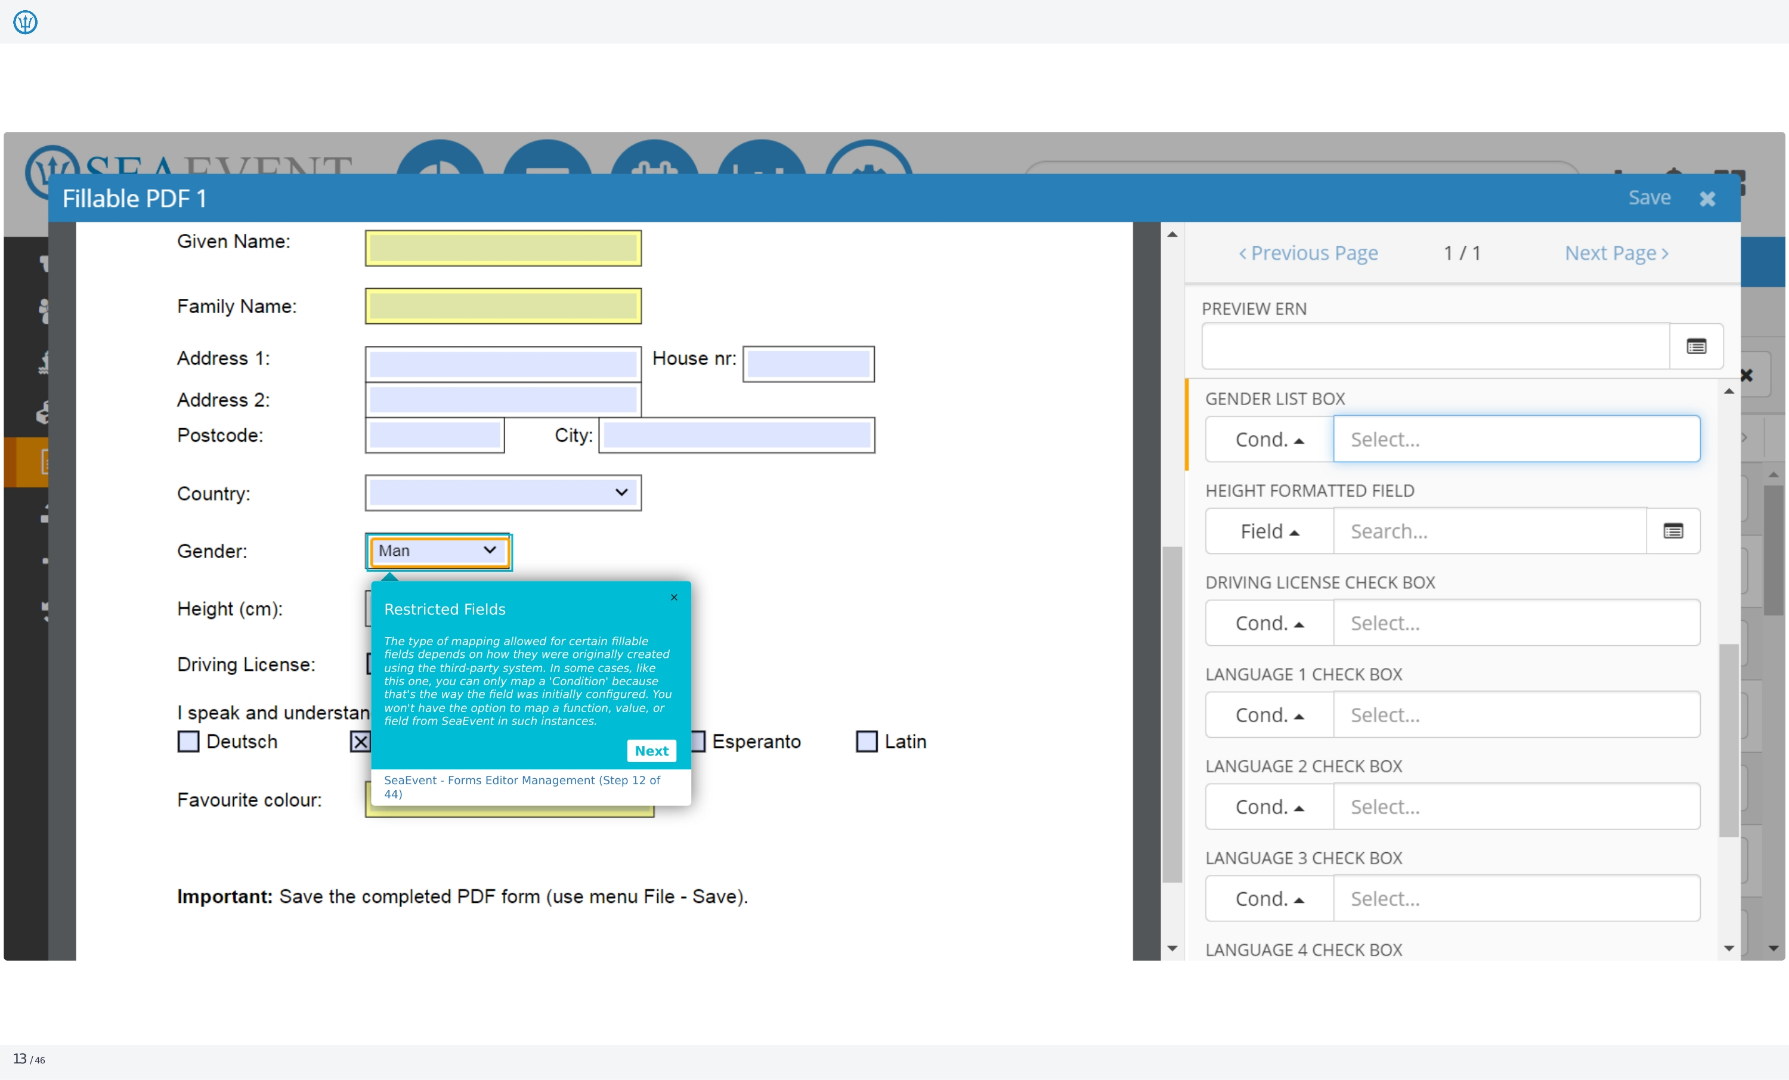
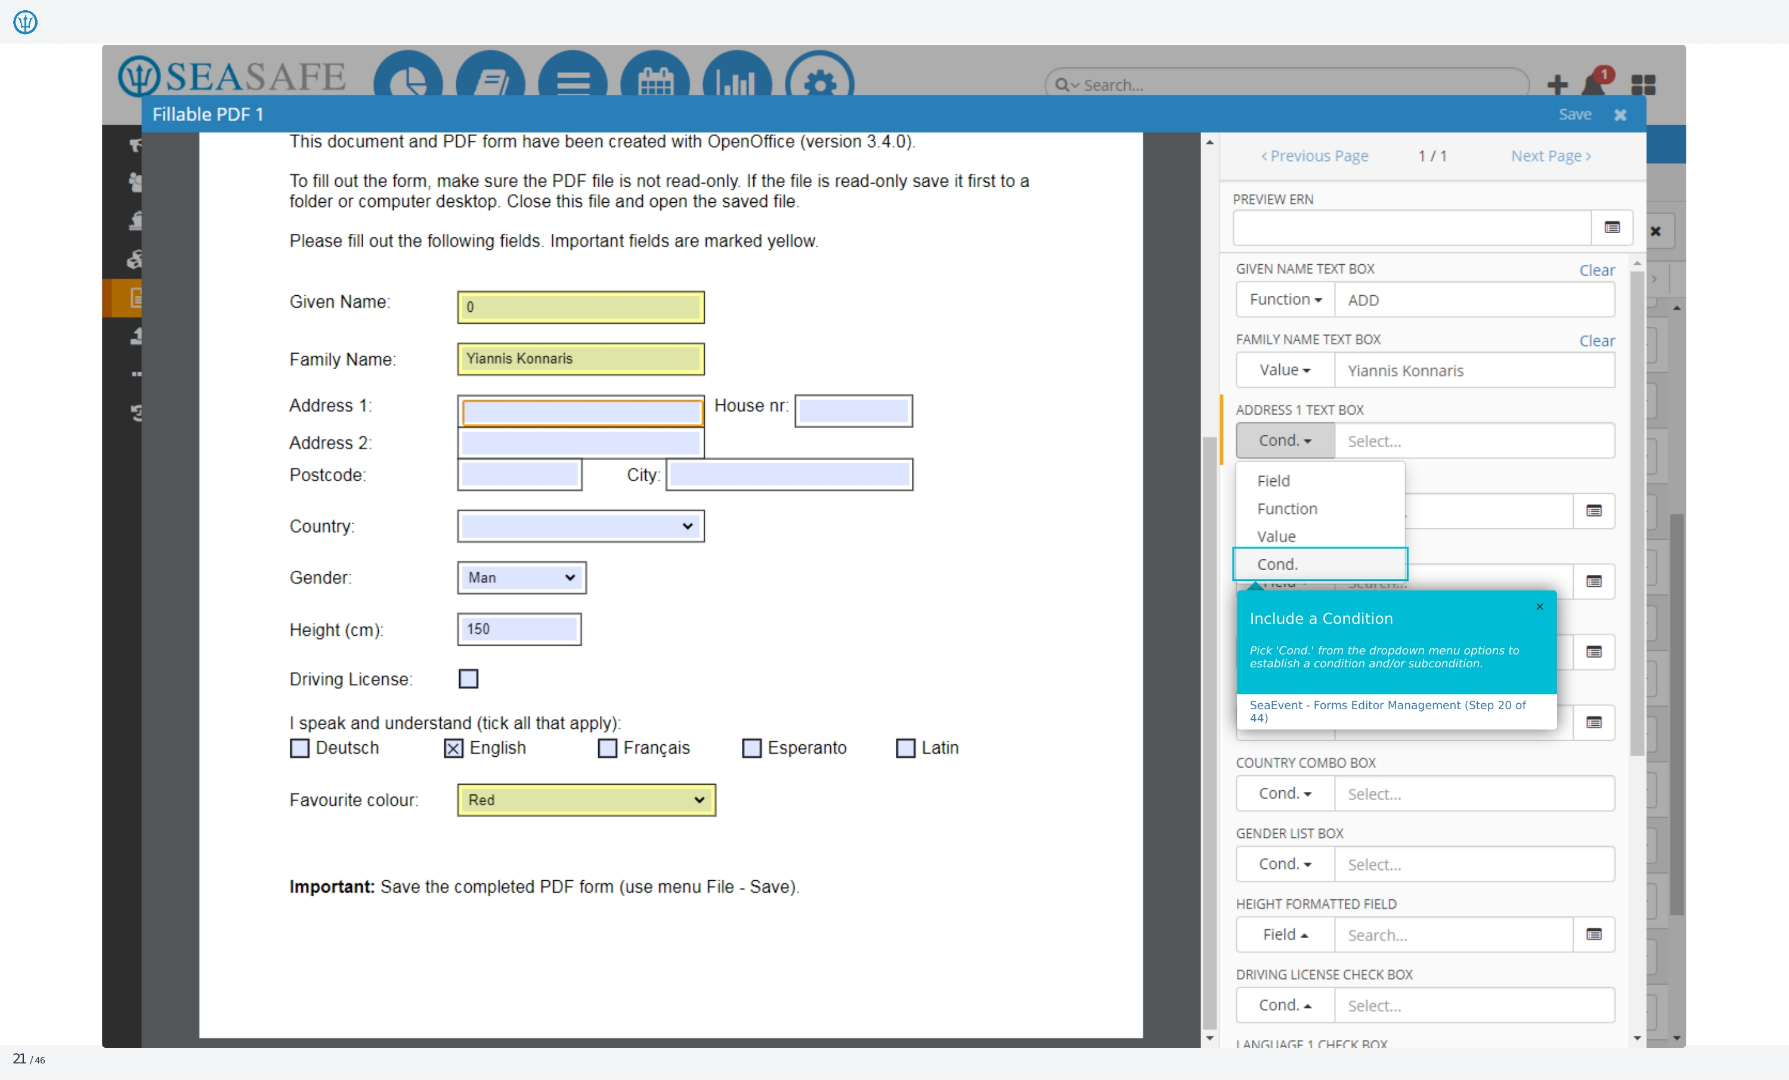
13. Restricted Fields
The type of mapping allowed for certain fillable fields depends on how they were originally created using the third-party system. In some cases, like this one, you can only map a 'Condition' because that's the way the field was initially configured. You won't have the option to map a function, value, or field from Ideagen Maritime Management in such instances.
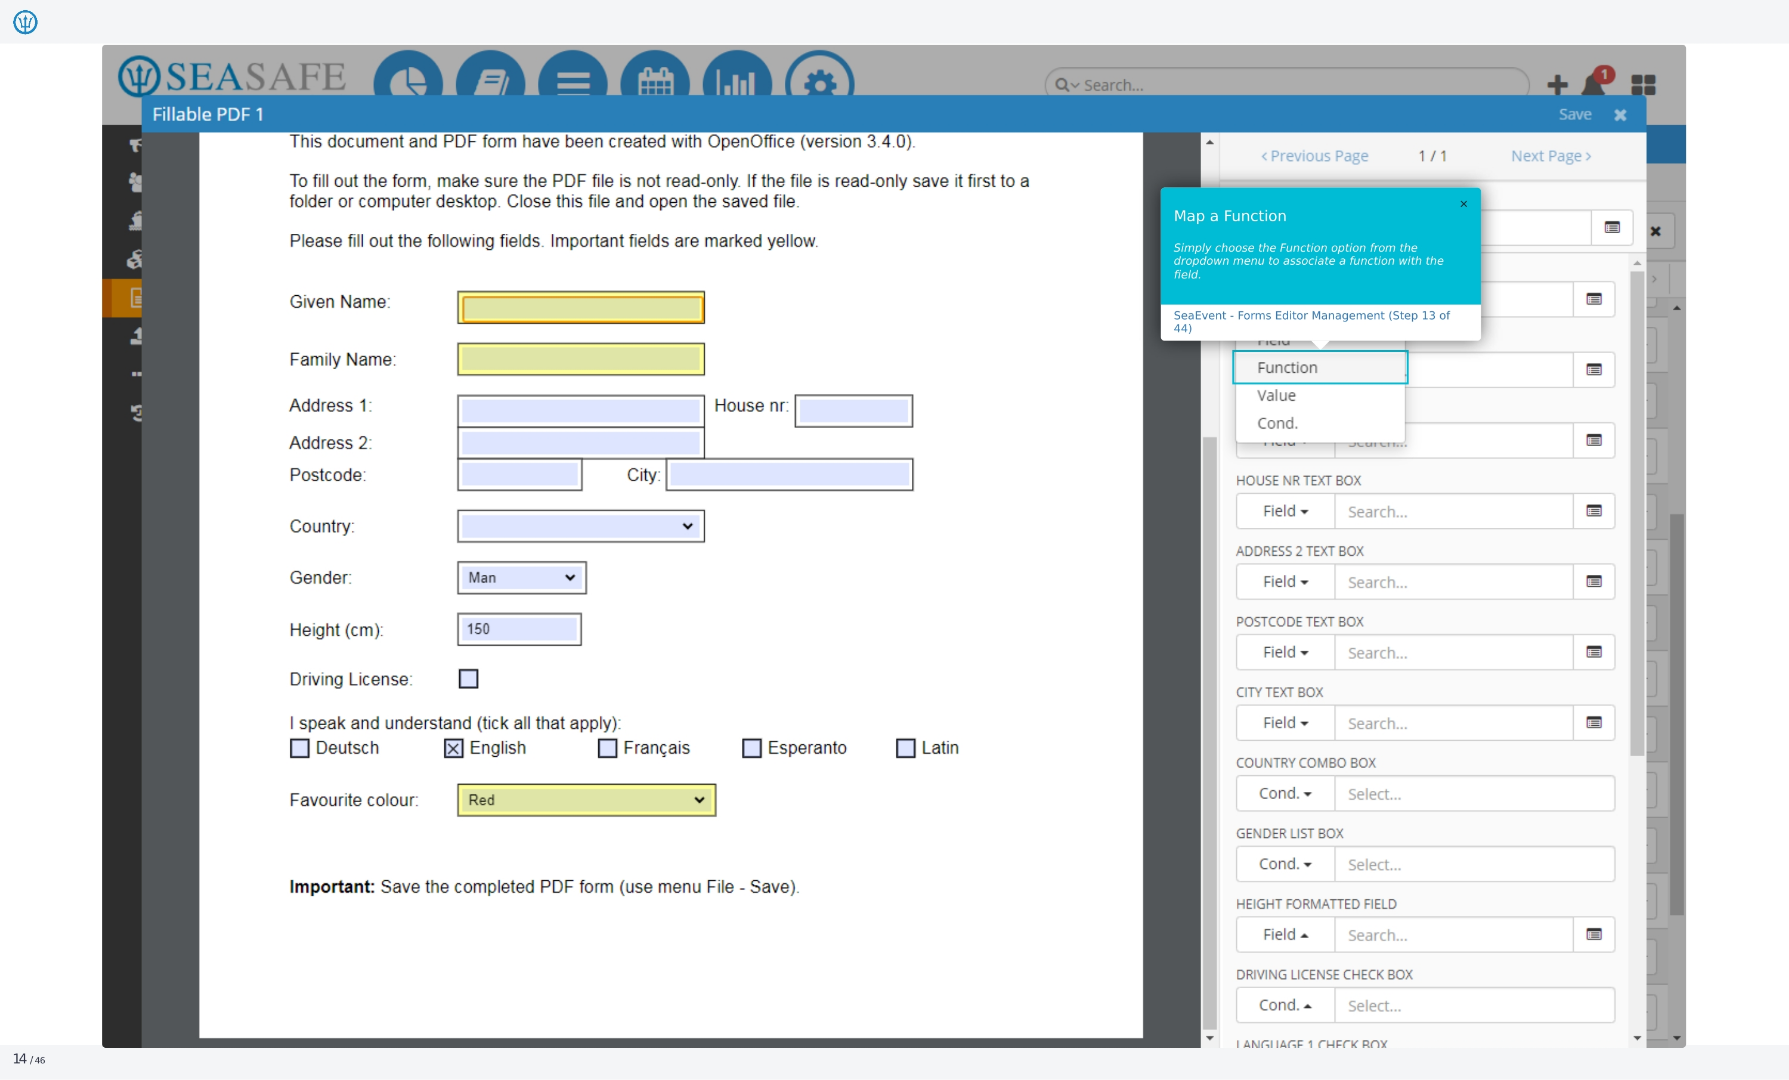
14. Map a Function
Simply choose the Function option from the dropdown menu to associate a function with the field. This allows you to perform calculations or manipulations on the data before it is populated in the PDF form. This can include text functions, math functions, and date functions.
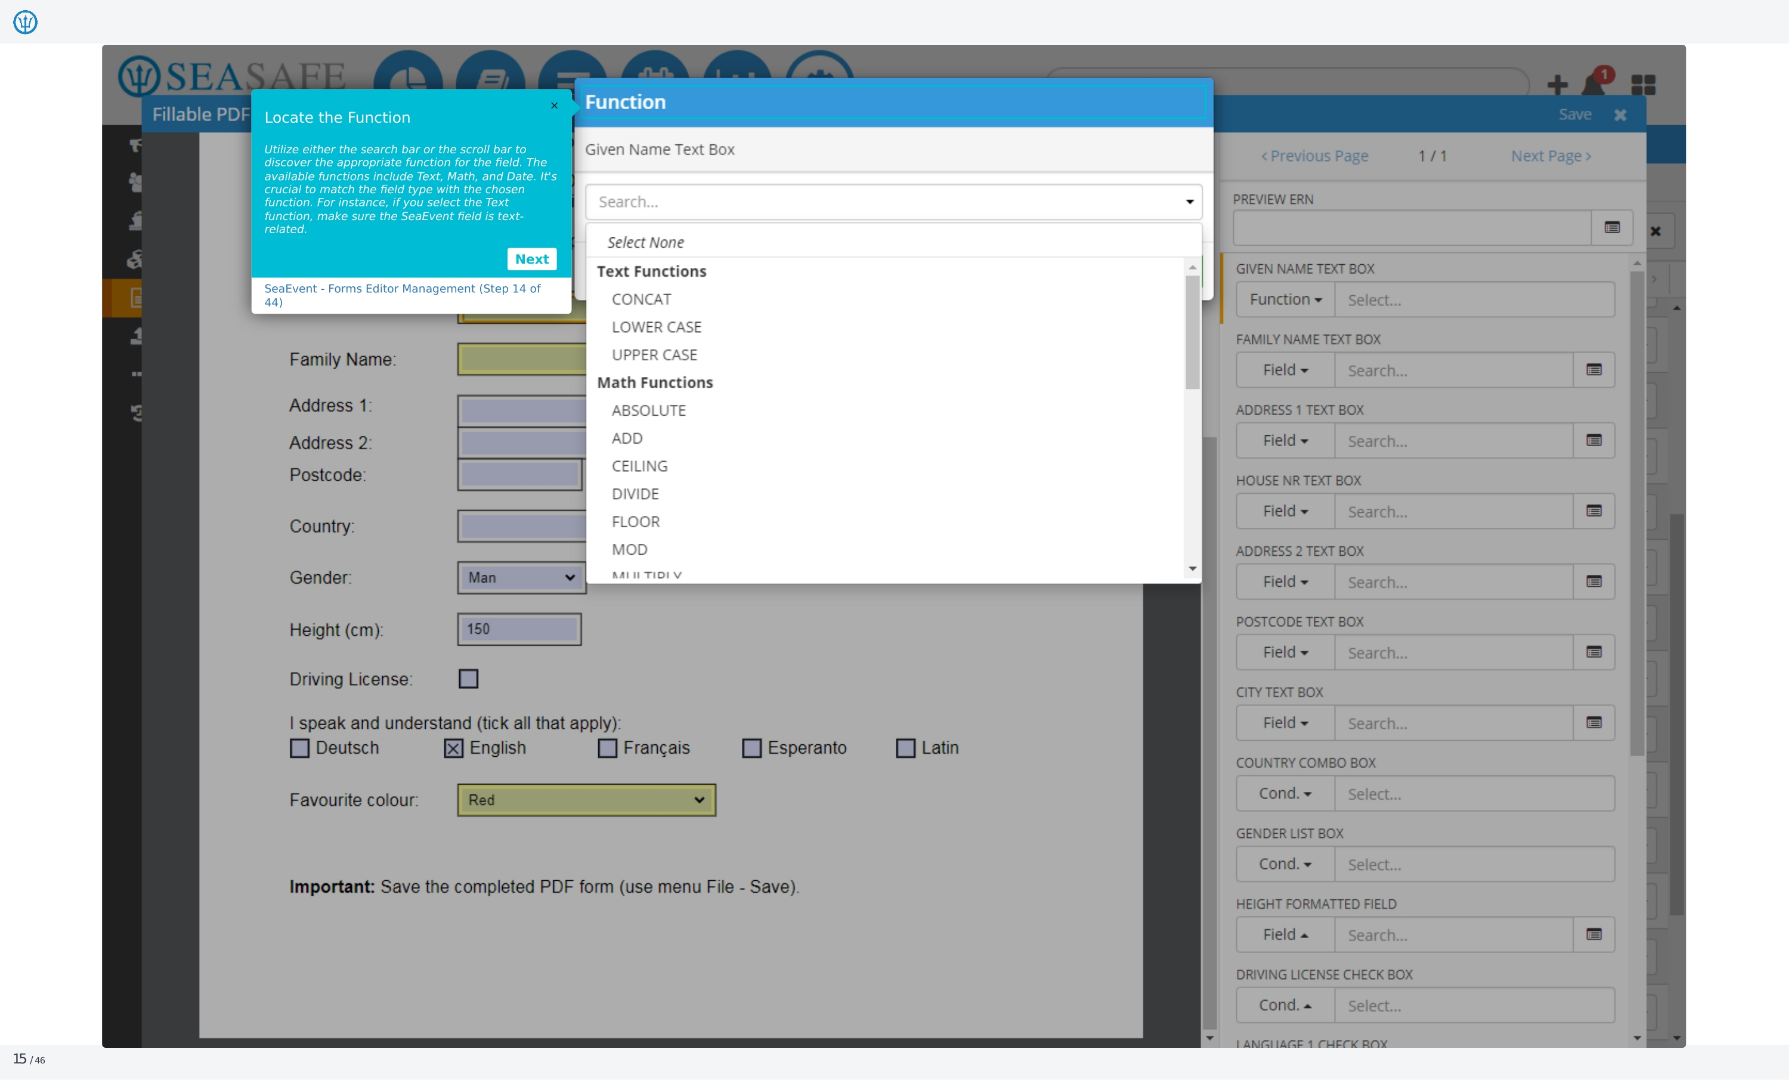
15. Locate the Function
Utilize either the search bar or the scroll bar to discover the appropriate function for the field. The available functions include Text, Math, and Date. It's crucial to match the field type with the chosen function. For instance, if you select the Text function, make sure the Ideagen Maritime Management field is text-related.
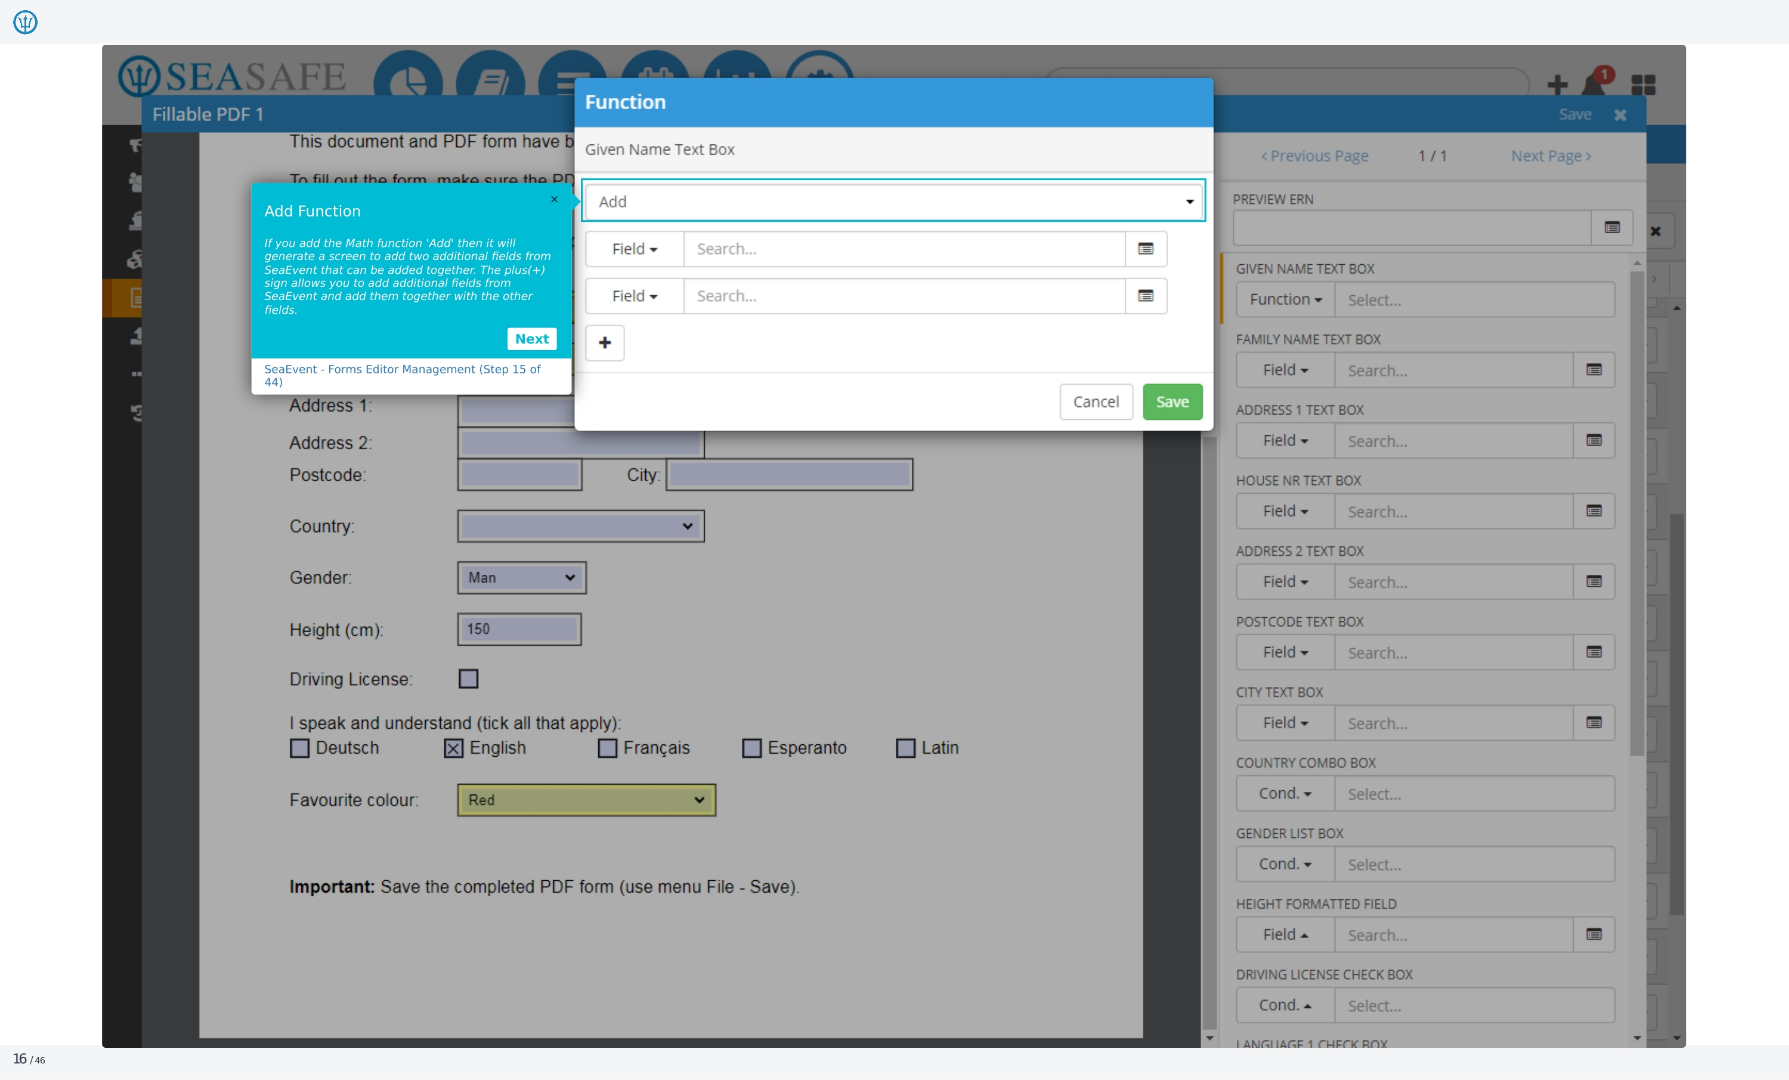
16. Add Function
If you add the Math function 'Add' then it will generate a screen to add two additional fields from Ideagen Maritime Management that can be added together. The plus(+) sign allows you to add additional fields from Ideagen Maritime Management and add them together with the other fields.
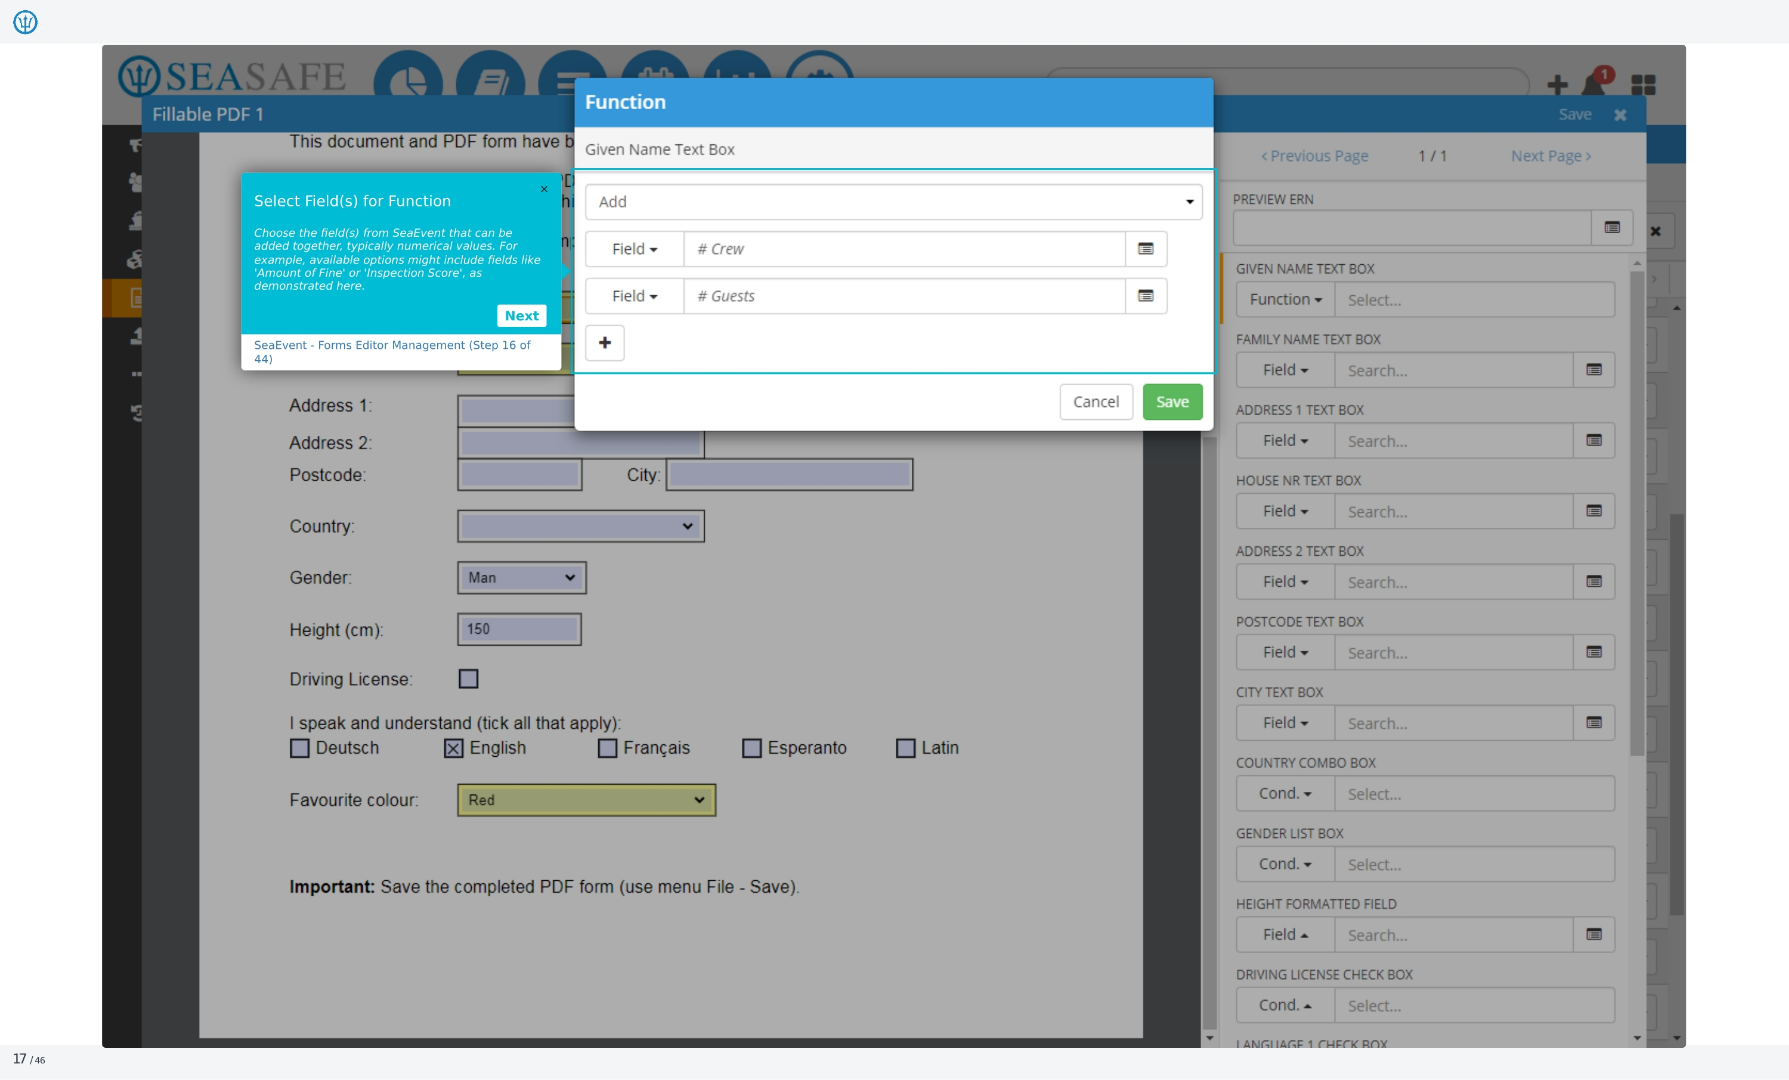
17. Select Field(s) for Function
Choose the field(s) from Ideagen Maritime Management that can be added together, typically numerical values. For example, available options might include fields like 'Amount of Fine' or 'Inspection Score', as demonstrated here. This allows you to perform calculations directly within the form.
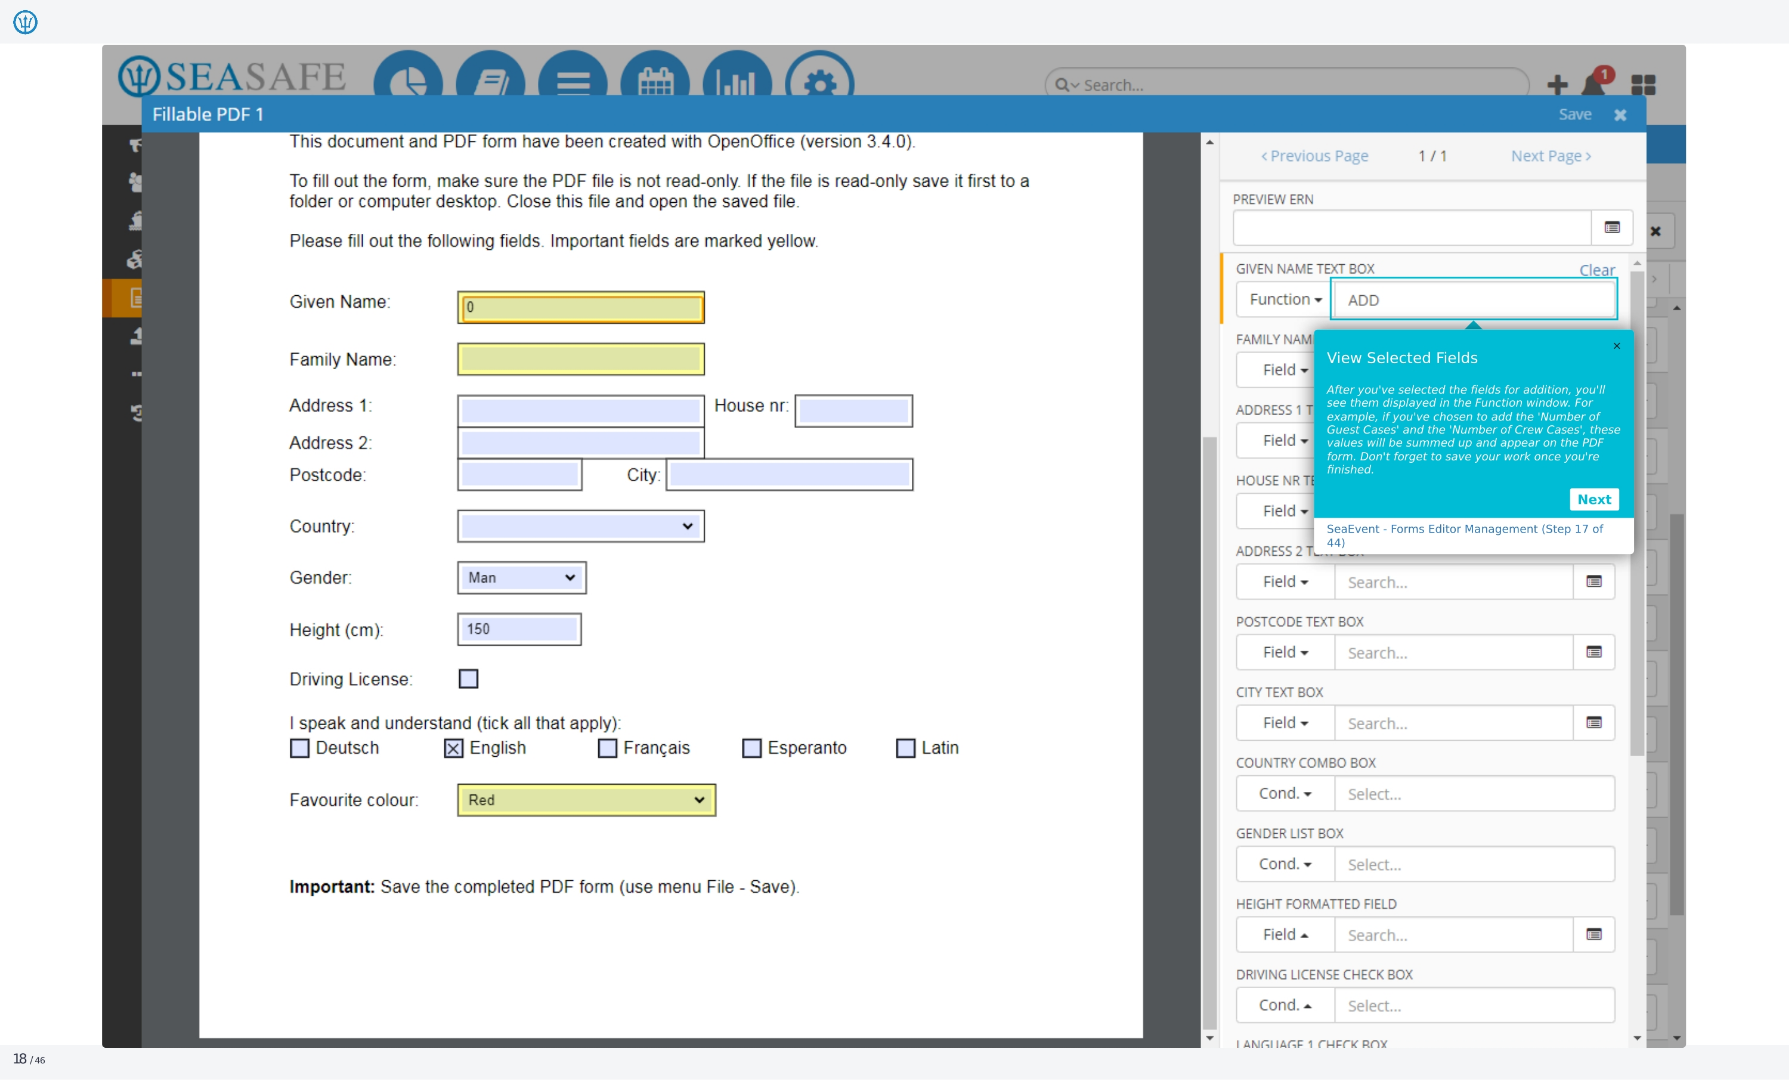
18. View Selected Fields
After you've selected the fields for addition, you'll see them displayed in the Function window. For example, if you've chosen to add the 'Number of Guest Cases' and the 'Number of Crew Cases', these values will be summed up and appear on the PDF form. Don't forget to save your work once you're finished.
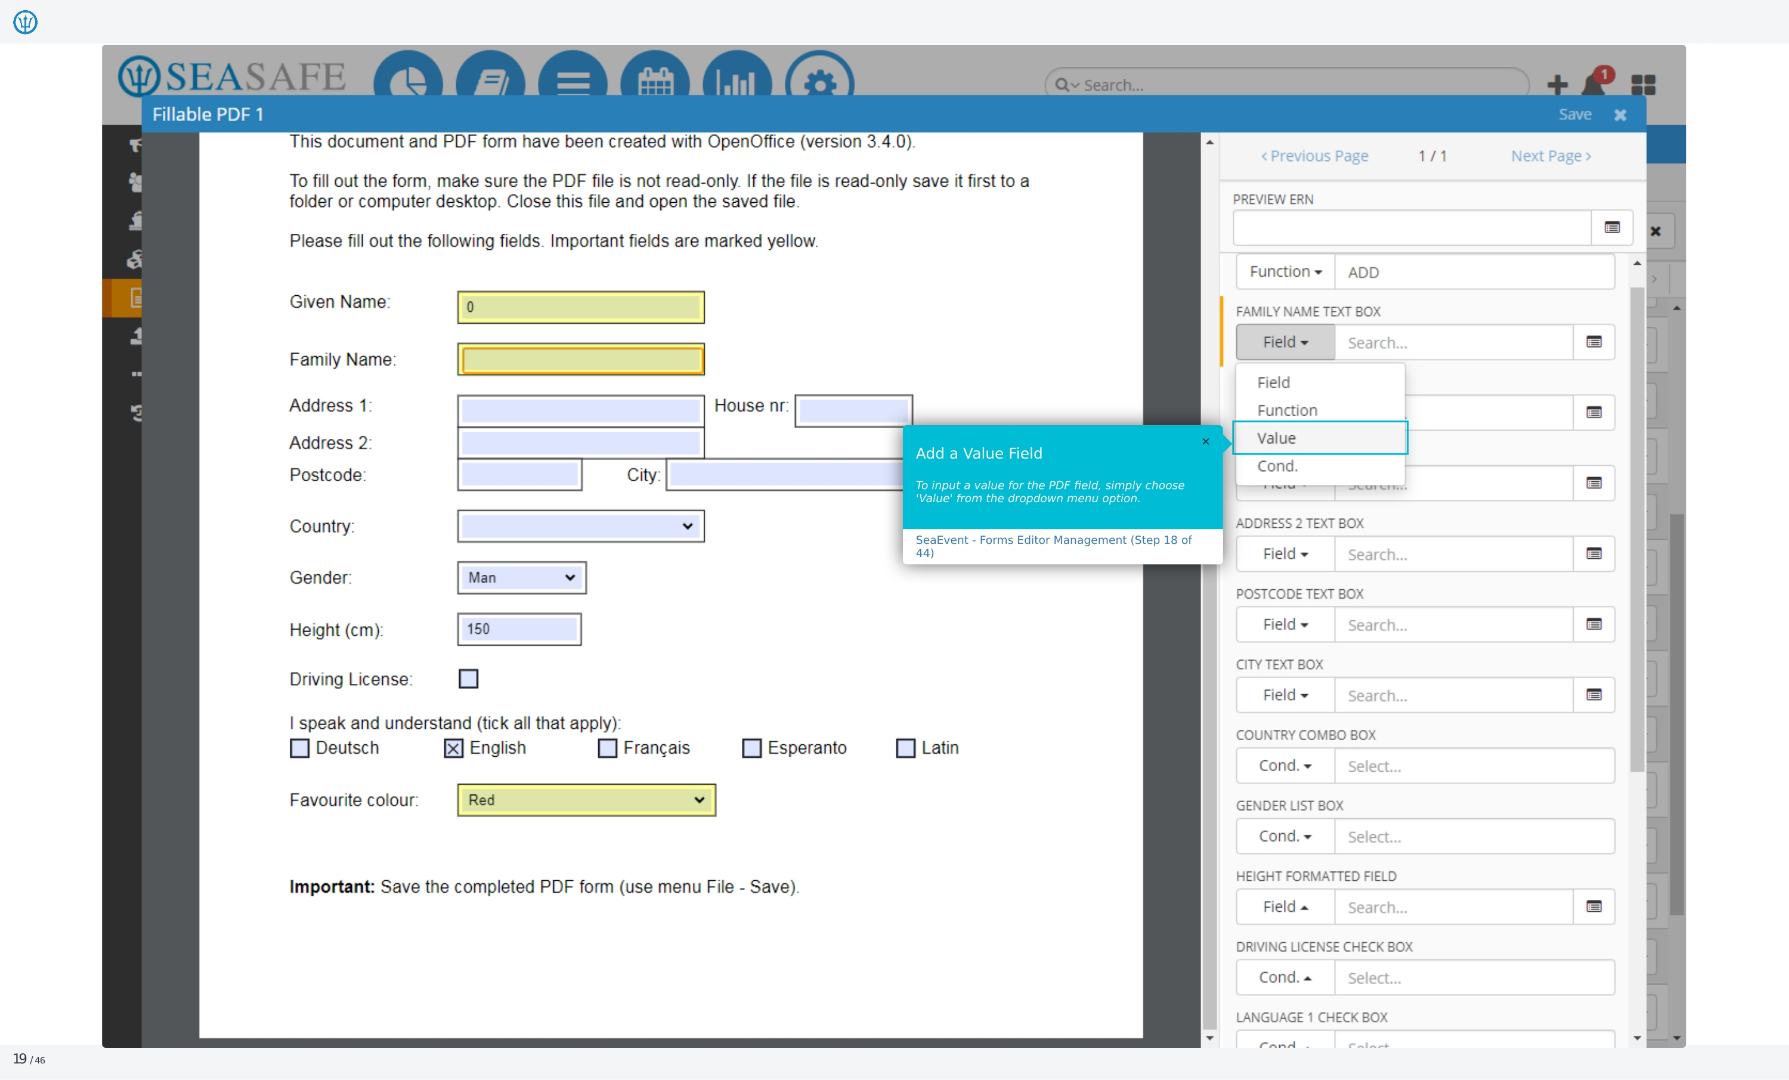
19. Add a Value Field
To input a value for the PDF field, simply choose 'Value' from the dropdown menu option. This allows you to manually enter specific information that is not automatically populated from Ideagen Maritime Management data. This is useful for fields that require unique or variable input.
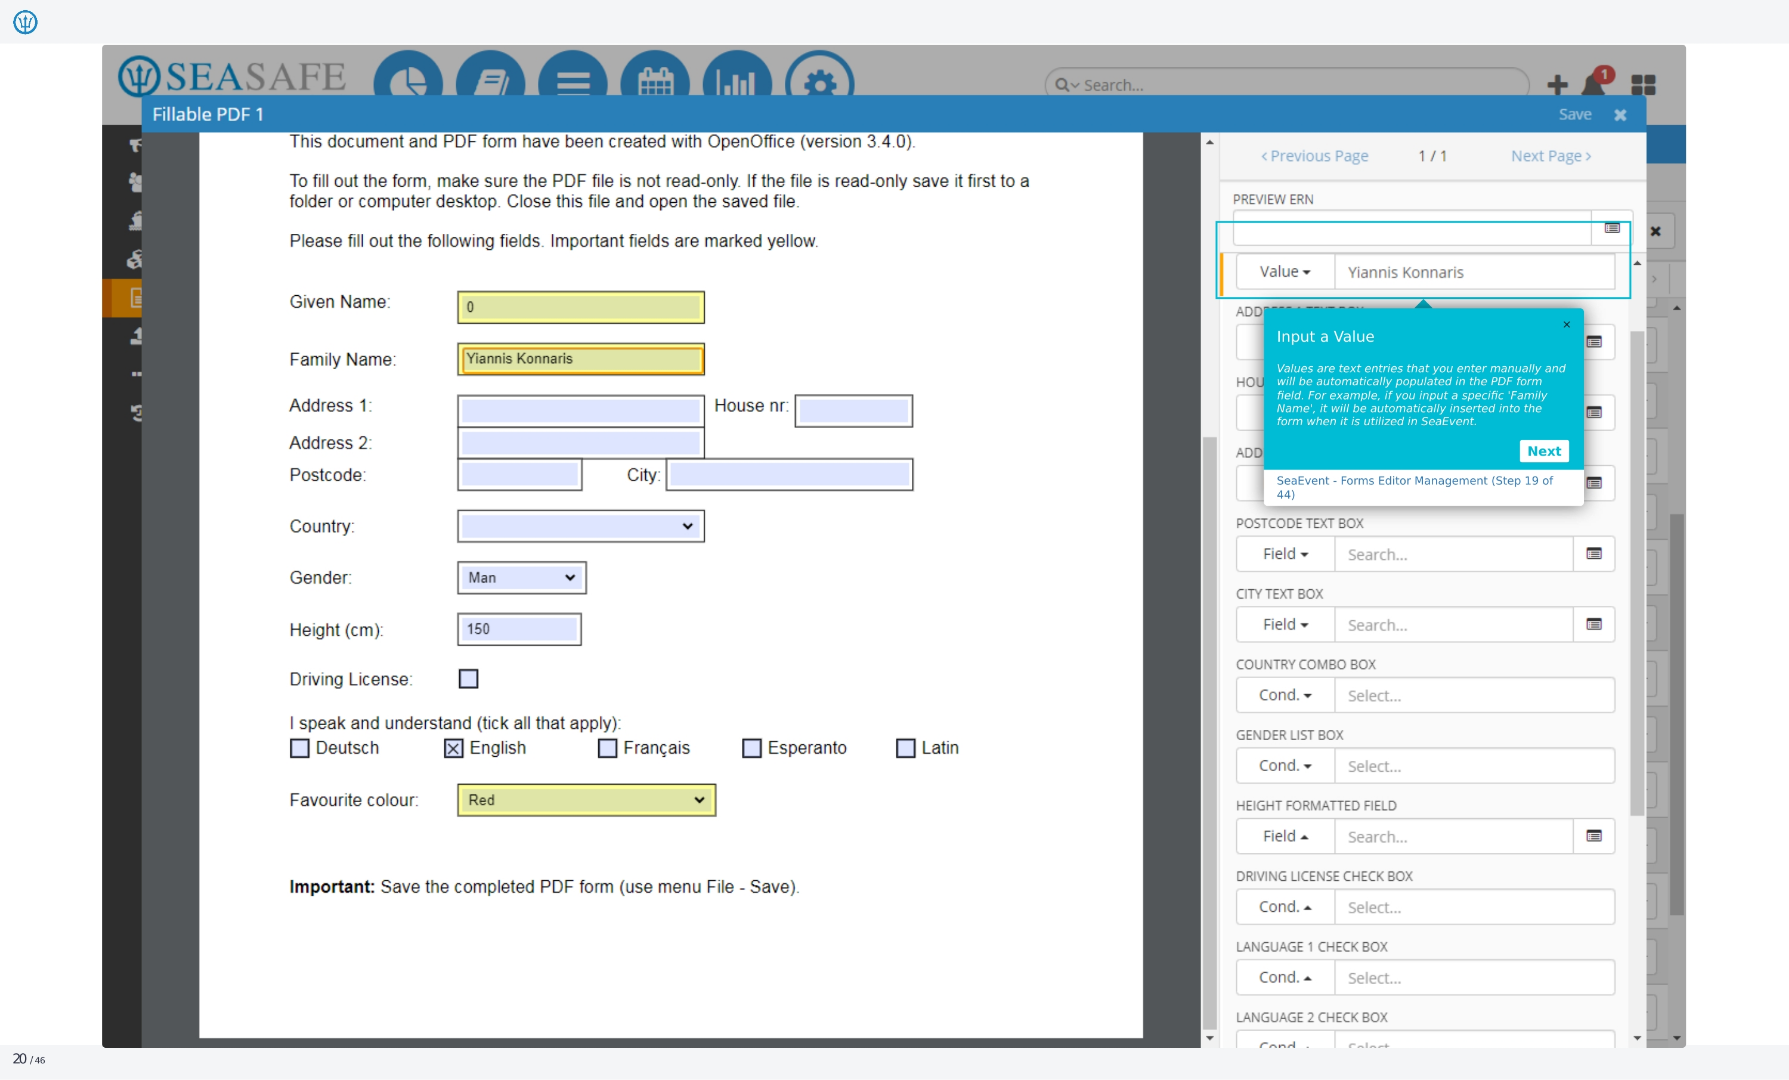
20. Input a Value
Values are text entries that you enter manually and will be automatically populated in the PDF form field. For example, if you input a specific 'Family Name', it will be automatically inserted into the form when it is utilized in Ideagen Maritime Management.
21. Fillable PDF 1
This document and PDF form were created with OpenOffice. To fill out the form, ensure the PDF file is not read-only. If it is, save it to your desktop, close it, and reopen the saved file. Please fill out the following fields, noting that important fields are marked in yellow. The form includes fields for given name, family name, address, postcode, country, gender, height, driving license, languages spoken, and favorite color. Remember to save the completed form using the File-Save menu option.
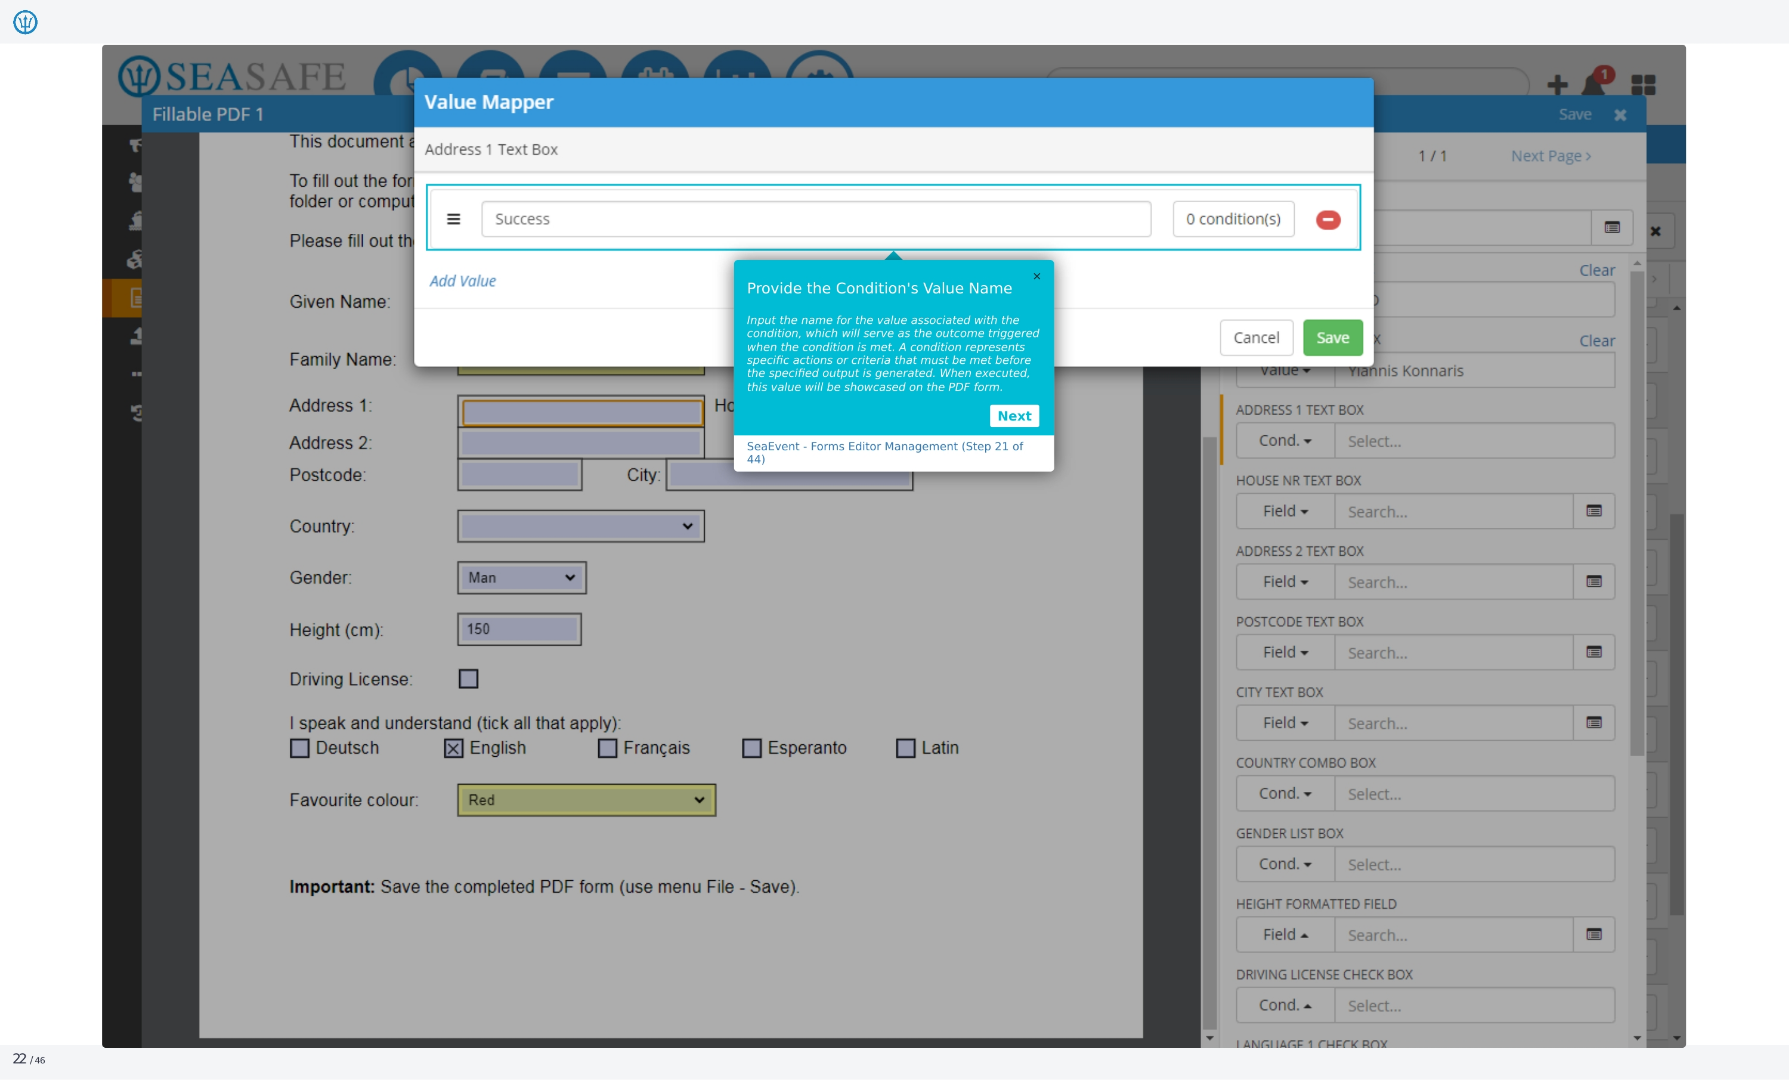
22. Value Mapper
Here we see the Value Mapper, specifically for the Address 1 text box. A successful condition has been set. To add a value, click the 'Add Value' button. You'll need to provide a condition's value name, which serves as the outcome when the condition is met. This value will then be displayed on the PDF form. You can cancel or save your changes.
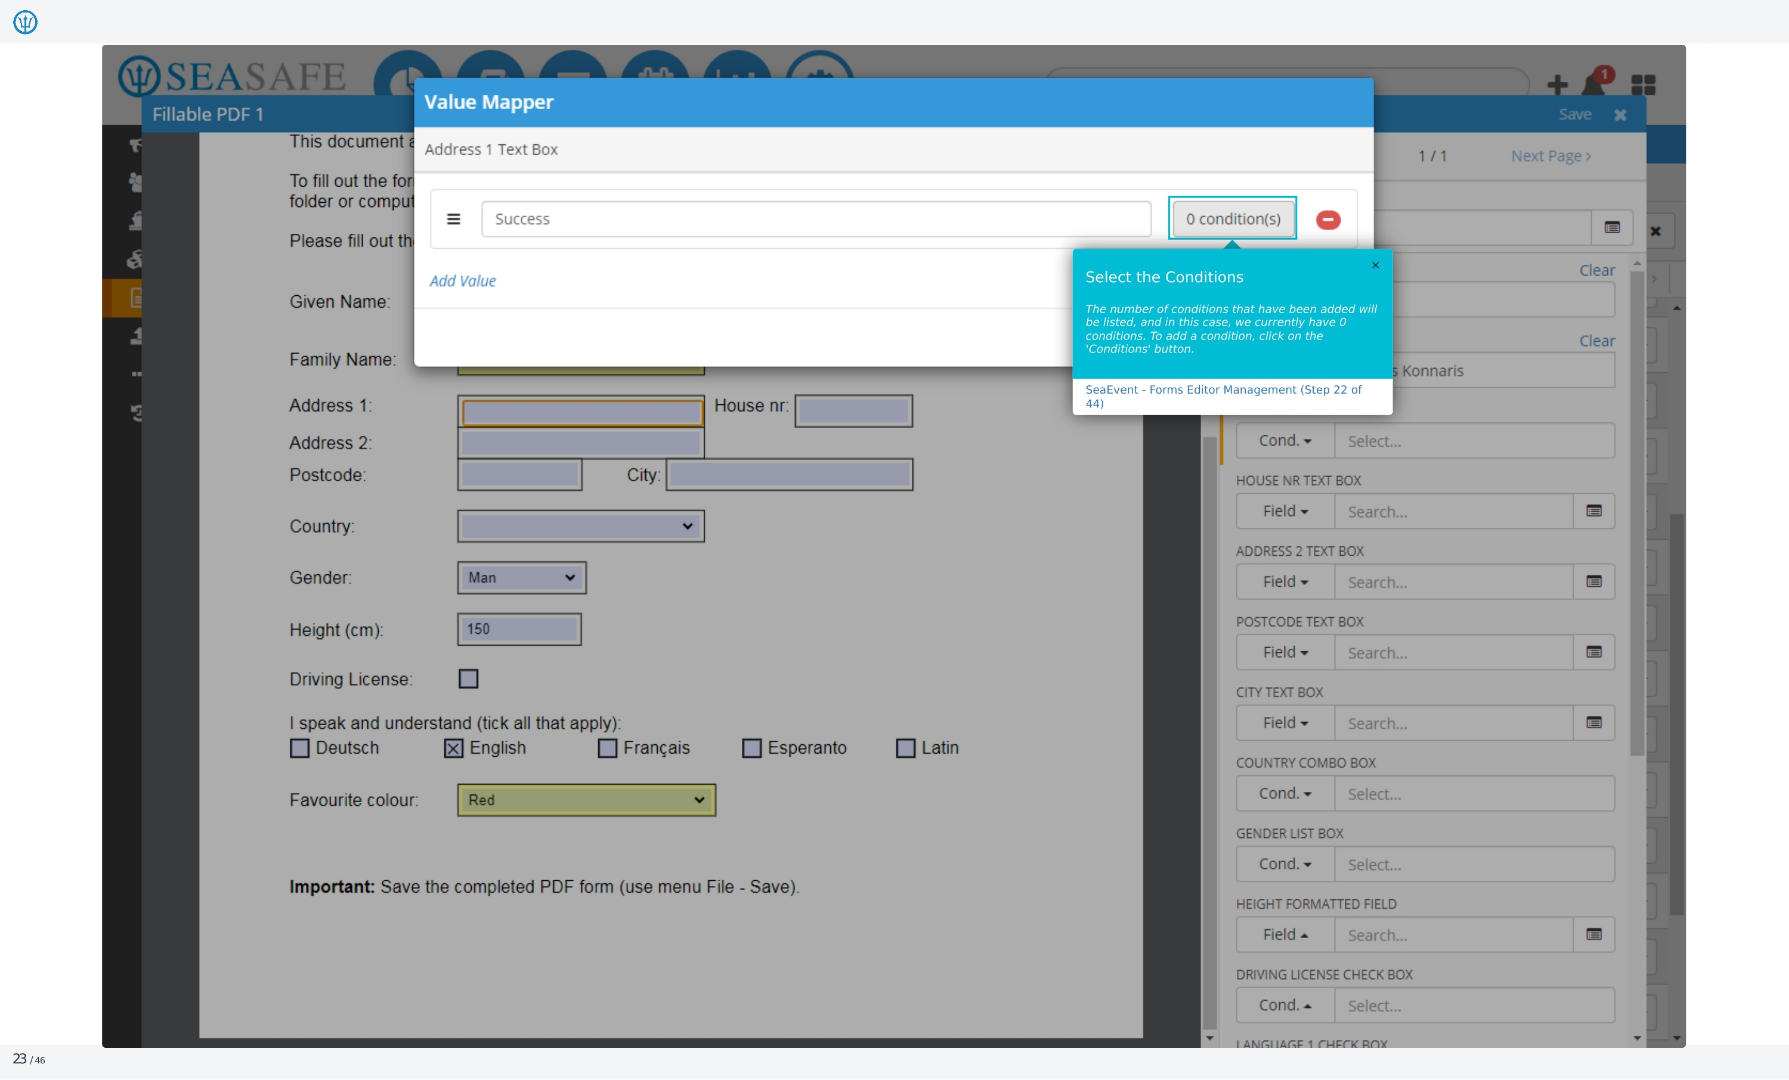
23. Value Mapper
Continuing with the Address 1 text box in the Value Mapper, we see a success message. Click 'Add Value' to proceed. The number of conditions added will be listed. Currently, there are zero conditions. To add a condition, click the 'Conditions' button. This step is part of the Ideagen Maritime Management Forms Editor Management process, specifically step 22 of 44.
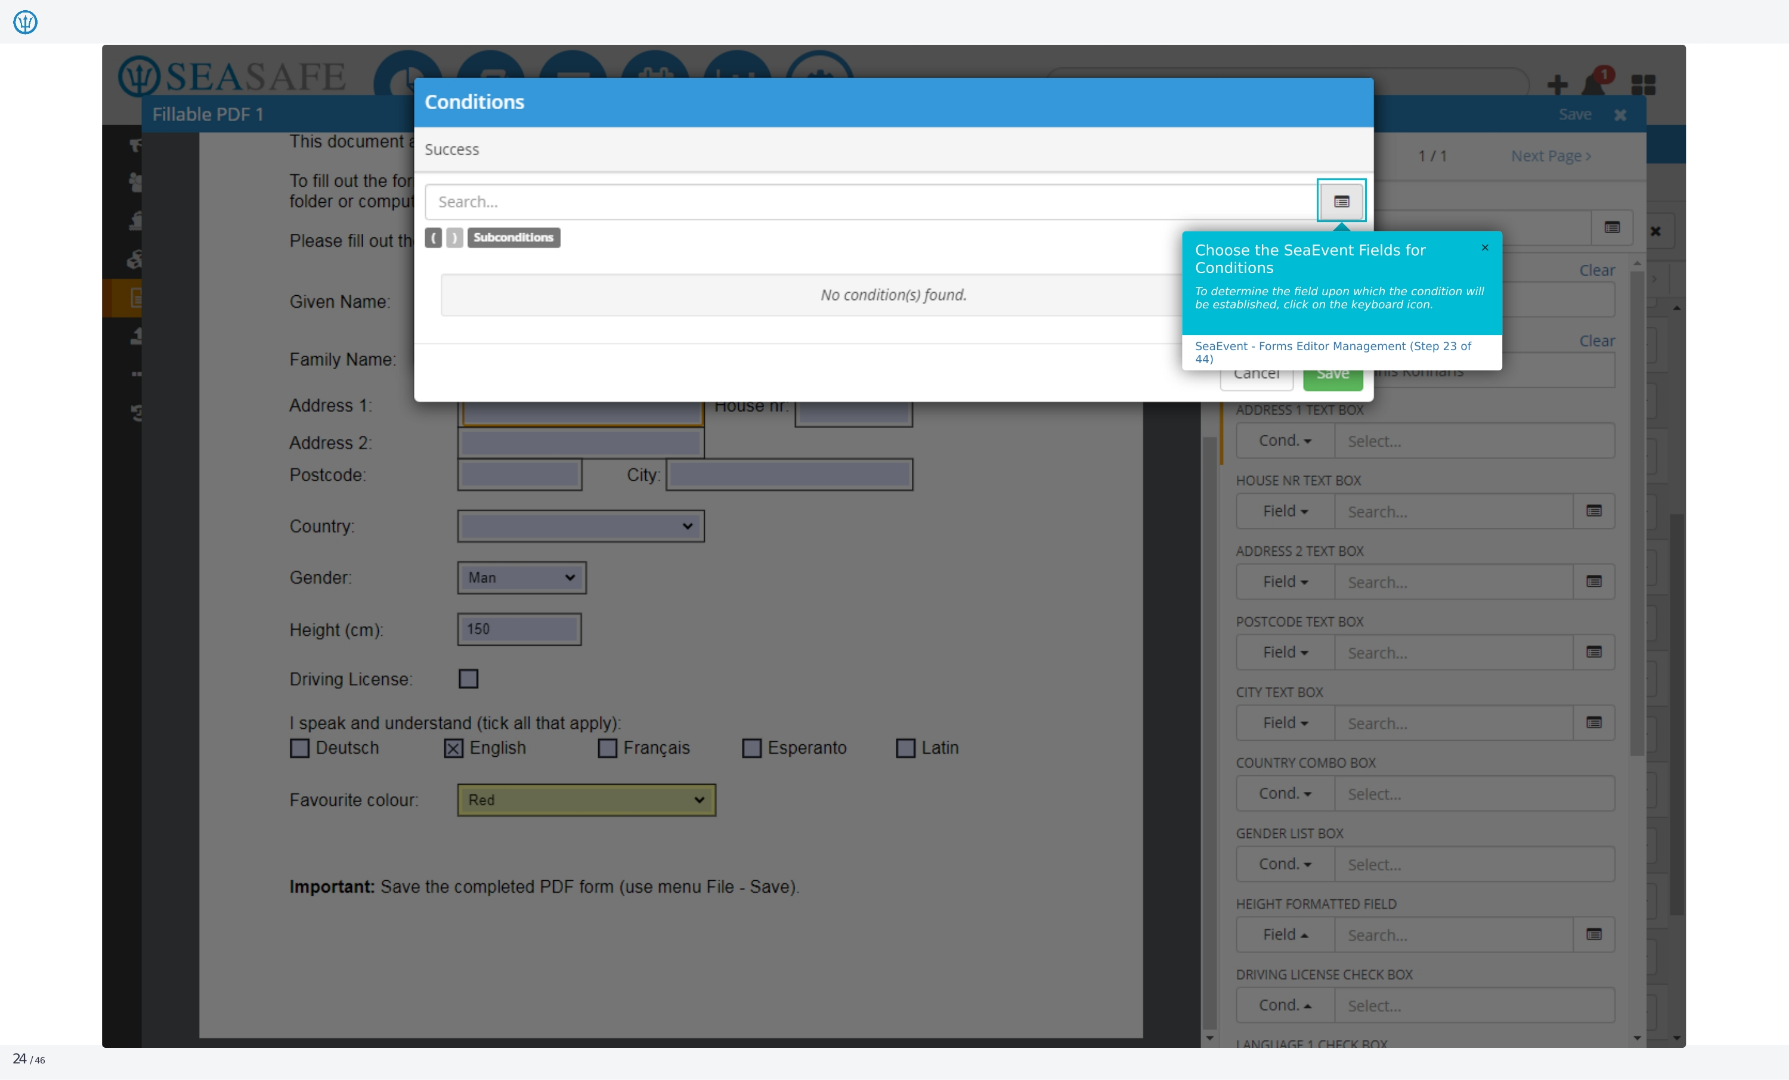
24. Conditions
Now we're looking at the Conditions window, showing a success status. You can search for sub-conditions. Currently, no conditions are found. To determine the field upon which the condition will be established, click on the keyboard icon. This is step 23 of 44 in the Ideagen Maritime Management Forms Editor Management process.
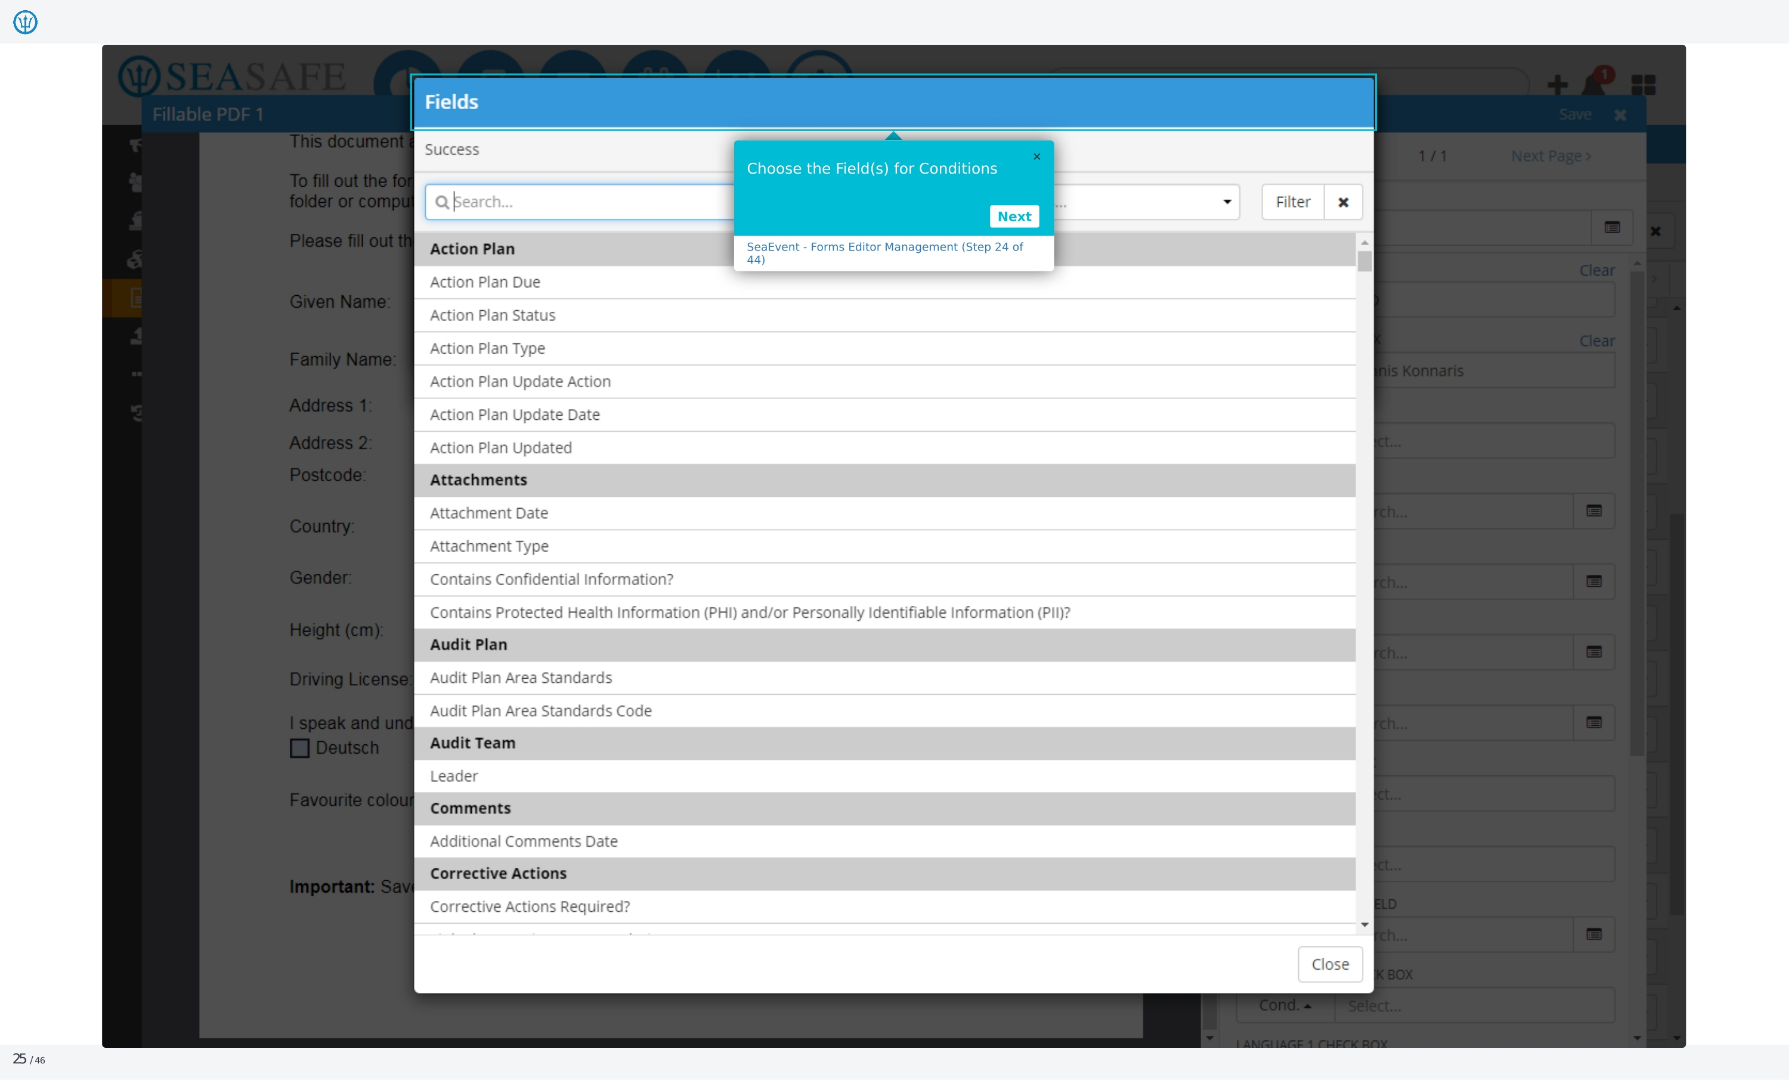
25. Fields
Here are the Fields for Conditions. You can search for a specific field. To choose the fields for conditions, use the search bar. This is step 24 of 44 in the Ideagen Maritime Management Forms Editor Management process. Available fields include Action Plan, Action Plan Due, Action Plan Status, Action Plan Type, and more.
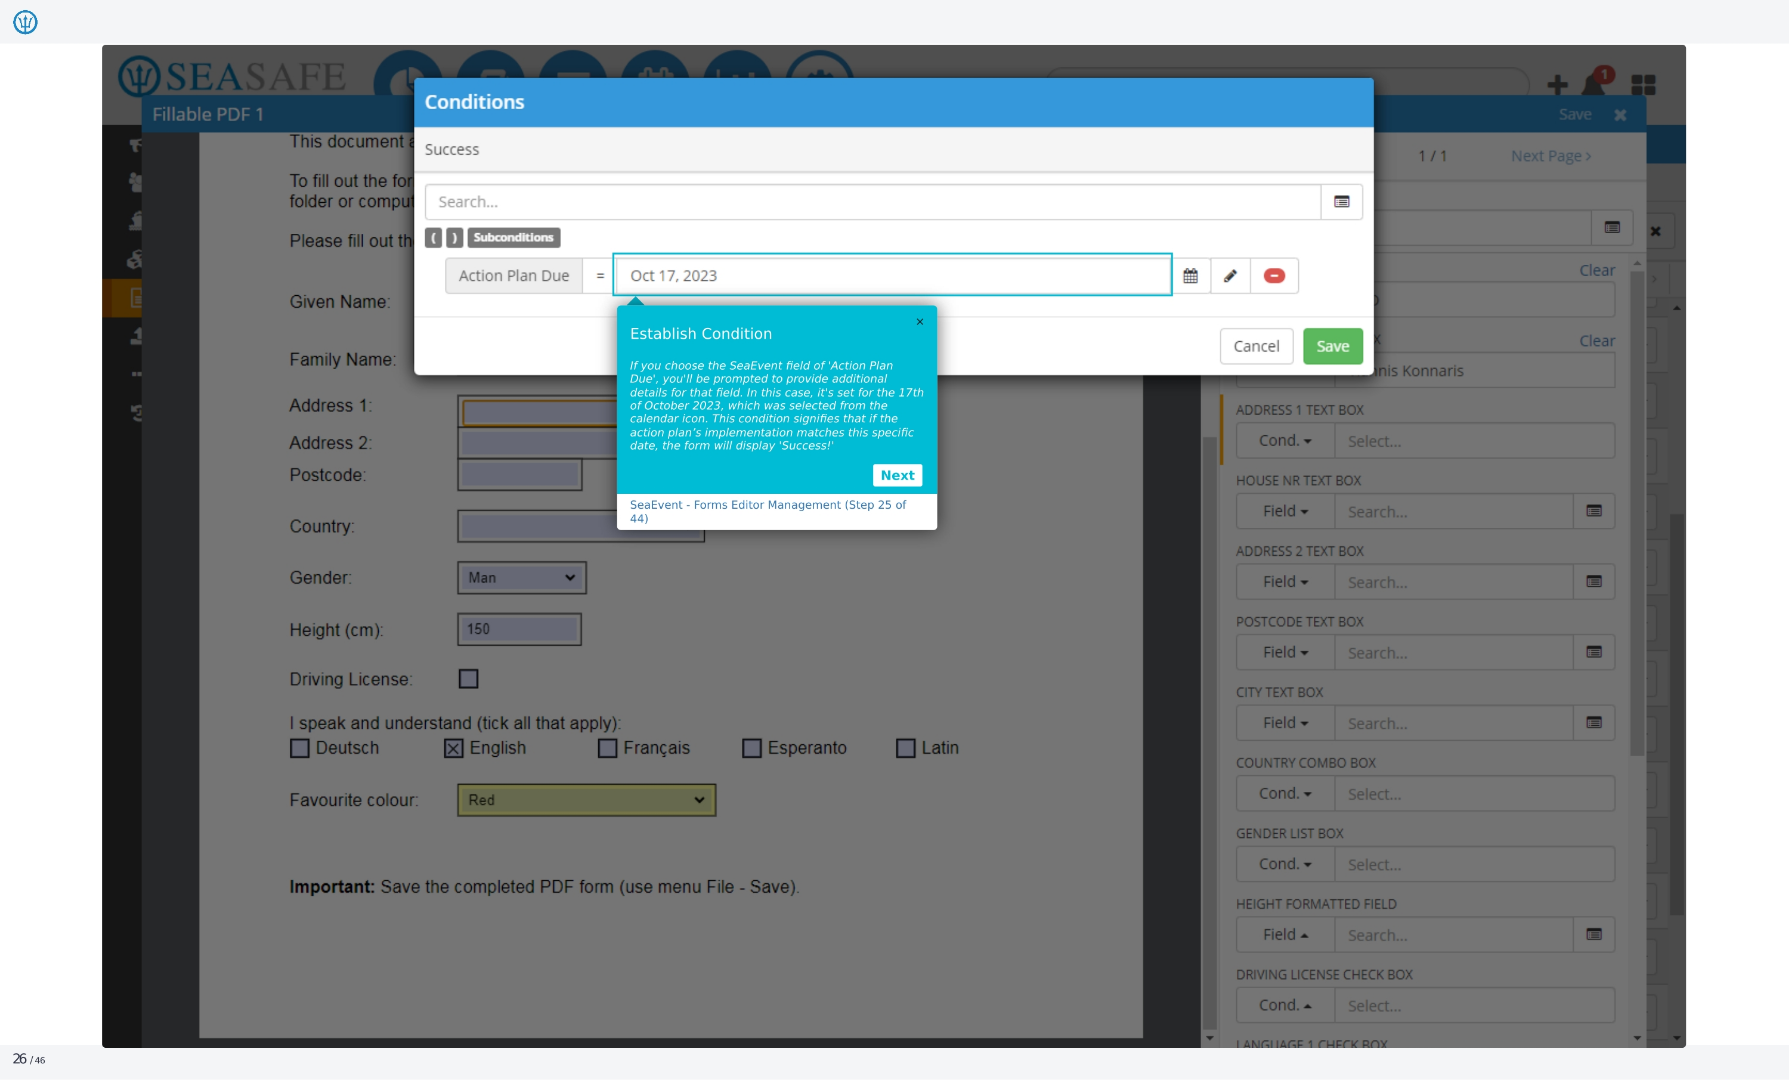
26. Conditions
We're now establishing a condition. If you choose the Ideagen Maritime Management field of 'Action Plan Due', you'll be prompted to provide additional details for that field. In this case, it's set for October 17, 2023, selected from the calendar icon. This condition signifies that if the action plan's implementation matches this specific date, the form will display 'Success!'
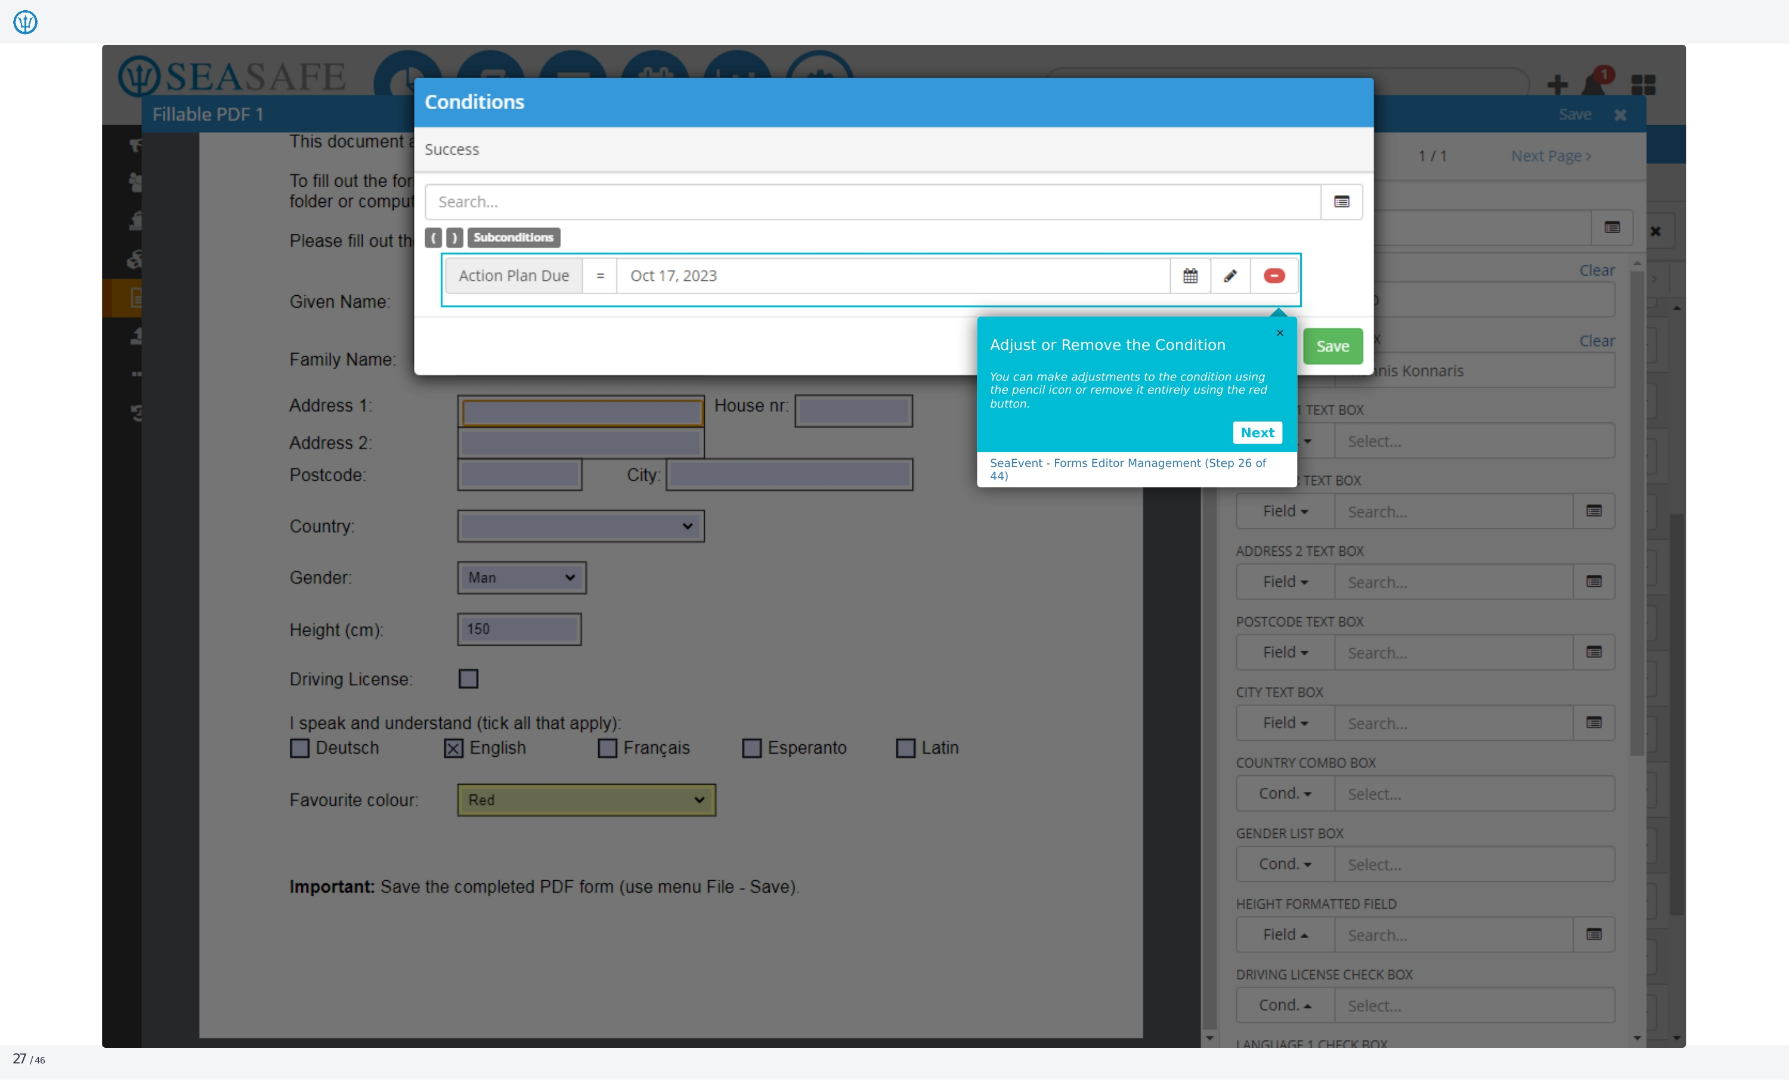
27. Conditions
You can adjust or remove the condition using the pencil icon to make adjustments or the red button to remove it entirely. This is step 26 of 44 in the Ideagen Maritime Management Forms Editor Management process. You can also save your changes or cancel.
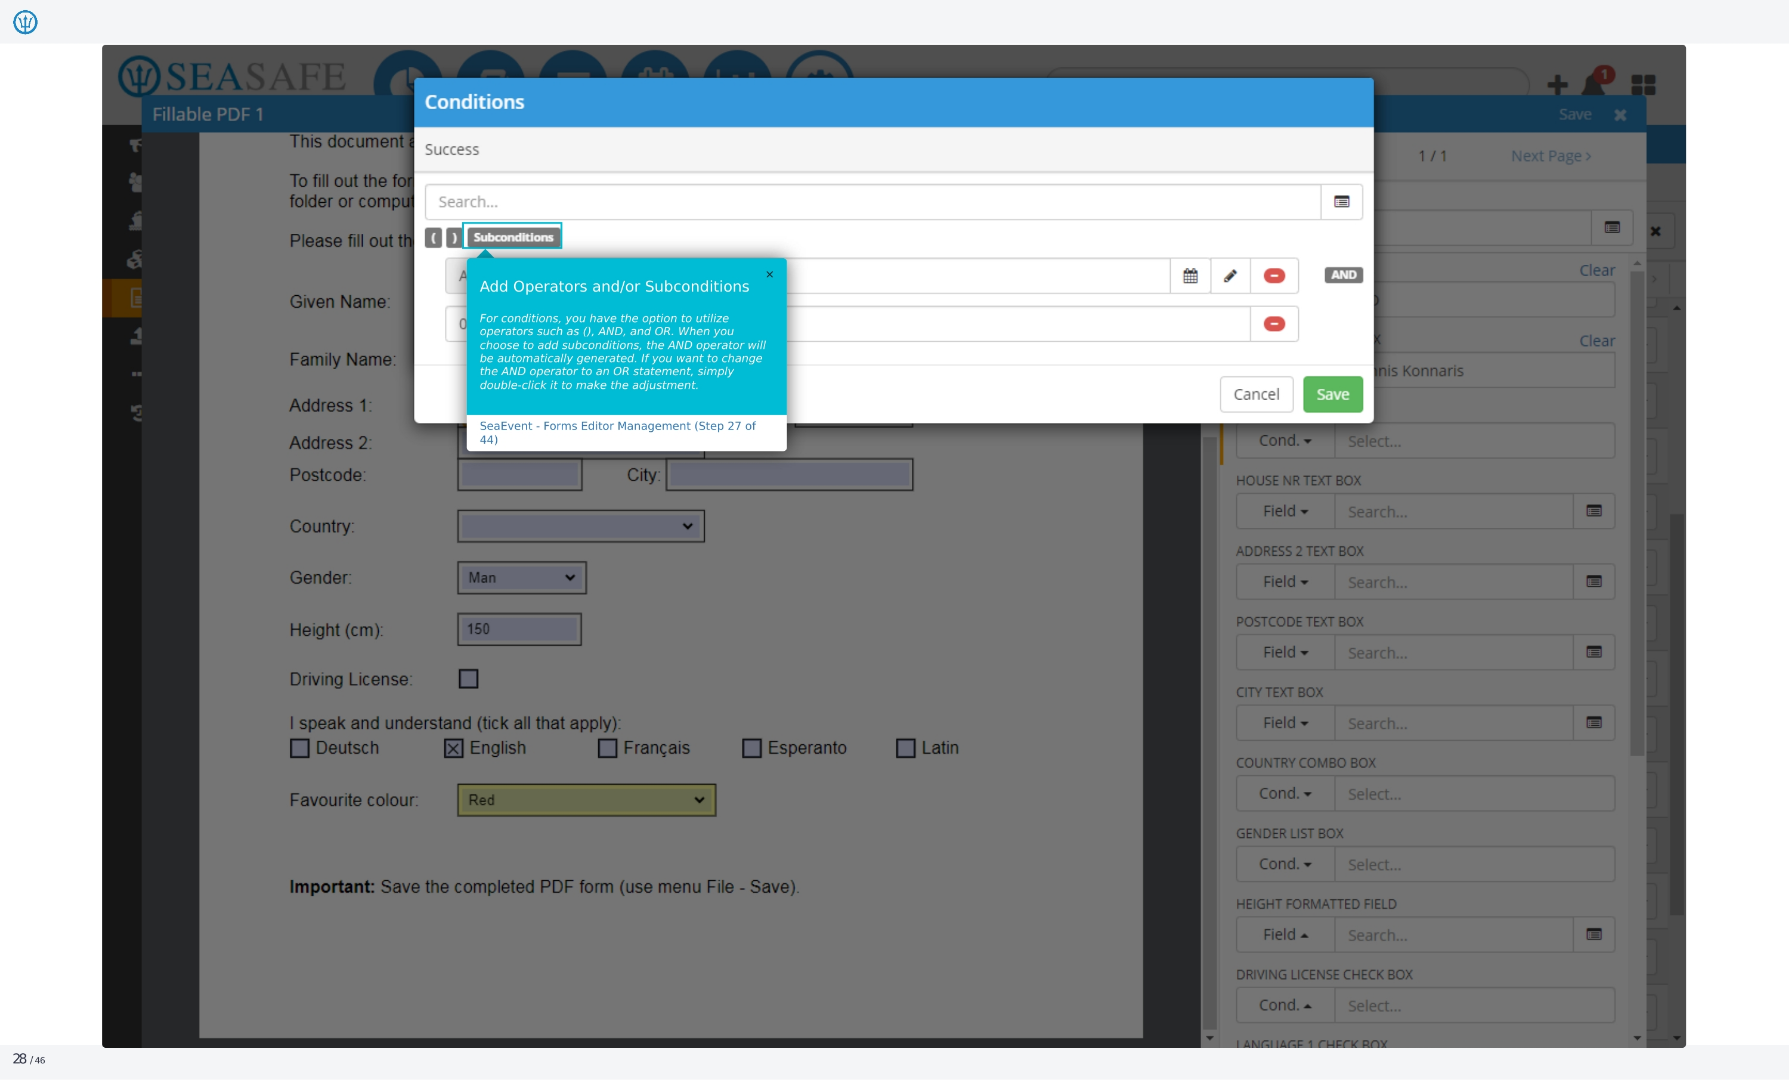
28. Conditions
For conditions, you have the option to utilize operators such as parentheses, AND, and OR. When you choose to add sub-conditions, the AND operator will be automatically generated. If you want to change the AND operator to an OR statement, simply double-click it to make the adjustment.
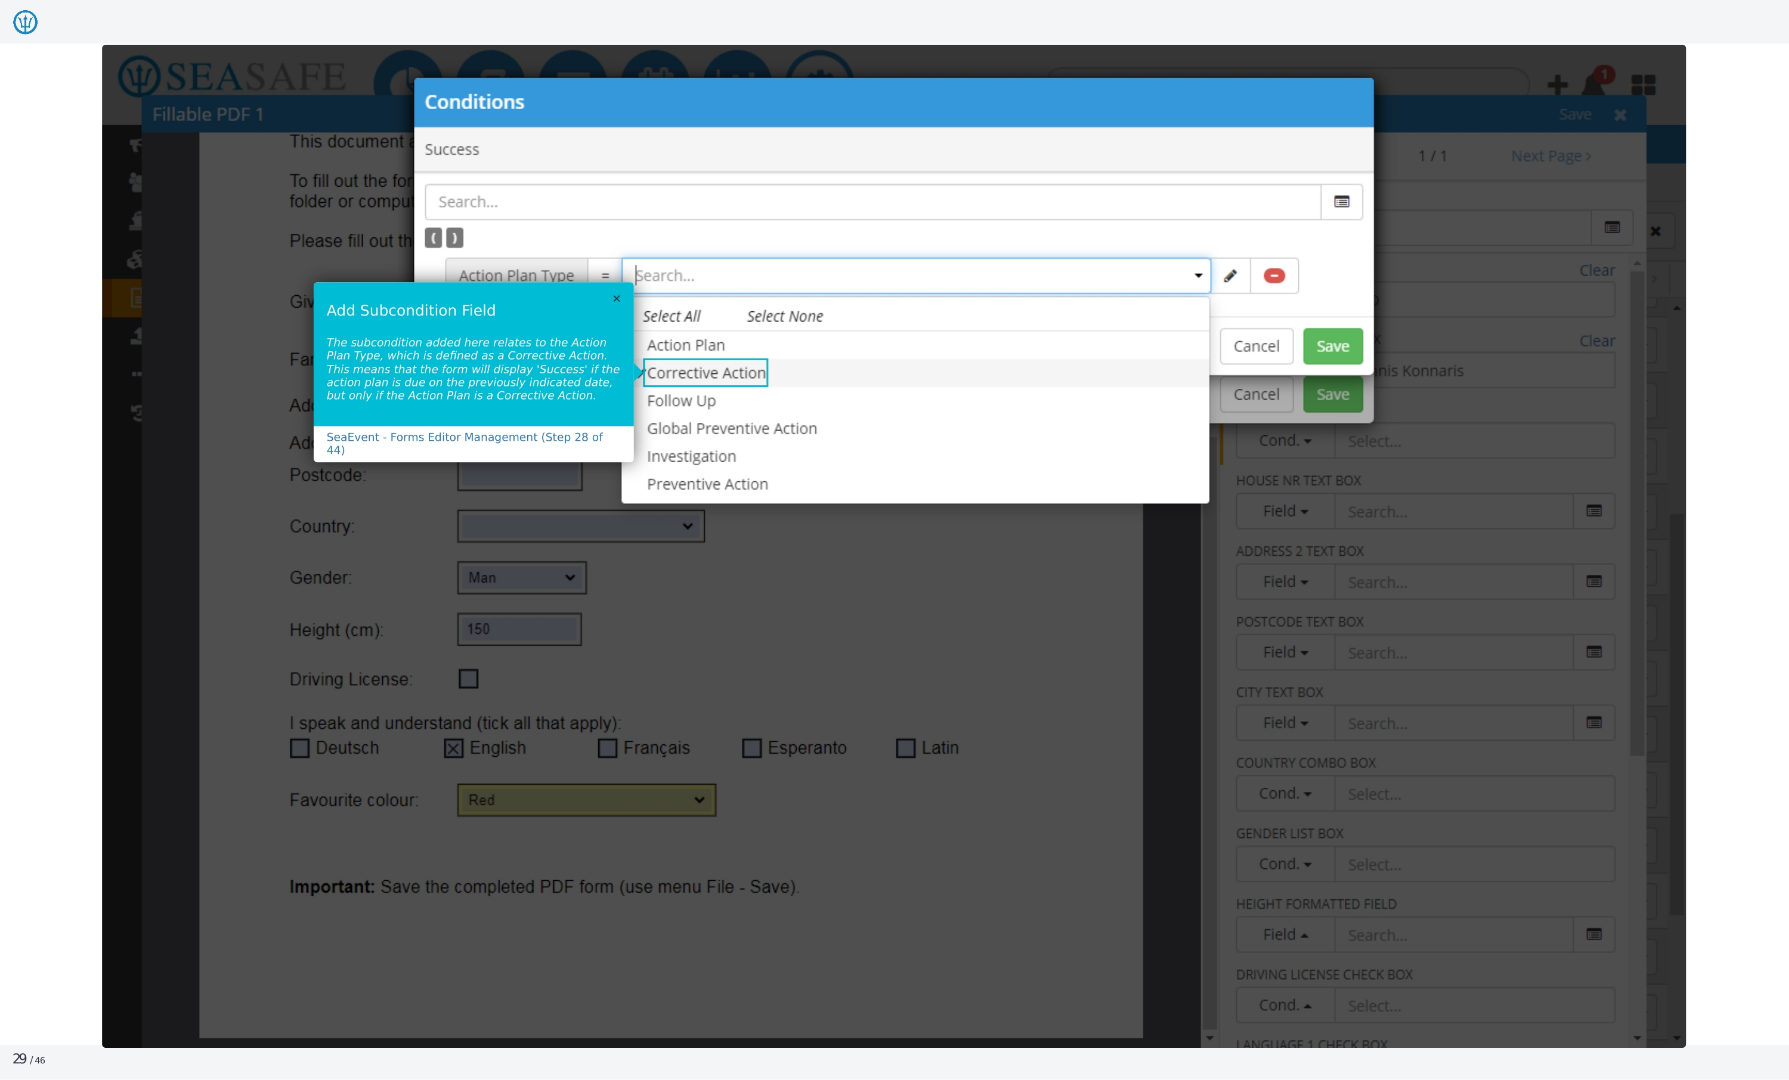
29. Conditions
The sub-condition added here relates to the Action Plan Type, which is defined as a Corrective Action. This means that the form will display 'Success' if the action plan is due on the previously indicated date, but only if the Action Plan is a Corrective Action. This is step 28 of 44 in the Ideagen Maritime Management Forms Editor Management process.
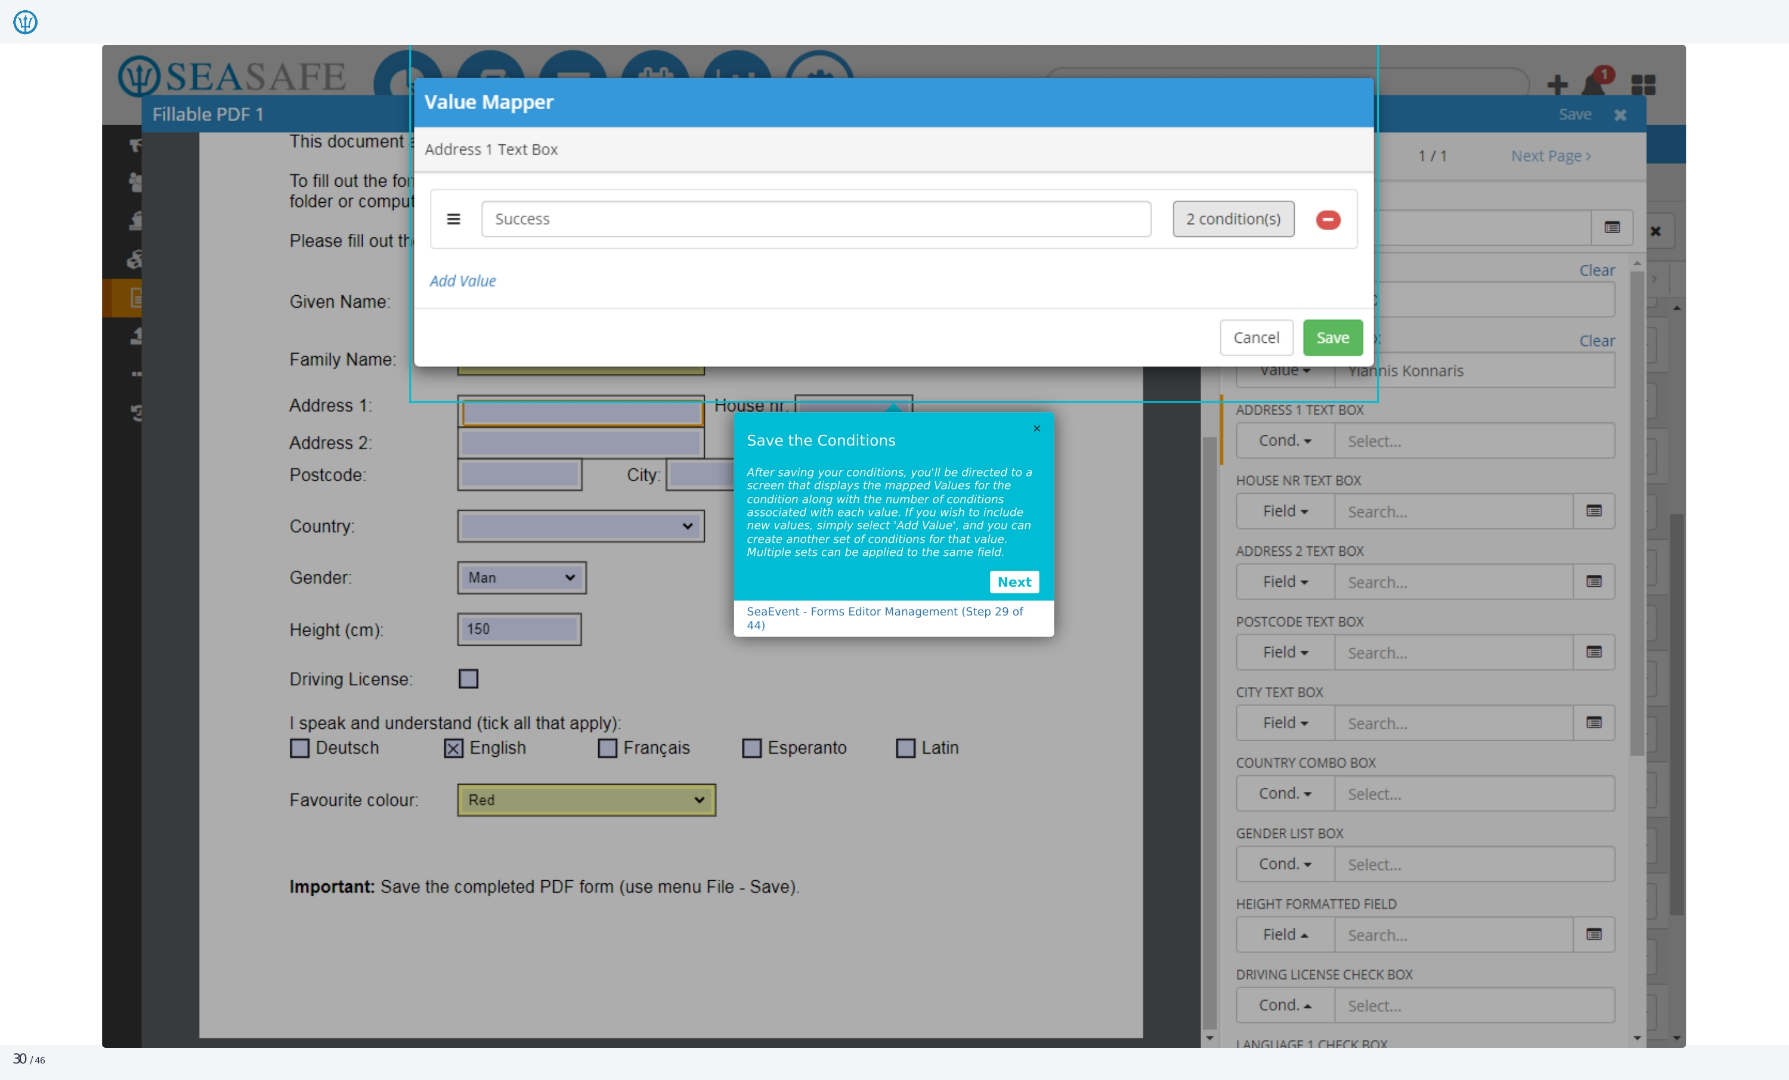
30. Value Mapper
After saving your conditions, you'll be directed to a screen that displays the mapped Values for the condition along with the number of conditions associated with each value. If you wish to include new values, simply select 'Add Value', and you can create another set of conditions for that value. Multiple sets can be applied to the same field.
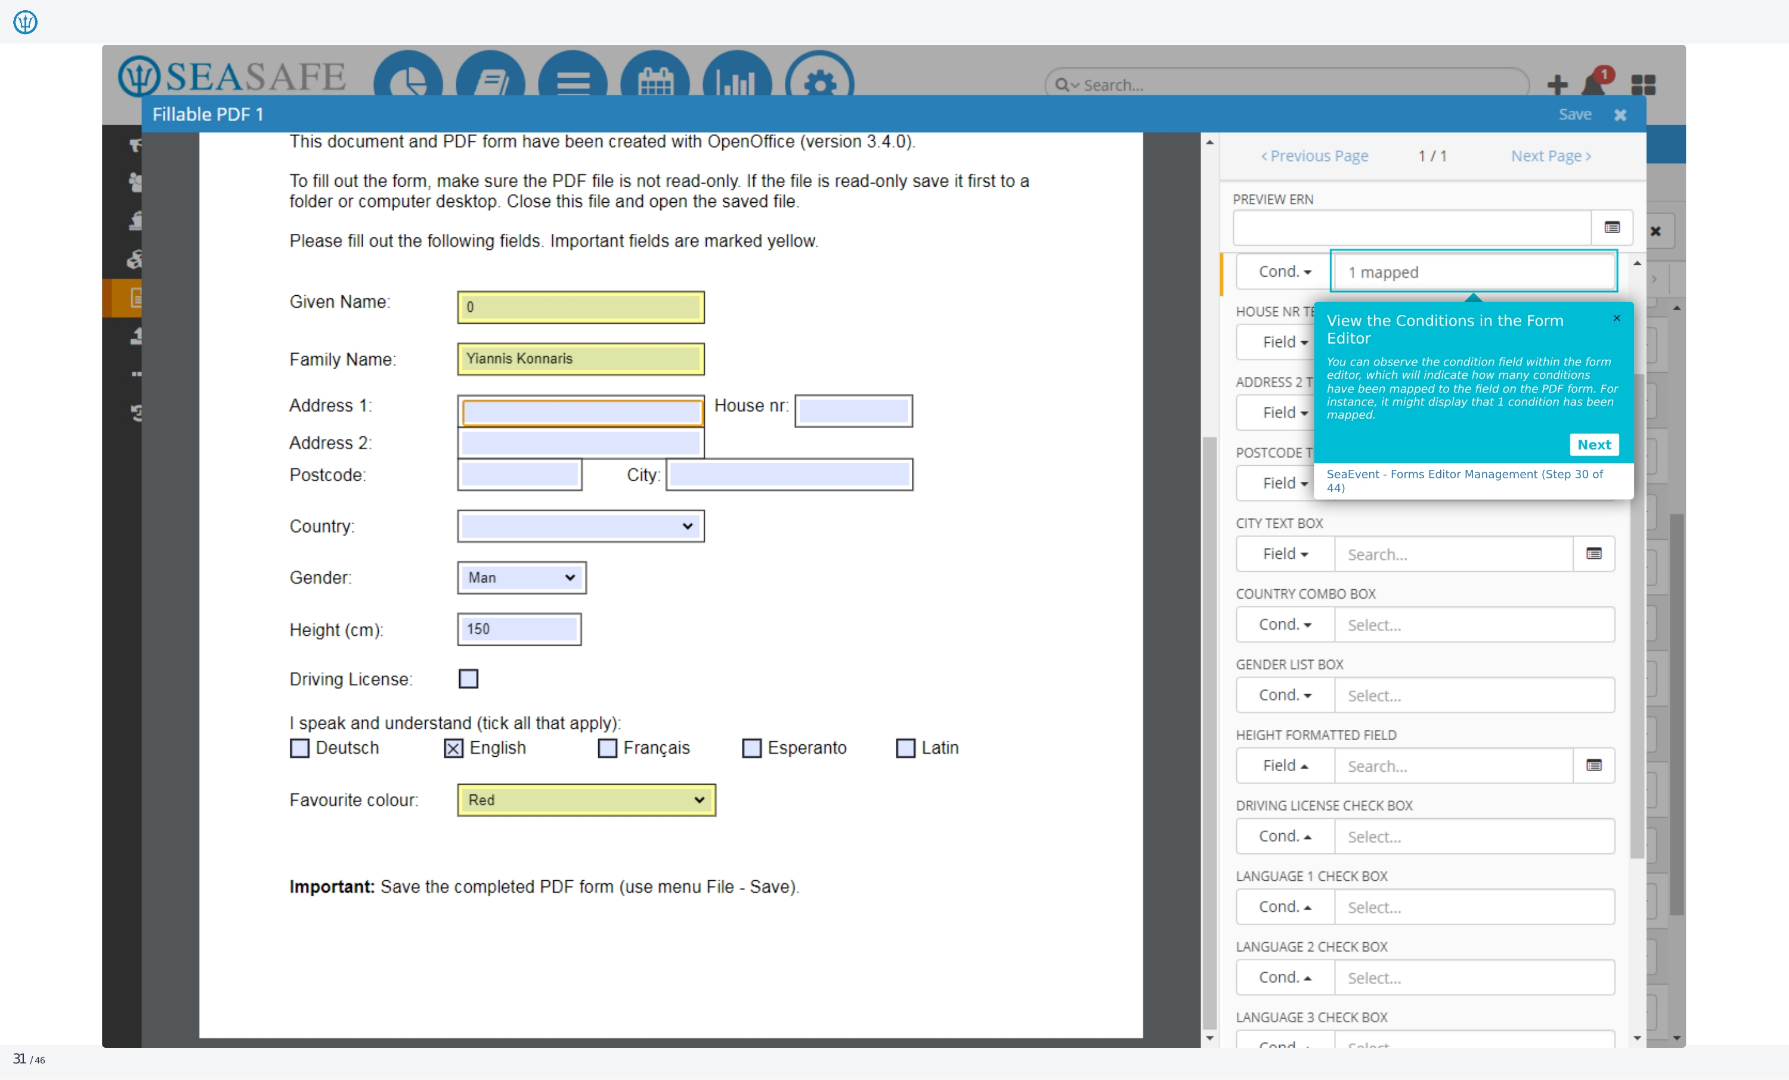
31. Fillable PDF 1
You can observe the condition field within the form editor, which will indicate how many conditions have been mapped to the field on the PDF form. For instance, it might display that one condition has been mapped. This is step 30 of 44 in the Ideagen Maritime Management Forms Editor Management process. Click next to continue.
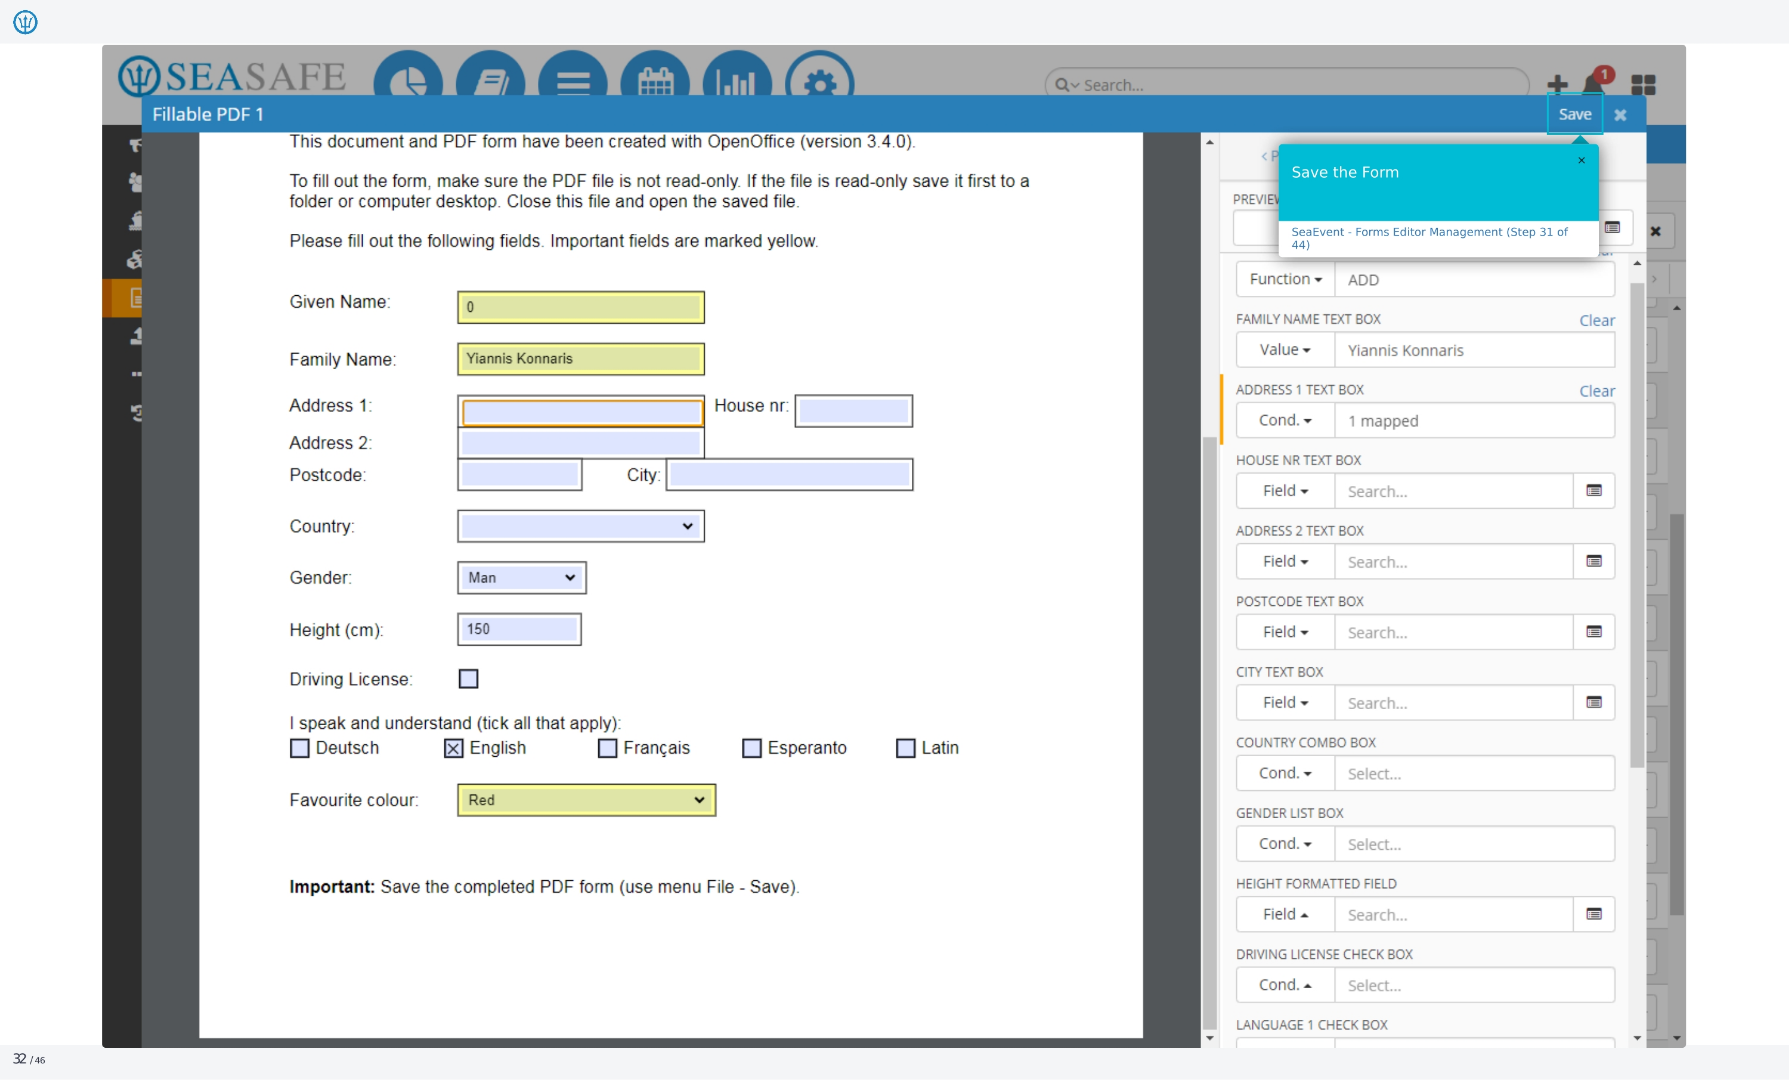
32. Fillable PDF 1
Now you can save the form. This is step 31 of 44 in the Ideagen Maritime Management Forms Editor Management process. The form includes fields for given name, family name, address, postcode, country, gender, height, driving license, languages spoken, and favorite color.
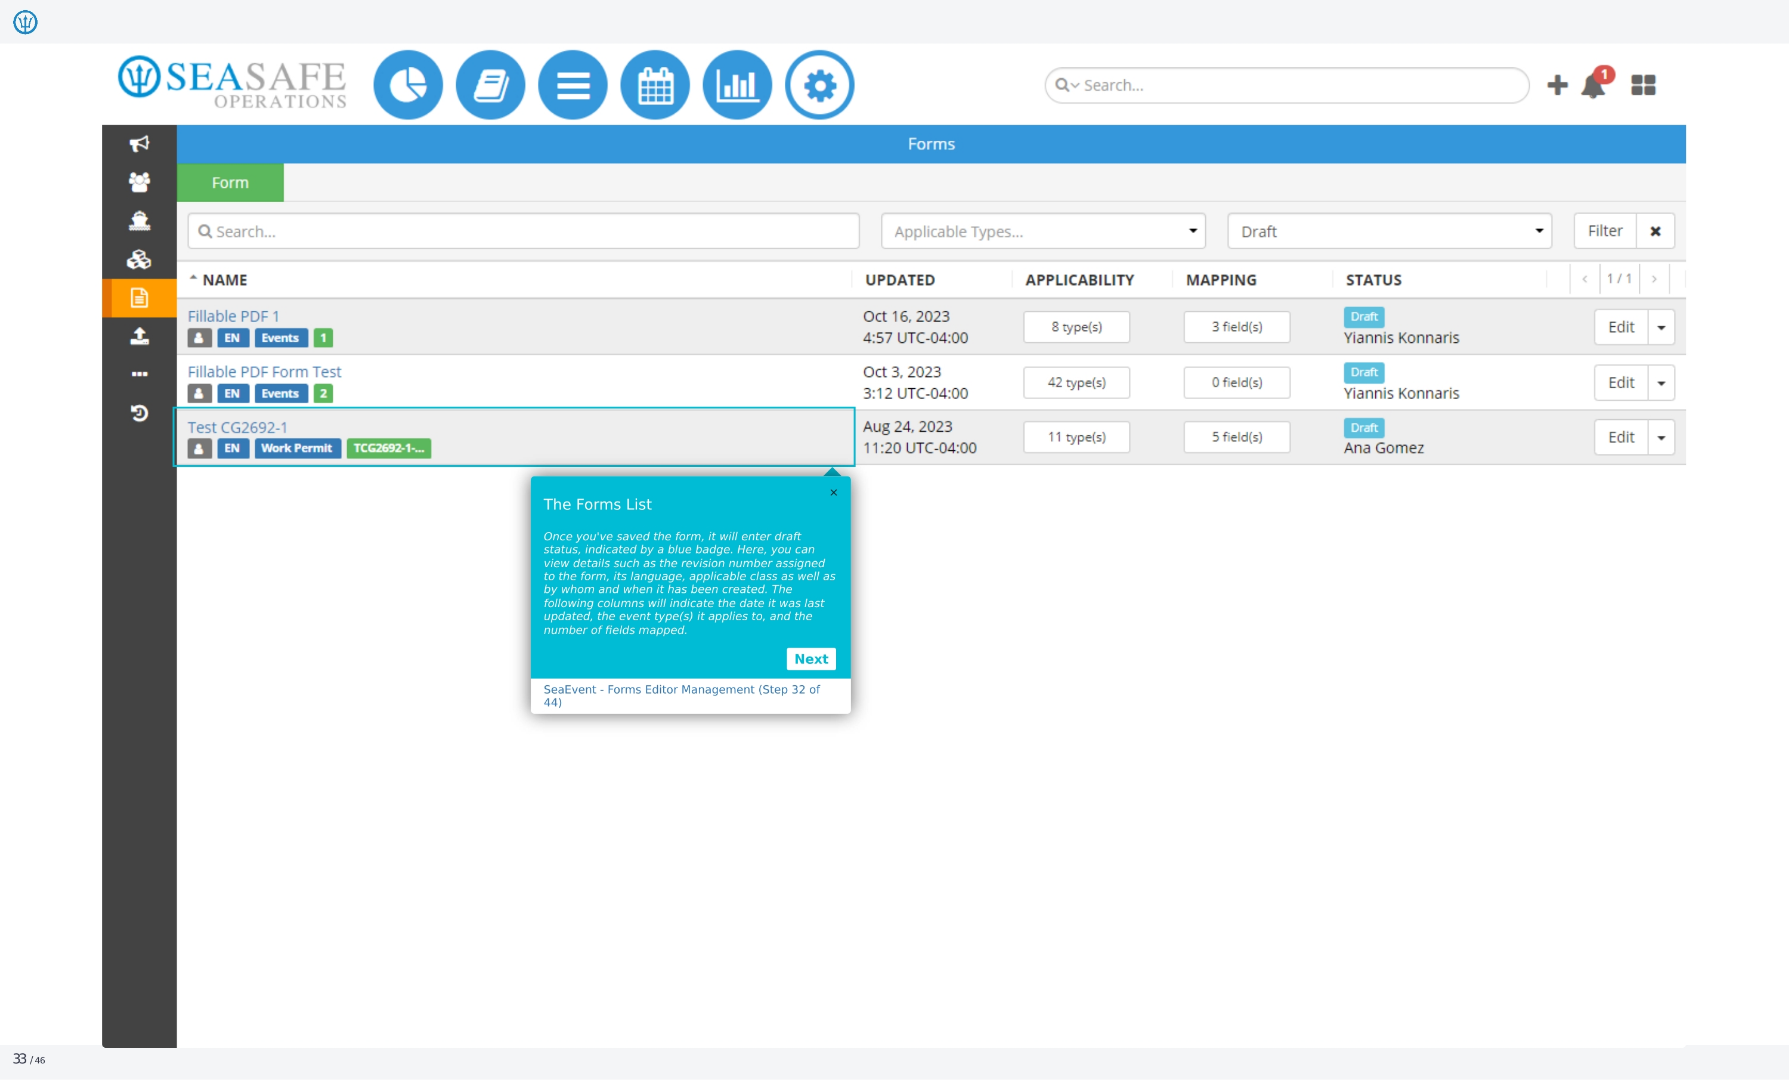
33. Forms
Once you've saved the form, it will enter draft status, indicated by a blue badge. Here, you can view details such as the revision number assigned to the form, its language, applicable class as well as by whom and when it has been created. The following columns will indicate the date it was last updated, the event type it applies to, and the number of fields mapped.
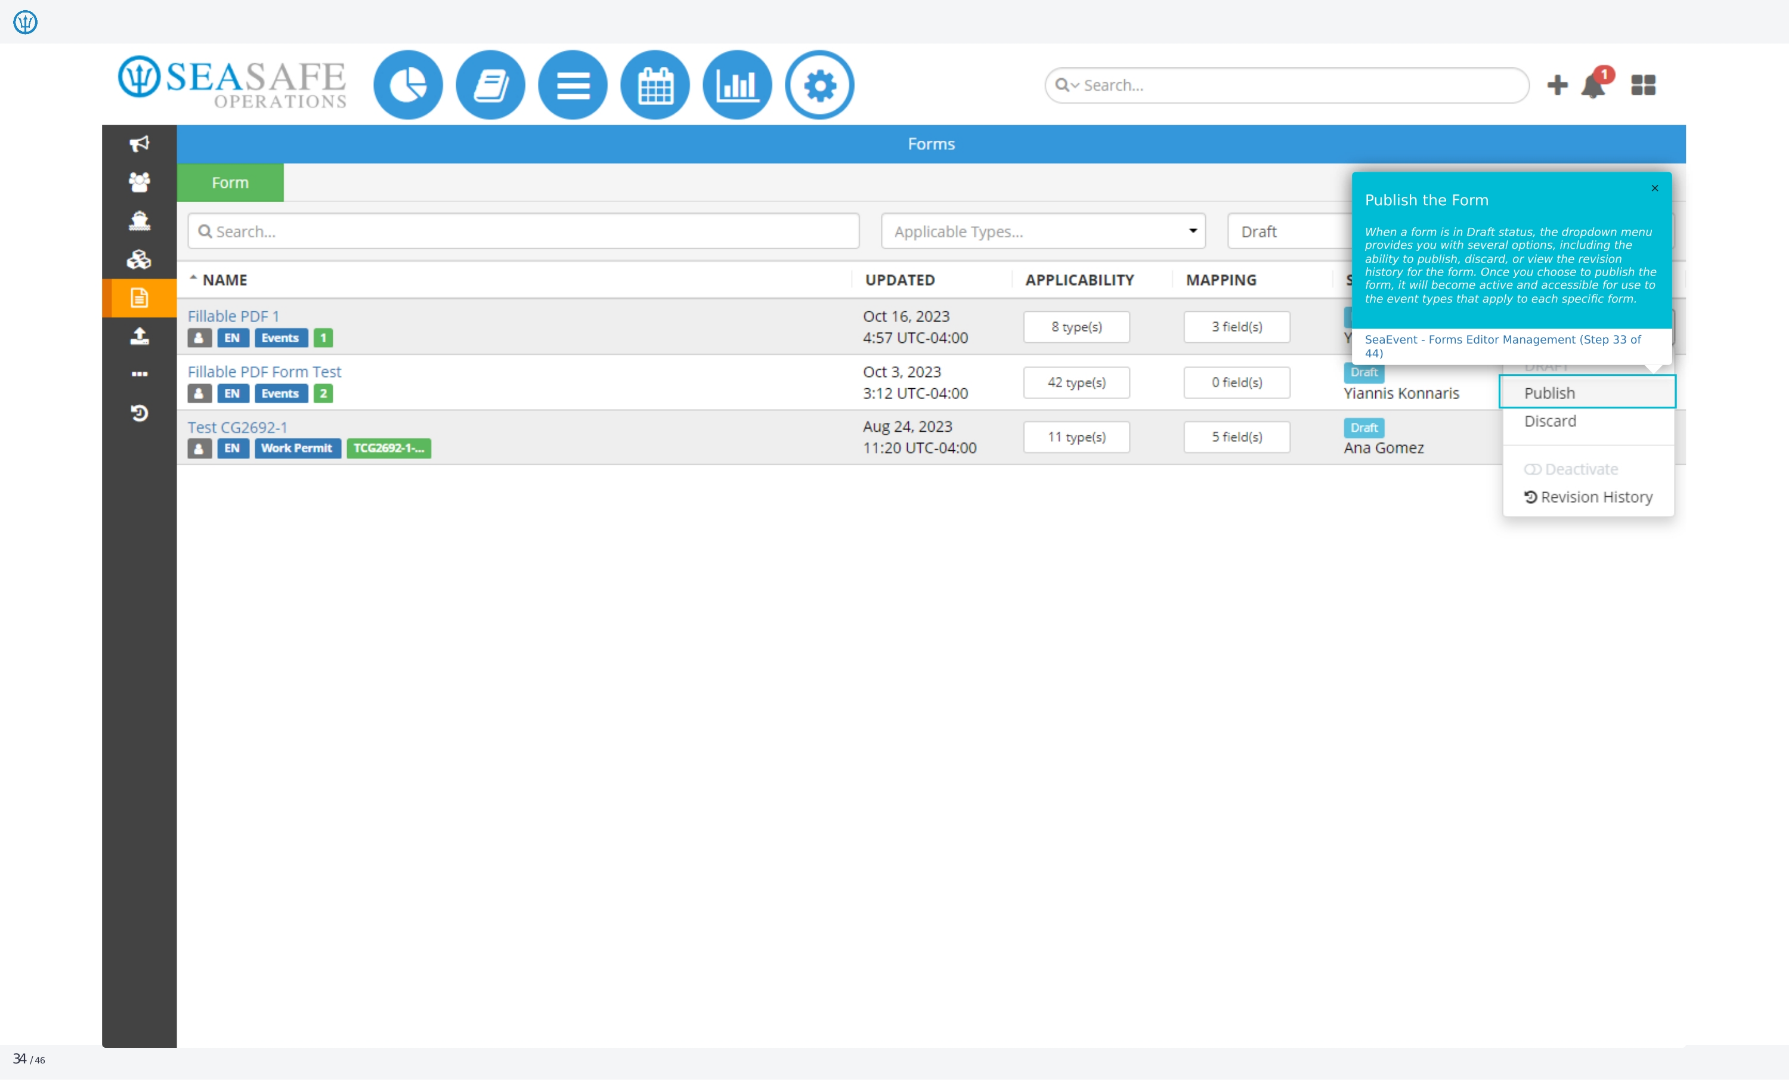
34. Forms
When a form is in Draft status, the dropdown menu provides you with several options, including the ability to publish, discard, or view the revision history for the form. Once you choose to publish the form, it will become active and accessible for use to the event types that apply to each specific form.
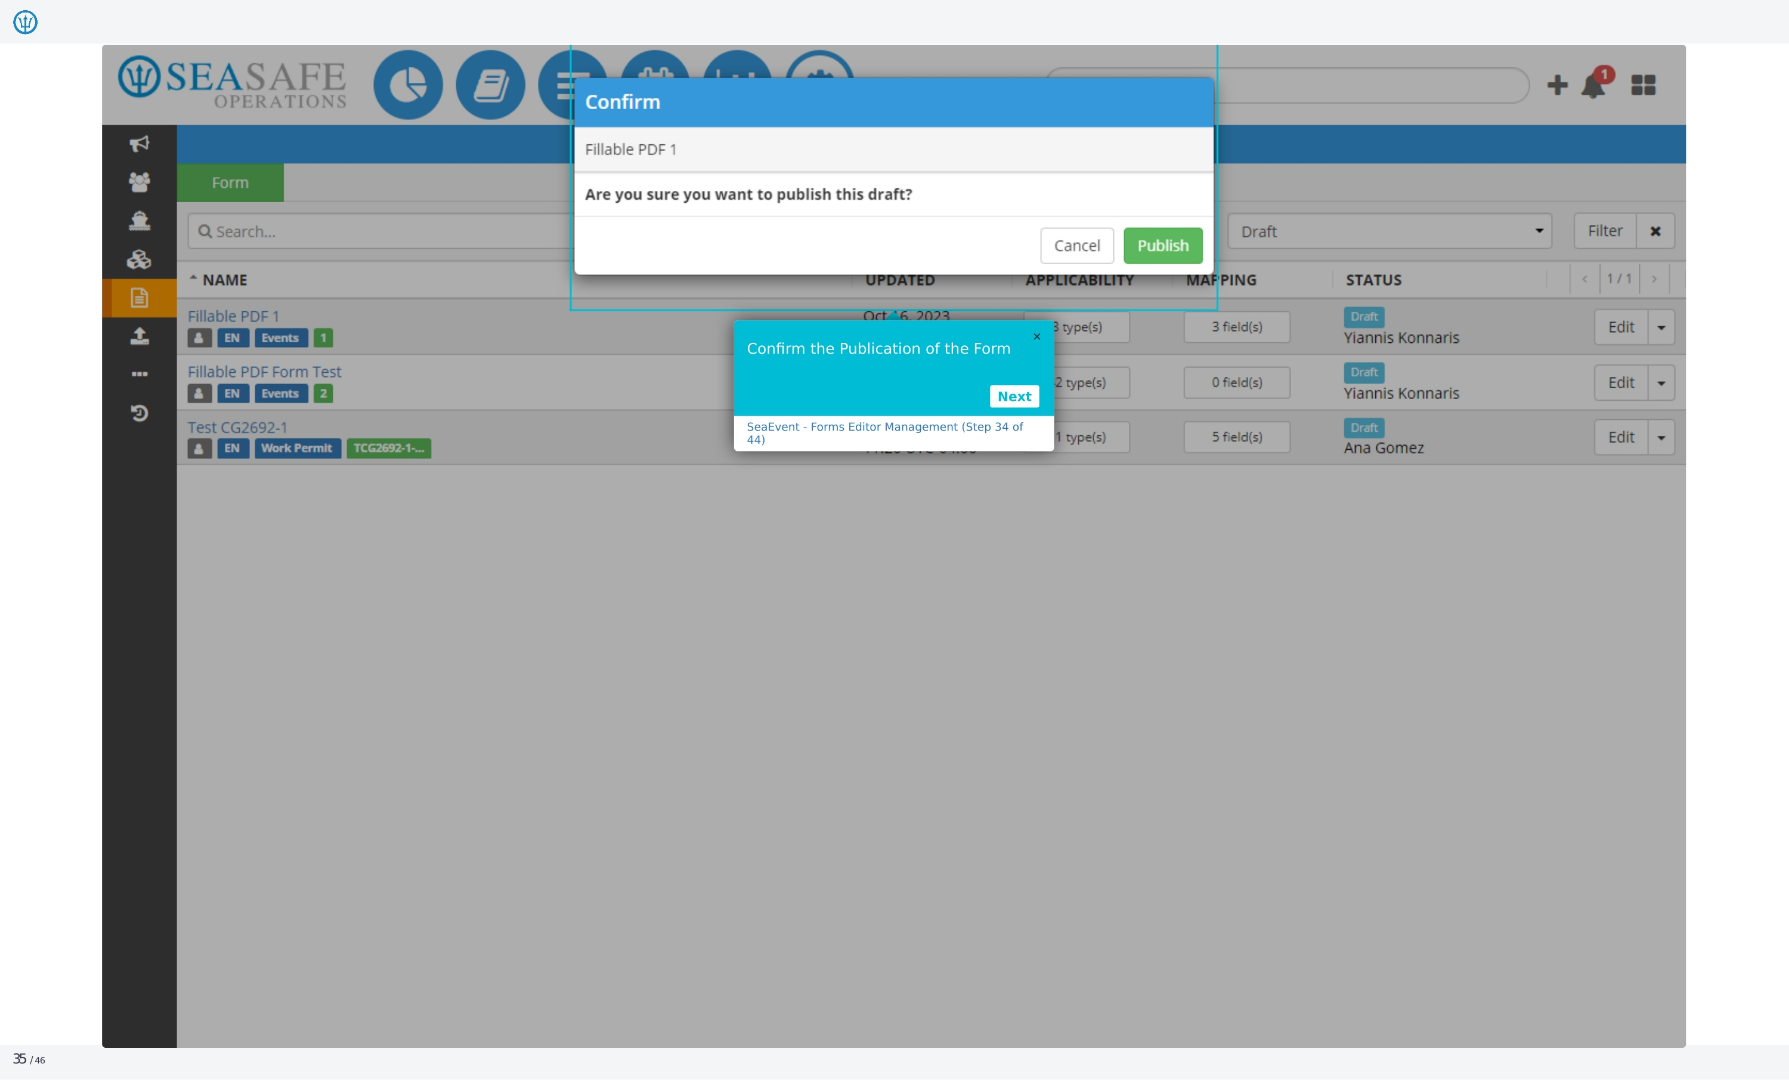
35. Confirm
Are you sure you want to publish this draft? Confirm the publication of the form. This is step 34 of 44 in the Ideagen Maritime Management Forms Editor Management process. You can cancel or publish.
36. Forms
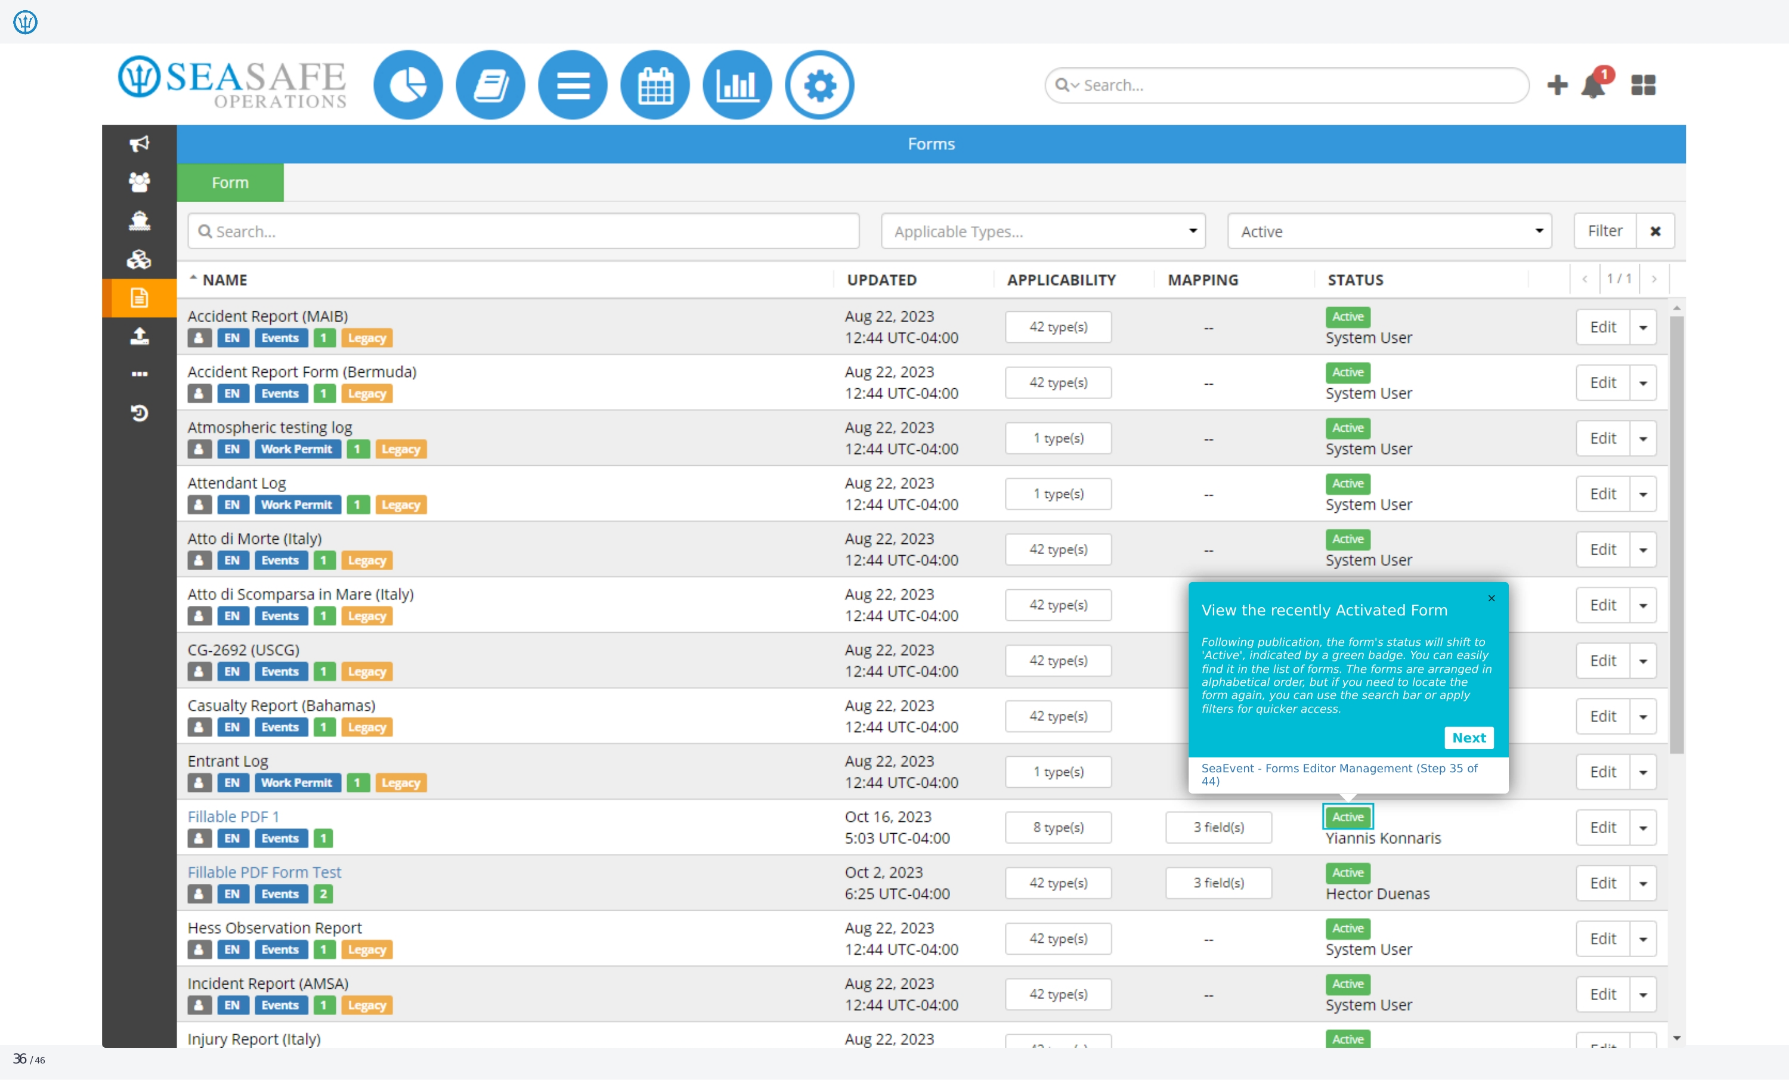
Following publication, the form's status will shift to 'Active', indicated by a green badge. You can easily find it in the list of forms. The forms are arranged in alphabetical order, but if you need to locate the form again, you can use the search bar or apply filters for quicker access.
37. Forms
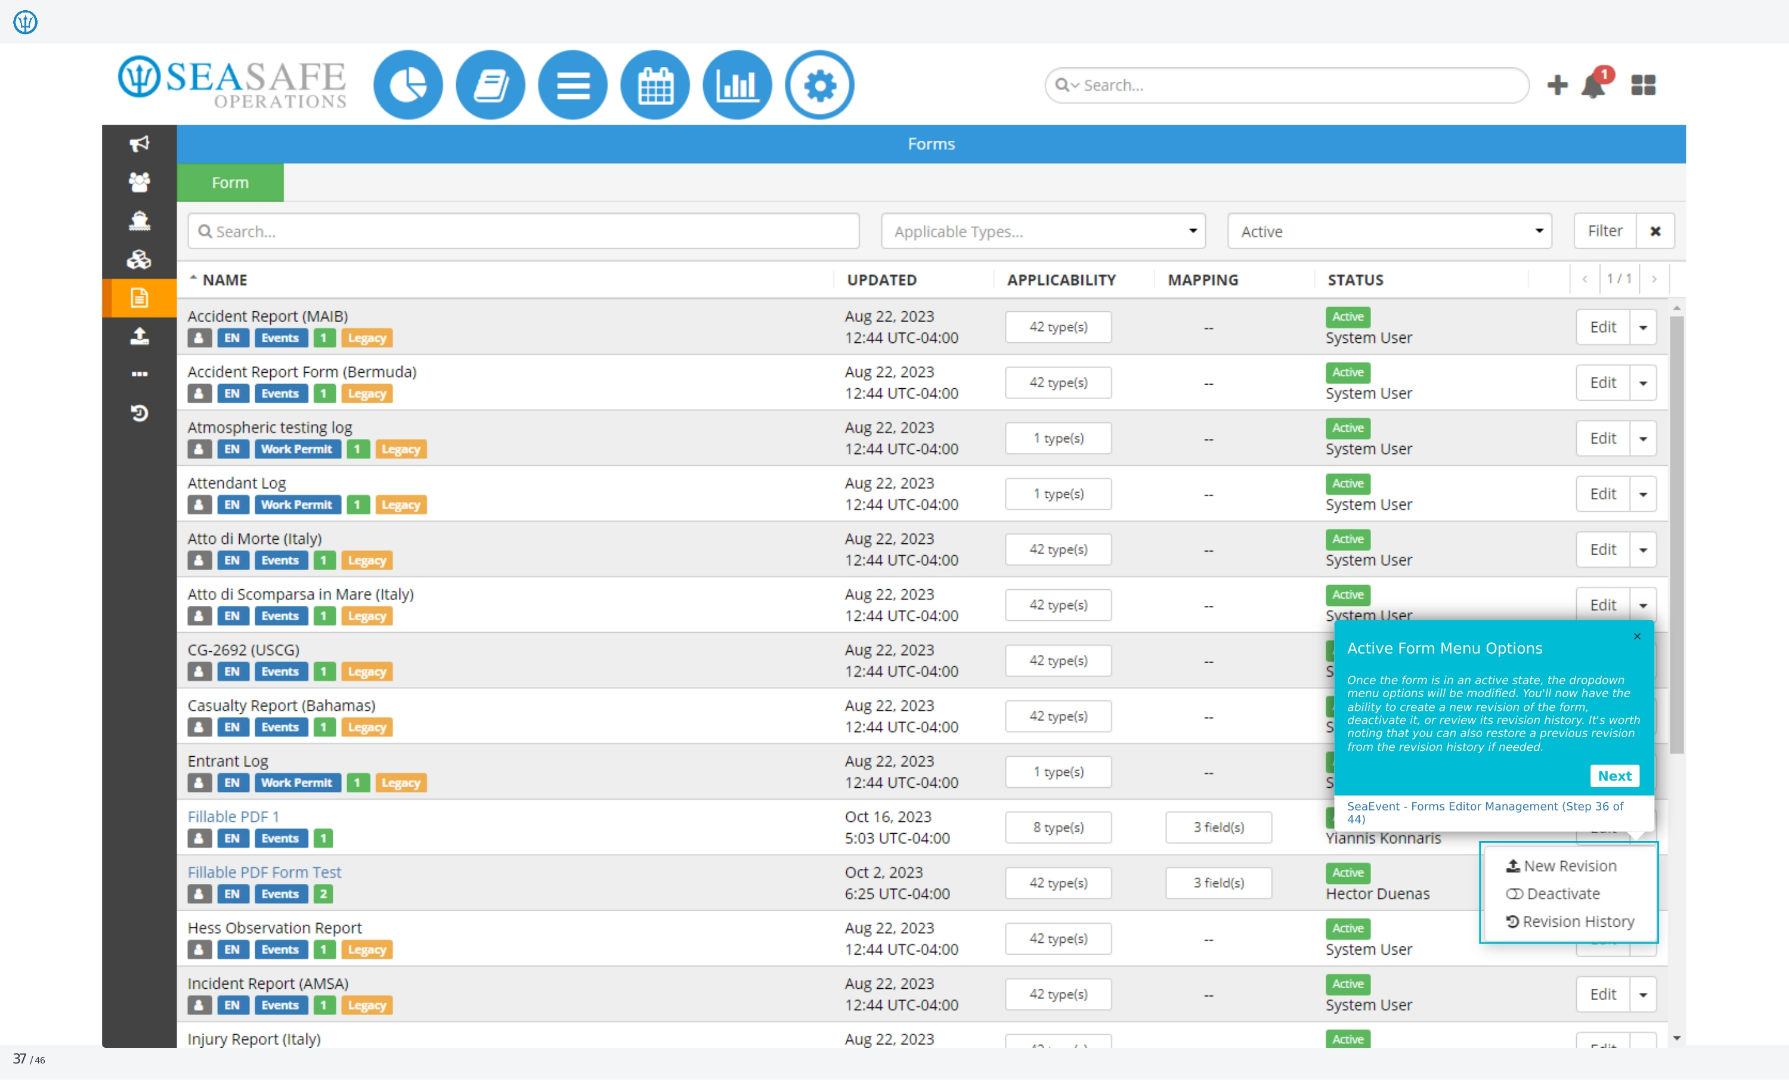
Once the form is in an active state, the dropdown menu options will be modified. You'll now have the ability to create a new revision of the form, deactivate it, or review its revision history. It's worth noting that you can also restore a previous revision from the revision history if needed.
38. Forms
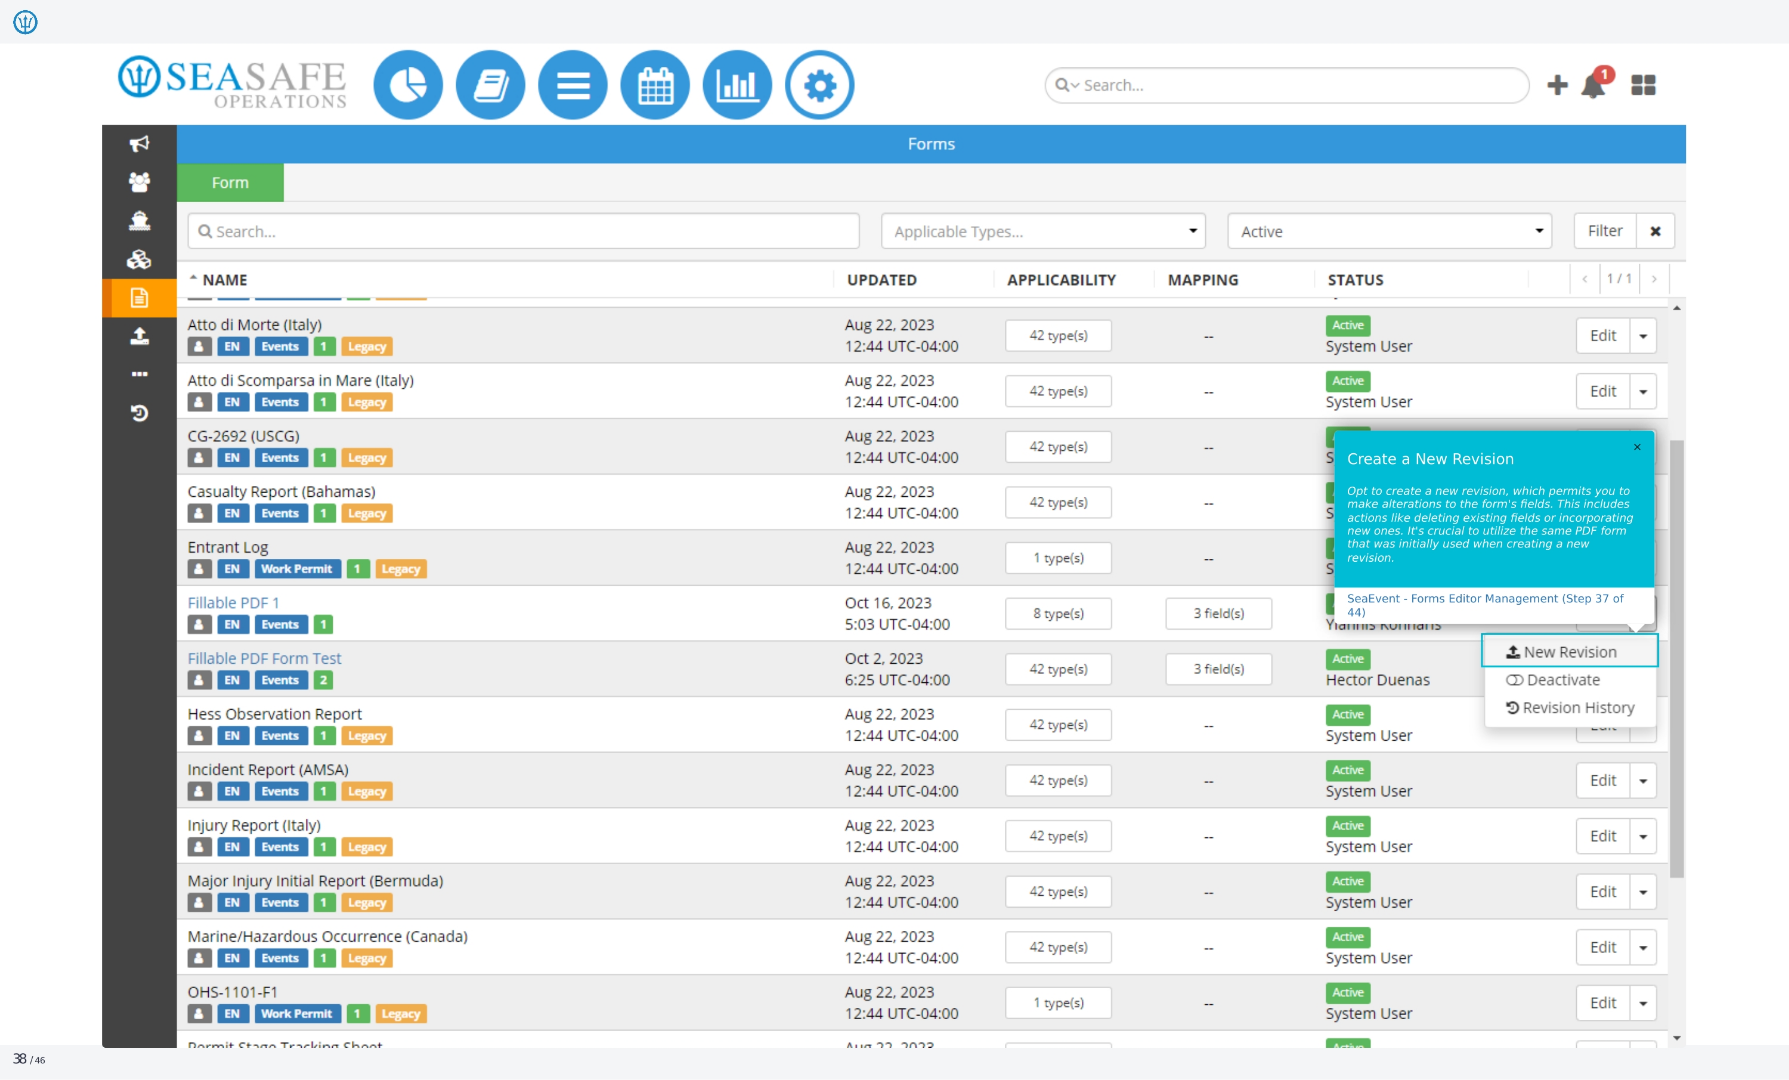
Opt to create a new revision, which permits you to make alterations to the form's fields. This includes actions like deleting existing fields or incorporating new ones. It's crucial to utilize the same PDF form that was initially used when creating a new revision.
39. Forms
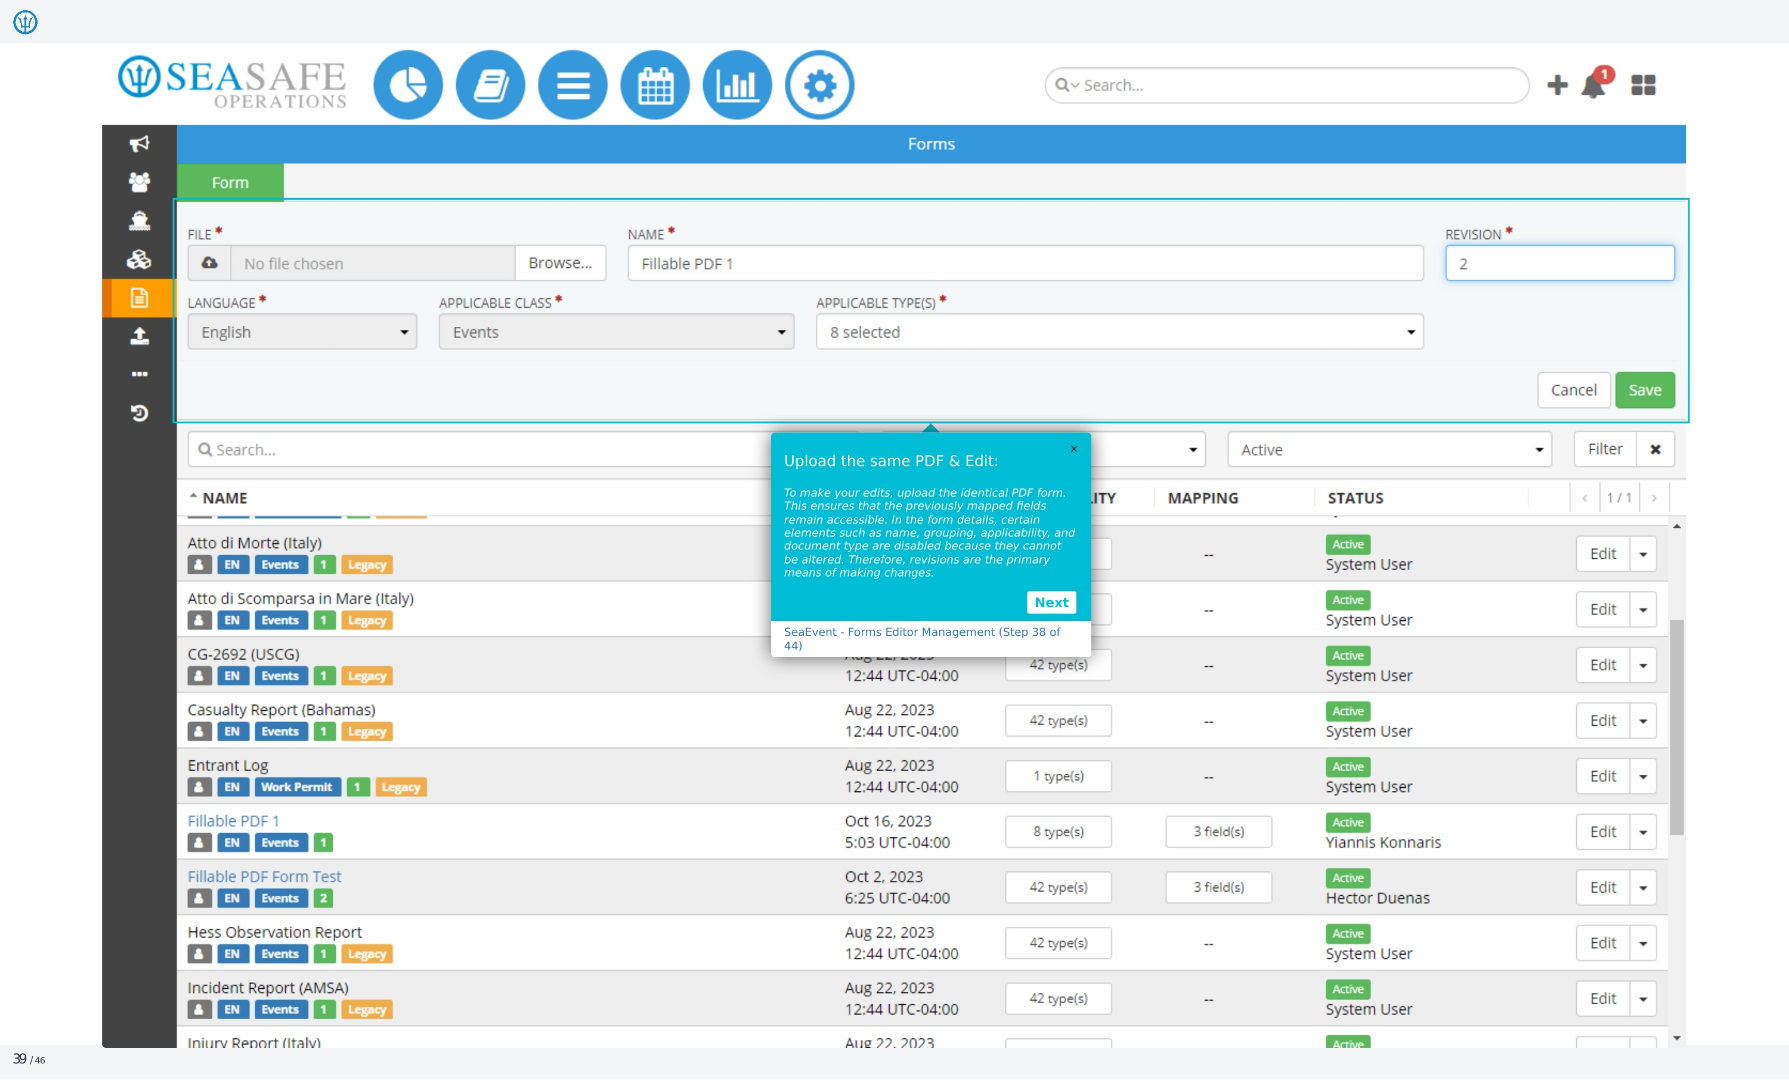
To make your edits, upload the identical PDF form. This ensures that the previously mapped fields remain accessible. In the form details, certain elements such as name, grouping, applicability, and document type are disabled because they cannot be altered. Therefore, revisions are the primary means of making changes.
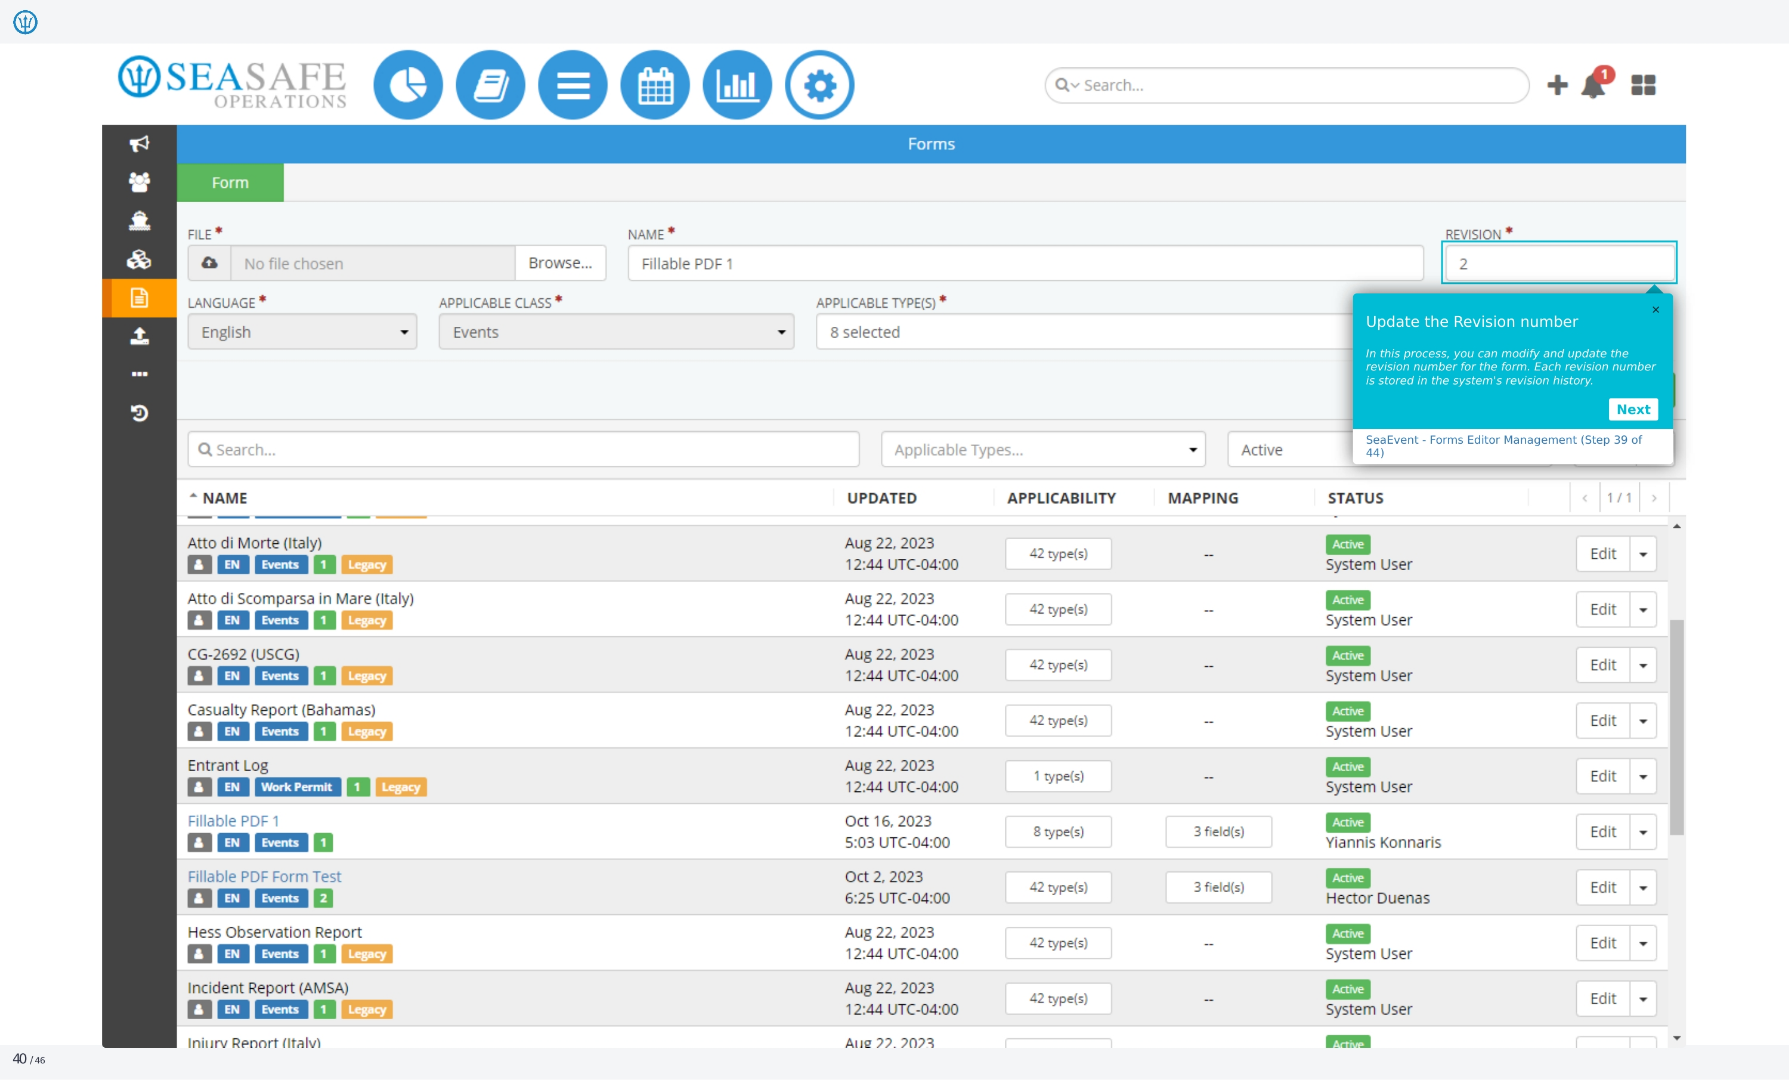
40. Forms
In this process, you can modify and update the revision number for the form. Each revision number is stored in the system's revision history. This is step 39 of 44 in the Ideagen Maritime Management Forms Editor Management process. Click next to continue.
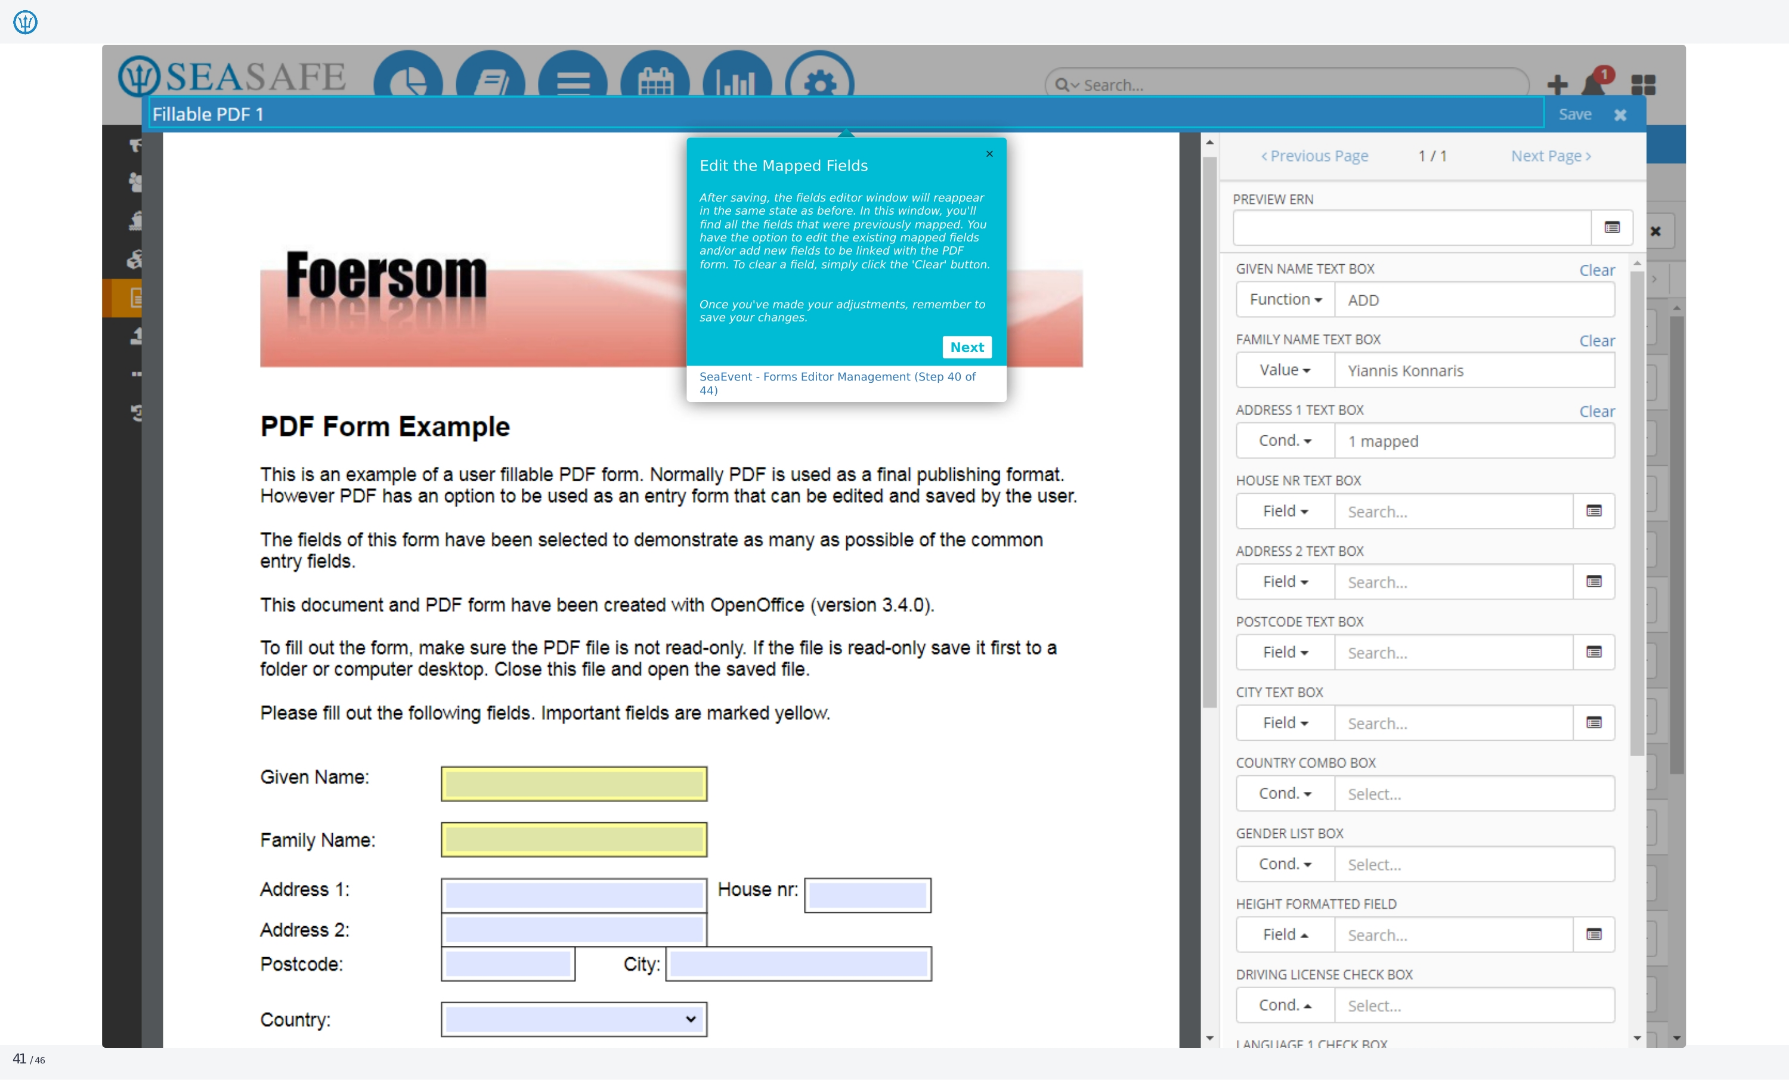
41. PDF Form Example
Here's an example of a user-fillable PDF form. While PDFs are typically used as a final publishing format, they can also function as entry forms that users can edit and save. The fields in this form demonstrate common entry fields. This document and PDF form were created with OpenOffice version 3.4.0. To fill out the form, ensure the PDF file is not read-only. If it is, save it to your computer, close it, and reopen the saved file. Please fill out the following fields, noting that important fields are marked in yellow.
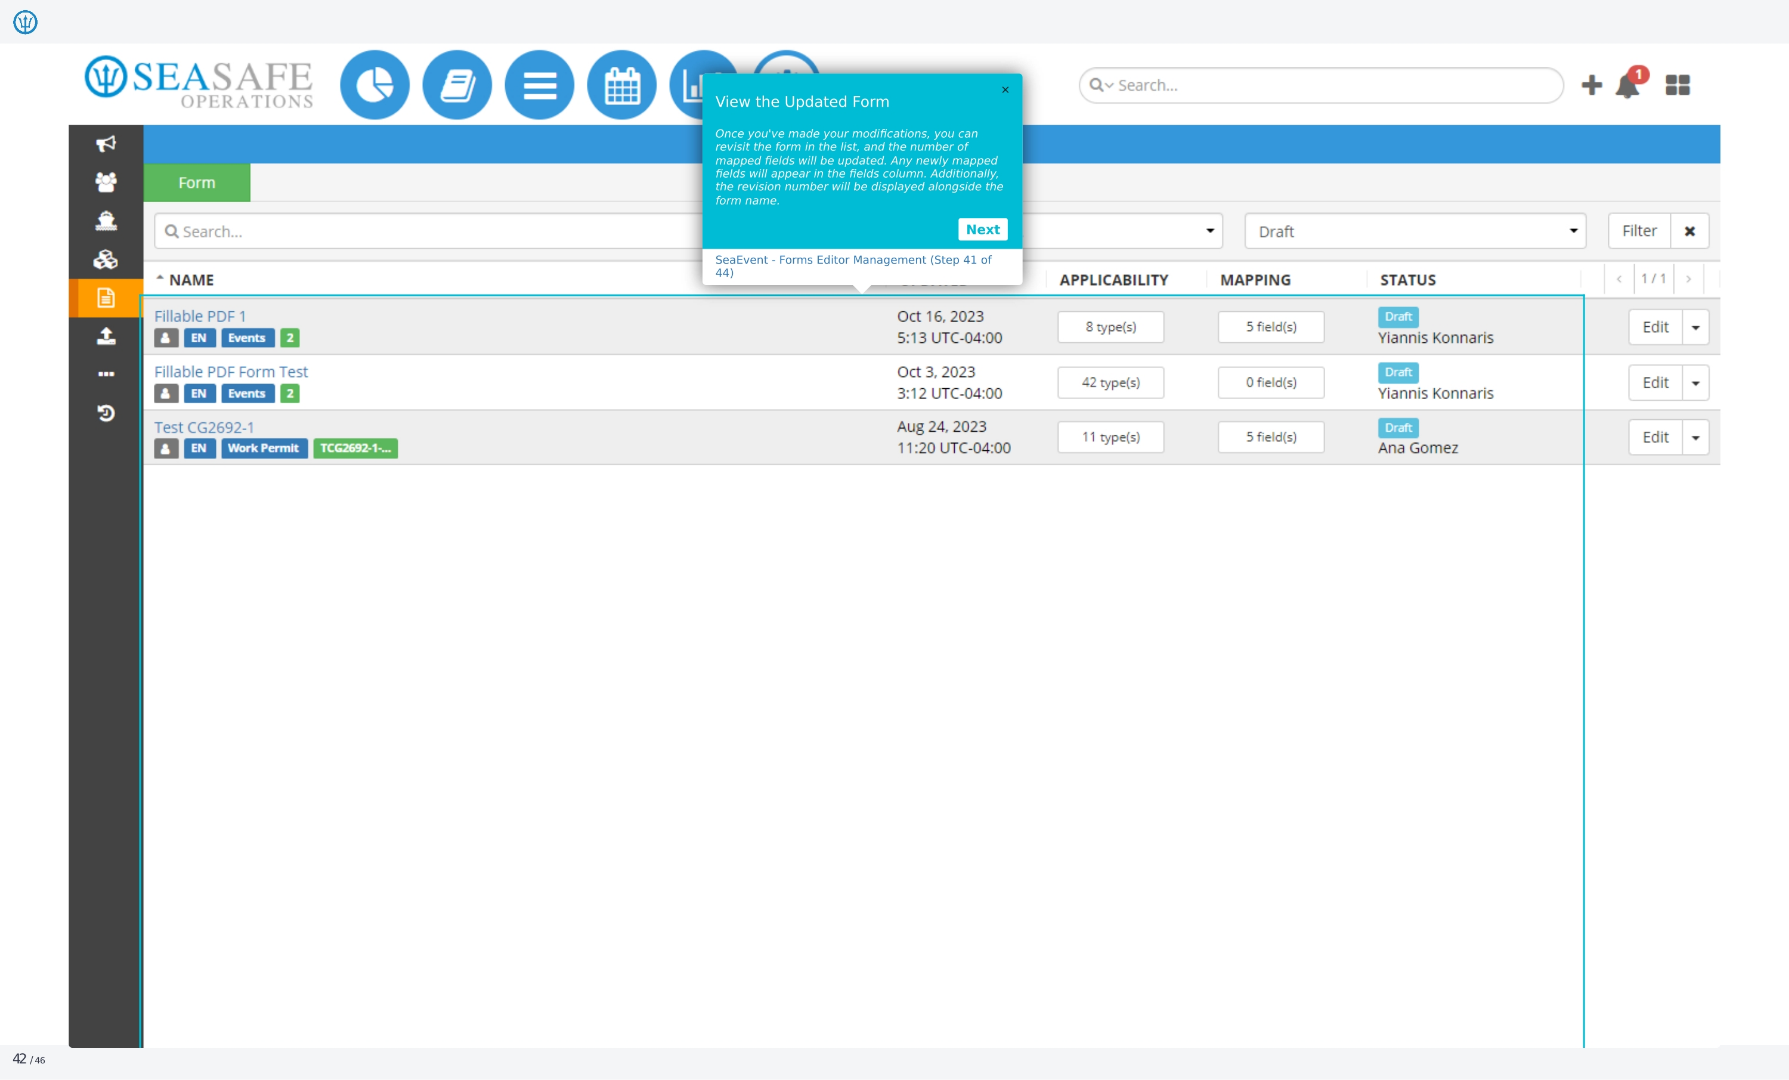
42. View the Updated Form
Once you've made your modifications, you can revisit the form in the list, and the number of mapped fields will be updated. Any newly mapped fields will appear in the fields column. Additionally, the revision number will be displayed alongside the form name.
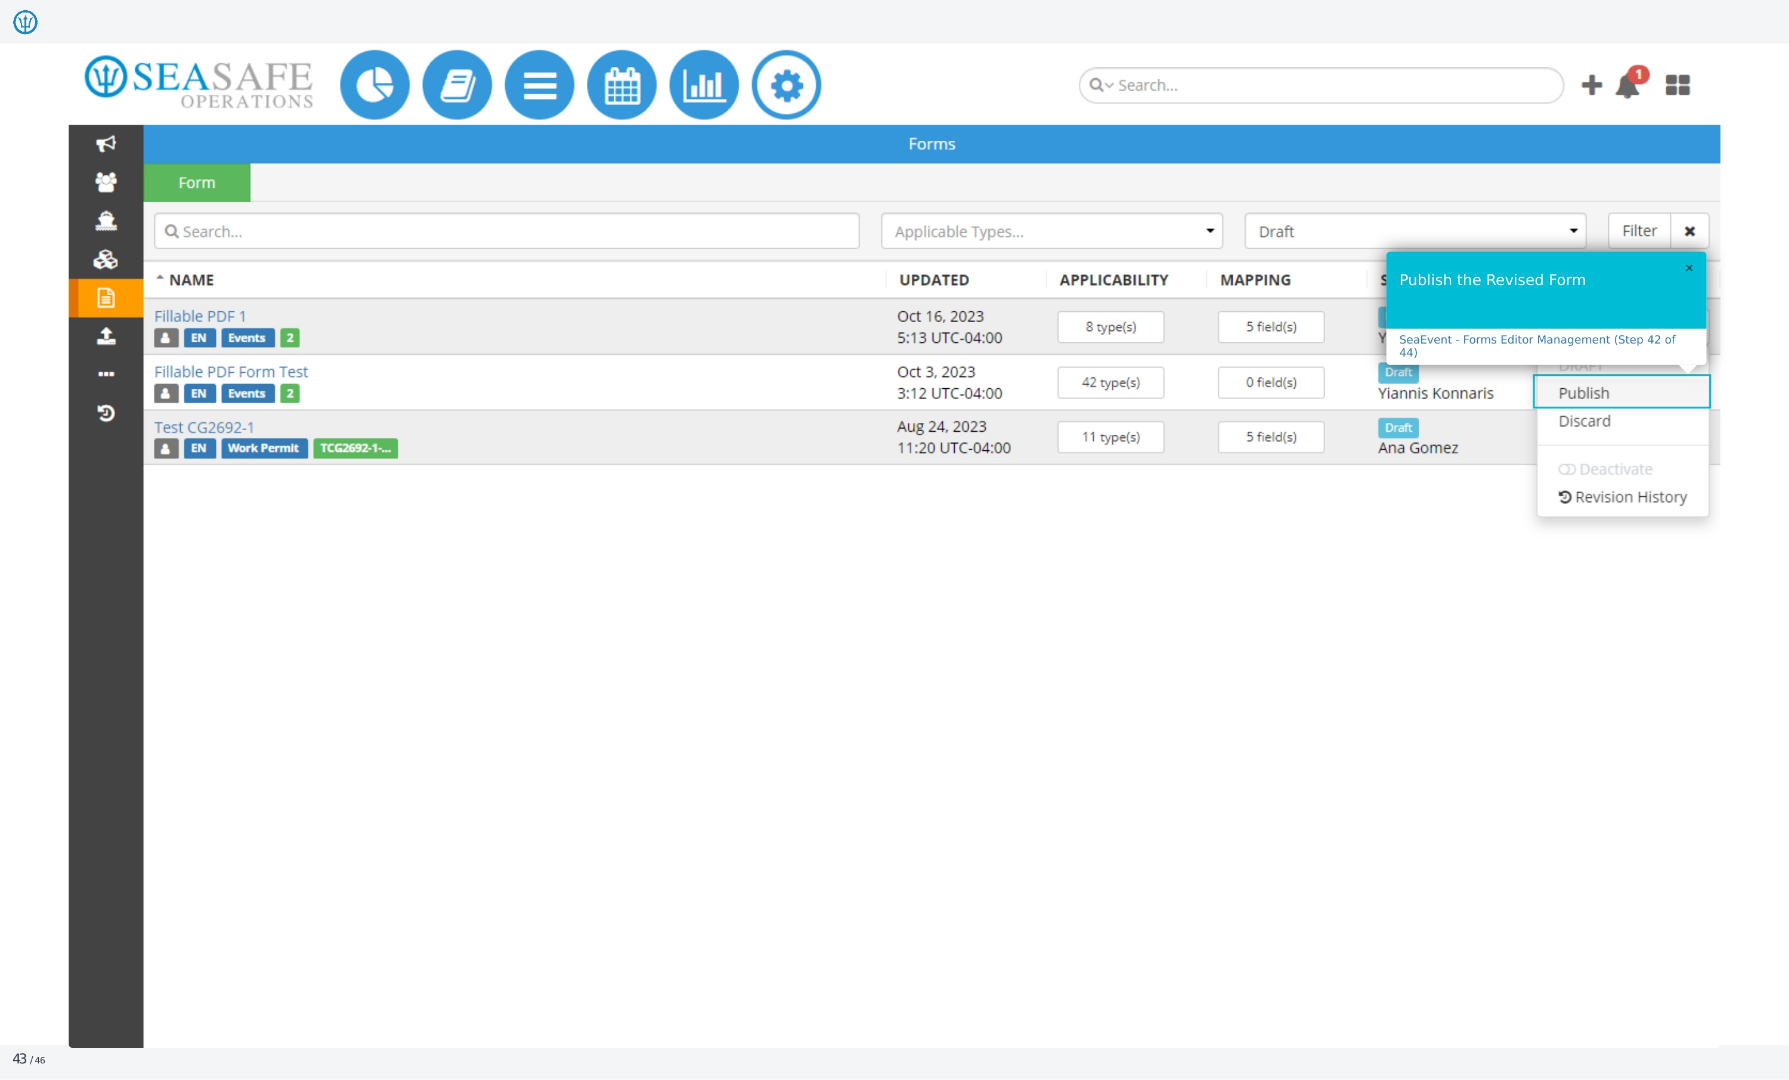
43. Publish the Revised Form
Here we see the option to publish the revised form. This is part of the Ideagen Maritime Management Forms Editor Management process, specifically step 42 of 44.
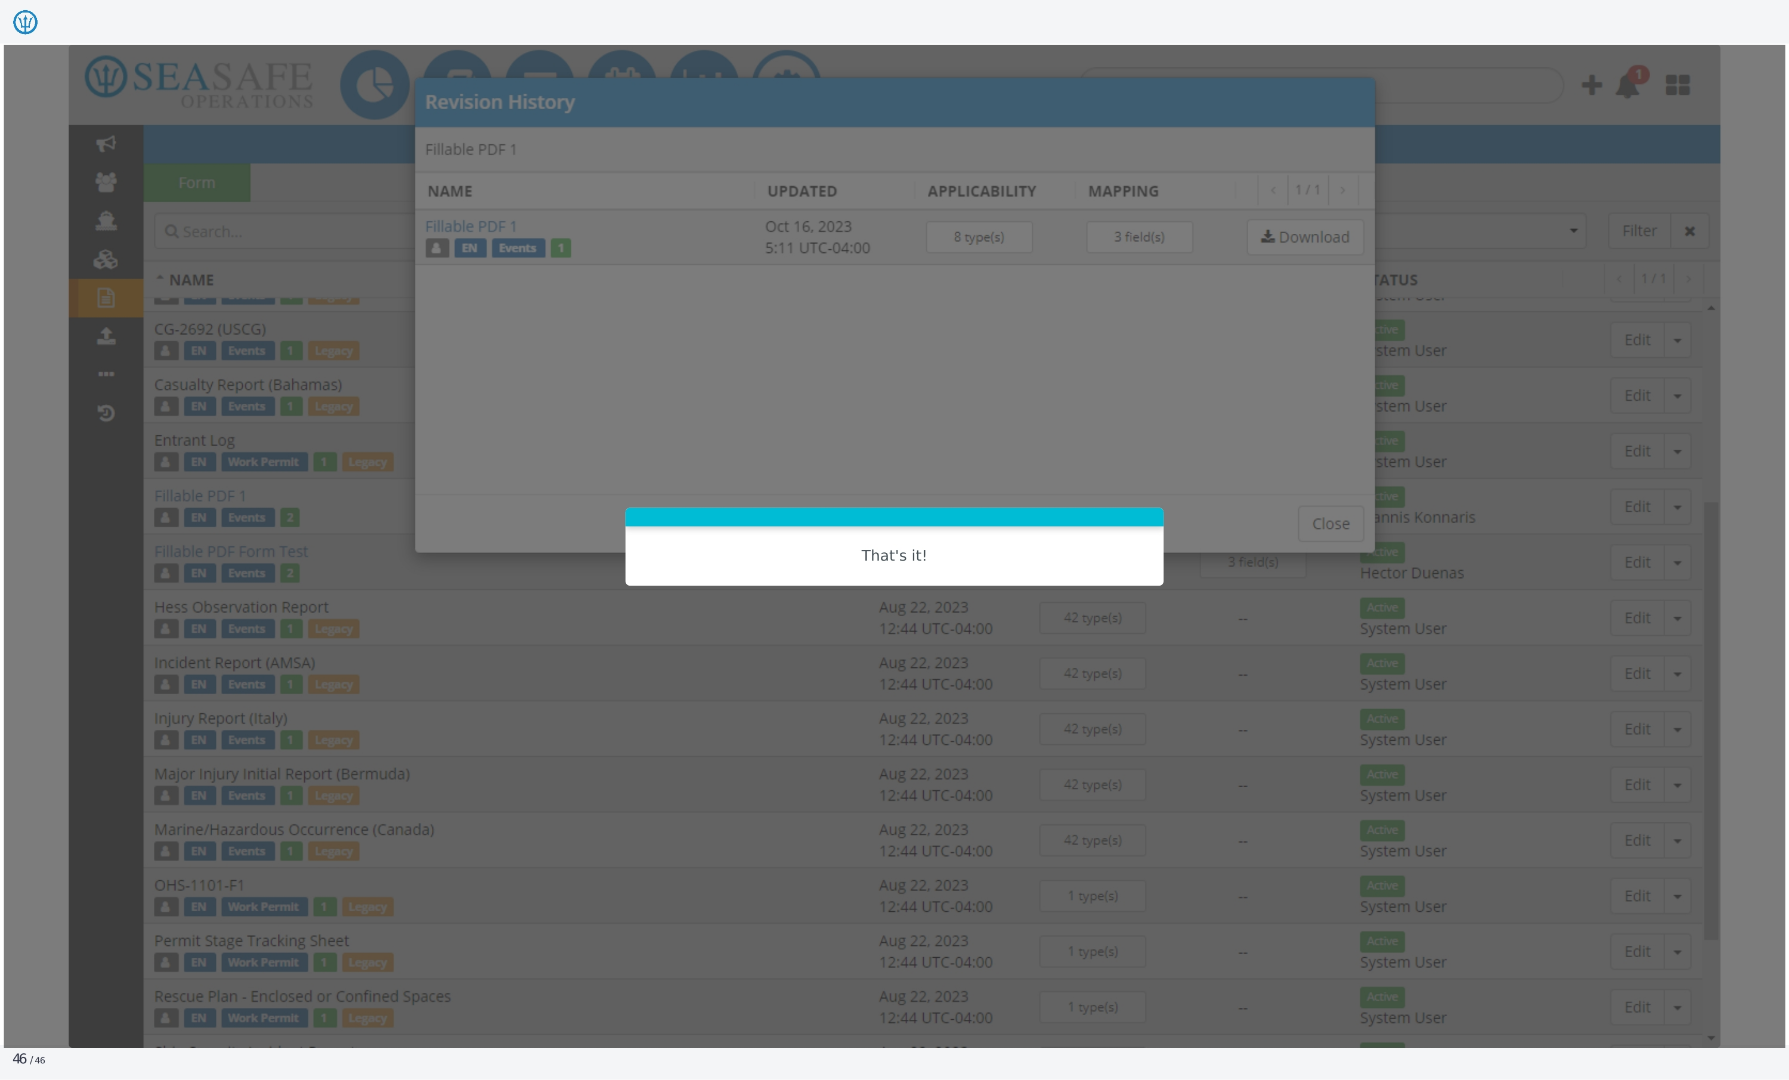
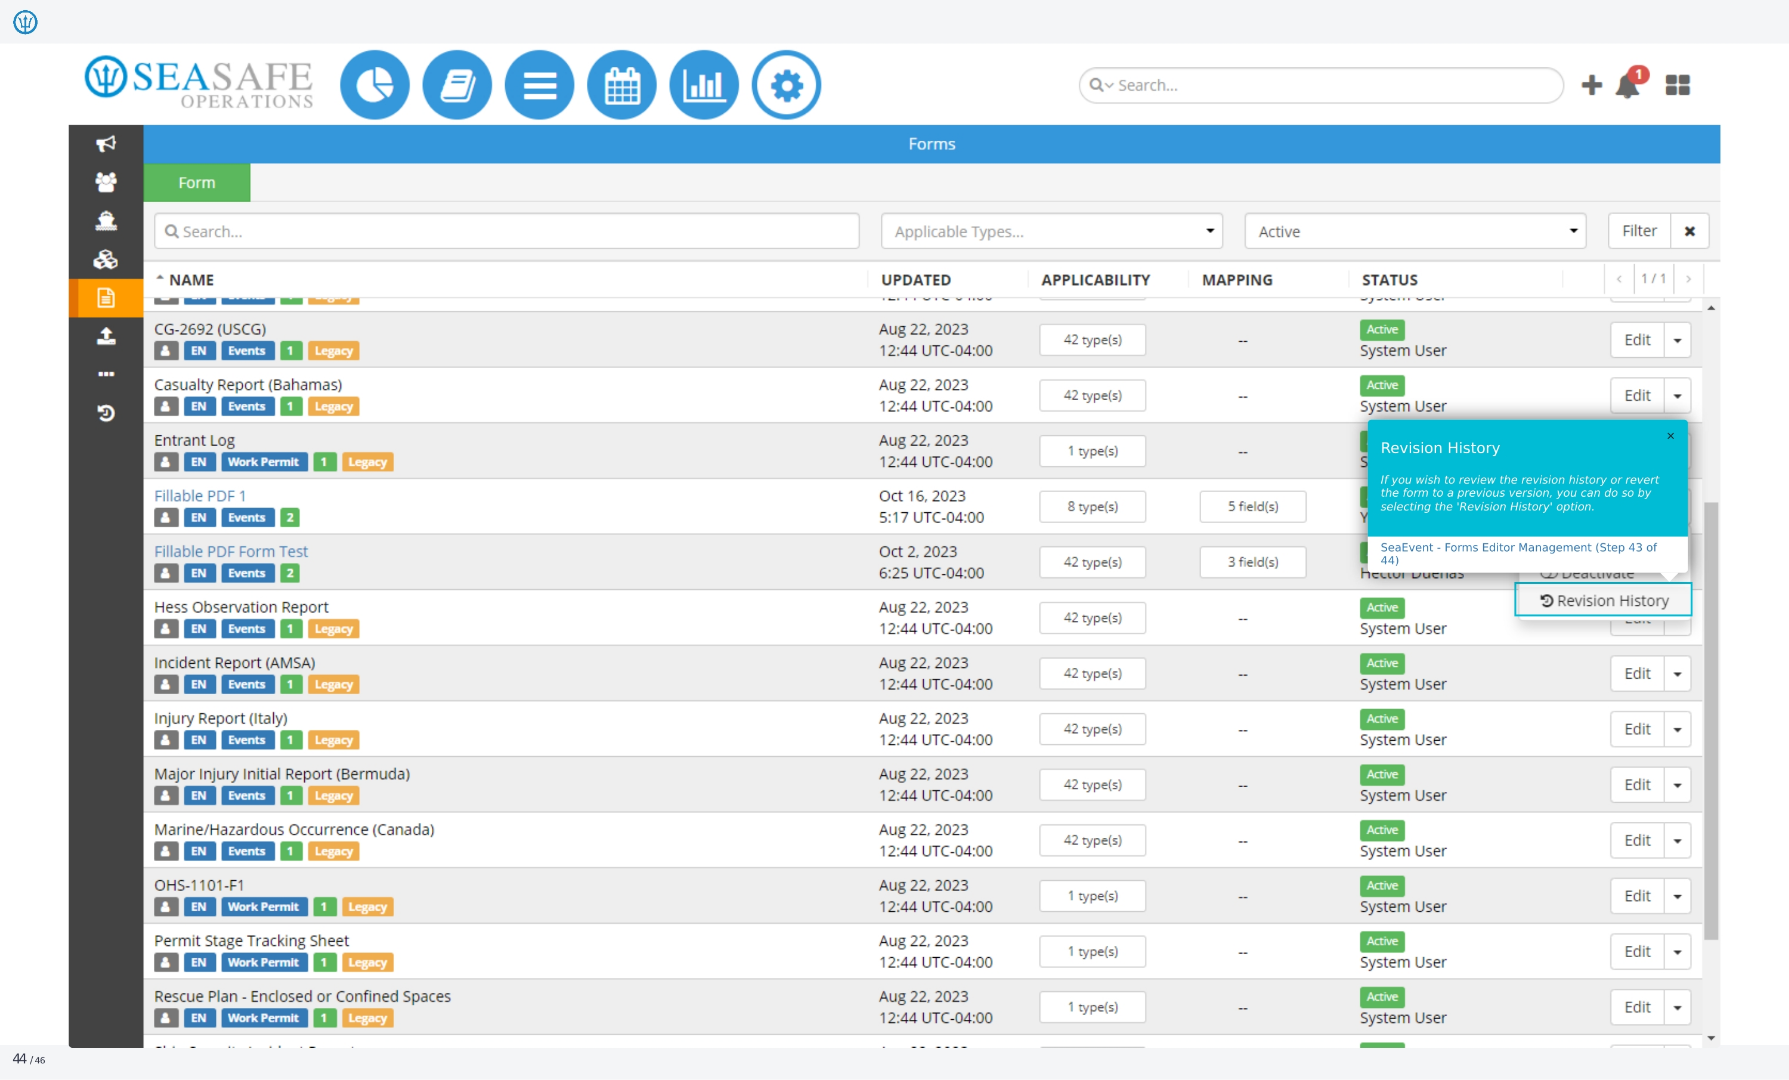
44. Revision History
If you wish to review the revision history or revert the form to a previous version, you can do so by selecting the 'Revision History' option.
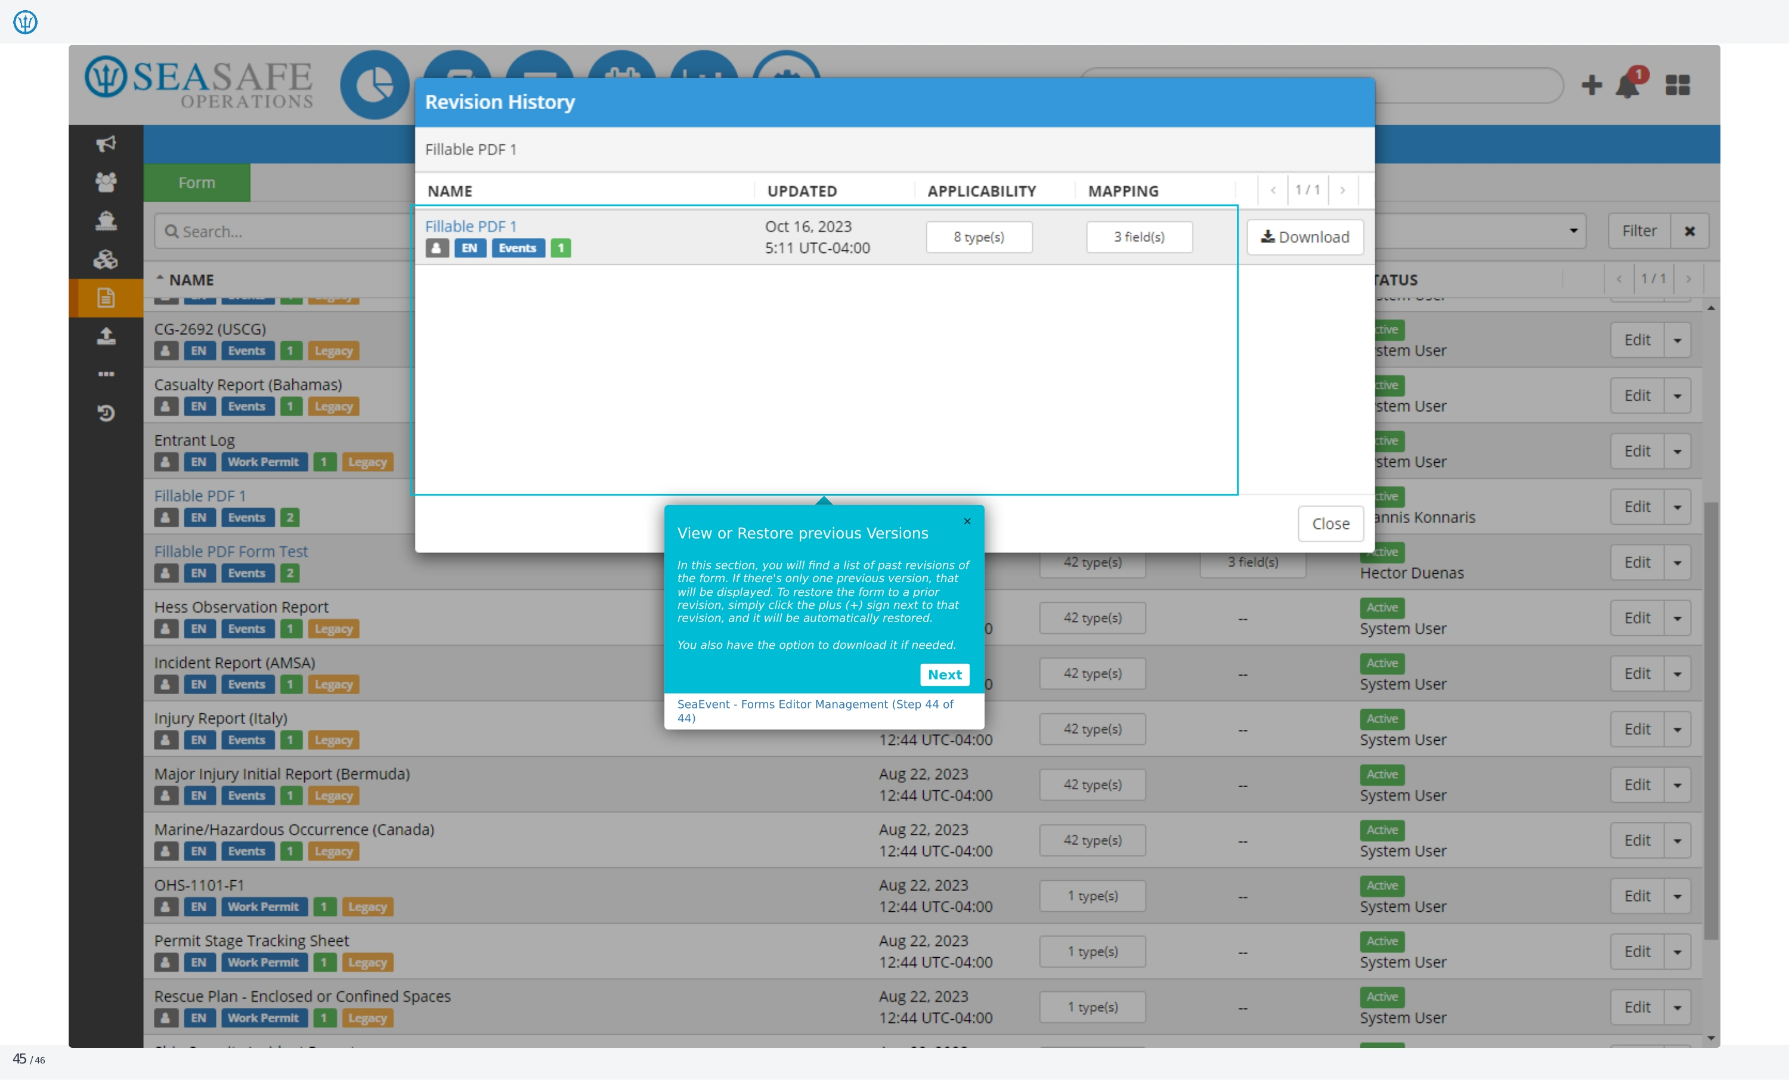
45. View or Restore Previous Versions
In this section, you will find a list of past revisions of the form. If there's only one previous version, that will be displayed. To restore the form to a prior revision, simply click the plus sign next to that revision, and it will be automatically restored. You also have the option to download it if needed.
46. Revision History
That's it!