
New article
Recently updated
Managing Checklists in the Library

This walkthrough serves as a complete guide to checklist management within the Operations system. It highlights essential features, functionalities, and configuration options, providing step-by-step instructions for effectively creating, utilizing, deactivating, and removing checklists.
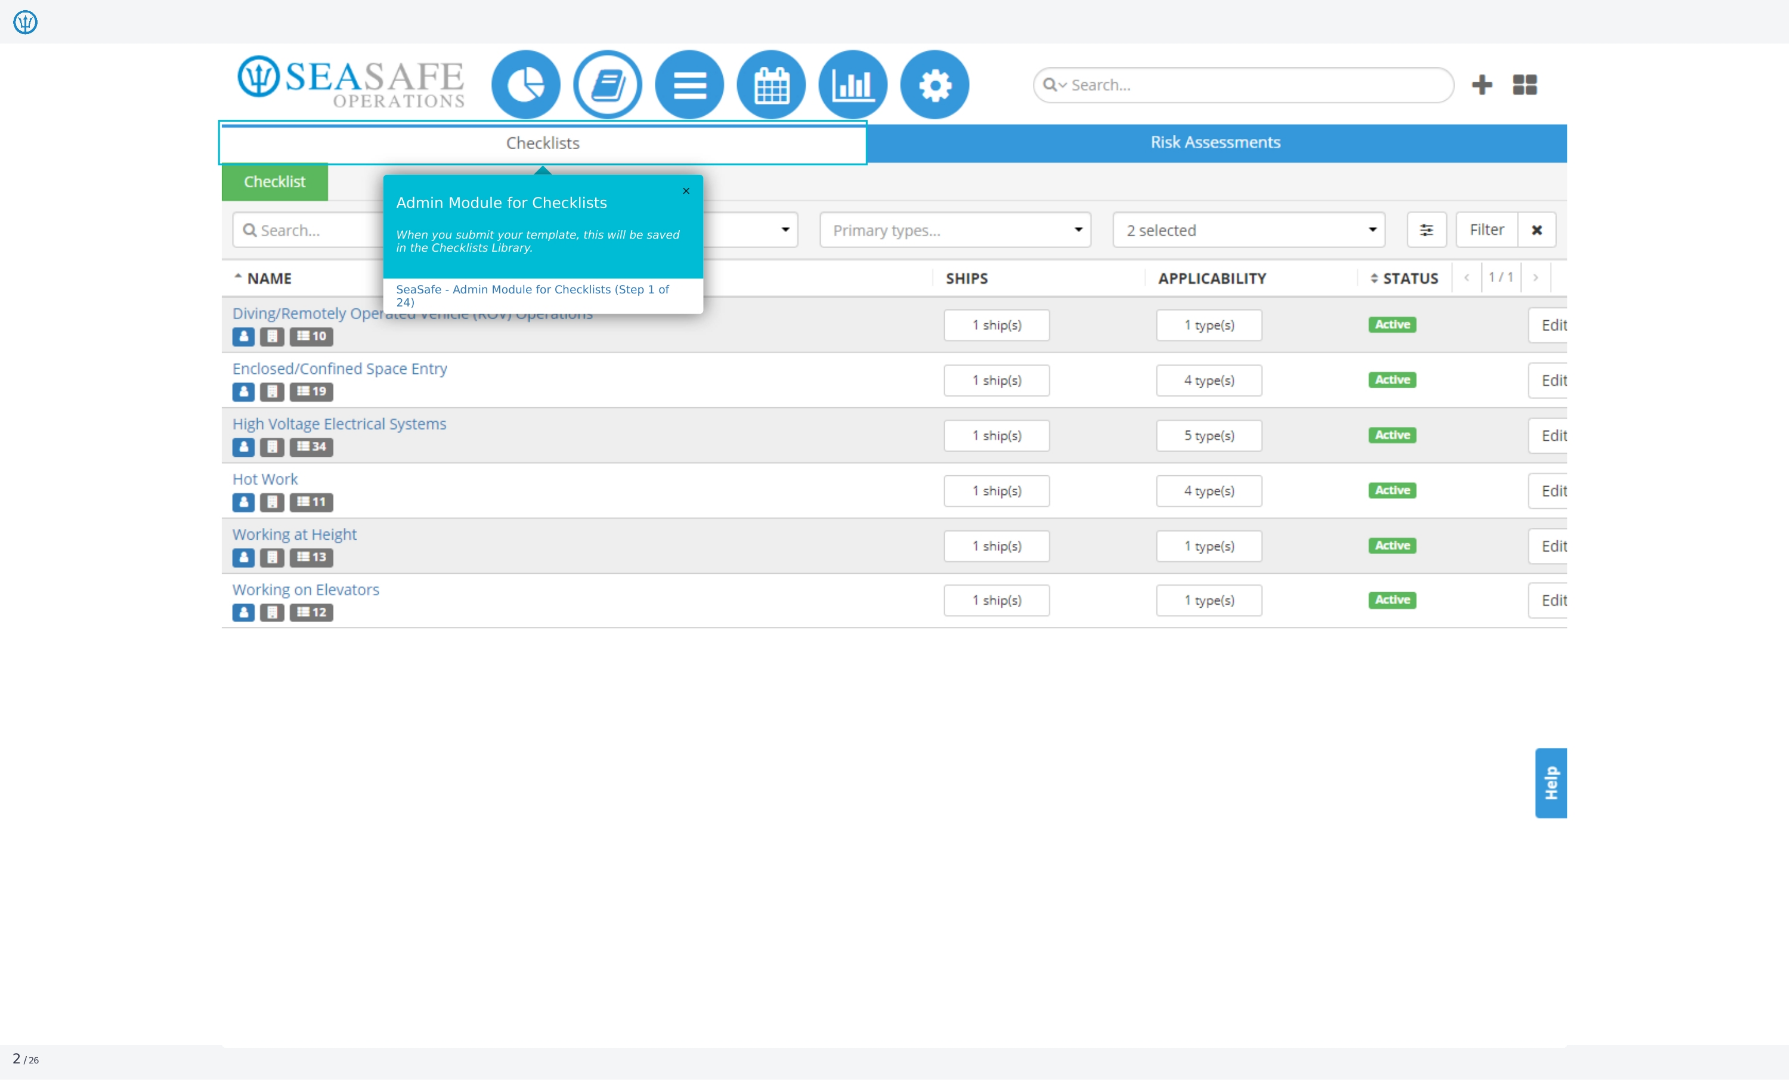
1. Admin Module for Checklists
This will guide you on using the Admin Module for Checklists. The module allows administrators to manage and configure checklists for various operations. When you submit your template, it will be saved in the Checklists Library. This module helps you manage checklists effectively.
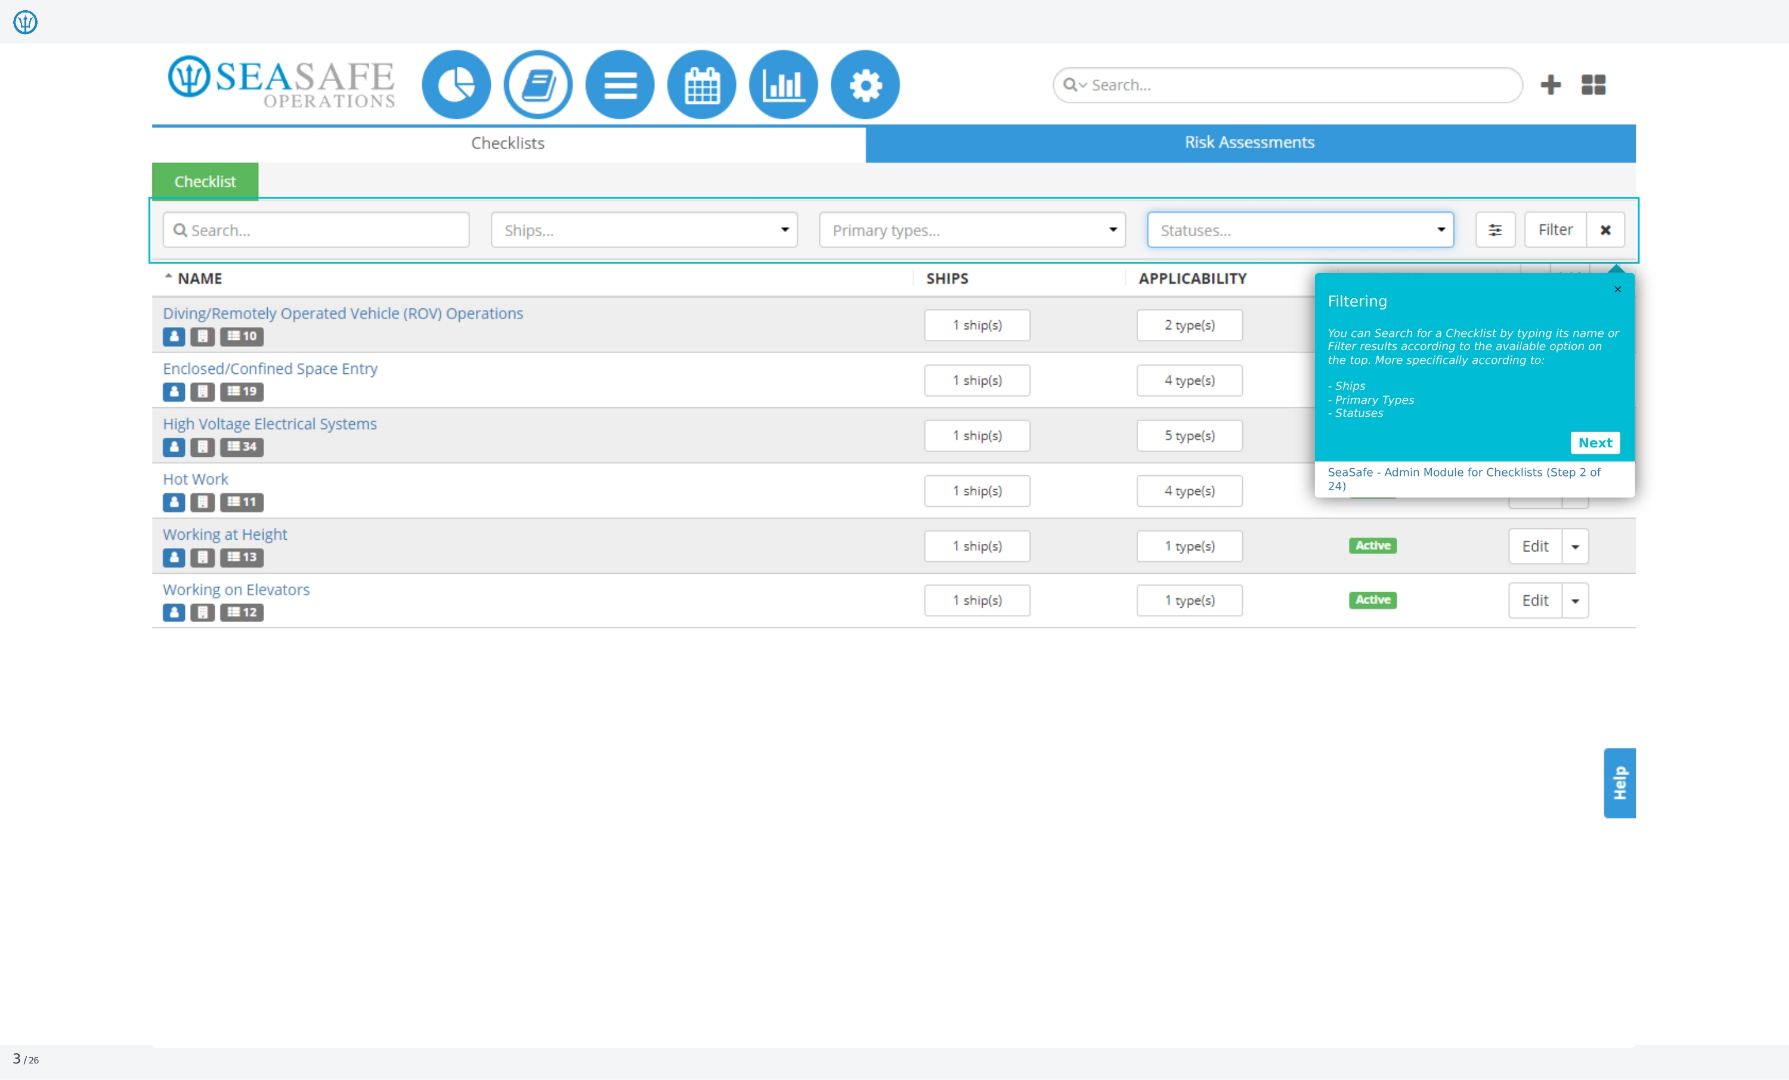
2. Filtering
You can search for a checklist by typing its name or filter results according to the available options on the top, more specifically according to ships, primary types, and statuses.
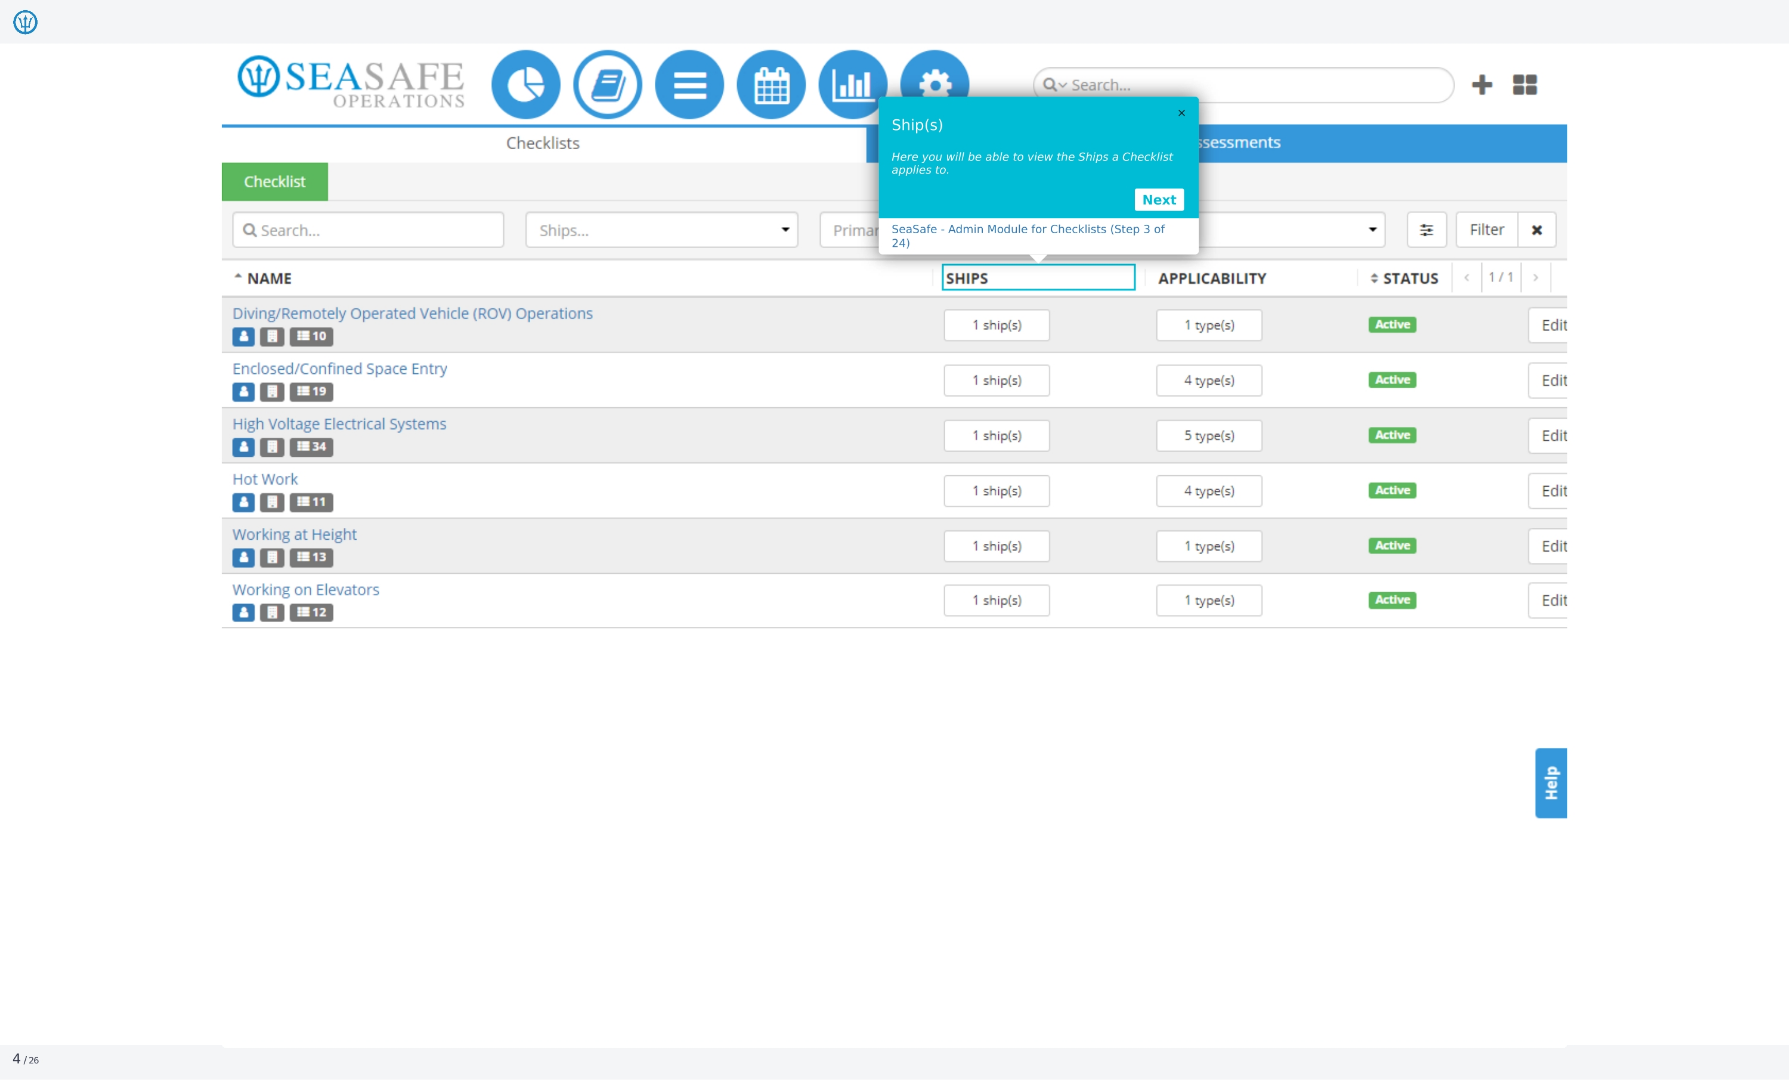
3. Ships
Here, you will be able to view the ships a checklist applies to. This allows you to see which vessels are covered by a specific checklist.
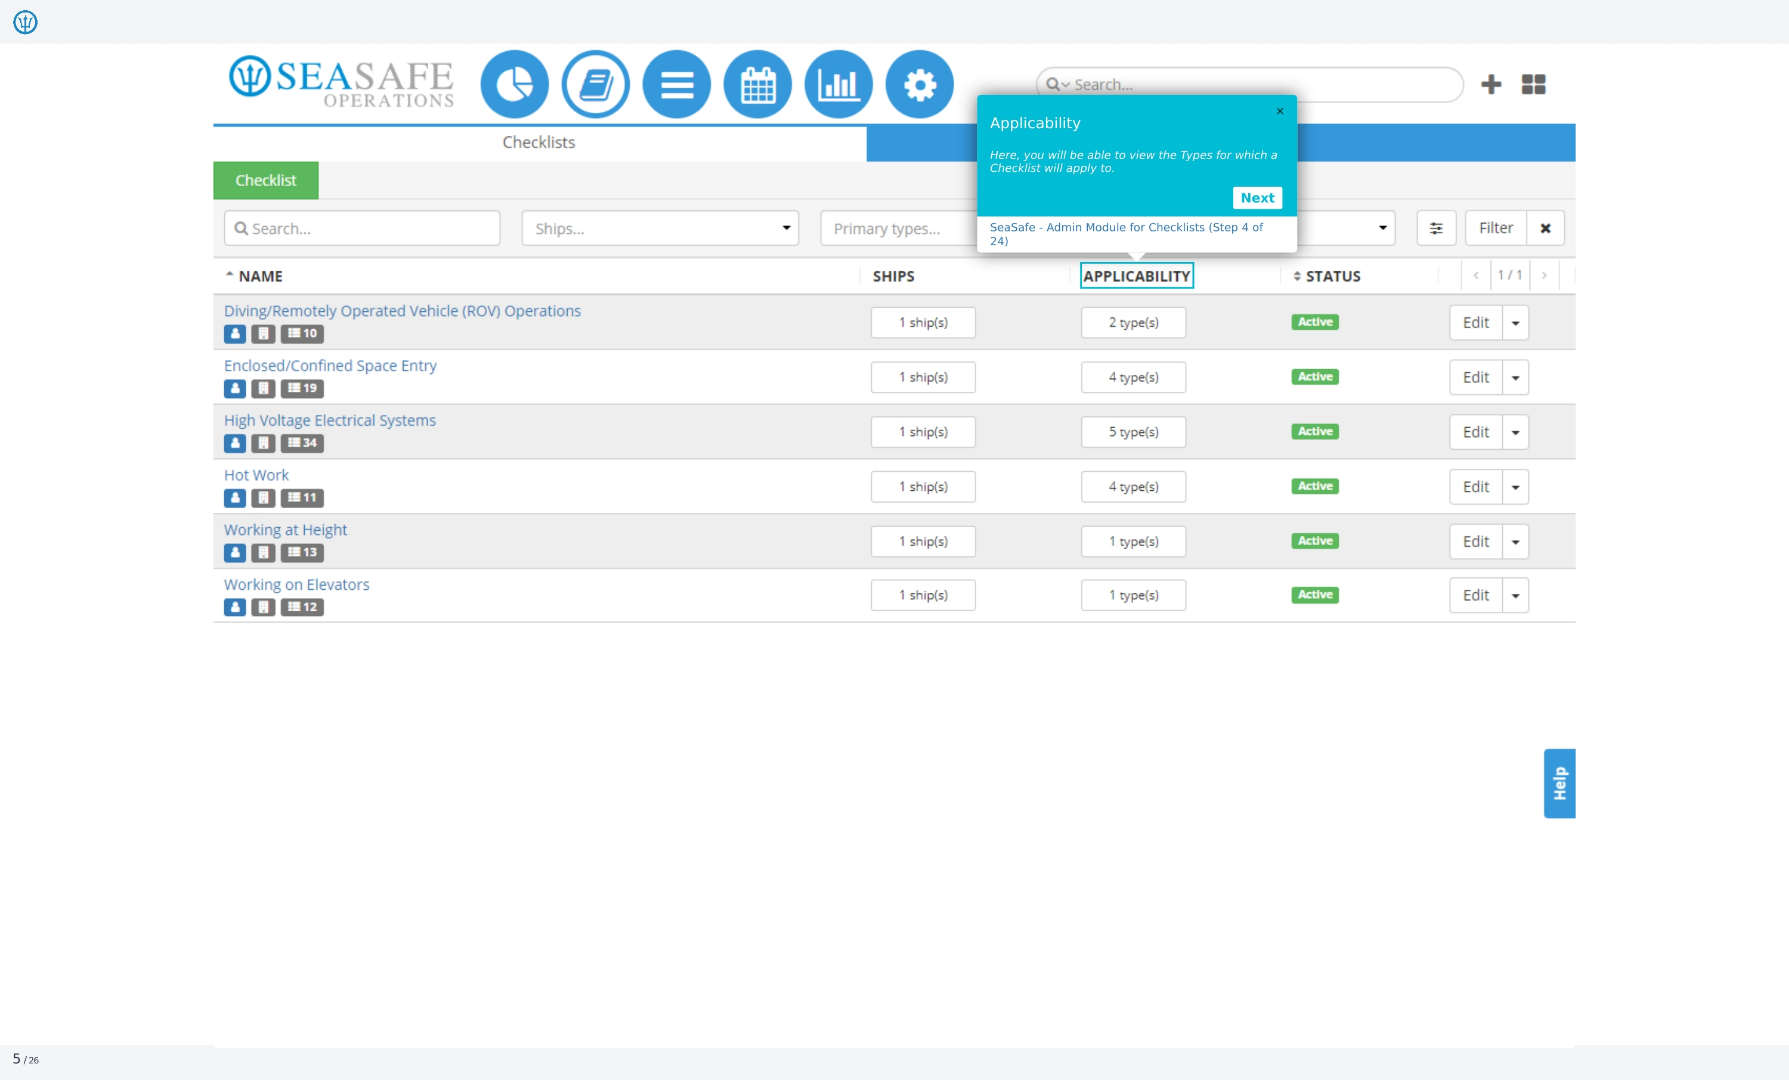
4. Applicability
Here, you will be able to view the types for which a checklist will apply to. This helps you understand the scope of the checklist.
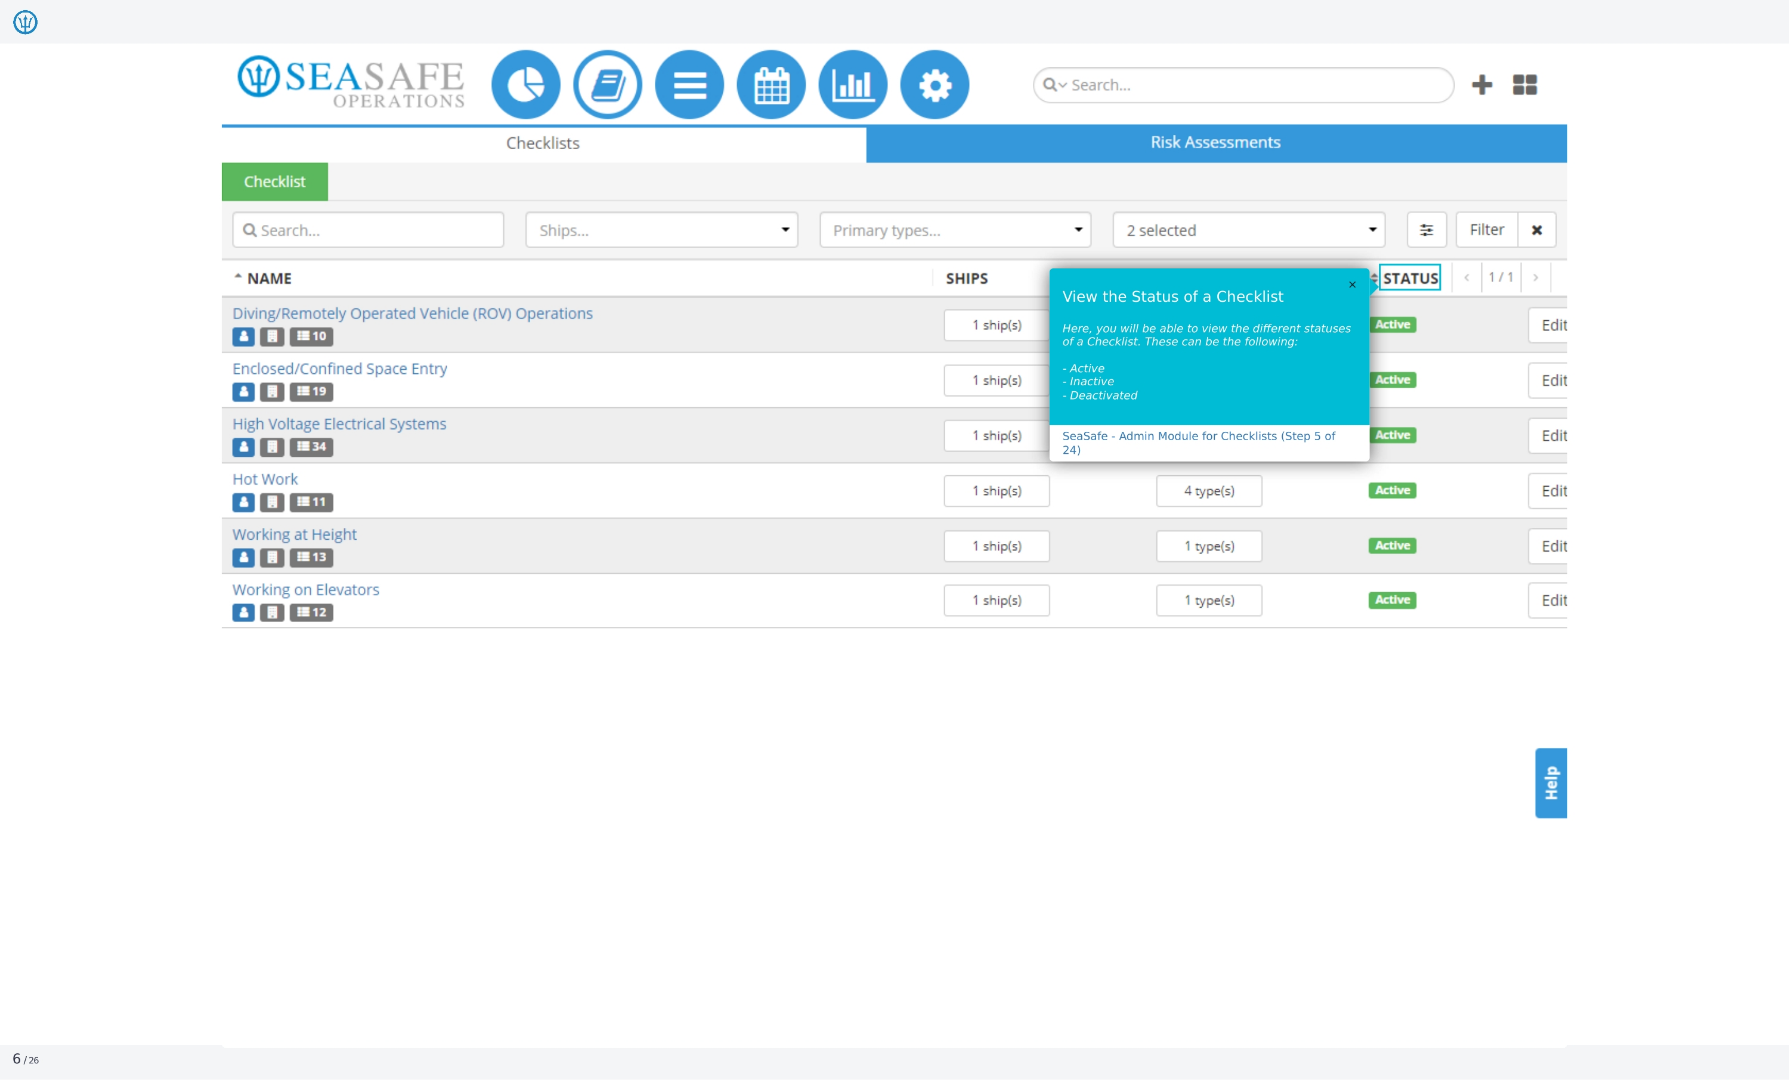
5. View the Status of a Checklist
Here, you will be able to view the different statuses of a checklist. These can be the following: active, inactive, or deactivated.
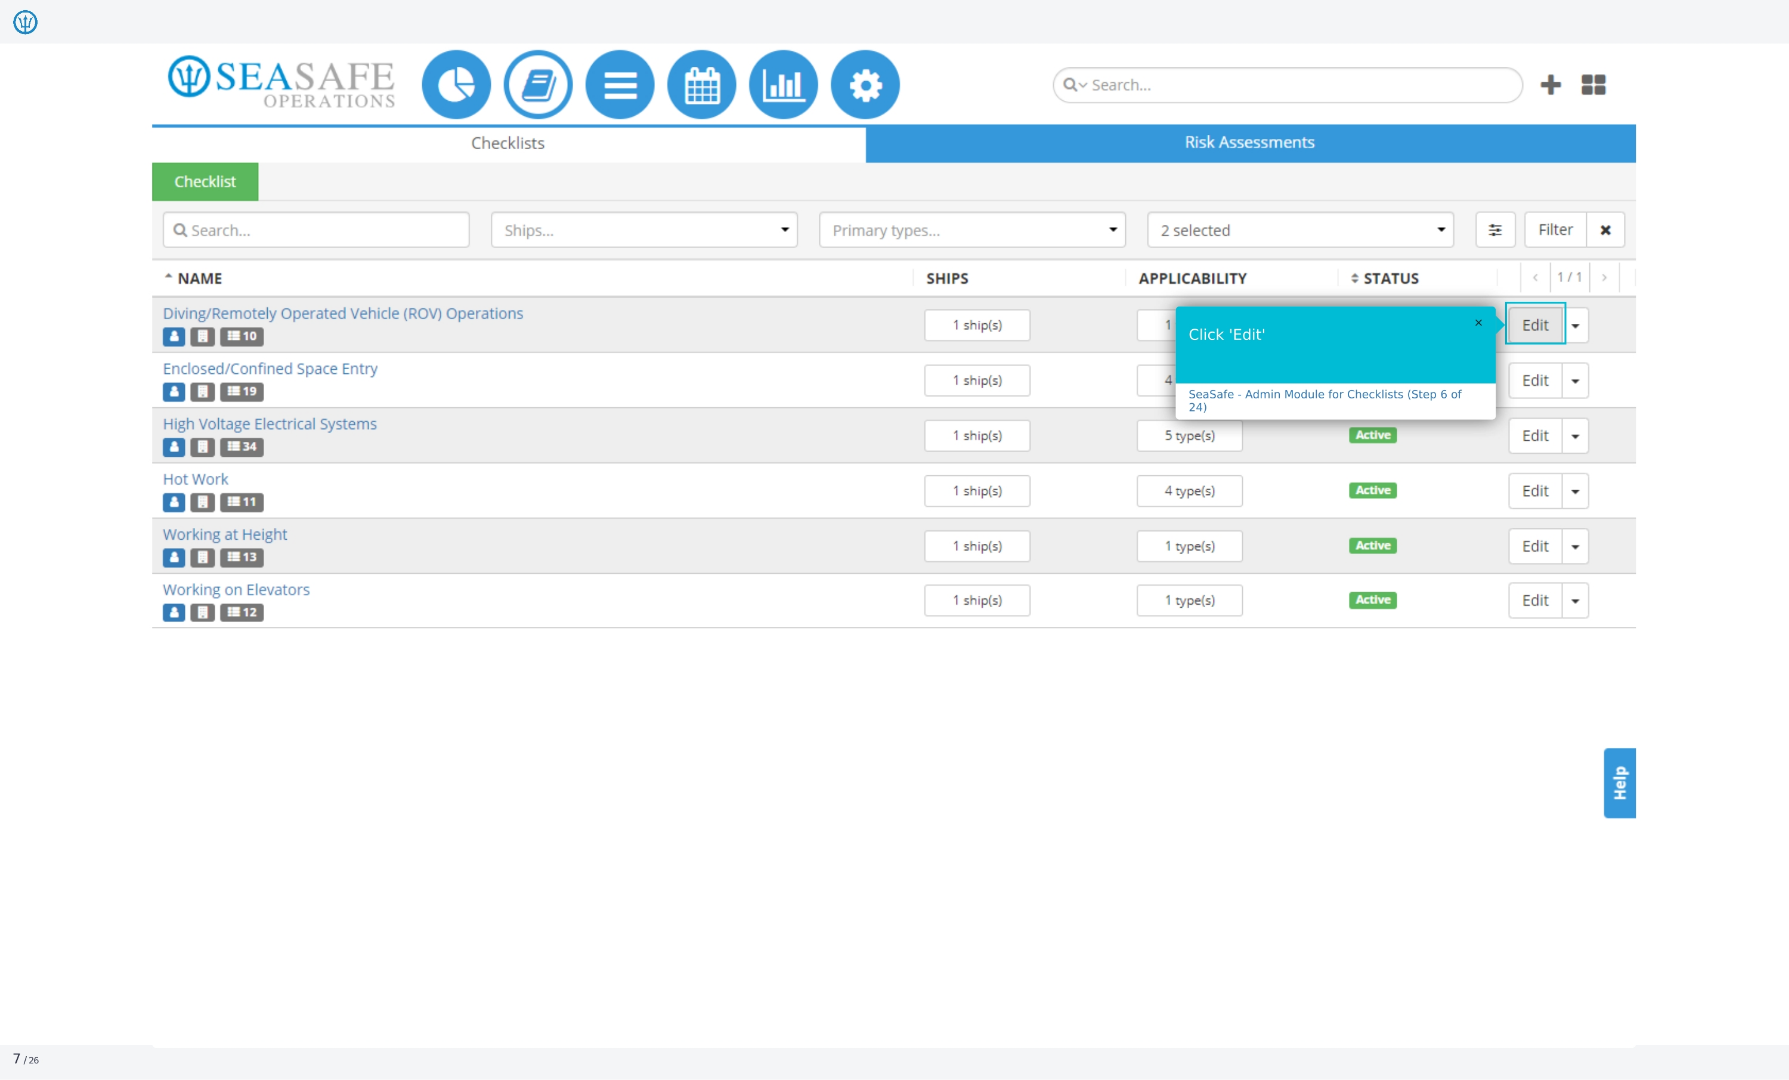
6. Click 'Edit'
Clicking the 'Edit' button allows you to modify the checklist and its settings. This is where you can make changes to the checklist's content and configuration.
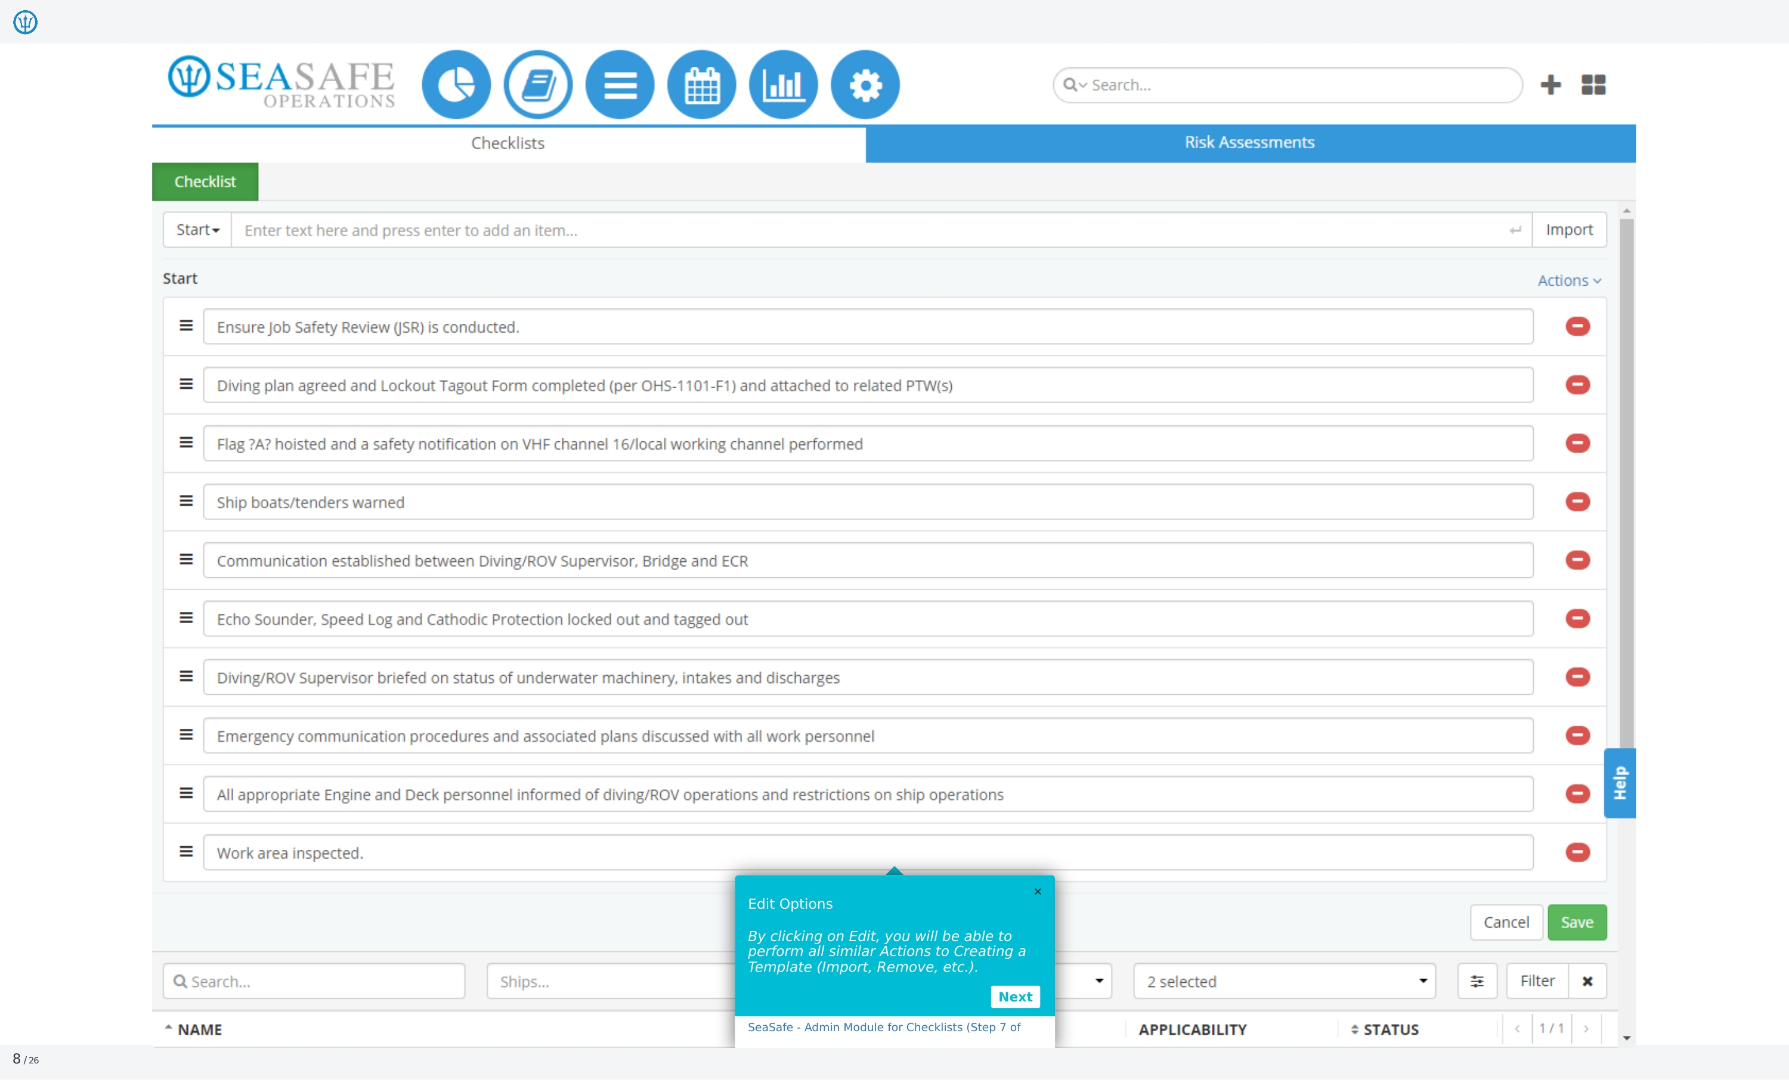
7. Edit Options
By clicking on 'Edit', you will be able to perform all similar actions to creating a template, such as import and remove items.
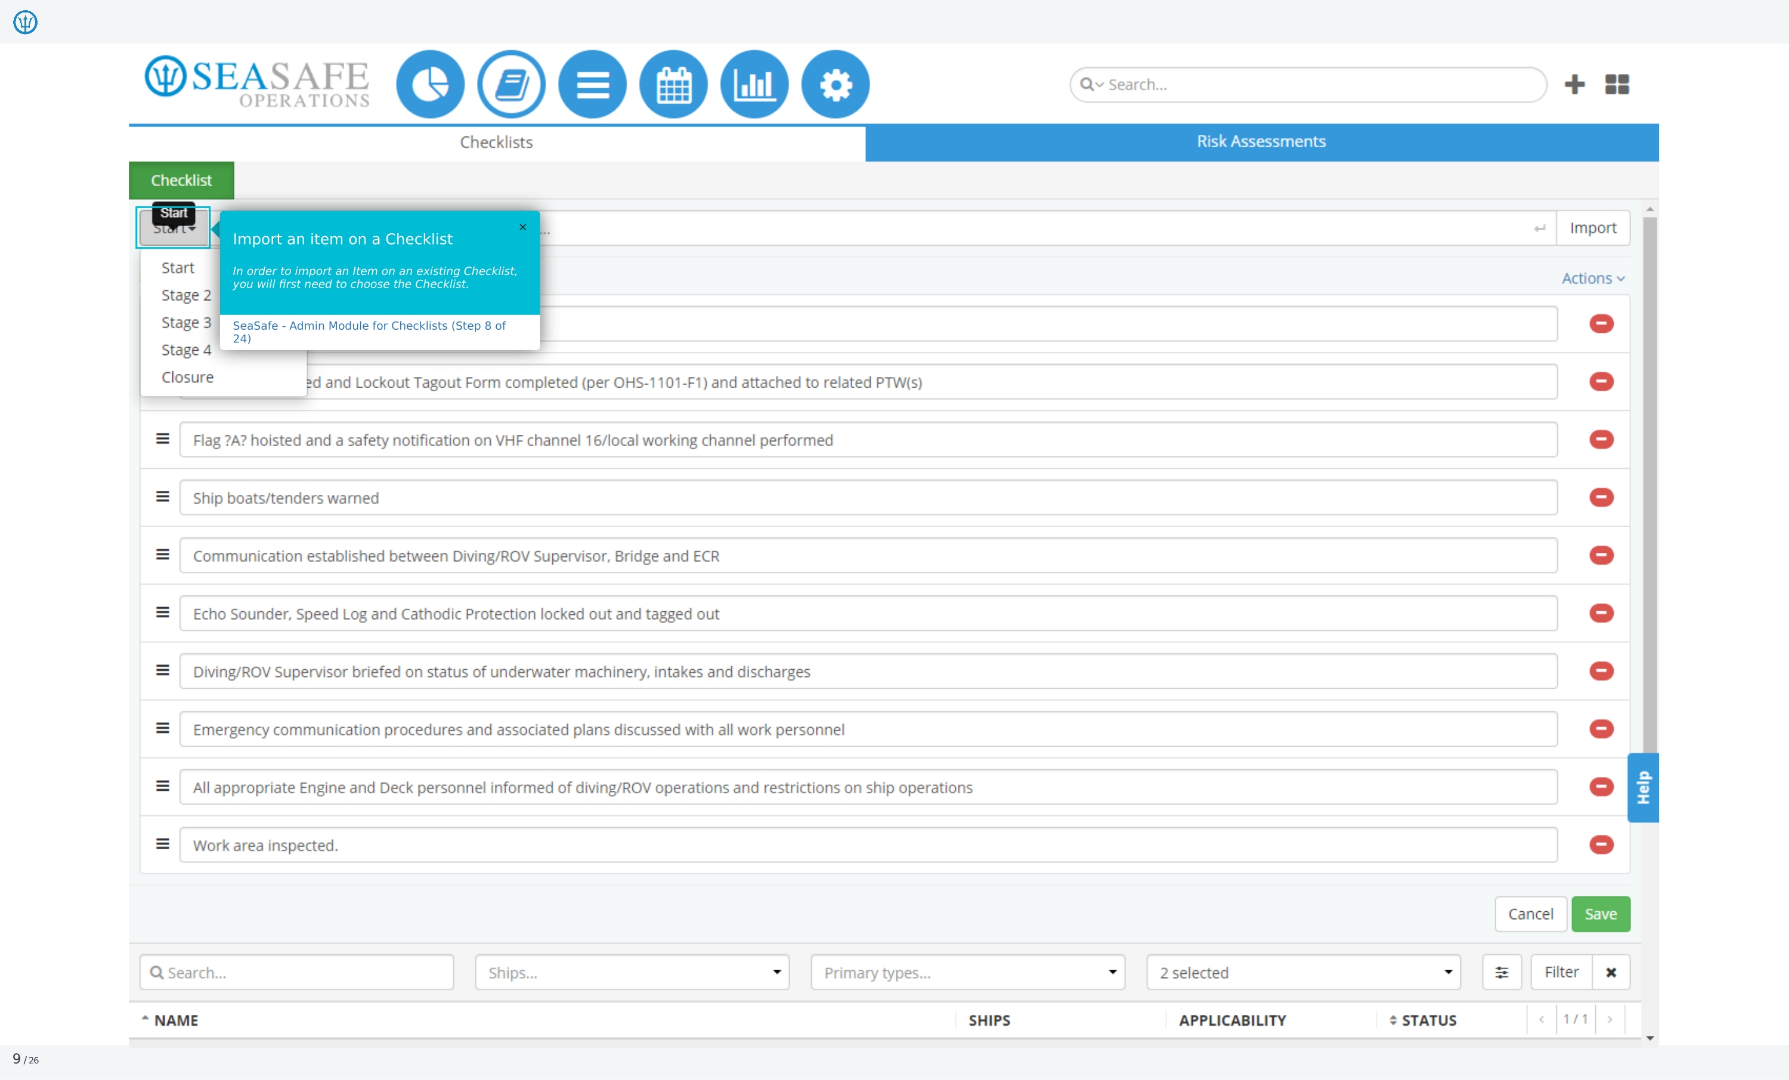
8. Import an item on a Checklist
In order to import an item on an existing checklist, you will first need to choose the checklist. This allows you to add pre-existing items to your current checklist.
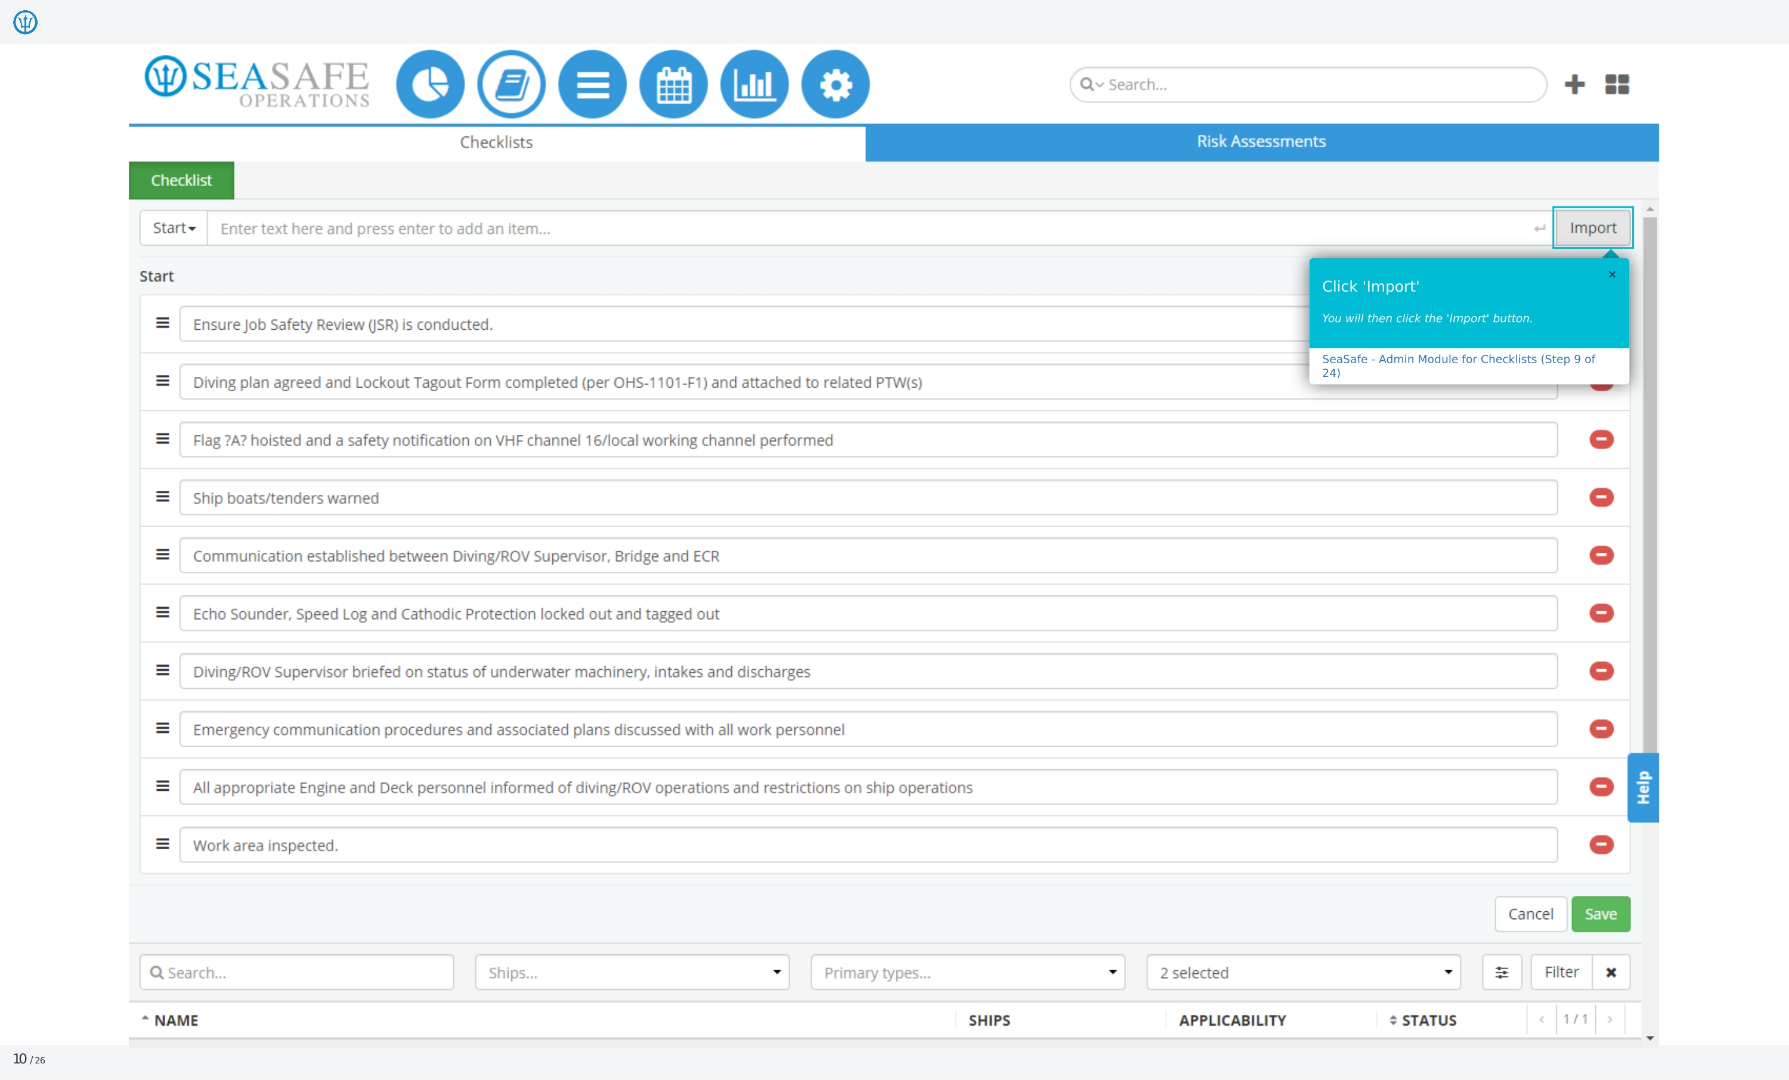
9. Click 'Import'
You will then click the 'Import' button. This finalizes the import process and adds the selected items to your checklist.
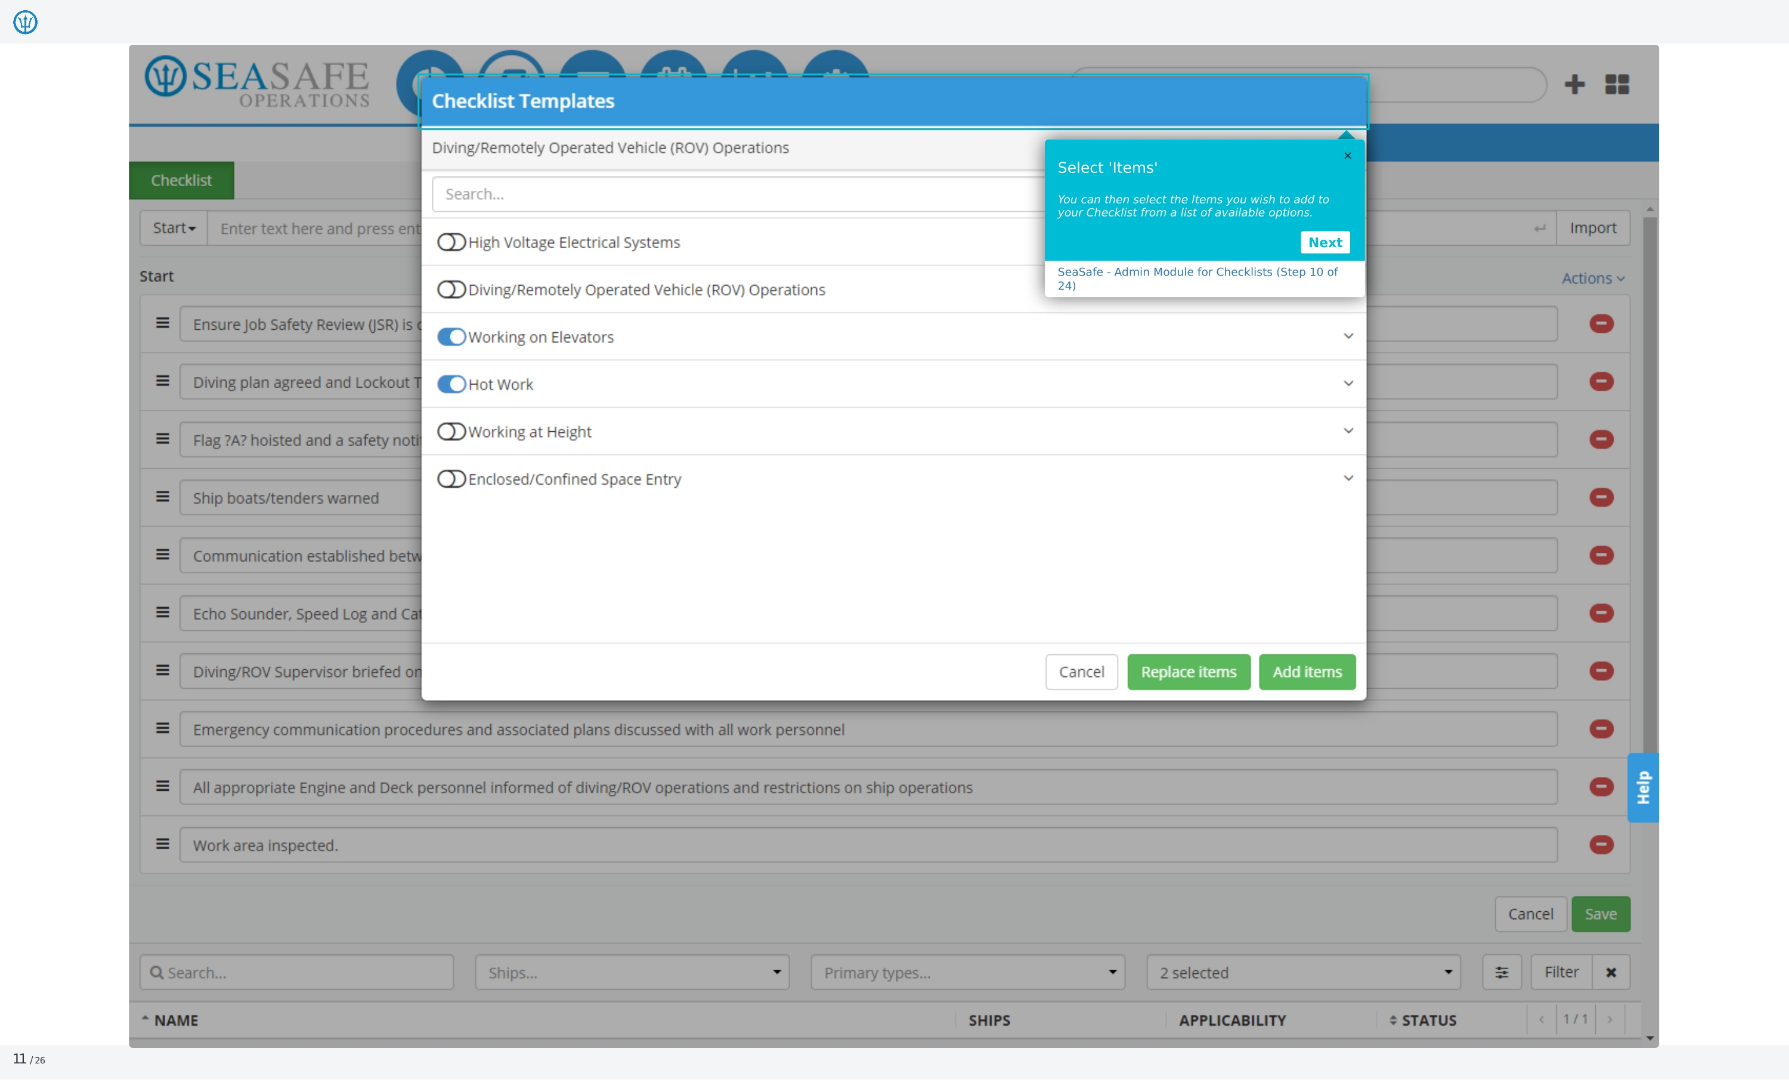
10. Select 'Items'
You can then select the items you wish to add to your checklist from a list of available options. This allows you to customize your checklist with specific items.
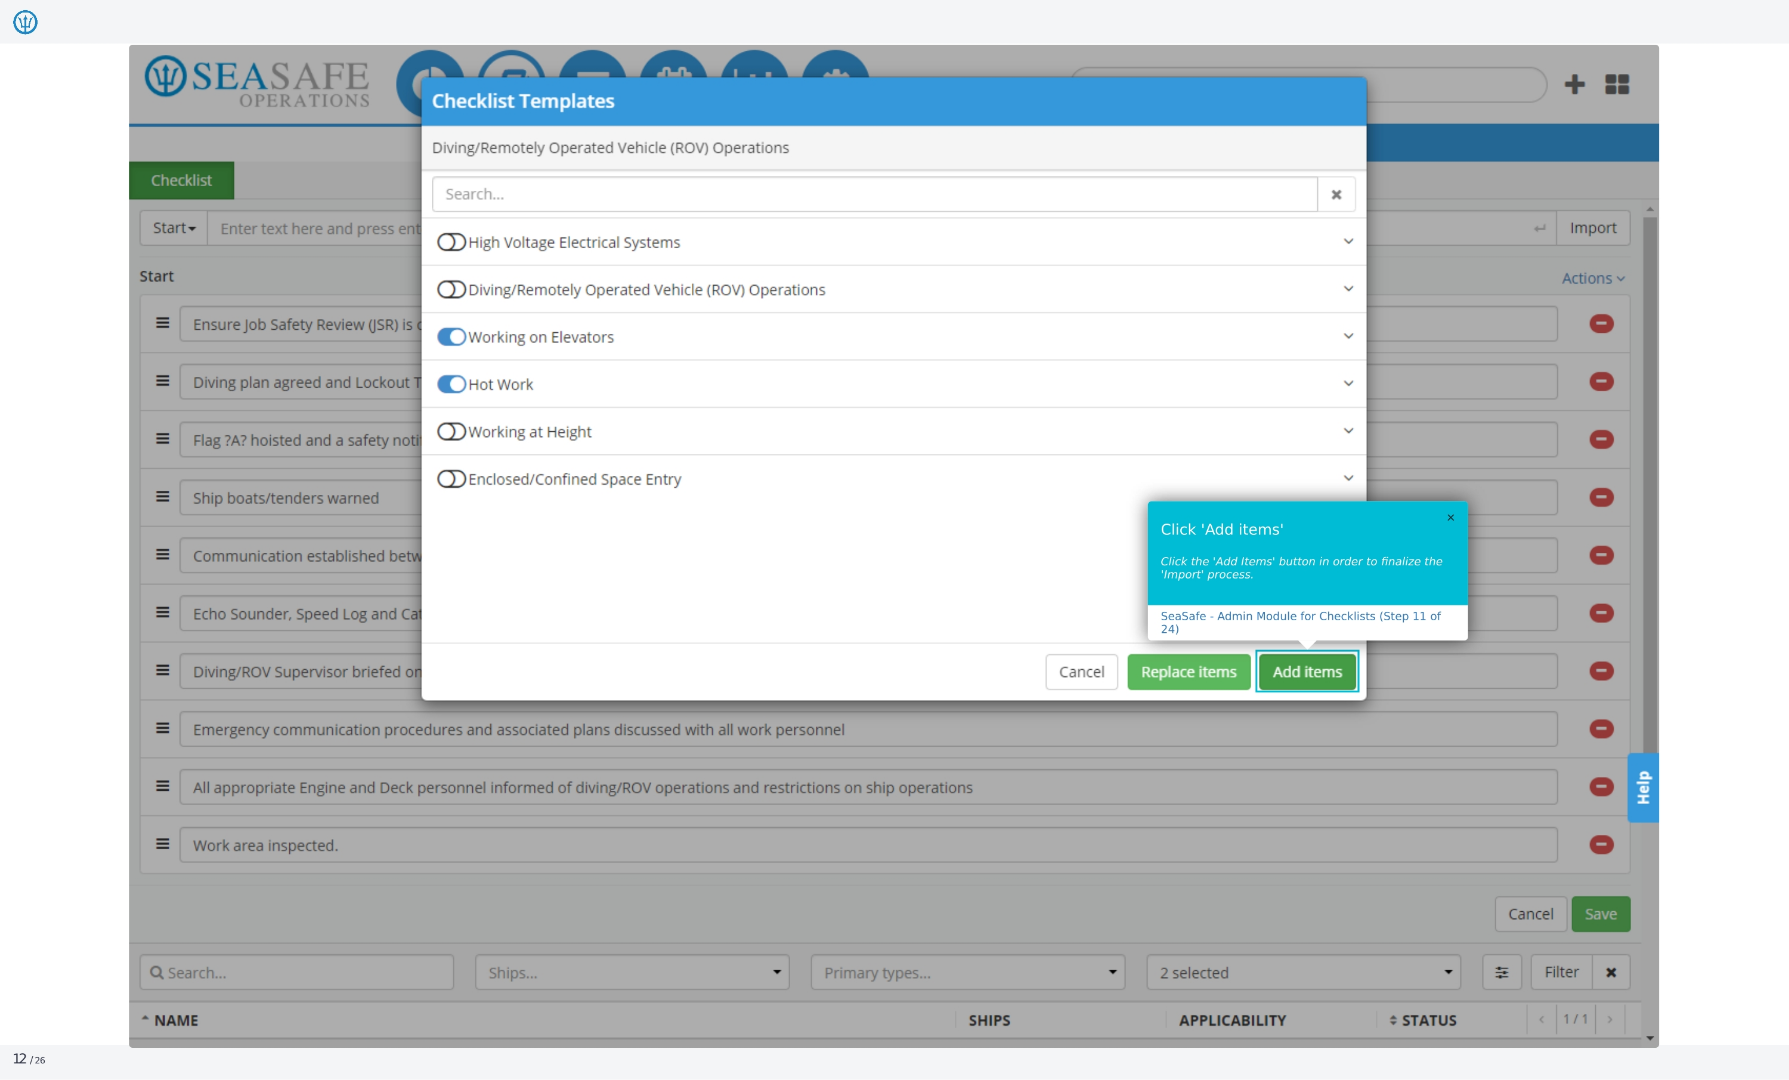
11. Click 'Add items'
Click the 'Add Items' button in order to finalize the import process. This confirms your selection and adds the items to the checklist.
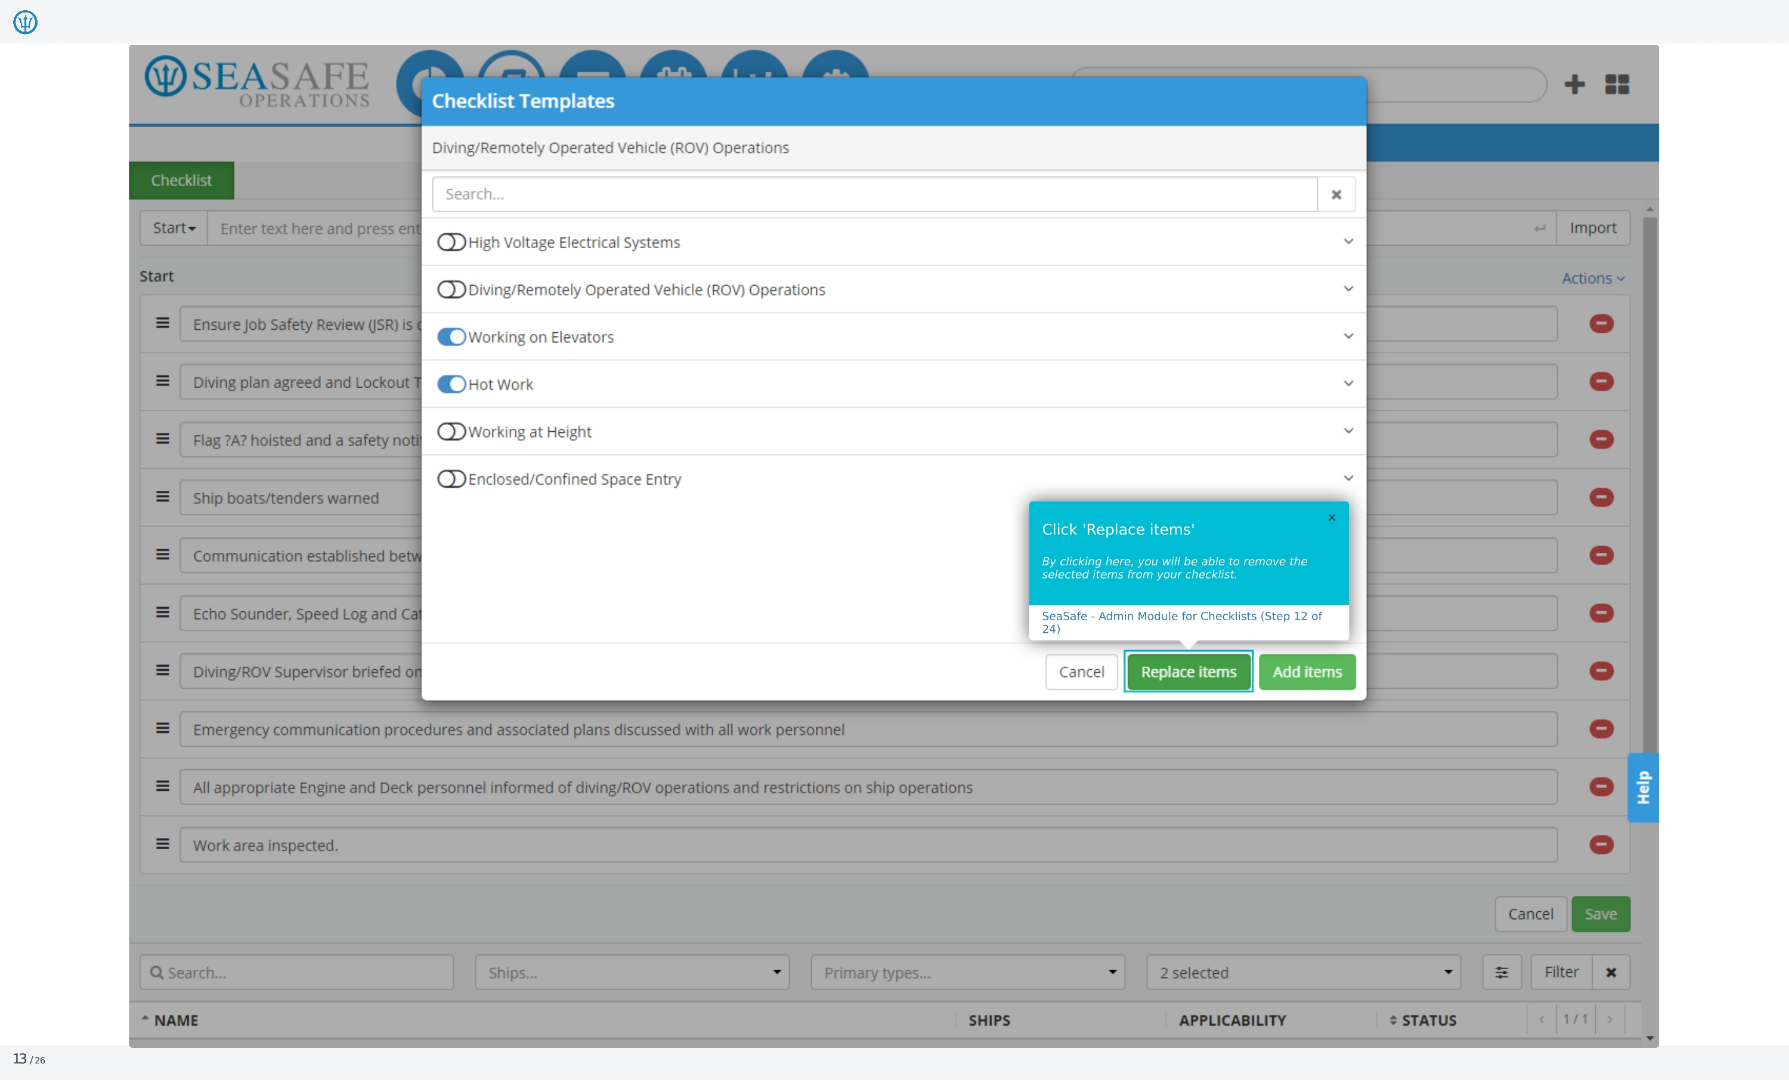
12. Click 'Replace items'
By clicking here, you will be able to remove the selected items from your checklist. This allows you to update your checklist by removing outdated or irrelevant items.
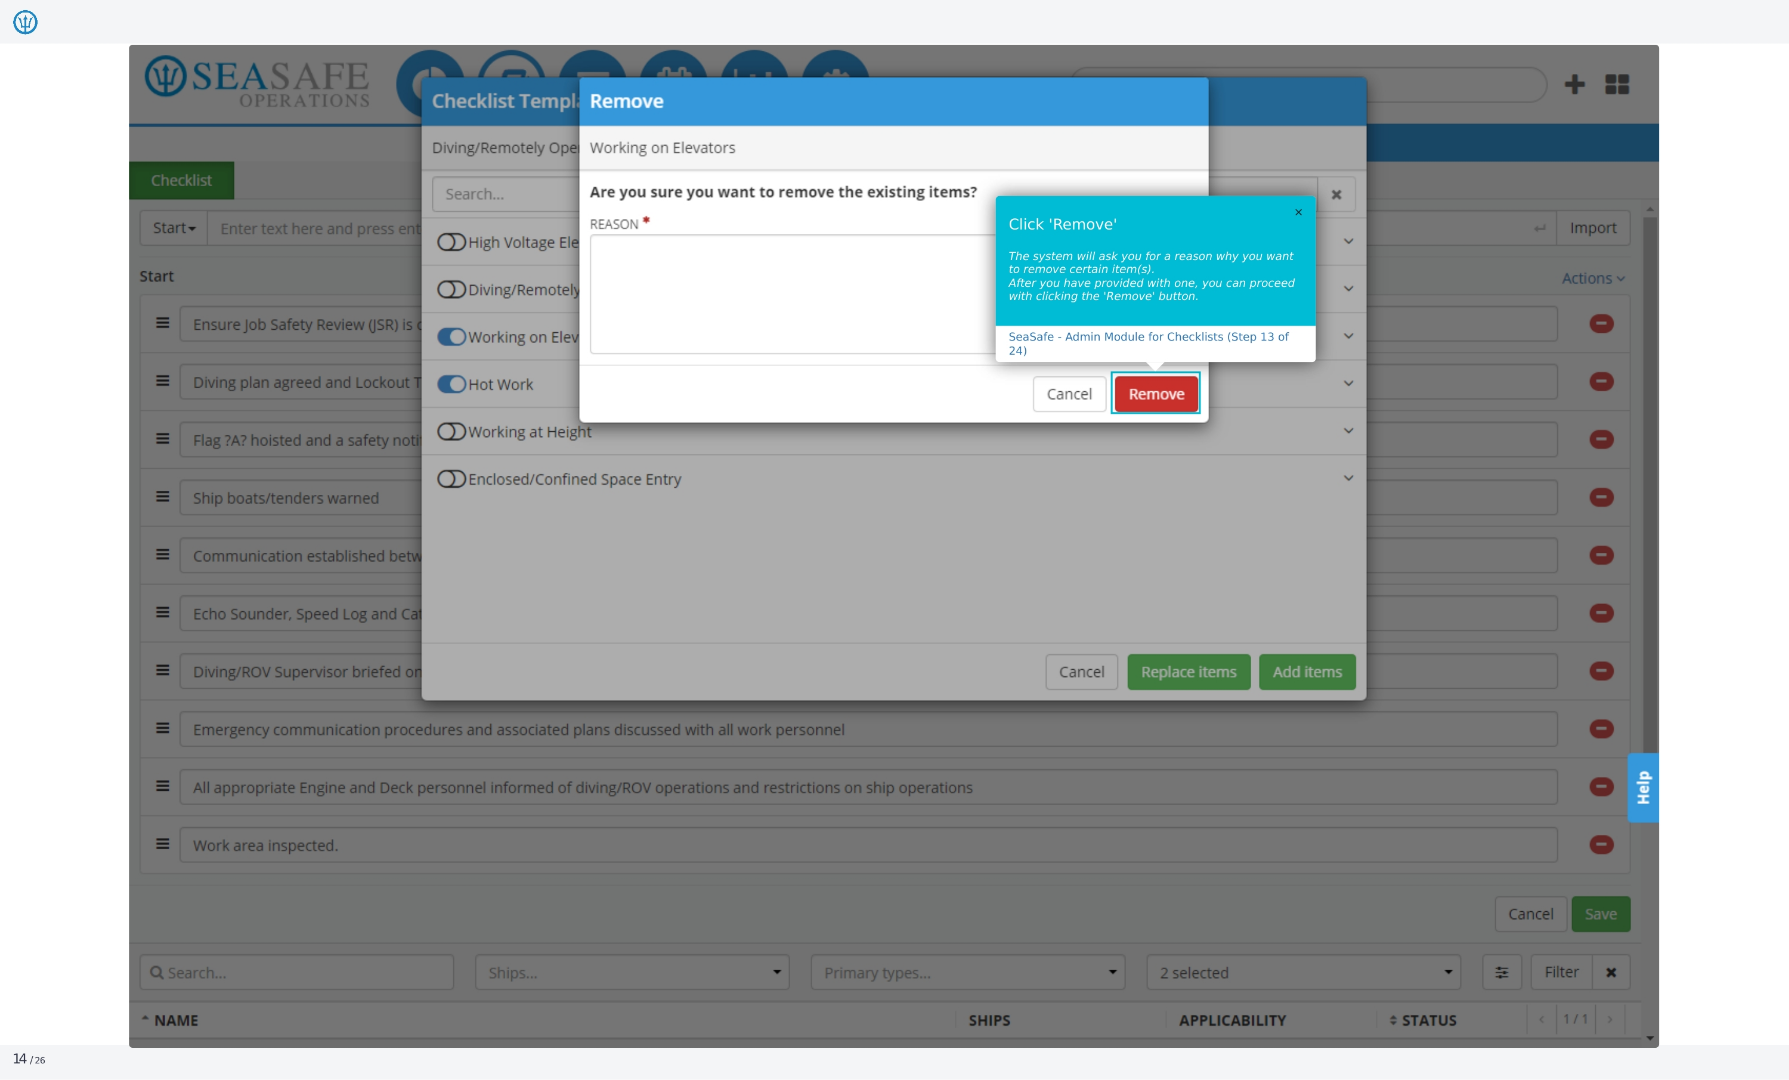
13. Click 'Remove'
The system will ask you for a reason why you want to remove certain items. After you have provided one, you can proceed with clicking the 'Remove' button.
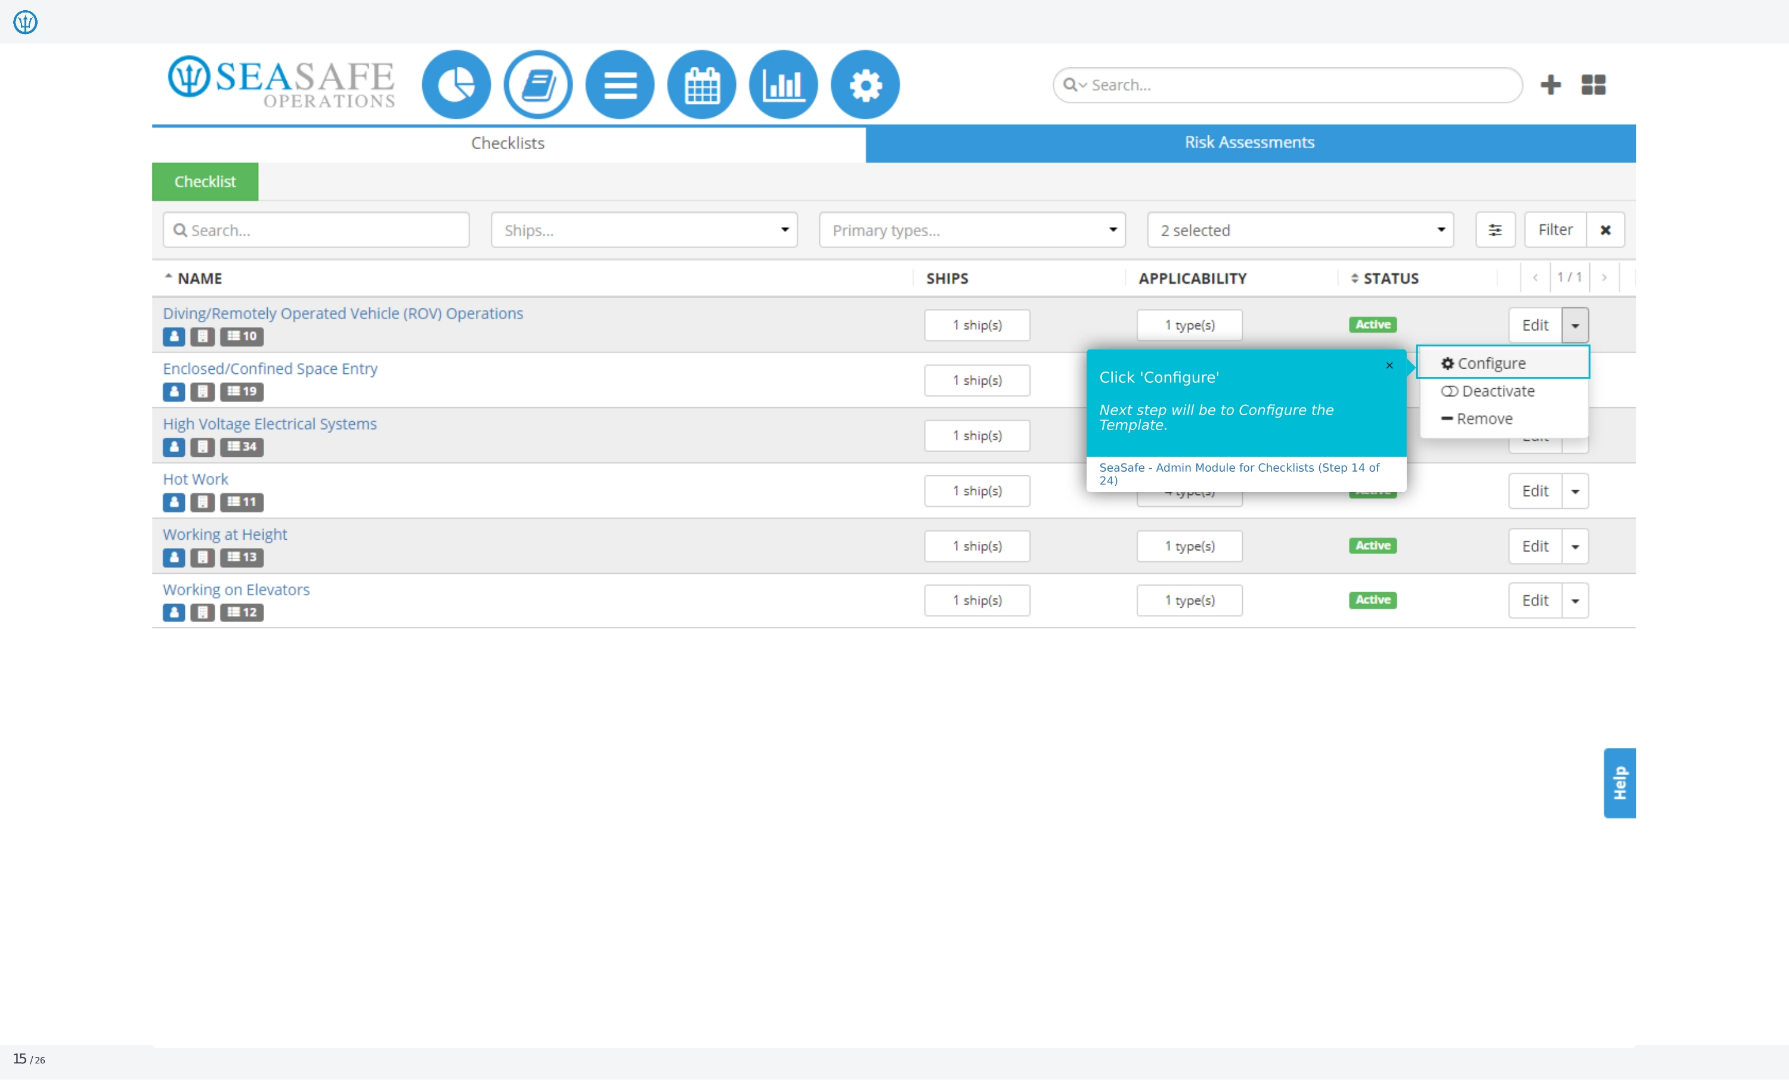
14. Click 'Configure'
The next step will be to configure the template. This allows you to customize the checklist to meet your specific needs.
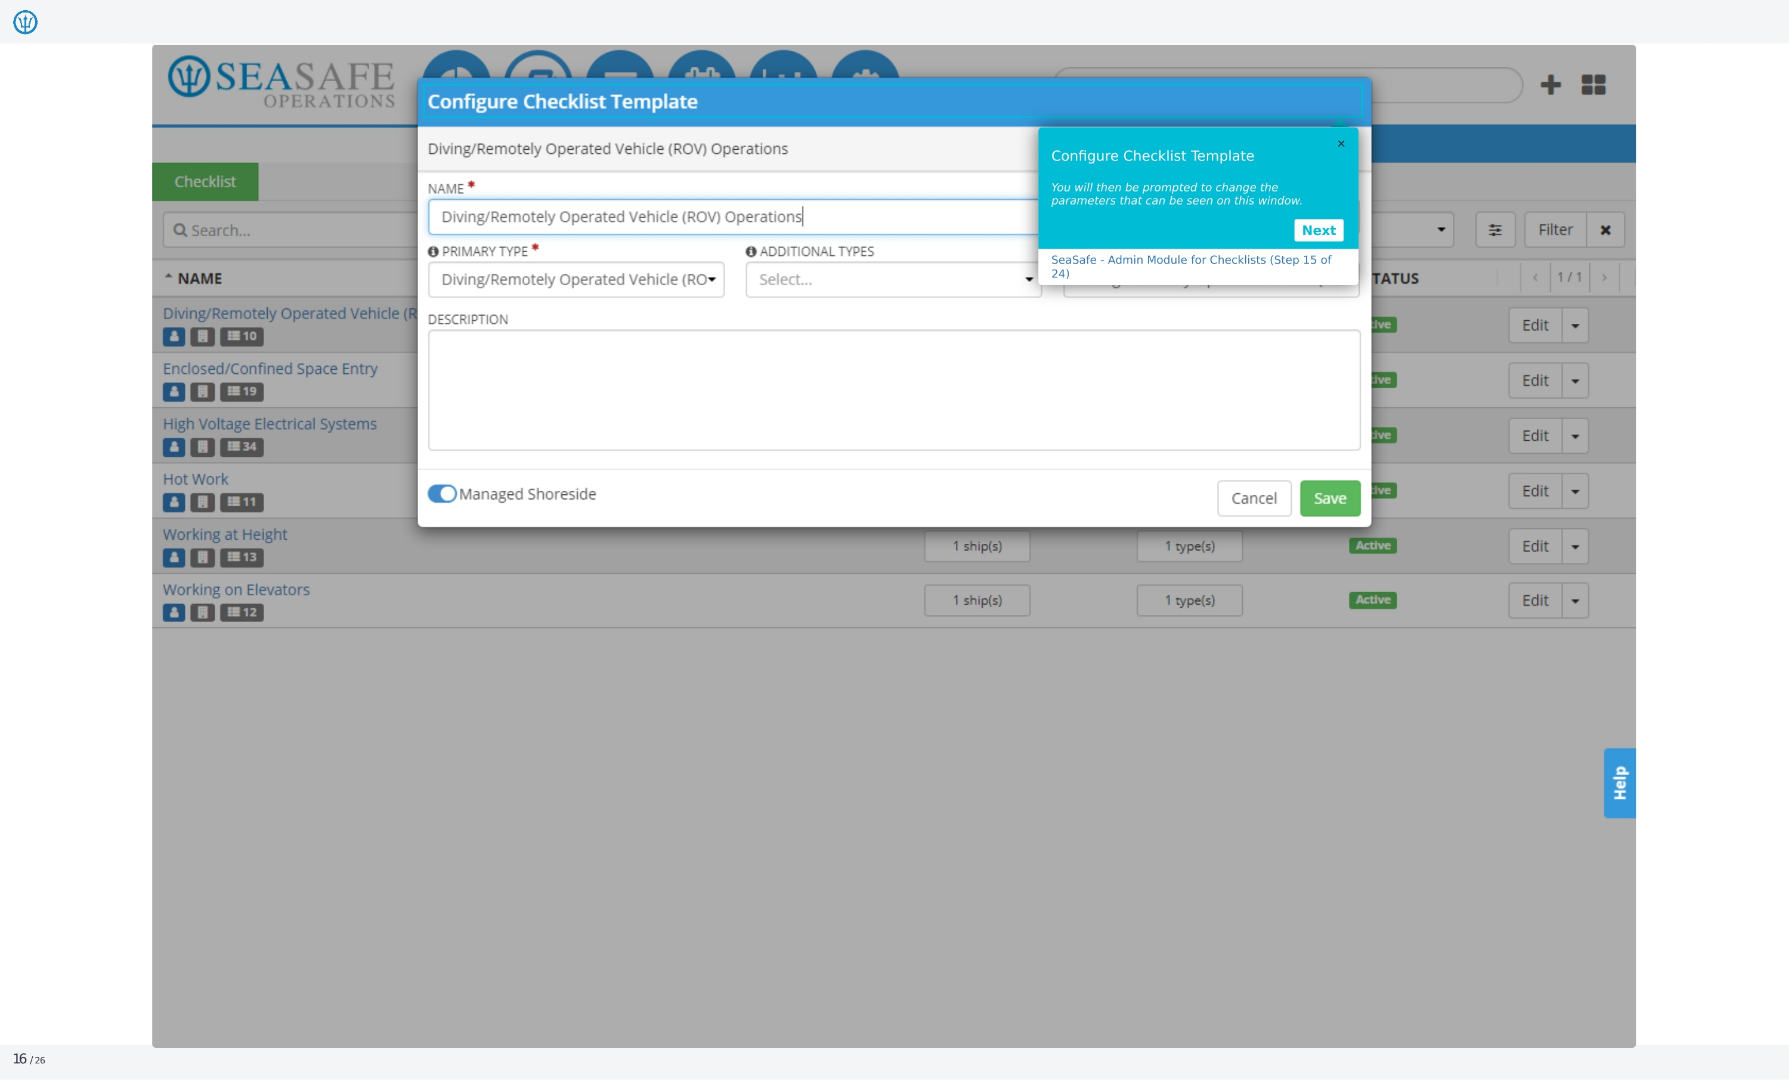
15. Configure Checklist Template
You will then be prompted to change the parameters that can be seen on this window. This includes the name, primary type, and additional types.
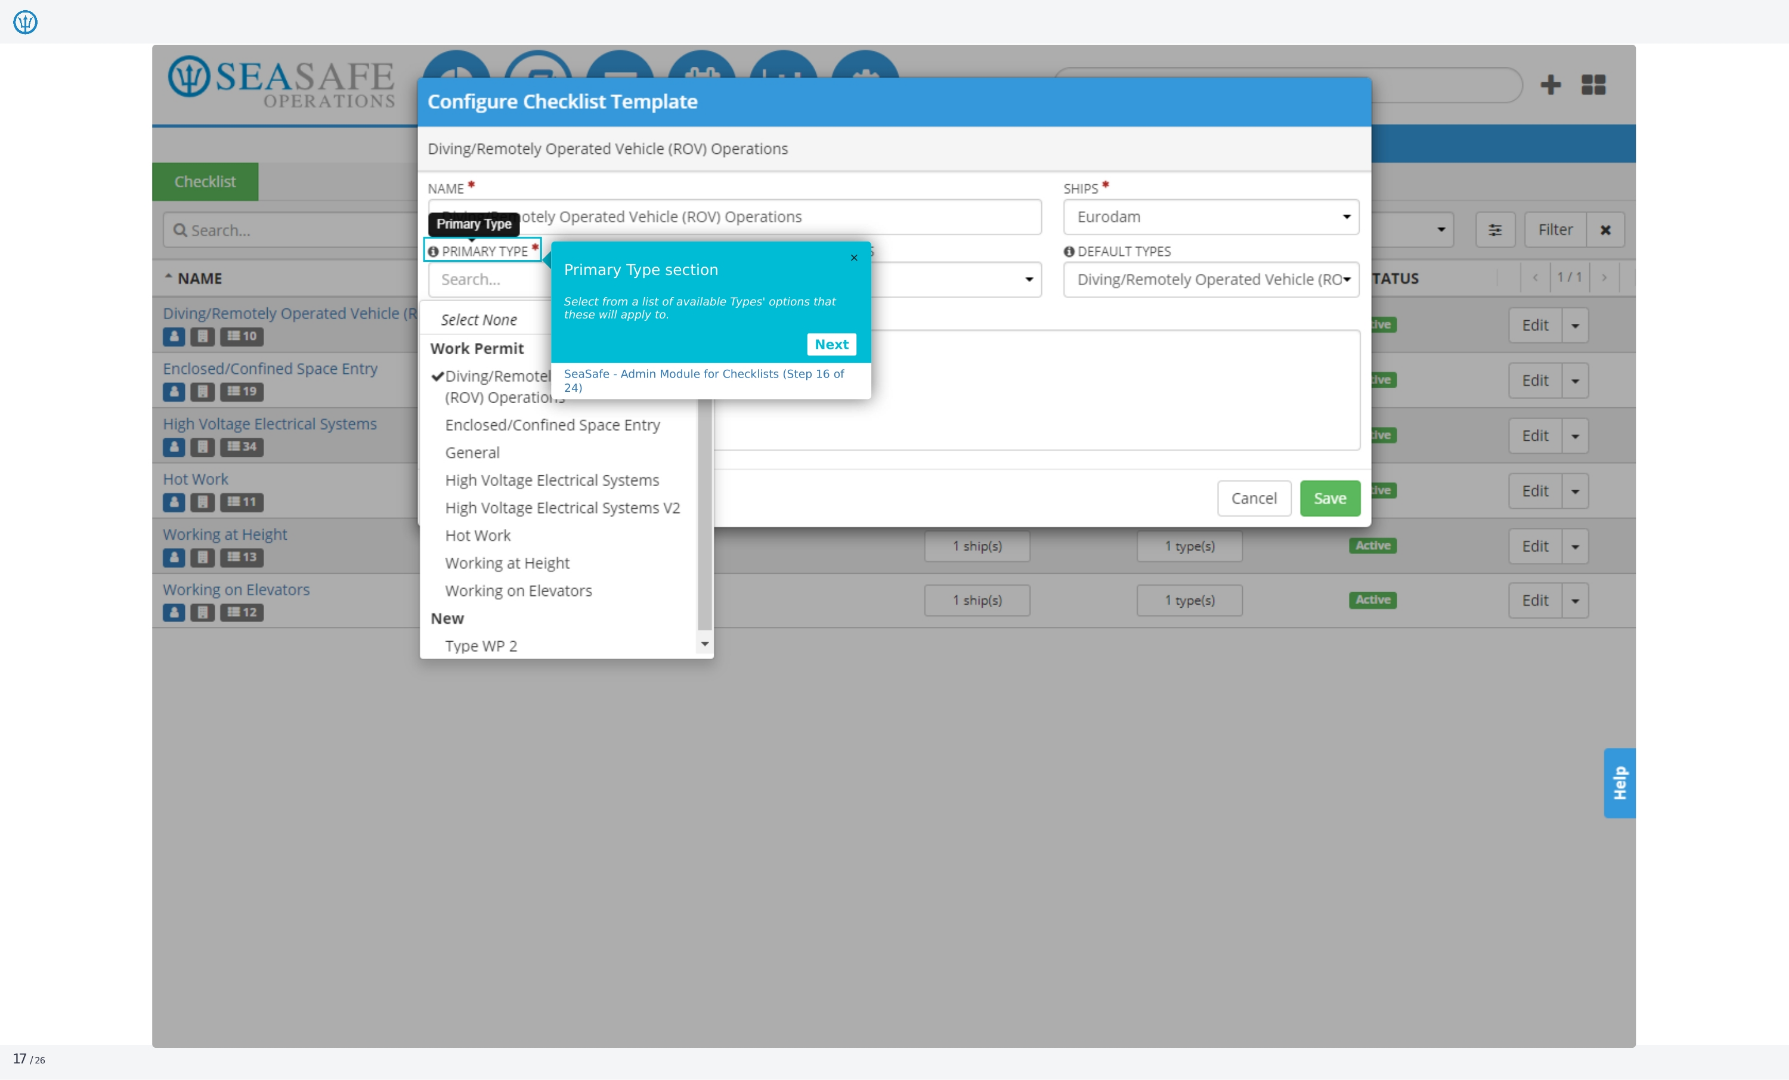
16. Primary Type section
Select from a list of available types' options that these will apply to. This helps you categorize and organize your checklists.
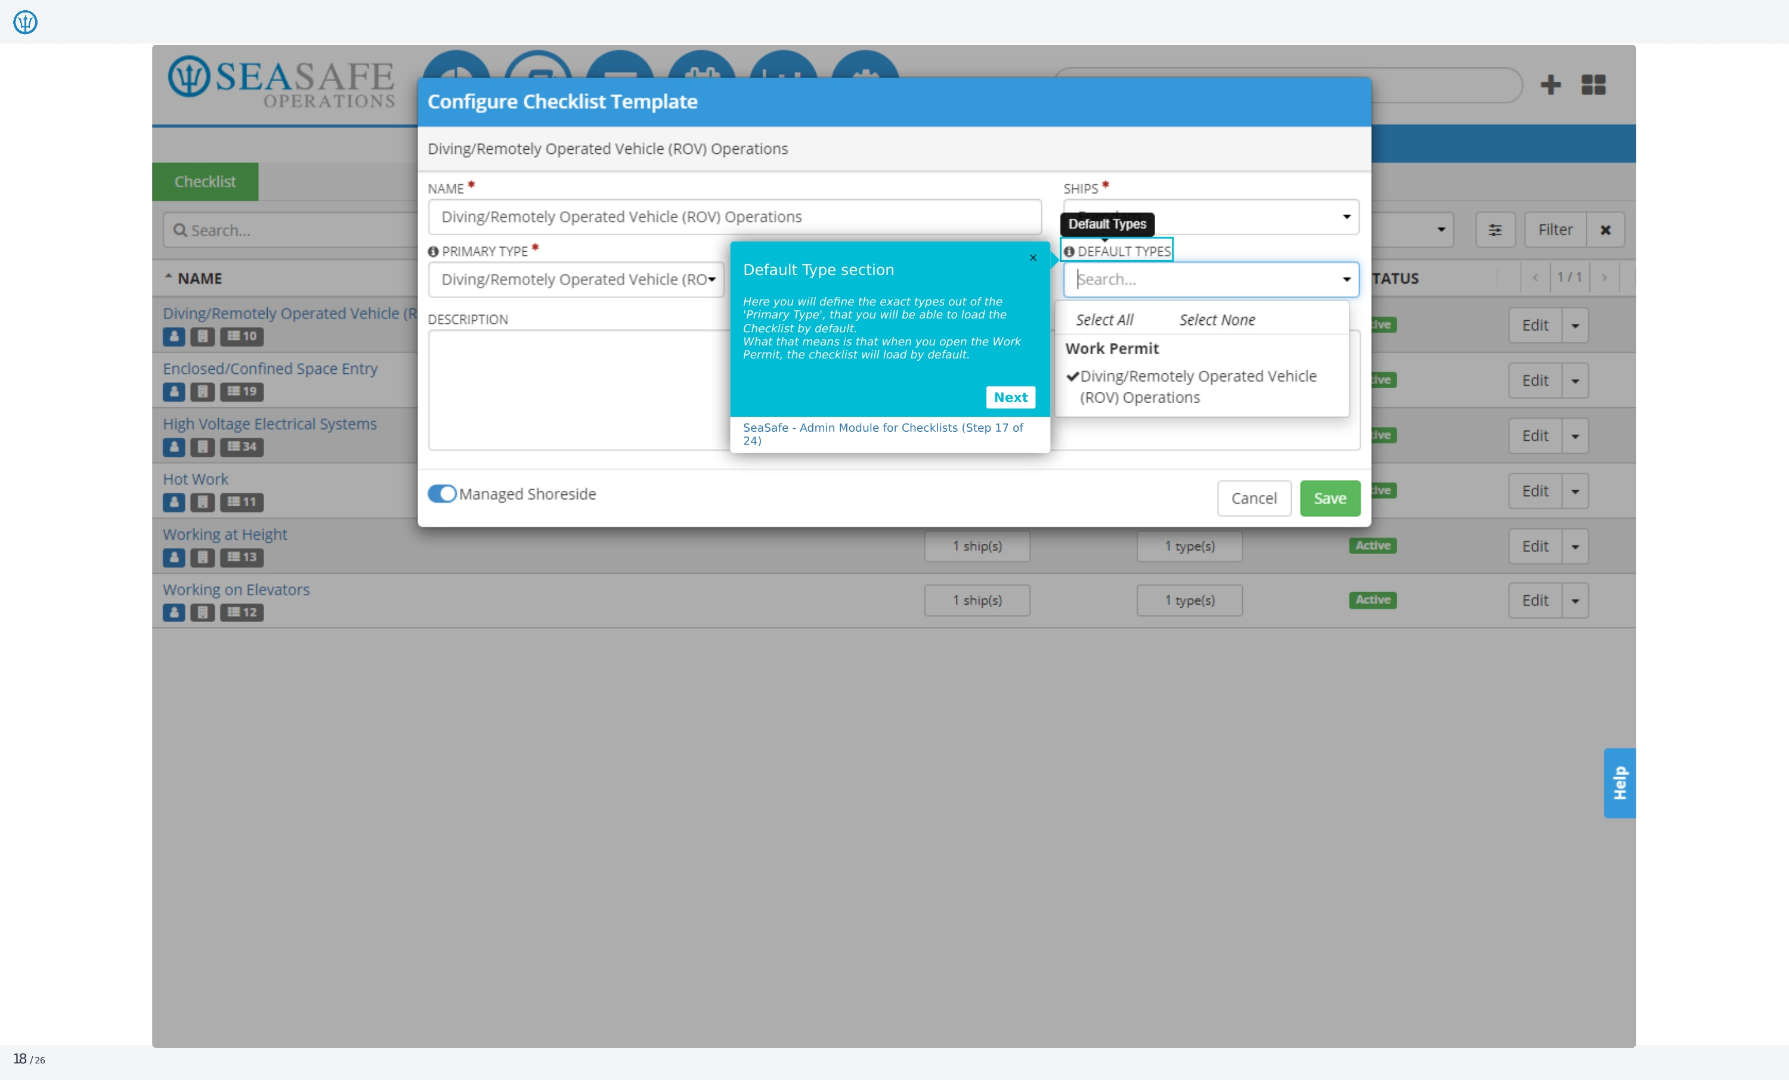
17. Default Type section
Here you will define the exact types out of the 'Primary Type' that you will be able to load the checklist by default. What that means is that when you open the work permit, the checklist will load by default.
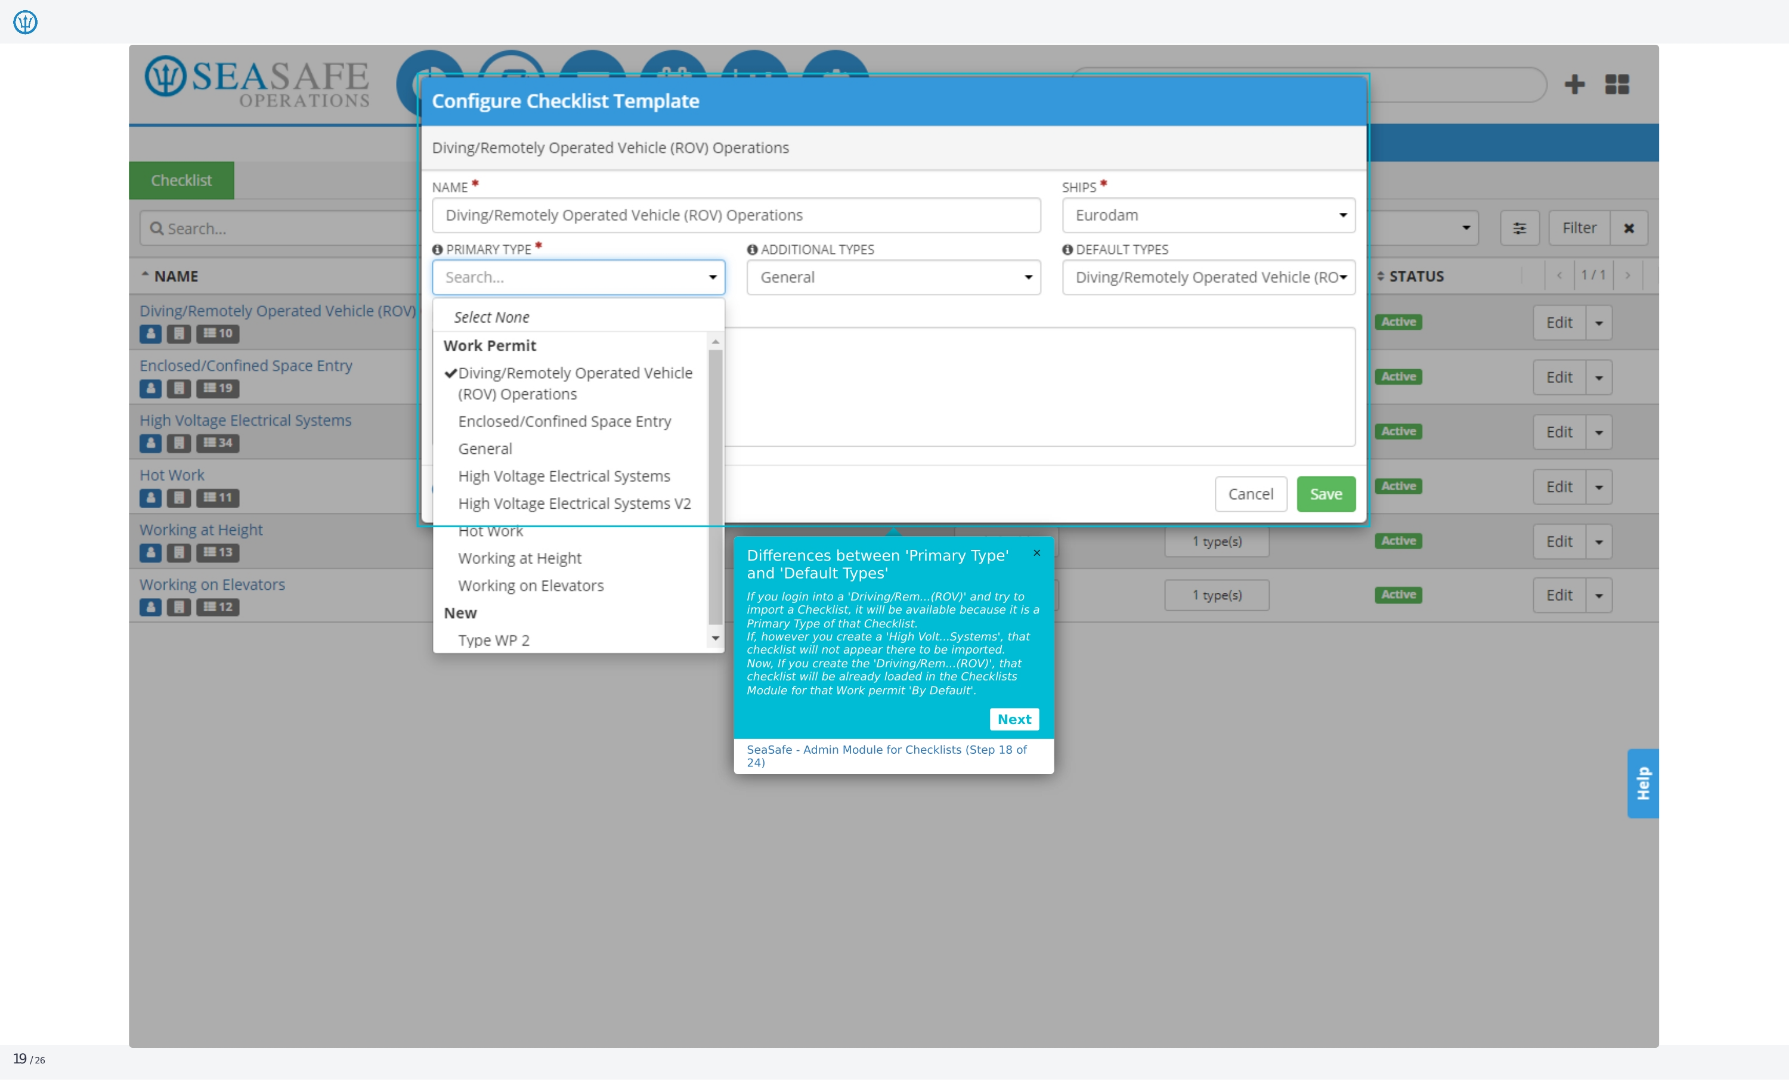
18. Differences between 'Primary Type' and 'Default Types'
Primary Type: This is the main type linked to a checklist. If you select this type (for example, Driving Remotely Operated Vehicle), the checklist will always be available for import because it is its designated primary type. Default Types: These are additional types where the checklist will appear by default when creating related work permits. For example, if Driving ROV is set as a default type, the checklist will automatically show up in the Checklists module for that permit. Key Difference: Primary Type guarantees checklist availability for its main category, while Default Types allow broader inclusion across other related categories.
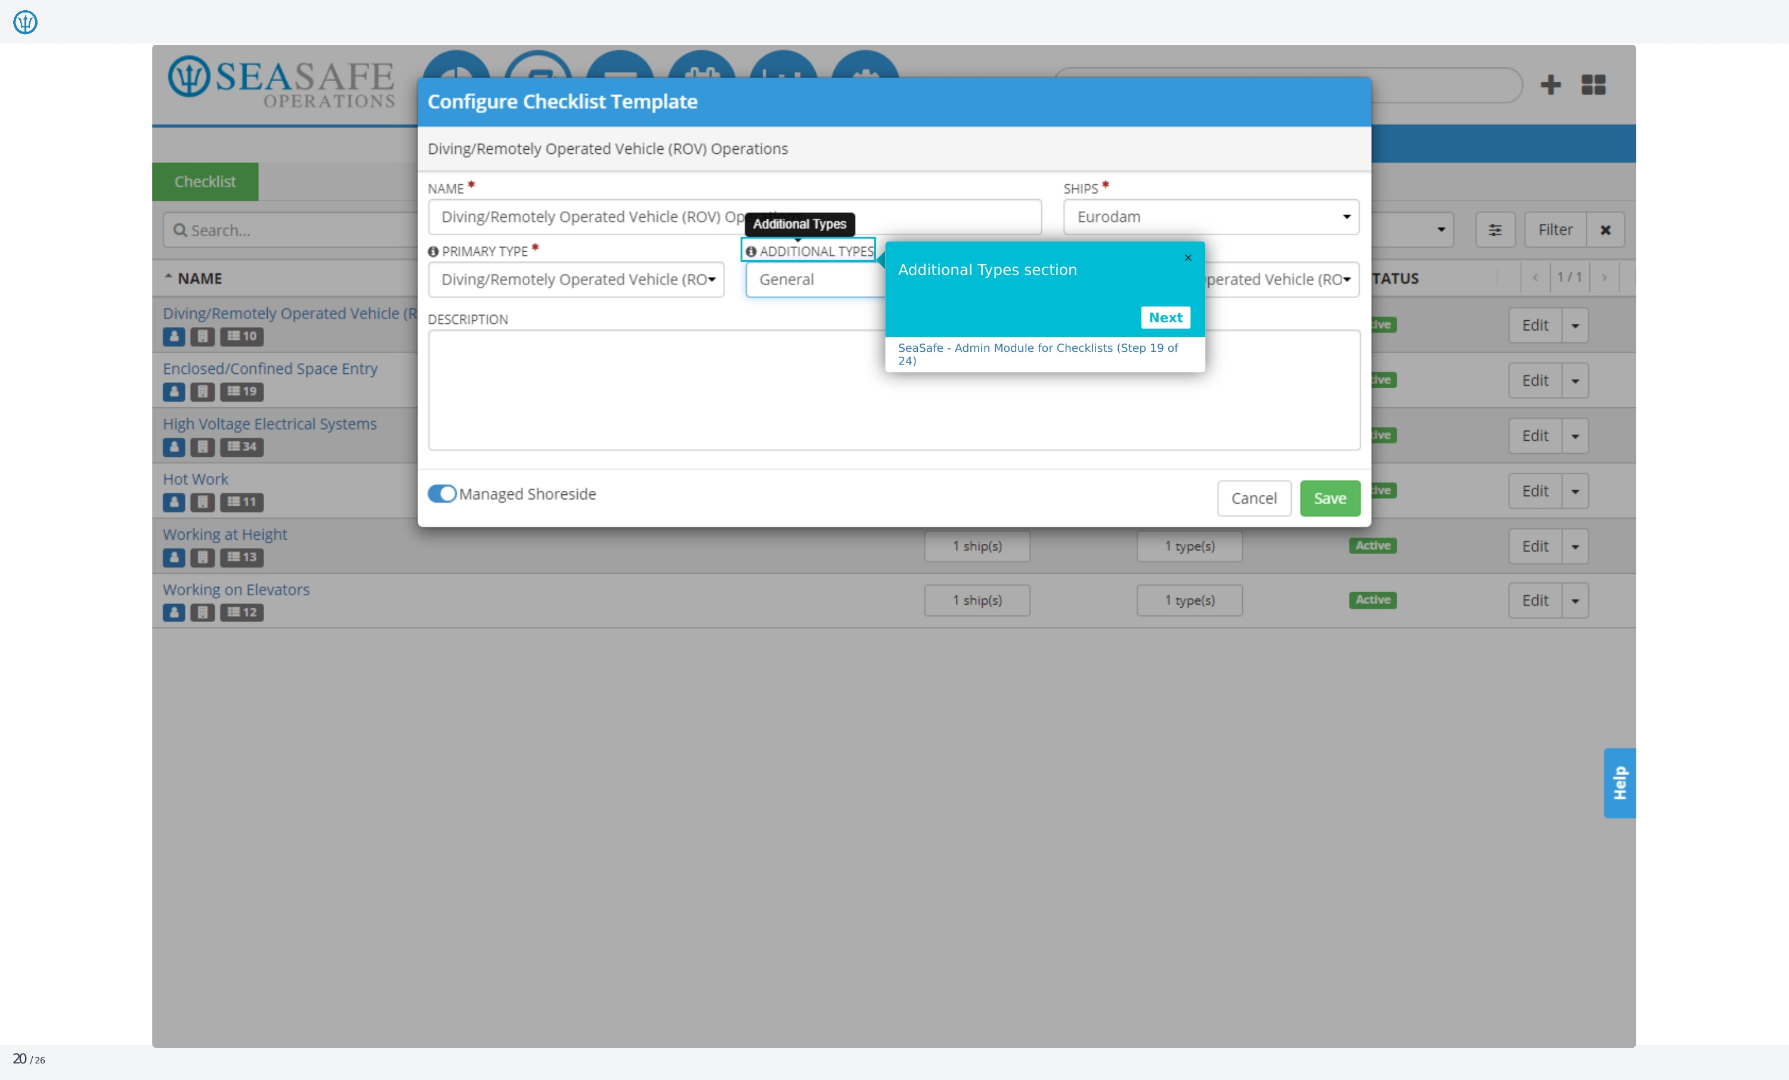
19. Additional Types section
This section allows you to add additional types to the checklist. This provides further categorization and organization options.
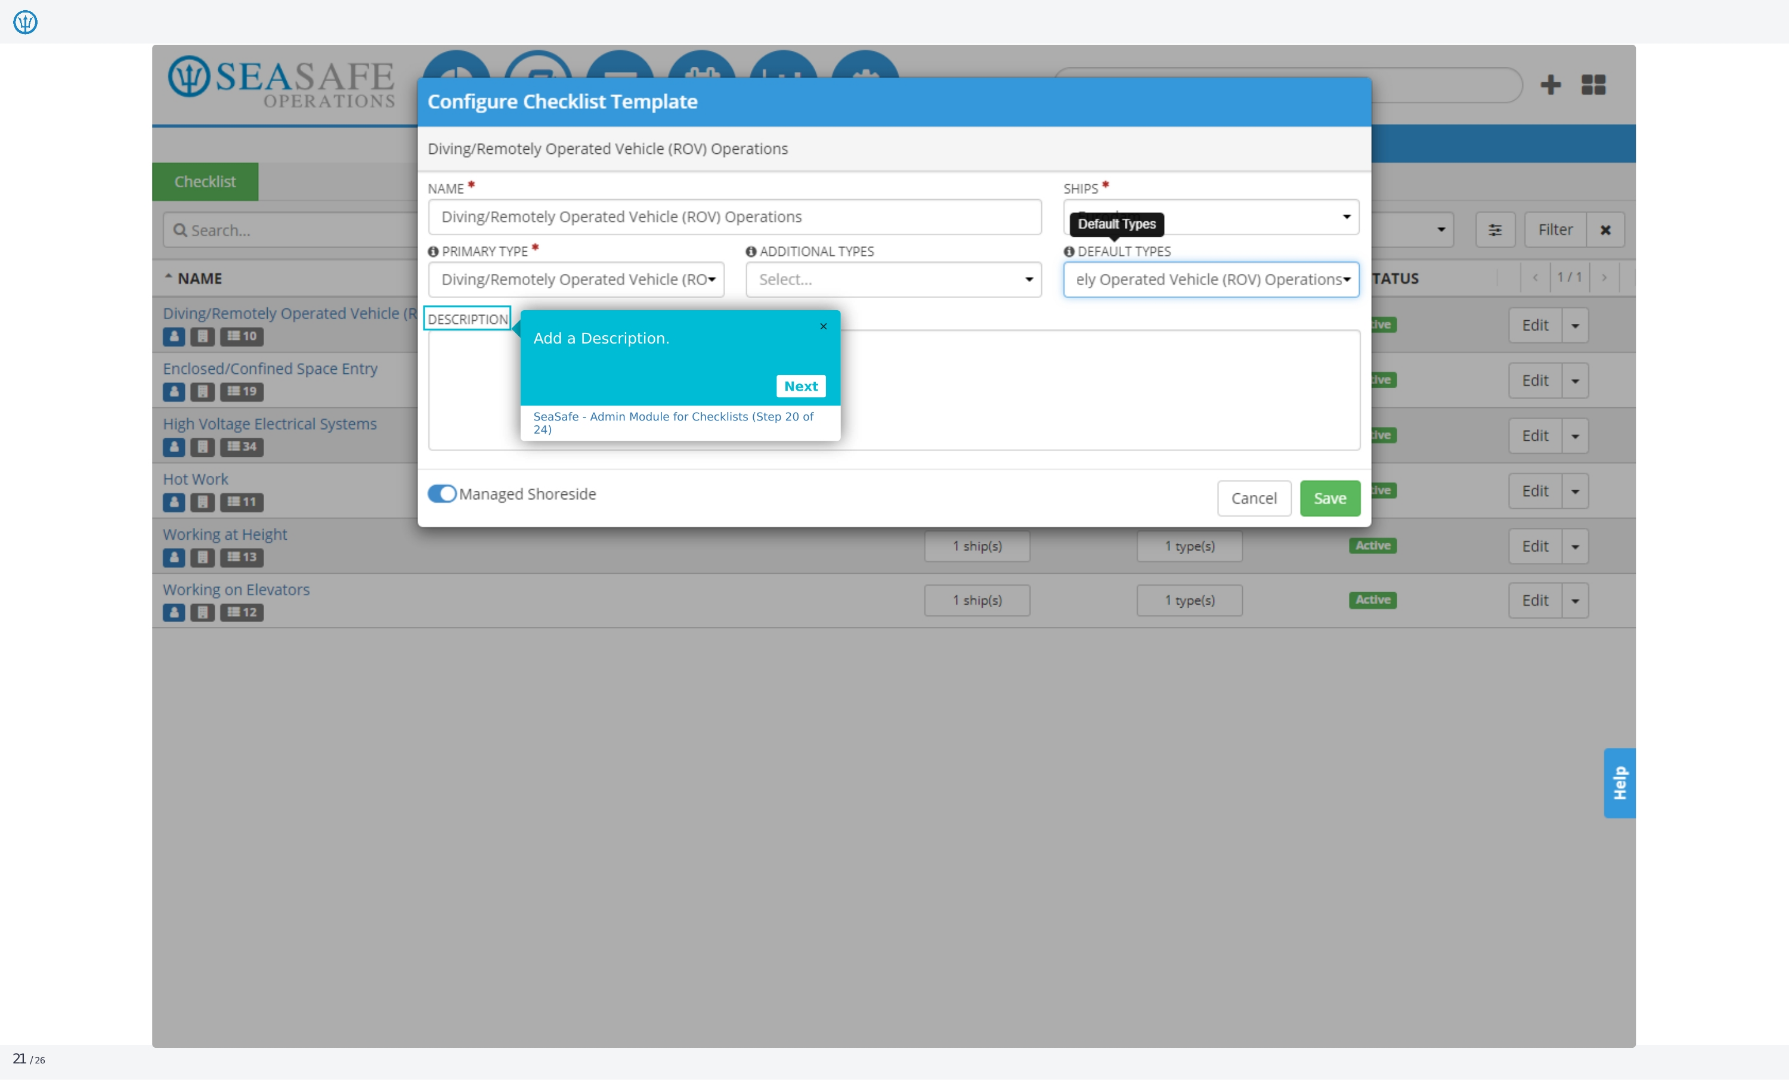
20. Configure Checklist Template
Here we're configuring a checklist template for Diving/Remotely Operated Vehicle, or ROV, Operations. You'll need to input the name, primary type, and any additional types. You can also select the ships and default types. Finally, you can add a description for the checklist.
21. Configure Checklist Template
Continuing with the configuration, you have the option to designate the checklist as 'Managed Shoreside'. When this is selected, only the shoreside team will have the ability to modify the checklist, providing a centralized control point for updates and changes.

22. Checklists
Here, you can see additional options for the checklists. You are also able to deactivate or remove a checklist. This allows for flexibility in managing and maintaining the checklists as needed.

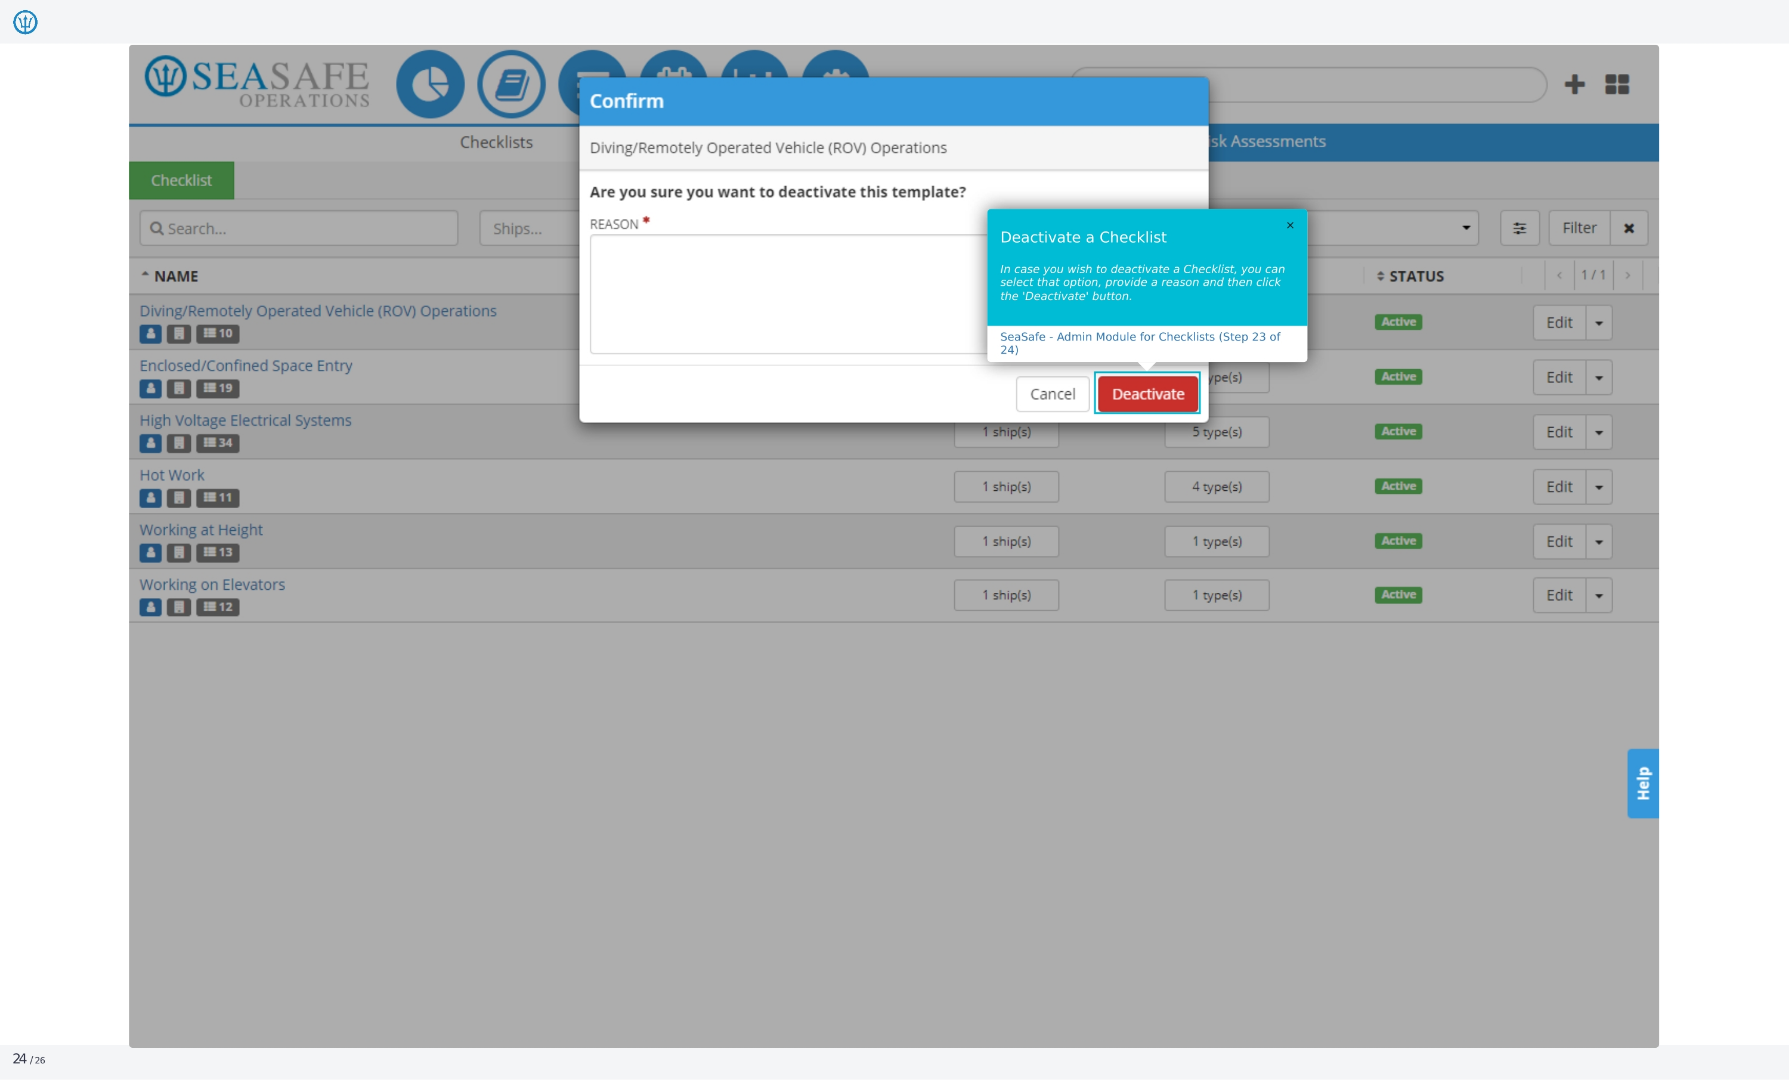
23. Confirm
This screen confirms the deactivation of the Diving/Remotely Operated Vehicle, or ROV, Operations template. You'll need to provide a reason for deactivation. Once deactivated, the checklist will no longer be active.
24. Remove
This screen shows the removal of the Diving/Remotely Operated Vehicle, or ROV, Operations template. Similar to deactivation, you'll need to provide a reason for removing the template. Once removed, the checklist will be permanently deleted.
