New article
Recently updated
Checklist Process in Ideagen Maritime Management Operations

This walkthrough provides a comprehensive overview of the checklist process.
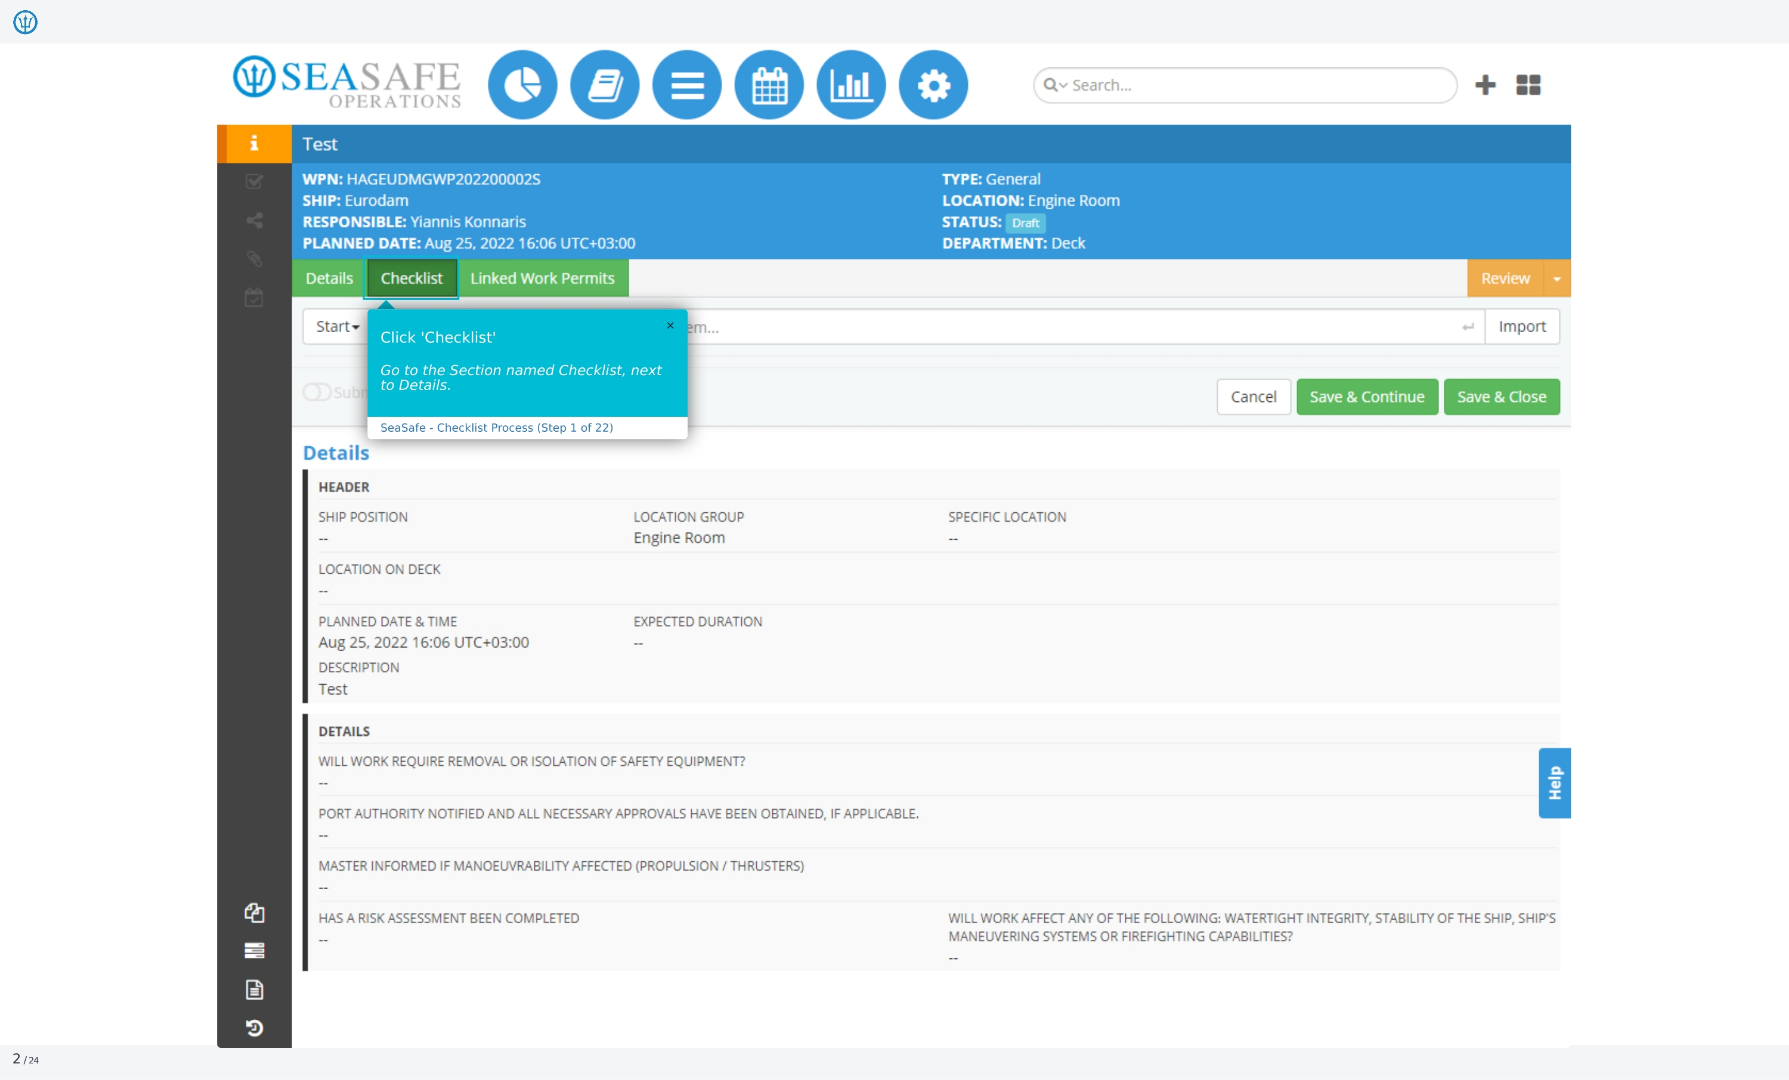
1. Accessing the Checklist Section
To begin, click on the 'Checklist' option located next to 'Details'. This action will direct you to the Checklist section
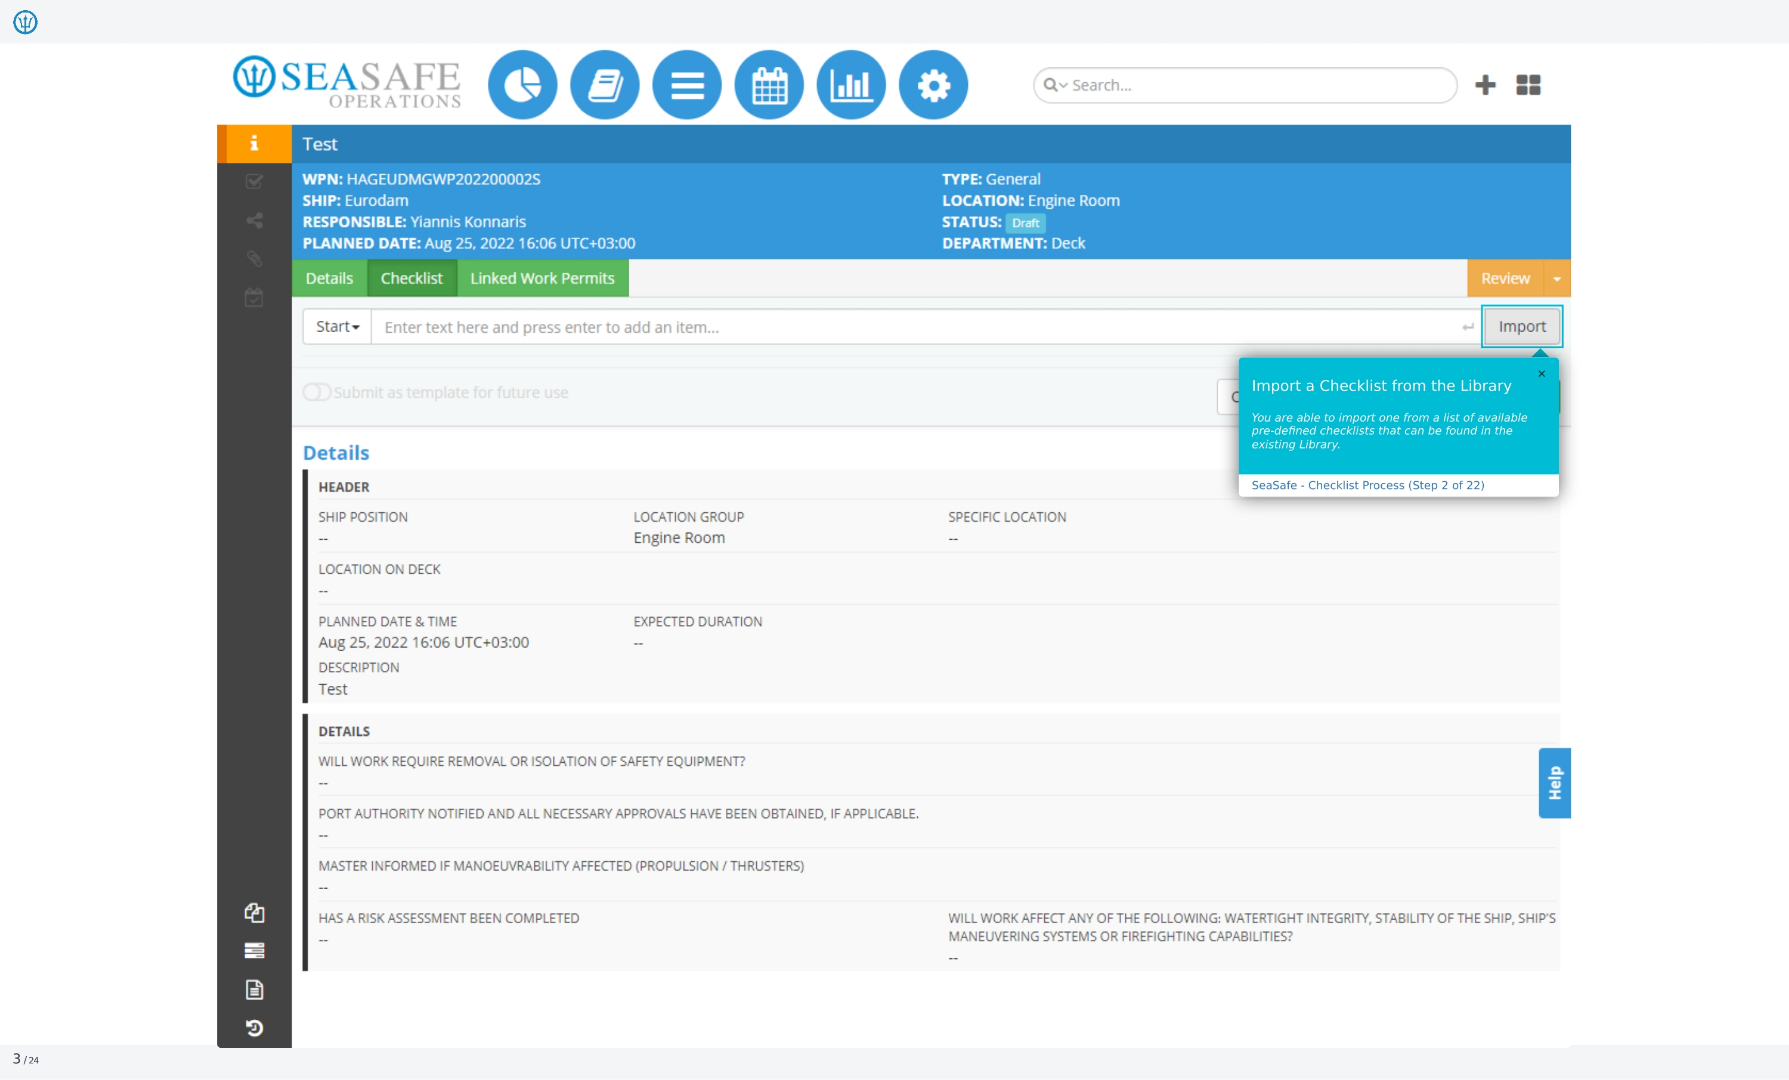
2. Importing a Checklist from the Library
You have the option to import a checklist from the library. This allows you to select from a list of available pre-defined checklists that can be found in the existing library.
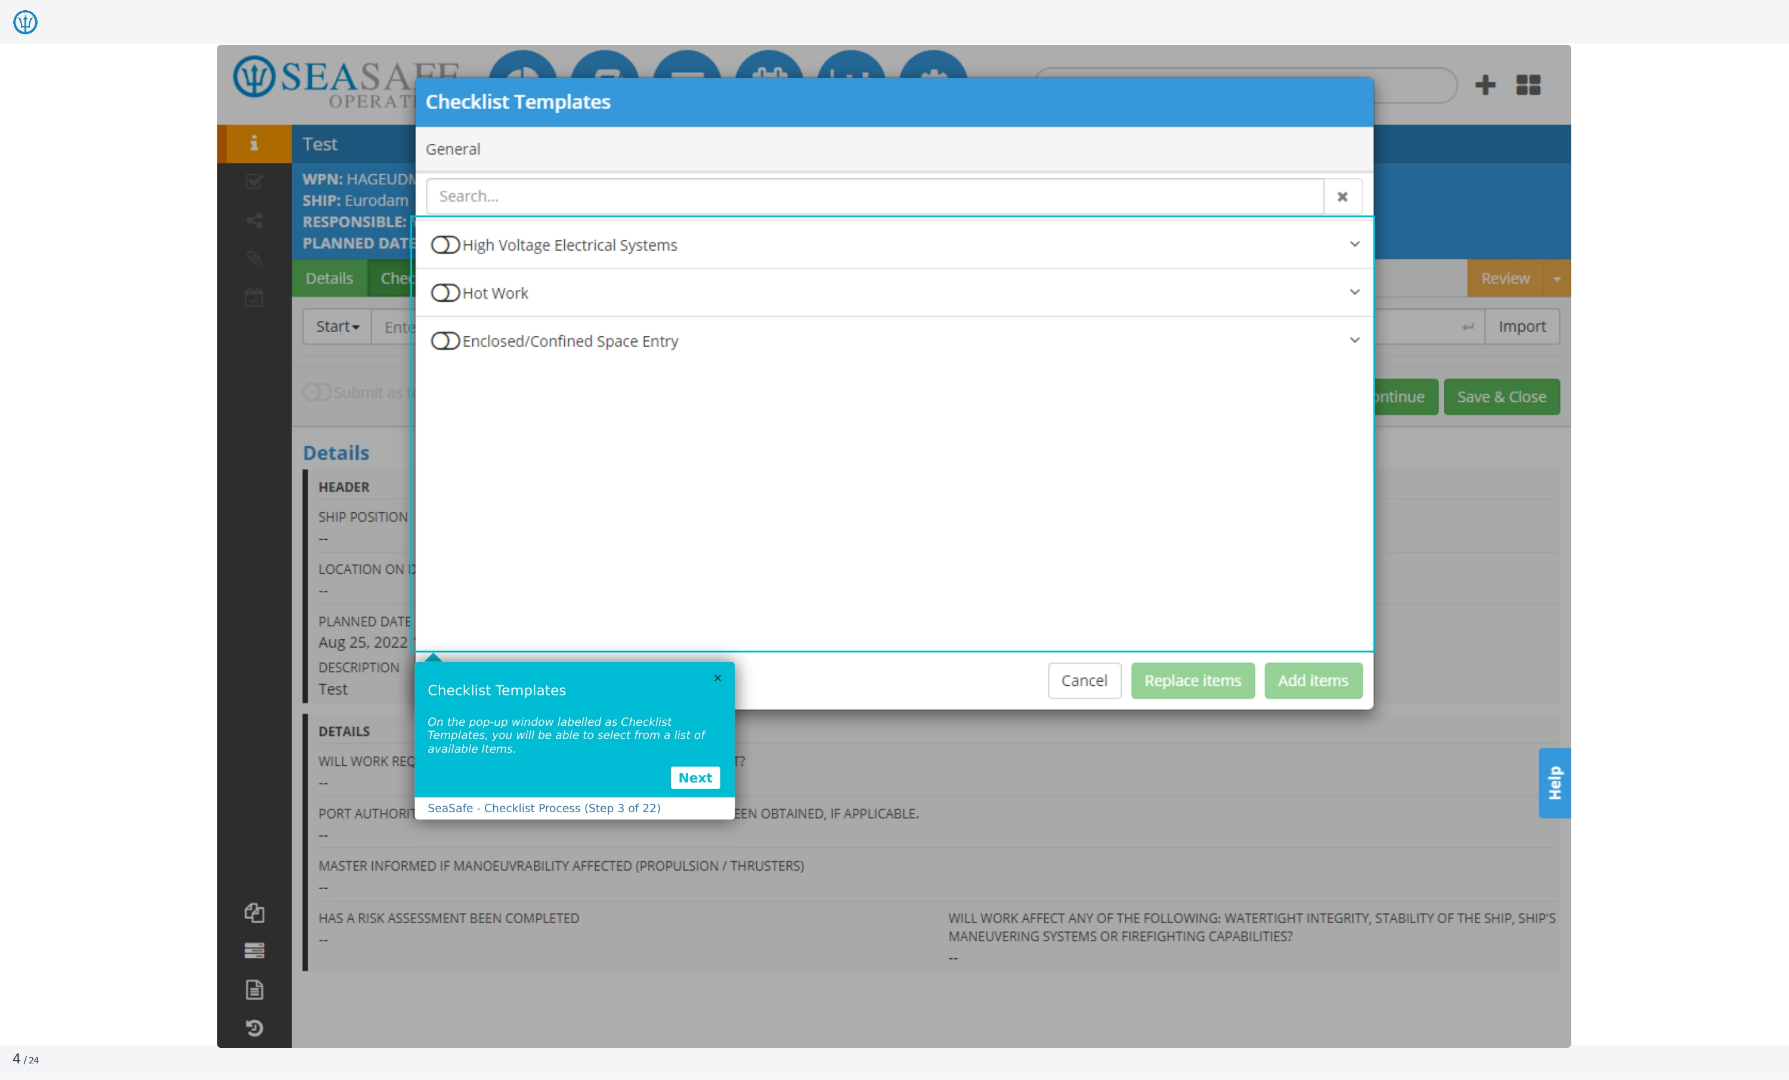
3. Checklist Templates Selection
In the pop-up window labeled as 'Checklist Templates', you can select from a list of available items.
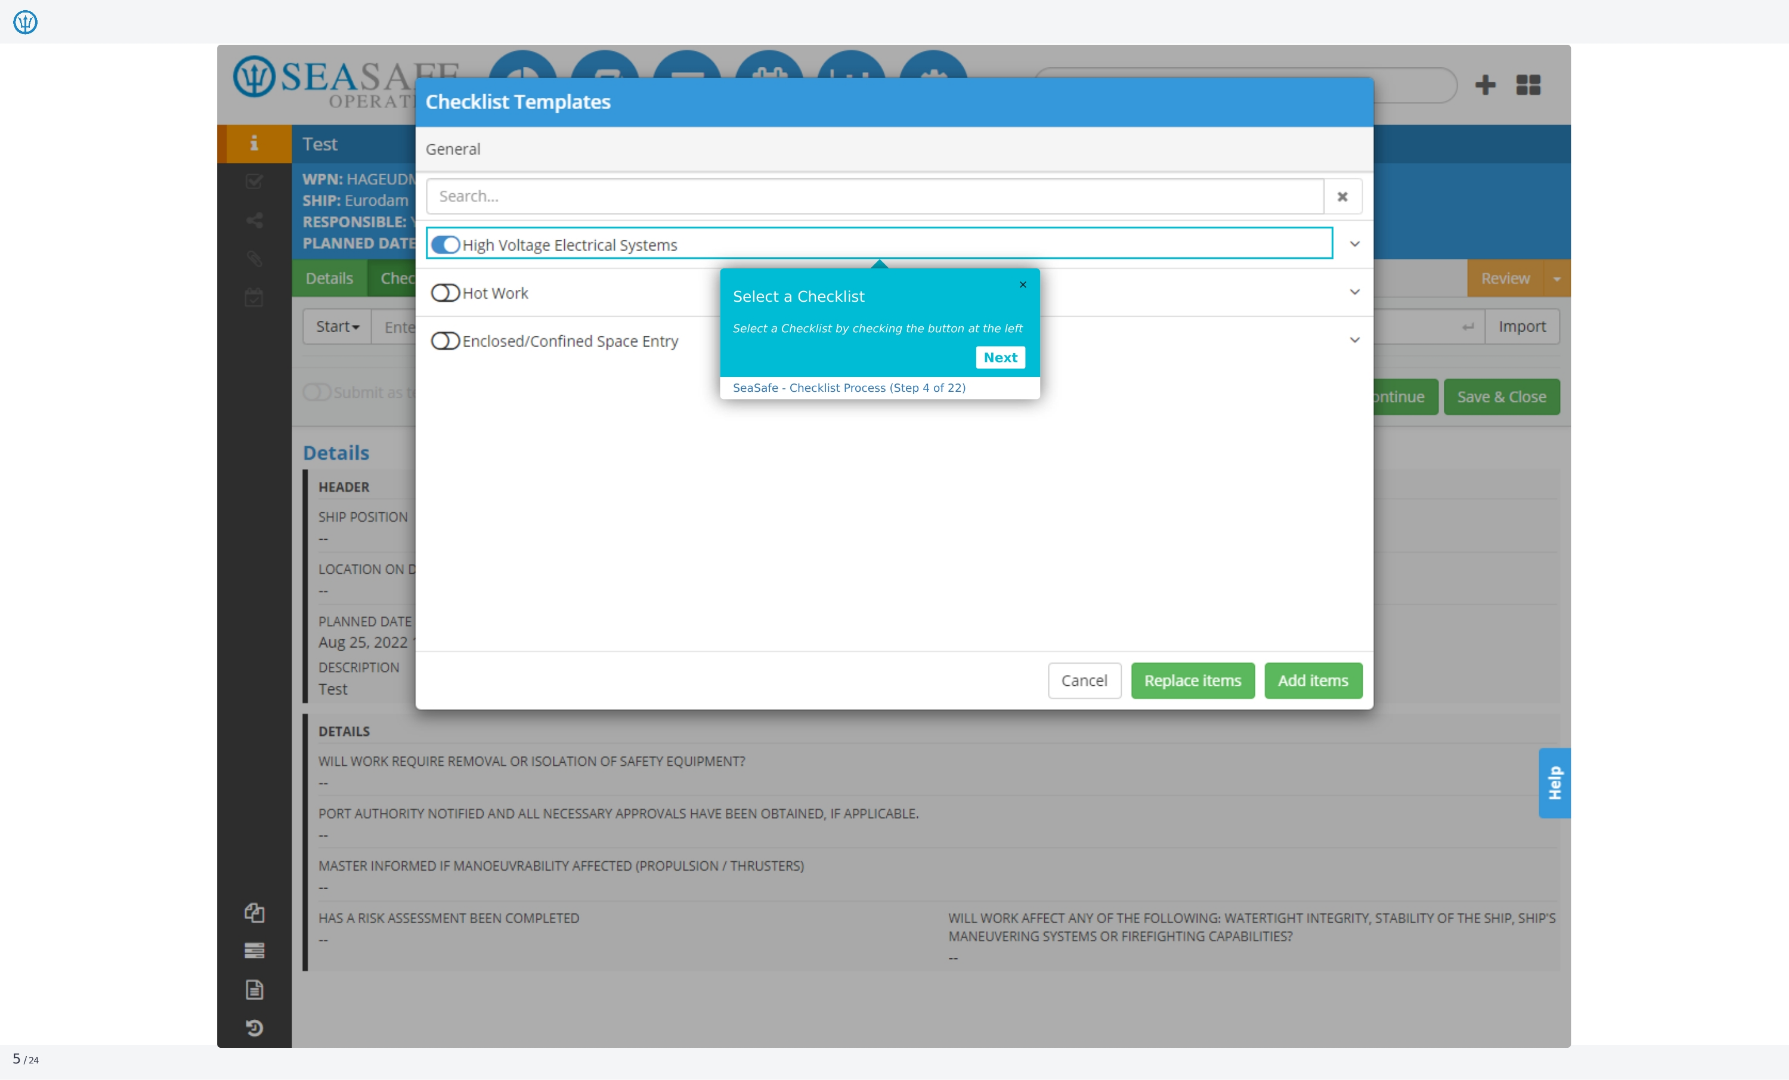
4. Selecting a Checklist
Select a checklist by checking the button at the left.
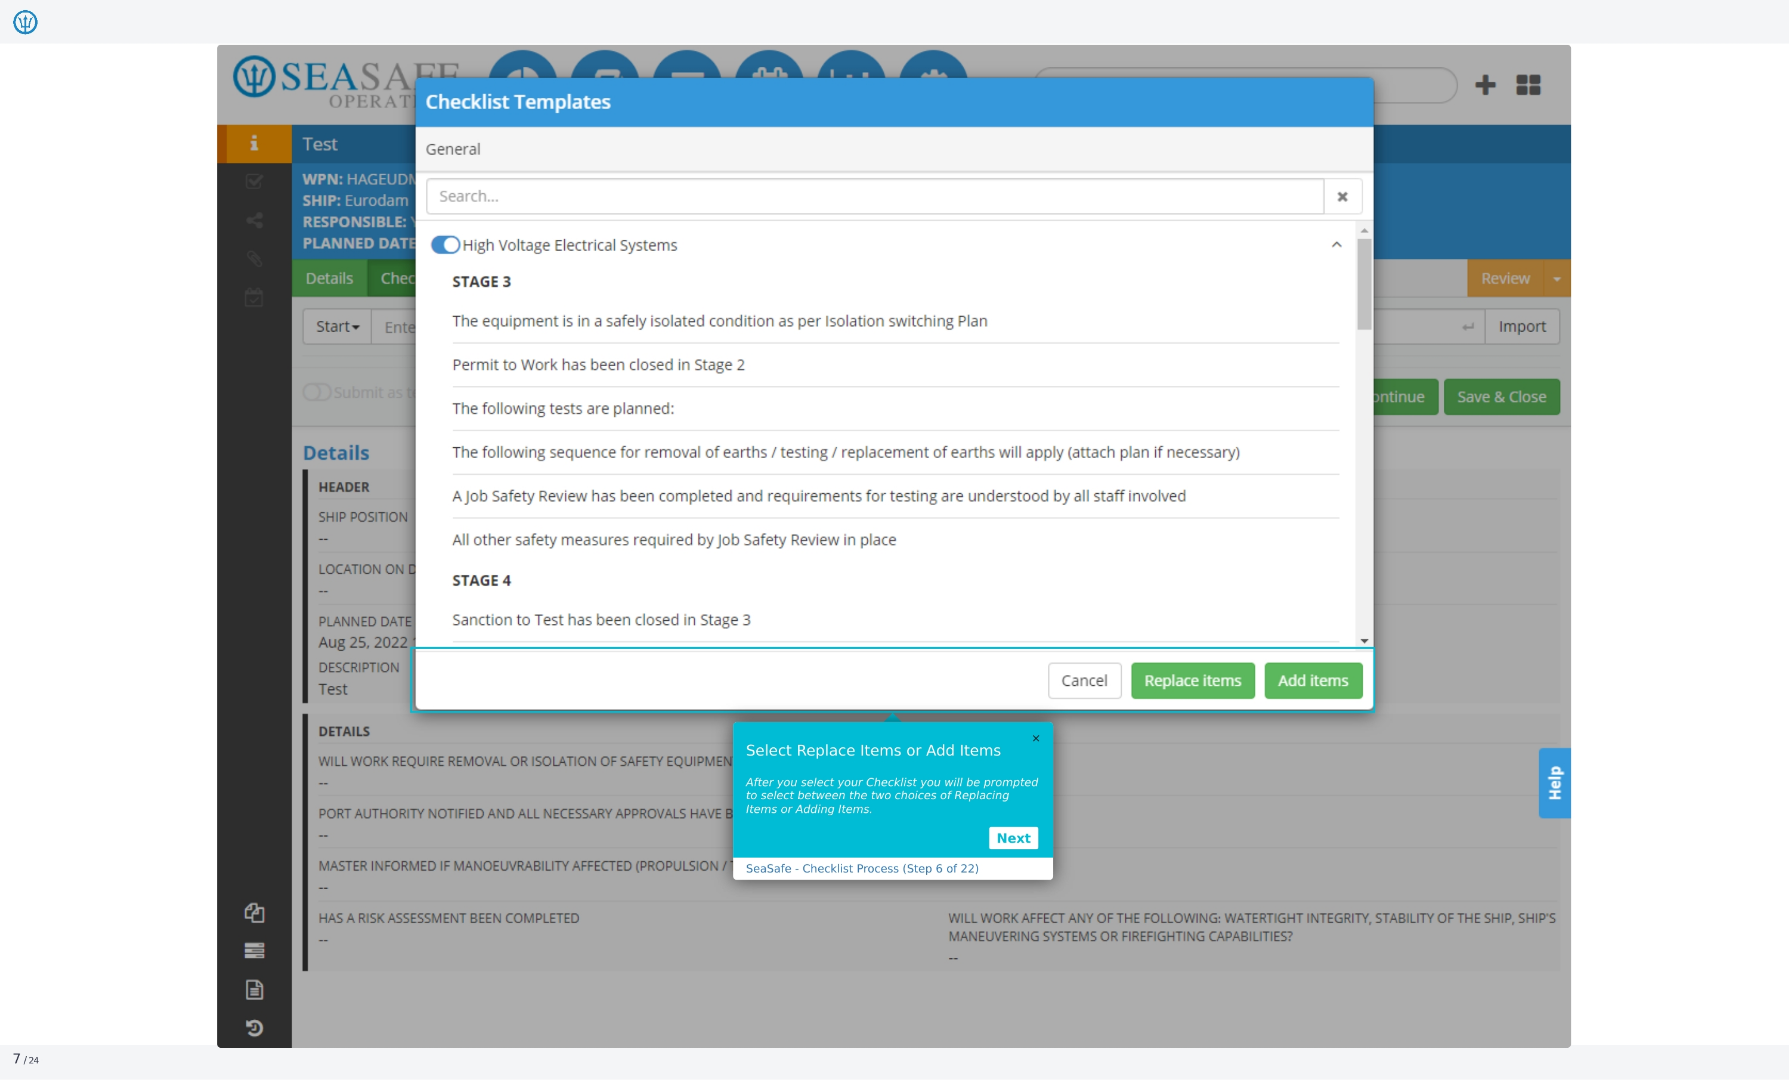
5. Expanding the Checklist
By clicking, you will be able to expand a checklist.

6. Choosing Replace or Add Items
After you select your checklist, you will be prompted to select between the two choices of replacing items or adding items.
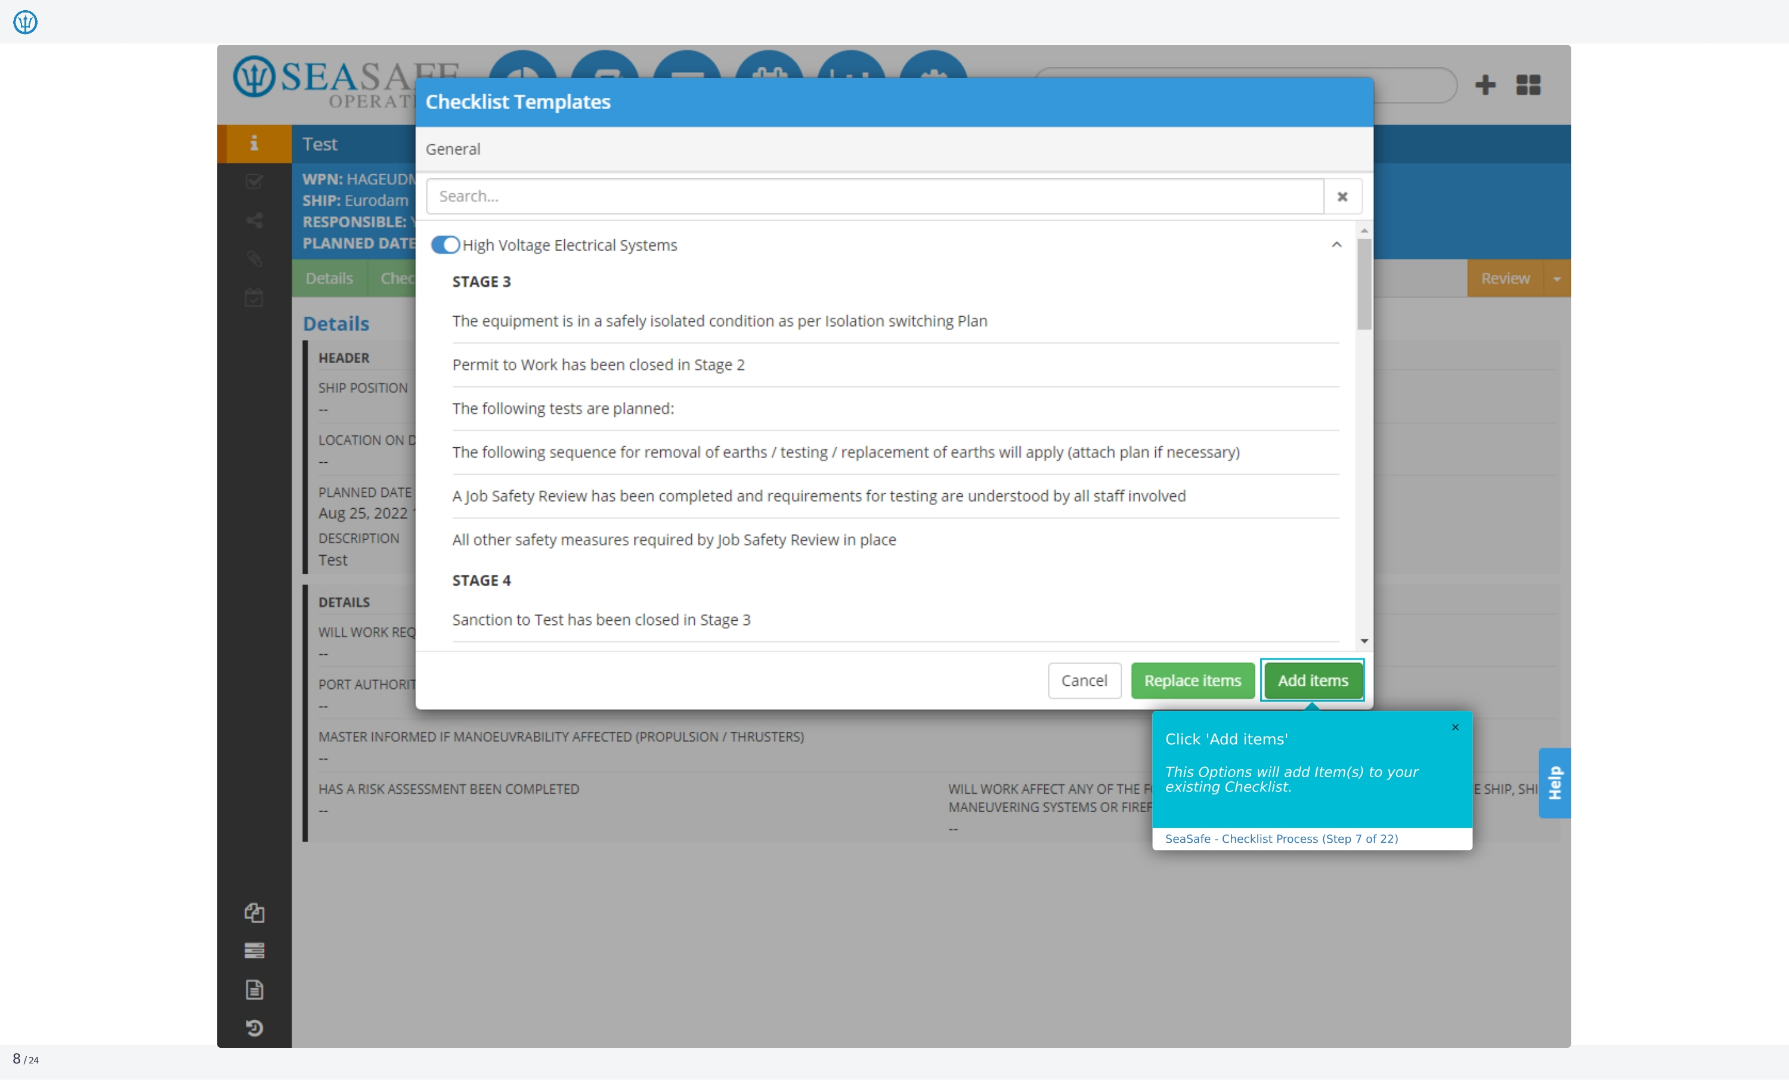
7. Adding Items to the Checklist
This option will add items to your existing checklist.
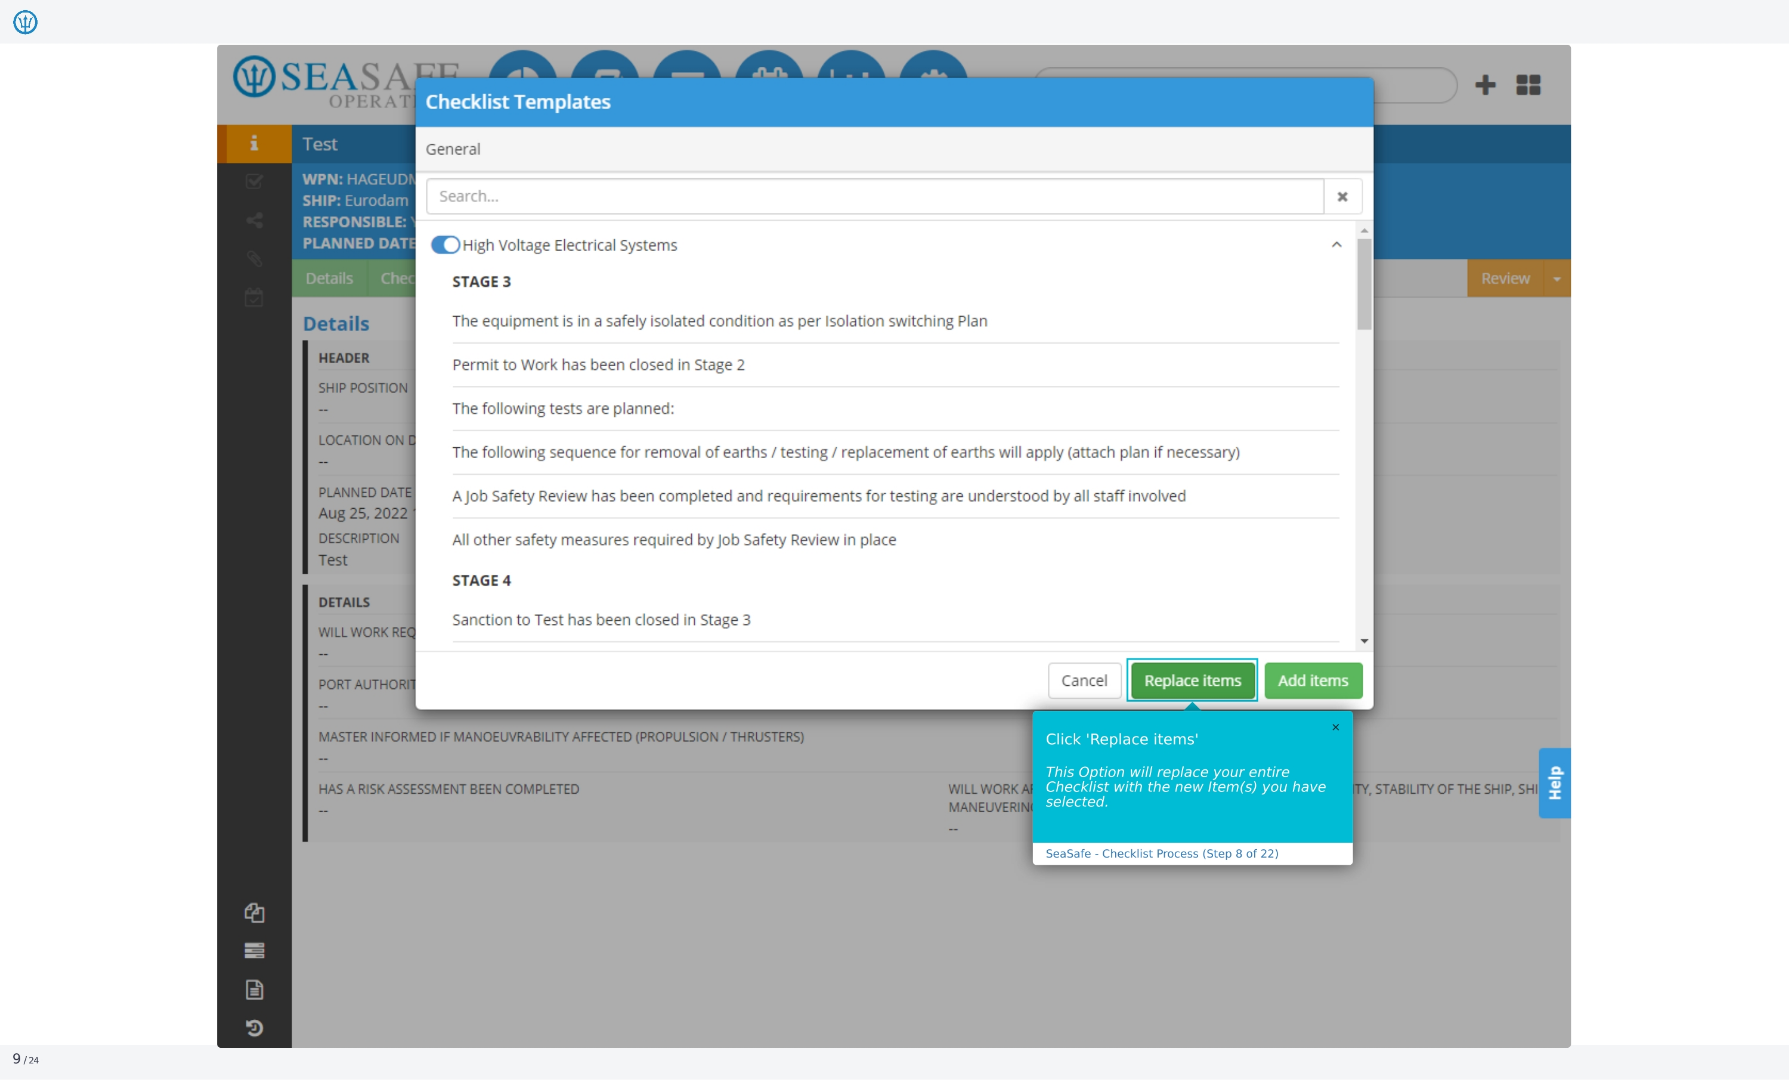
8. Replacing Items in the Checklist
This option will replace your entire checklist with the new items you have selected.
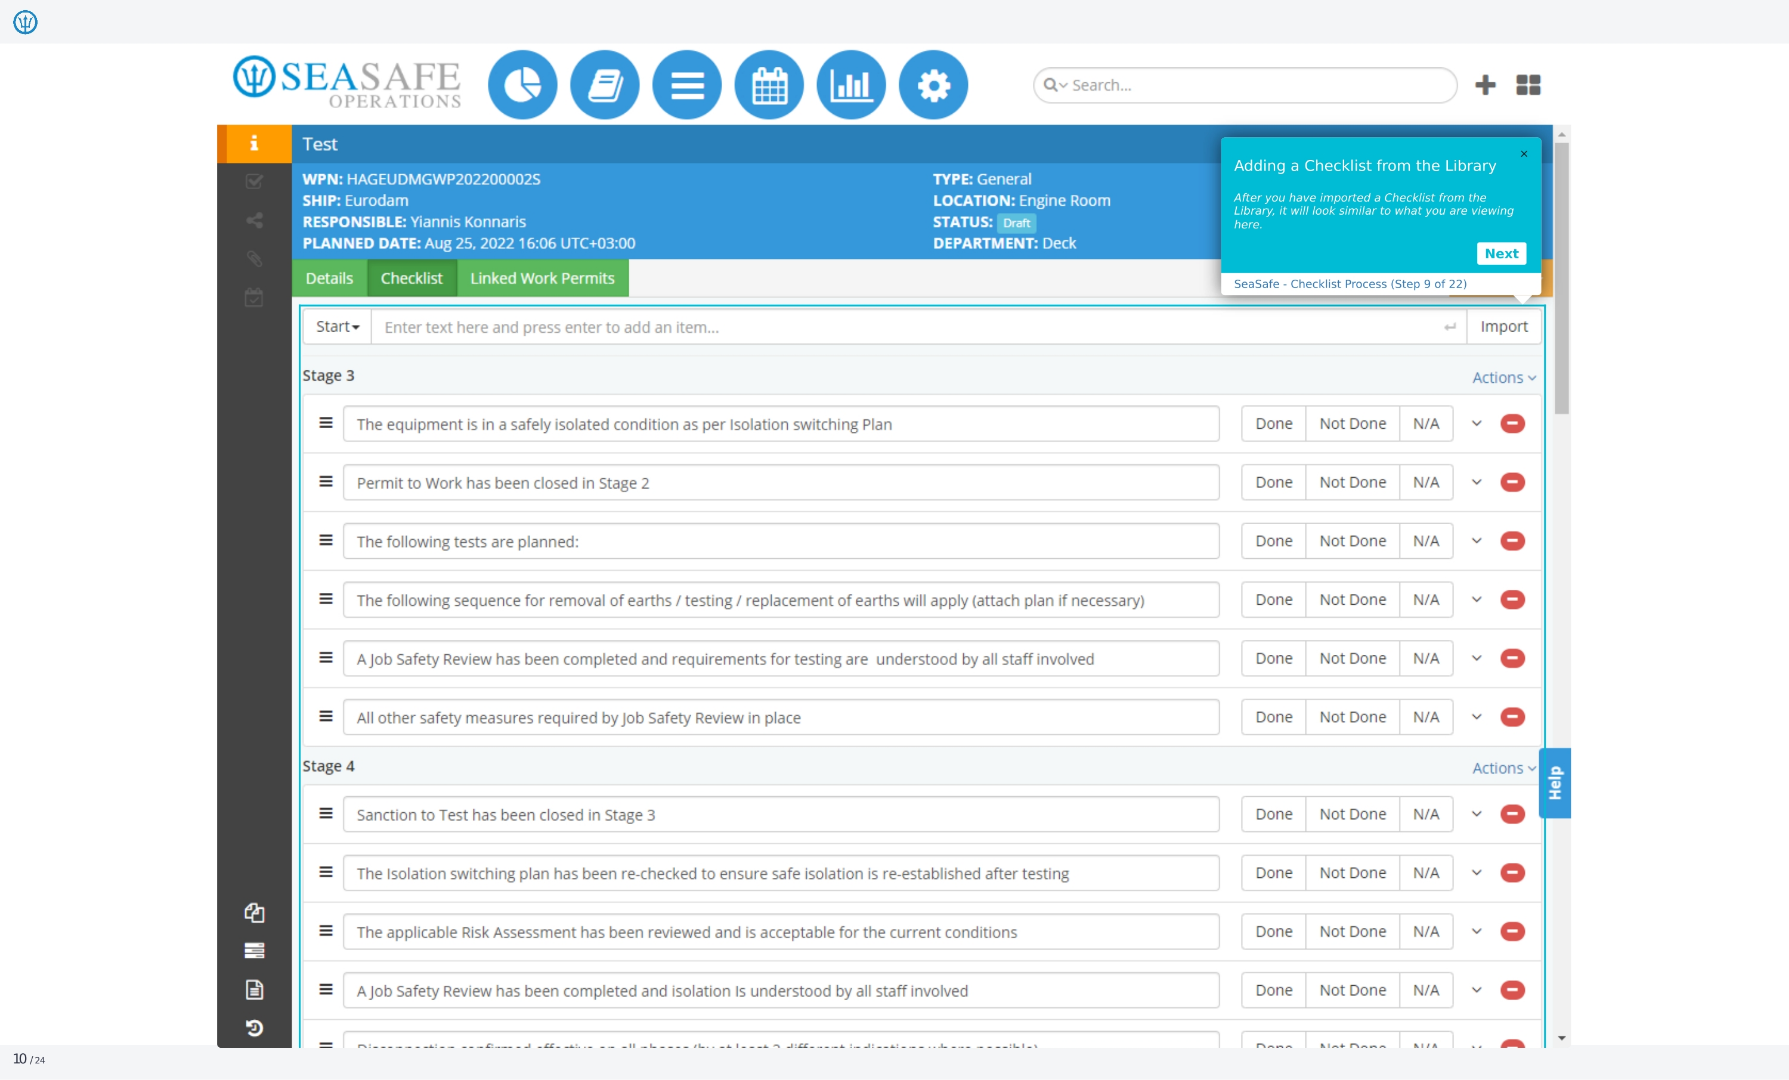
9. Checklist Library View
After you have imported a checklist from the library, it will look similar to what you are viewing here.
10. Adding a Custom Entry
When you want to add or create your own custom checklist, you can start by entering an item's name, for example, Custom 1.0, and this will be found at the bottom of the list.

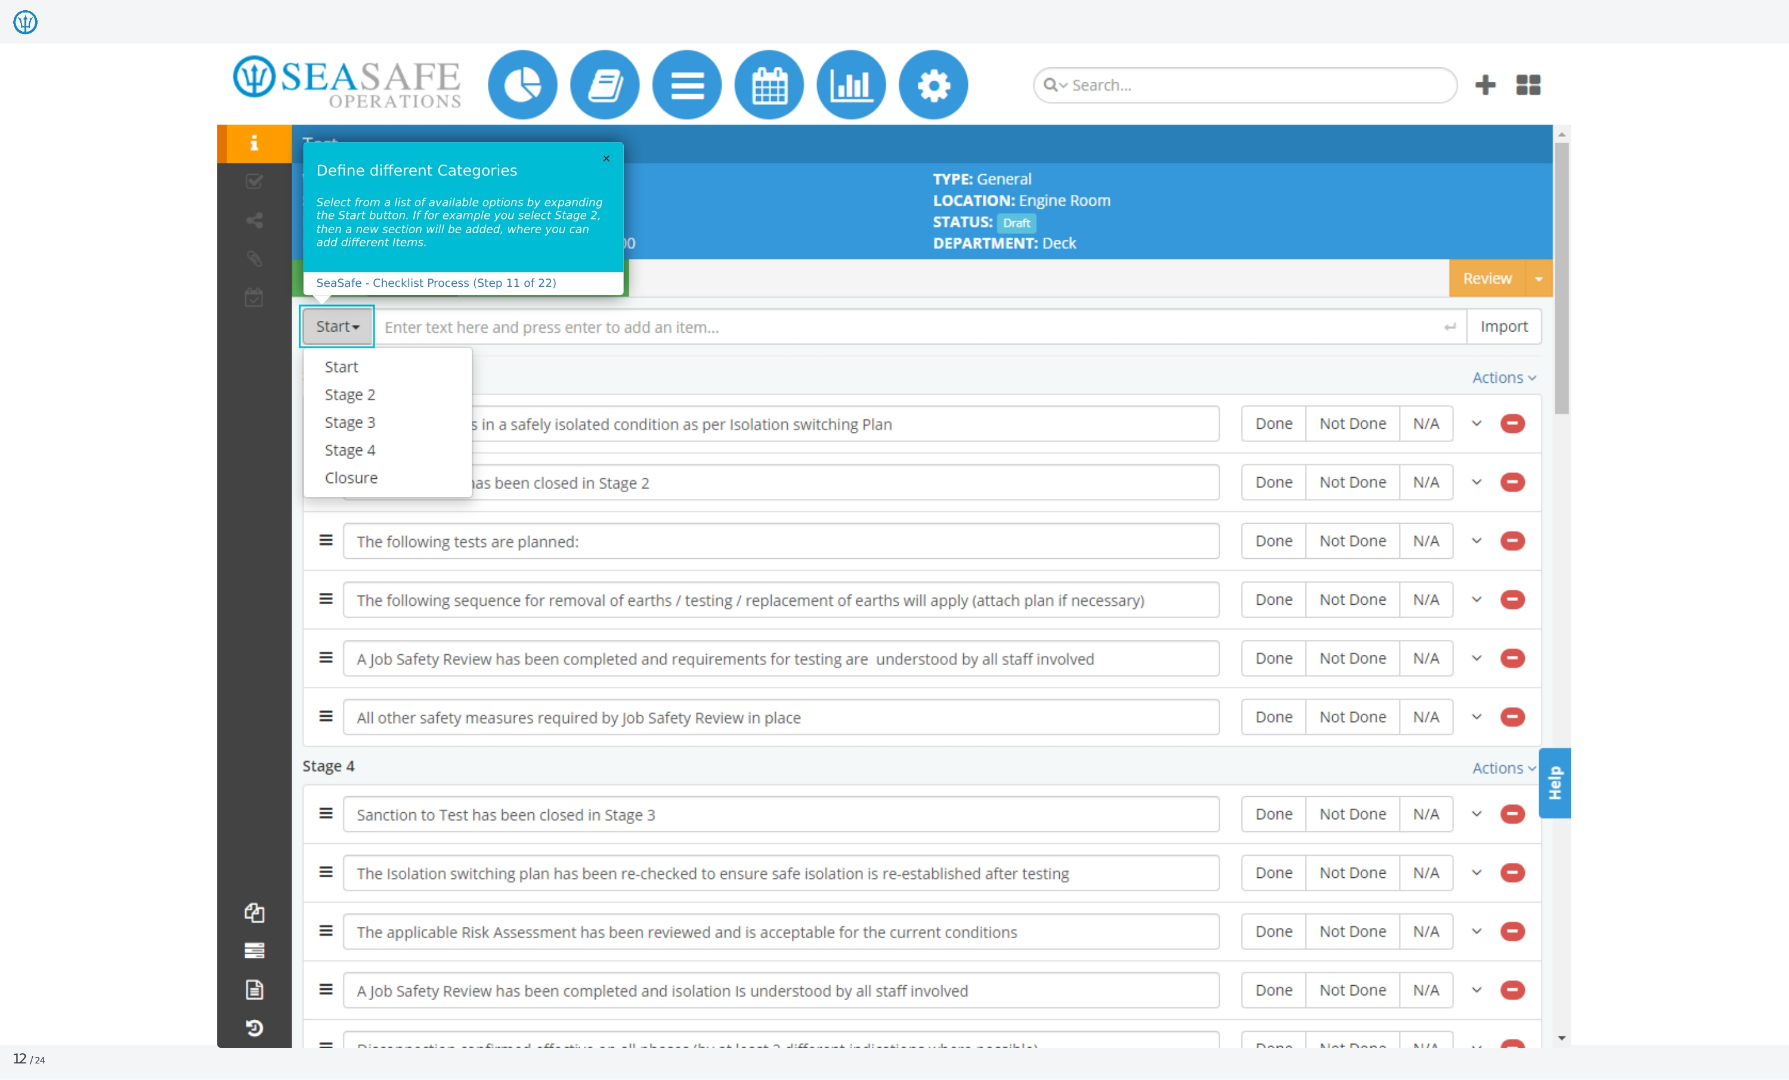
11. Defining Different Categories
Select from a list of available options by expanding the Start button. If, for example, you select Stage 2, then a new section will be added, where you can add different items.
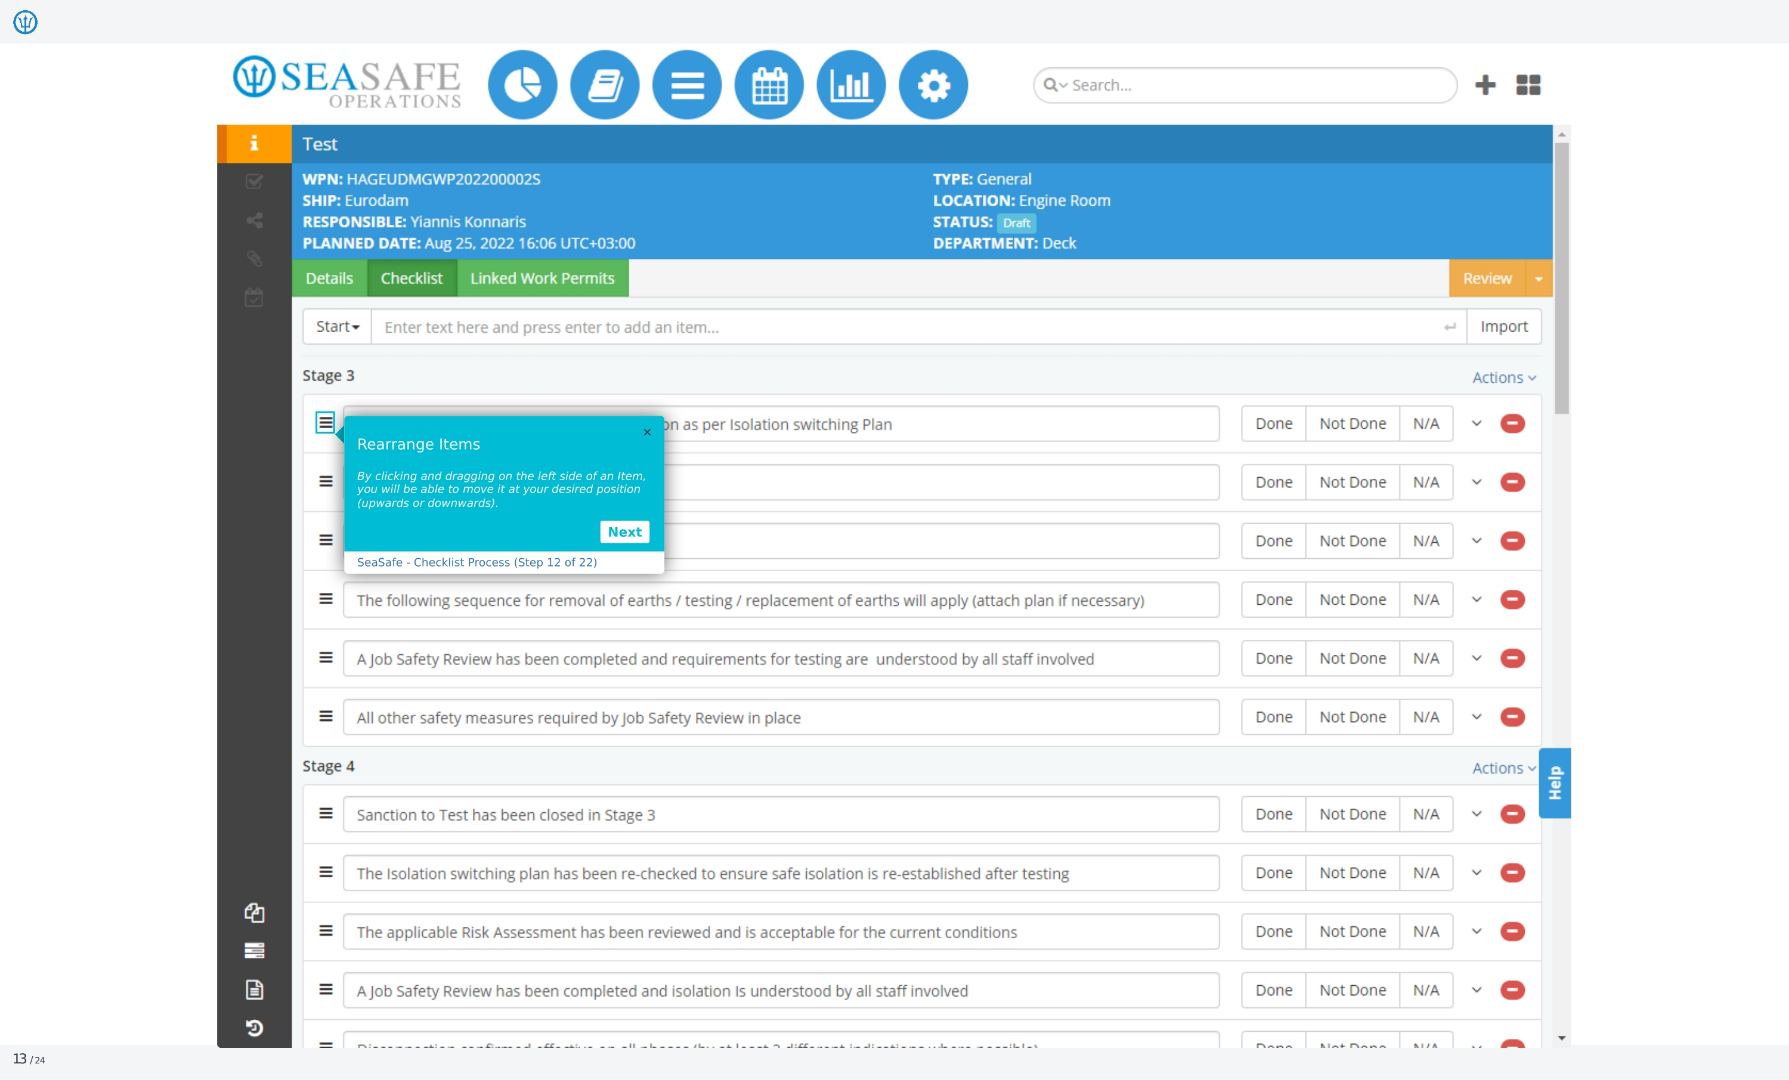
12. Rearranging Items
By clicking and dragging on the left side of an item, you will be able to move it at your desired position, upwards or downwards.
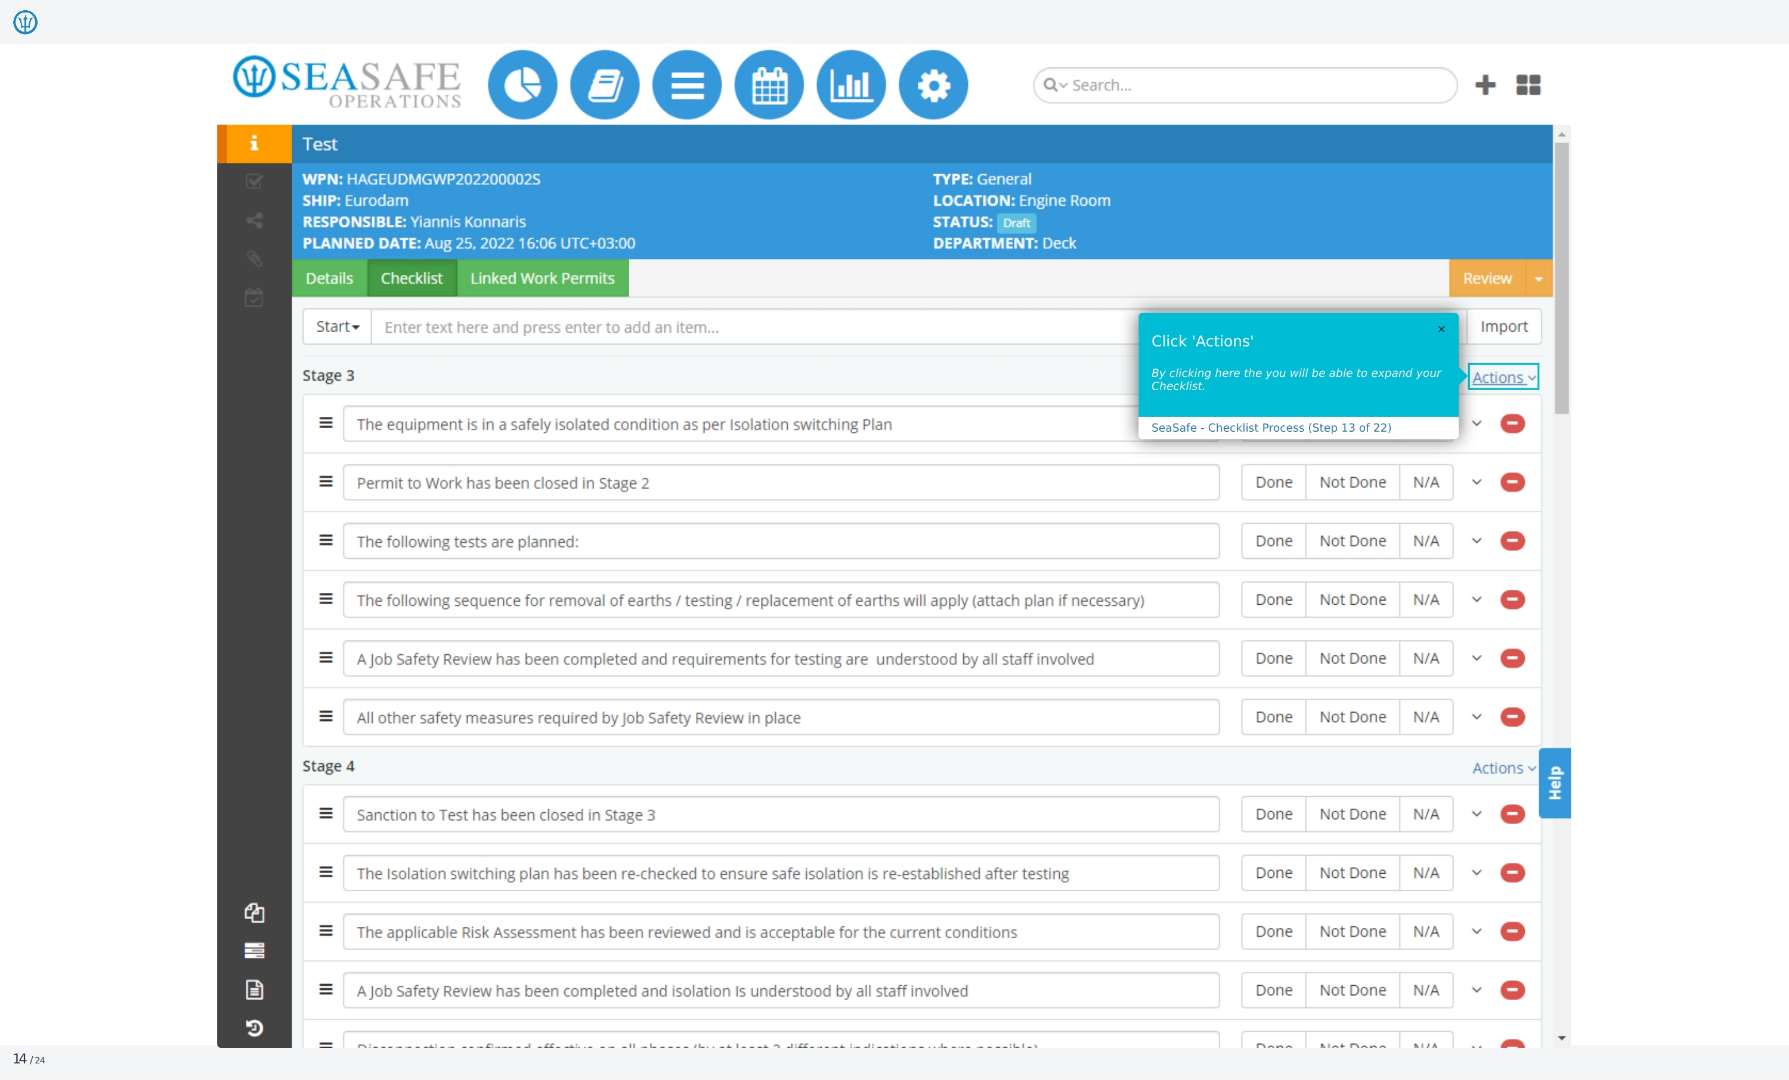
13. Accessing Actions
By clicking here, you will be able to expand your checklist.
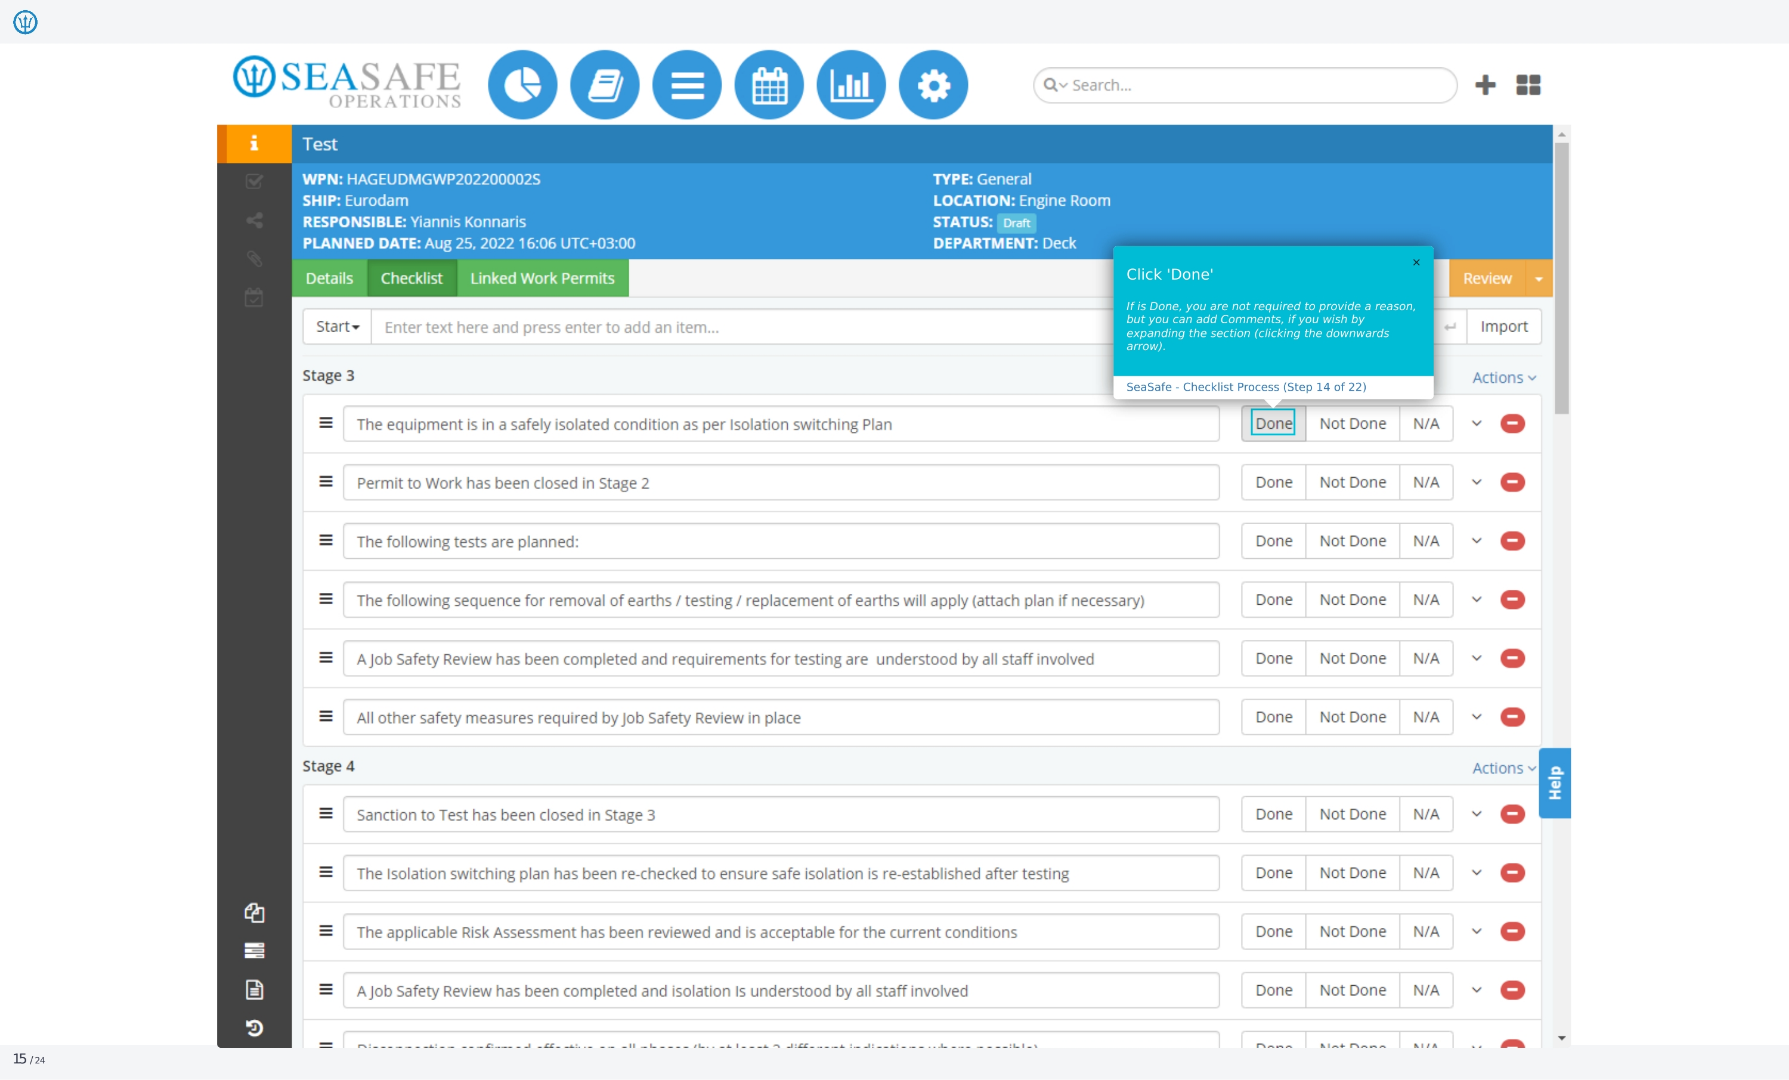
14. Marking Items as Done
If an item is done, you are not required to provide a reason, but you can add comments if you wish by expanding the section, clicking the downwards arrow.
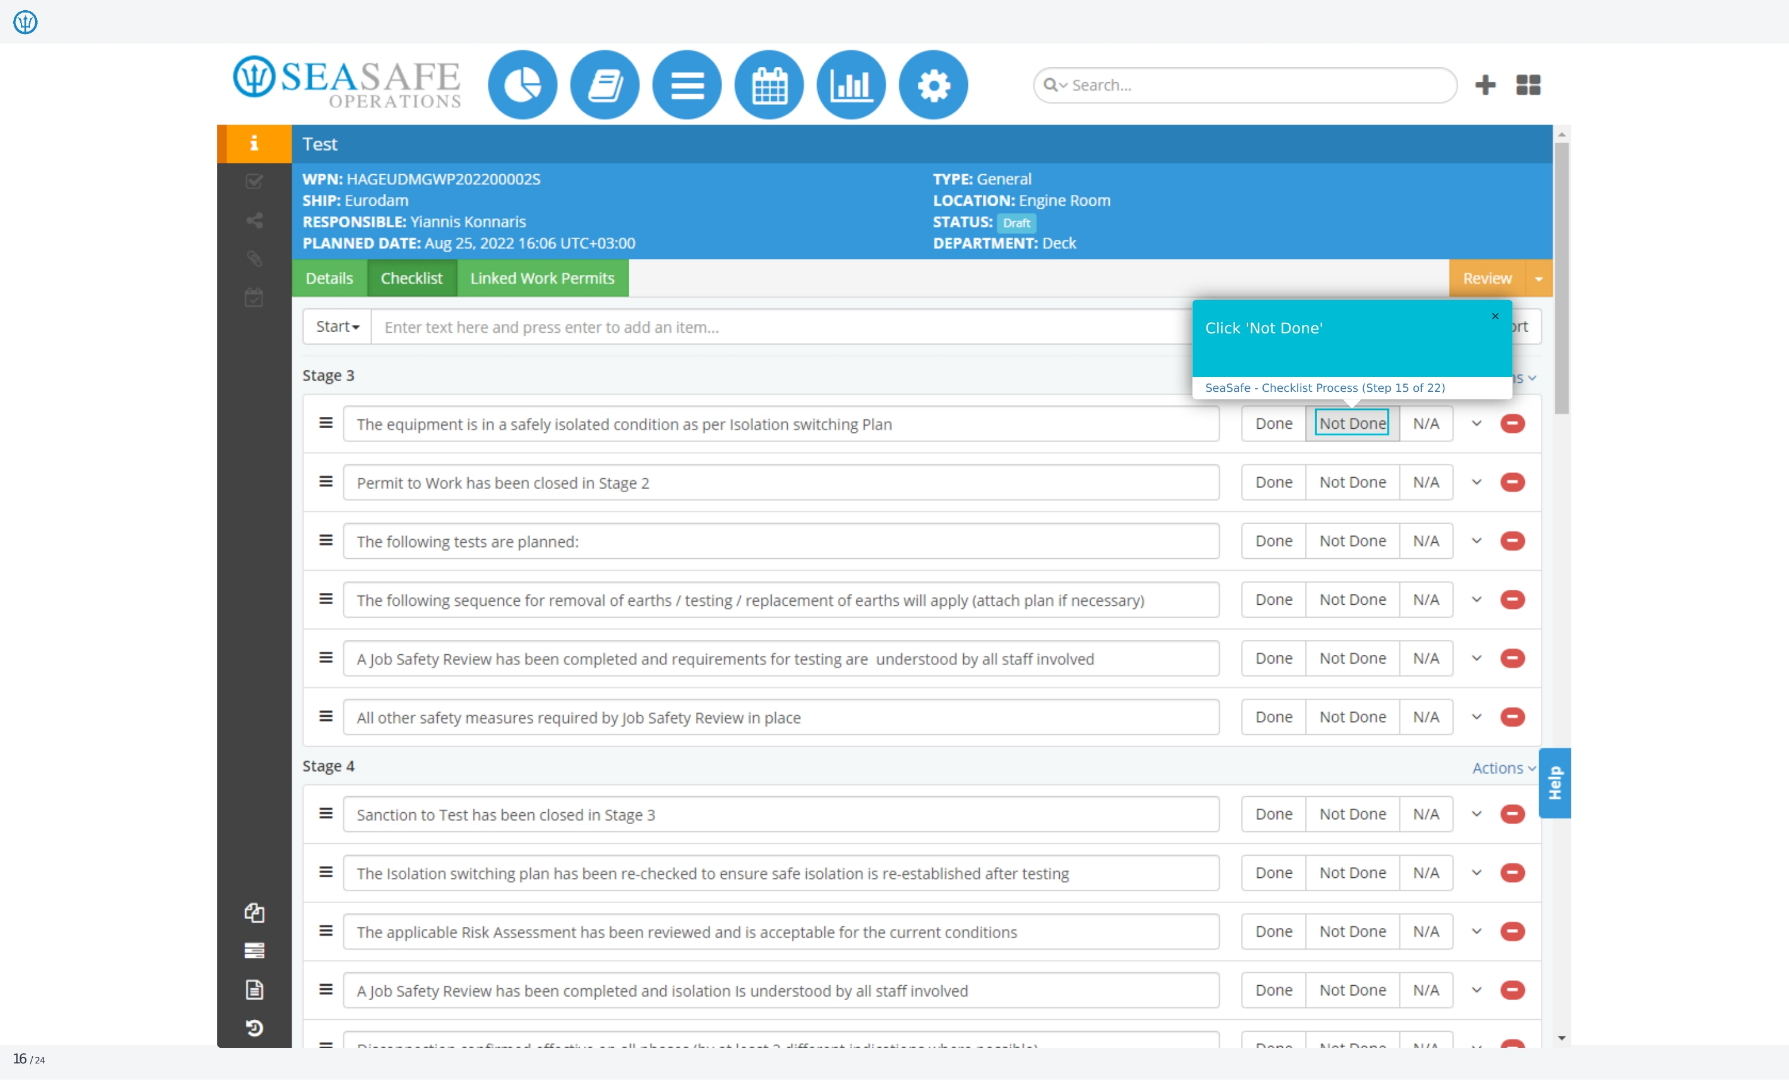
15. Marking Items as Not Done
Click 'Not Done'.
16. Entering Comments
The system will prompt you in providing a reason.

17. Selecting N/A
Click Not Applicable.

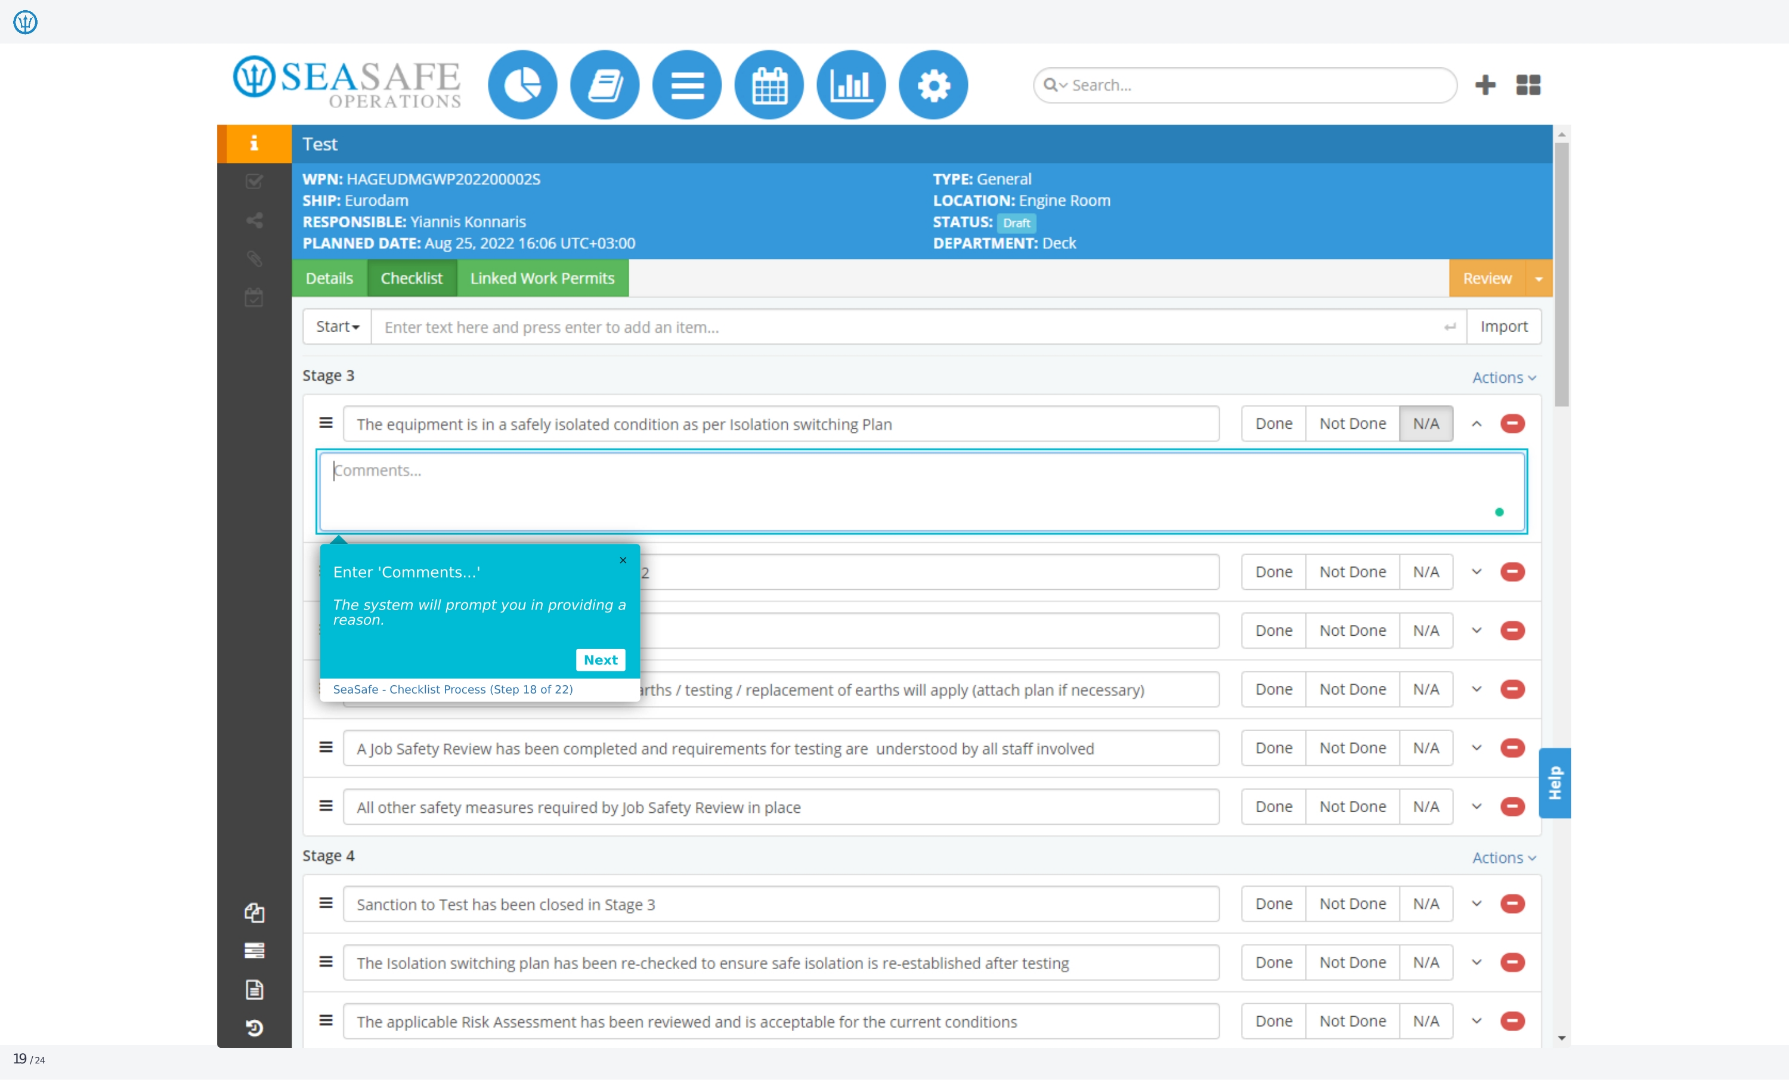
18. Entering Comments
The system will prompt you in providing a reason.
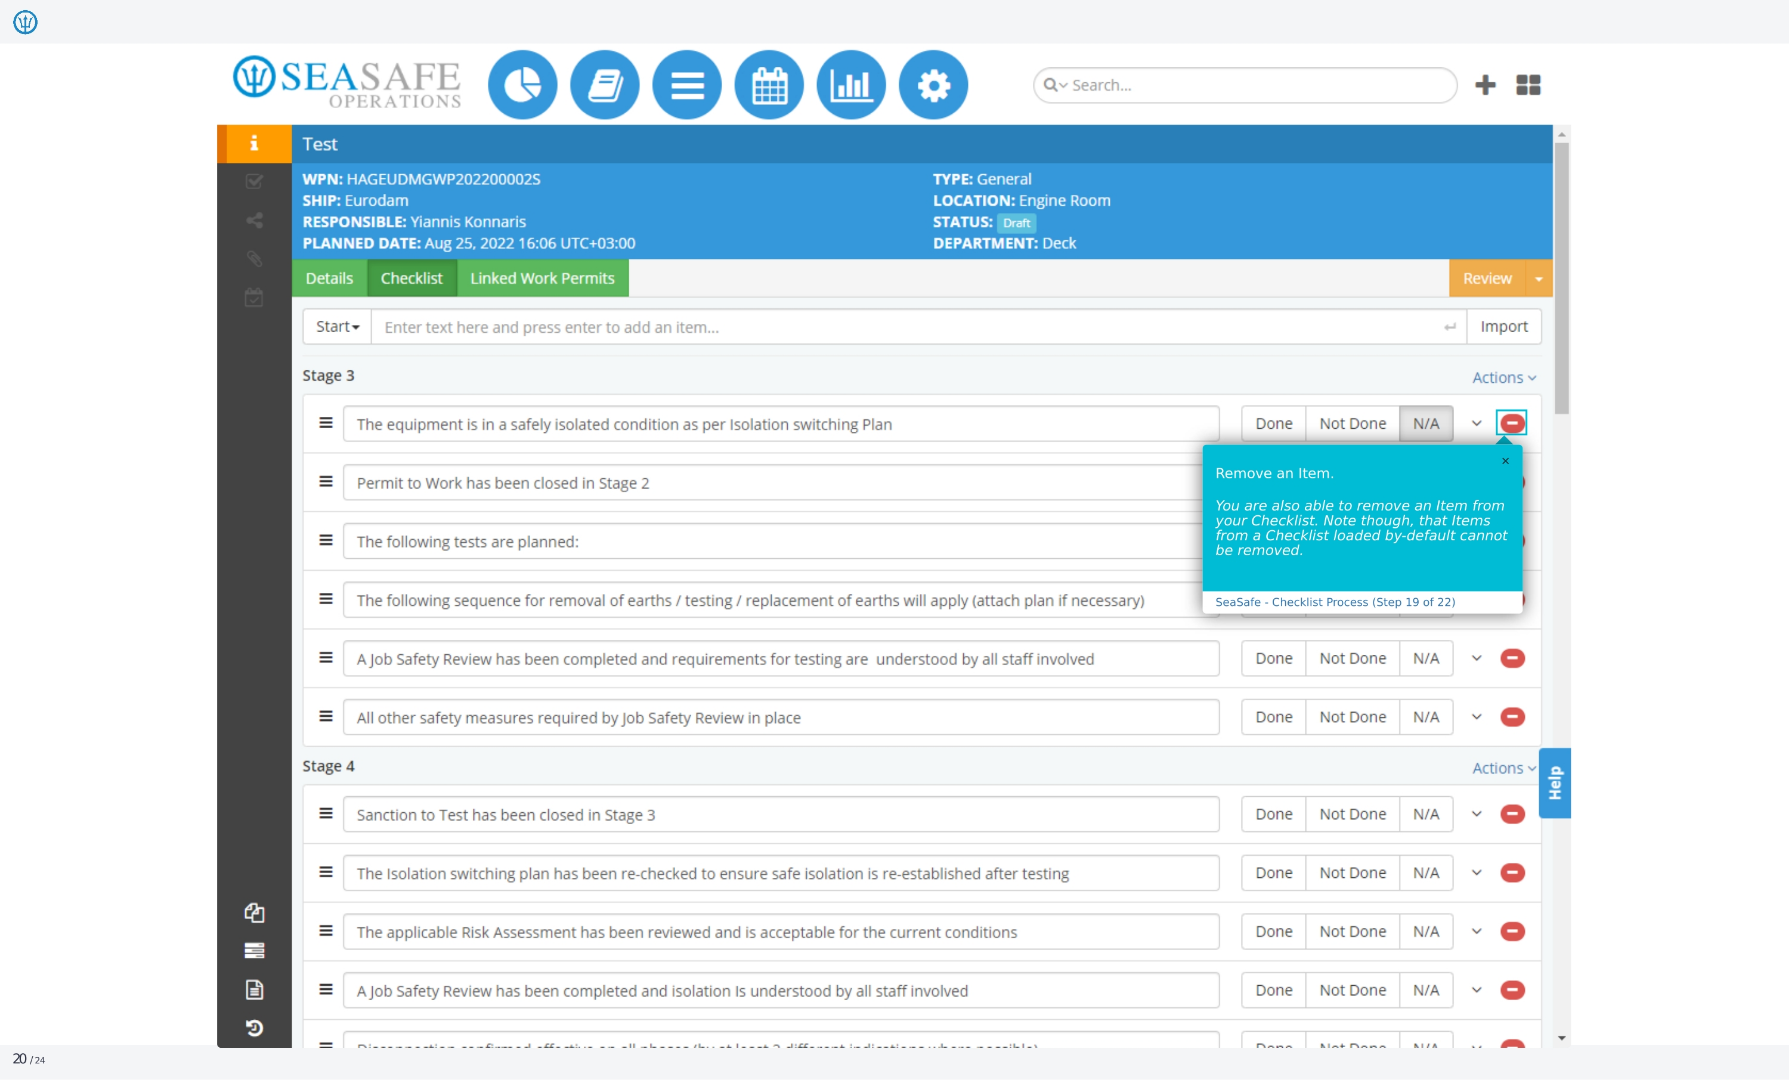
19. Removing an Item
You are also able to remove an item from your checklist. Note though, that items from a checklist loaded by default cannot be removed.
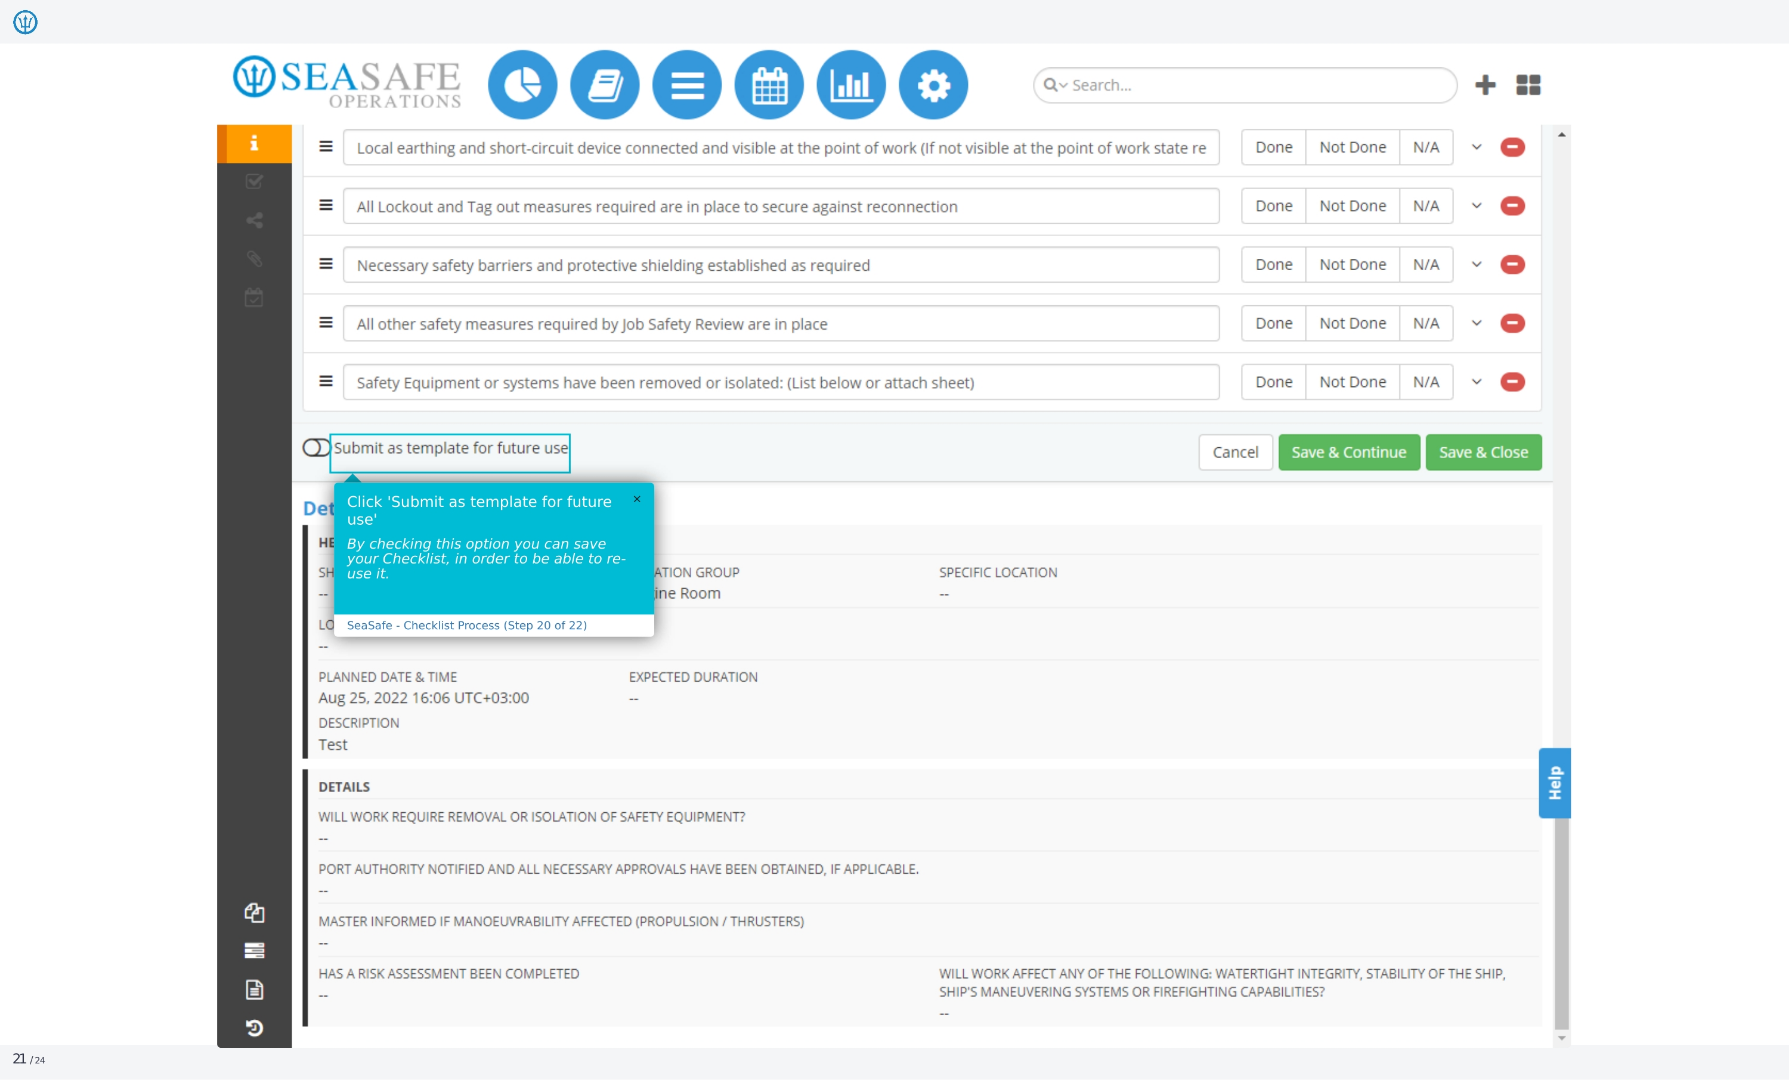
20. Submitting as Template
By checking this option, you can save your checklist in order to be able to reuse it.
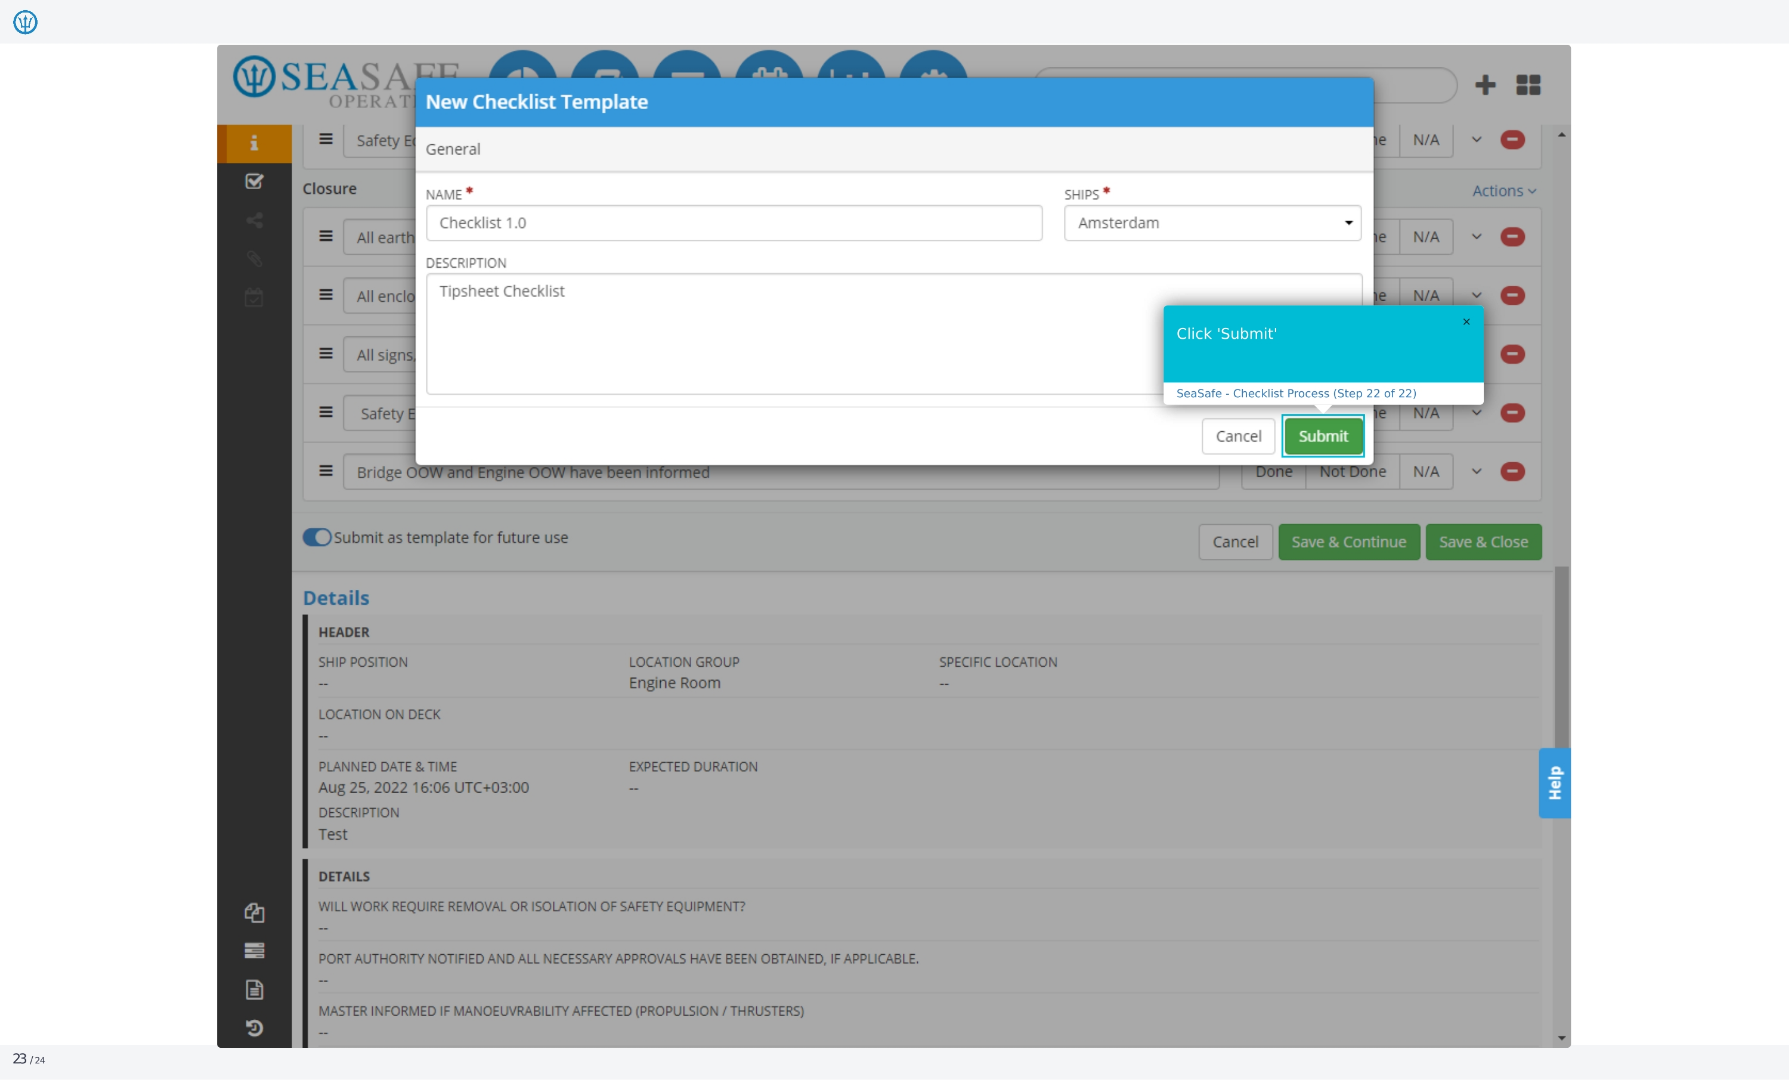
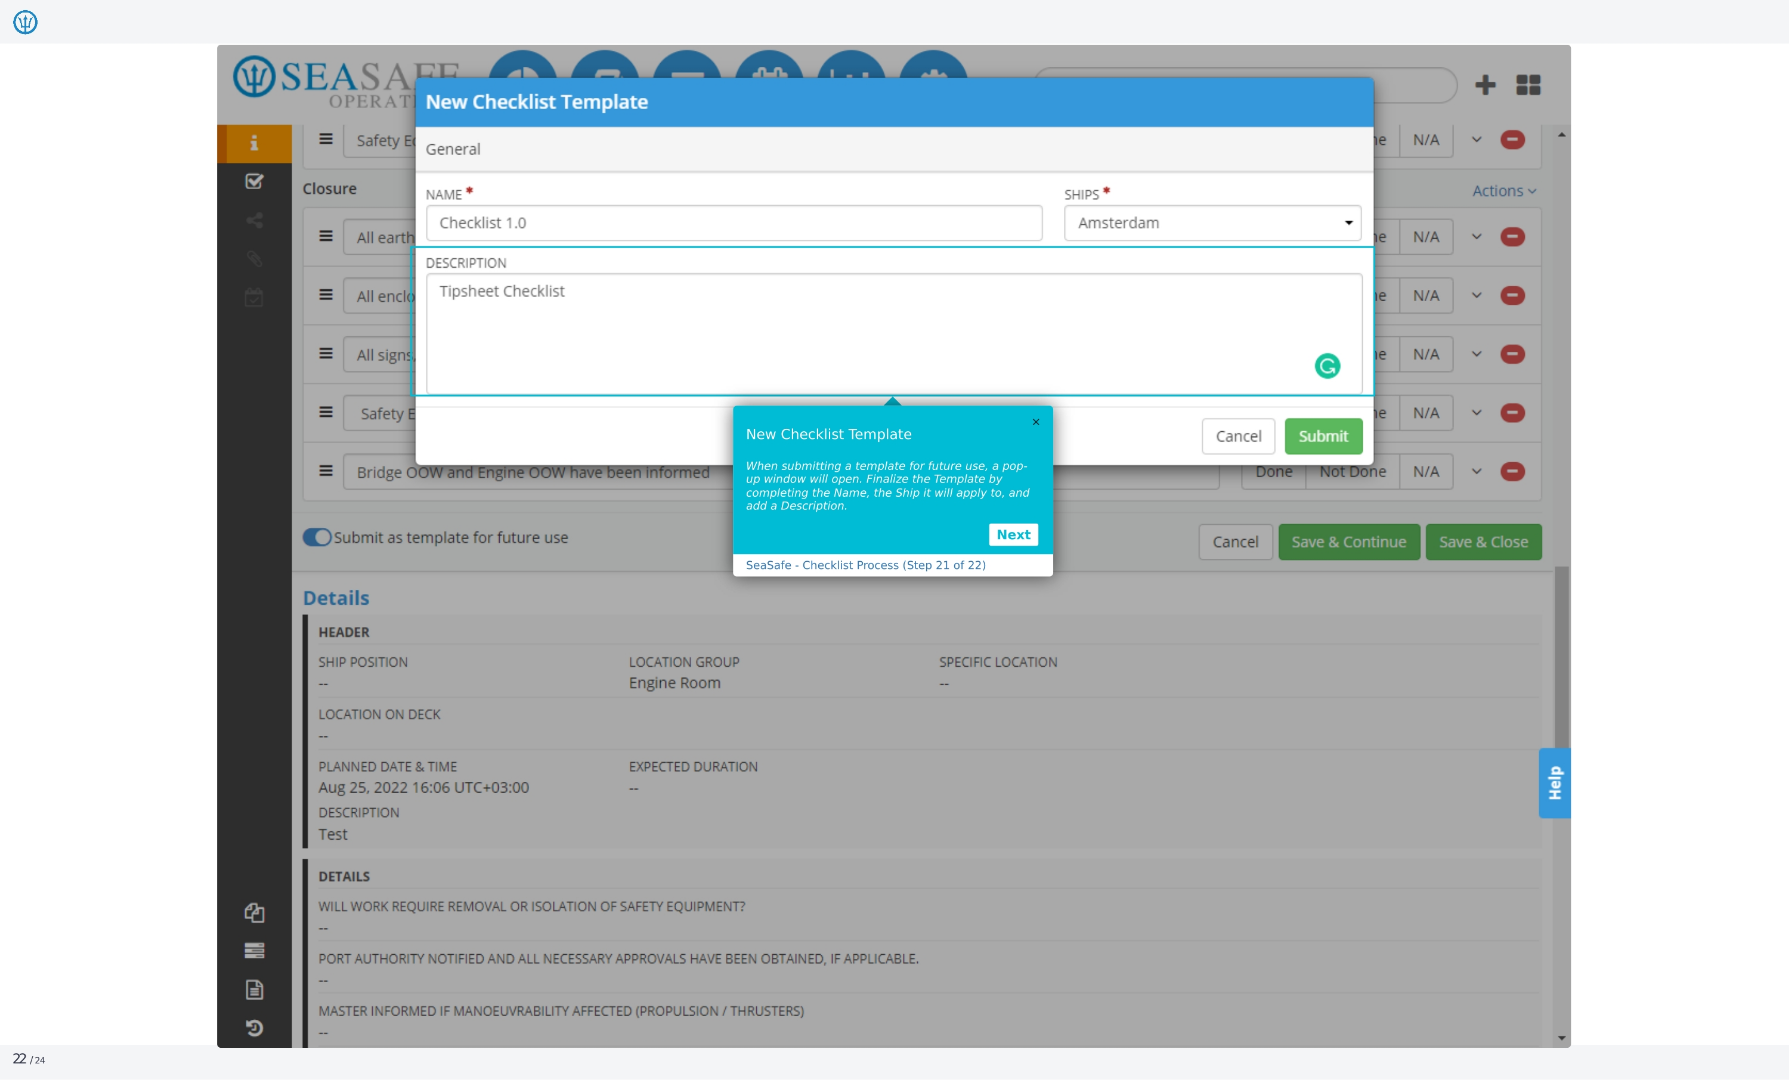
21. New Checklist Template
When submitting a template for future use, a pop-up window will open. Finalize the template by completing the name, the ship it will apply to, and add a description.
22. Click Submit
Click Submit.