New article
Recently updated
Add New Statuses and Transitions in the Workflow Editor

This walkthrough will show you how to add new statuses and transitions in the Workflow Editor, which is the backbone of Ideagen Maritime Management workflows. Statuses represent stages in a process (for example, Draft, Review, Approved), and transitions define how the workflow moves between these stages. Configuring them correctly ensures smooth routing, proper approvals.
1. Introduction
Start in the shoreside "Admin Menu" in the "Types, Fields, and Workflows" under the "Workflow" tab.
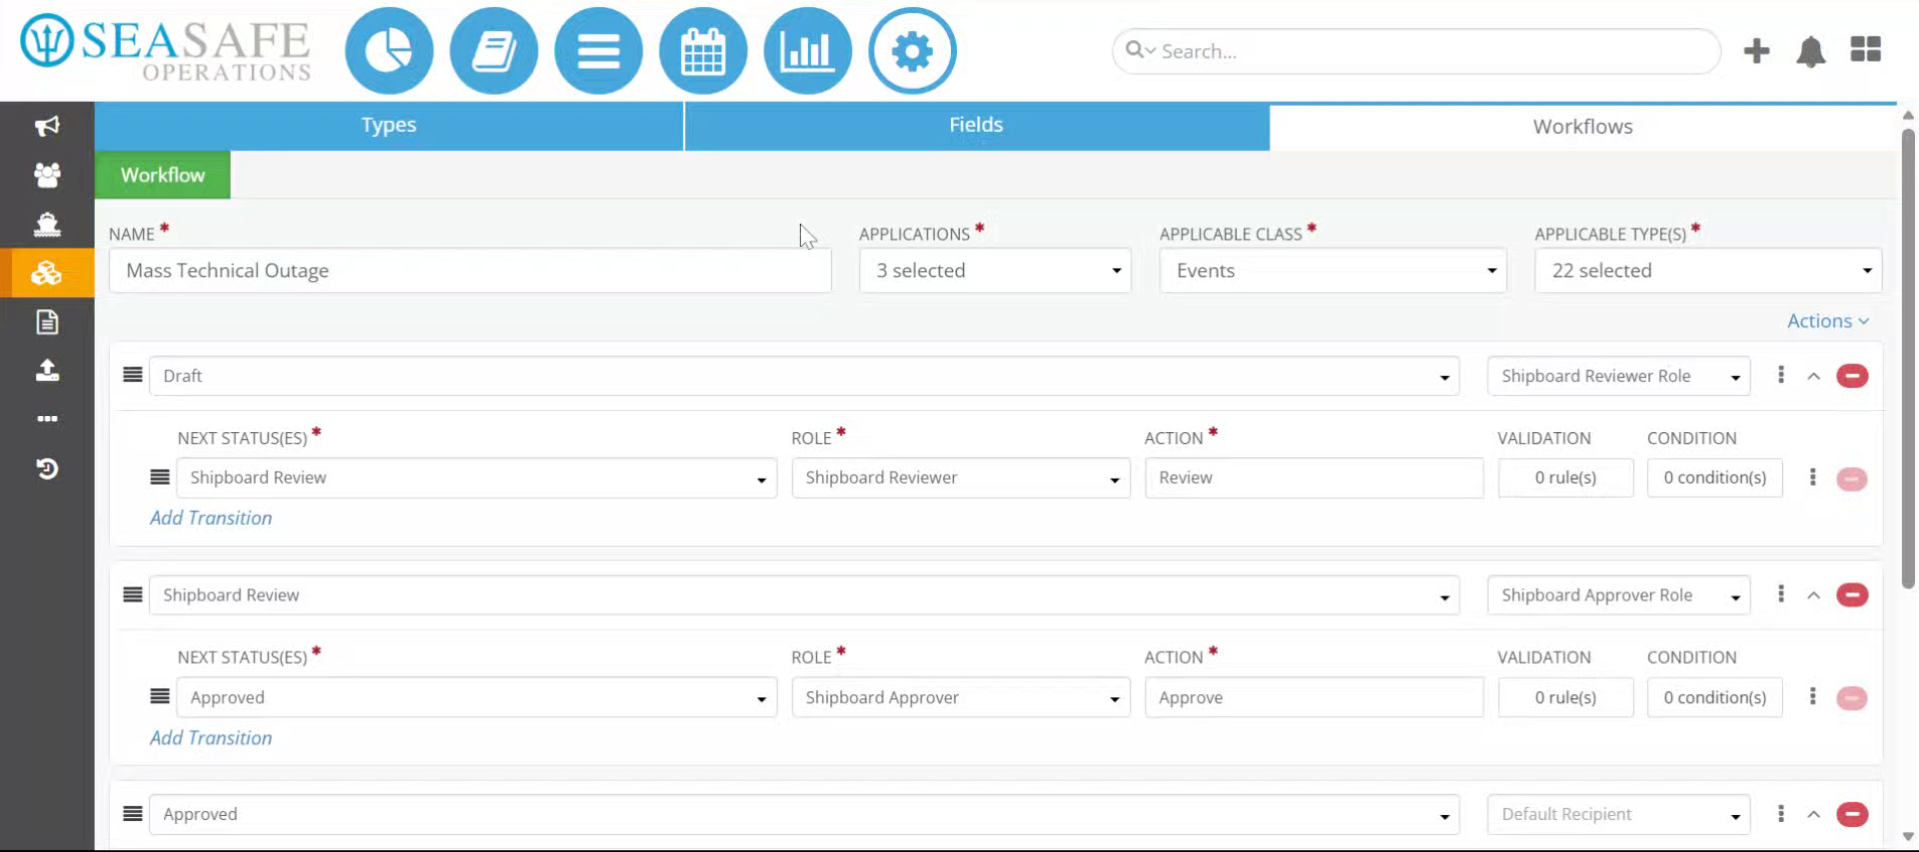
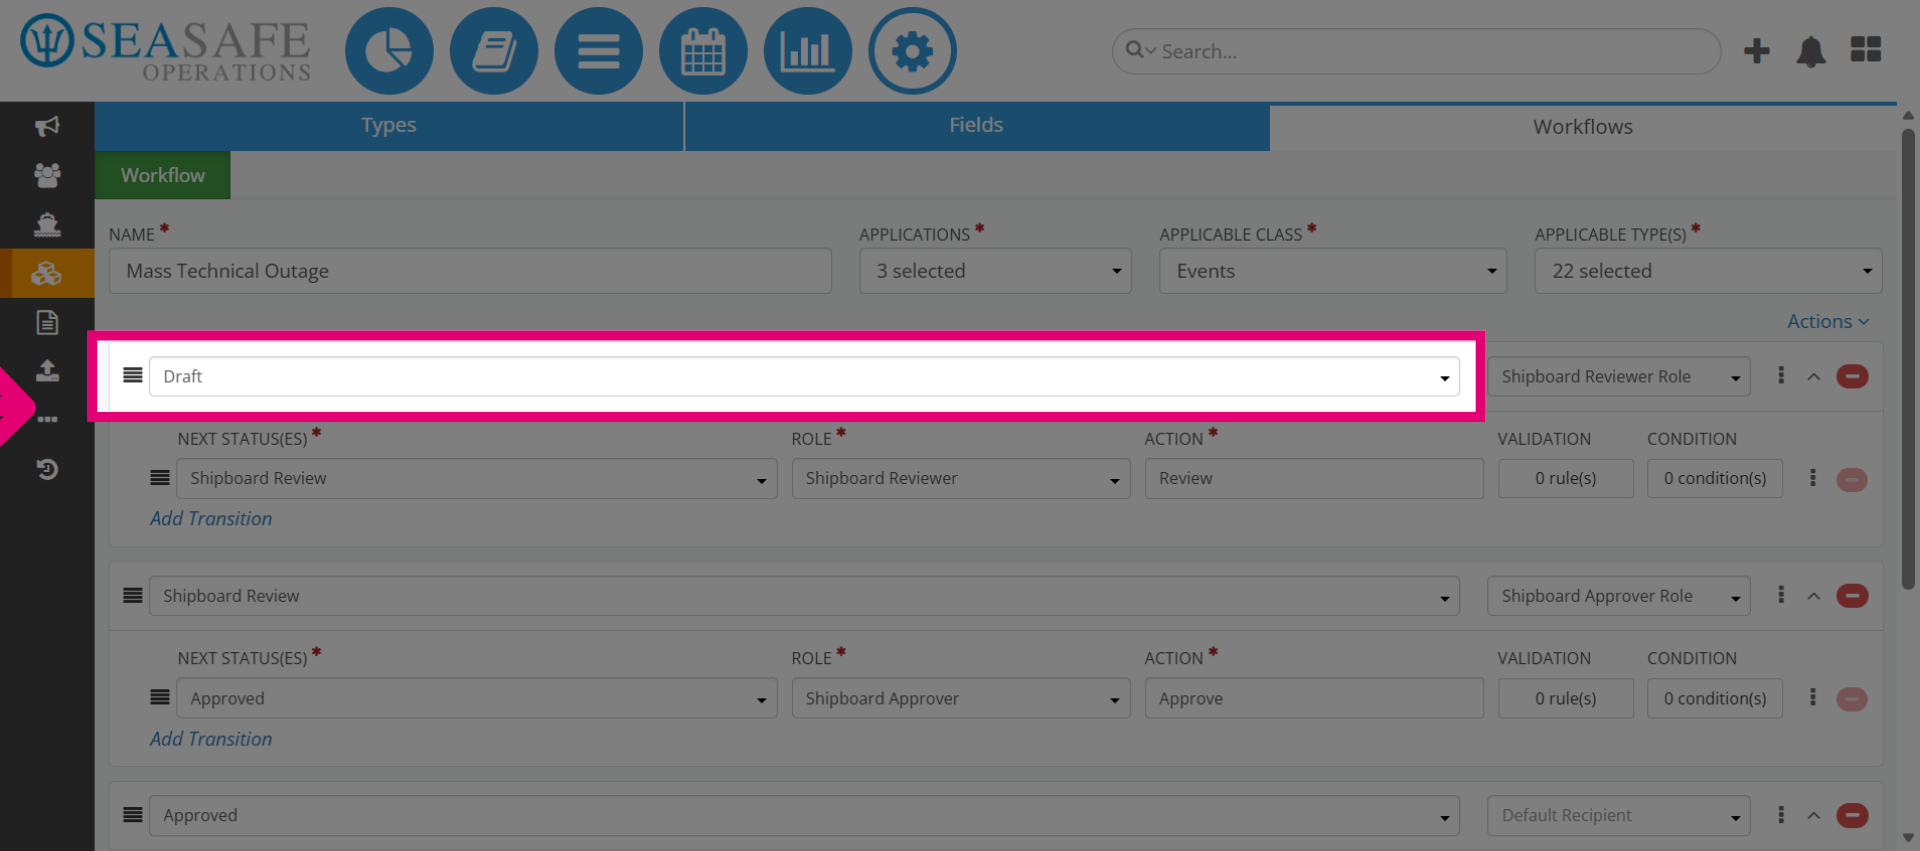
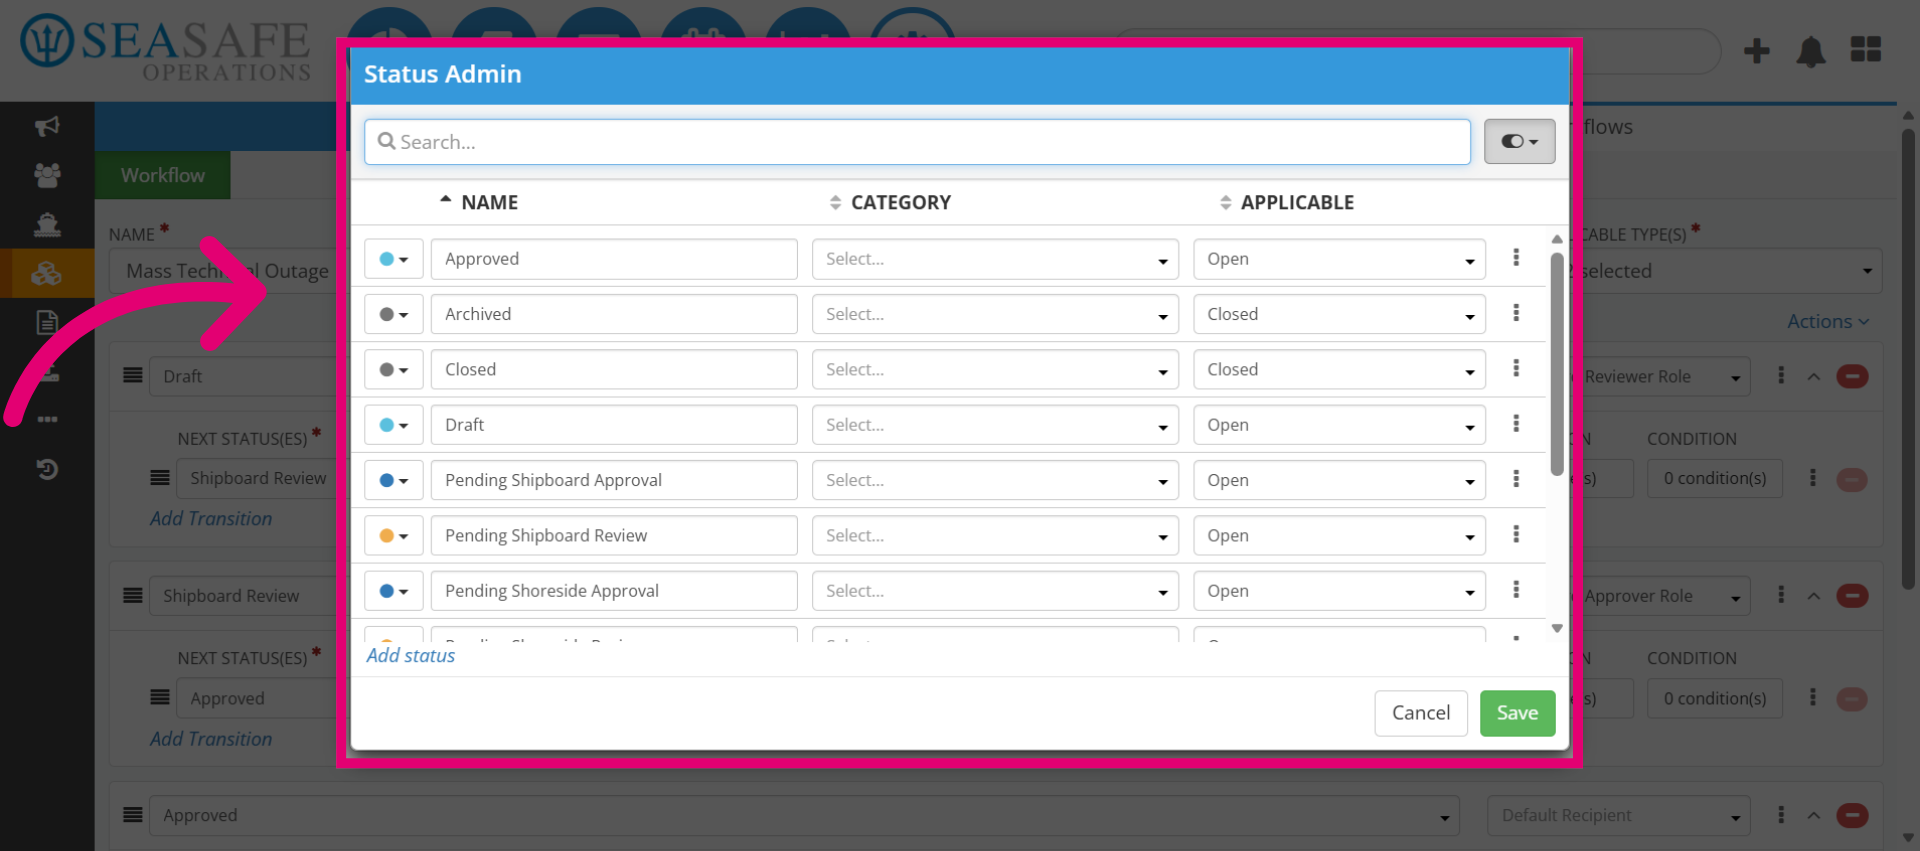
2. Open Draft Status
Start by clicking the "Draft" status to begin editing the workflow. You do this because Draft is usually the starting point for most workflows. Opening it allows you to review existing configurations before adding new statuses.
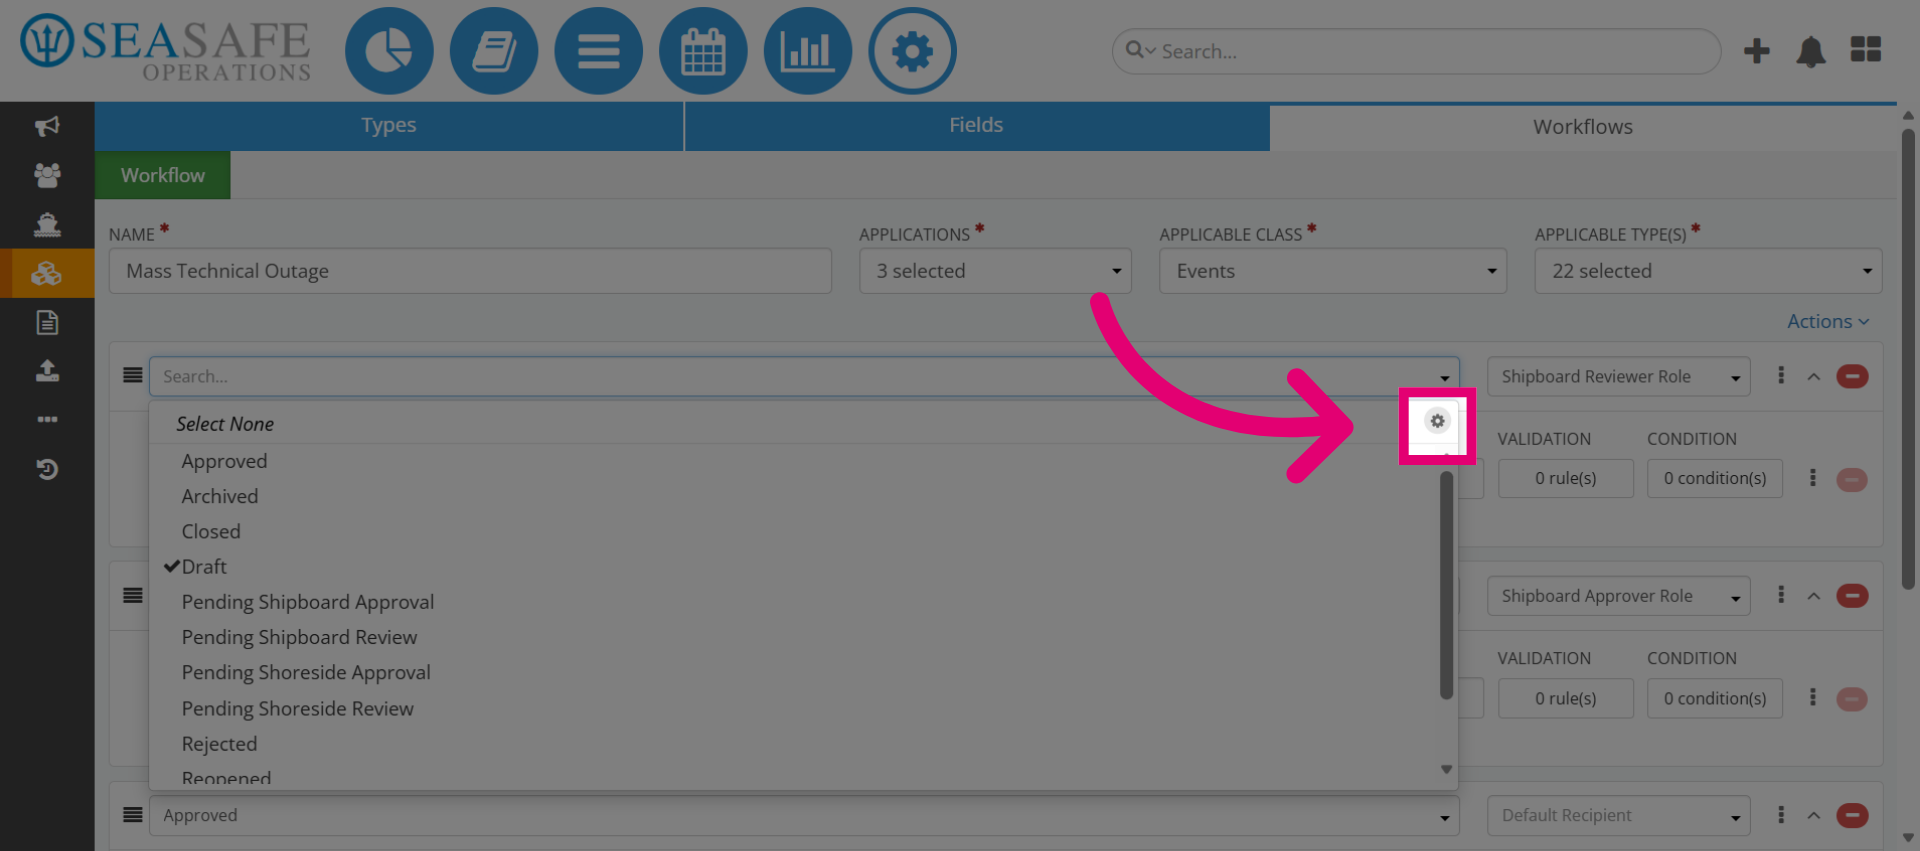
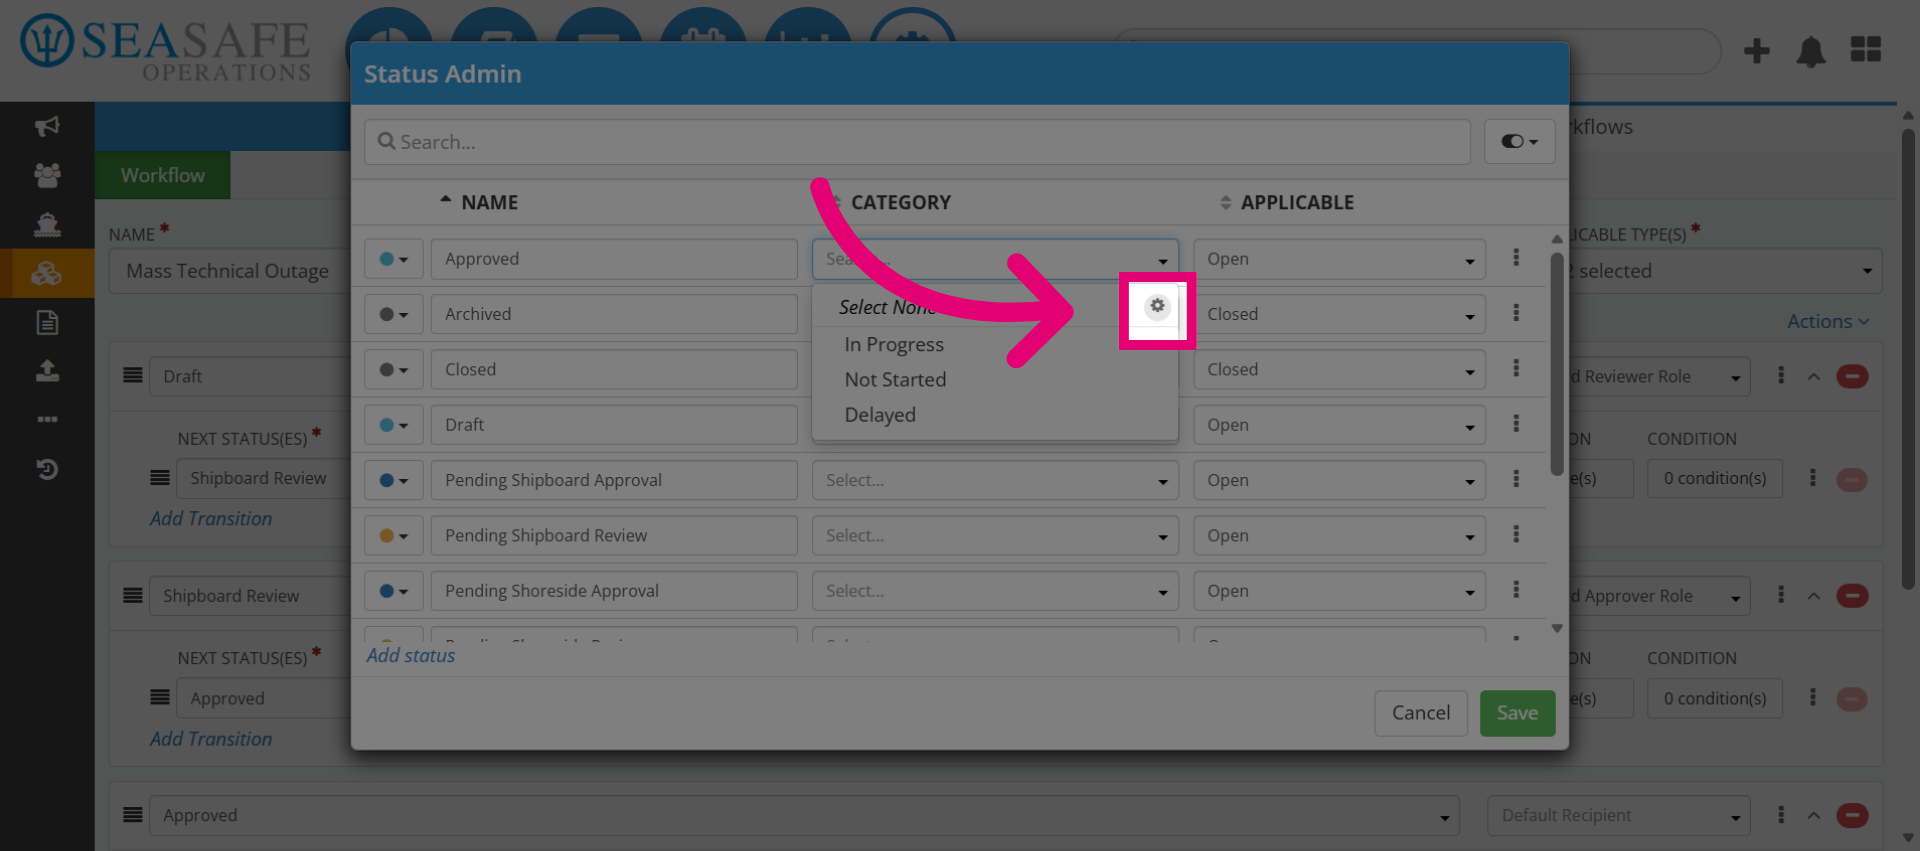
3. Access Workflow Settings
Then, click the settings gear to open the settings for a status. This is where you manage details like category, name, and permissions for each status.
4. Open Status Configuration
Here you can access the status configurations. This is whereStatus configuration ensures each stage is properly labeled and categorized for reporting and routing.
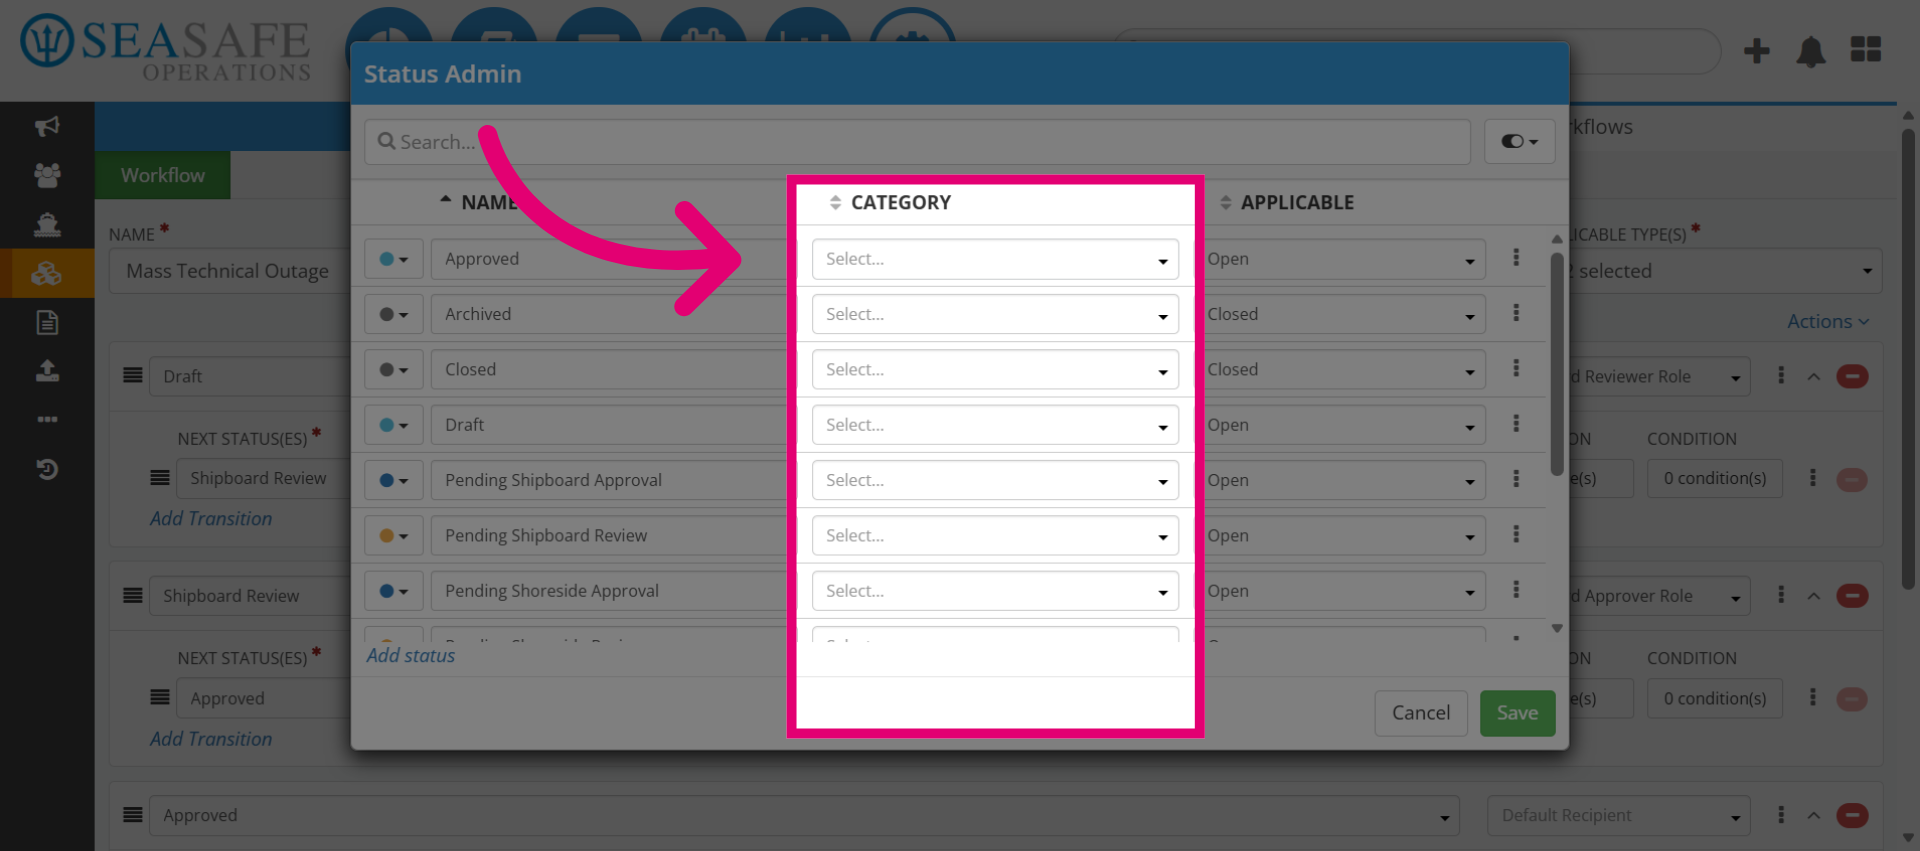
5. Open Status Selection Menu
Now click on a status to open the category menu. Categories help organize statuses into logical groups (for example, Open, Closed, Pending).
6. Access Category Management
View and manage status categories. This helps Categories improve clarity and reporting by grouping similar statuses together.

7. Access Category Management
Next, lick the settings gear and select Add Category to create a new category.
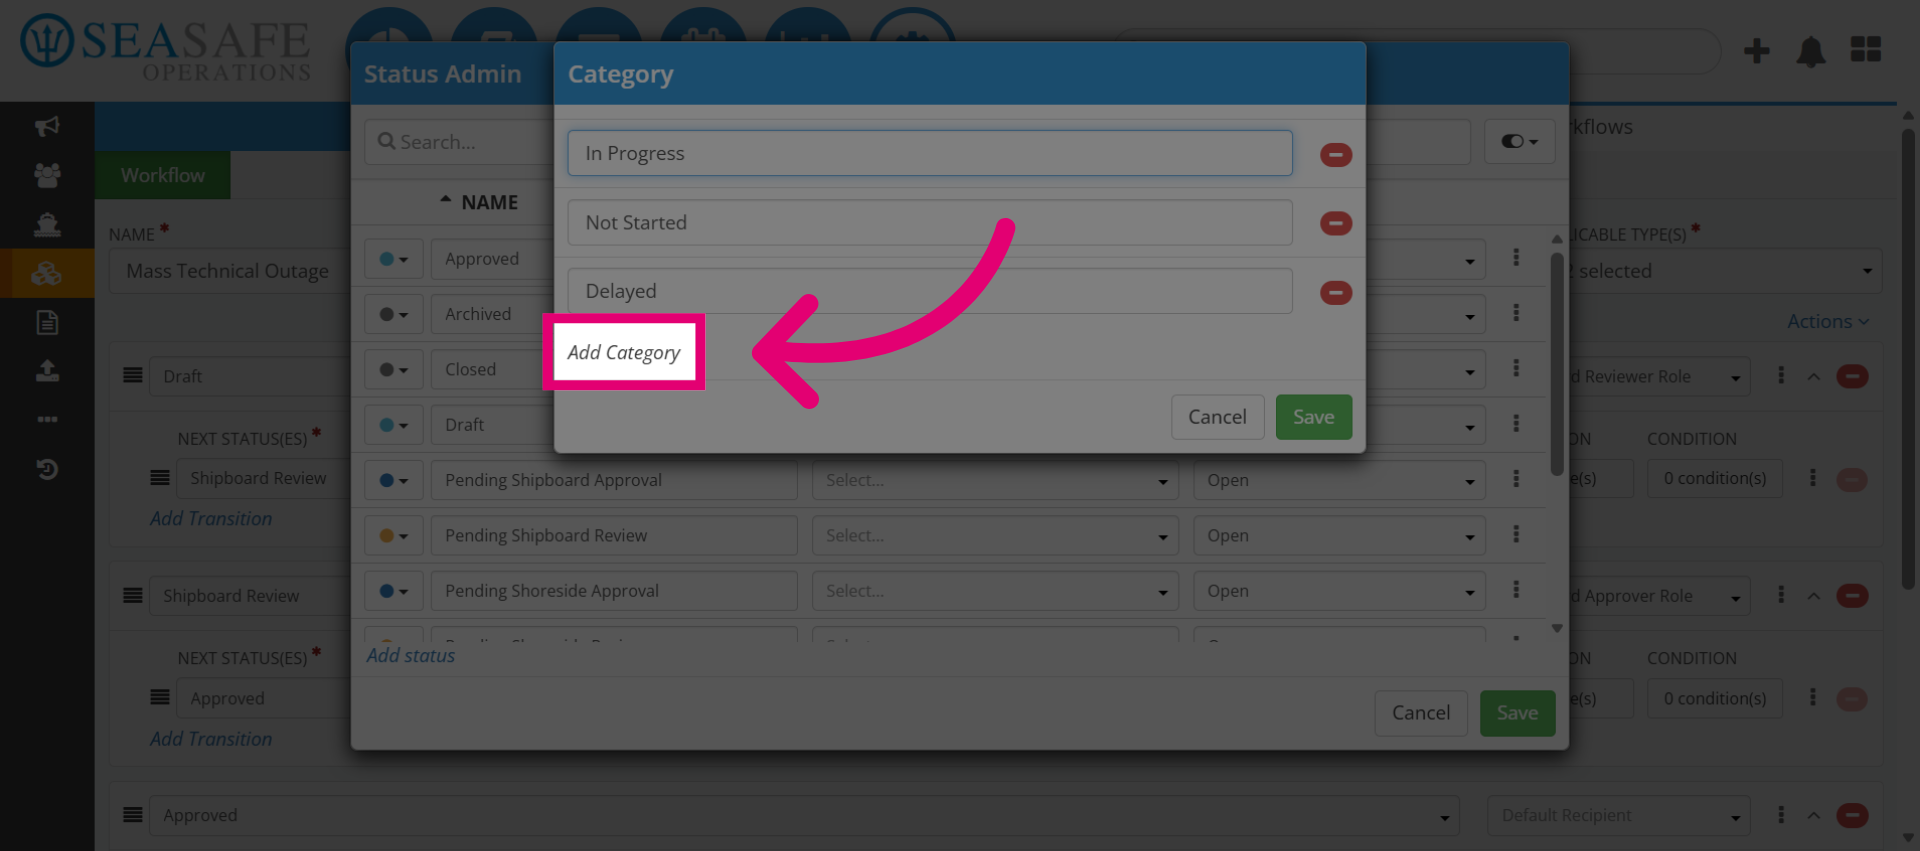
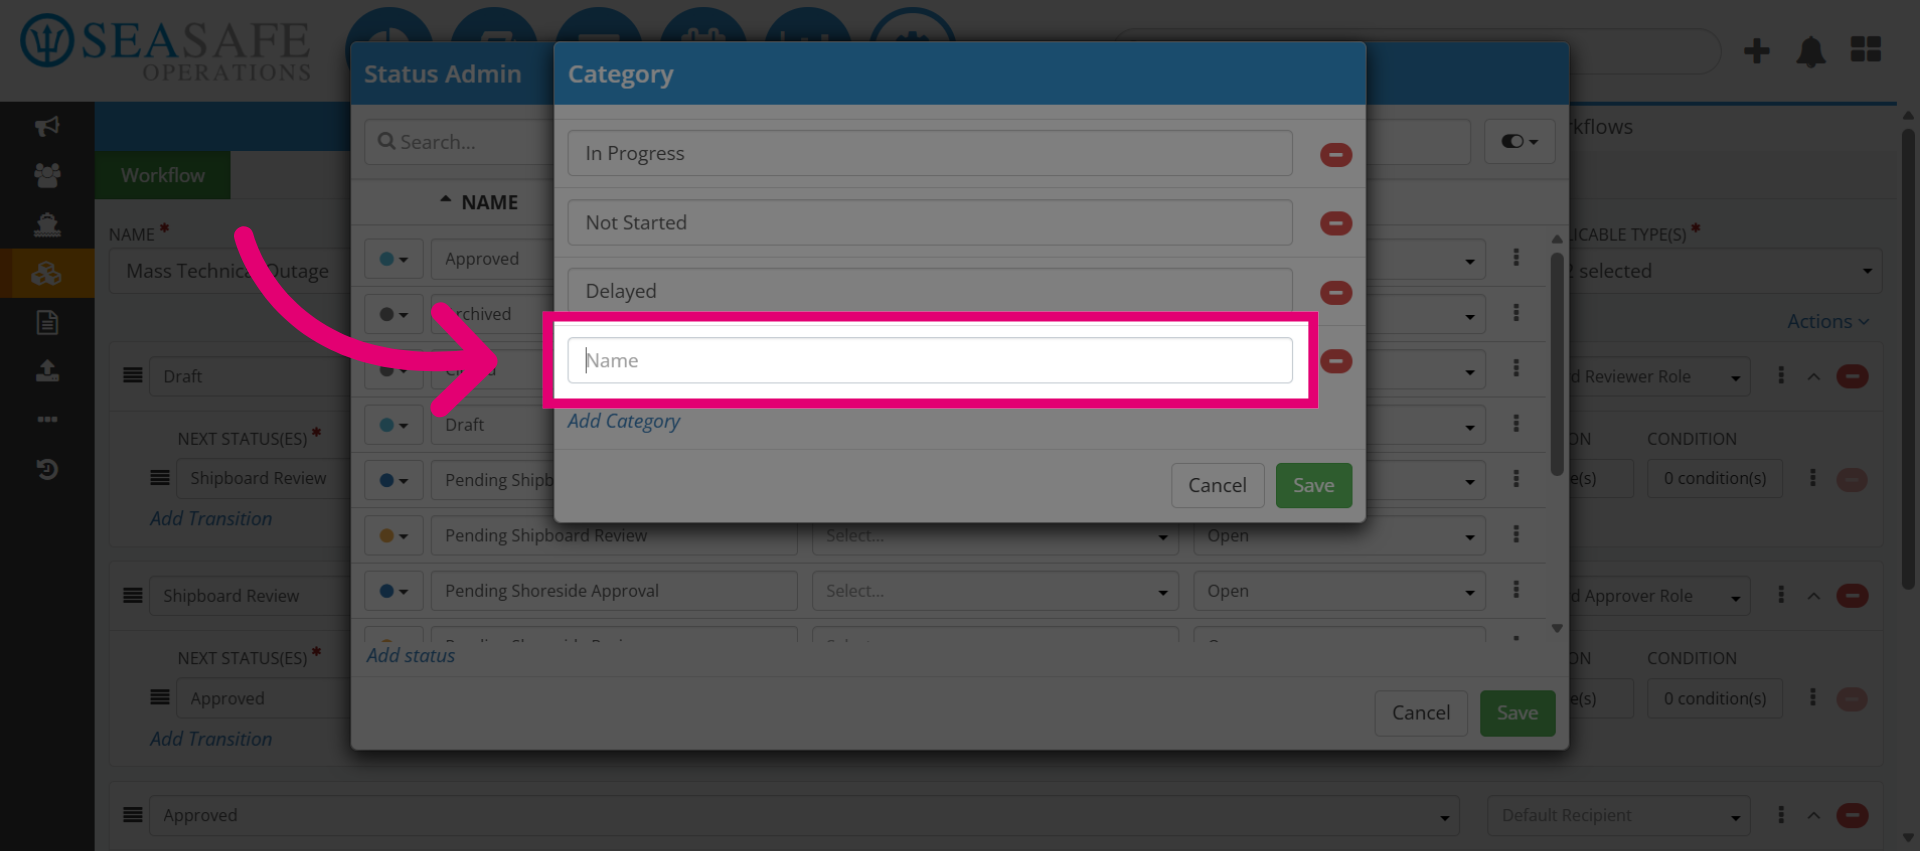
8. Add New Category
Then, click "Add Category".
9. Add a Name
Here, enter the category name (for example, "Pending"). Why: Clear names help users understand workflow stages at a glance.
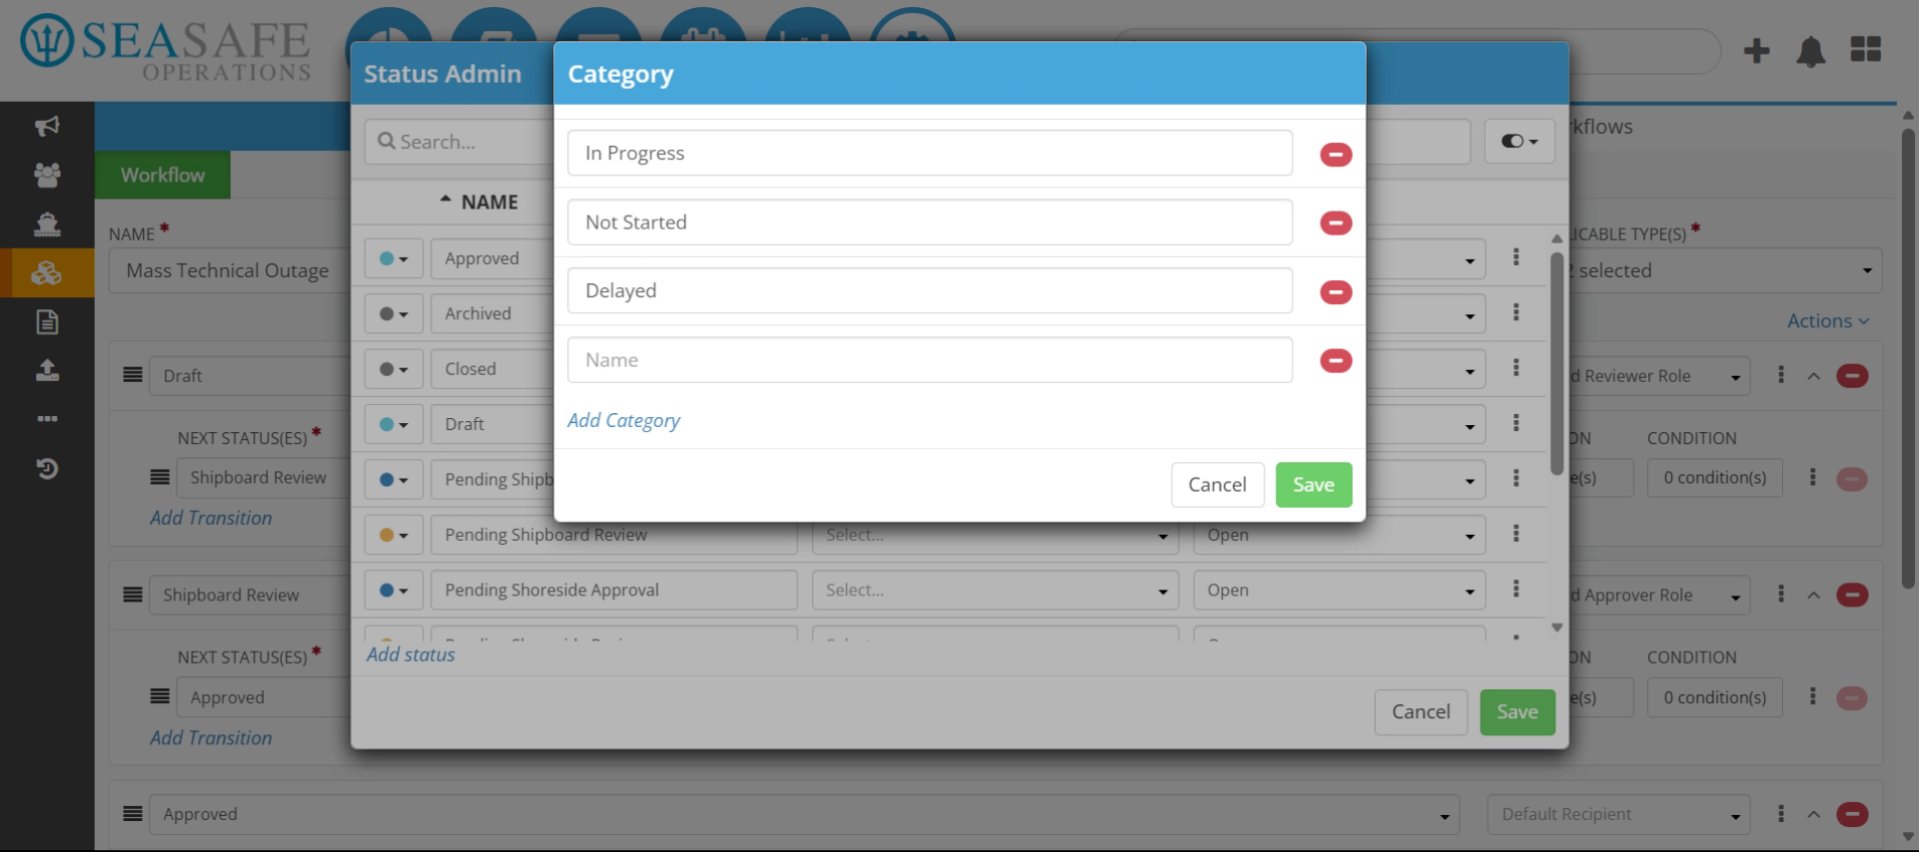
10. Enter Category Name
Then, review and confirm the category name accuracy.
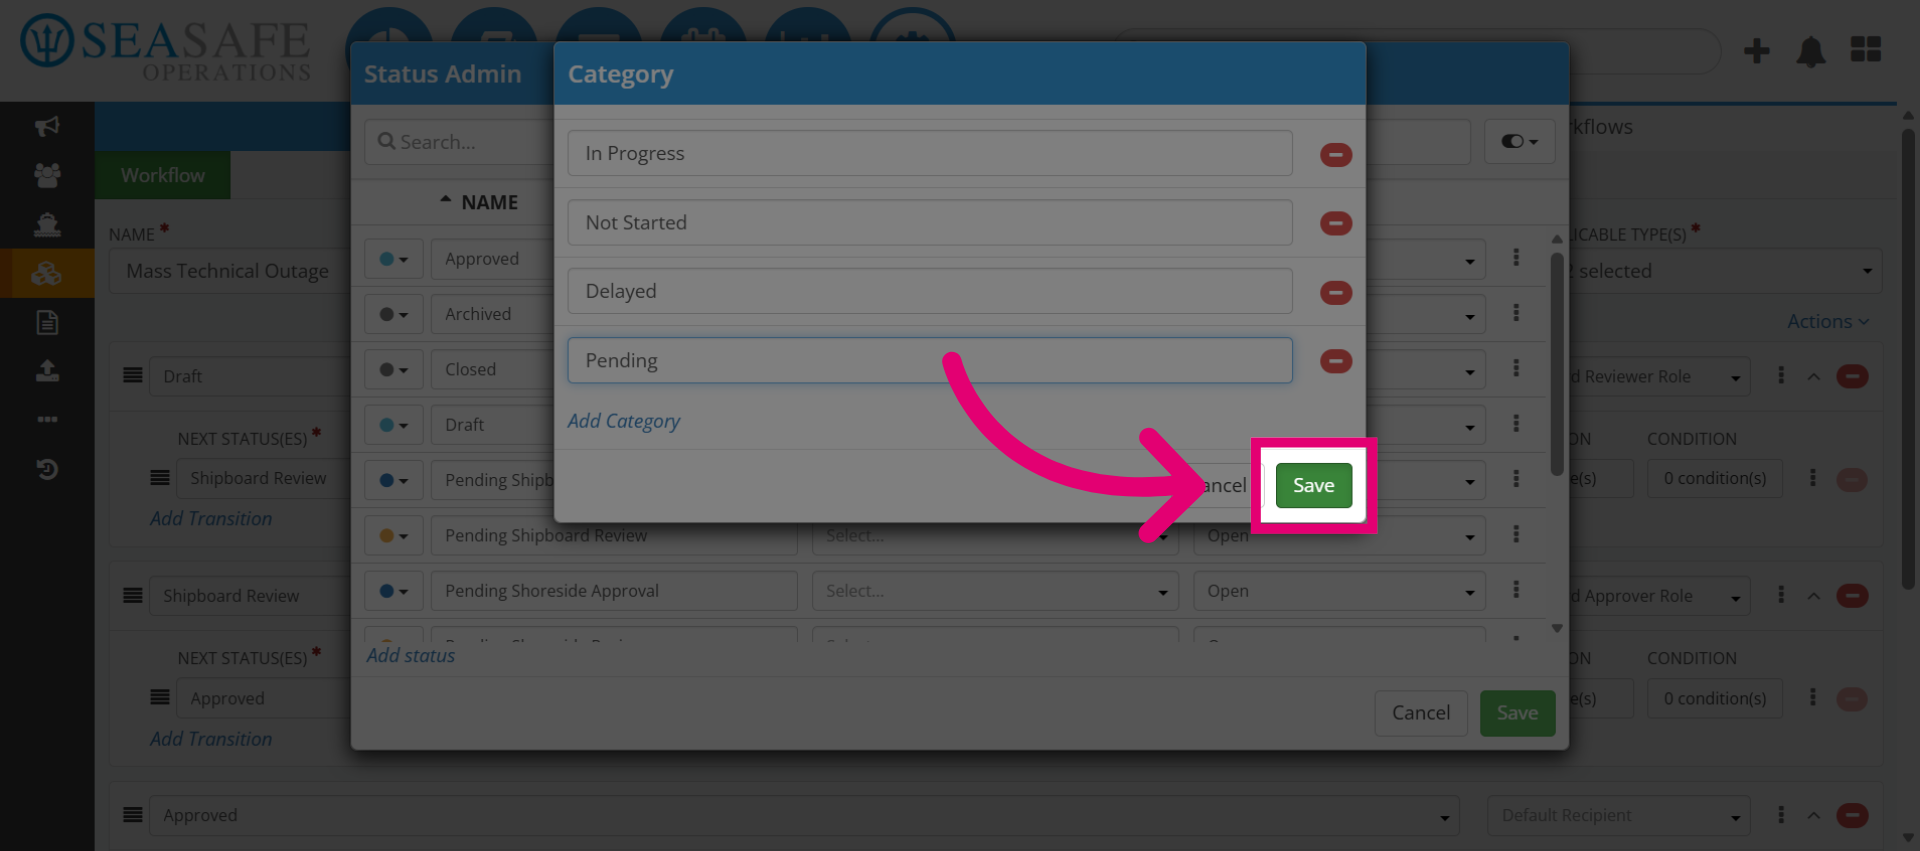
11. Save New Category
Next, click "Save" to store the new status category.
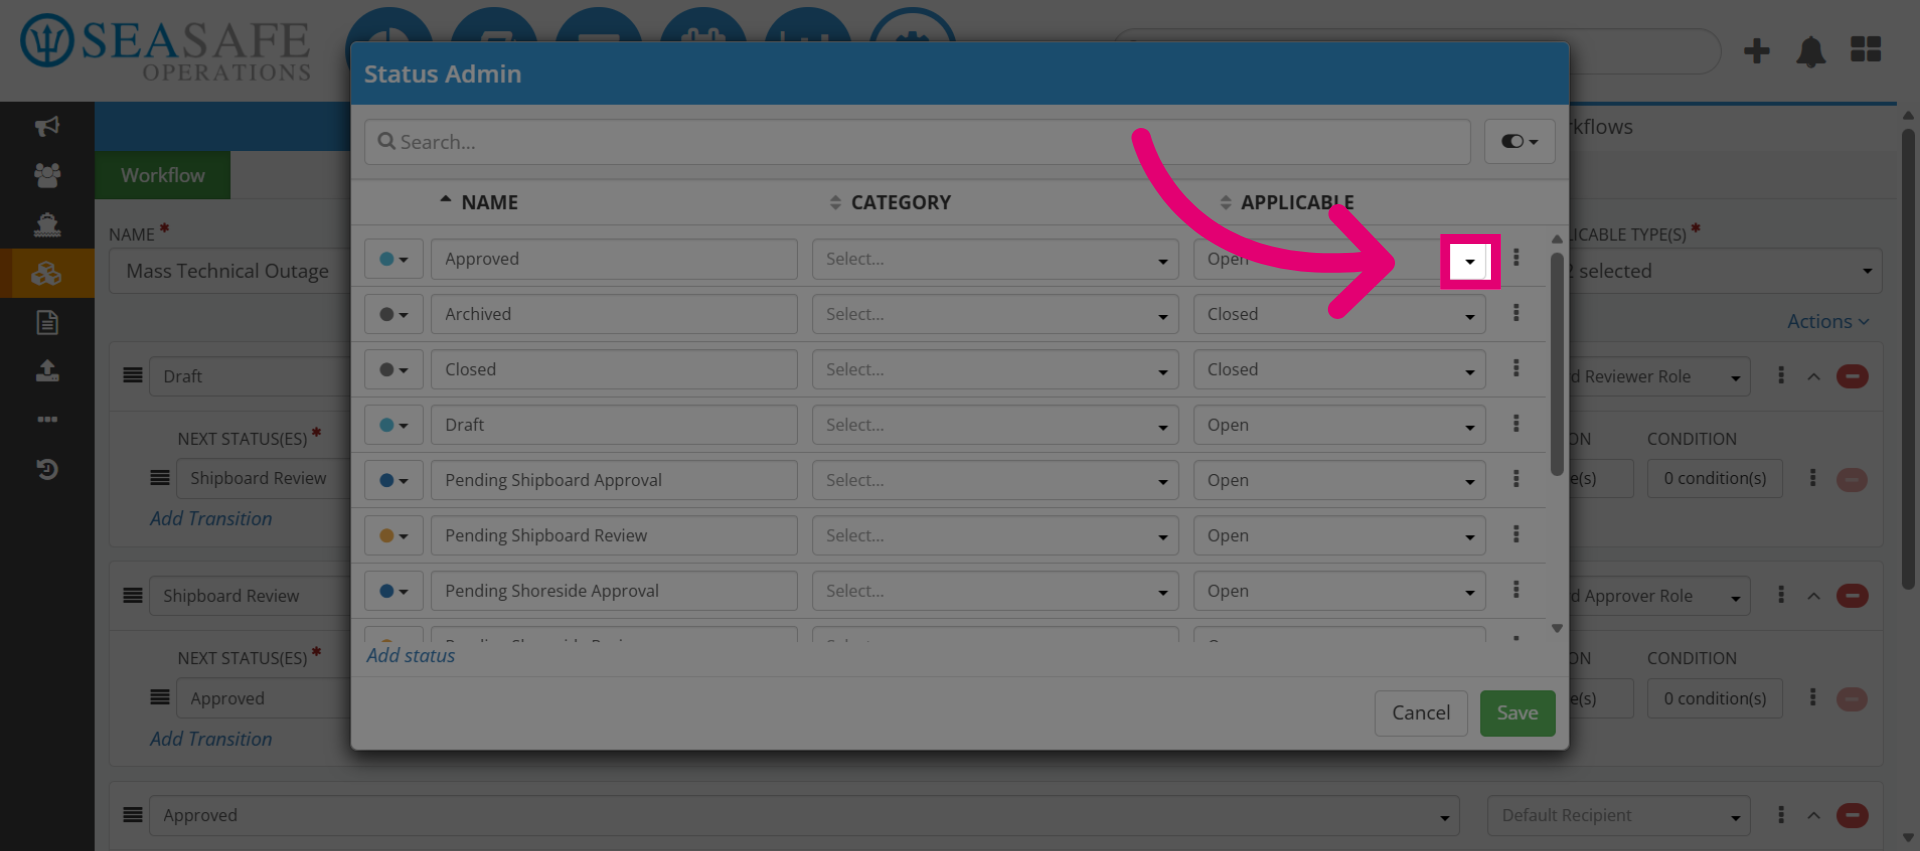
12. Review The Status List
Next, we will open the "Status" list and review it, so we can confirm that the new category appears and that existing statuses are correctly grouped.
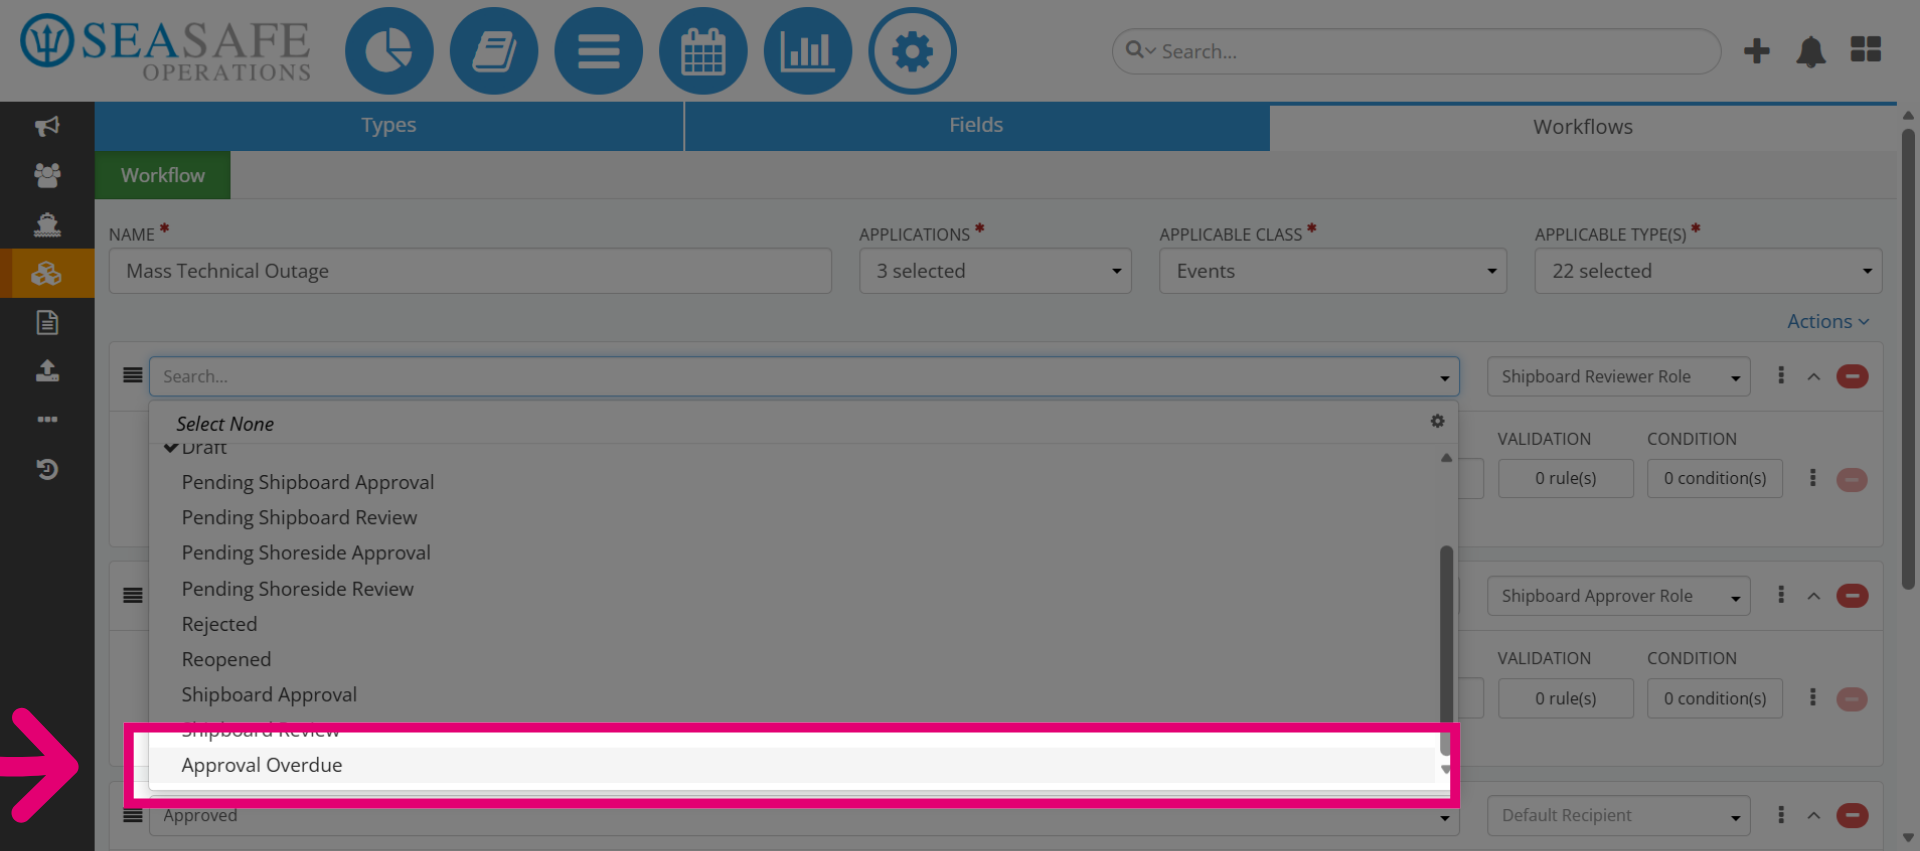
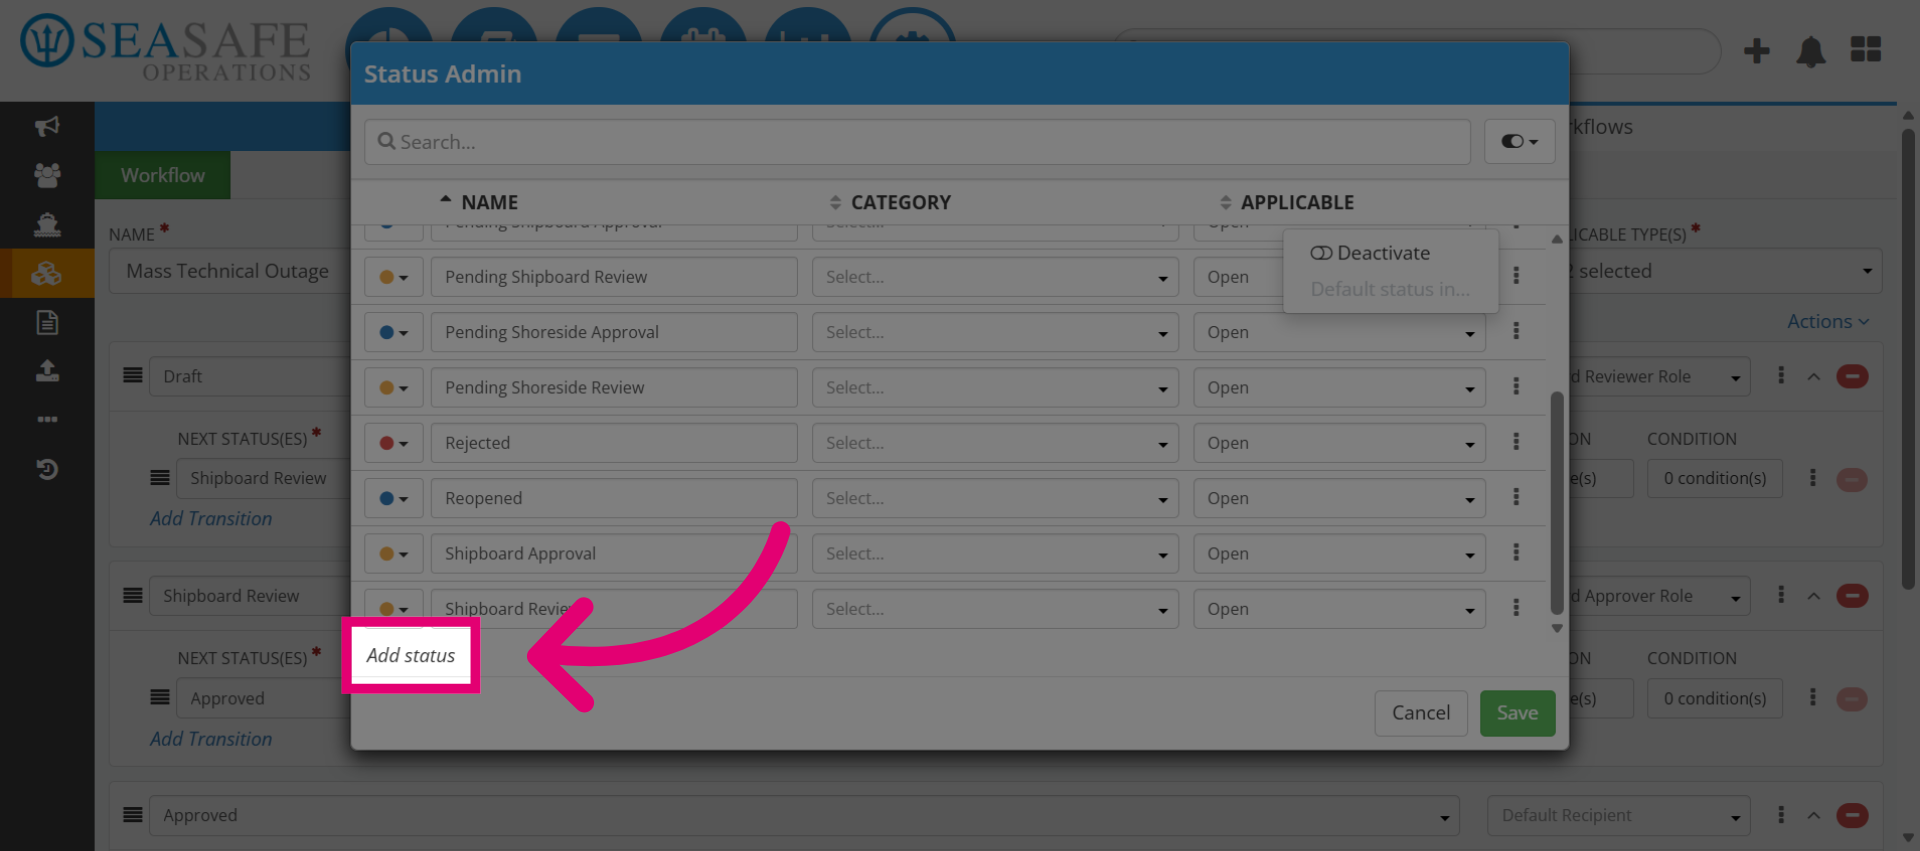
13. Initiate Adding Status
Now, select "Add status" to create a new workflow status. Why: Each status represents a step in the workflow process.
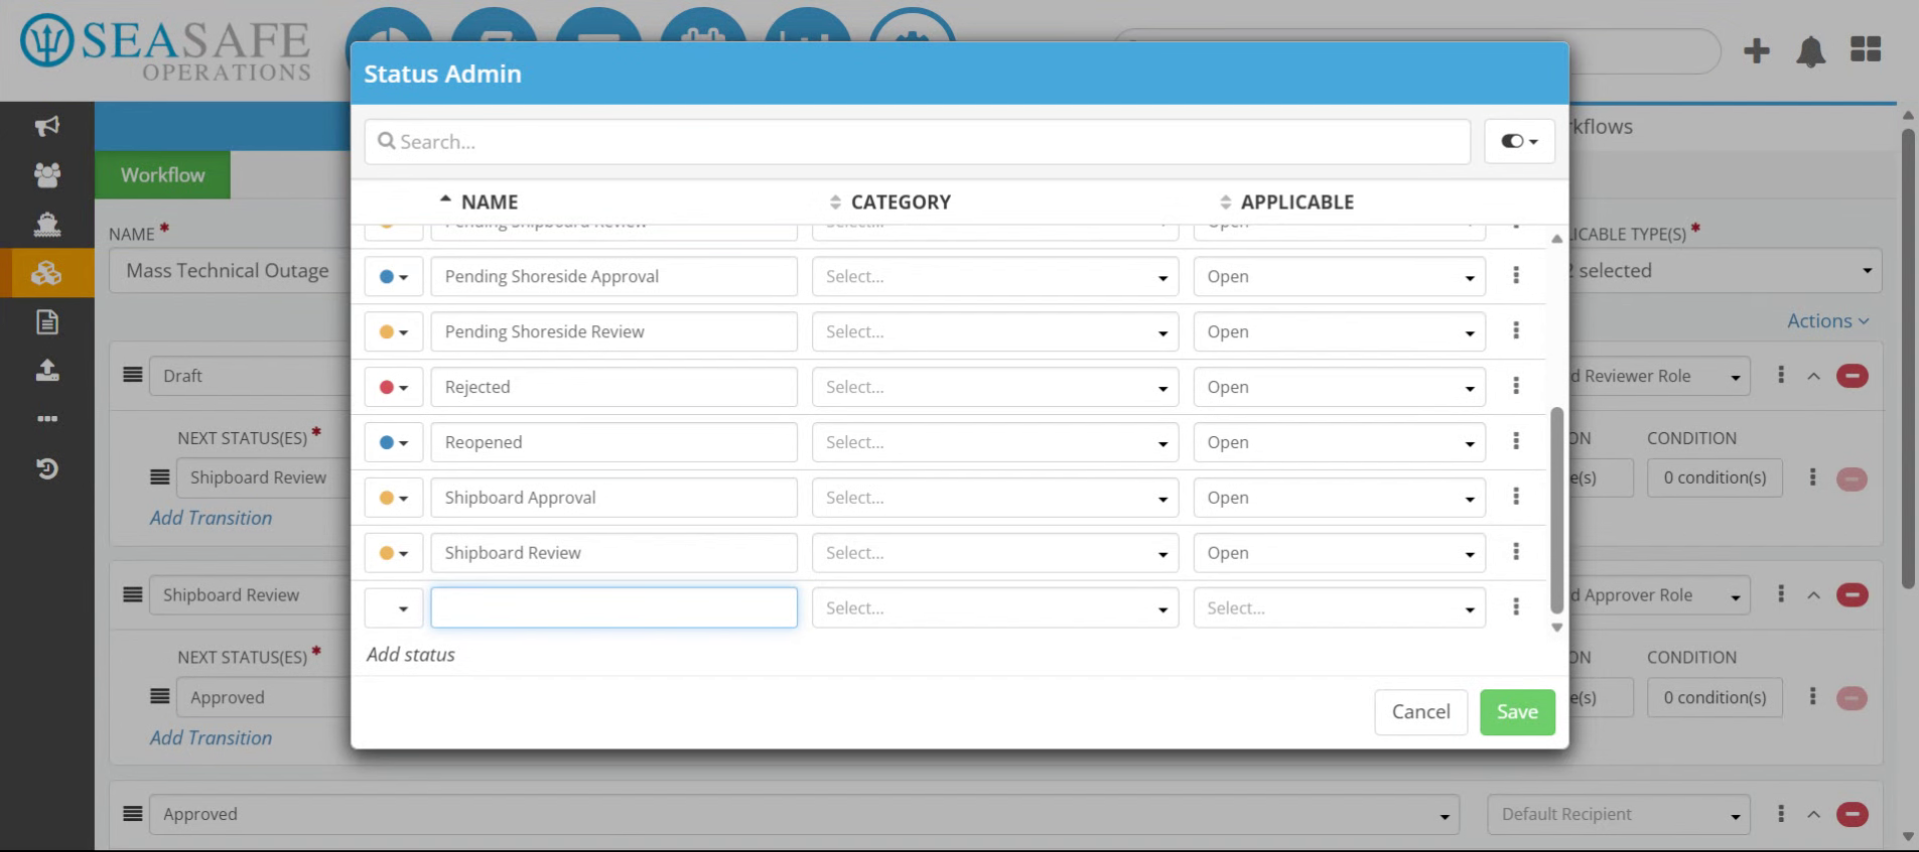
14. Enter Status Name
Then, enter the status name (e.g., Approval Overdue). This way, we are using descriptive names that clearly indicate the purpose of the status.
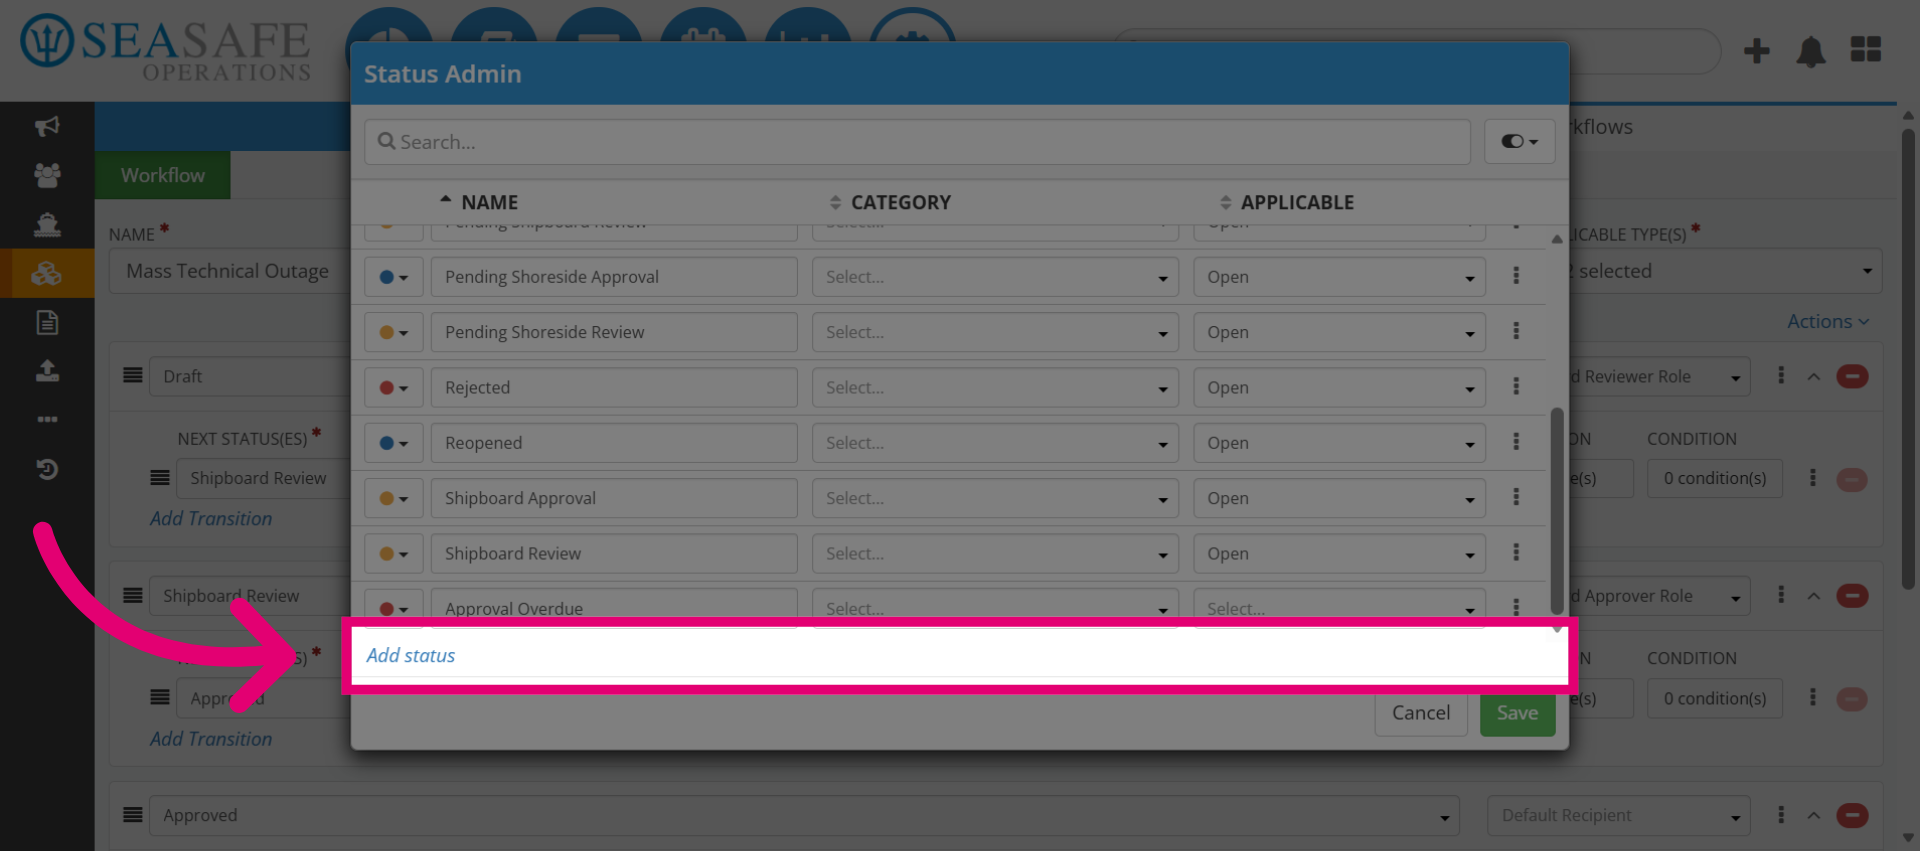
15. Add Another Status
After that, click "Add status" if you desire to create an additional workflow status.
16. Open Status Category Dropdown
Then, click to open the category dropdown menu.
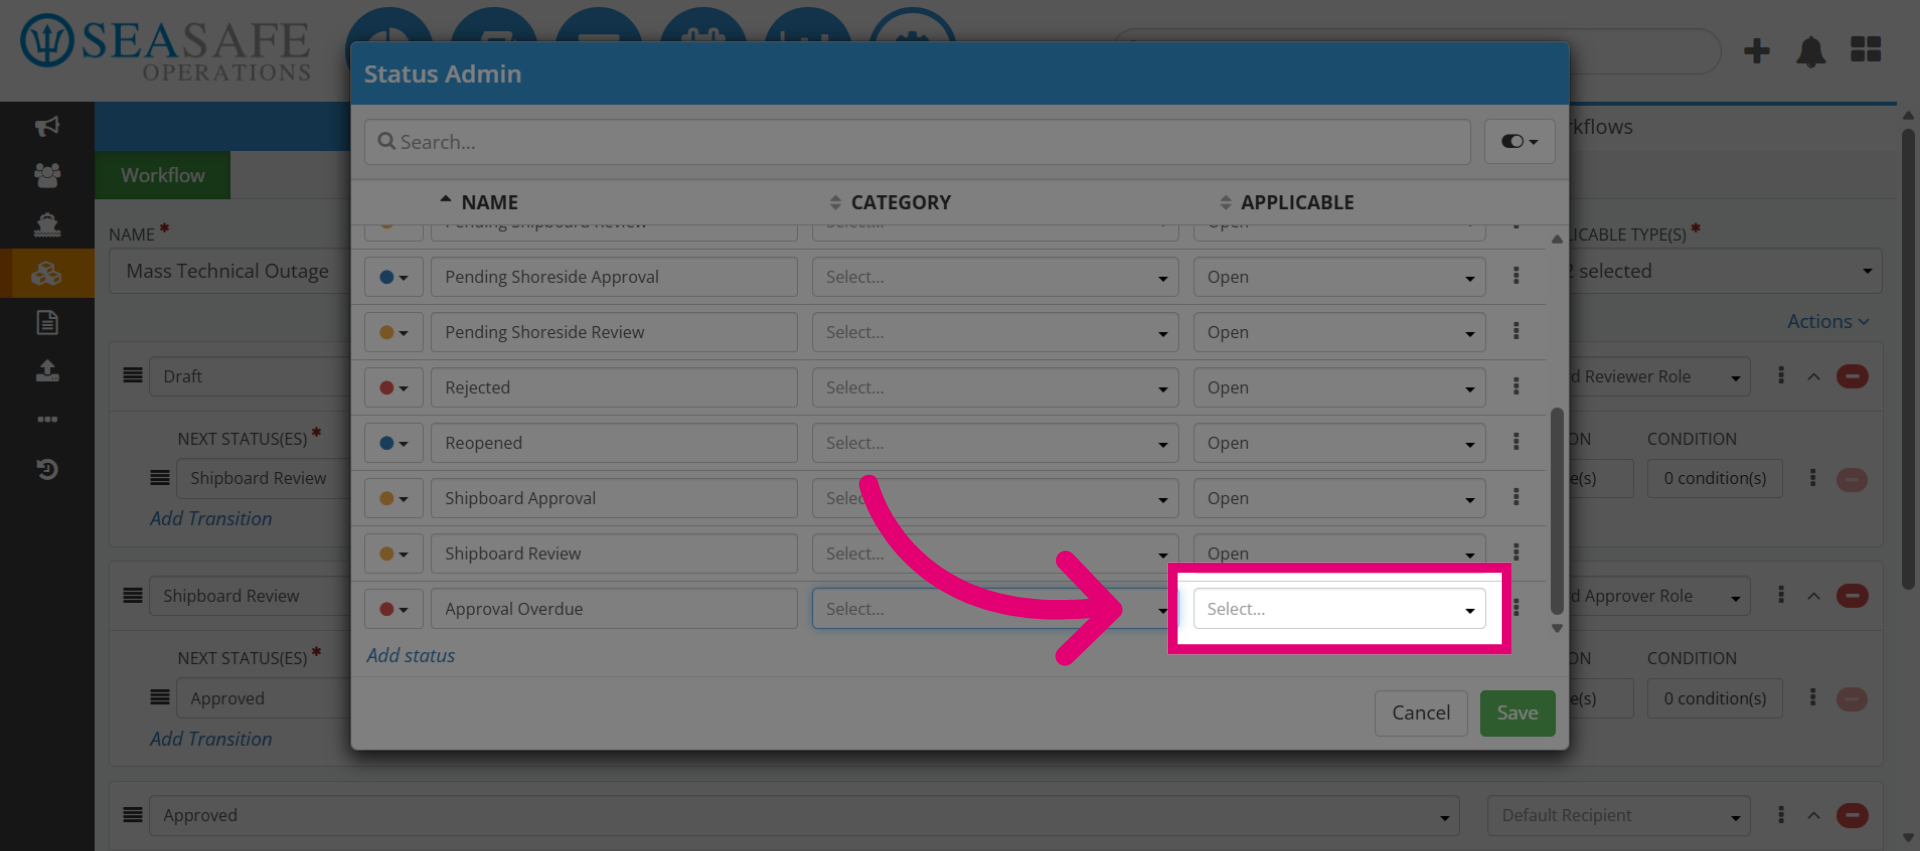
17. Select Open Status
Select the "Open" status from the available options.
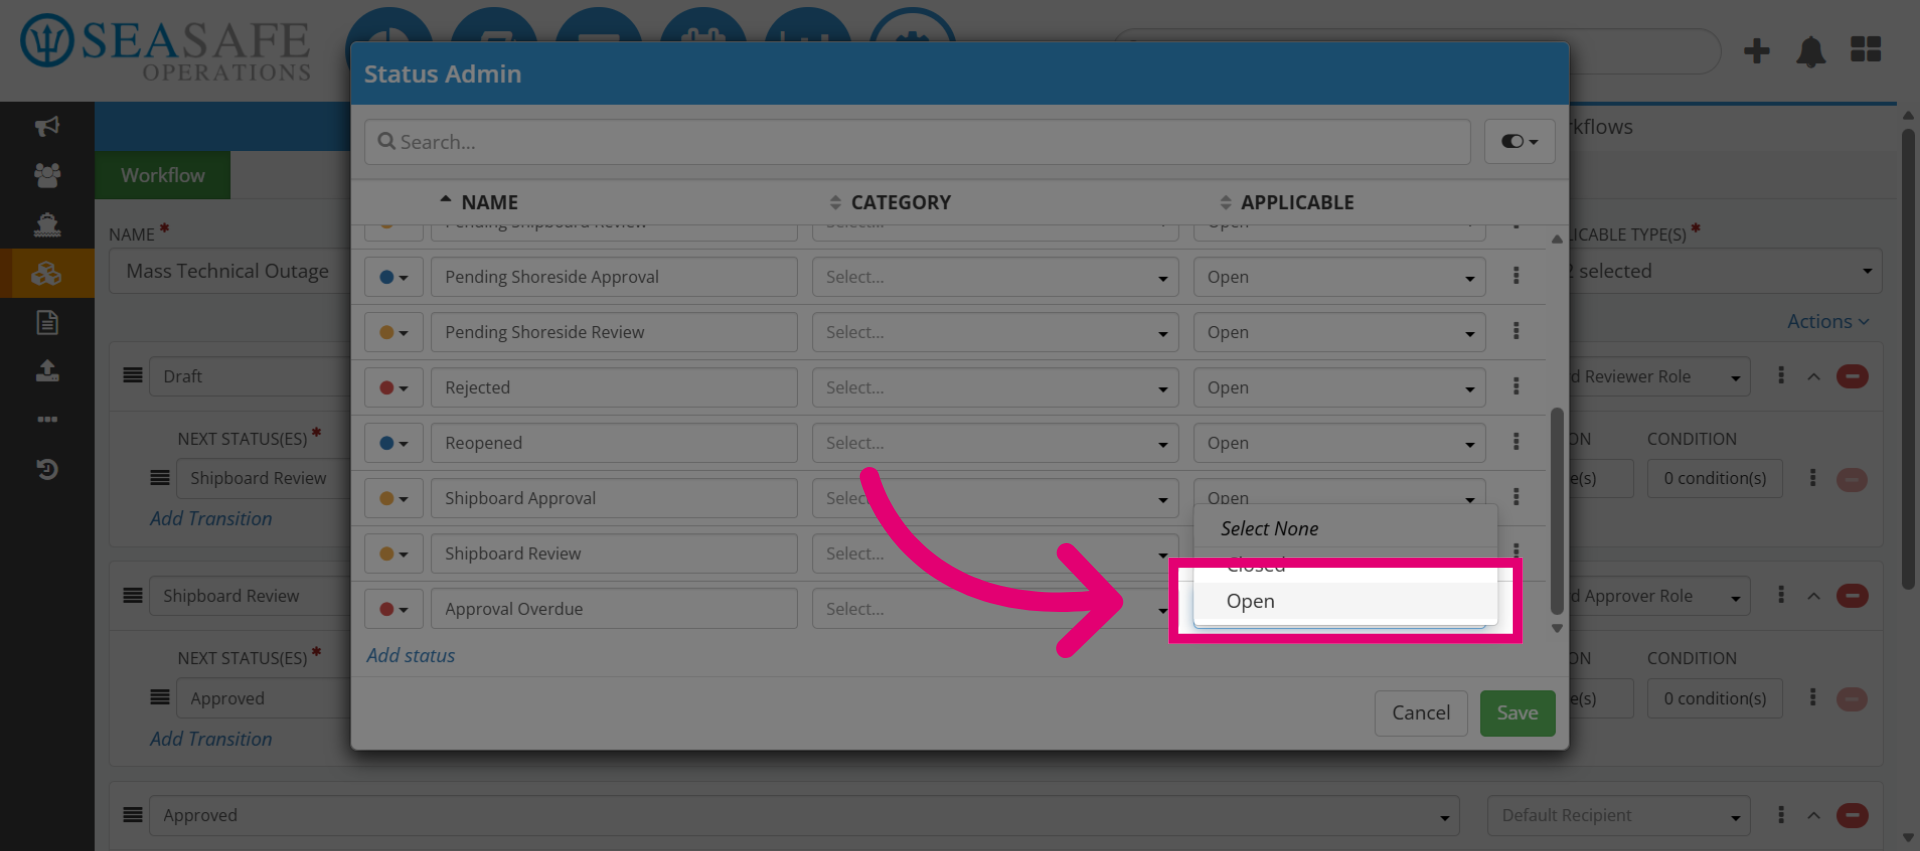
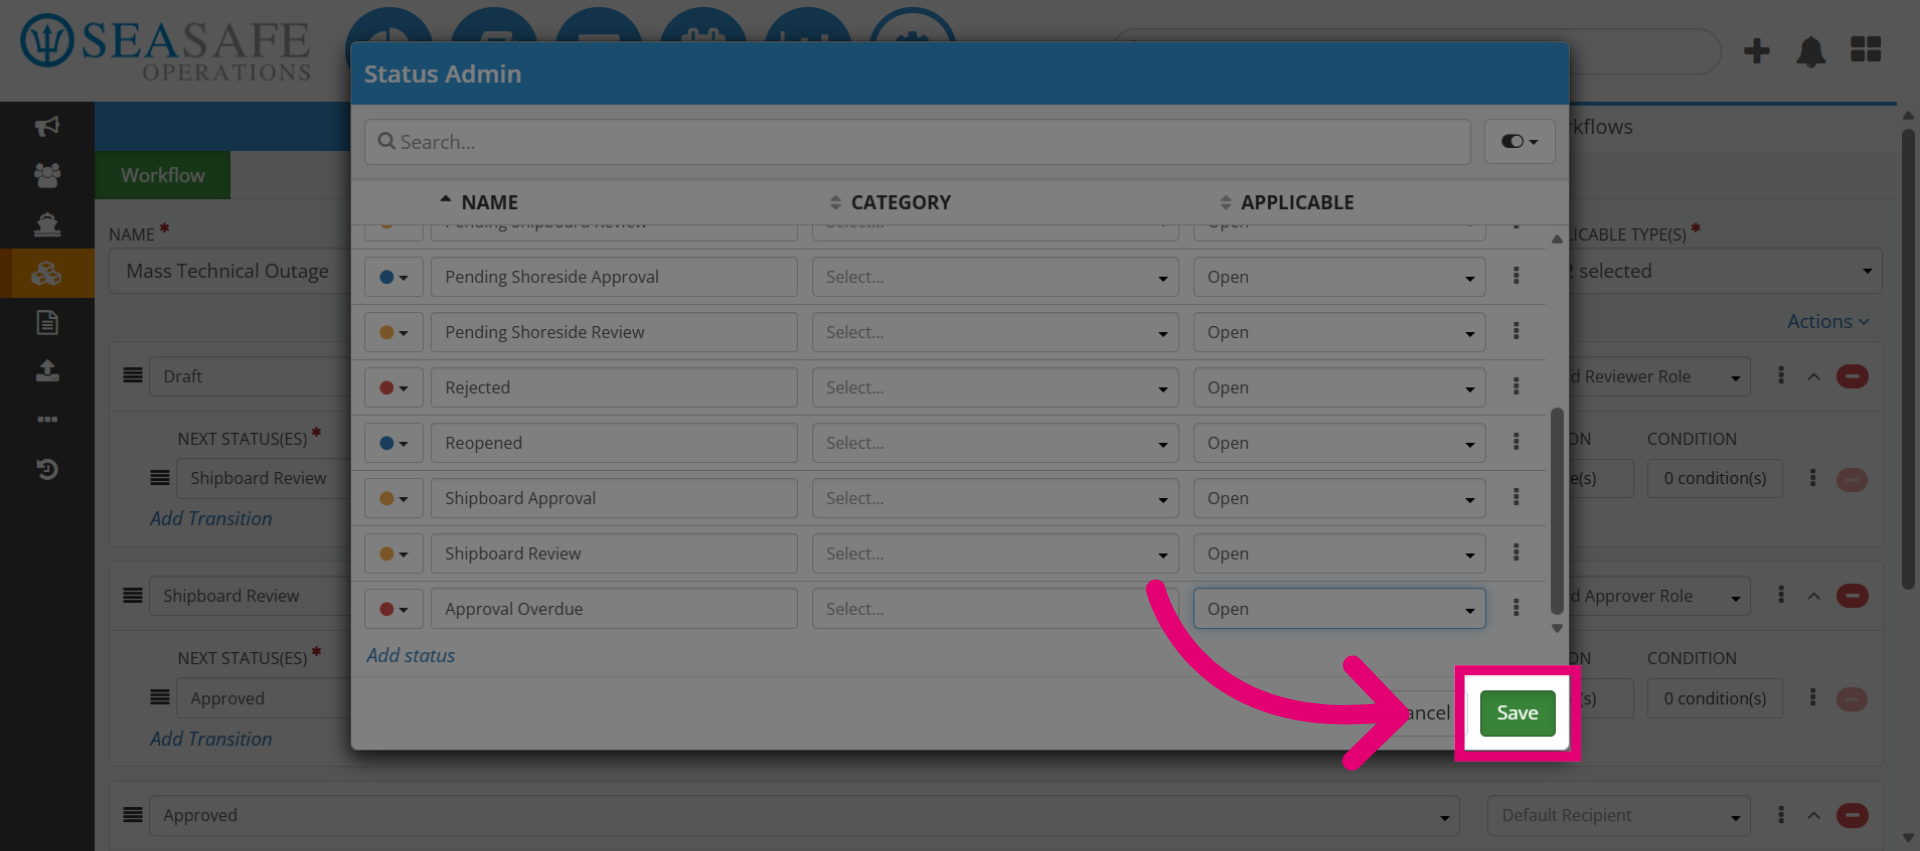
18. Save Status Changes
Click "Save" to apply changes to the workflow status.
19. Select Name Field Again
Then, click the "Name" field to edit the status name.
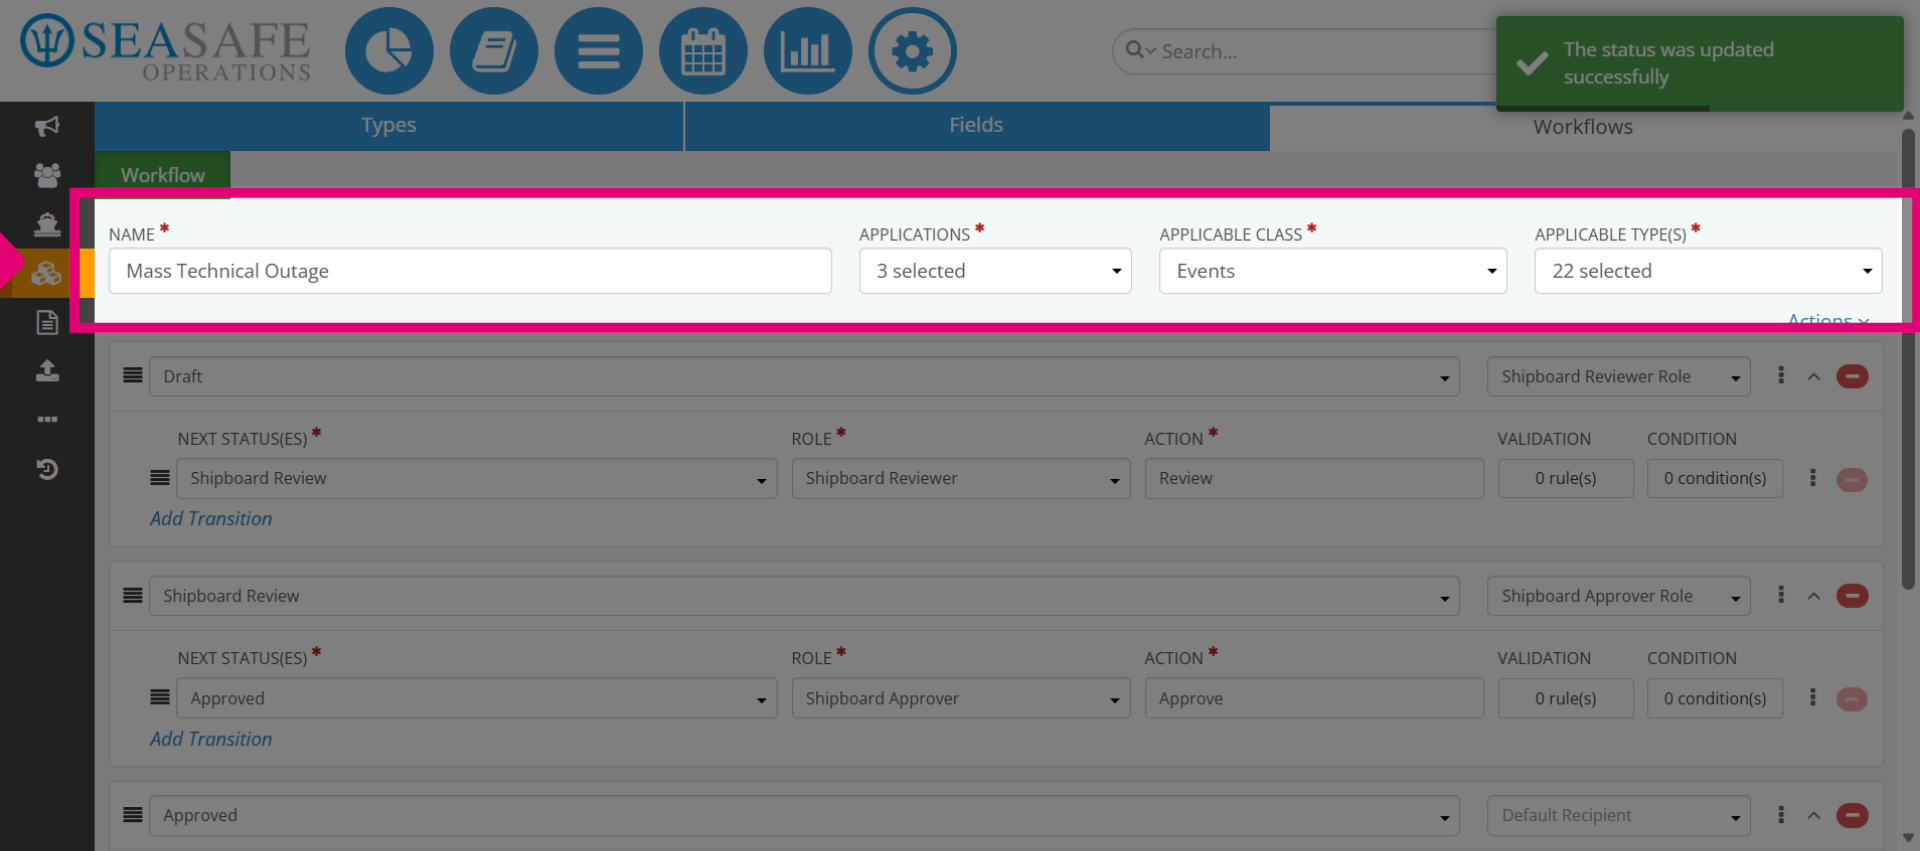
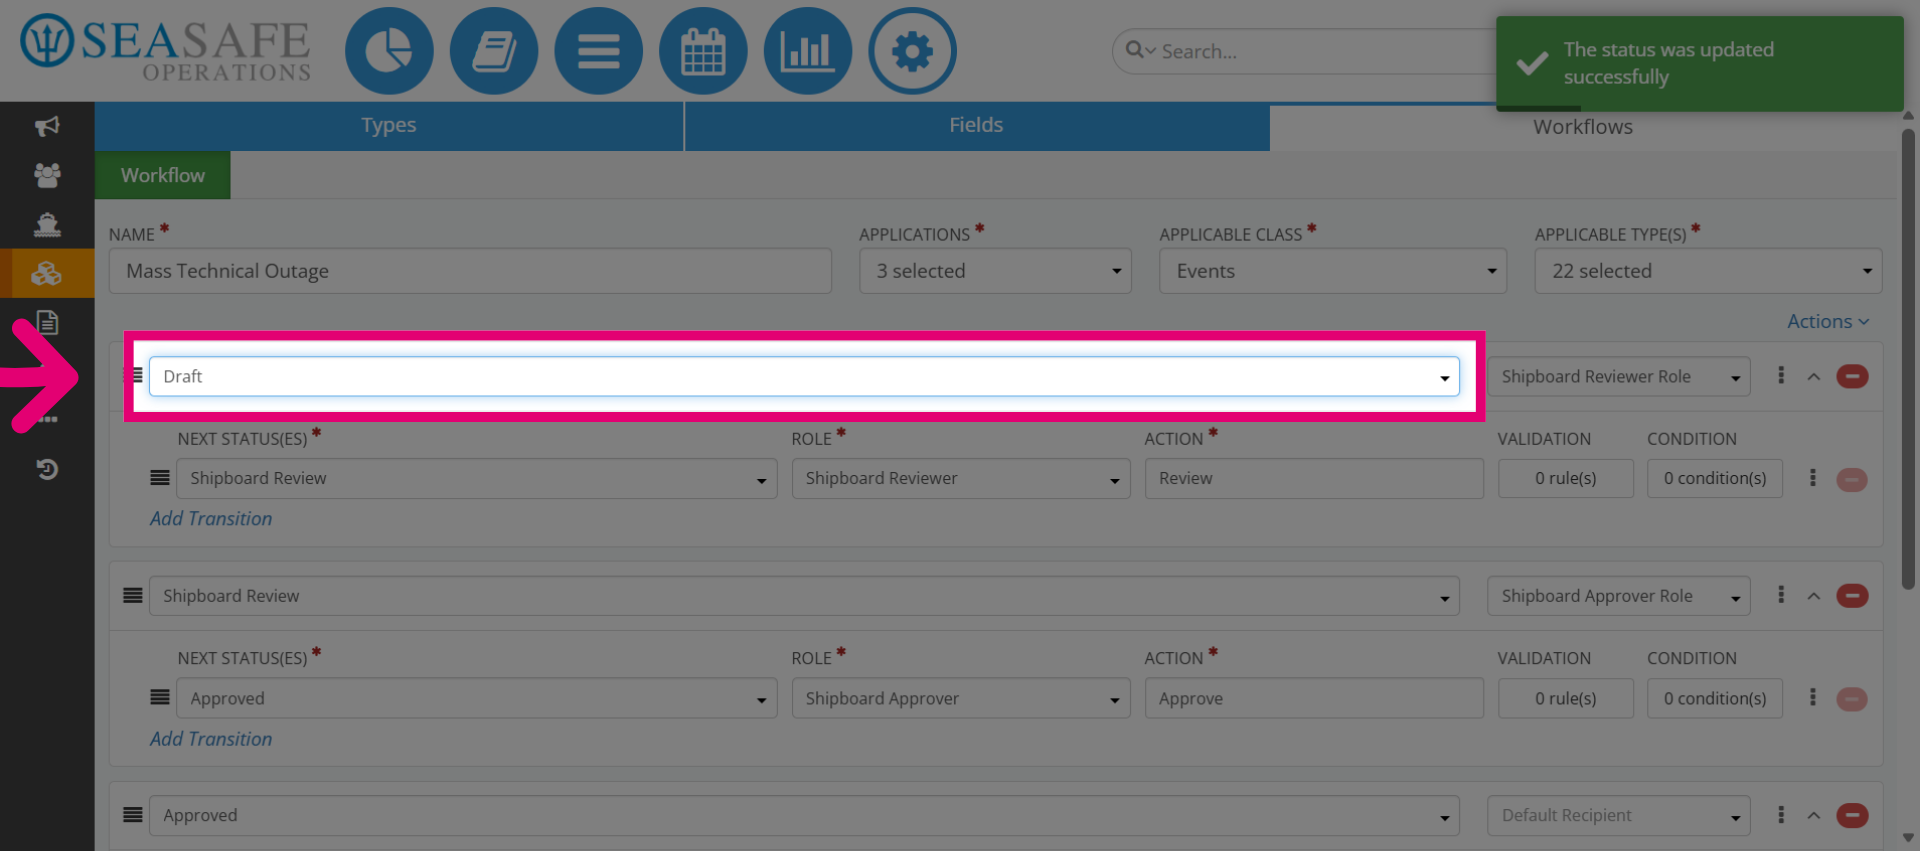
20. Reopen Draft Status
Next, click the "Draft" status to review or modify it.
21. Select Approval Overdue Status
Then, select the "Approval Overdue" status to finalize its configuration and save your changes.