New article
Recently updated
Add Status, Transitions, Roles in Ideagen Maritime Management Workflow

This walkthrough covers configuring workflow statuses, assigning roles, and setting up routing in Ideagen Maritime Management, defining workflow progression and responsibility. Proper configuration ensures smooth approvals, accurate notifications, and compliance.
1. Introduction
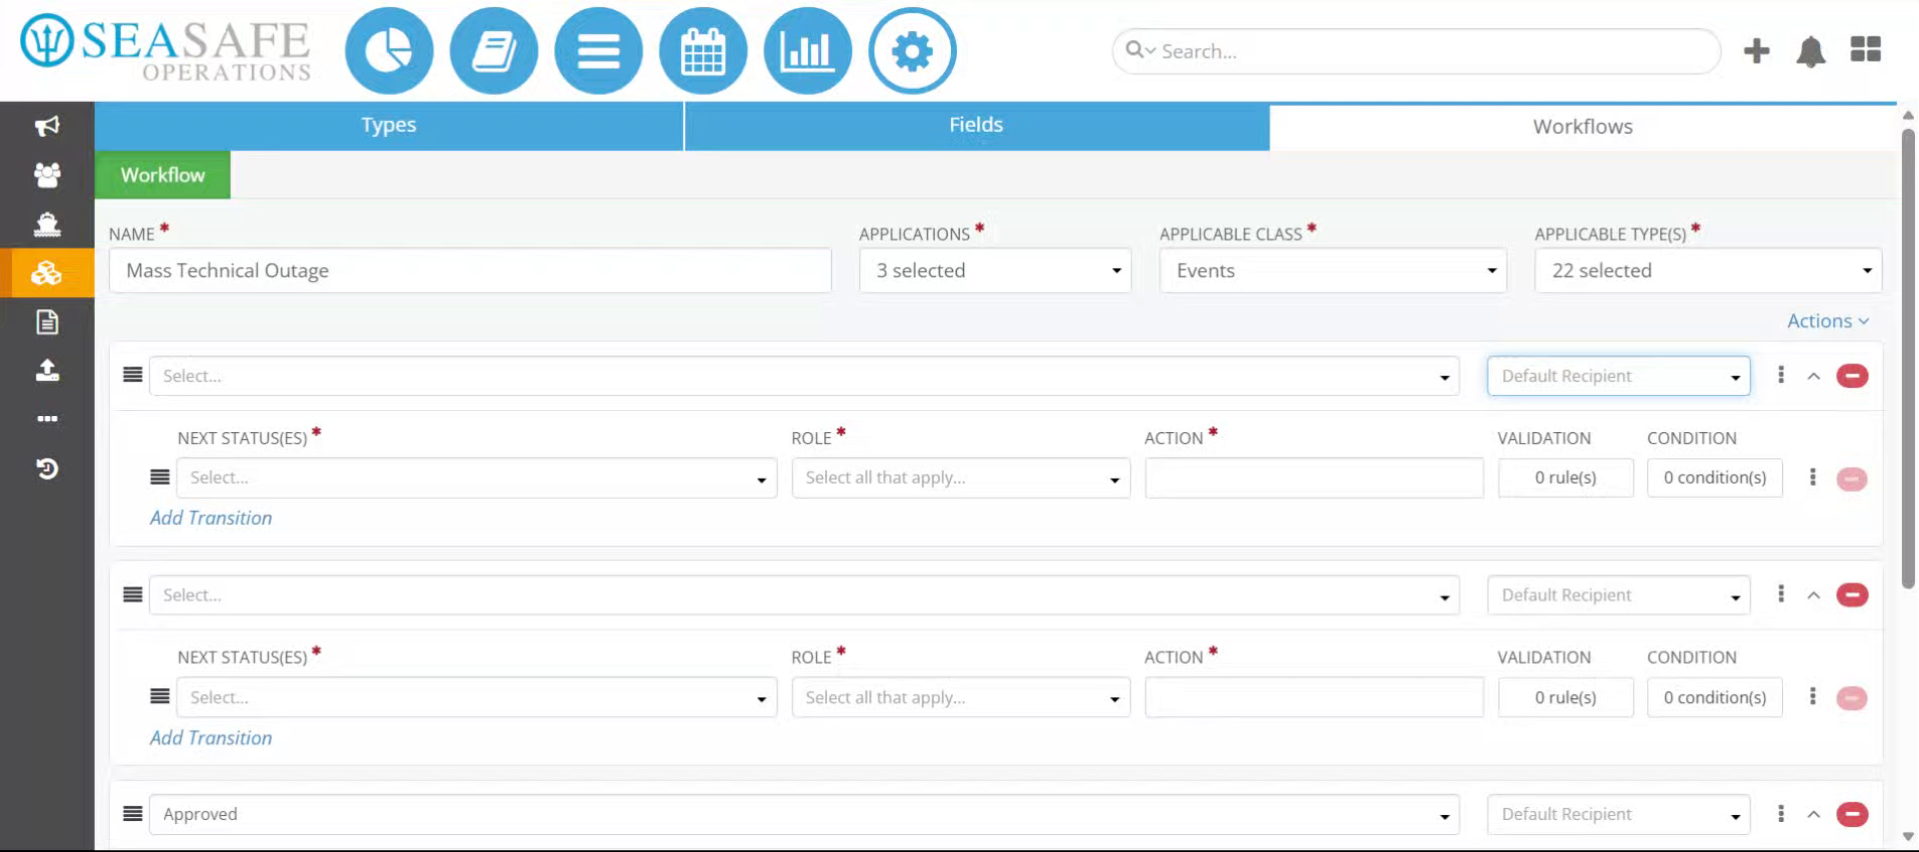
You will learn how to manage draft and approval stages effectively to streamline your workflow process. Start in the "Workflow" tab of the "Types, Fields, and Workflow" section in the shoreside "Admin Menu.
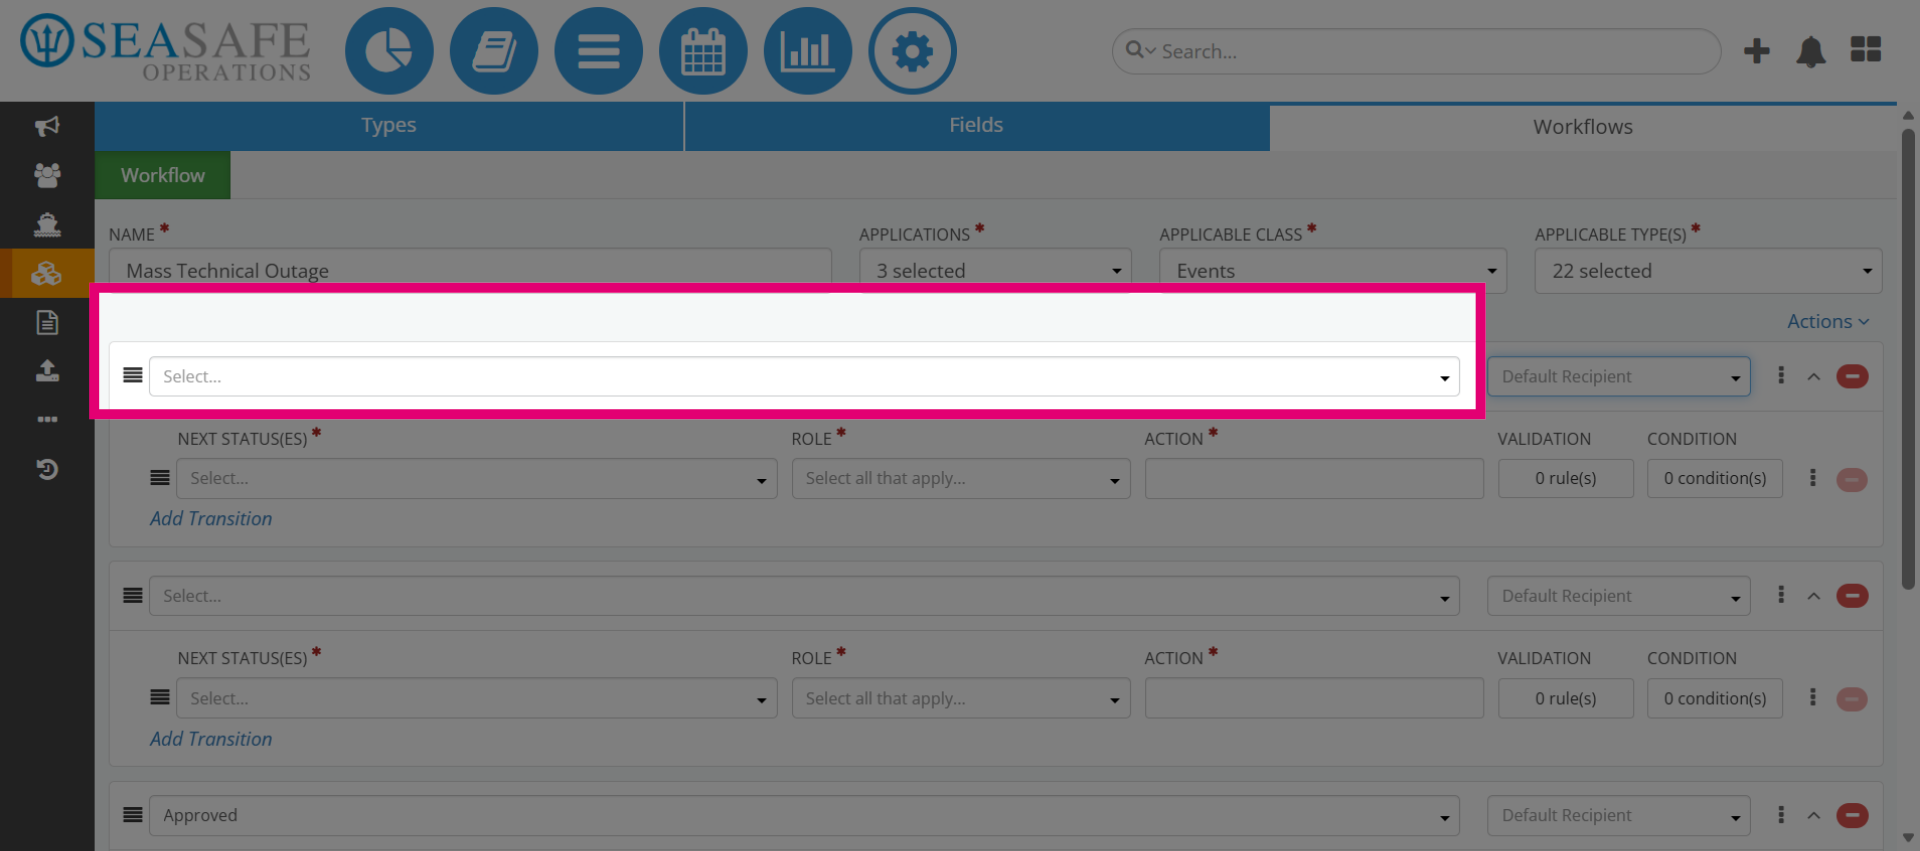
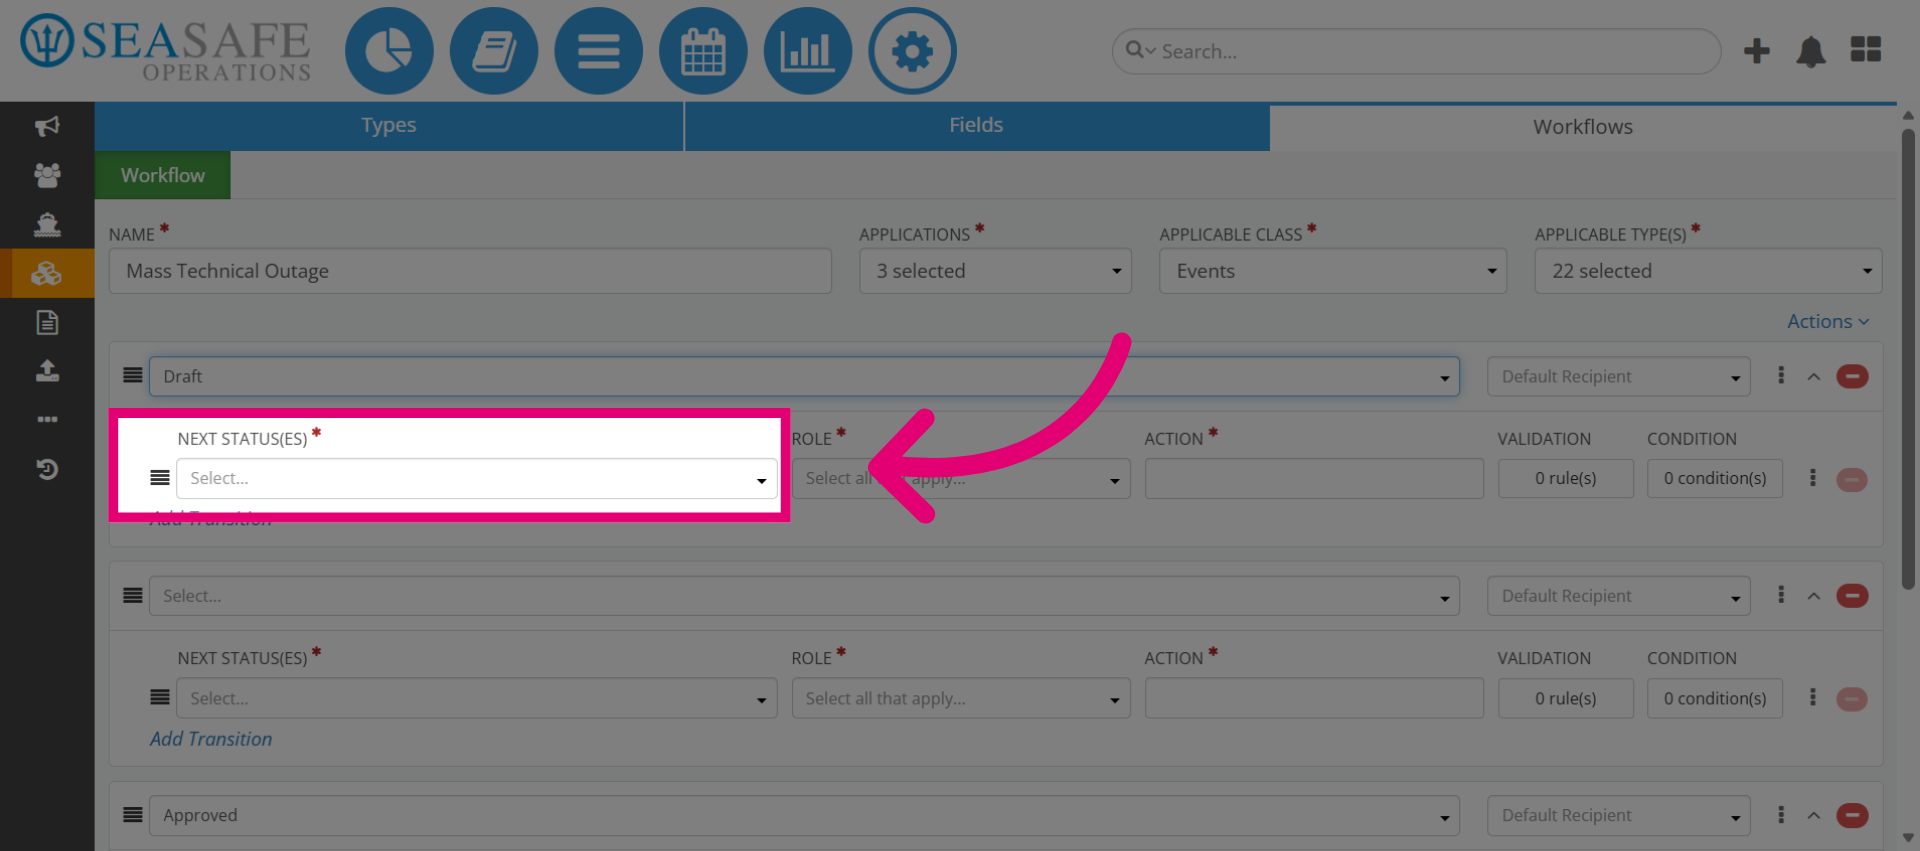
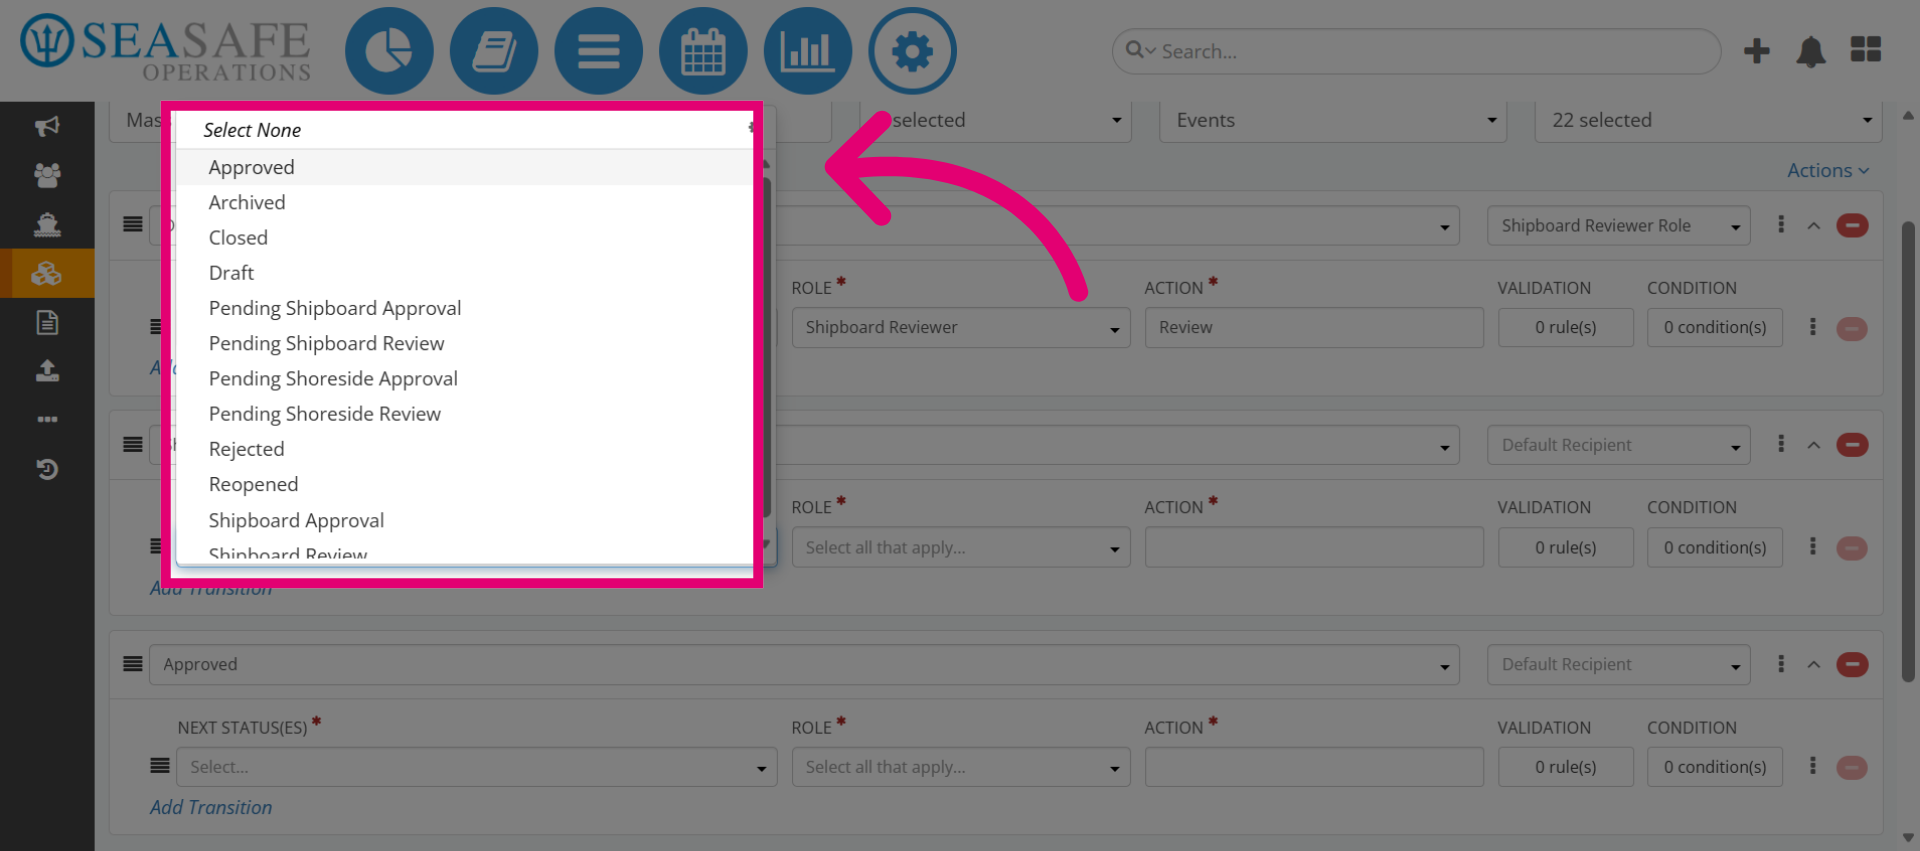
2. Open Status Selection
Start by selecting the "Status" dropdown menu to add the first status. Every workflow begins with a starting point, usually "Draft", to capture initial data before review.
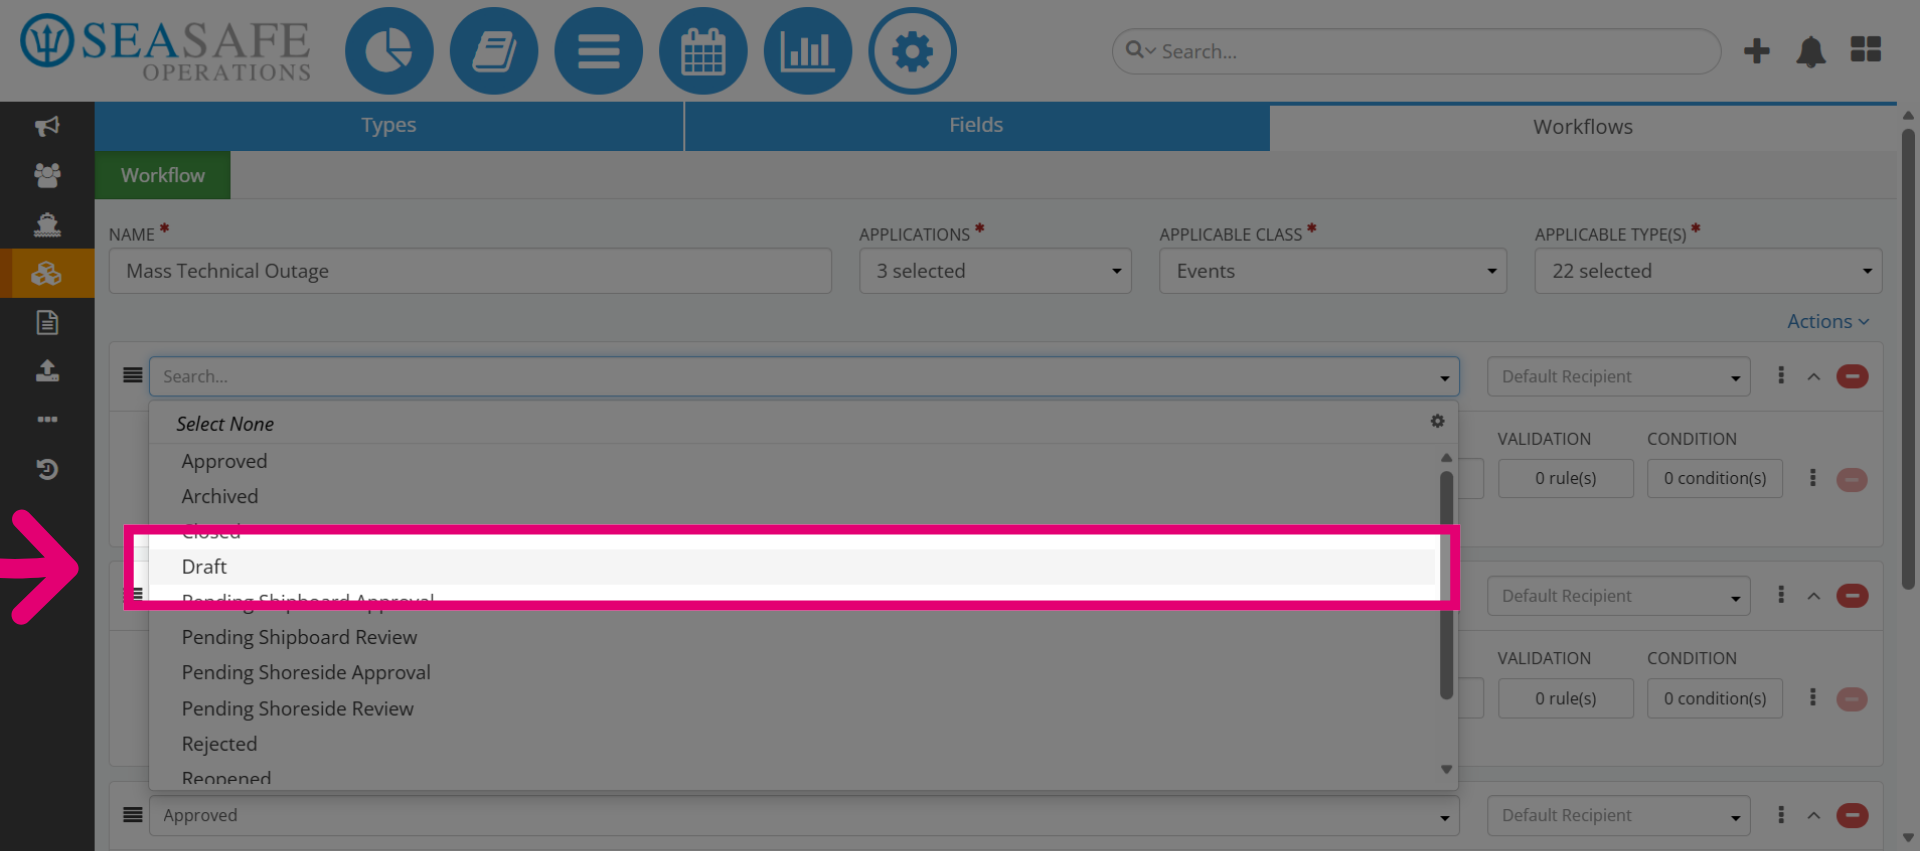
3. Choose Draft Status
Next, select "Draft" as the initial workflow status. This is because "Draft" is the default stage for creating and editing reports before submission.
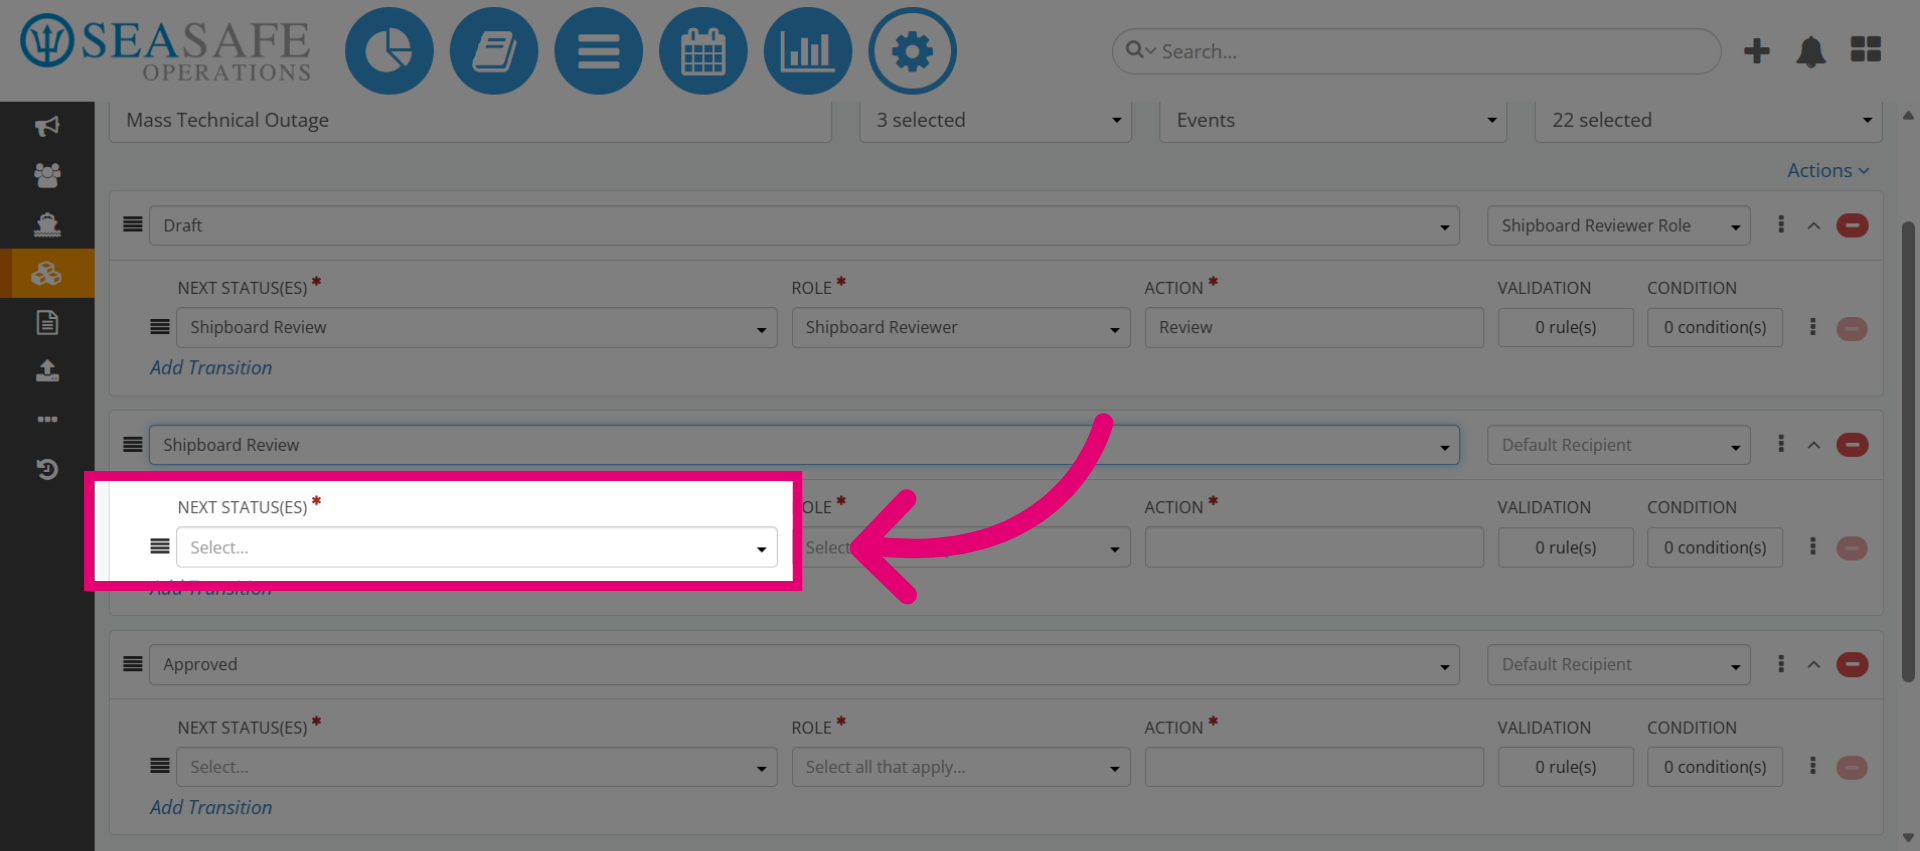
4. Open Next Status Selection
Then, select the "Next Status(e)" for the transition. Why: Transitions define how the workflow moves forward (e.g., Draft → Shipboard Review).
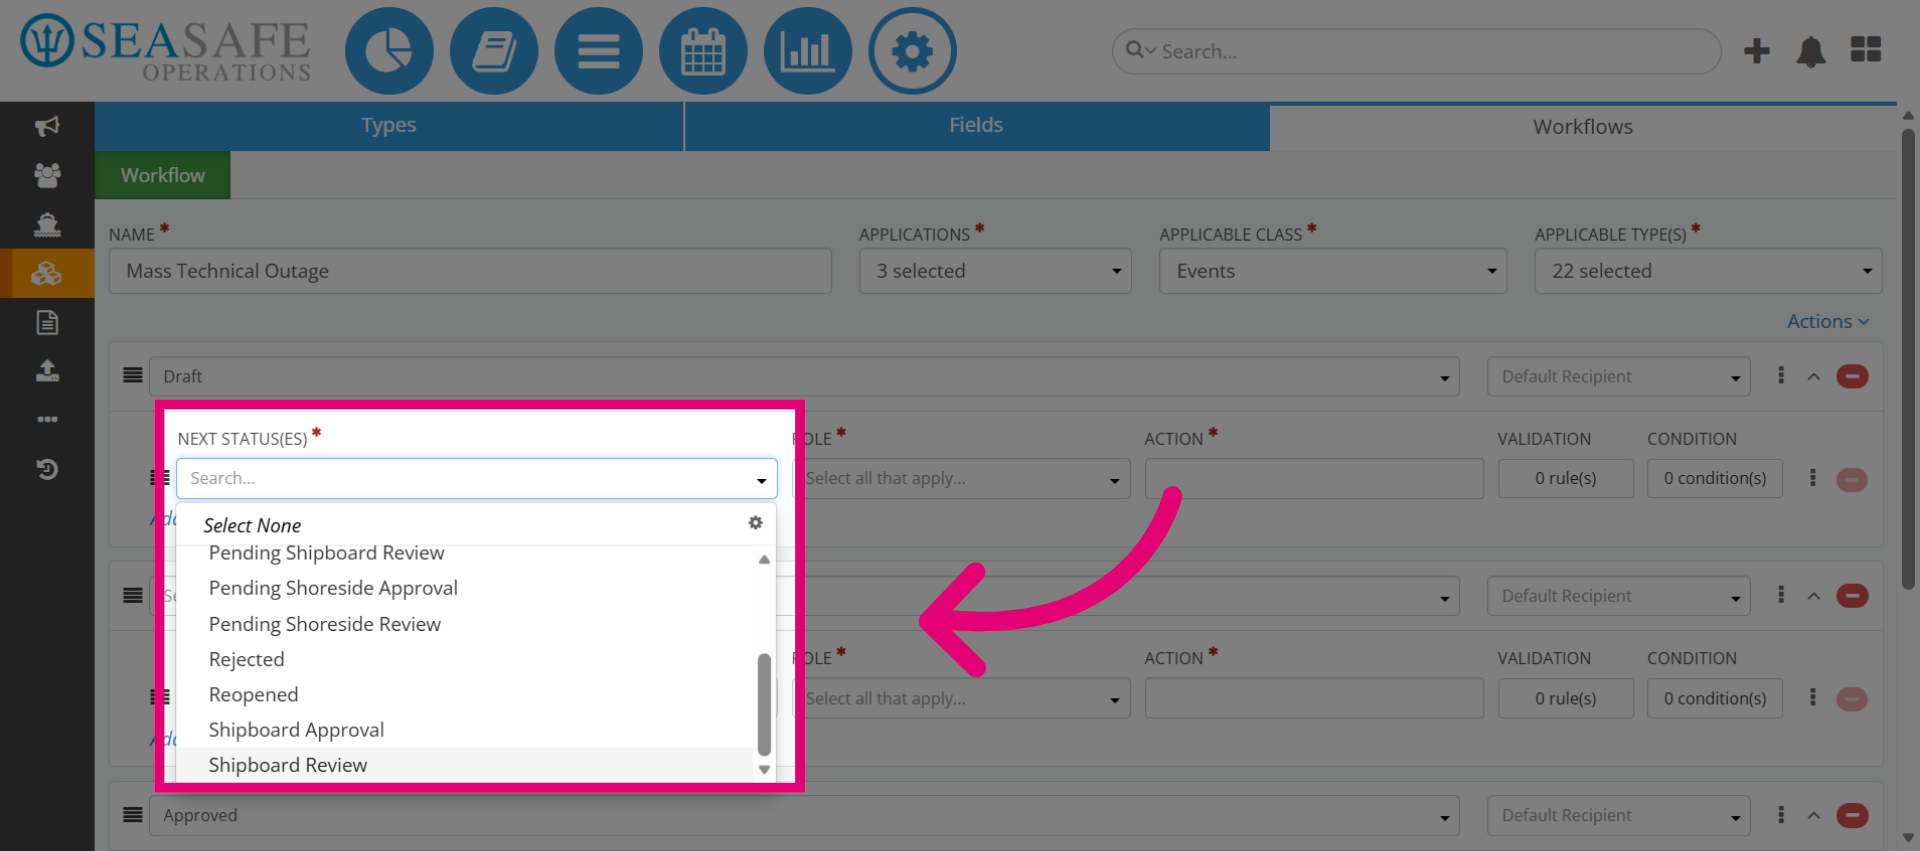
5. Select Shipboard Review Status
For example, we will choose "Shipboard Review" as the next stage, because his status allows onboard personnel to review and validate the report before escalation.
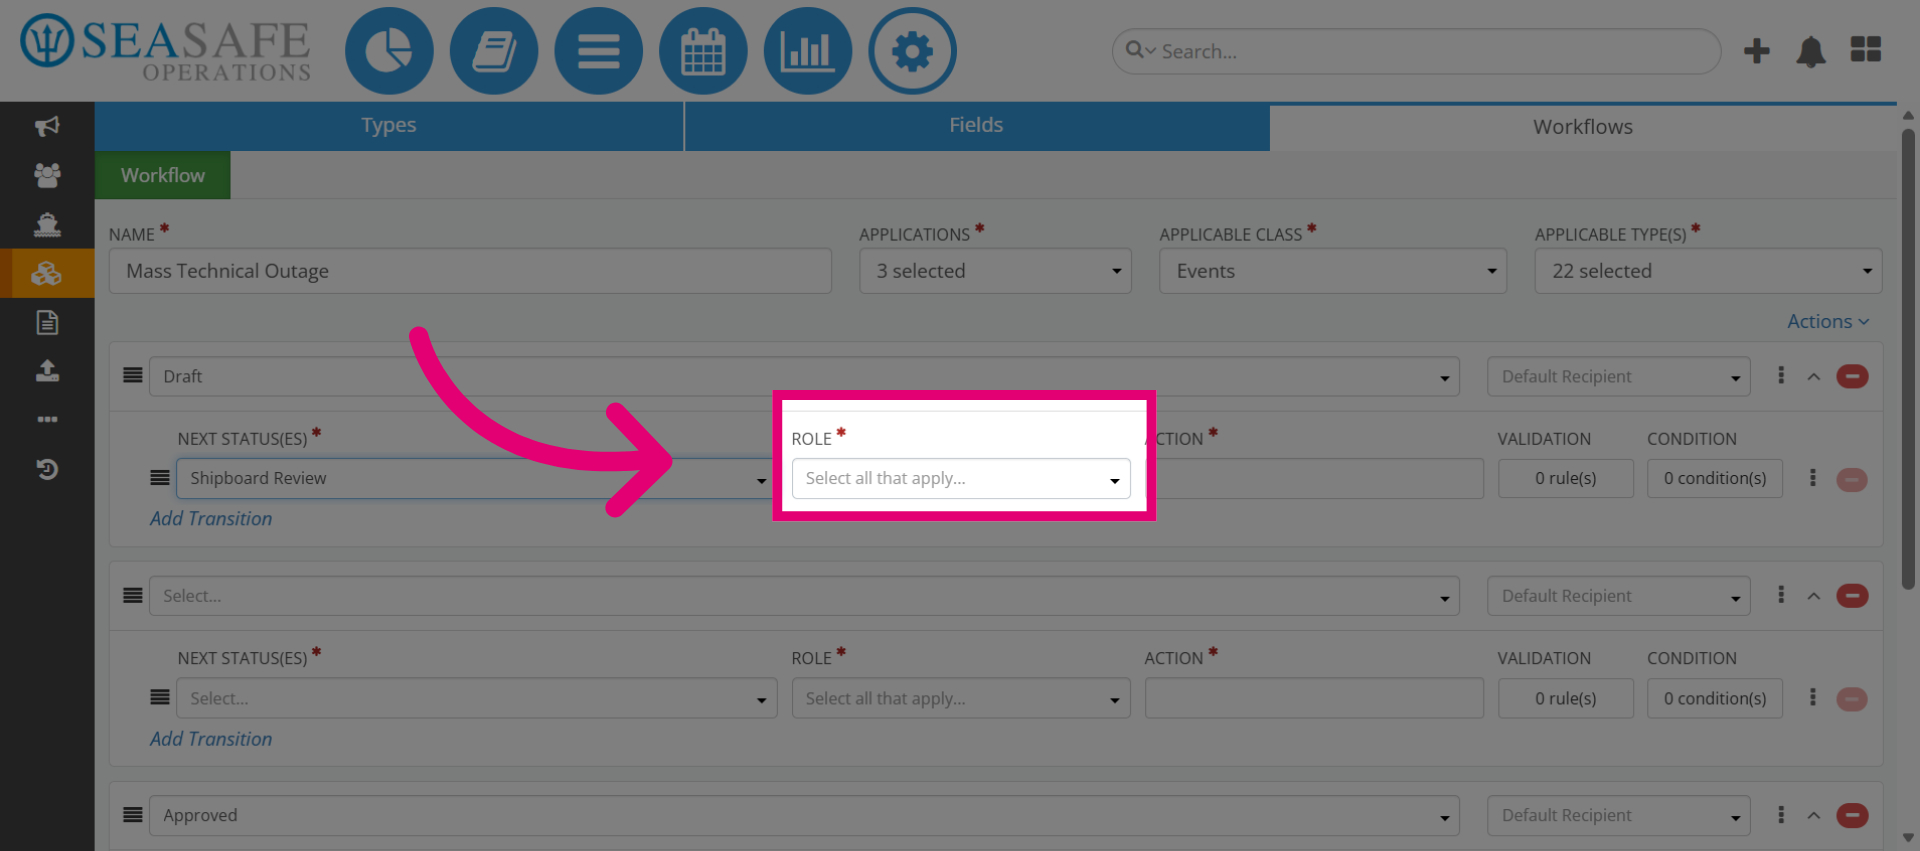
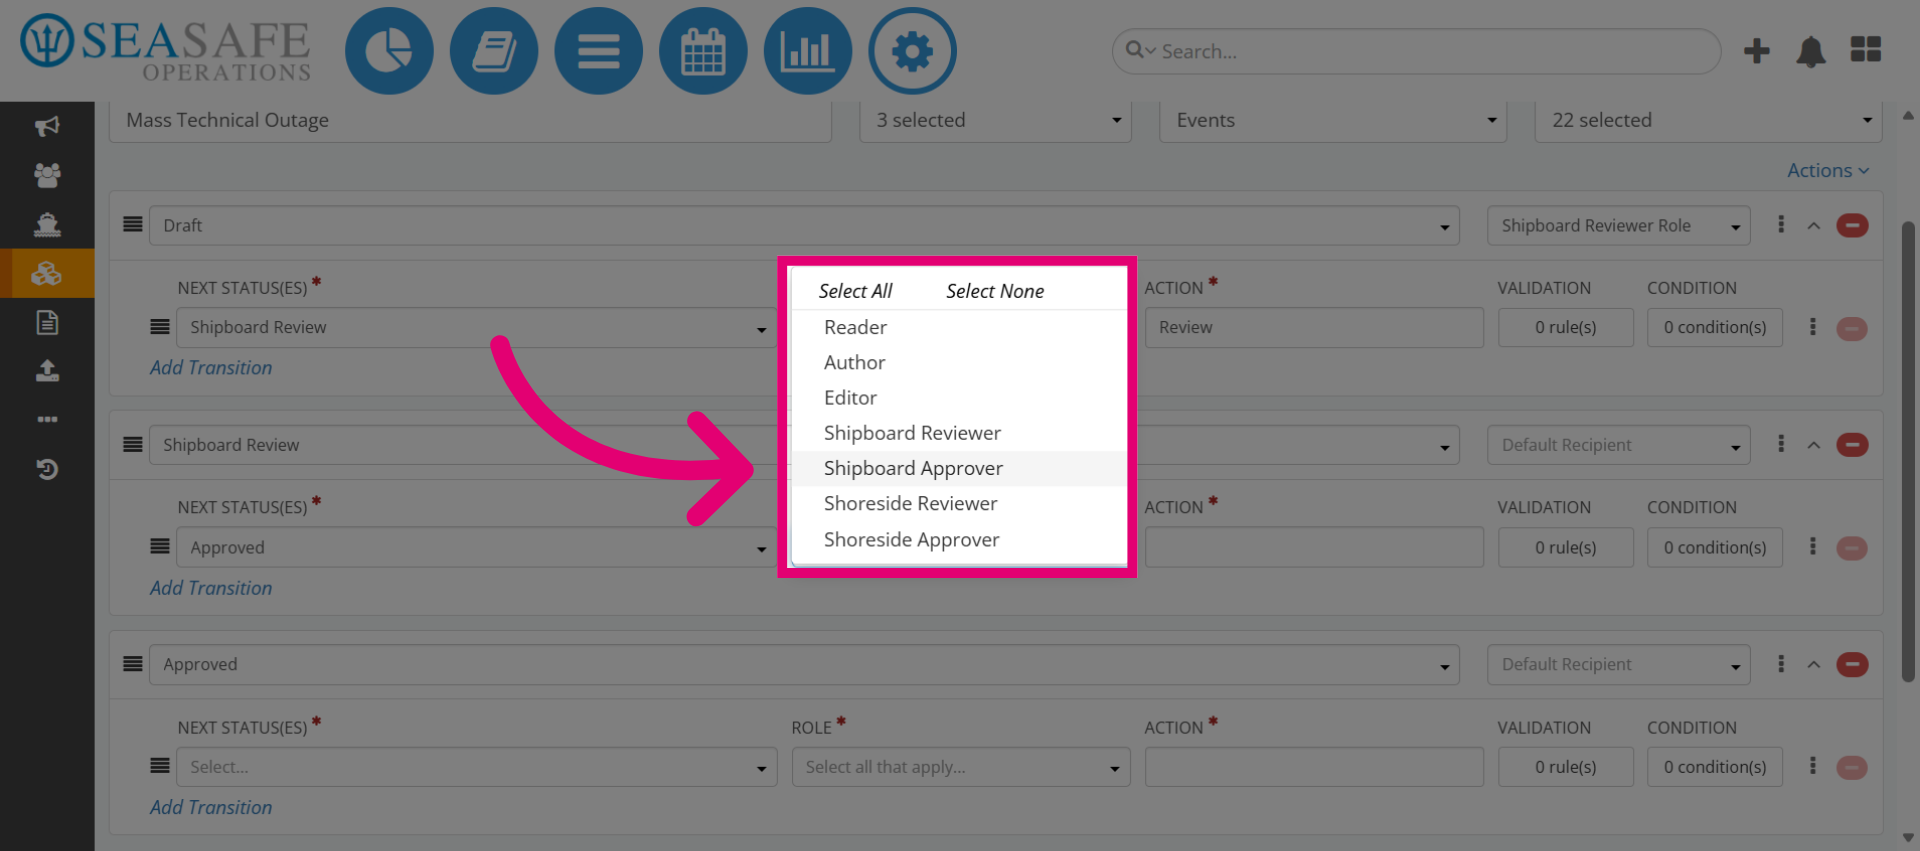
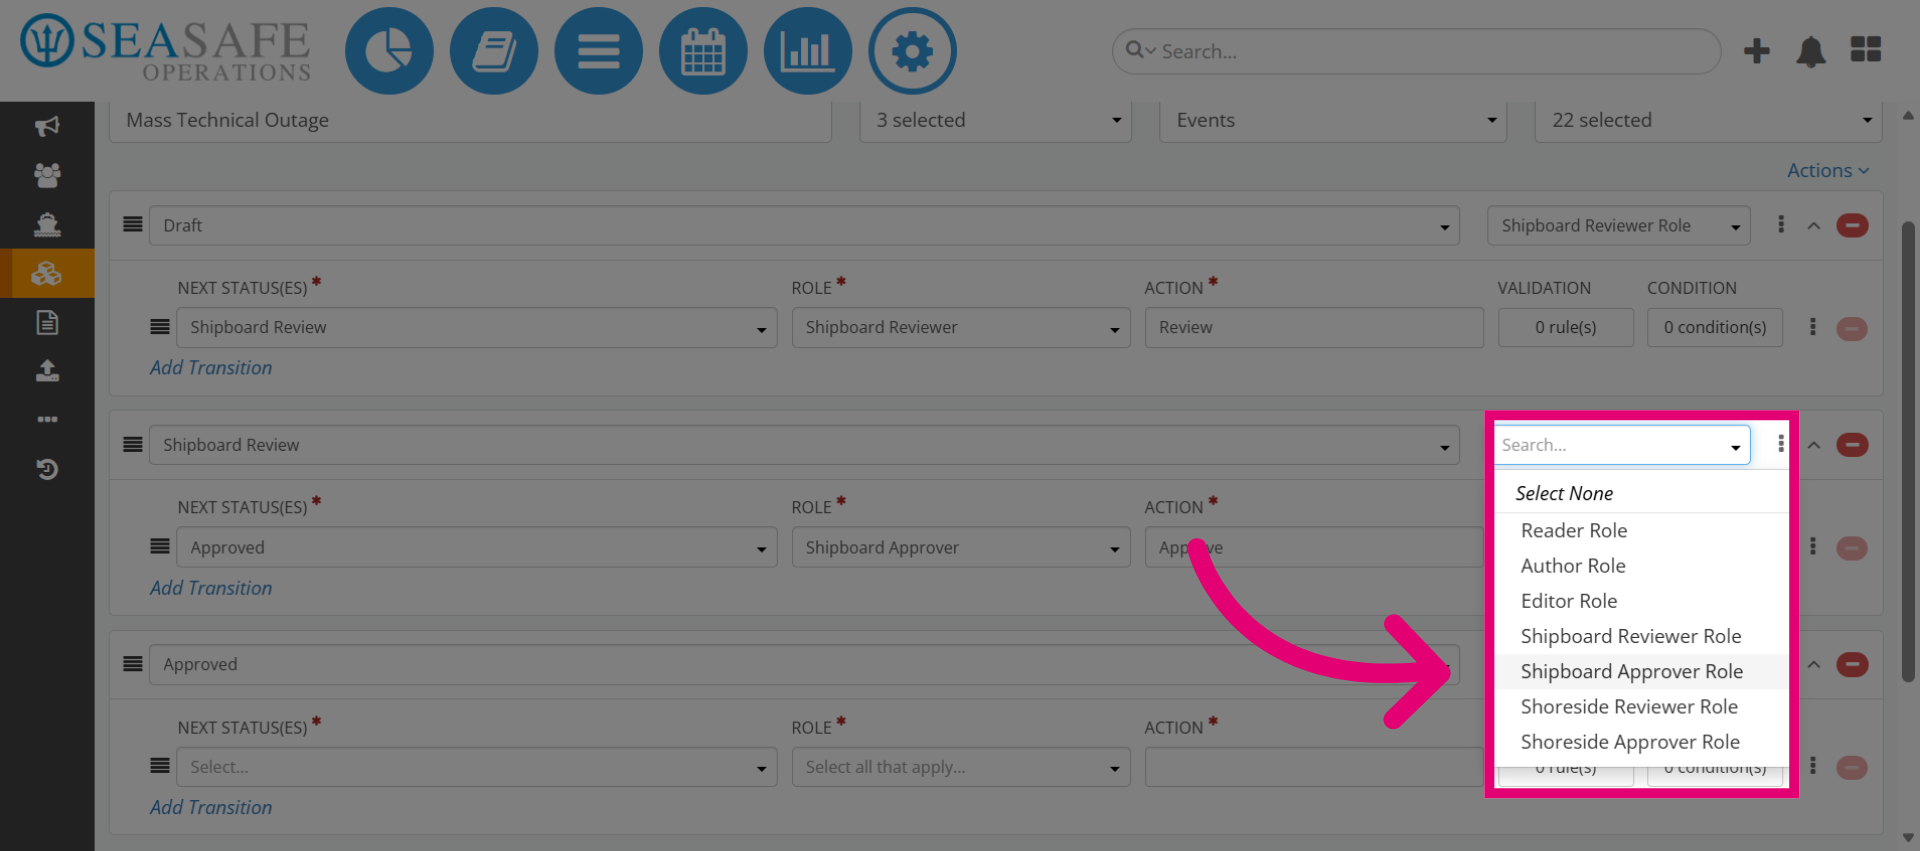
6. Open Role Selection Menu
Then select to open the "Role" selection menu since "Roles" determine who performs the transition and ensures accountability.
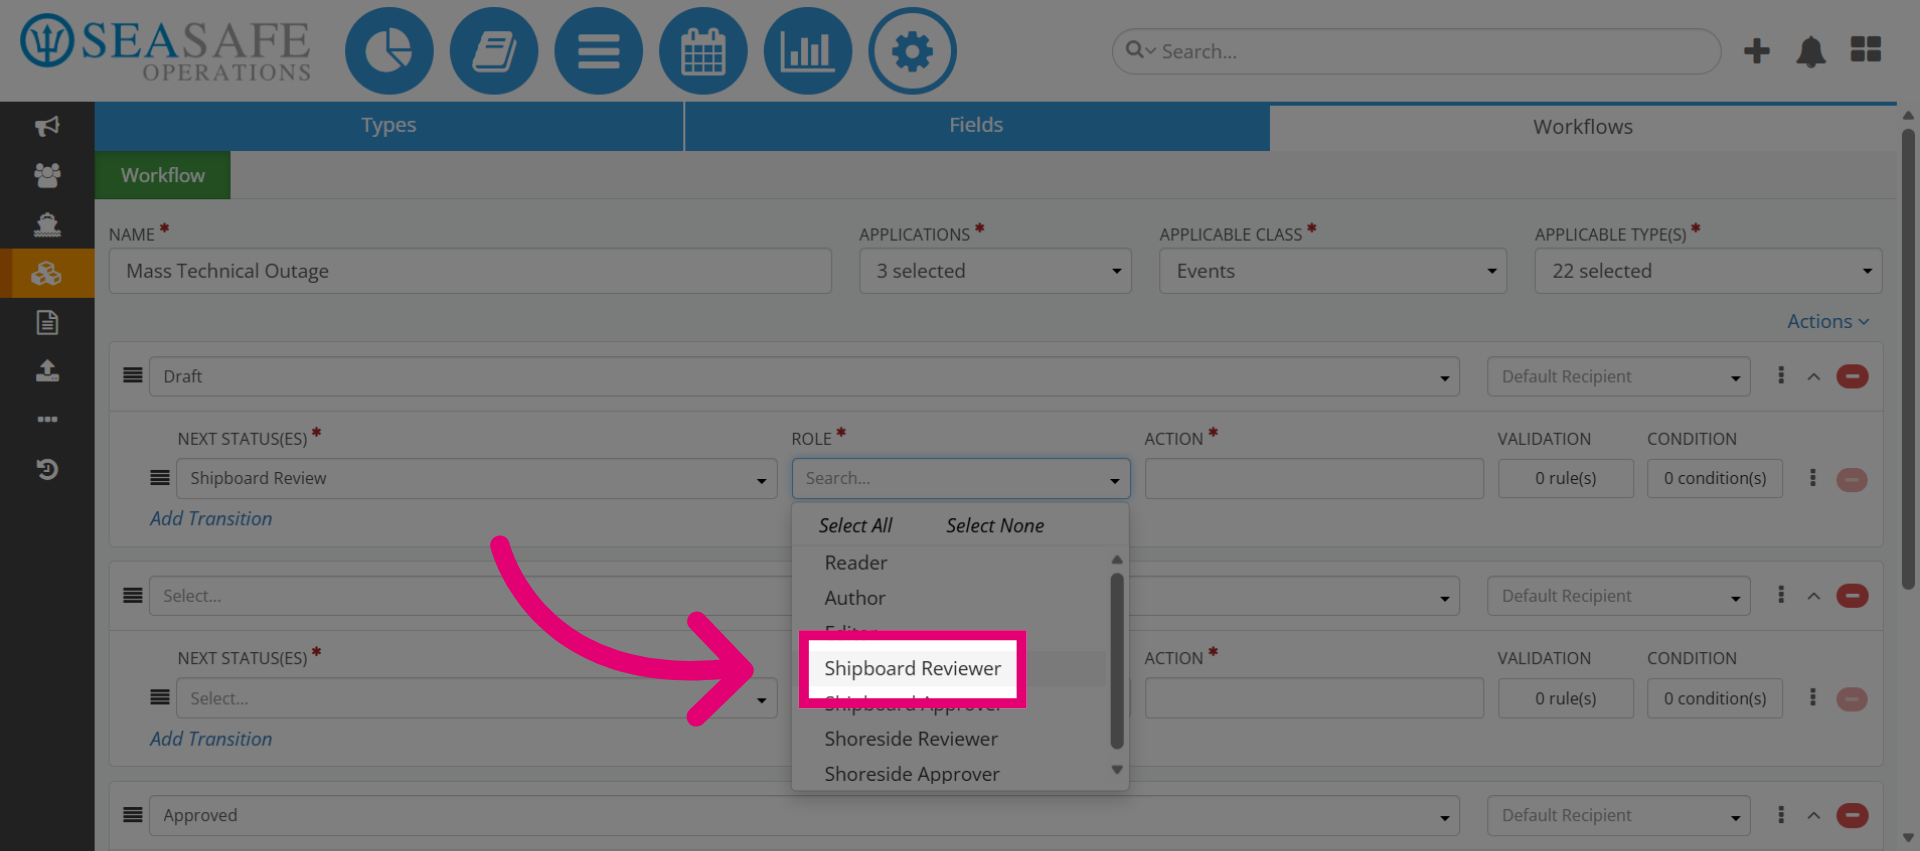
7. Select Shipboard Reviewer Role
For example, select the role "Shipboard Reviewer" for this transition. This role is responsible for reviewing reports onboard, aligning with operational responsibilities.
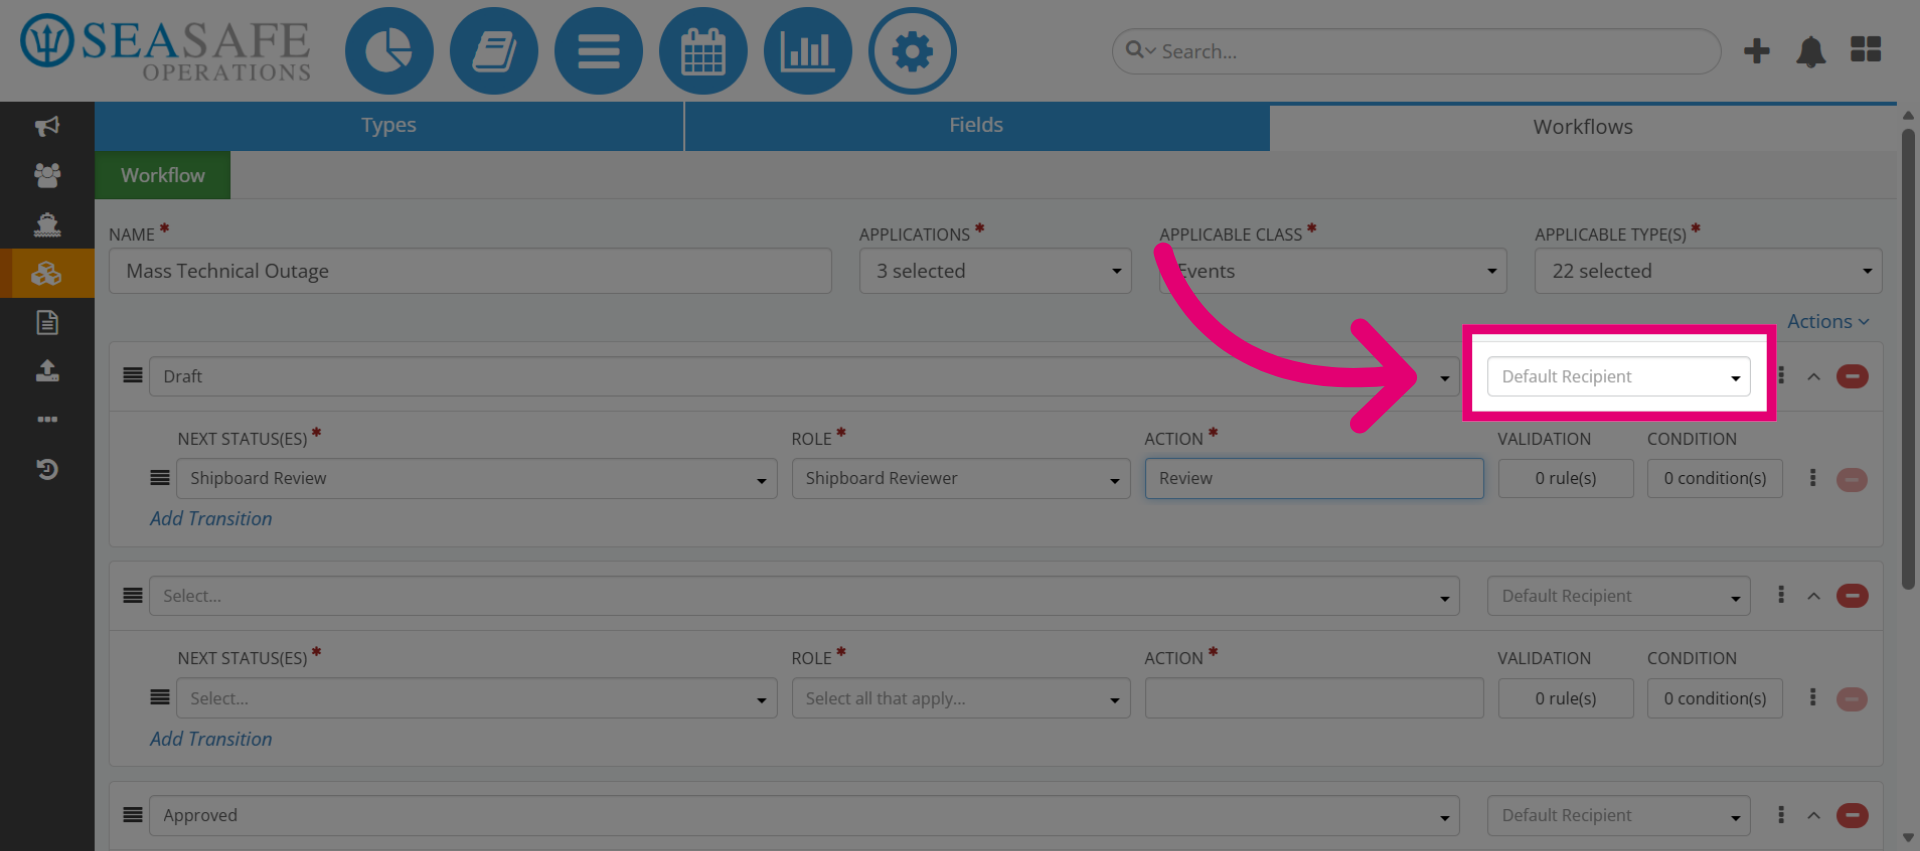
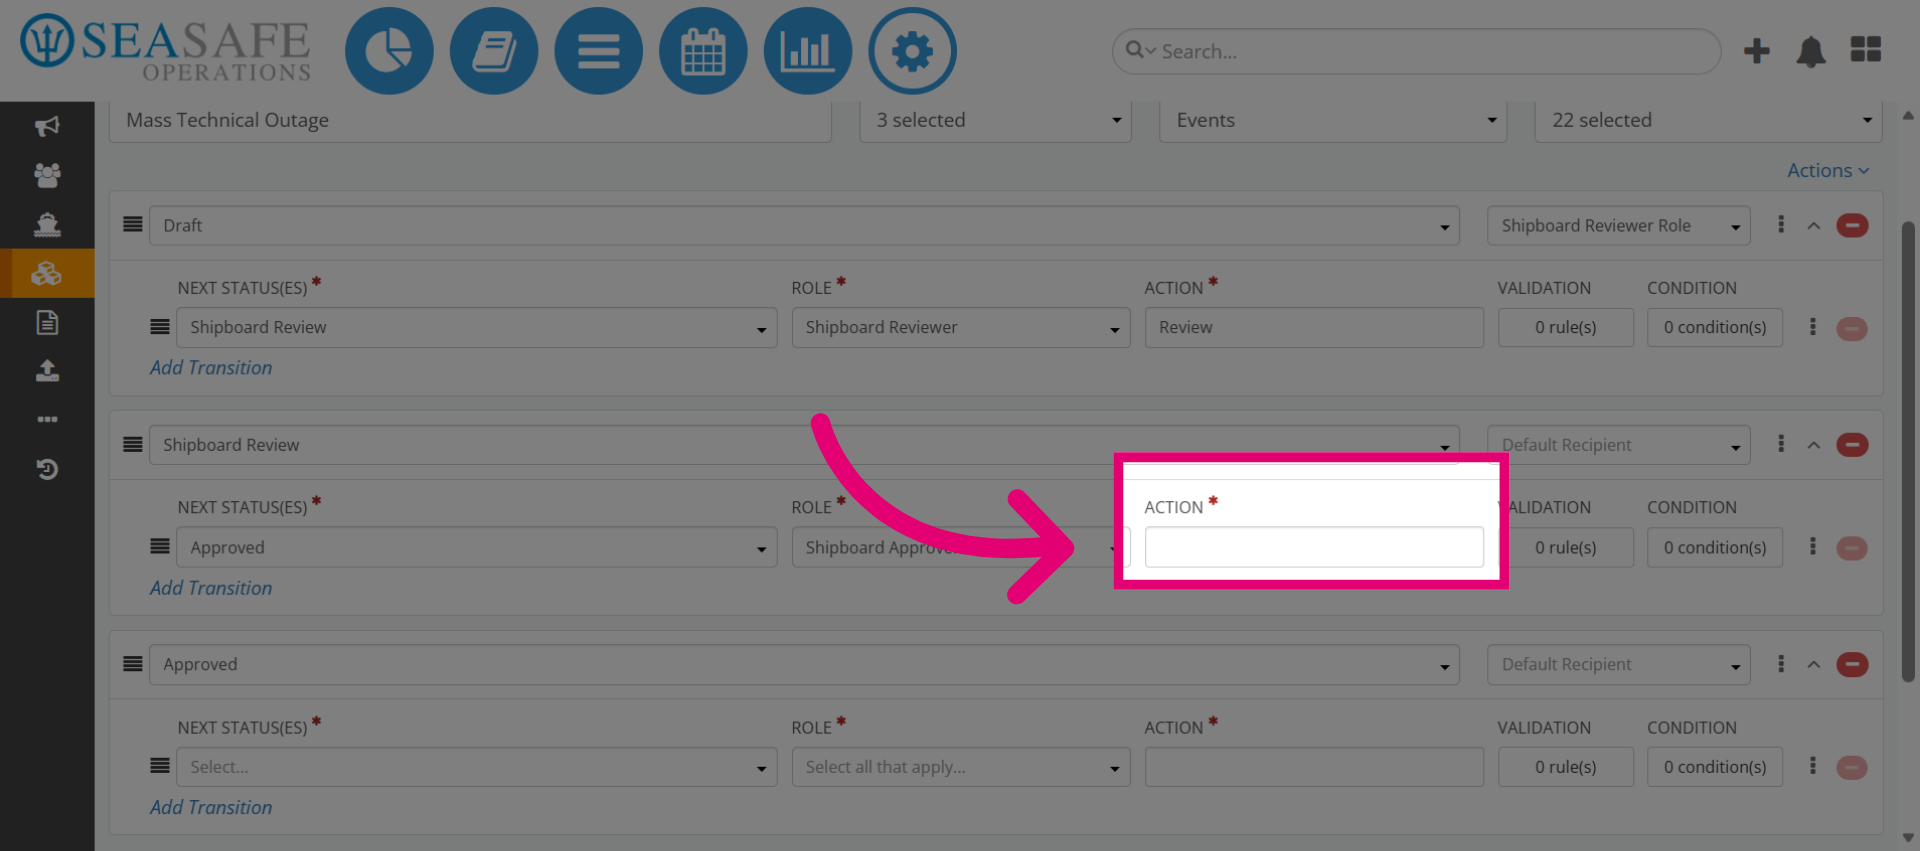
8. Select Default Recipient Option
Next, define the Role’s action. This example will be the Shipboard Reviewer who is "responsible for conducting the review" in the upcoming workflow stage.

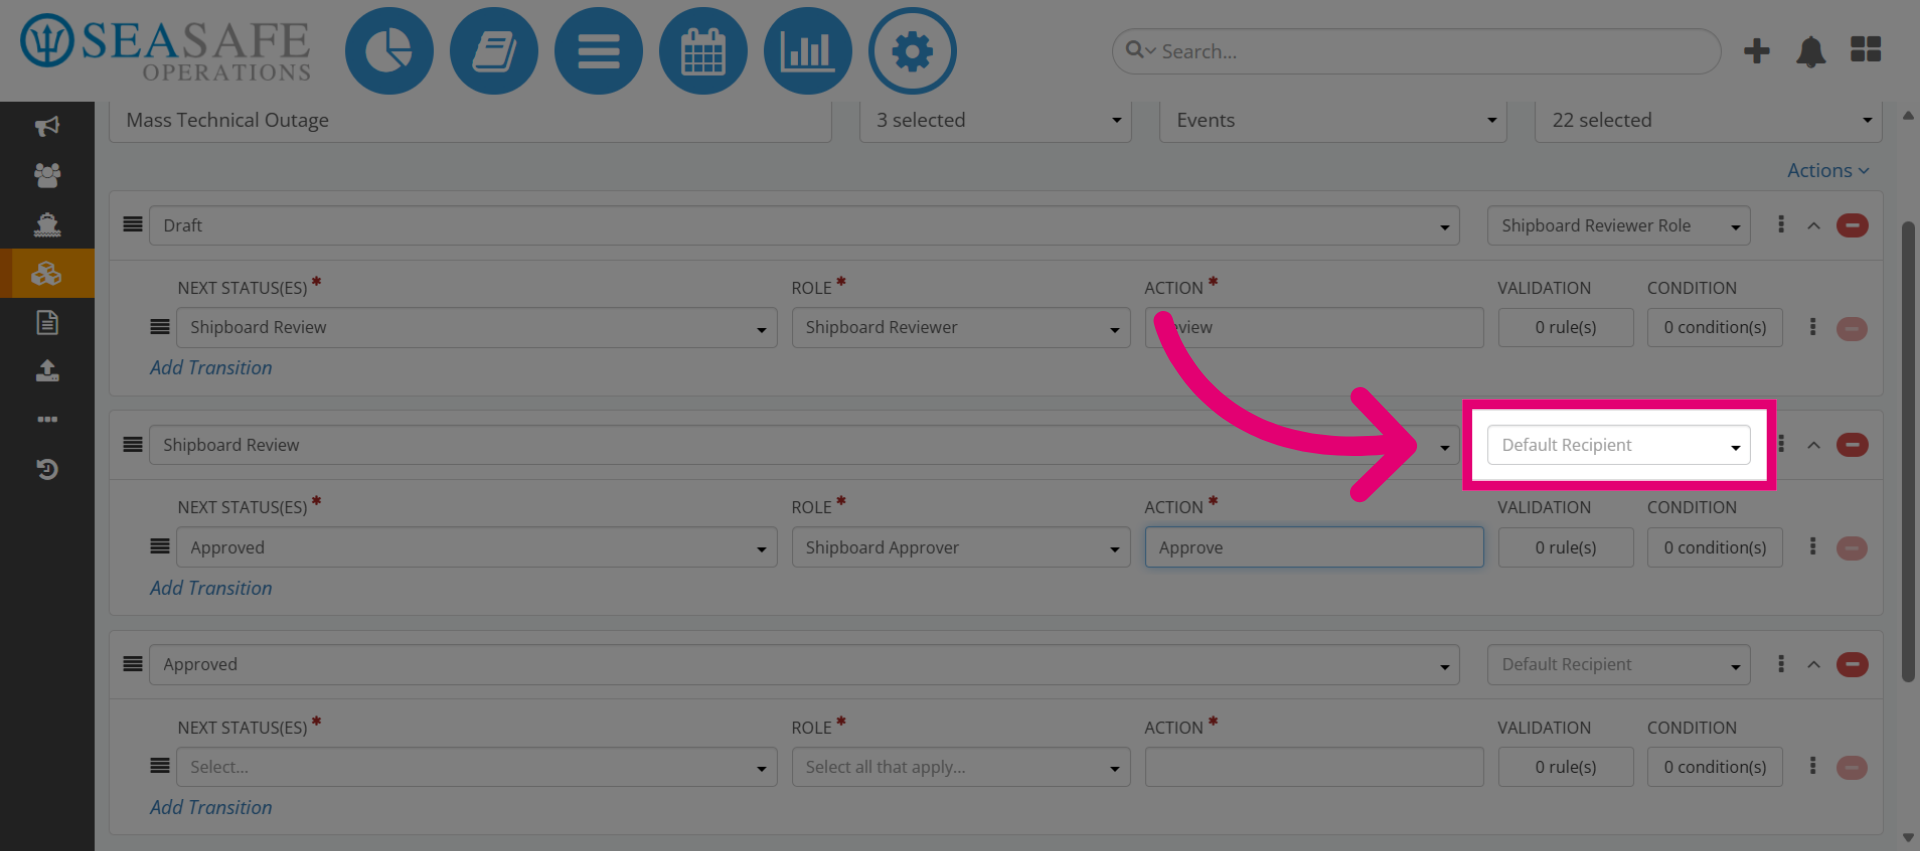
9. Select Default Recipient Option
Then, for the "Default Recipient" we will choose to select "Shipboard Reviewer Role for an example. This default recipient selection ensures notifications go to the correct person or group automatically.
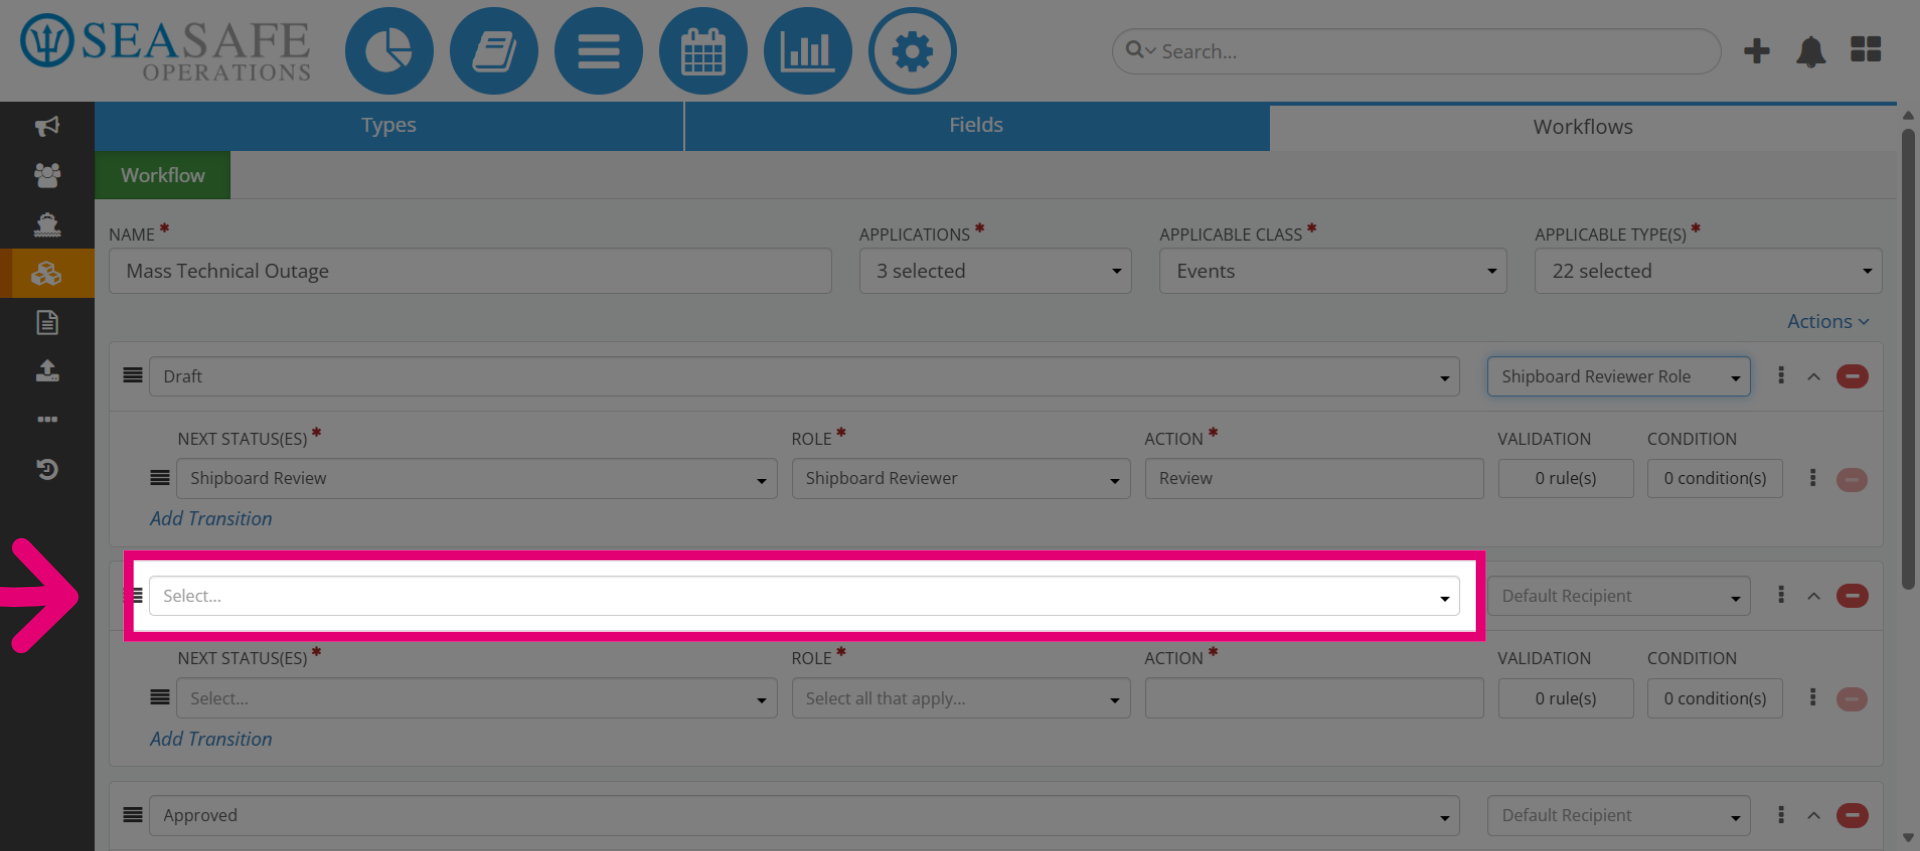
10. Choose Shipboard Reviewer Role
Next, select the "Shipboard Reviewer Role" to finalize linking it to the default. This role is essential as the designated reviewer. However, you have the flexibility to choose one that best aligns with your workflow.

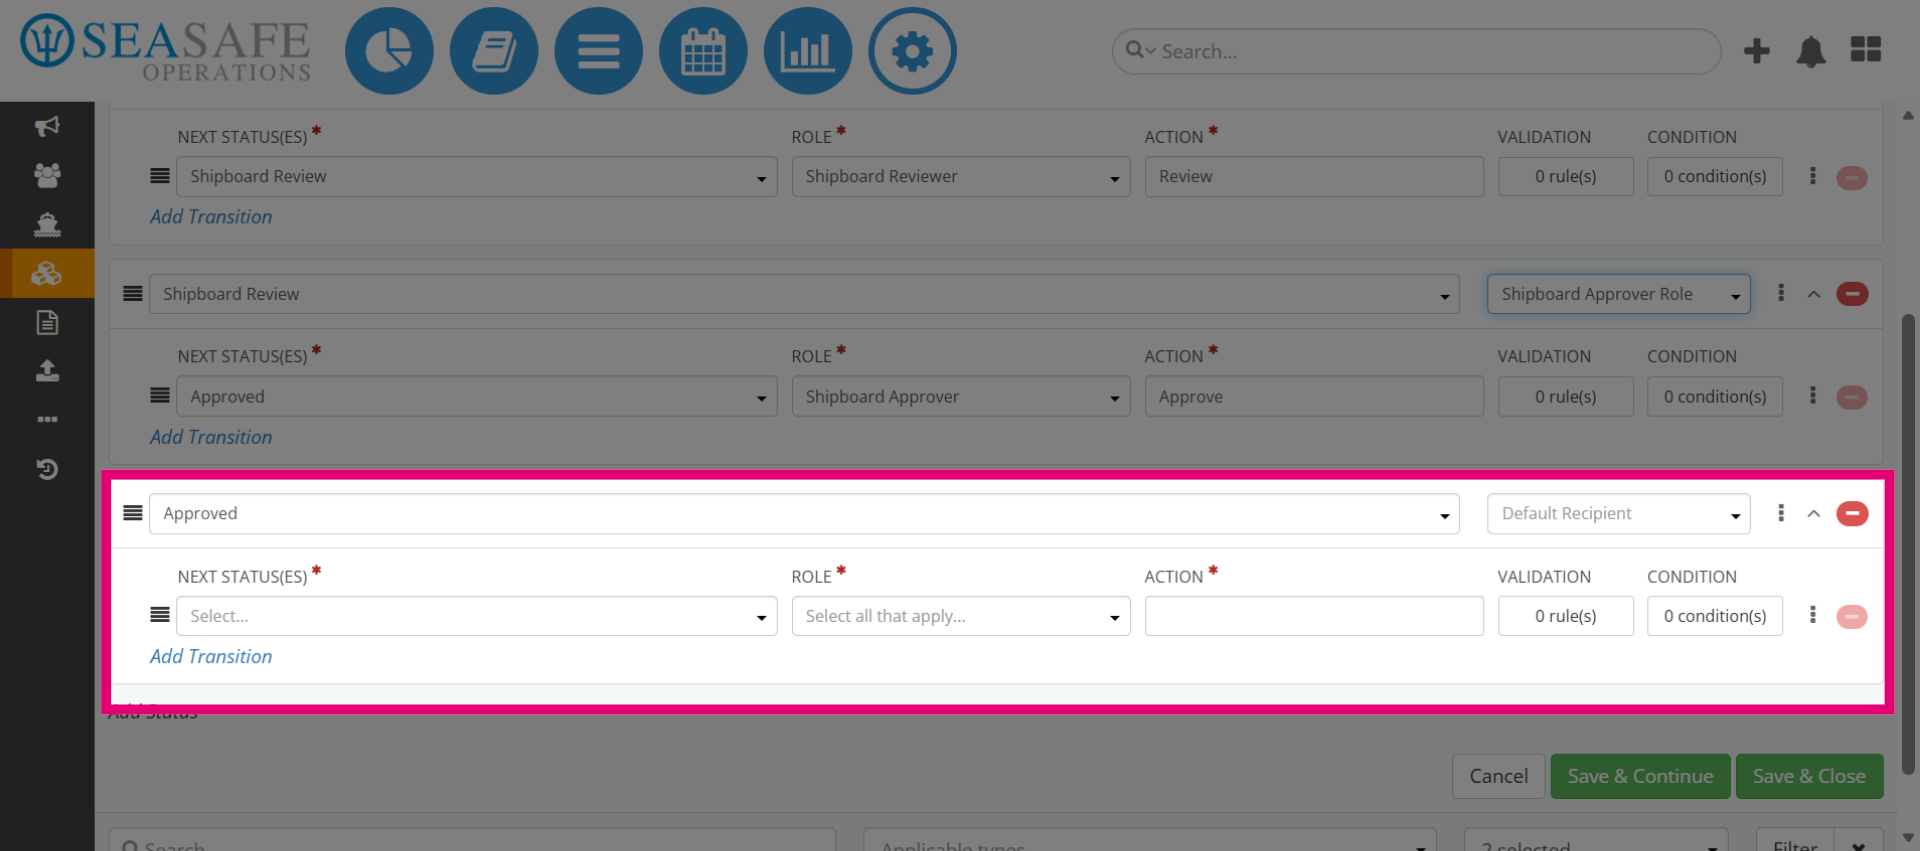
11. Open Status Selection Again
Now, if desired, add another status, for example one called "Approved". Approved status confirms that the report has passed review and is ready for closure or escalation.
12. Open Approval Status Selection
Then, define the "Next Status(es)" to open the approval status dropdown.
13. Choose Approved Status
Click "Approved" to set the status for completed approvals.
14. Open Role Selection for Approval
Then, choose the role needed to finalize the approval. For example, select "Shipboard Approver" for the "Approved" status because this role finalizes the approval process, ensuring compliance before closing.
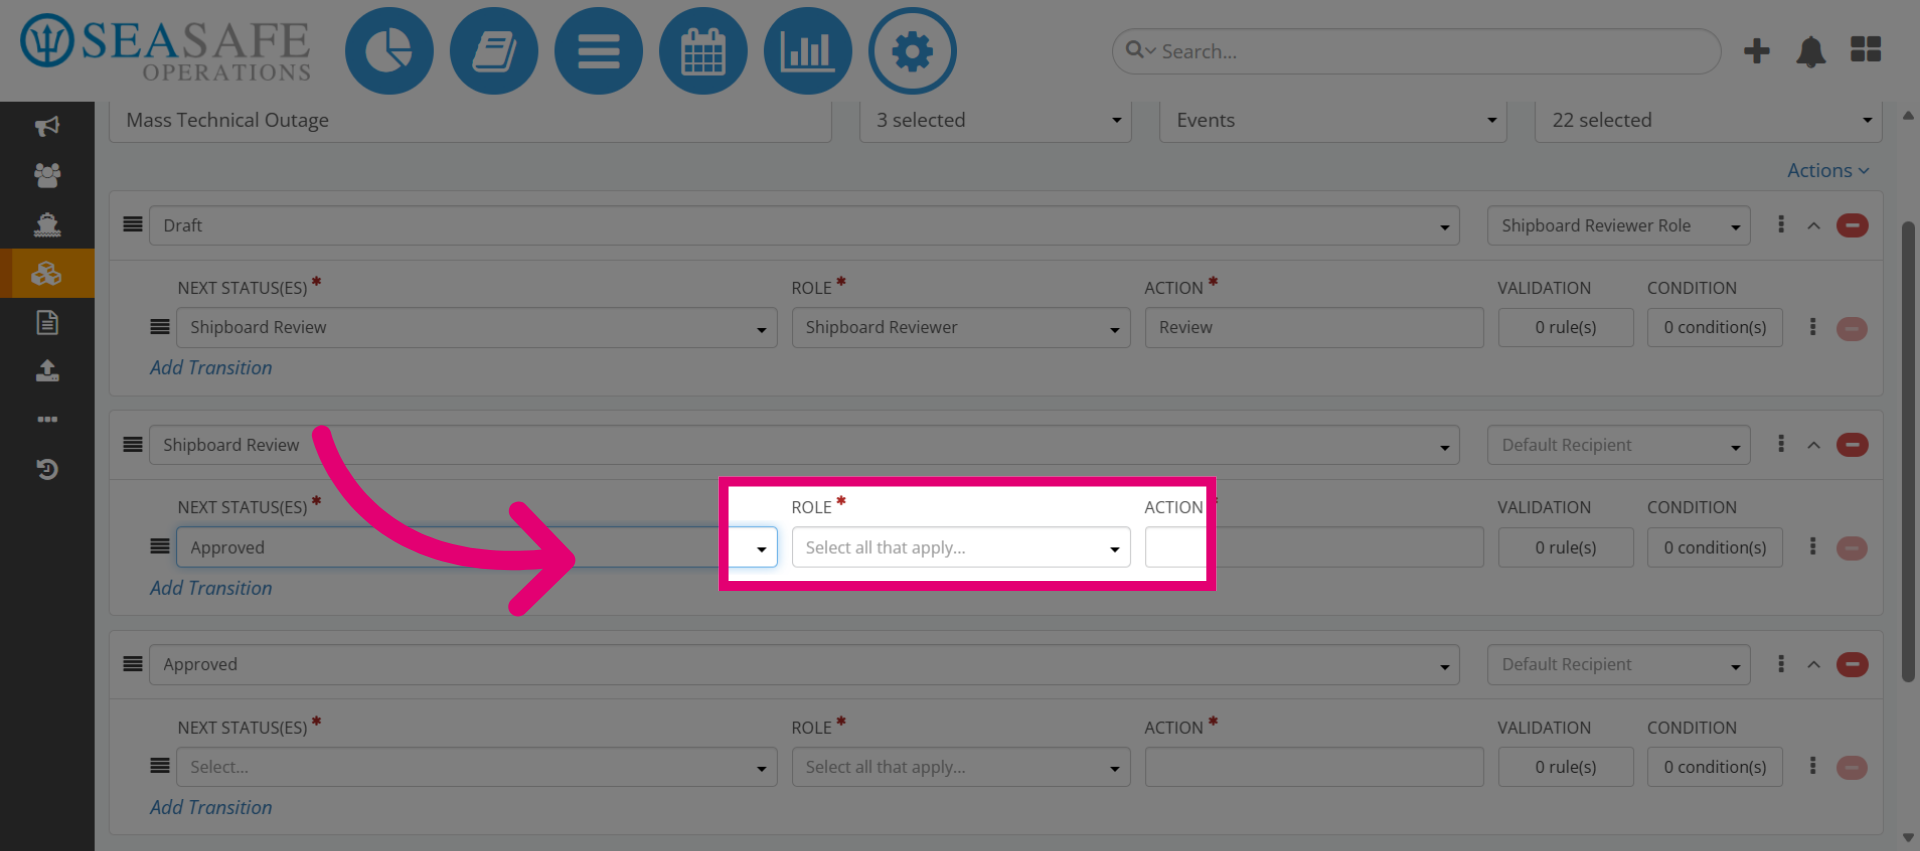
15. Select Shipboard Approver Role
After, click "Shipboard Approver" to assign the approver role for this status.
16. Access Approver Role Settings
Next we will enter the "Action" for the Shipboard Approver role. Using "Approved" aligns well with this role.
17. Select Default Recipient for Approval
Set "Shipboard Approver" as the default recipient for notifications. This keeps communication clear and ensures timely action.
18. Choose Shipboard Approver Role
Then, select "Shipboard Approver Role" to link the role to the default recipient.
19. Add New Status
The next status is "Approved". Click "Add Status" to create a new workflow status in the system.
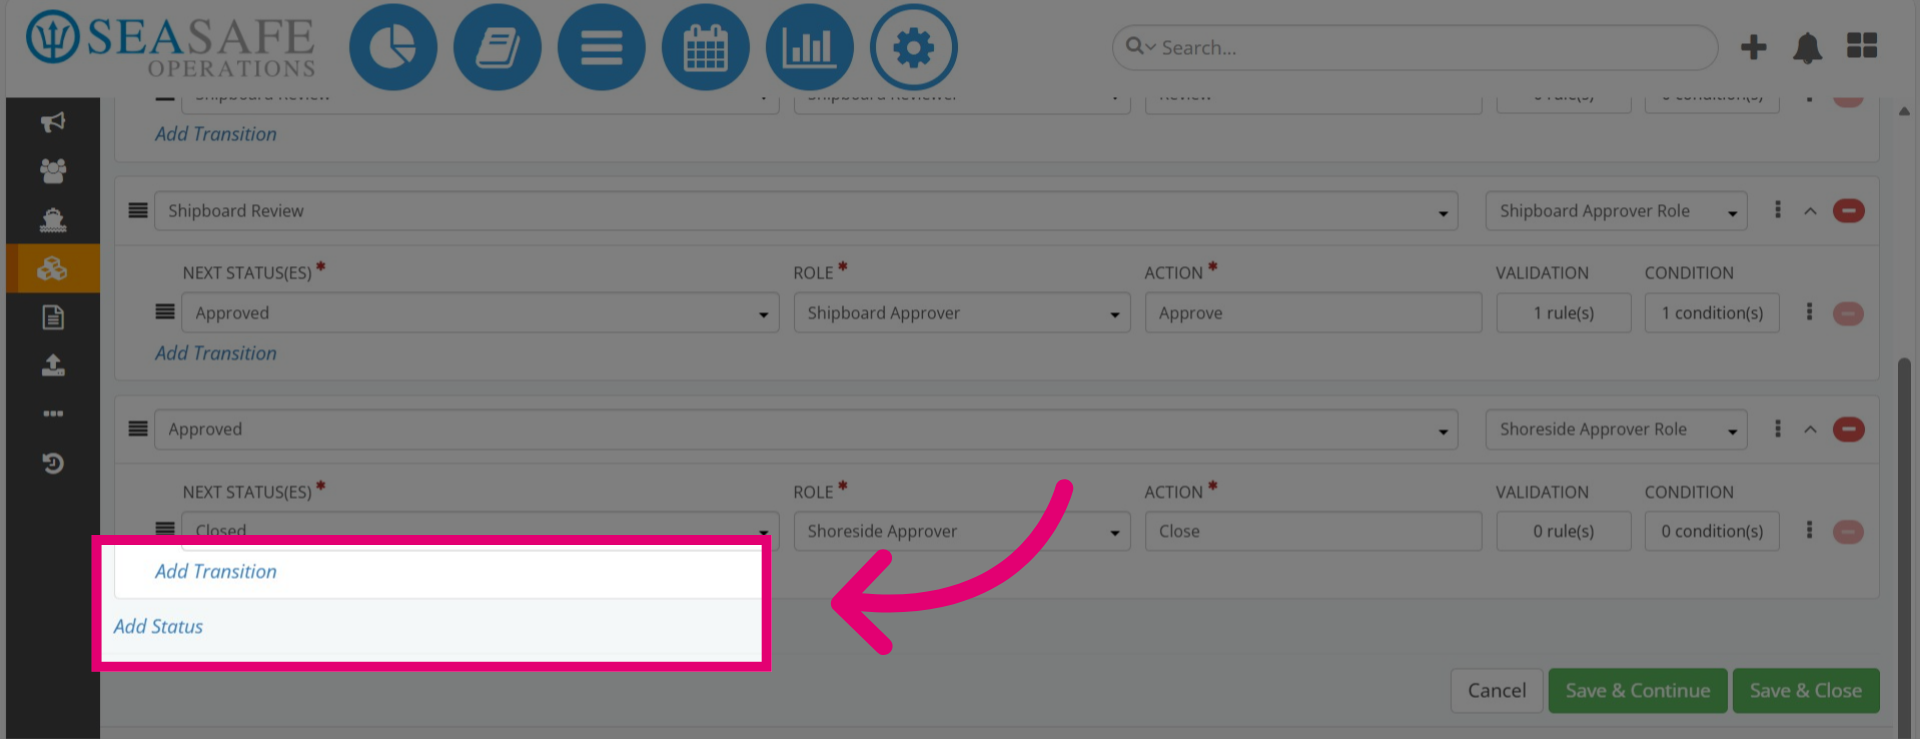
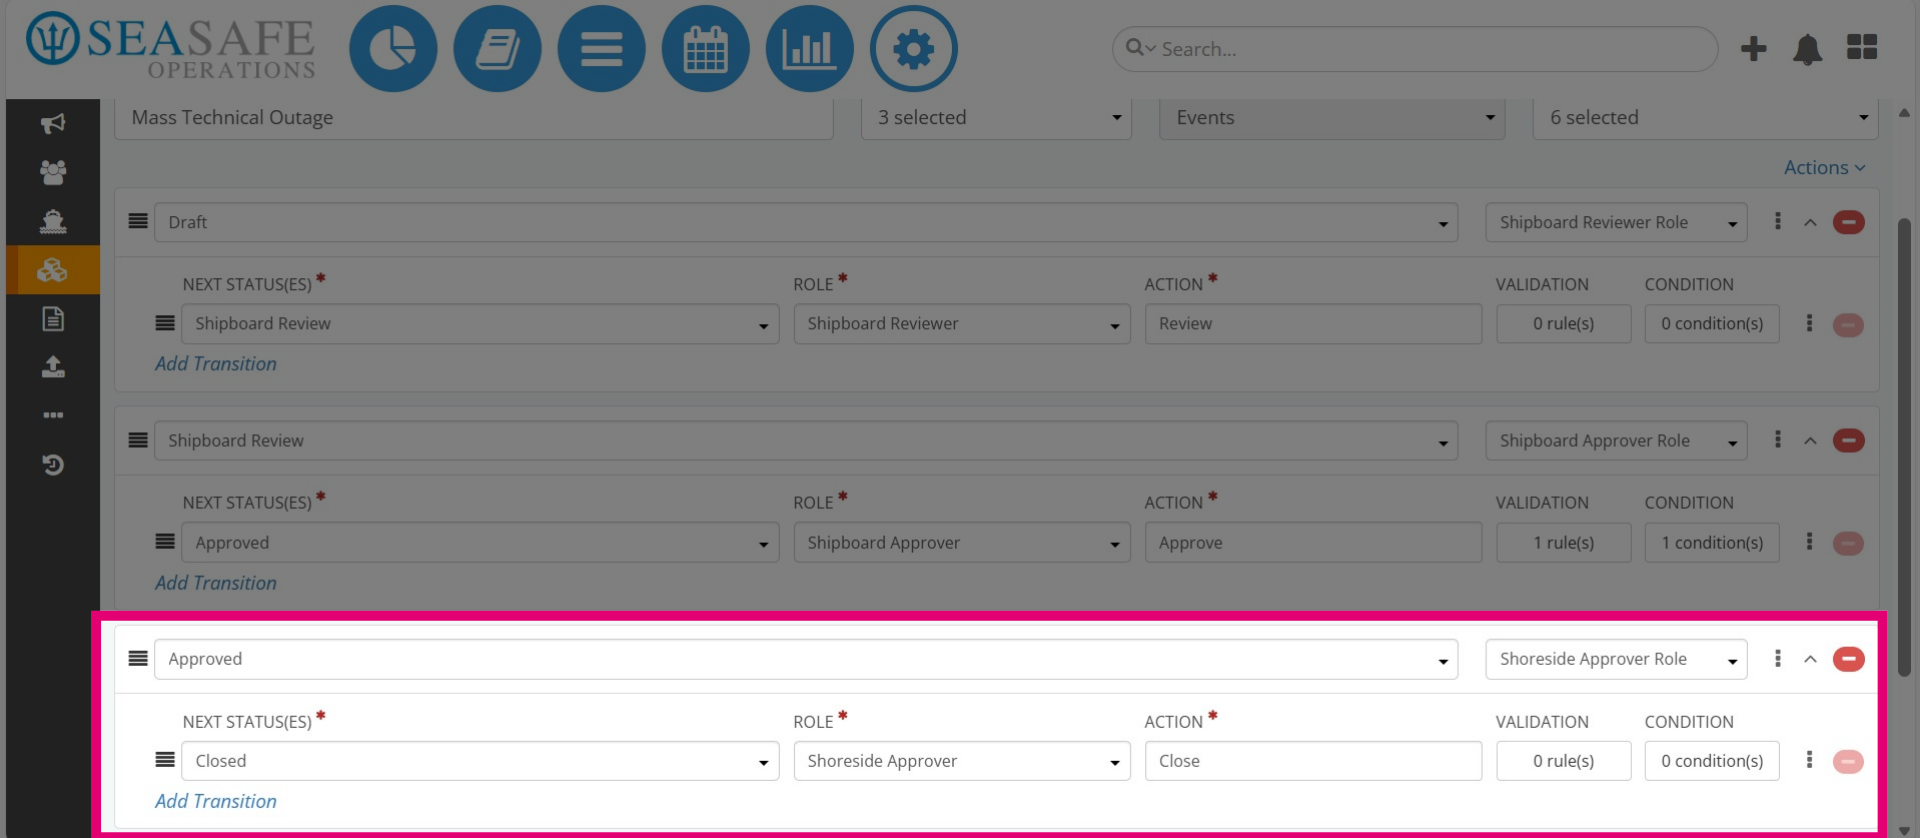
20. Add section for Approved Status
Then, add "Closed" as the last status and create a transition from Approved → Closed. Assign the "Role" "Shoreside Approver" for this step. Why: Closing the workflow confirms all actions are complete and documentation is finalized.
21. Ading a new Transition or Status
Then, to add a new transition, select "Add Transition," or to introduce a new status, choose "Add Status." For this example, we will keep the final status as "Closed."