New article
Recently updated
Add Field Details in Ideagen Maritime Management

This walkthrough explains how to configure field details in Ideagen Maritime Management to ensure fields are properly named, organized, and linked to the correct Class, Type, and Subtab. Well-structured fields improve workflow clarity, reporting accuracy, and user experience.
1. Introduction
Fields serve as another of the foundational elements of Ideagen Maritime Management workflows. You will learn how to name fields clearly and consistently, assign them to the appropriate Class and Type, and organize fields into subtabs to enhance navigation. Additionally, a well-structured field layout minimizes confusion and accelerates data entry for users. Start in the shoreside "Admin Menu", in the "Fields, Types & Workflow" section under the "Field" tab.
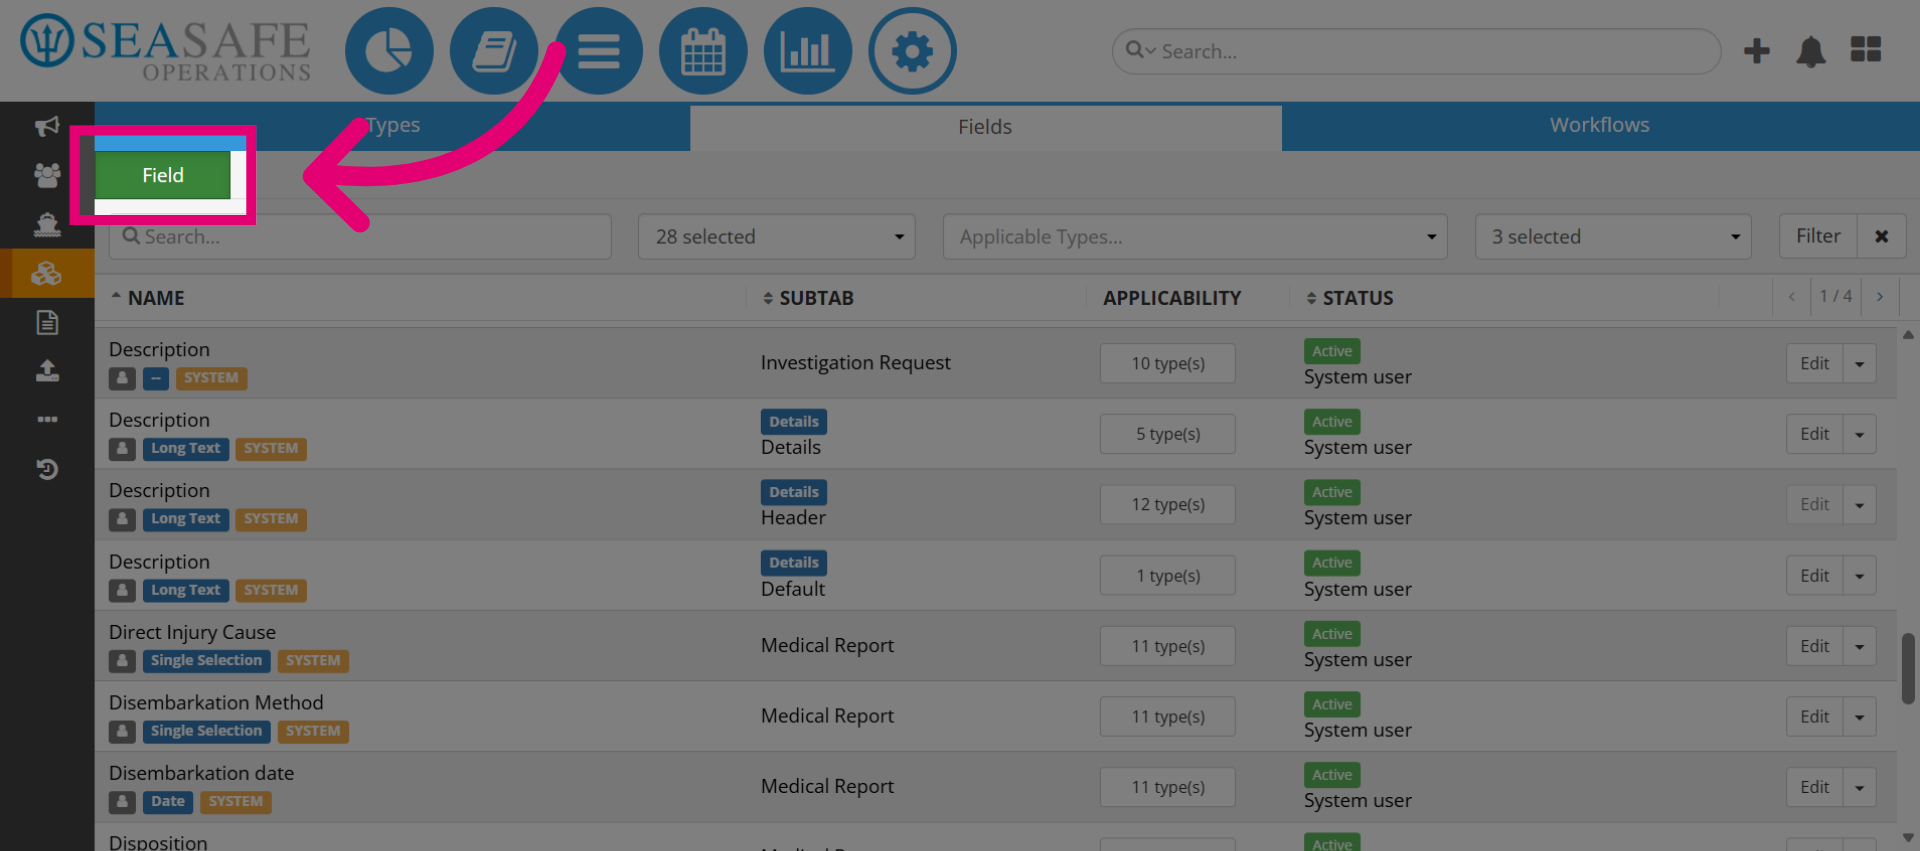
2. Select Field Button
Click the green Field button to start creating a new field. This opens the configuration panel where you define all details for the field.
3. Add a name
The first step is to add a name for the field. This name should be descriptive and meaningful.

4. Enter Field Name
Next, input the field name by providing a detailed description, such as "Technical Malfunction Loss." Ensure you type the complete description for clarity. For example: For Example: “Technical Malfunction Loss” Needs Improvement: “Loss” Why this is important: Clear field names enhance user understanding of the data required and improve the accuracy of reporting
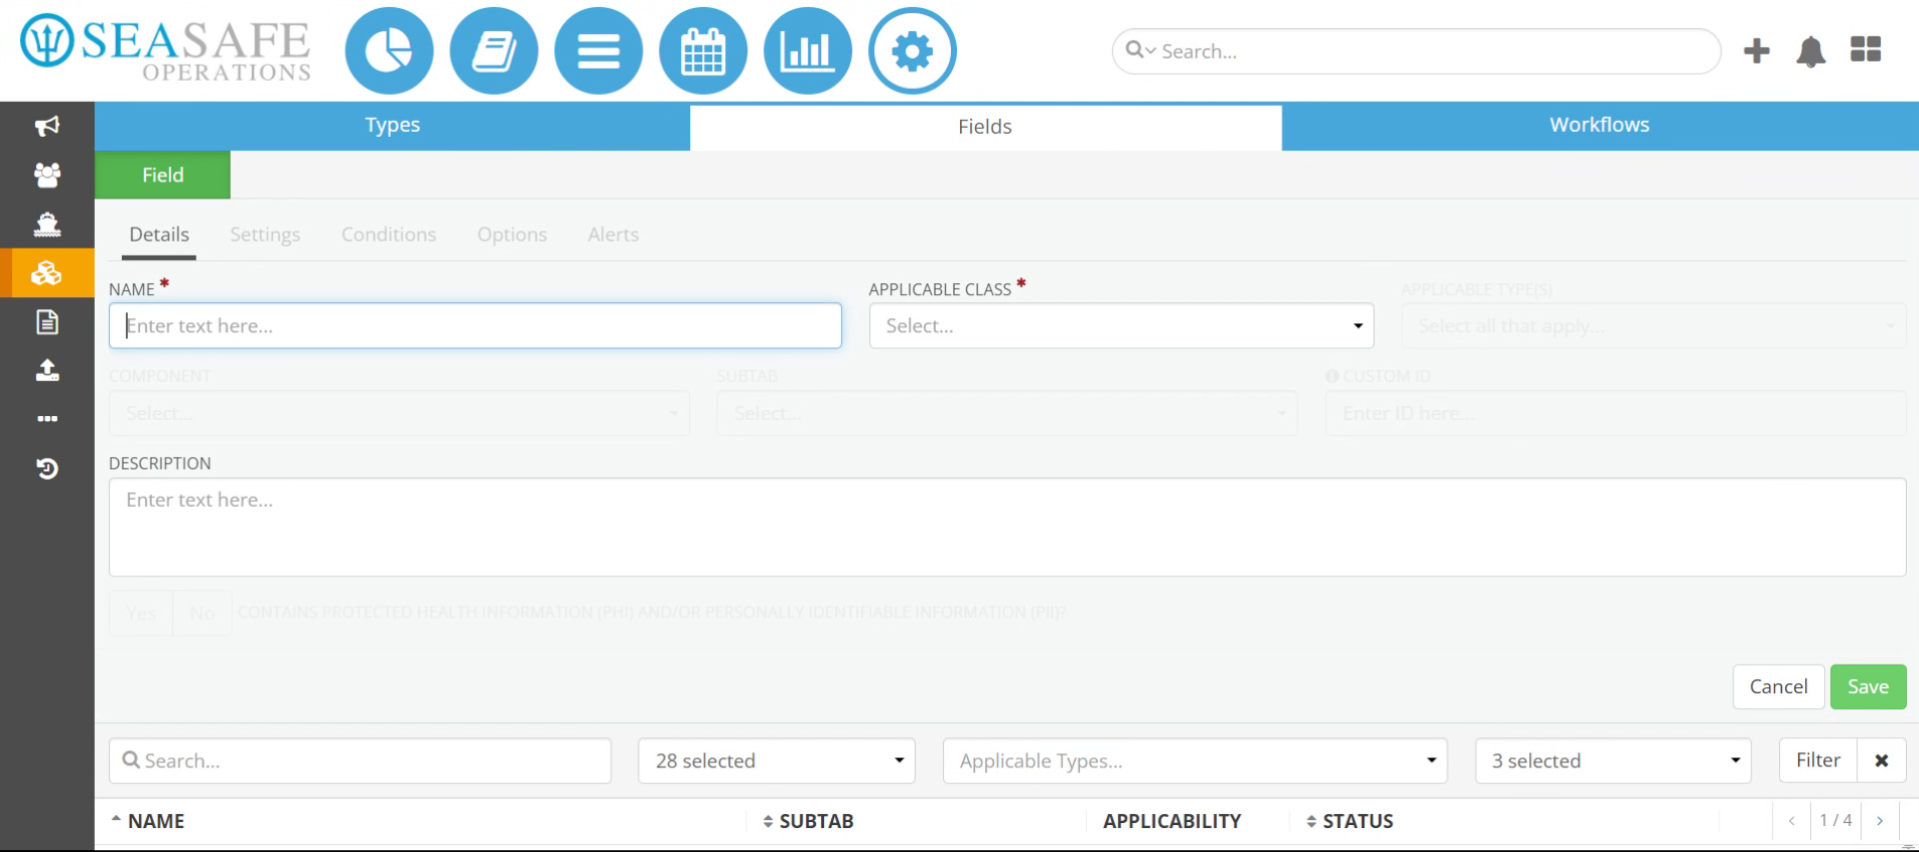
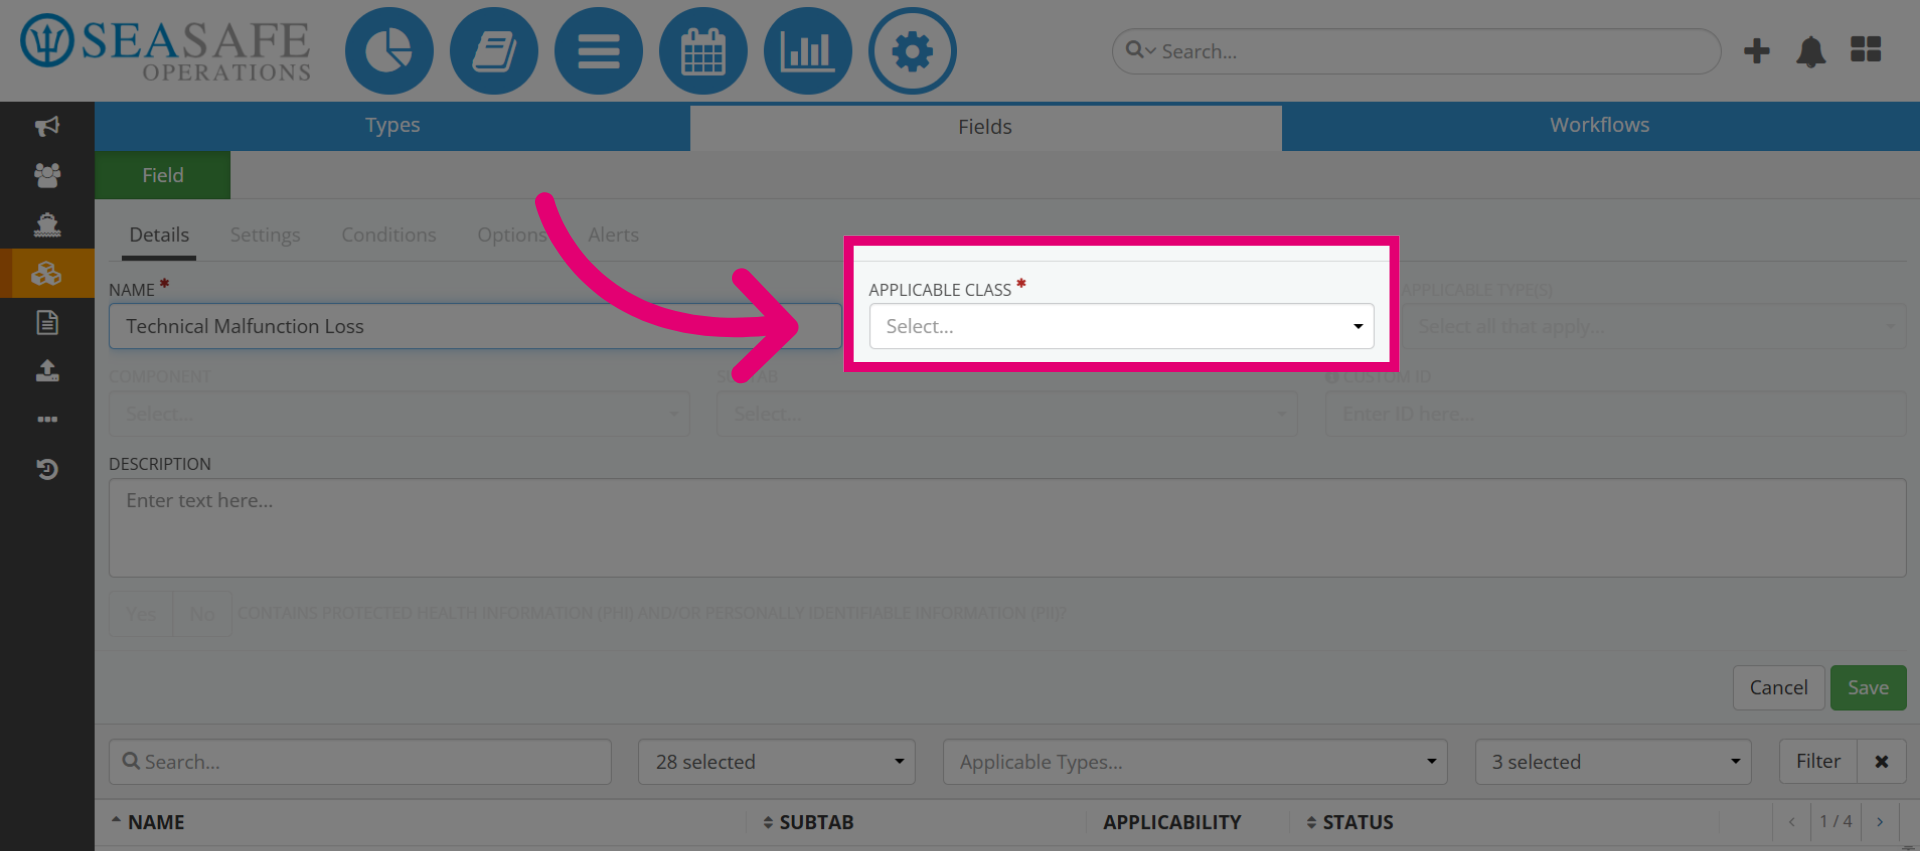
5. Open the Class Dropdown Menu
Then, click the "Applicable Class" dropdown menu to choose the "Class" for the field. Classes define the broad category (for example, Event, Hazard, Risk Assessment, etc.) that the field belongs to. A tip to remember is to try and match the Class to the workflow purpose. For example, if the field is for an incident report, select Event.
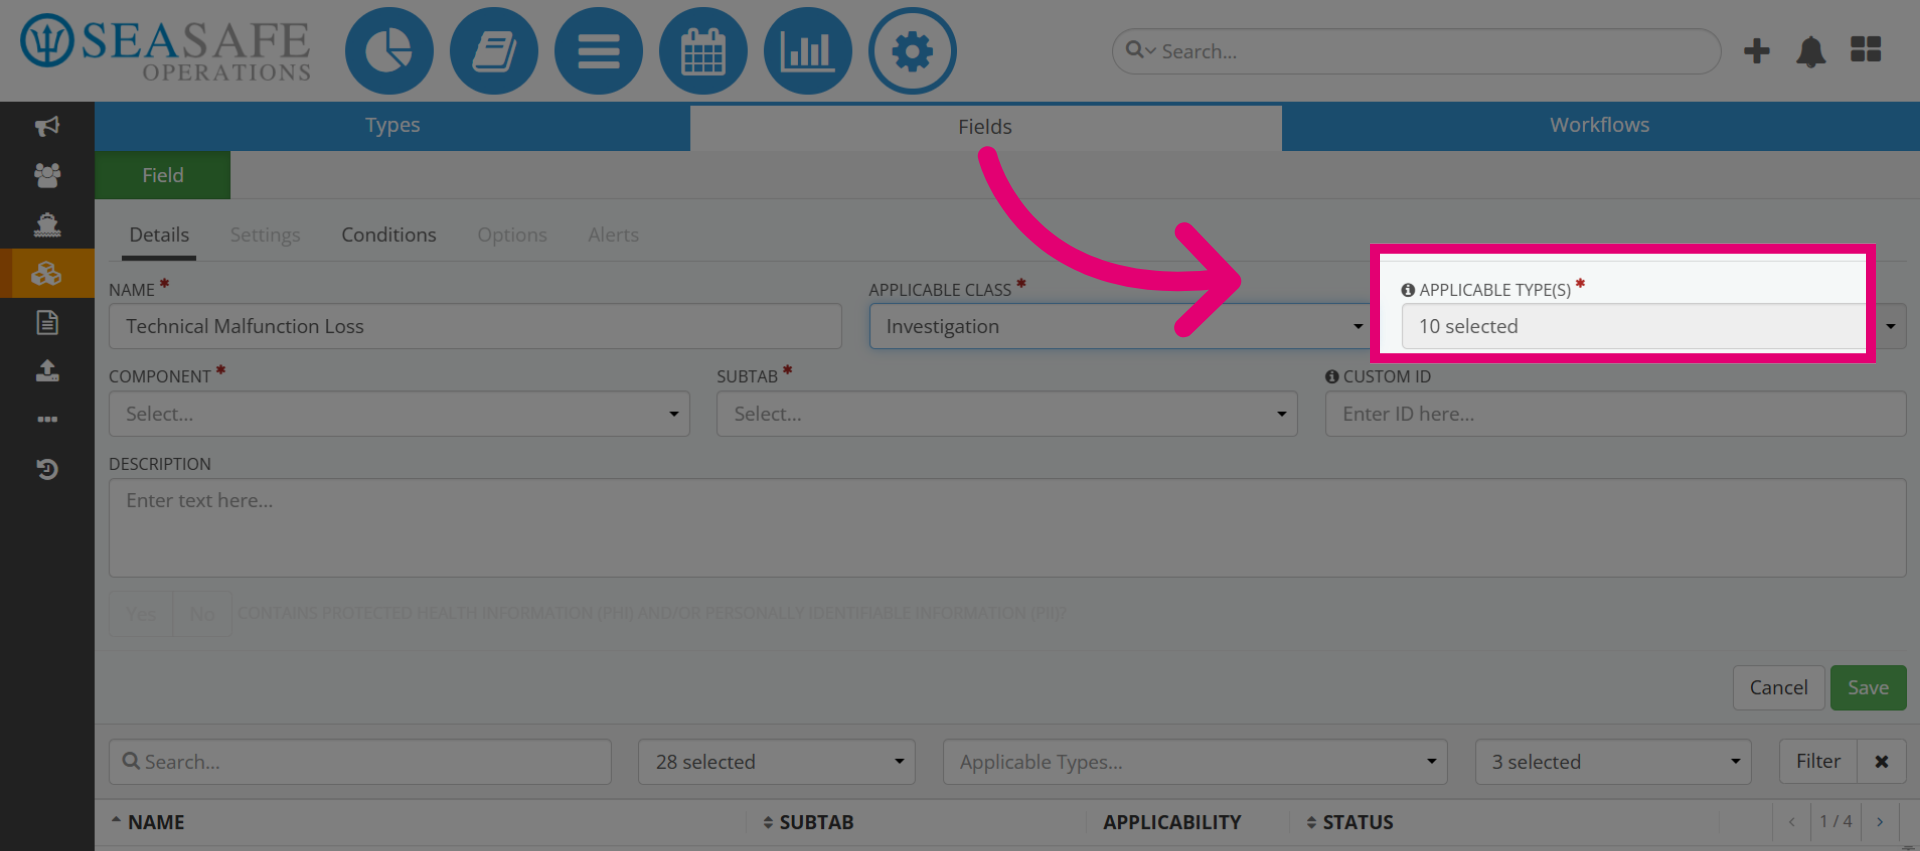
6. Select the Type(s)
Choose the Applicable Type(s) that this field will apply to. Types are templates within a Class (e.g., Personal Injury, Equipment Damage). Why it matters: Linking fields to the correct Types ensures they appear in the right forms and workflows.
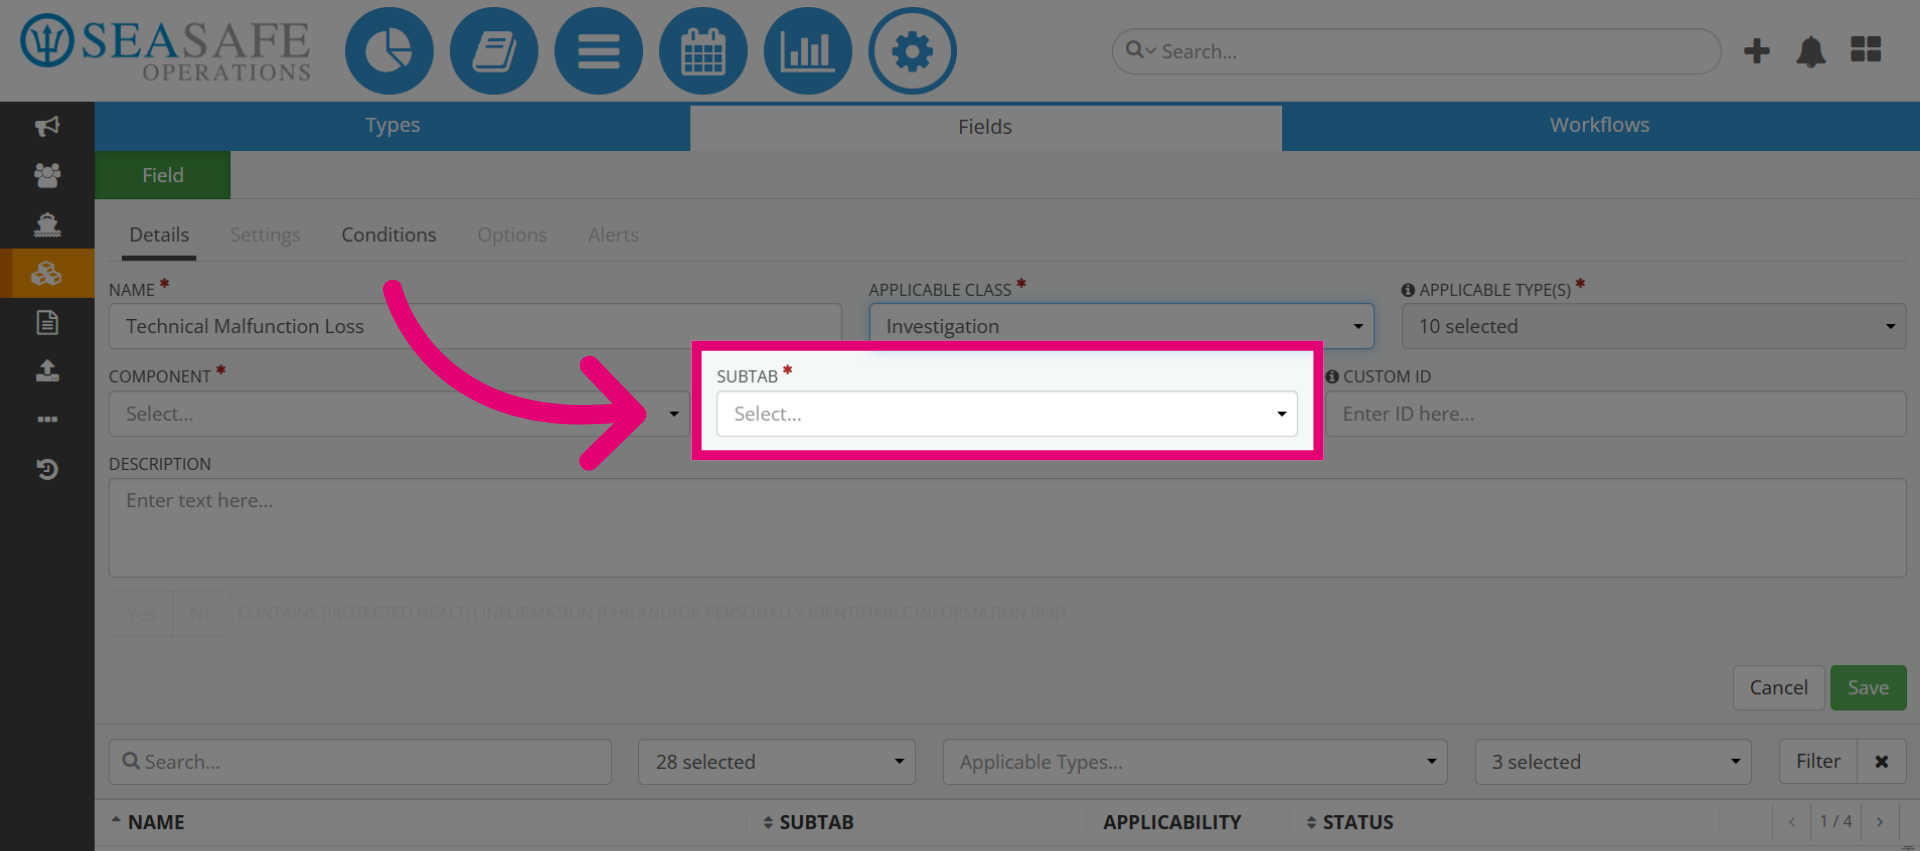
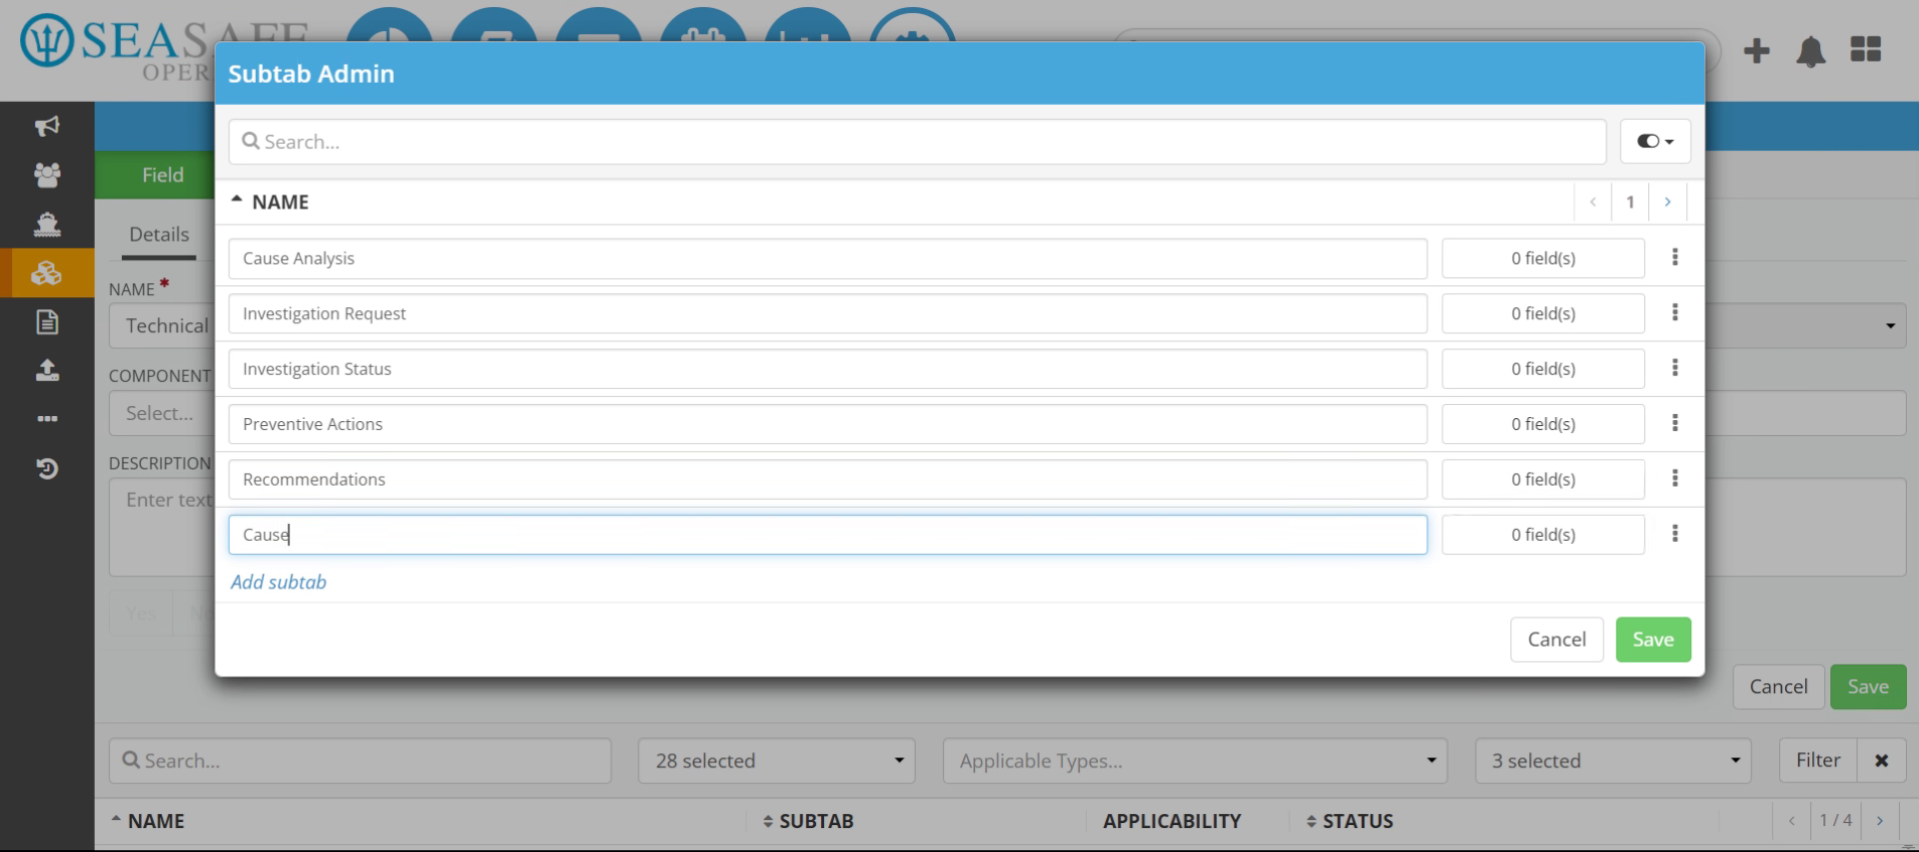
7. Choose a Subtab
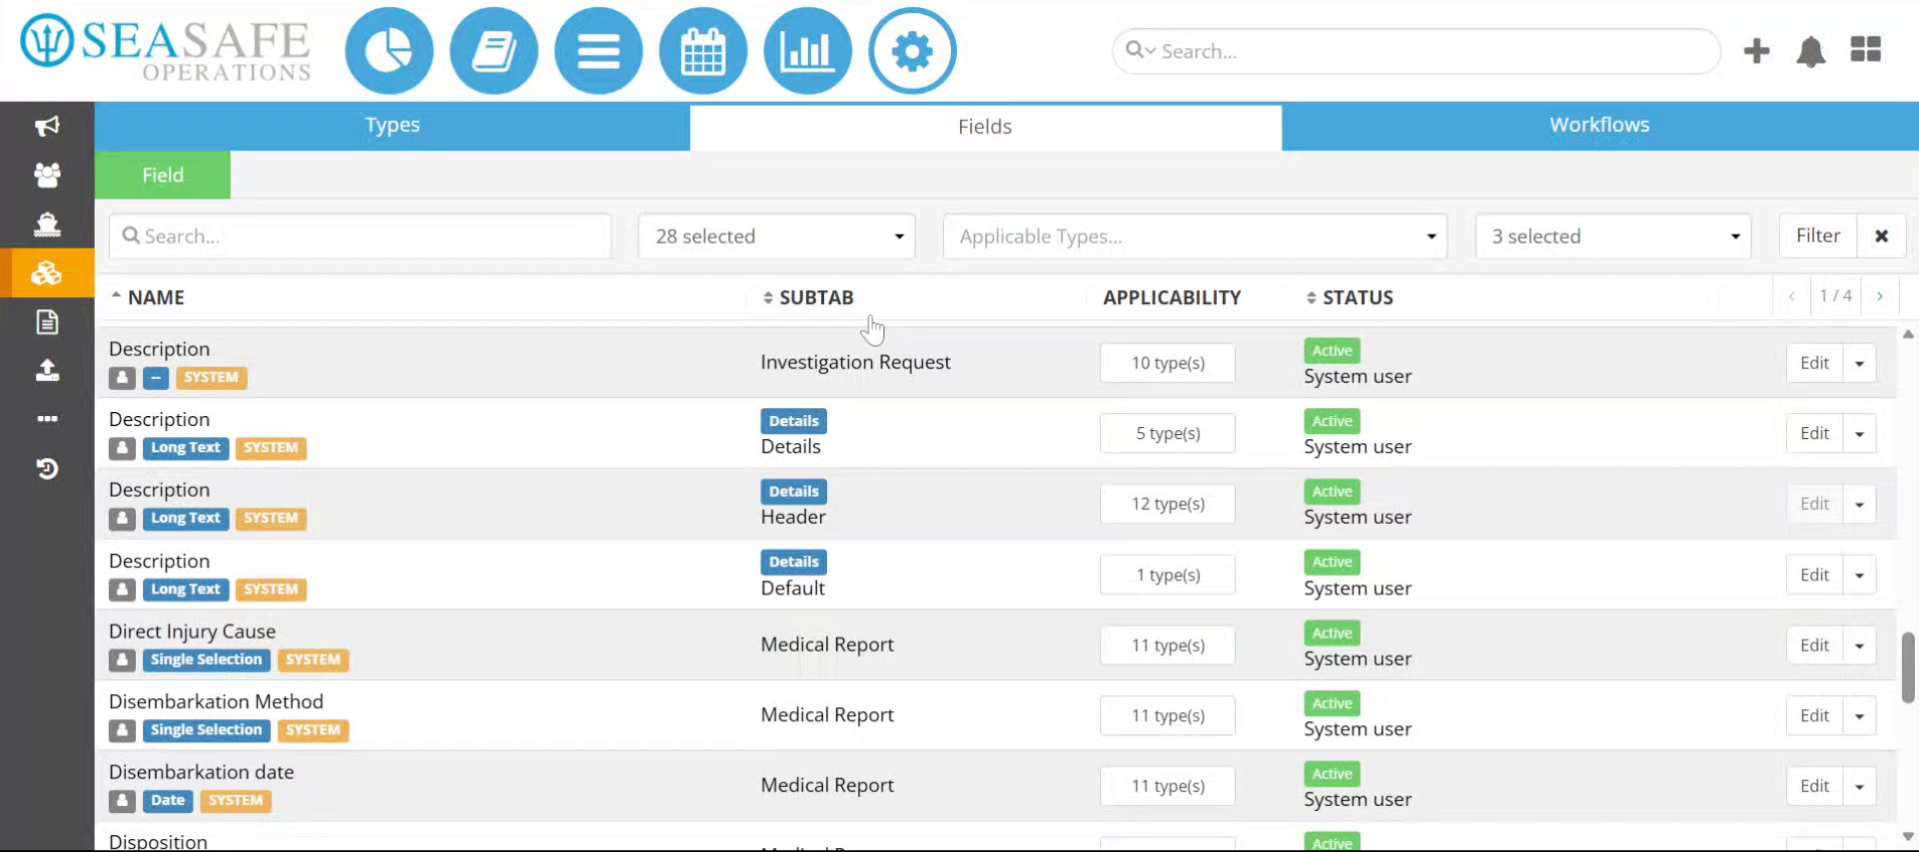
Next click the dropdown again to select a "Subtab". Subtabs organize fields into sections within a form (for example, “Cause Evidence,” “Investigation Details”).
8. Add New Subtab
If no suitable subtab exists, click "Add subtab" to create a new section.
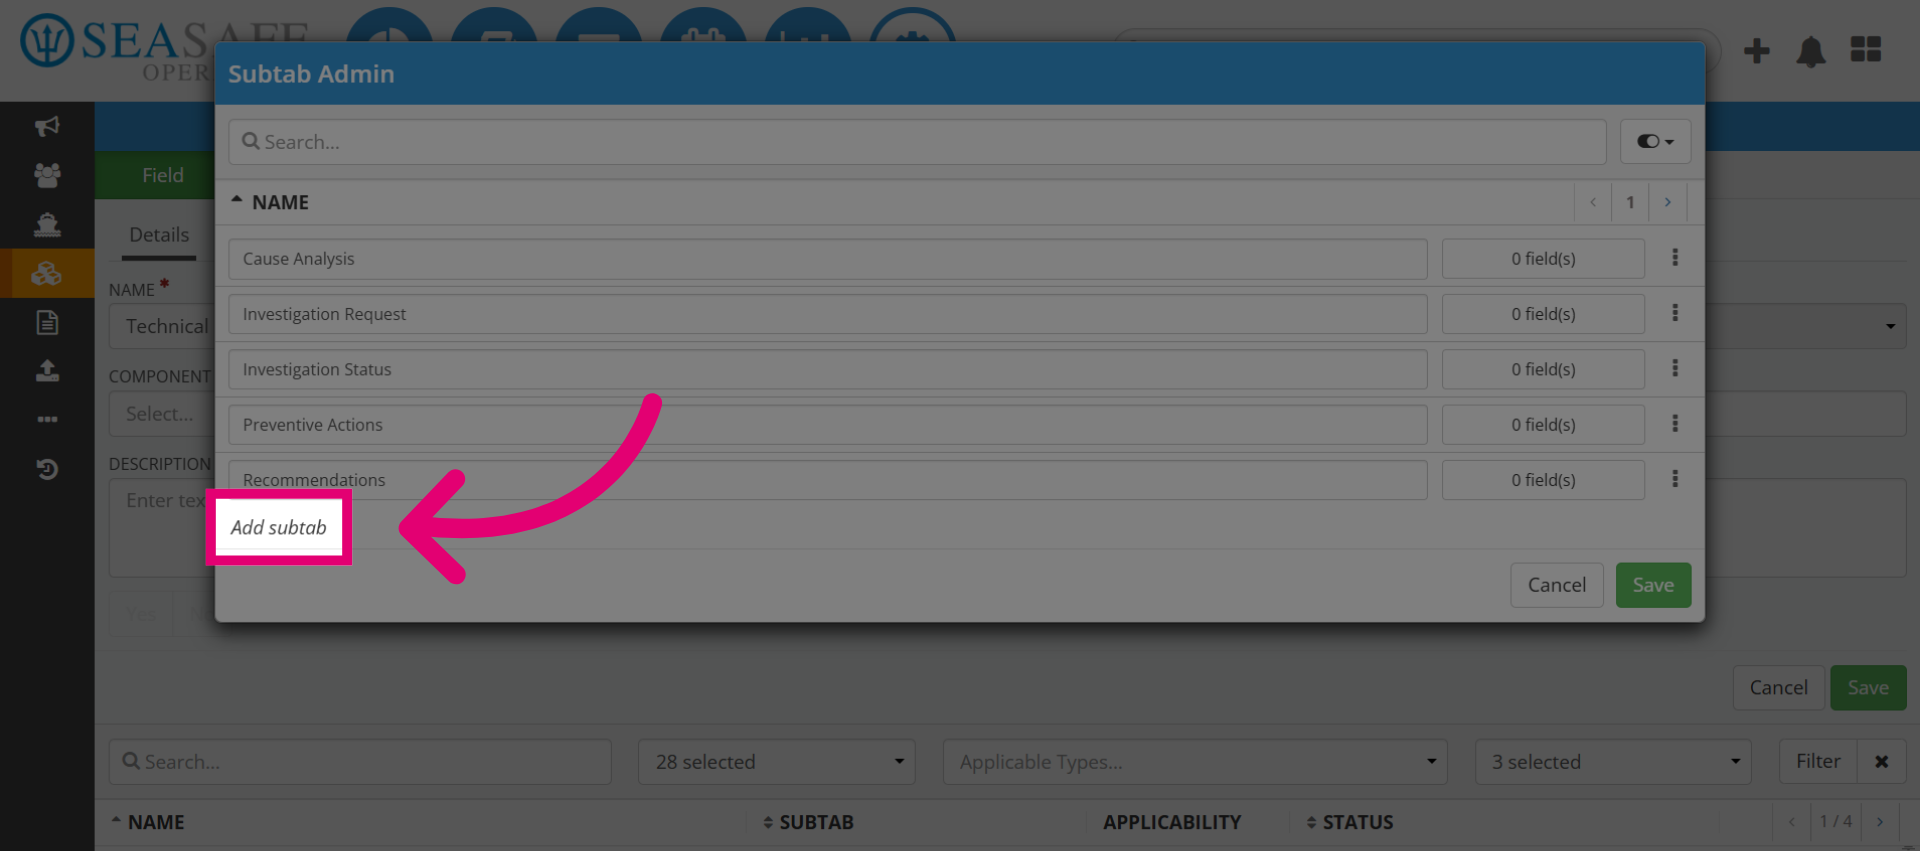
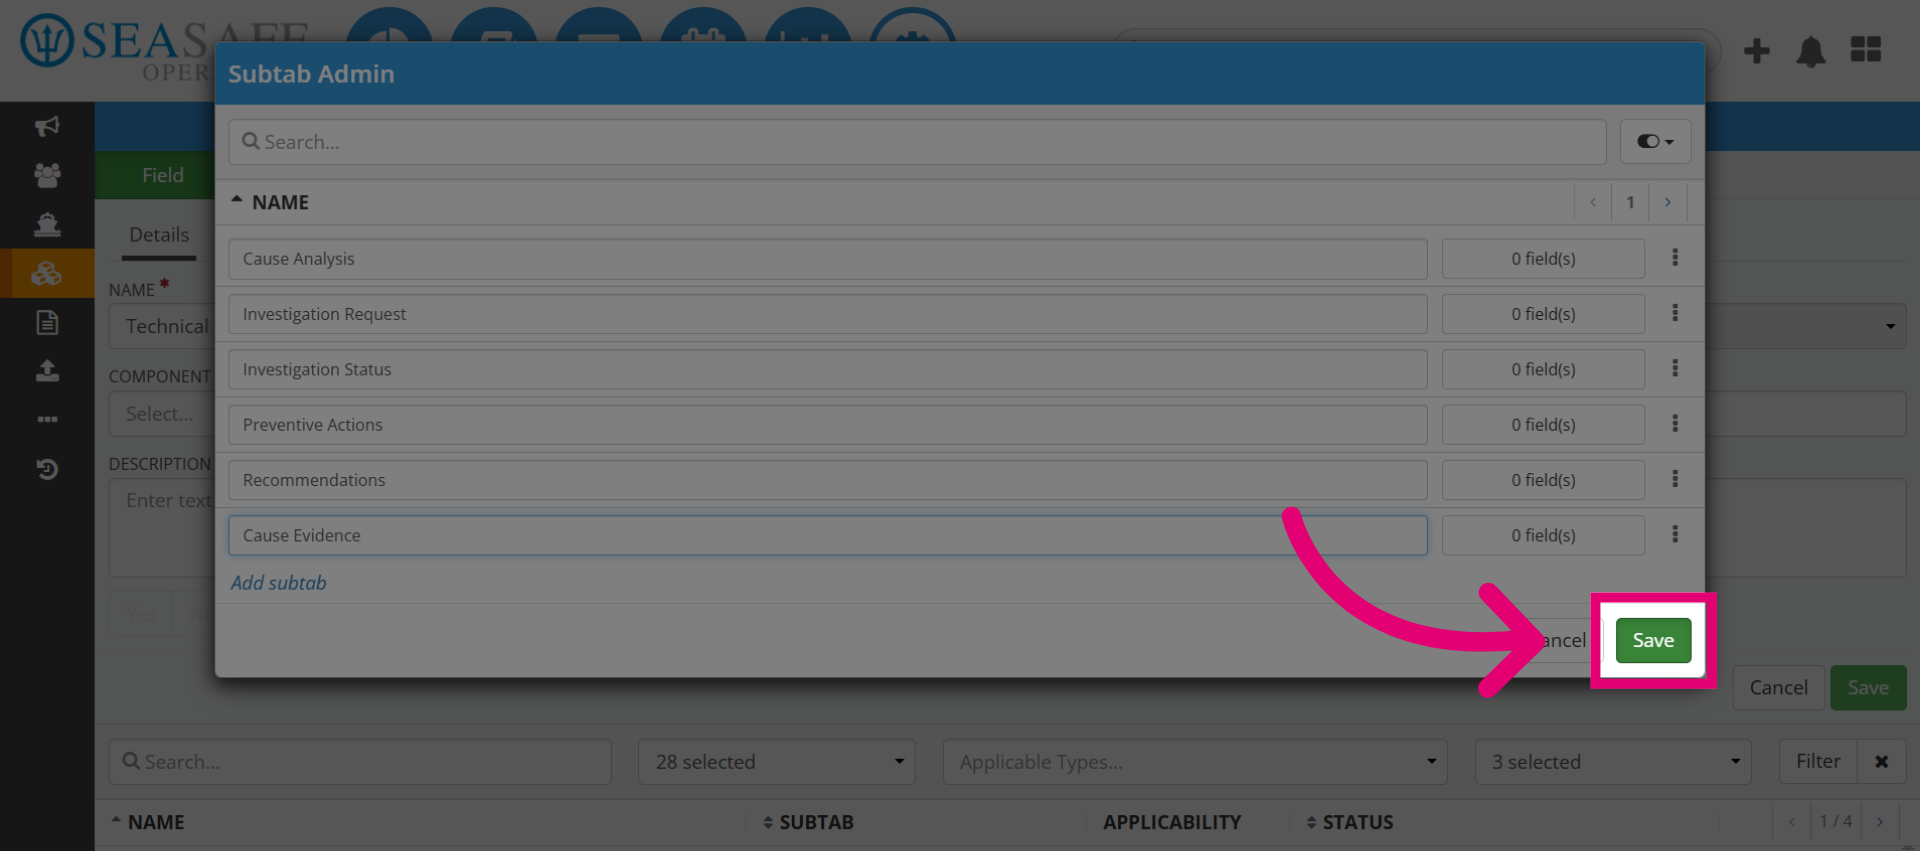
9. Name the Subtab
Then, enter the name for the new subtab, such as "Cause Evidence", to organize related information. You can also see the count of fields attached to the subtabs
10. Save Field Configuration
Then, click "Save" to apply and store the changes made to the field details.
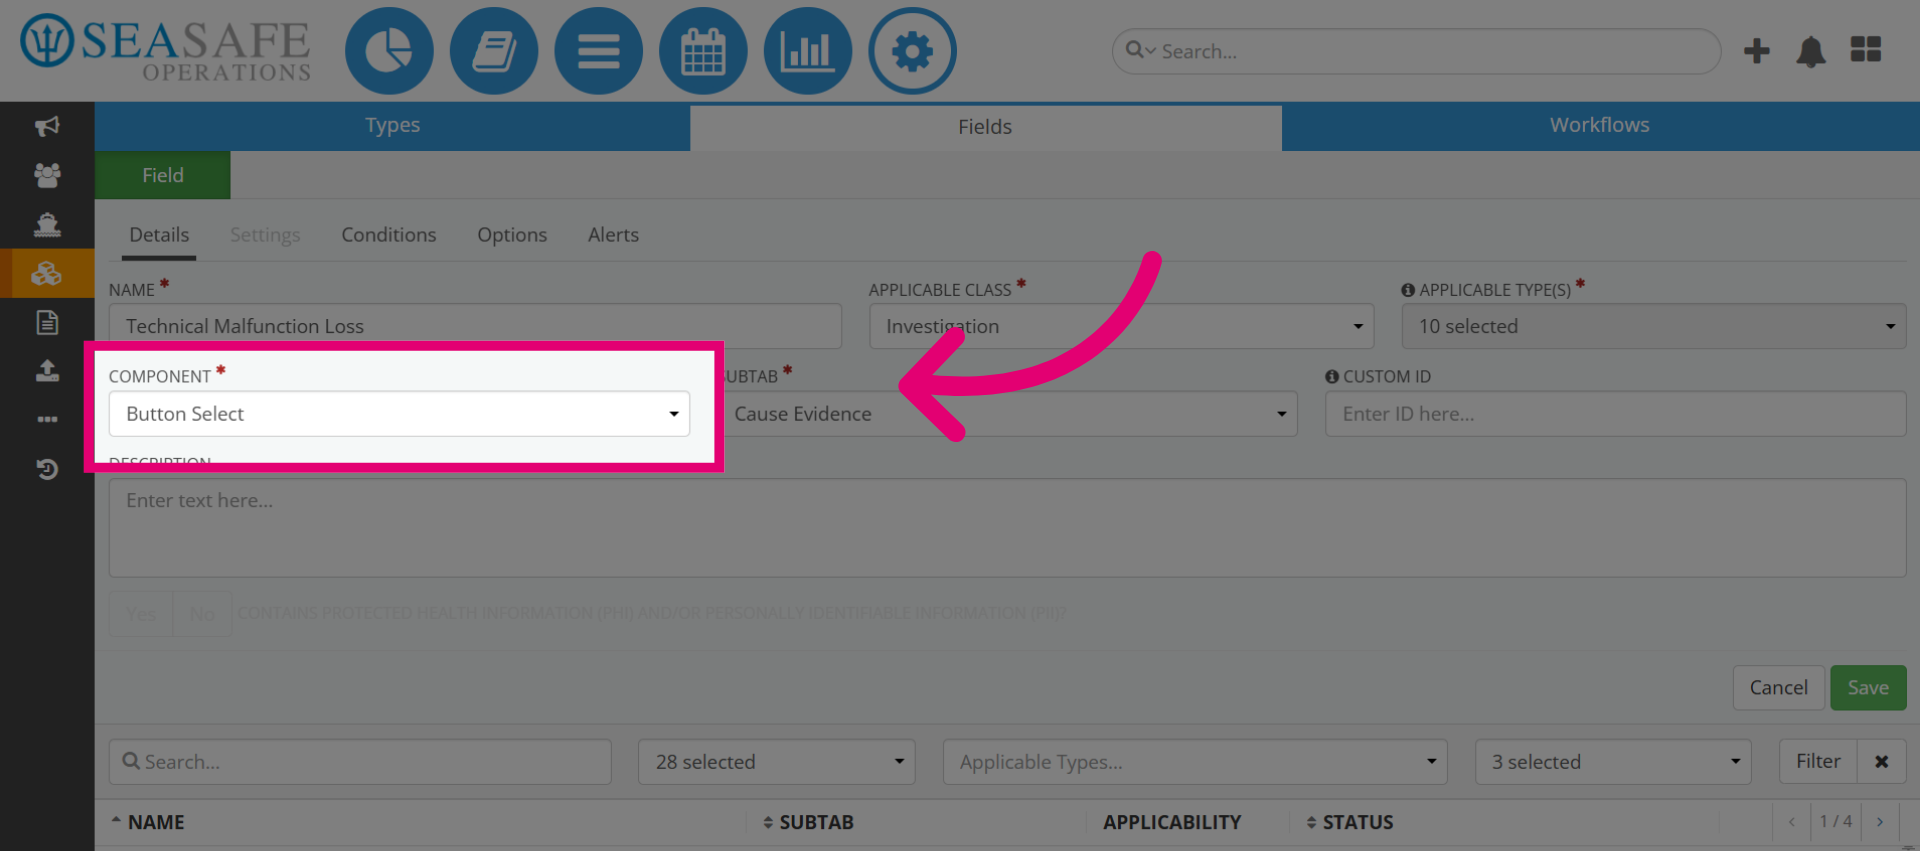
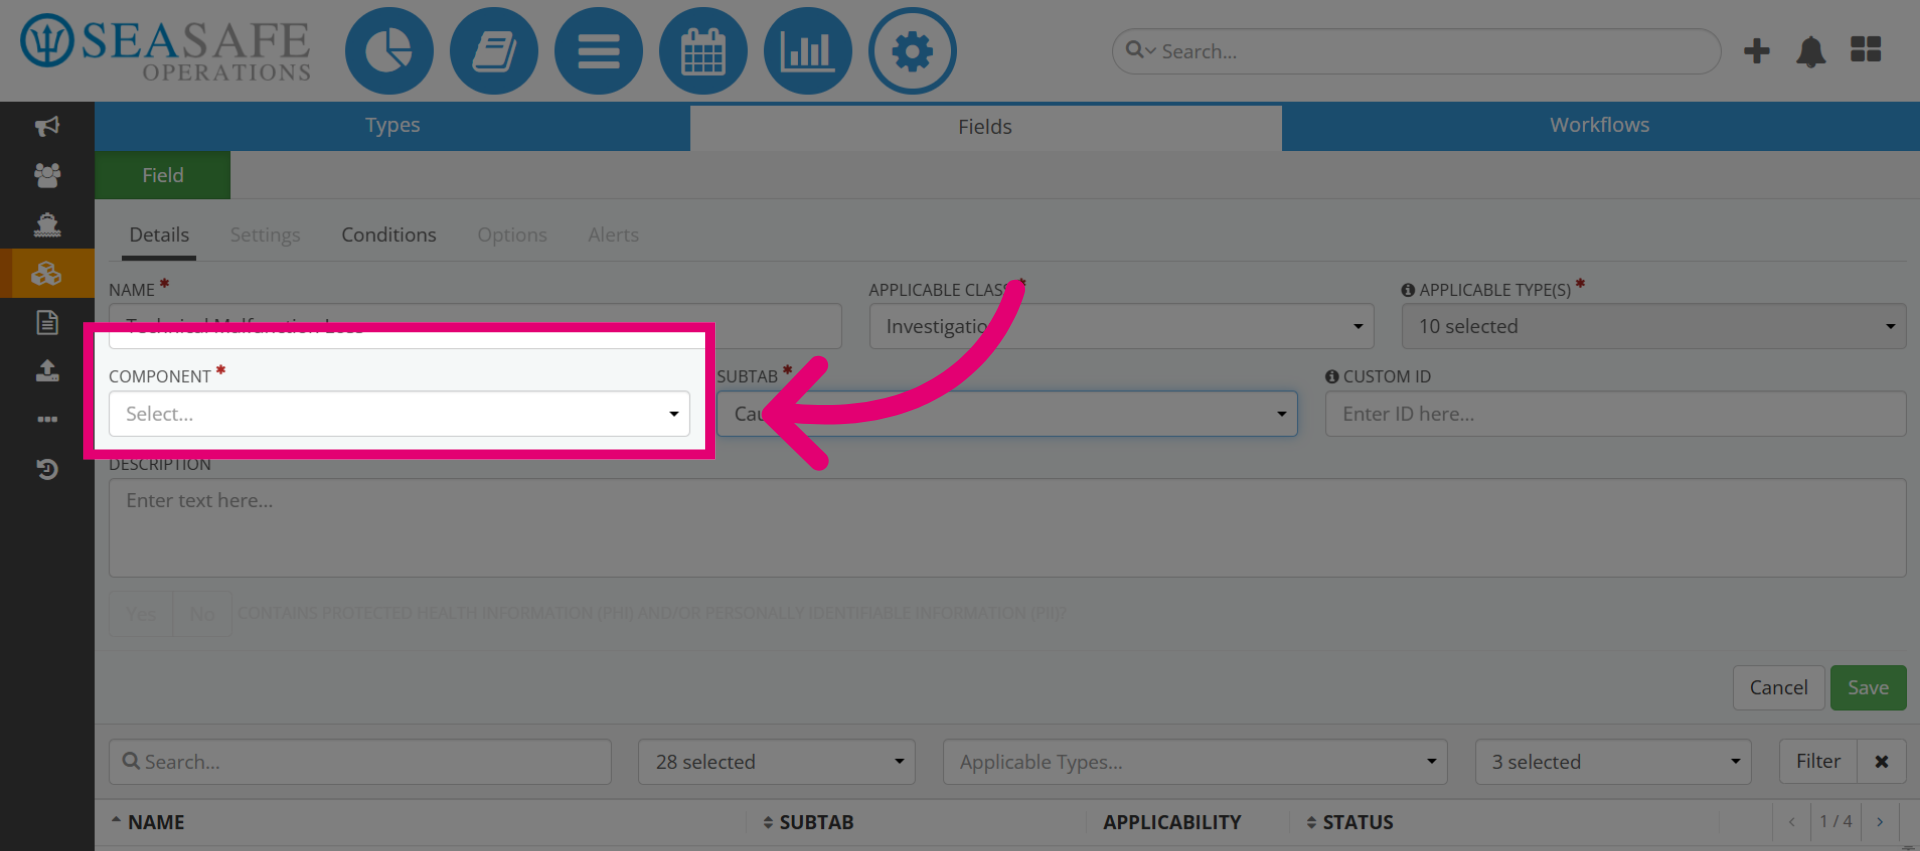
11. Select the Component
Choose the "Component" for the field. Components define how the field behaves (for examp, text box, dropdown, button). The right component improves usability. For instance, a "Text Box"-a freeform descriptions, provides detailed input without restrictions.
12. Select Button Option
Or, select "Button Select" if you want users to choose from predefined options. Though the best practice to keep in mind is to use components that match the data type—buttons for choices, text fields for descriptions, date pickers for dates.