New article
Recently updated
Accessing Audit Trails in Ideagen Maritime Health Operations

Who is this article for?Users who want to access Audit Trails in Ideagen Maritime Health Operations.
No elevated permissions are required.
This demonstartion aims to provide a comprehensive overview of the procedures involved in accessing the Audit Trails for Ideagen Maritime Health Operations. Understanding these steps is crucial for ensuring that all activities within the Ideagen Maritime Health system are thoroughly monitored and documented, which in turn aids in maintaining compliance and enhancing operational transparency.
1. Accessing Audit Trails in Ideagen Maritime Health Operations
1.1. Video
1.2. Steps
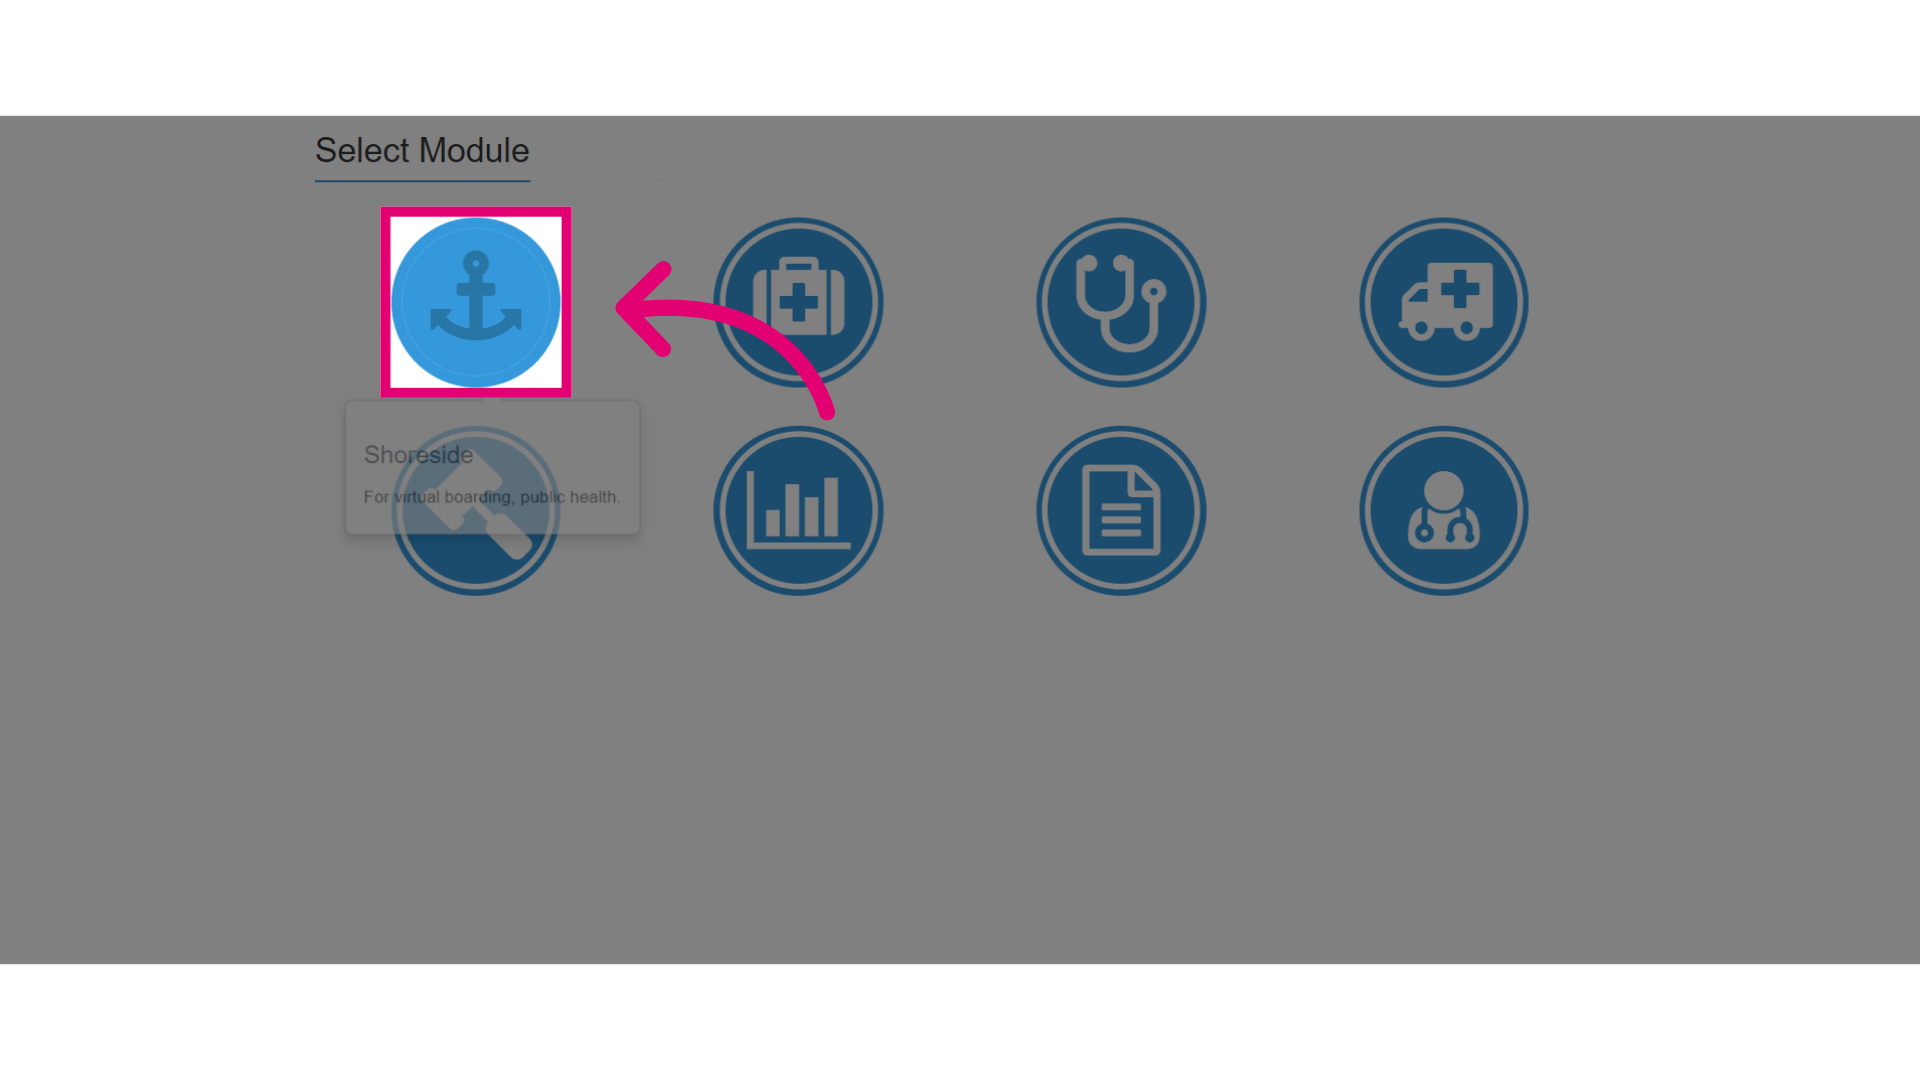
- Go to the Shoreside module.
- Click on your initials at the top of the page.
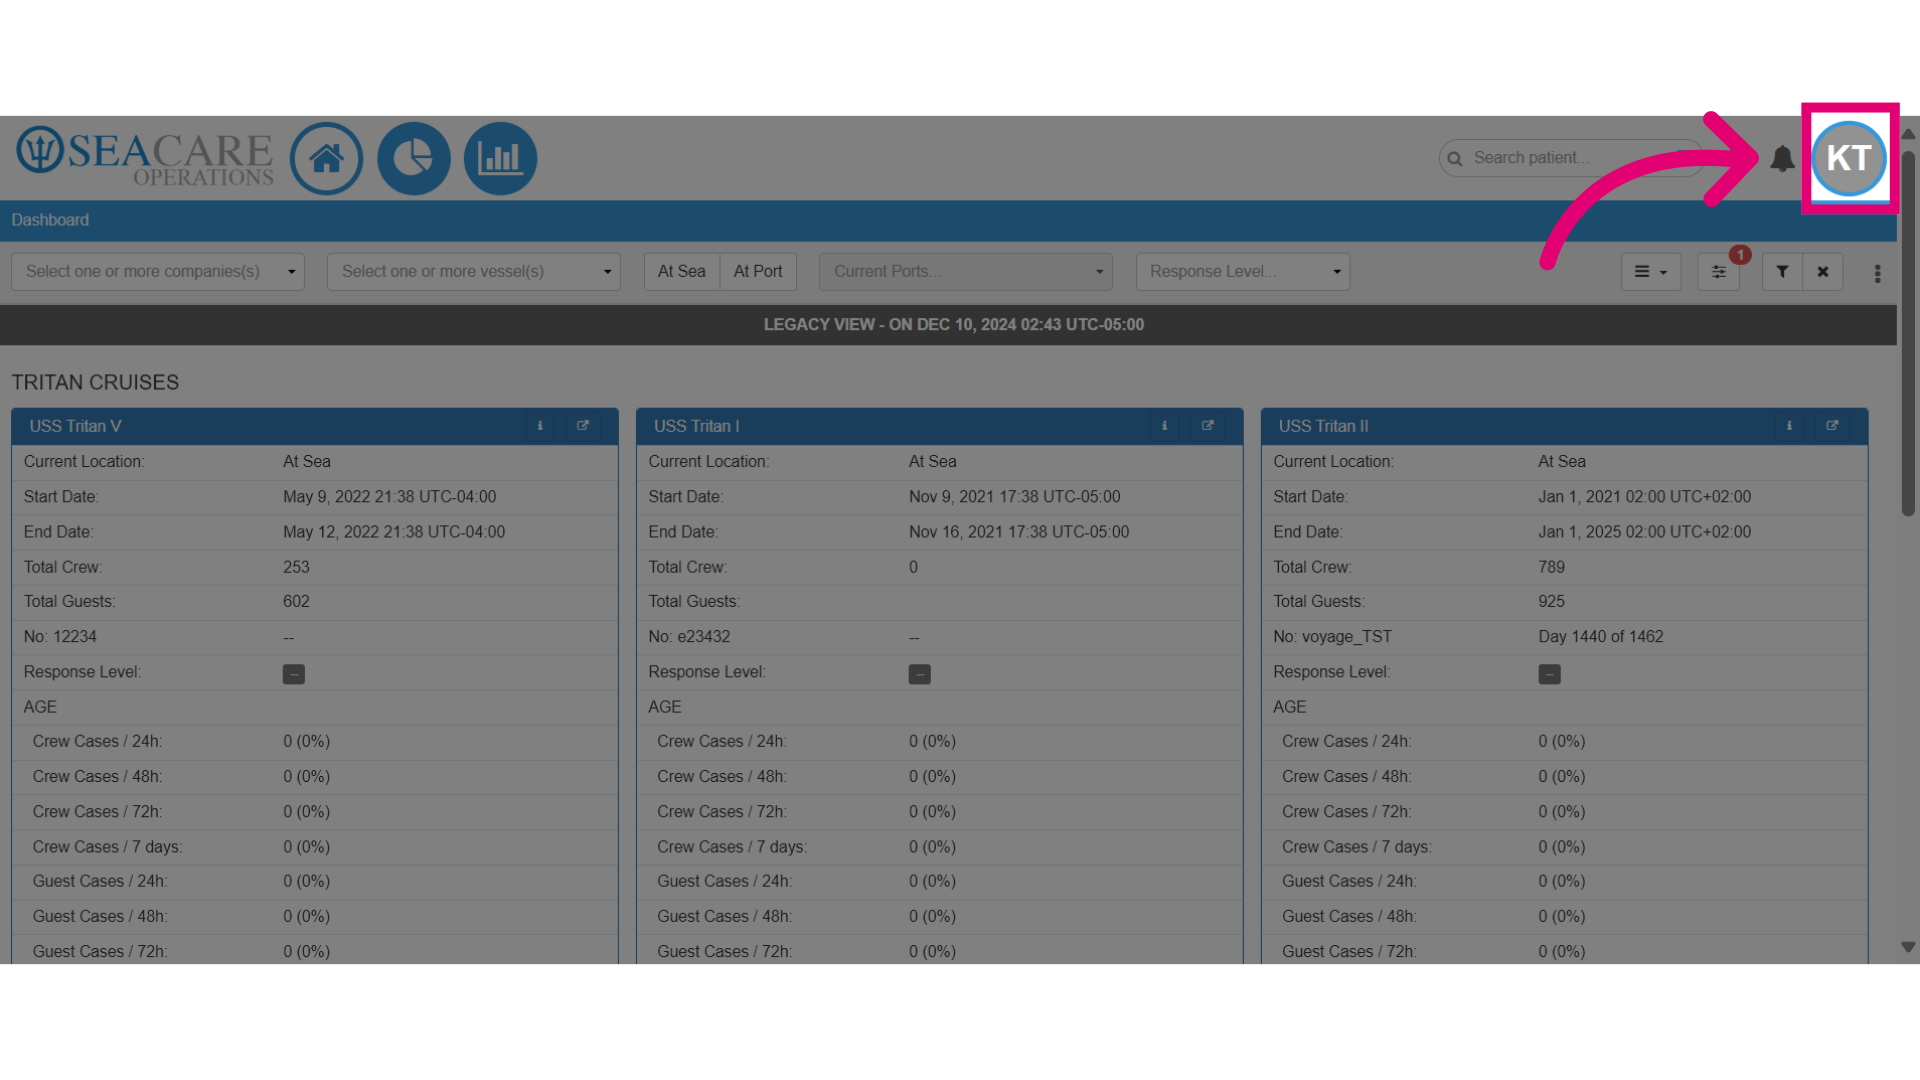
- Select Admin from the dropdown menu.

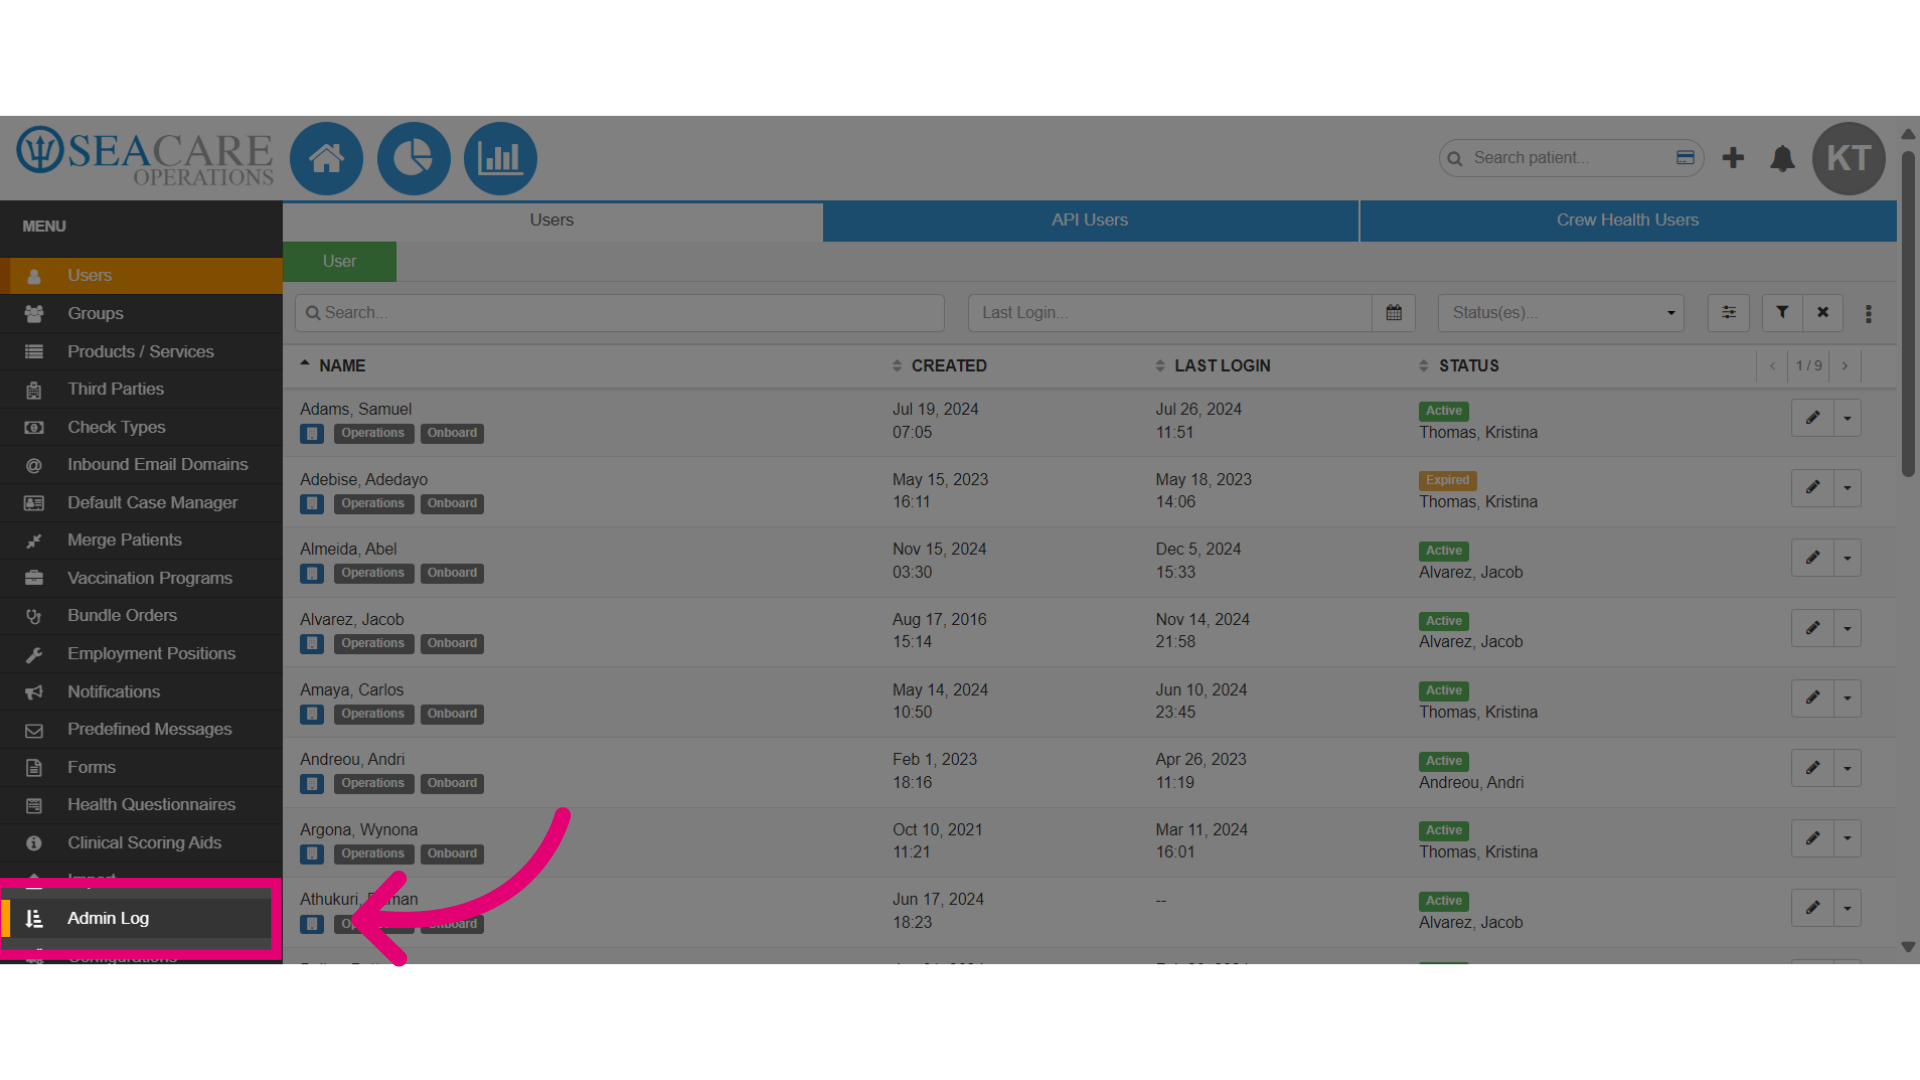
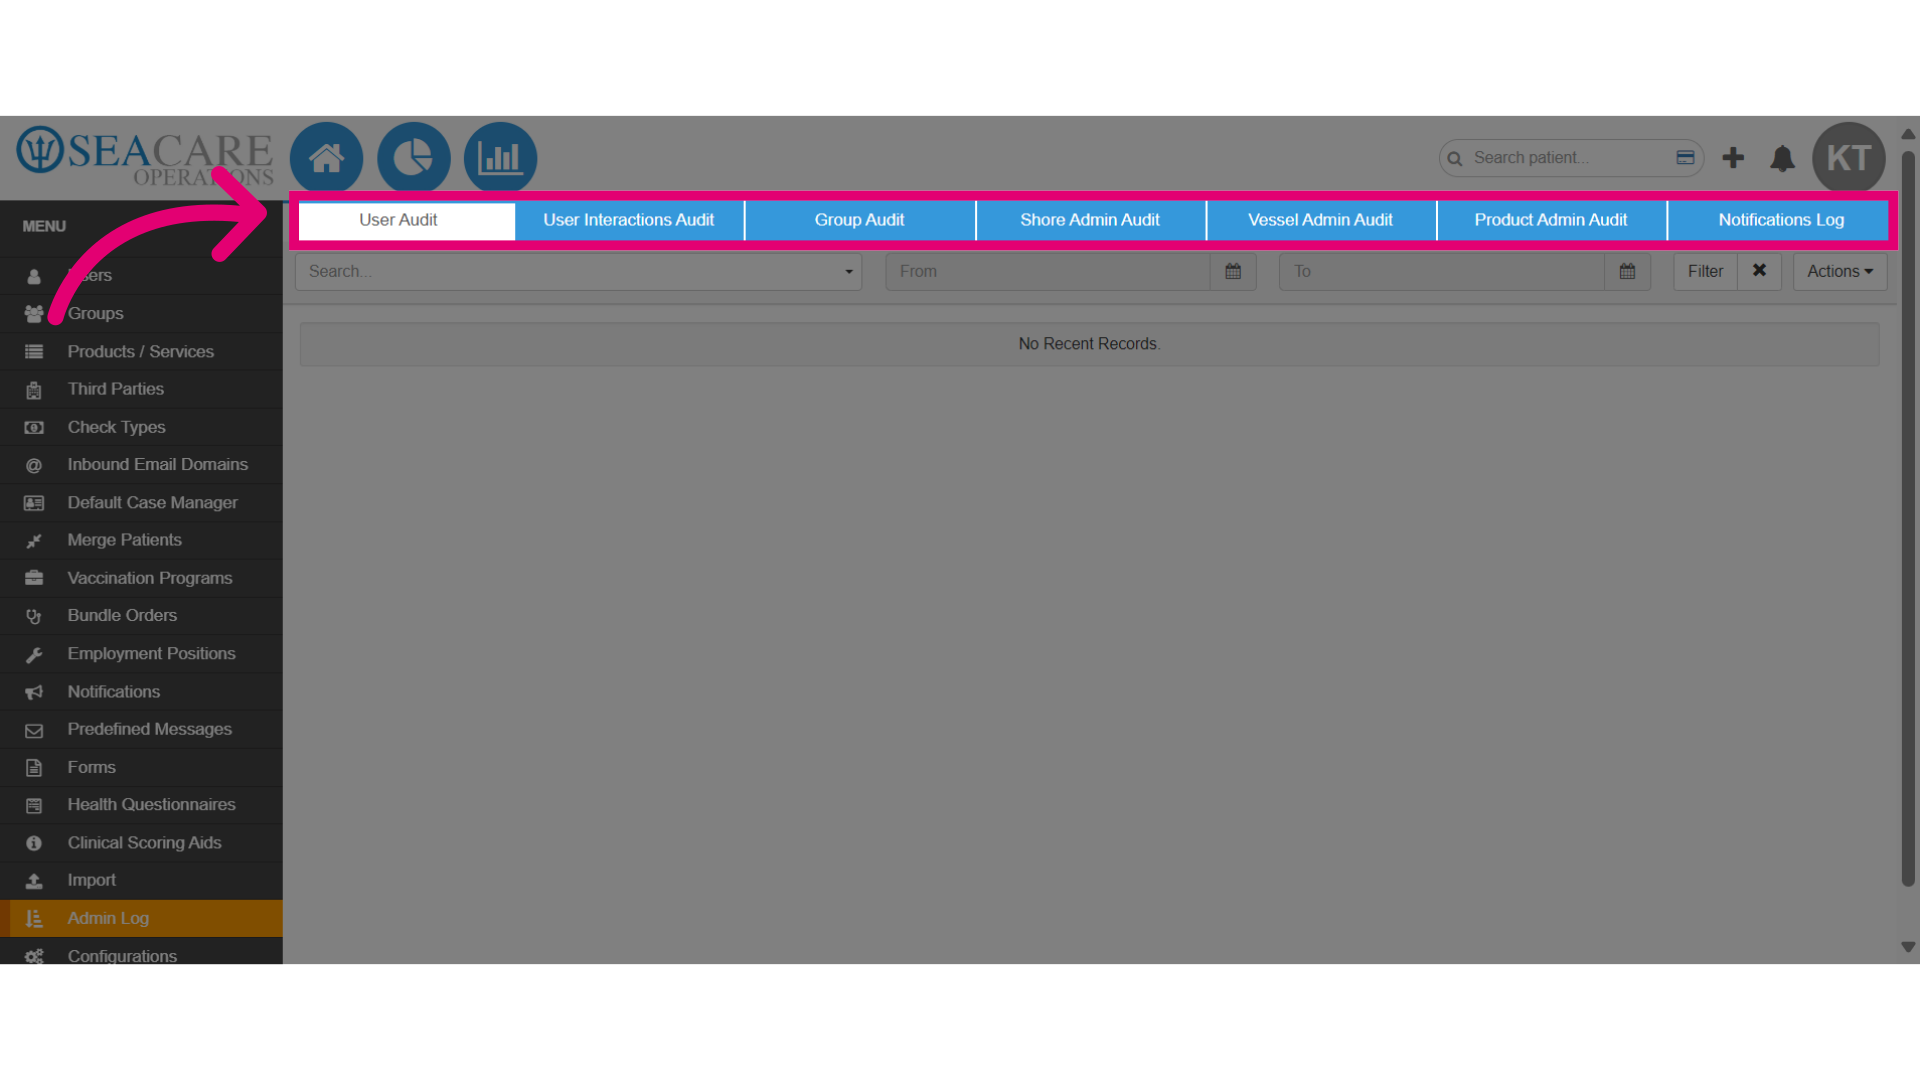
- Next, click the Admin Log module.
- There are seven tabs for audit categories:
- User Audit - This tab tracks updates for users within the system.
- User Interactions Audit - This tab provides information on user activity within the system, capturing various actions performed by users.
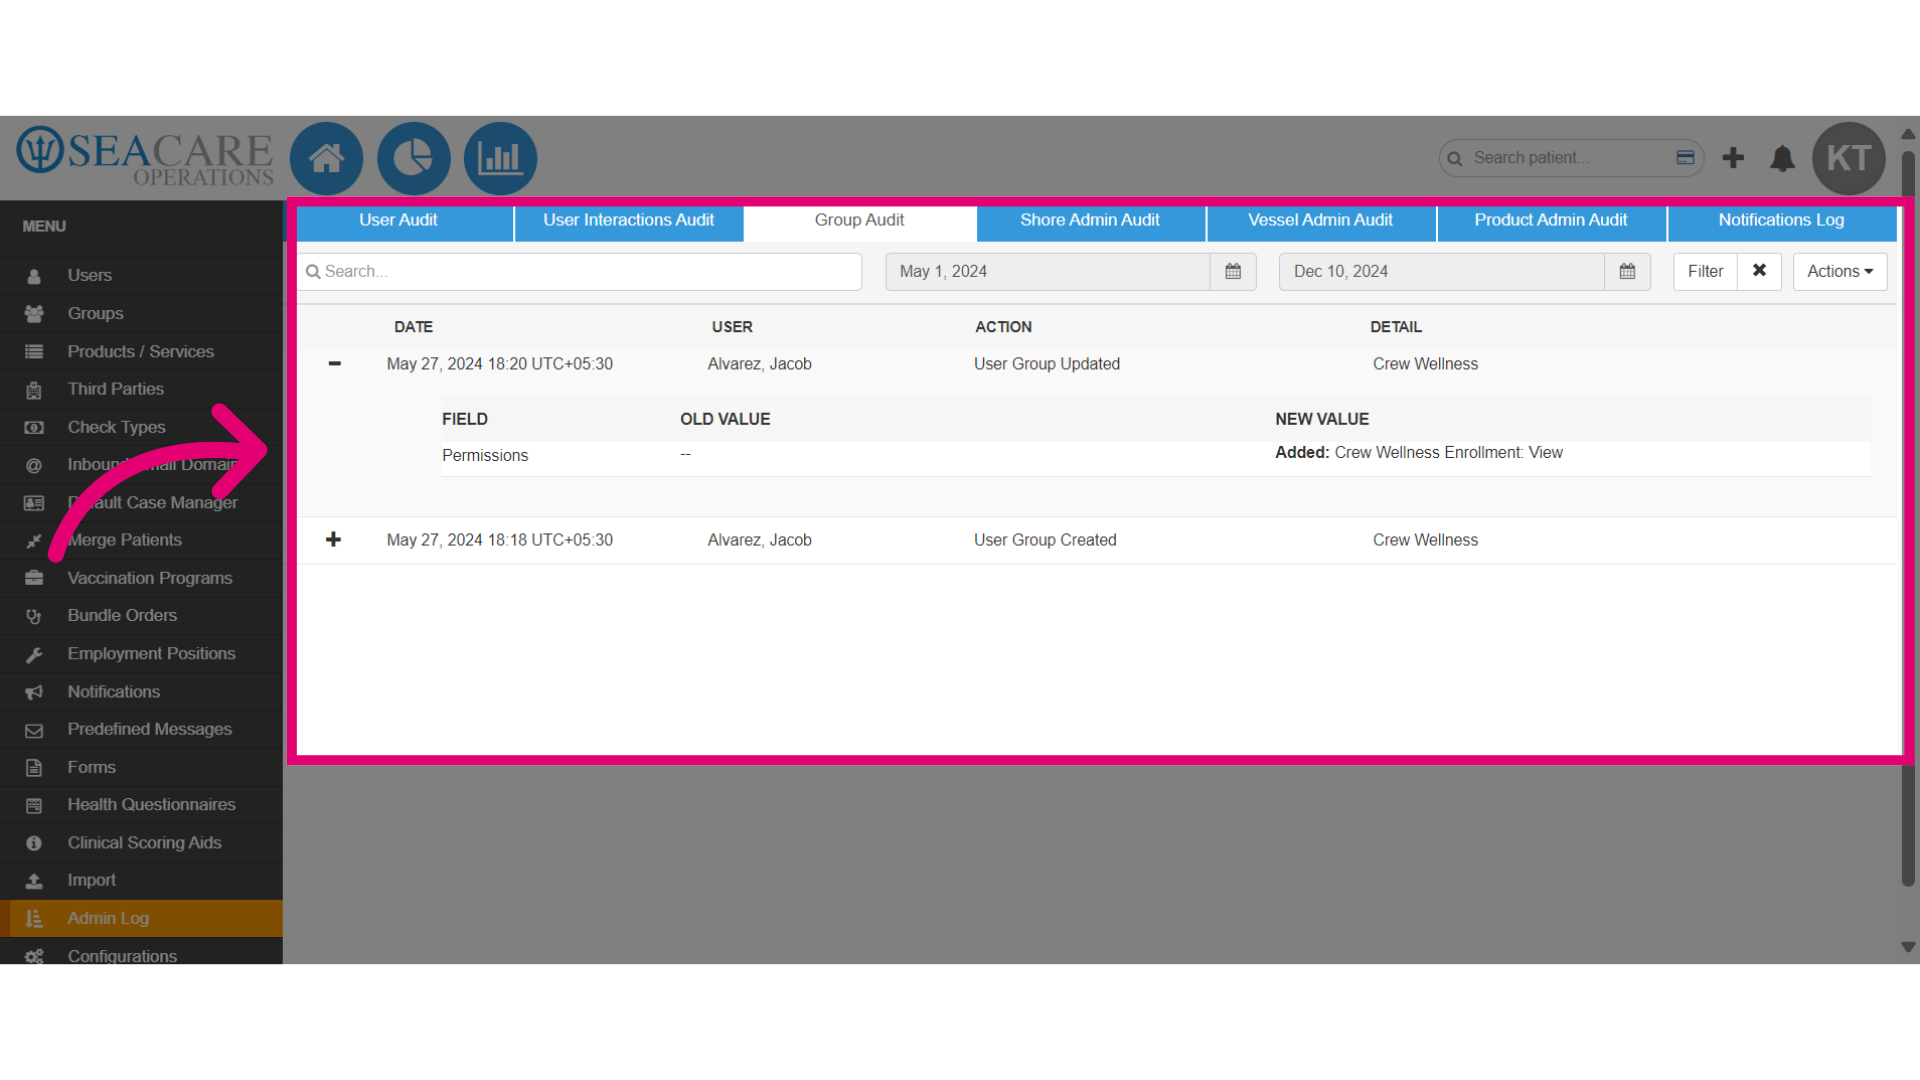
- Group Audit - This tab is tracks group activities with an overview of group actions.
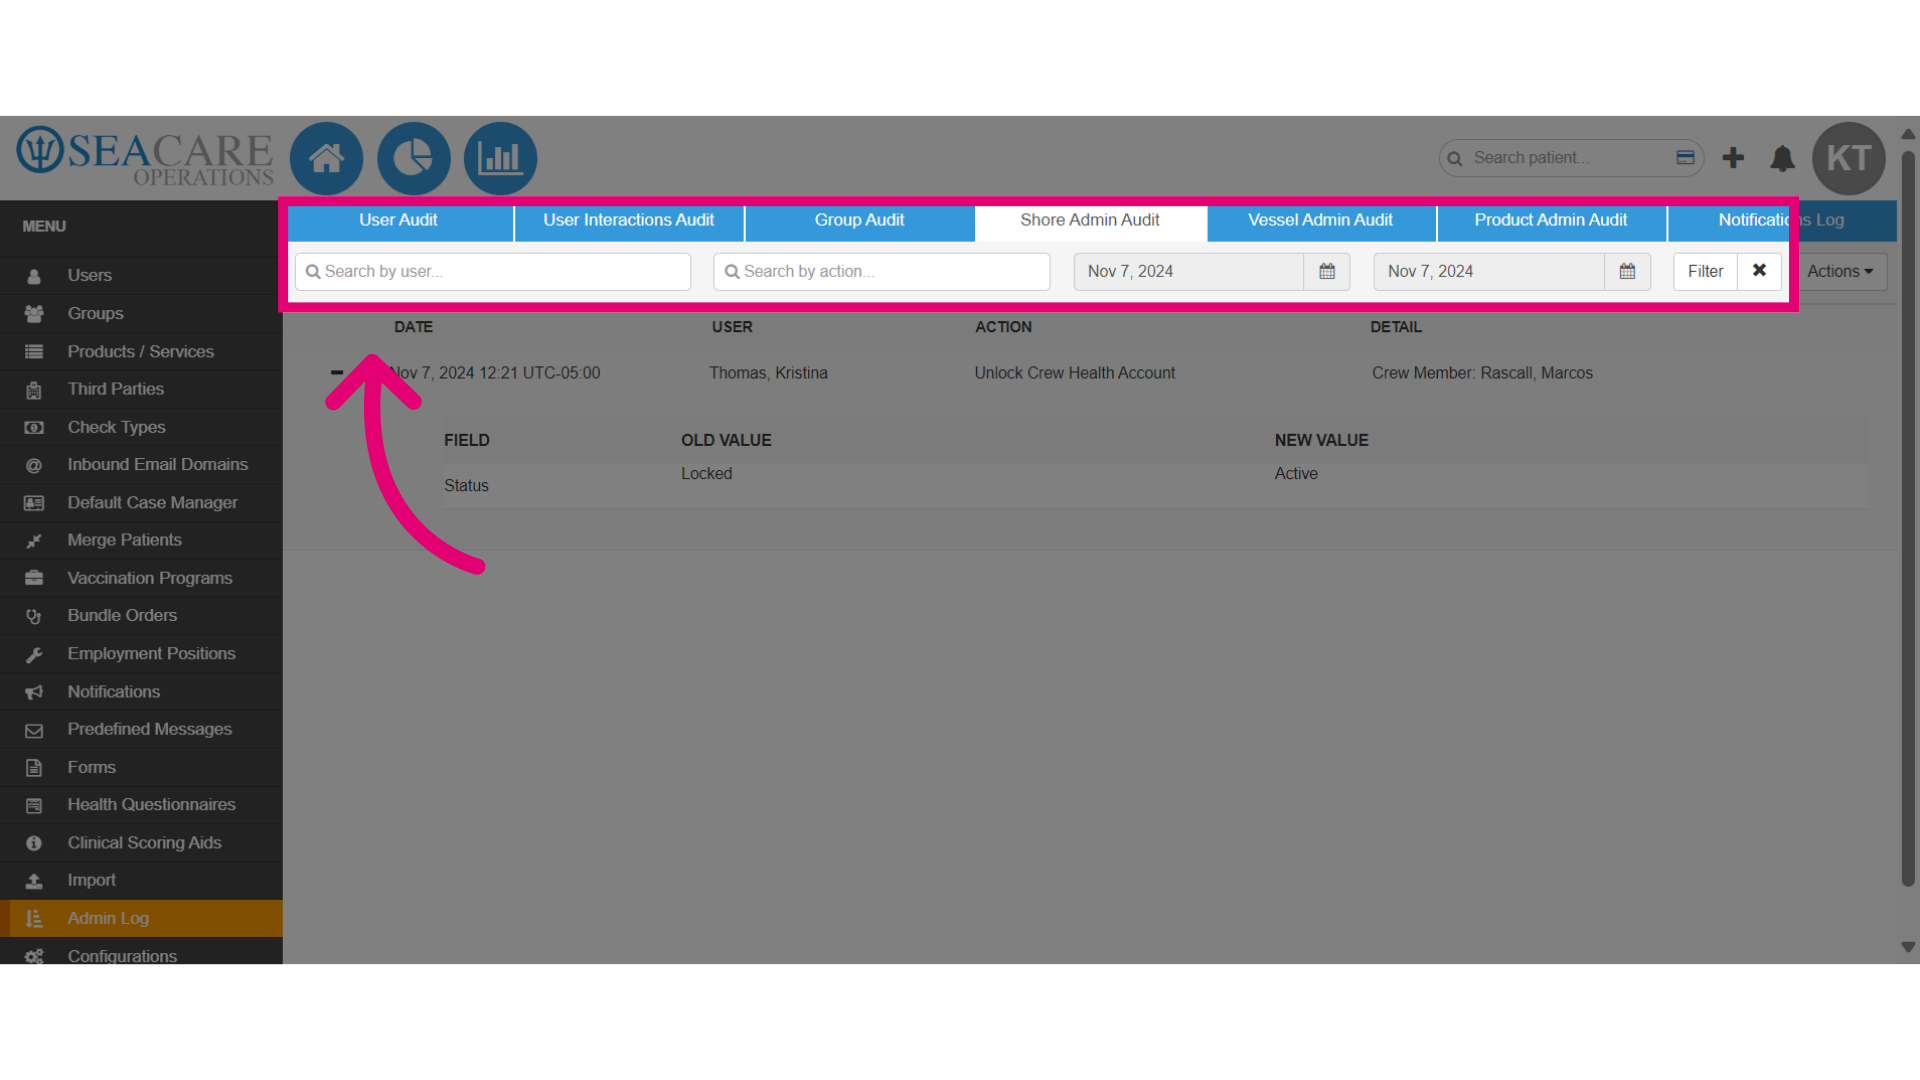
- Shore Admin Audit - This category specifically targets the activities of shore administrators by logging their actions.
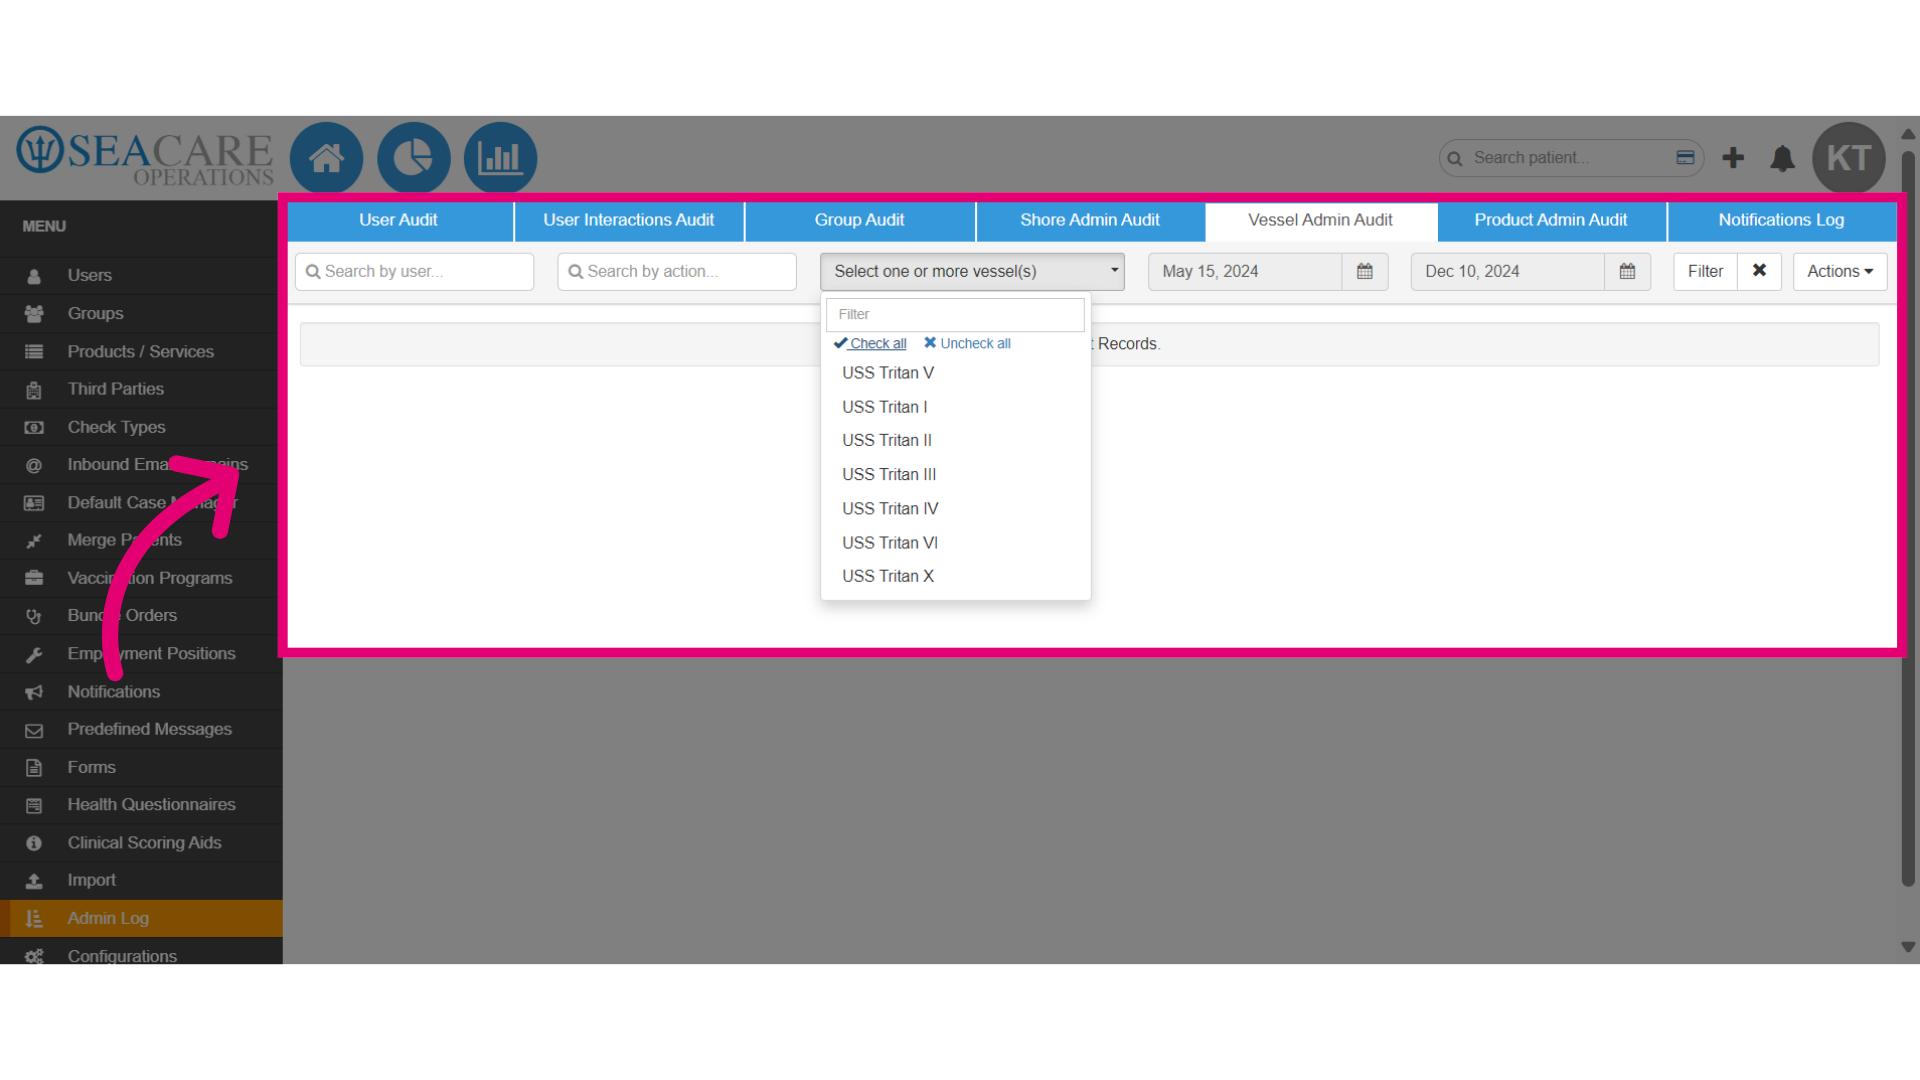
- Vessel Admin Audit - Similar to the shore admin category, this tab focuses on the actions of the vessel administrators with insight into vessel operations.
- Product Admin Audit - This section monitors the activities of product administrators, capturing changes and updates made to products within the system.
- Notifications Log - This tab serves as a record of all notifications sent within the system for alerts and messages.
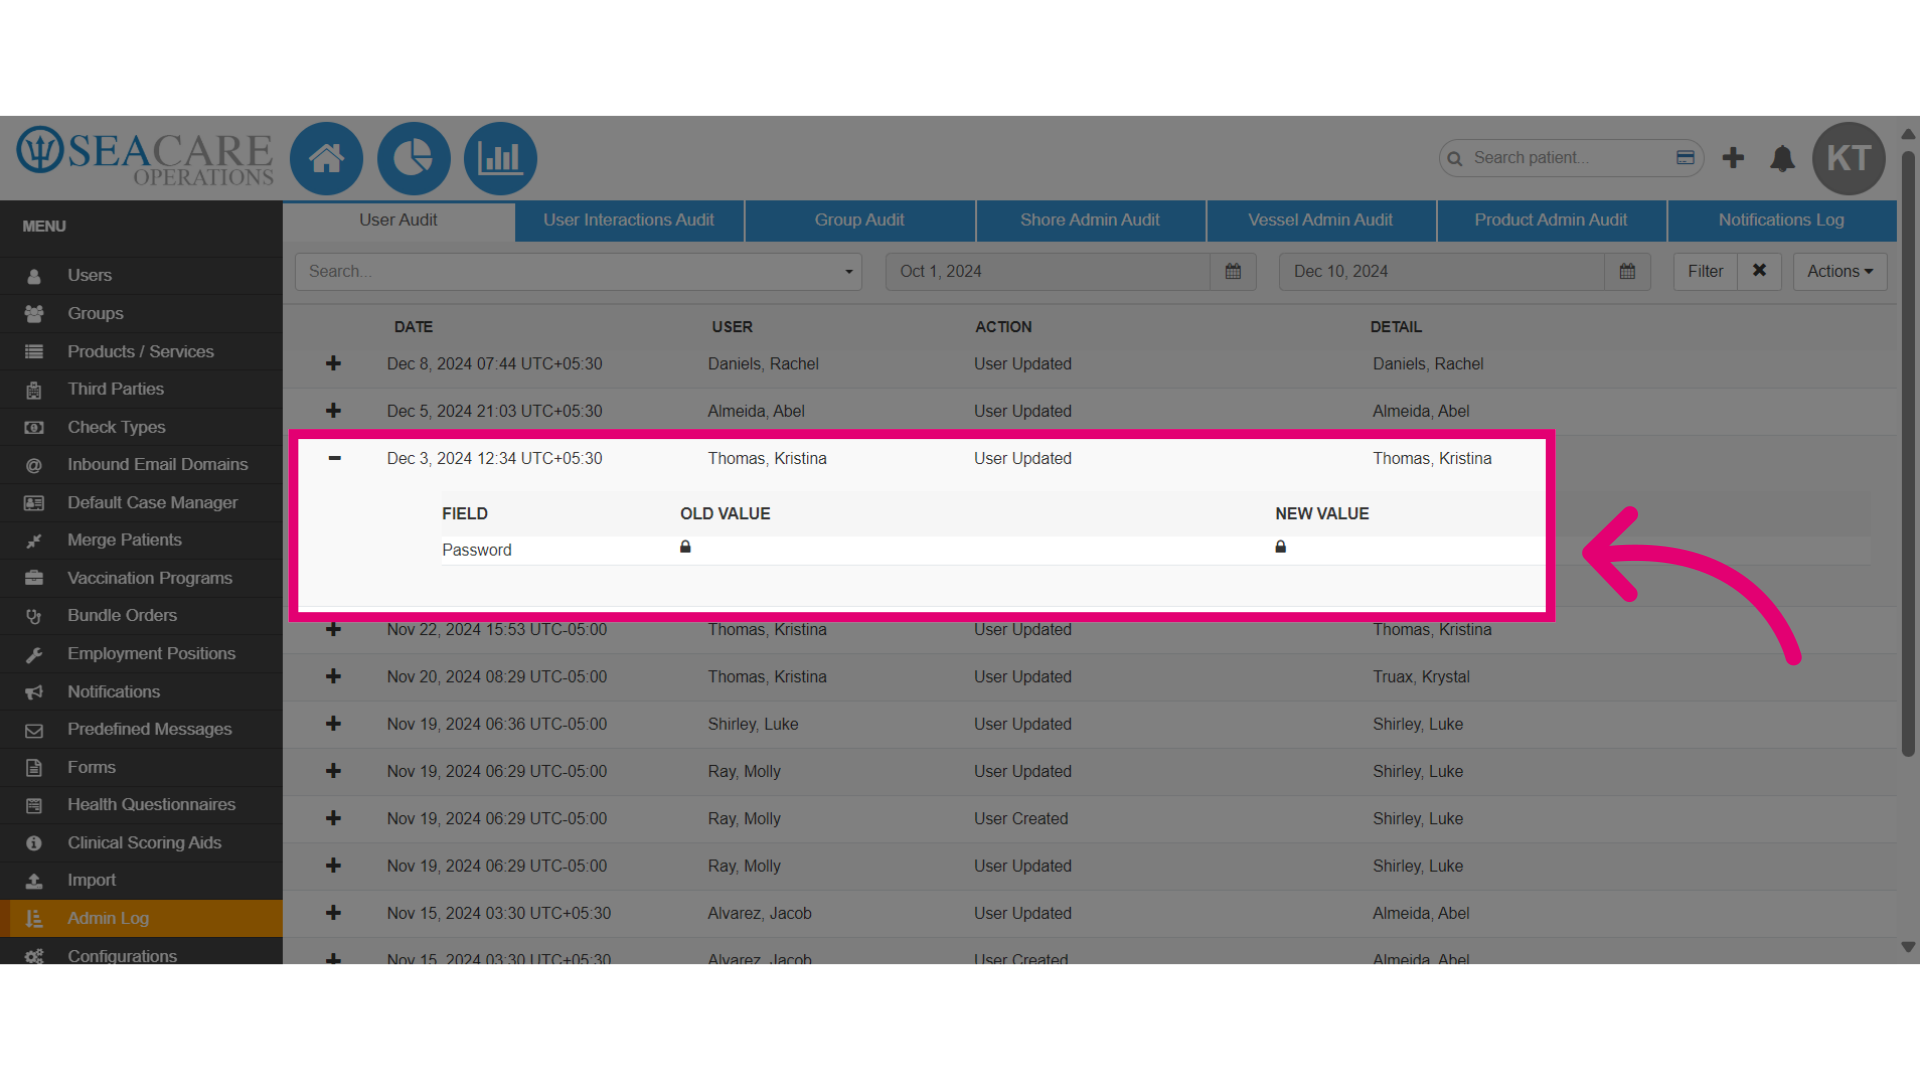
- For this demo, we'll start with the User Audit, which shows system user updates.
- Users may employ the filter bar to conduct searches using keywords or to refine their results within a designated date range by using the Date Picker fields.
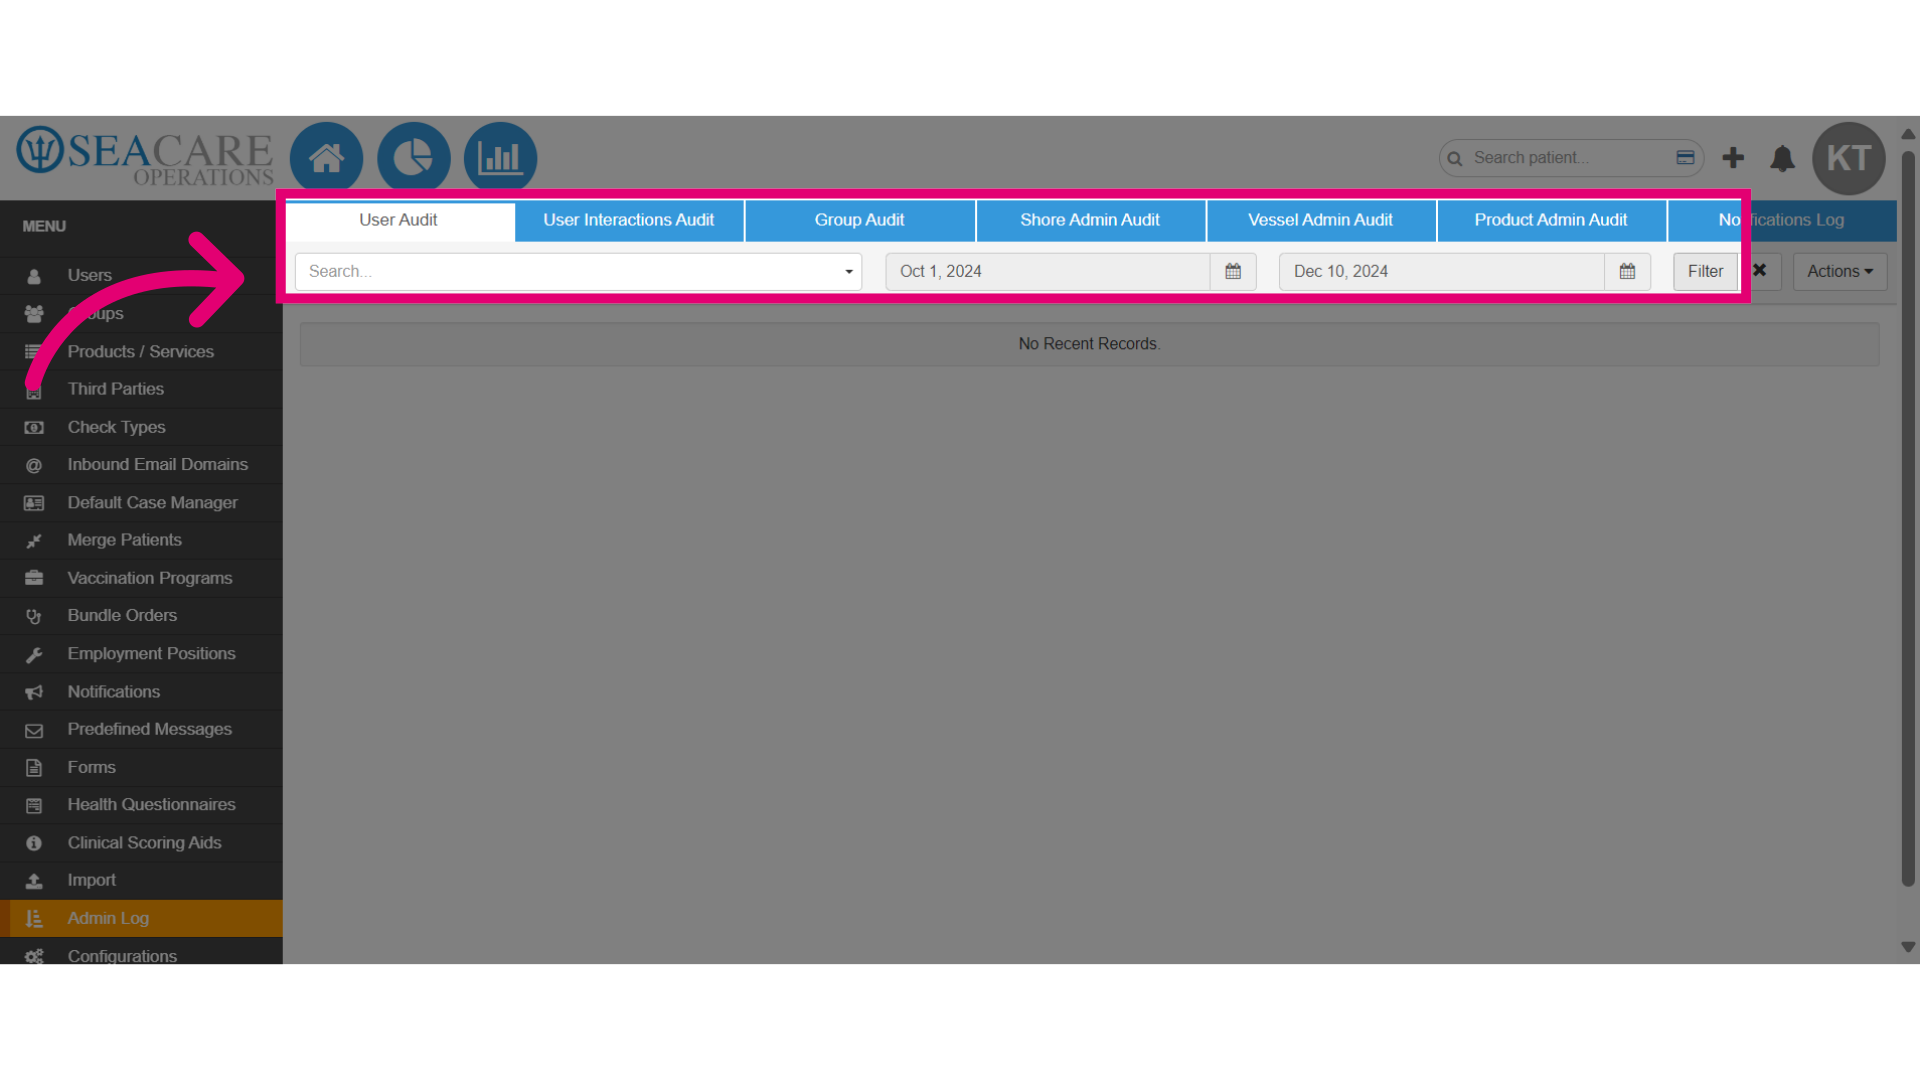
- Once dates have been chosen, the system will automatically display any entries matching the criteria in an audit list for users.
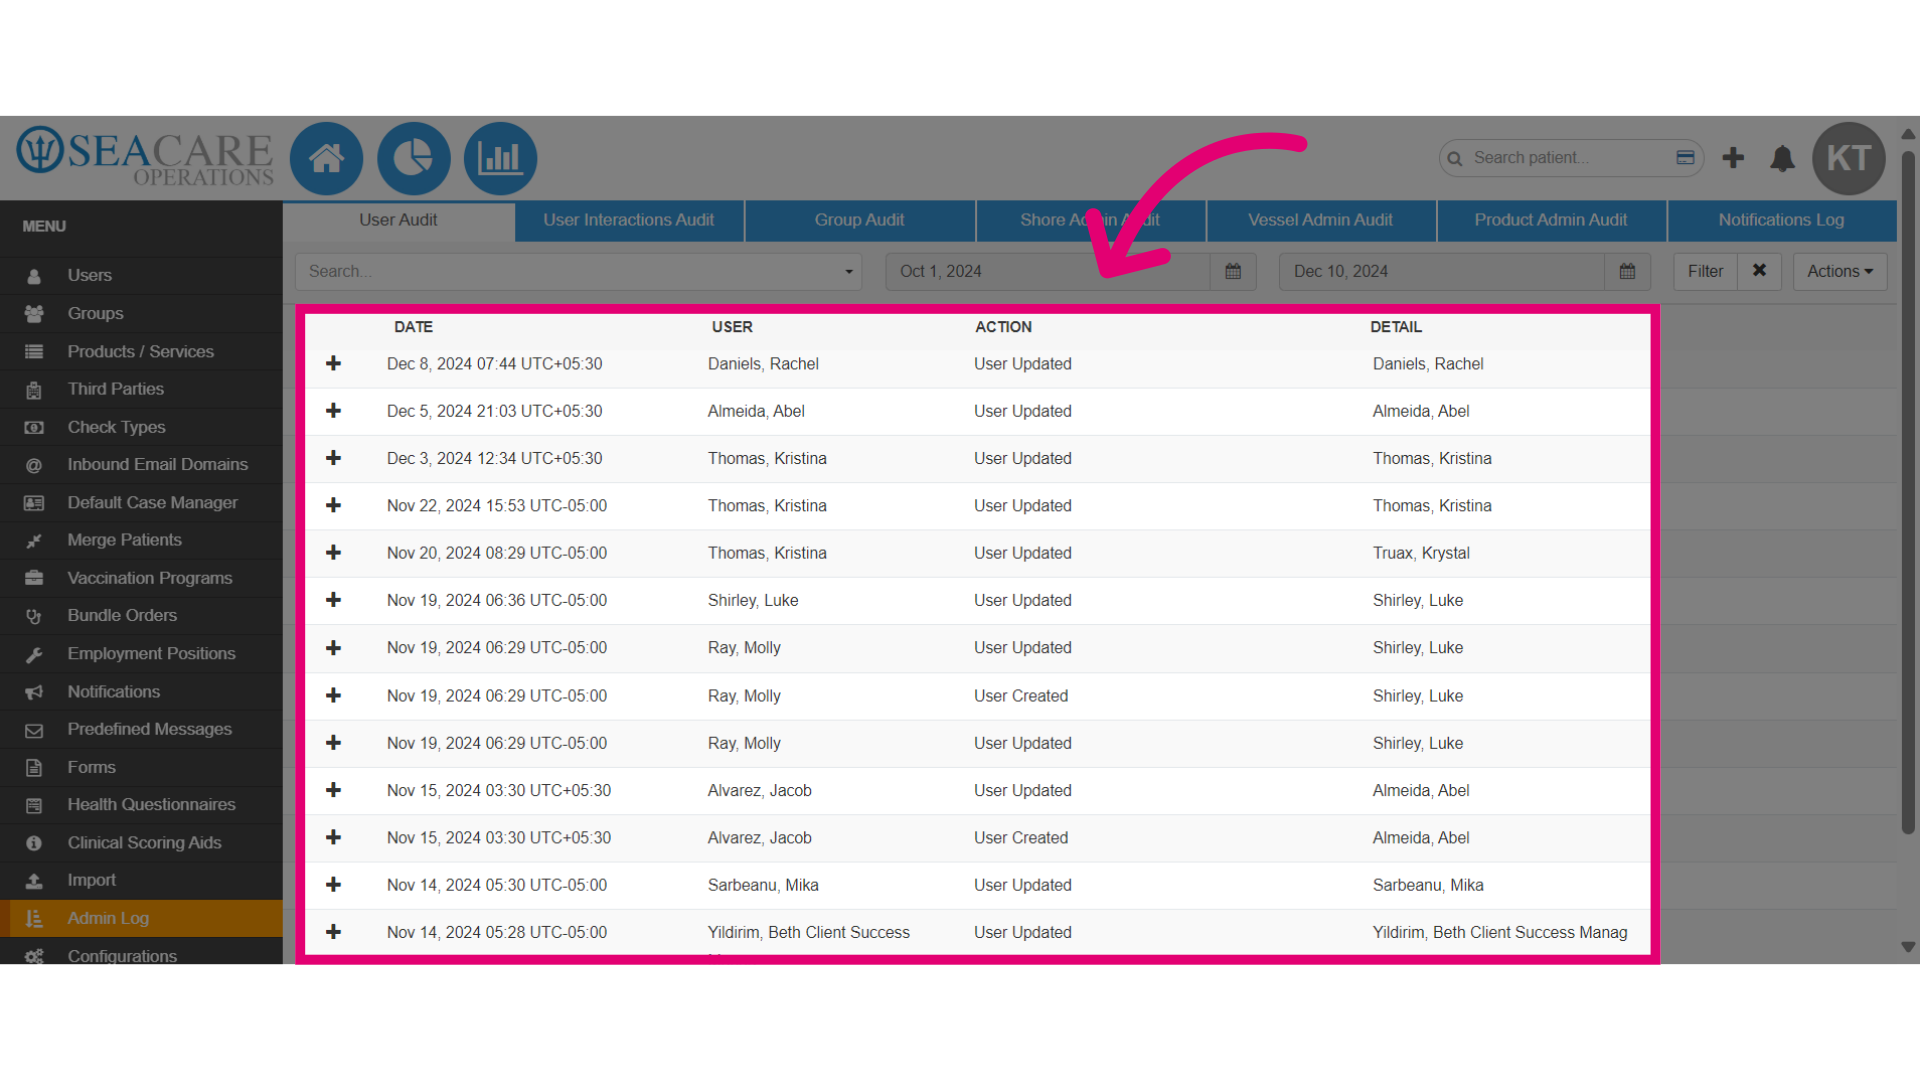
- To view further details about the entered action, select the expand menu button.
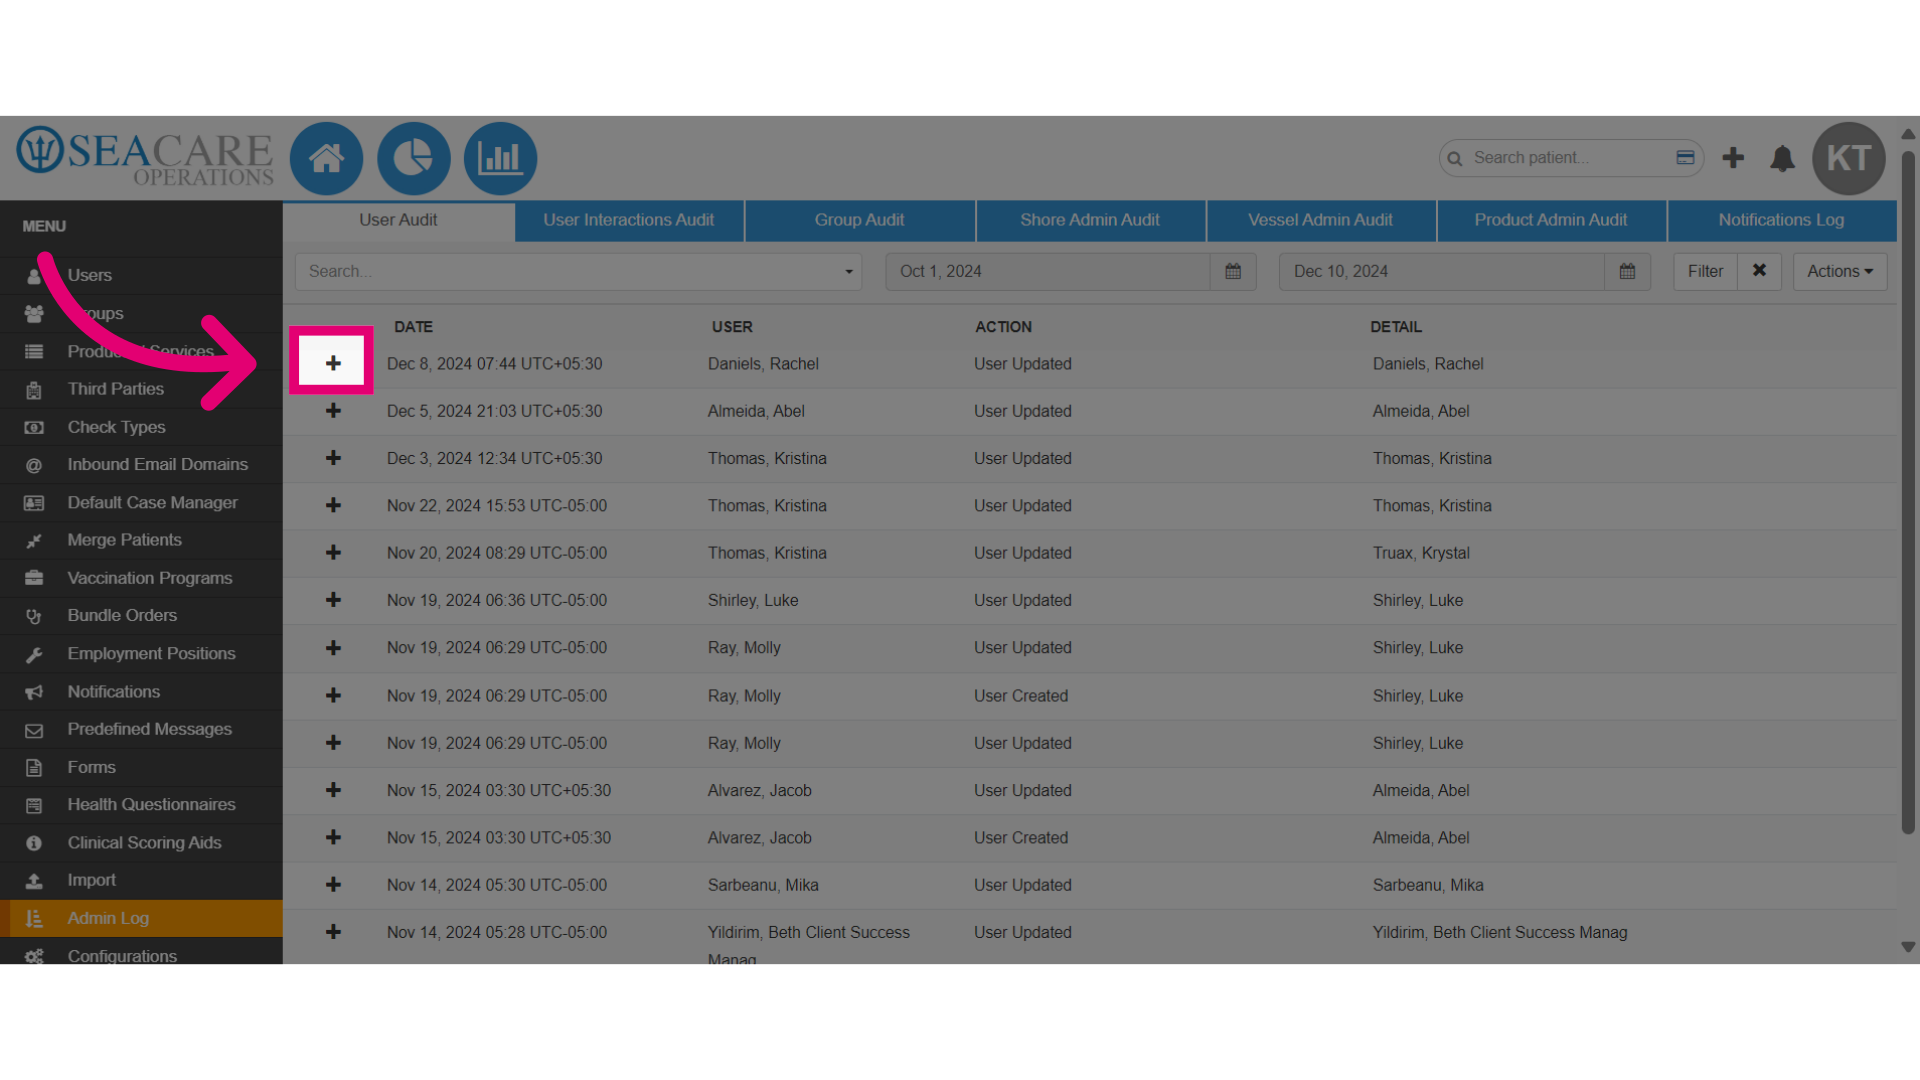
- Upon expansion, users can view the:
- Updated field
- Old value (if available)
- New value (e.g., permissions added or new user information).
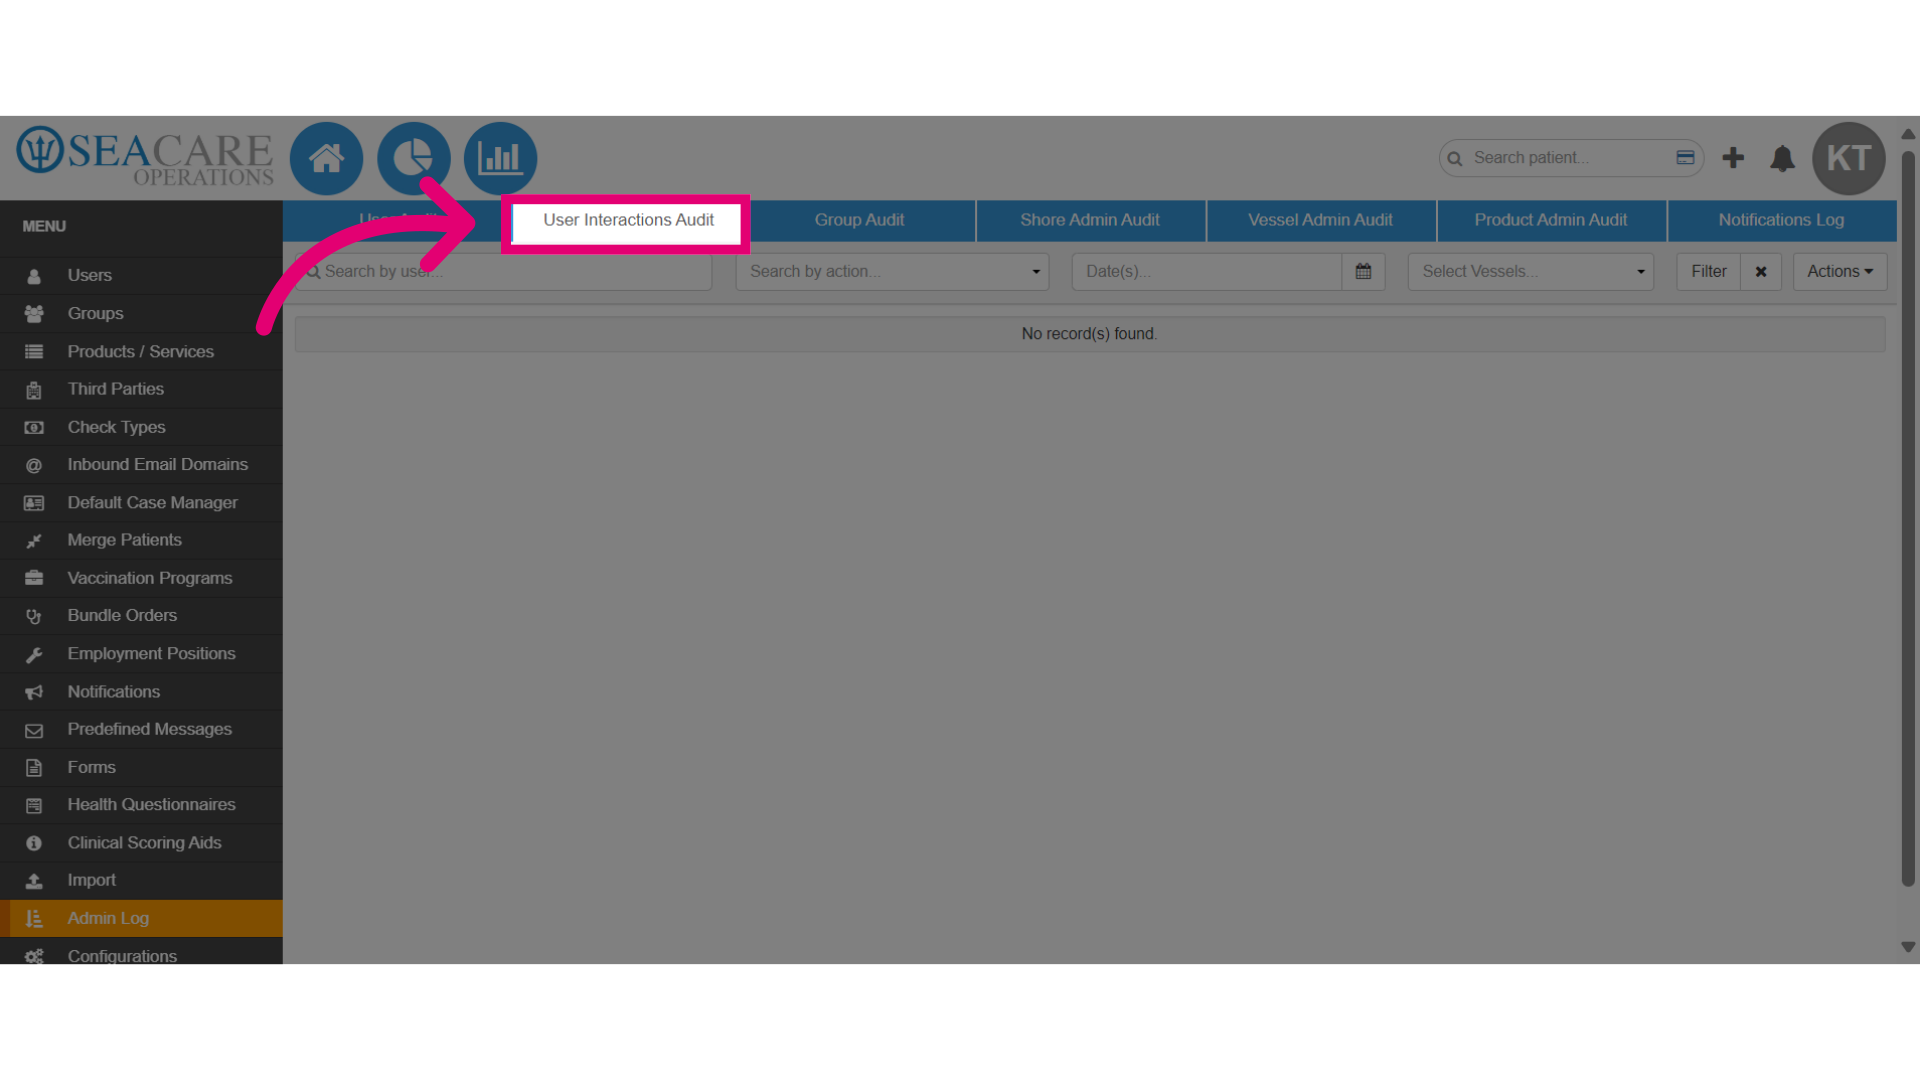
- Select User Interaction Audit to view user interactions.
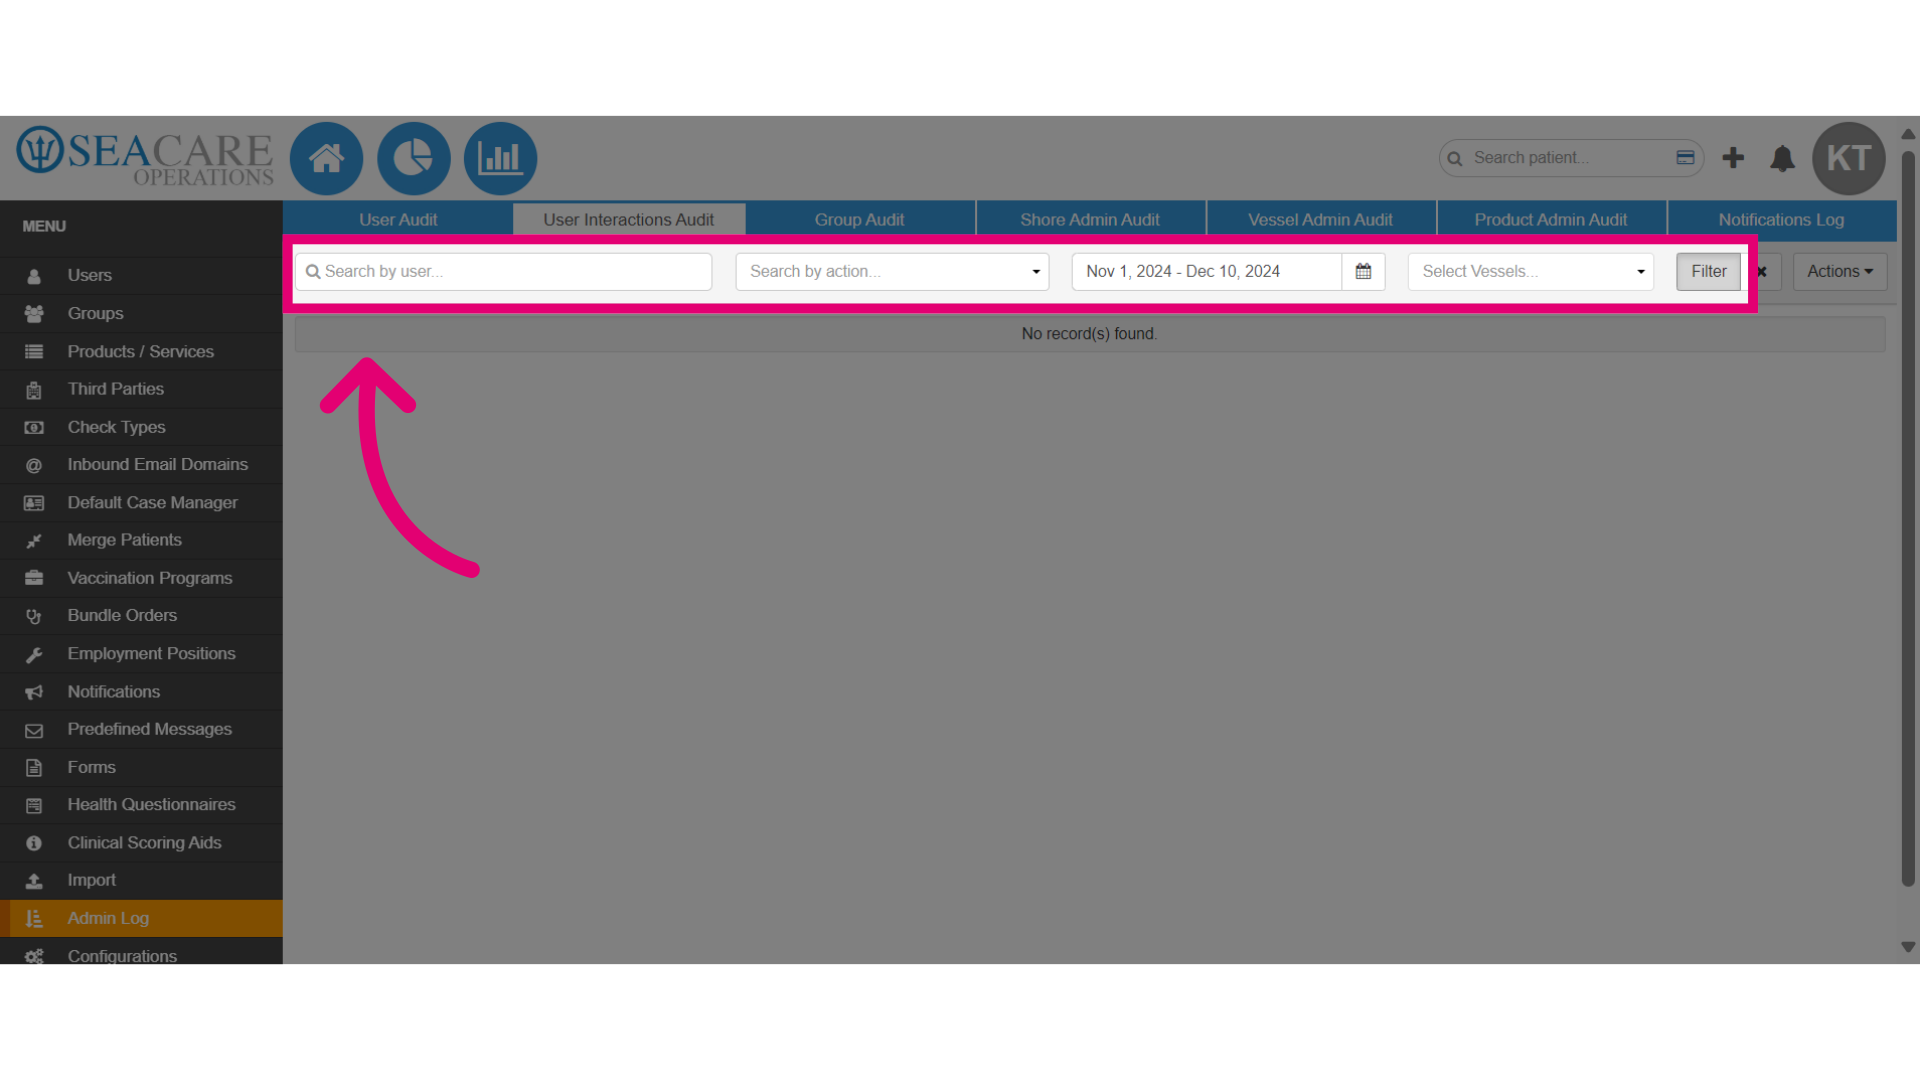
- Use the search filter to:
- Find specific actions such as requesting a report or reassigning a referral.
- Apply the date range picker filter.
- Use the vessel filter to specify a specific vessel.
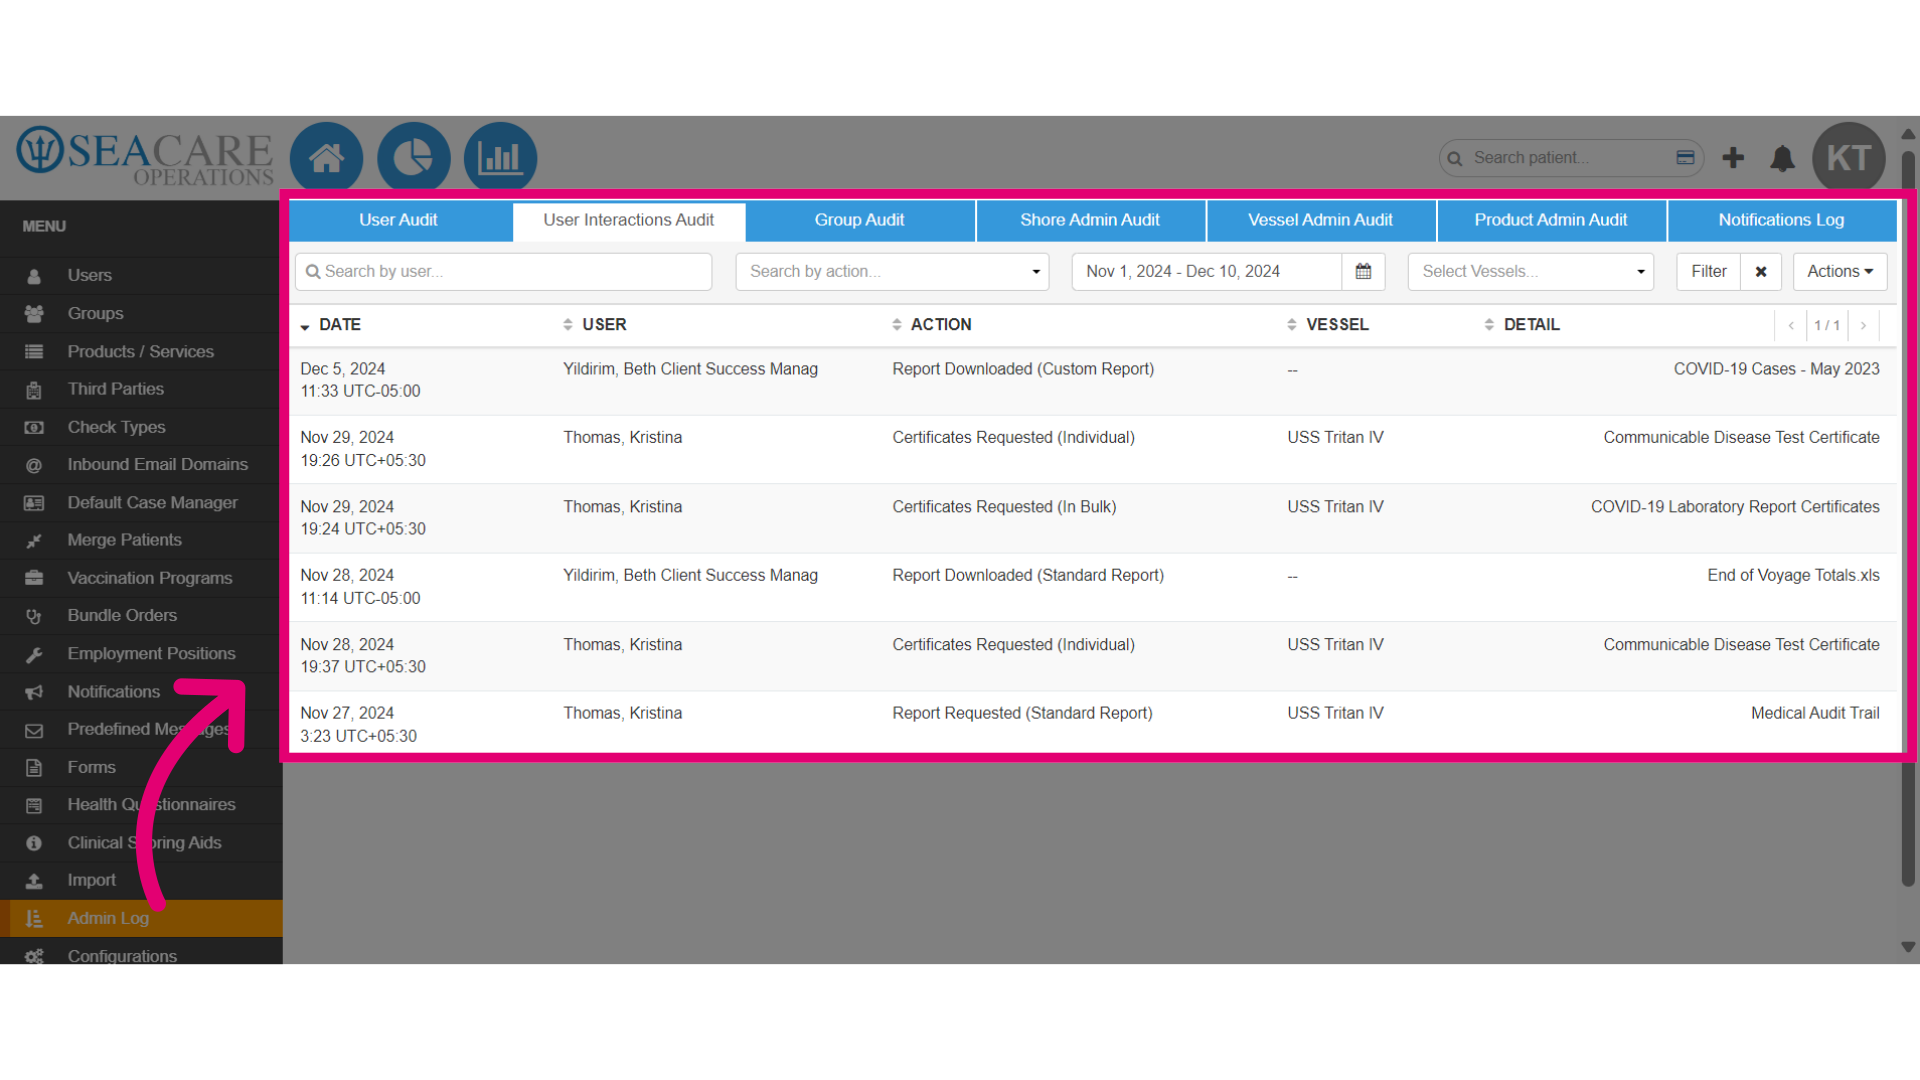
- View the results.
- Go to the Group Audit Tab and do the following:
- Set the filters
- View the group audit list
- Expand the details to view the Field, Old Value, and New Value.
- Go to the Shore Admin Audit tab, and use the following:
-
- Search filter
- Action filter to search by specific actions taken
- Apply the date range picker filter
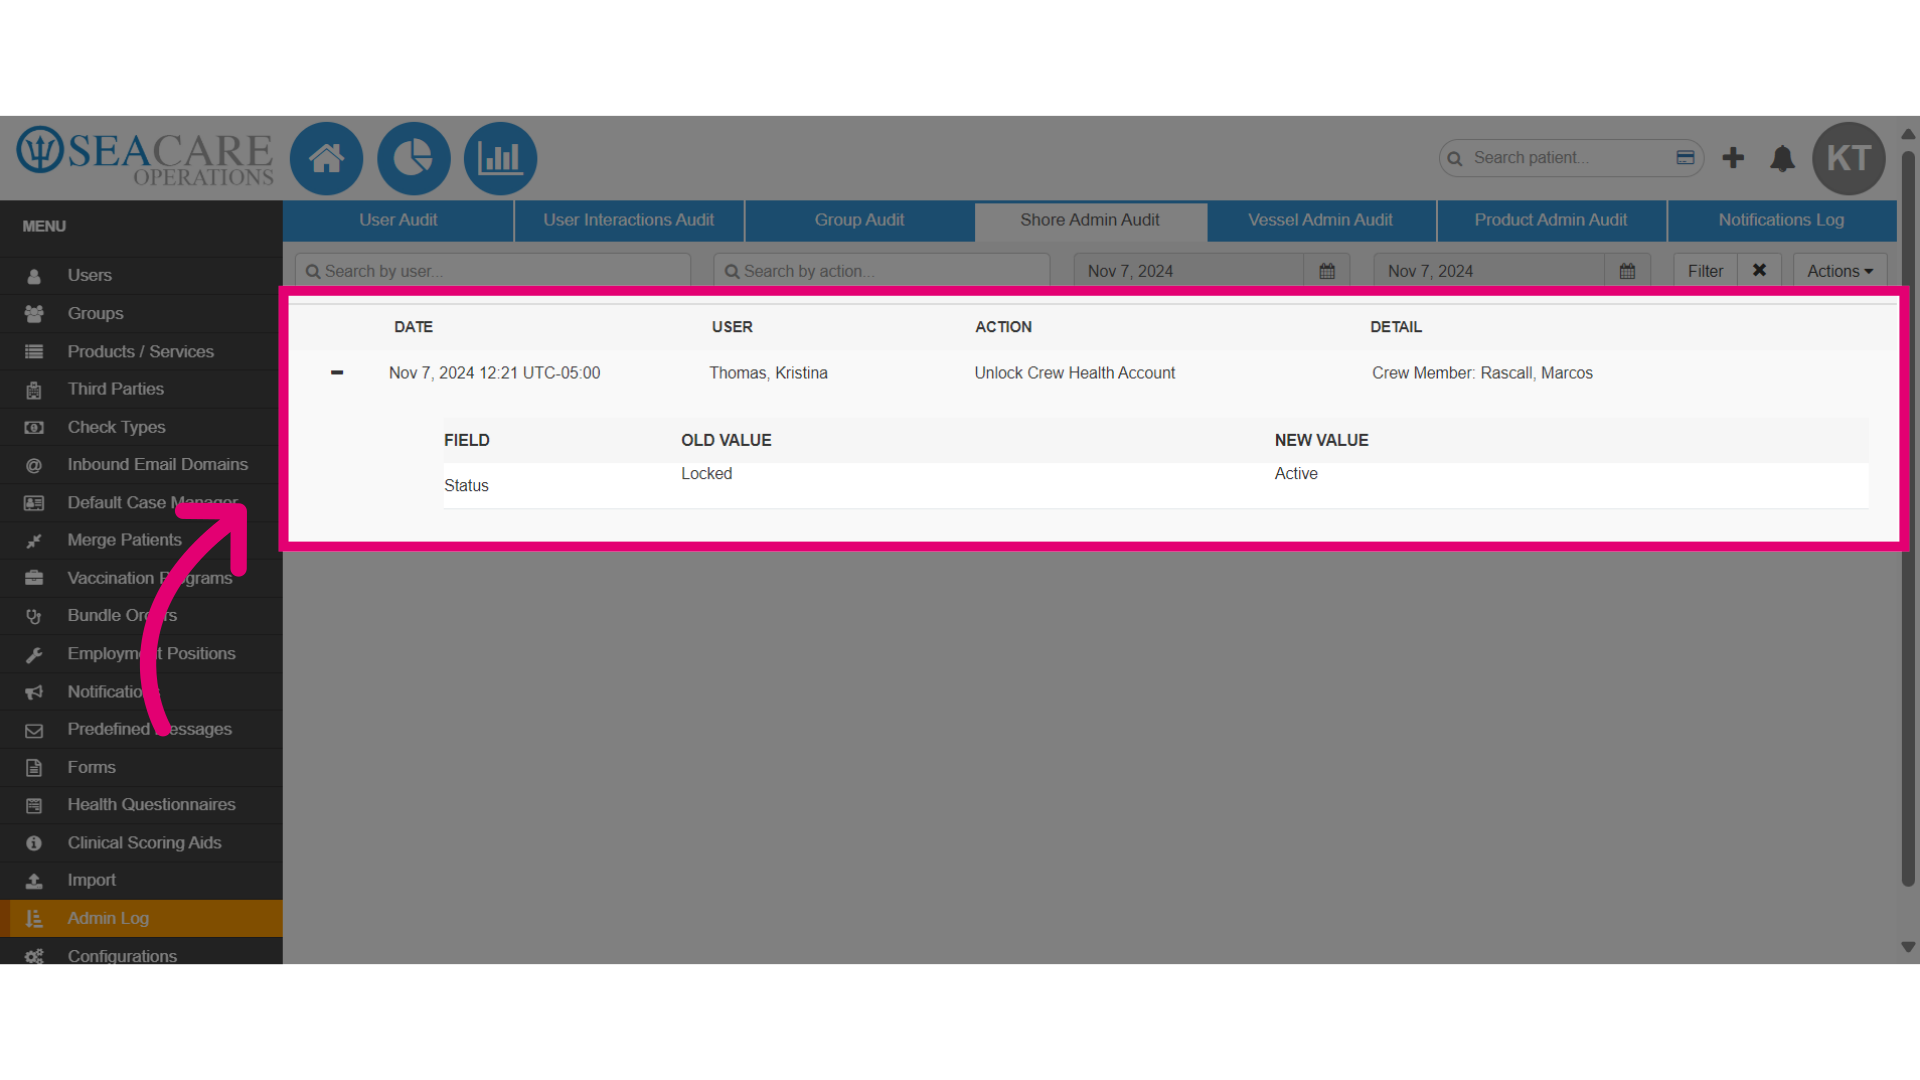
- After selecting the relevant filters, you can view the Shore Admin Audit list, including the Date, User, Action, and Detail for each entry.
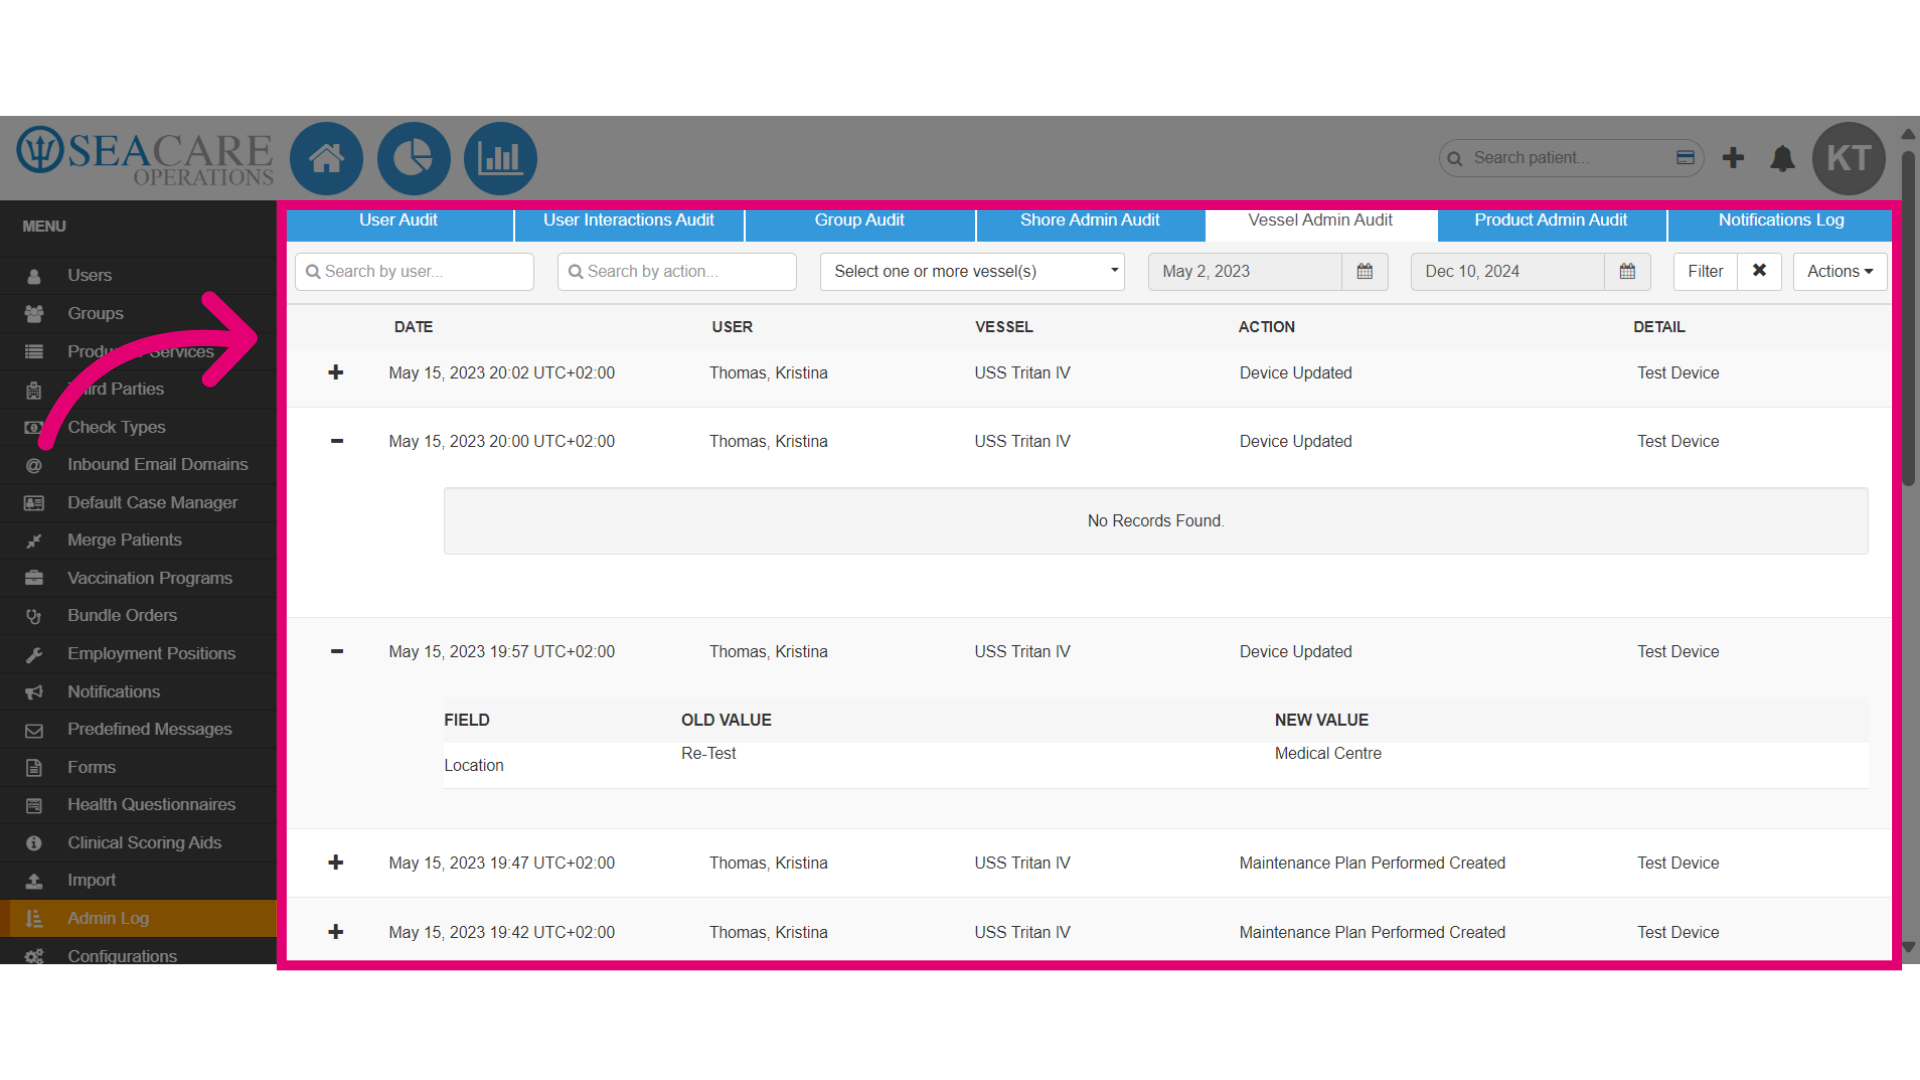
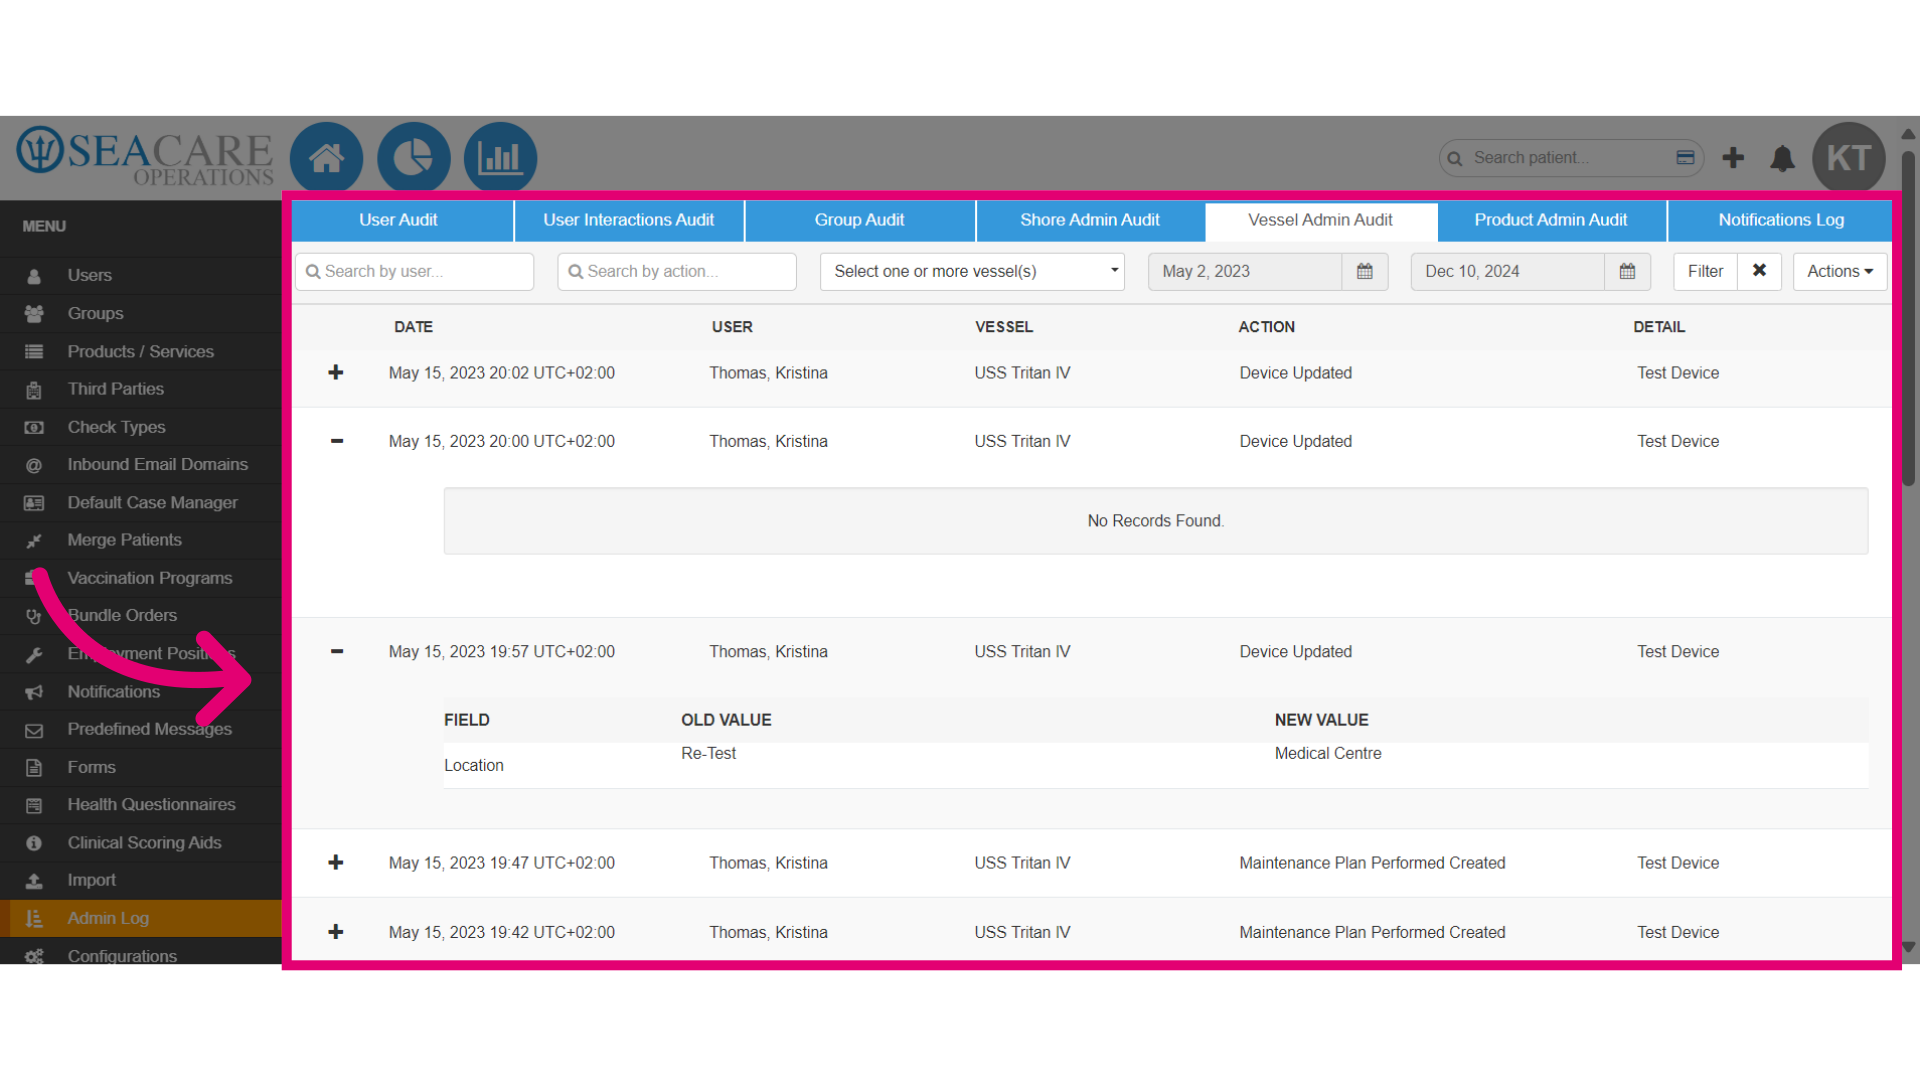
- Go to the Vessel Admin Audit tab, and set filters using:
- Search
- Action
- Vessel
- Date range picker
- Next, use the Product Admin Audit.
- Apply filters and complete the following:
- View updates made in the vessel admin section including the date, user, vessel, action, and details such as device creation, update, and maintenance.
- Expand the details to view information about who made the updates under updated, the old value (previous information), and the new value (updated information).
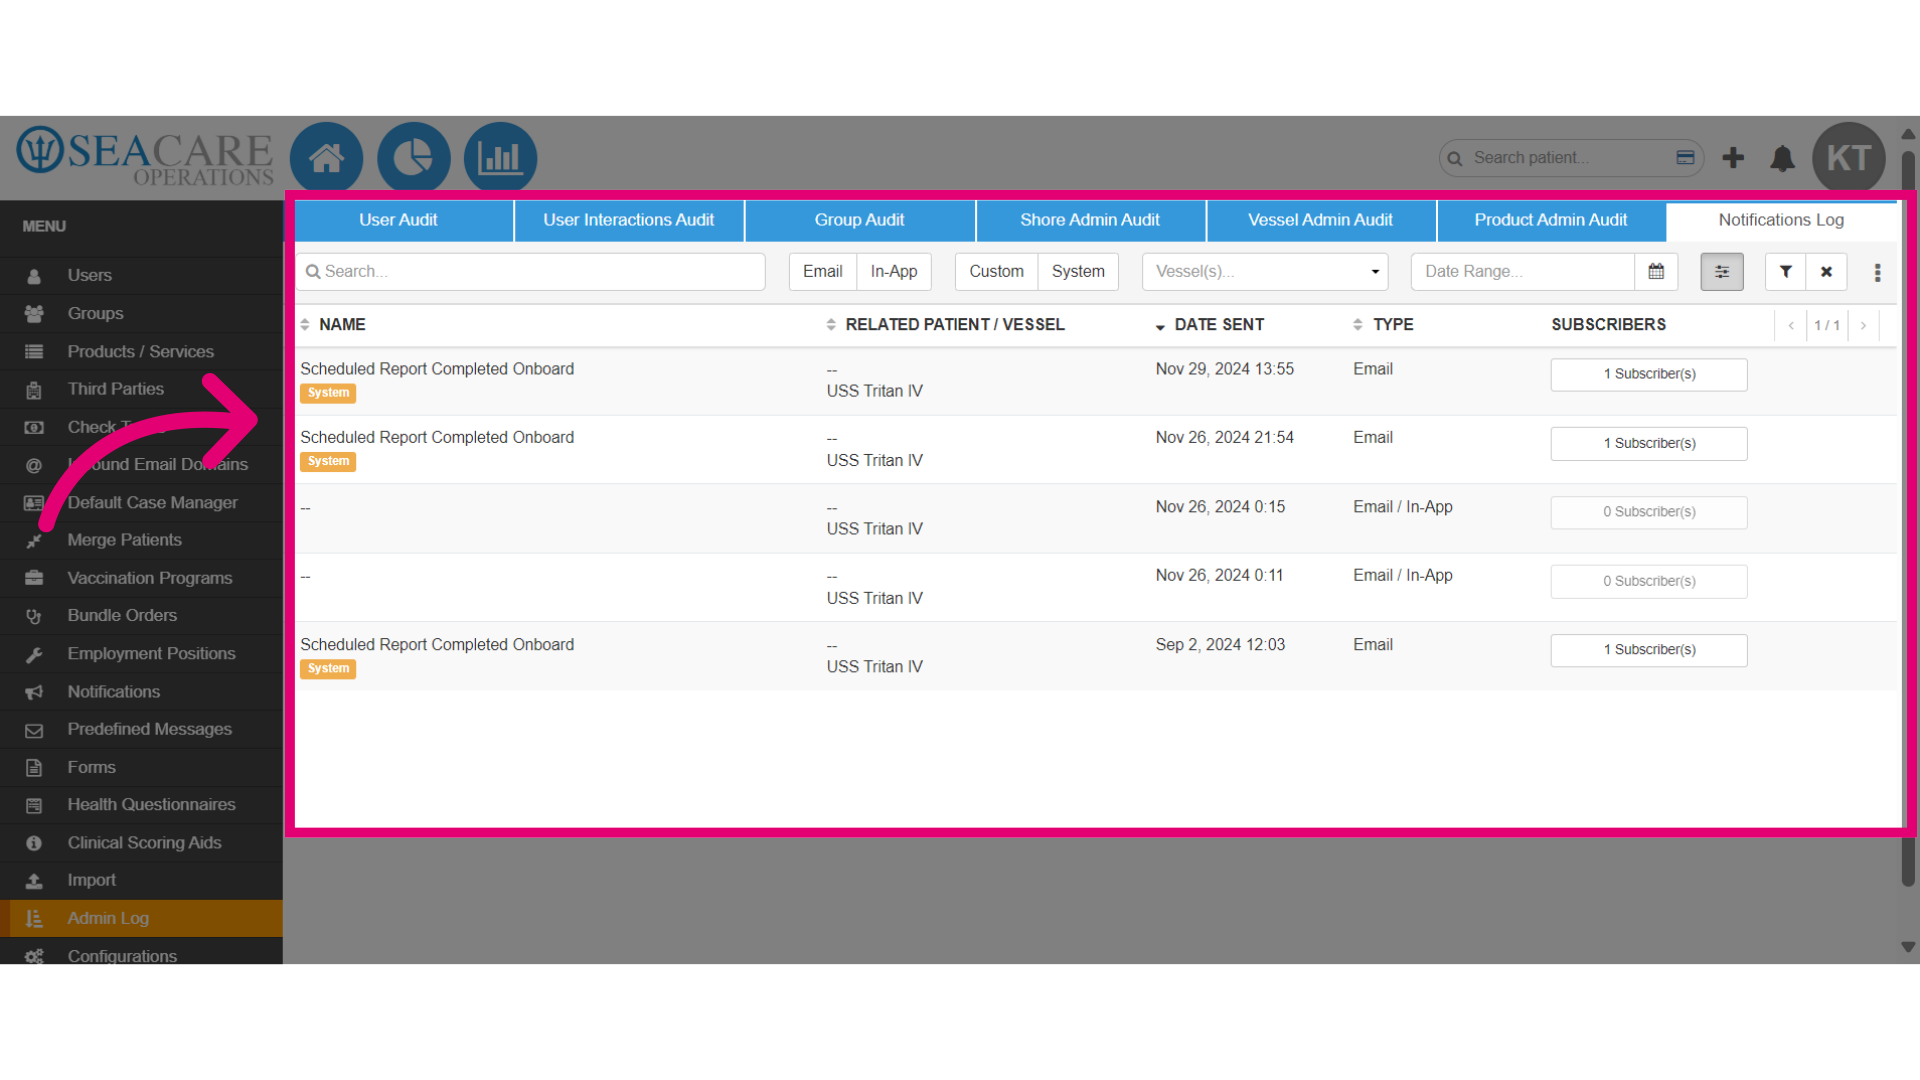
- Click on the Notifications Log tab to view an audit of all notifications sent throughout the system.
- Use the following filters and search tools to customize a search for notifications:
- Name - Search by the name of the notification.
- Email - Select this filter for notifications sent via email.
- In-app - Use filter for notifications sent through the in-app method.
- Custom - Filter for custom notifications made by users with permissions to edit or create them.
- System - Filter for system notifications which are pre-configured and cannot be edited.
- Vessel - Select a specific vessel where the notification was assigned.
- Date Range - Pick a date range to search for notifications.
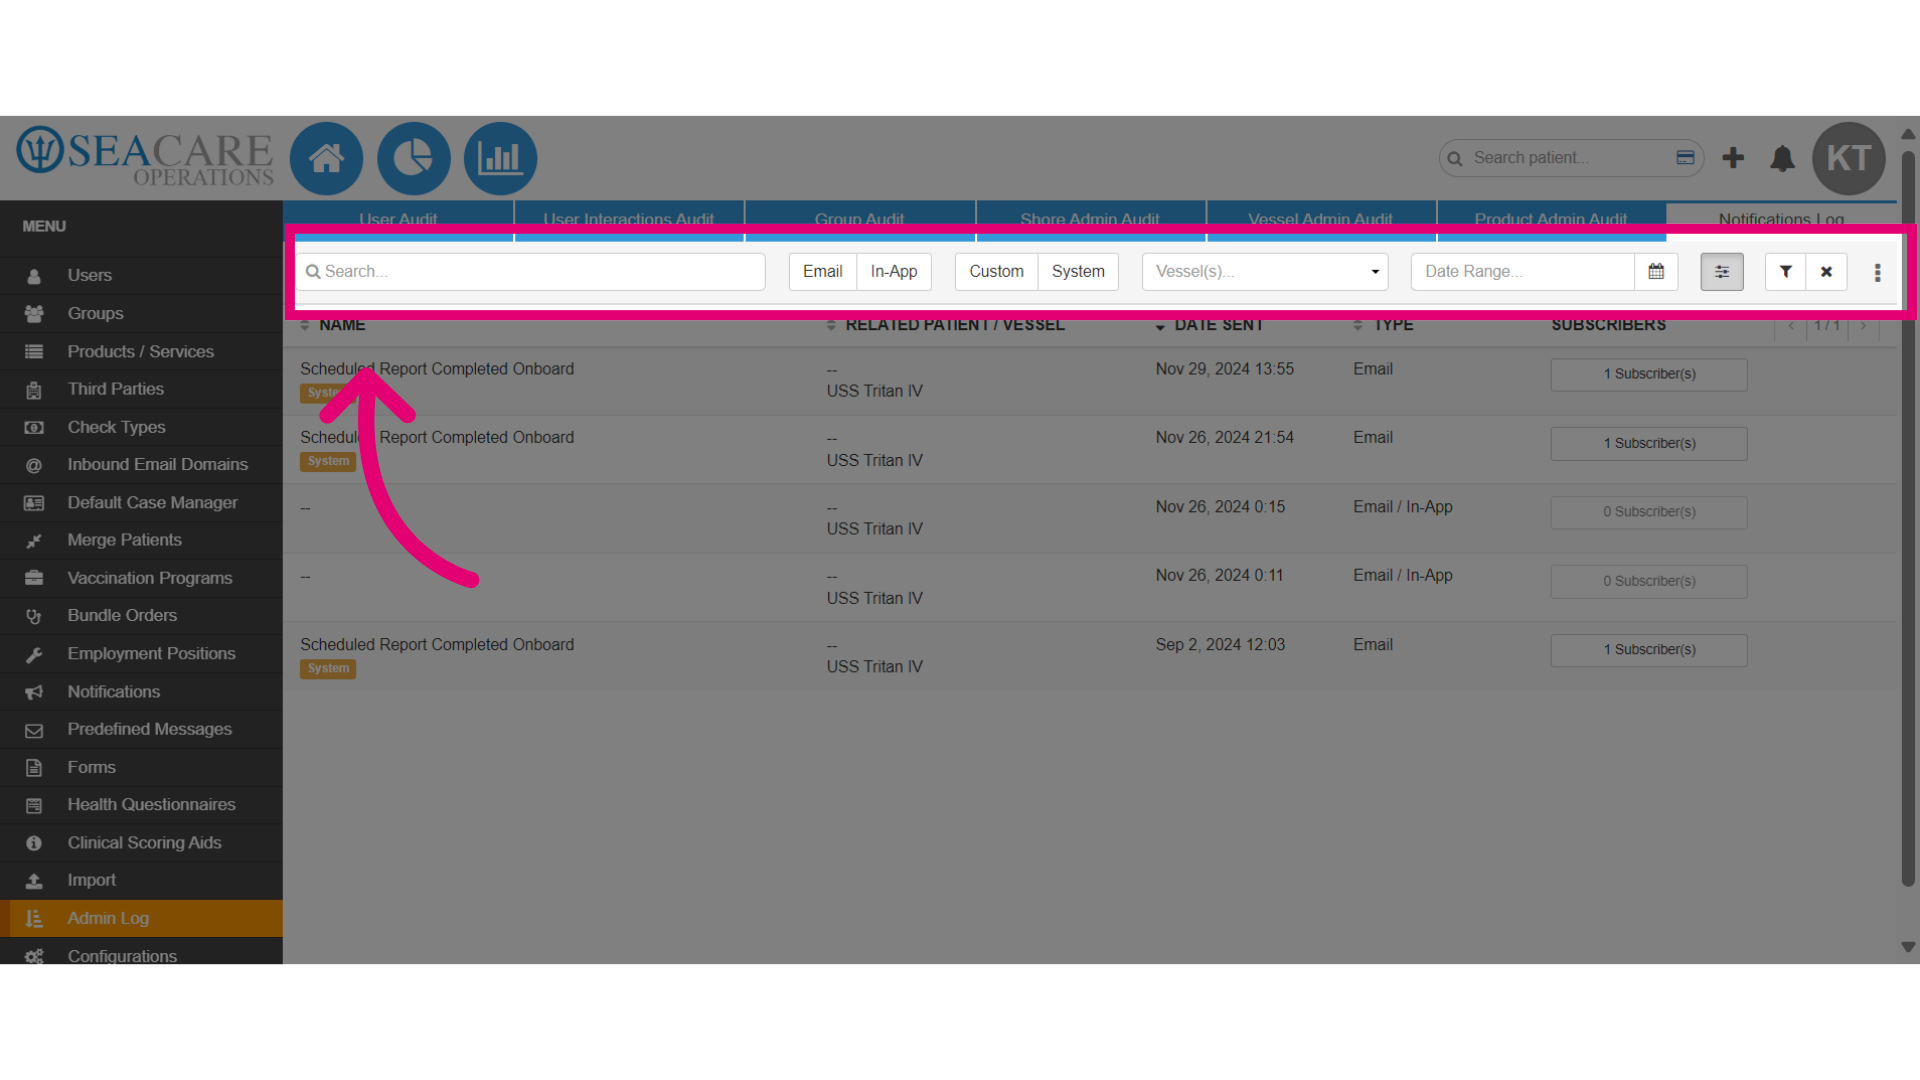
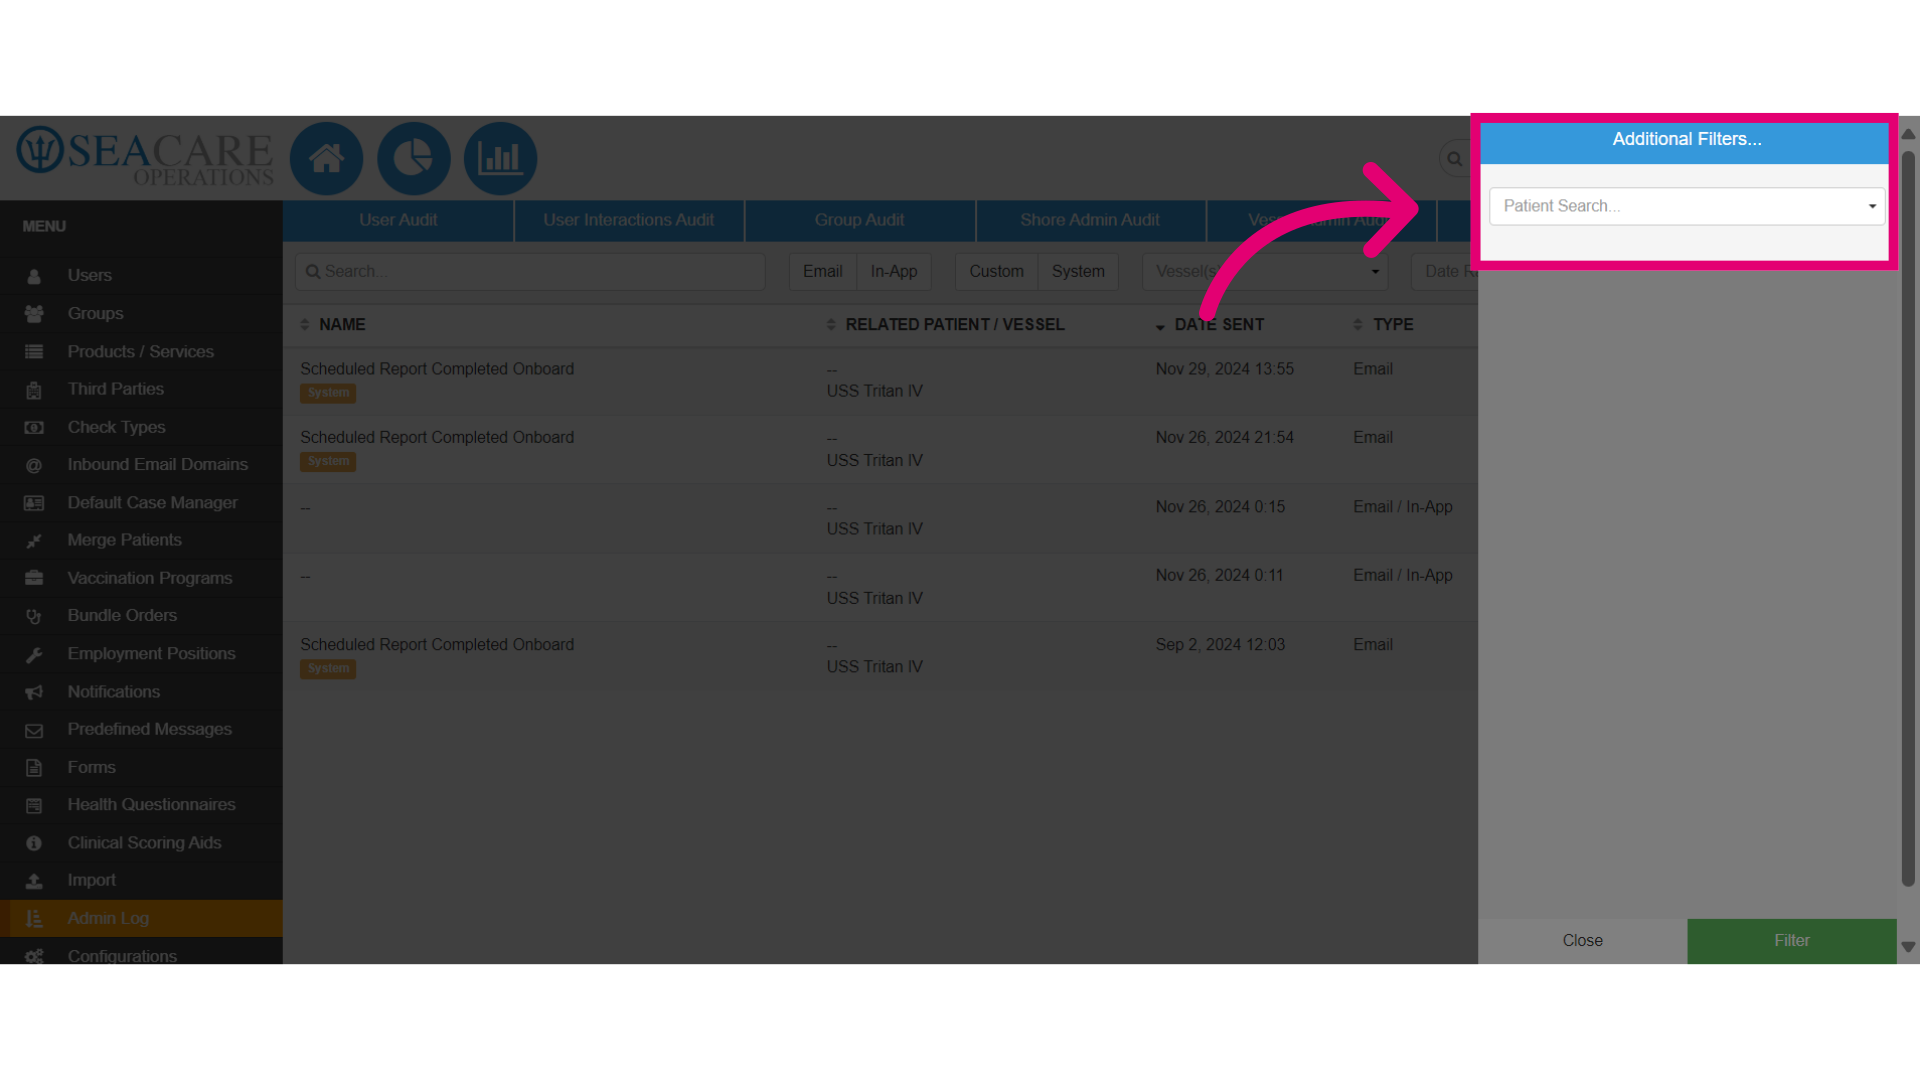
- Now, select the Additional Filters button to view more filter options.

- Choose the additional filters desired, then select Save.
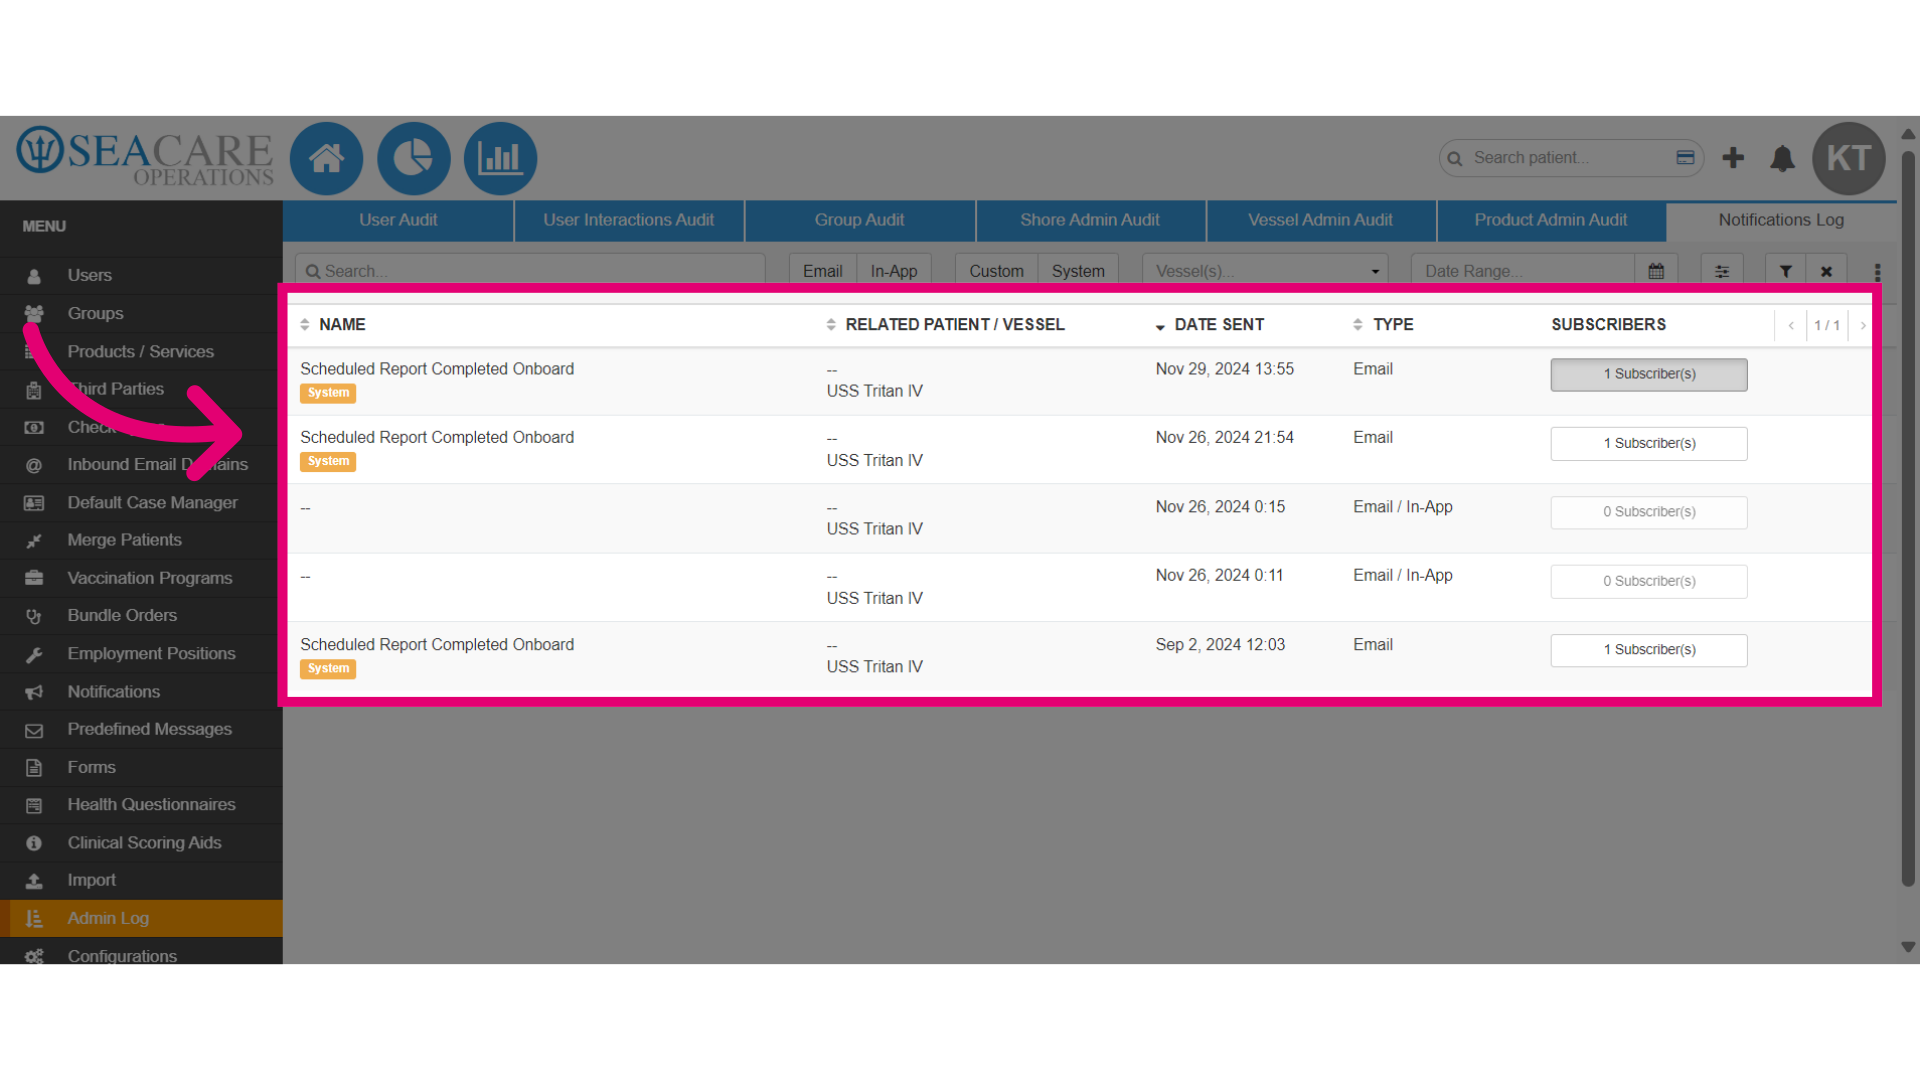
- Back on the main page, you can view a list of notifications including:
- Notification name
- Relation to a patient or vessel
- Date
- Type of notification (email or in-app)
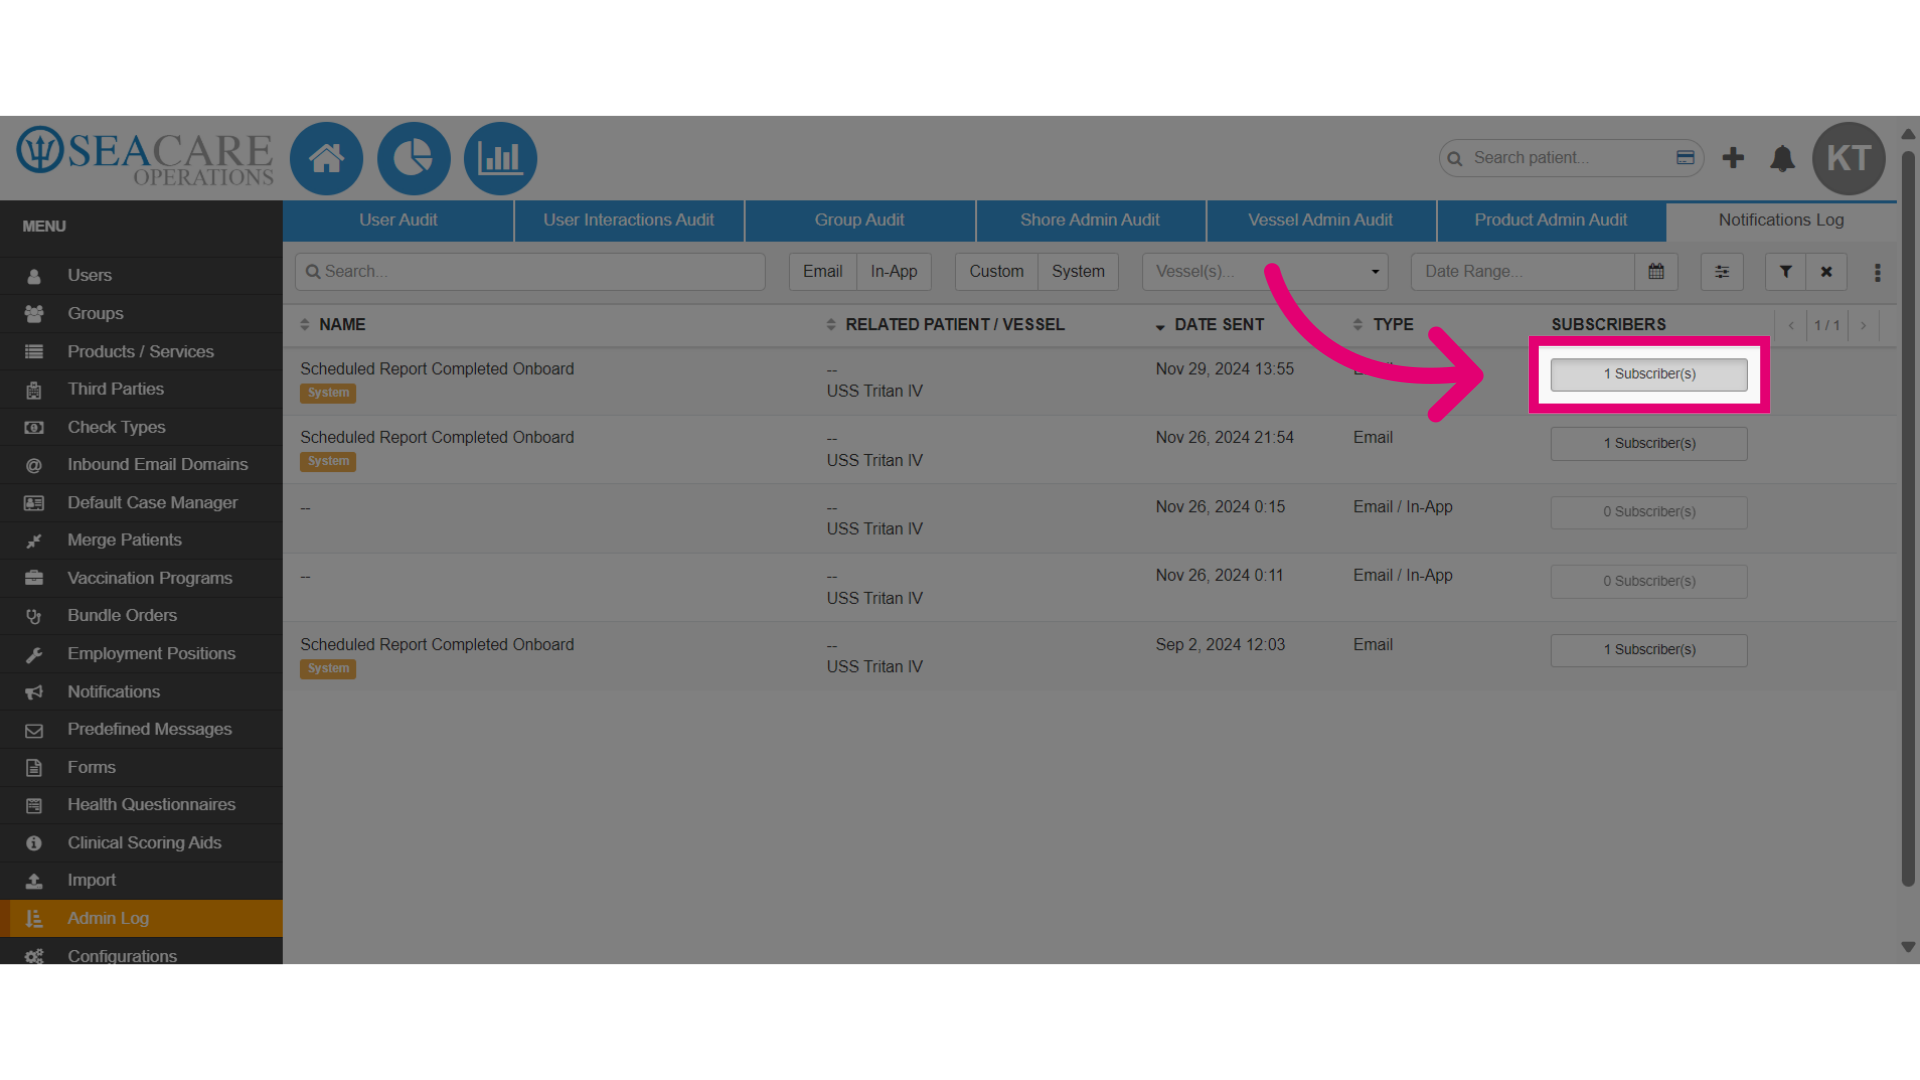
- Number of subscribers.
- Click Subscribers to view more details about who is subscribed to the notification.
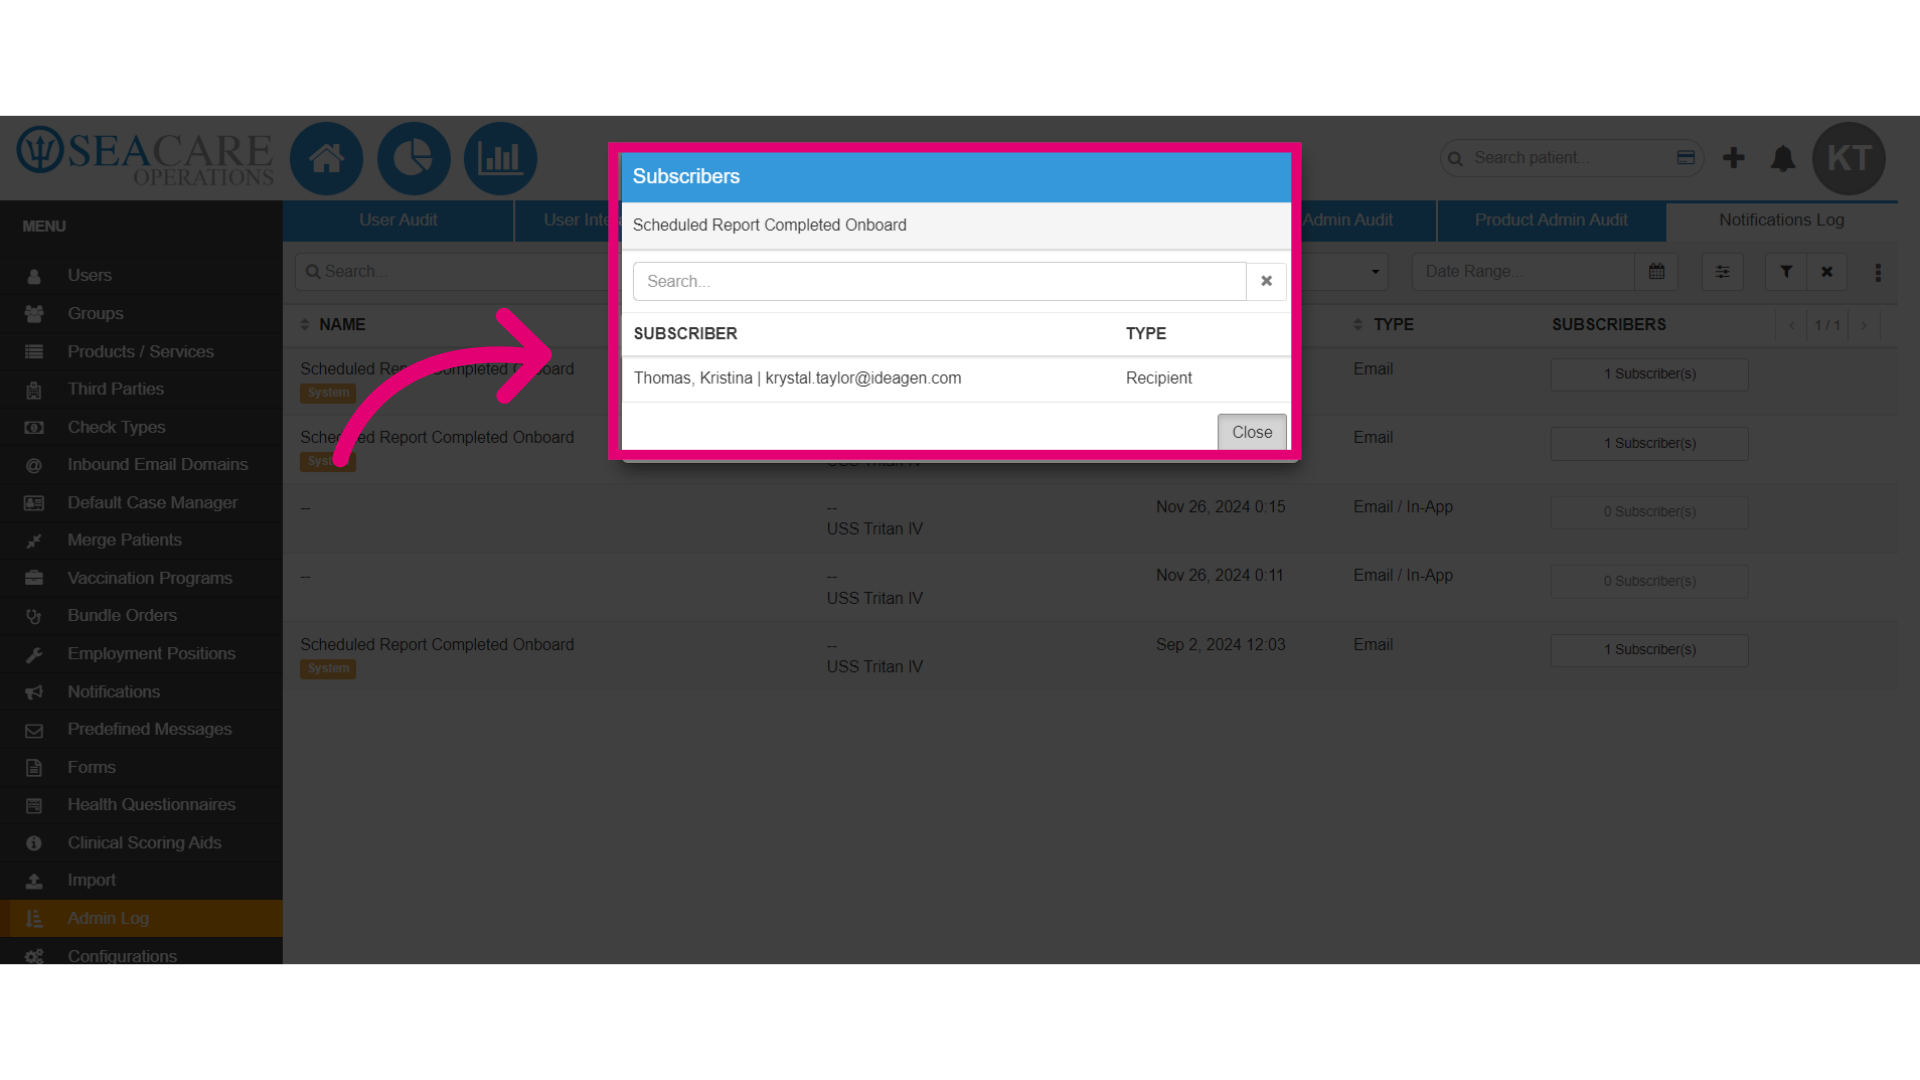
- In the Subscriber window, you can view the subscriber's:
- Name
- Type of subscriber
- Use the search bar to easily locate a subscriber, and close the window when you've finished.
- Access more information by clicking on the More Actions button.
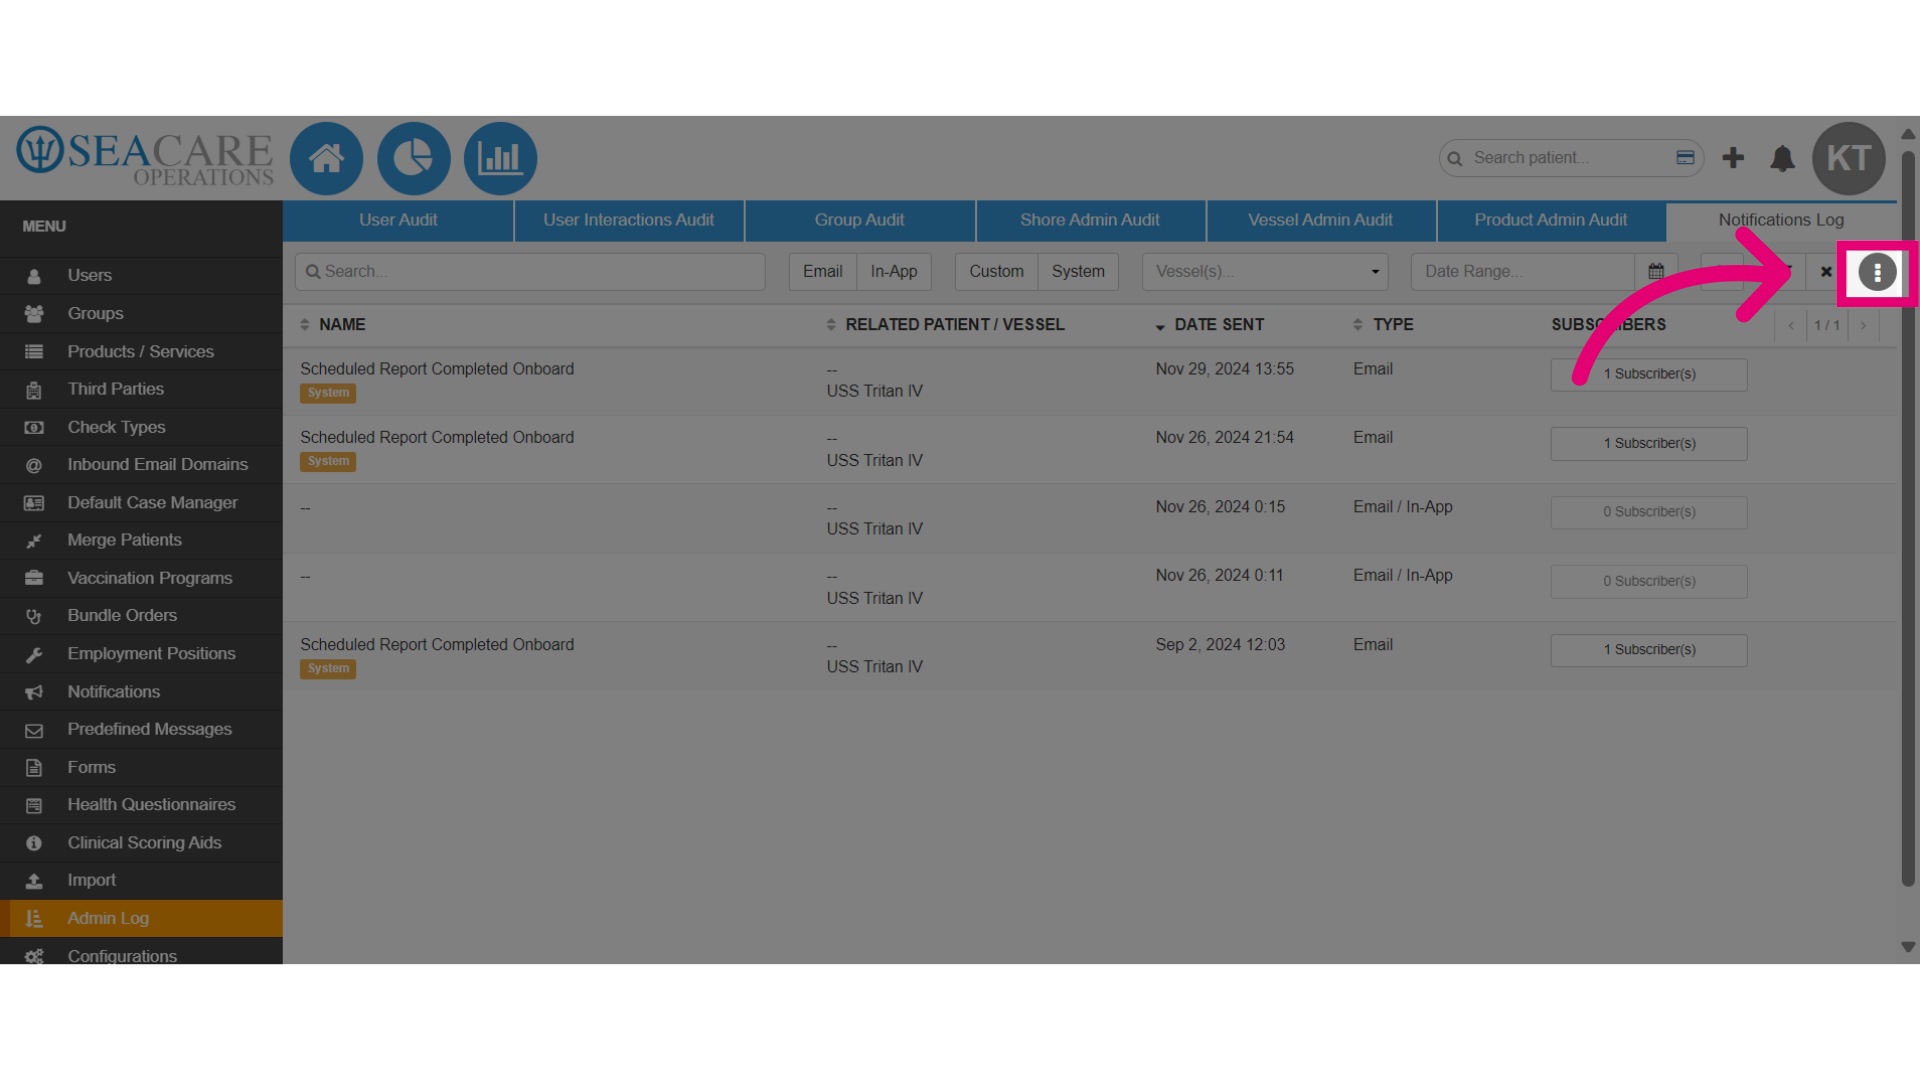
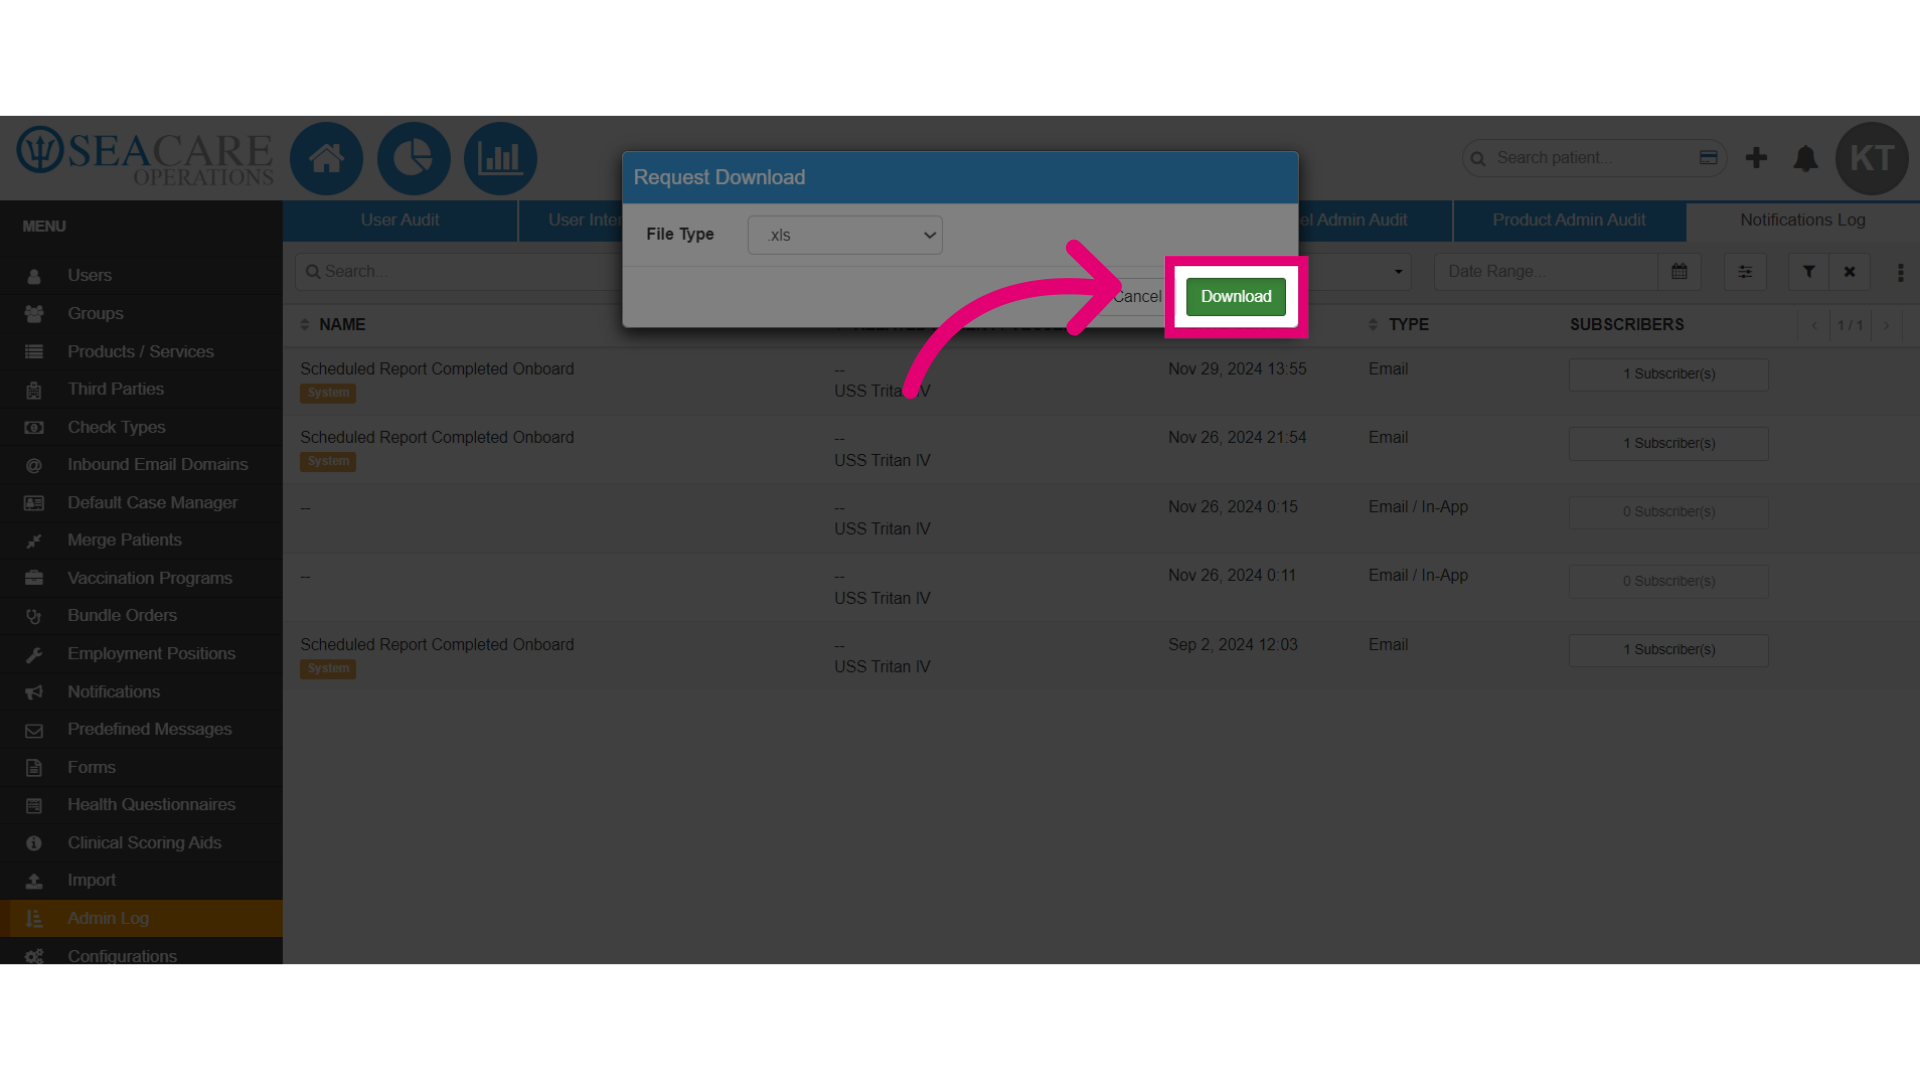
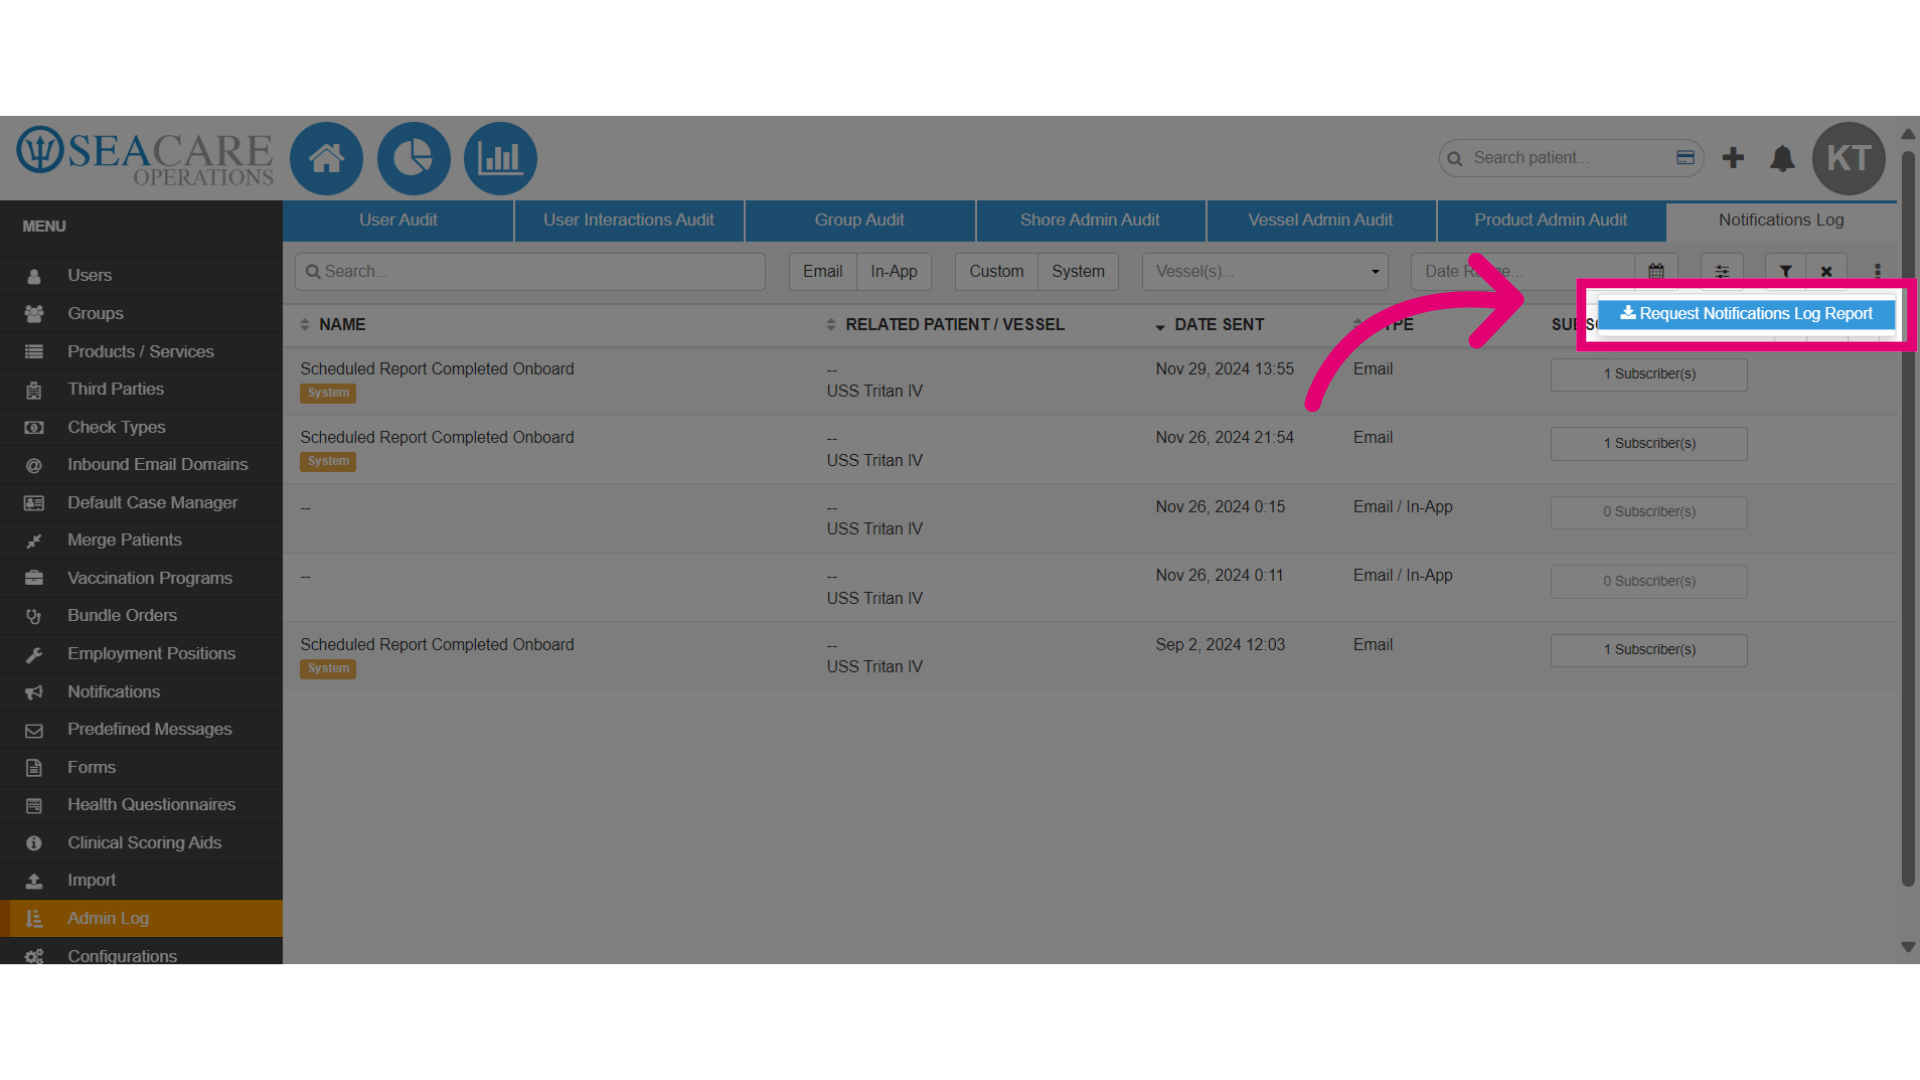
- Request a report by clicking on Request Notifications Log Report.
- This will download a copy of the report in this tab.
- Retrieve the report in the Request Report tab in the Standard Reports module.
- Then, select the File Type.
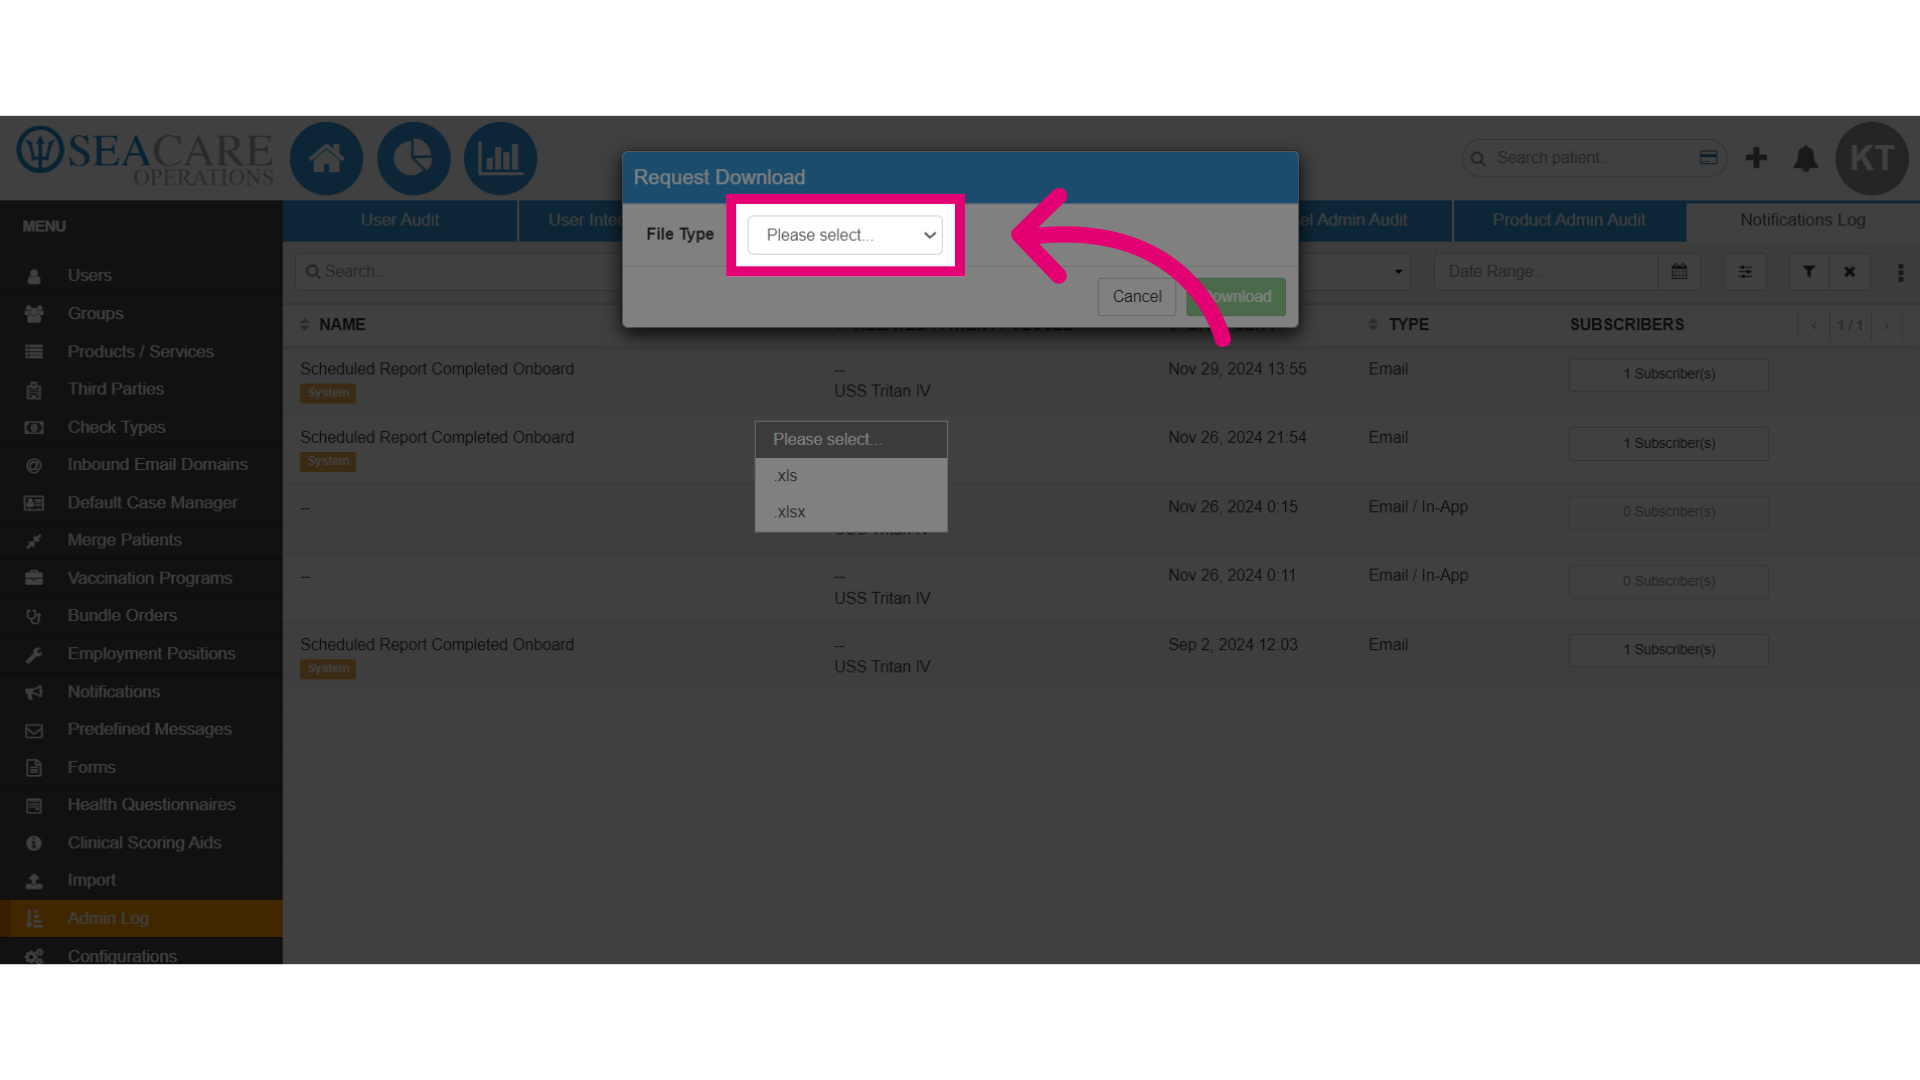
- Finally, click Download.