New article
Recently updated
Managing Rejected Documents in Ideagen Maritime Health Provider

Who is this article for?Users who want to learn to manage rejected documents in Ideagen Maritime Health Provider.
No elevated permissions are required.
Clinics may share documents with maritime companies or third parties. From time to time, these documents may be rejected for reasons like incorrect or missing medical details, inconsistencies, incomplete histories, or extra testing needs.
This guide helps you efficiently handle rejected documents in Ideagen Maritime Health Provider.
1. Managing Rejected Documents in Ideagen Maritime Health Provider
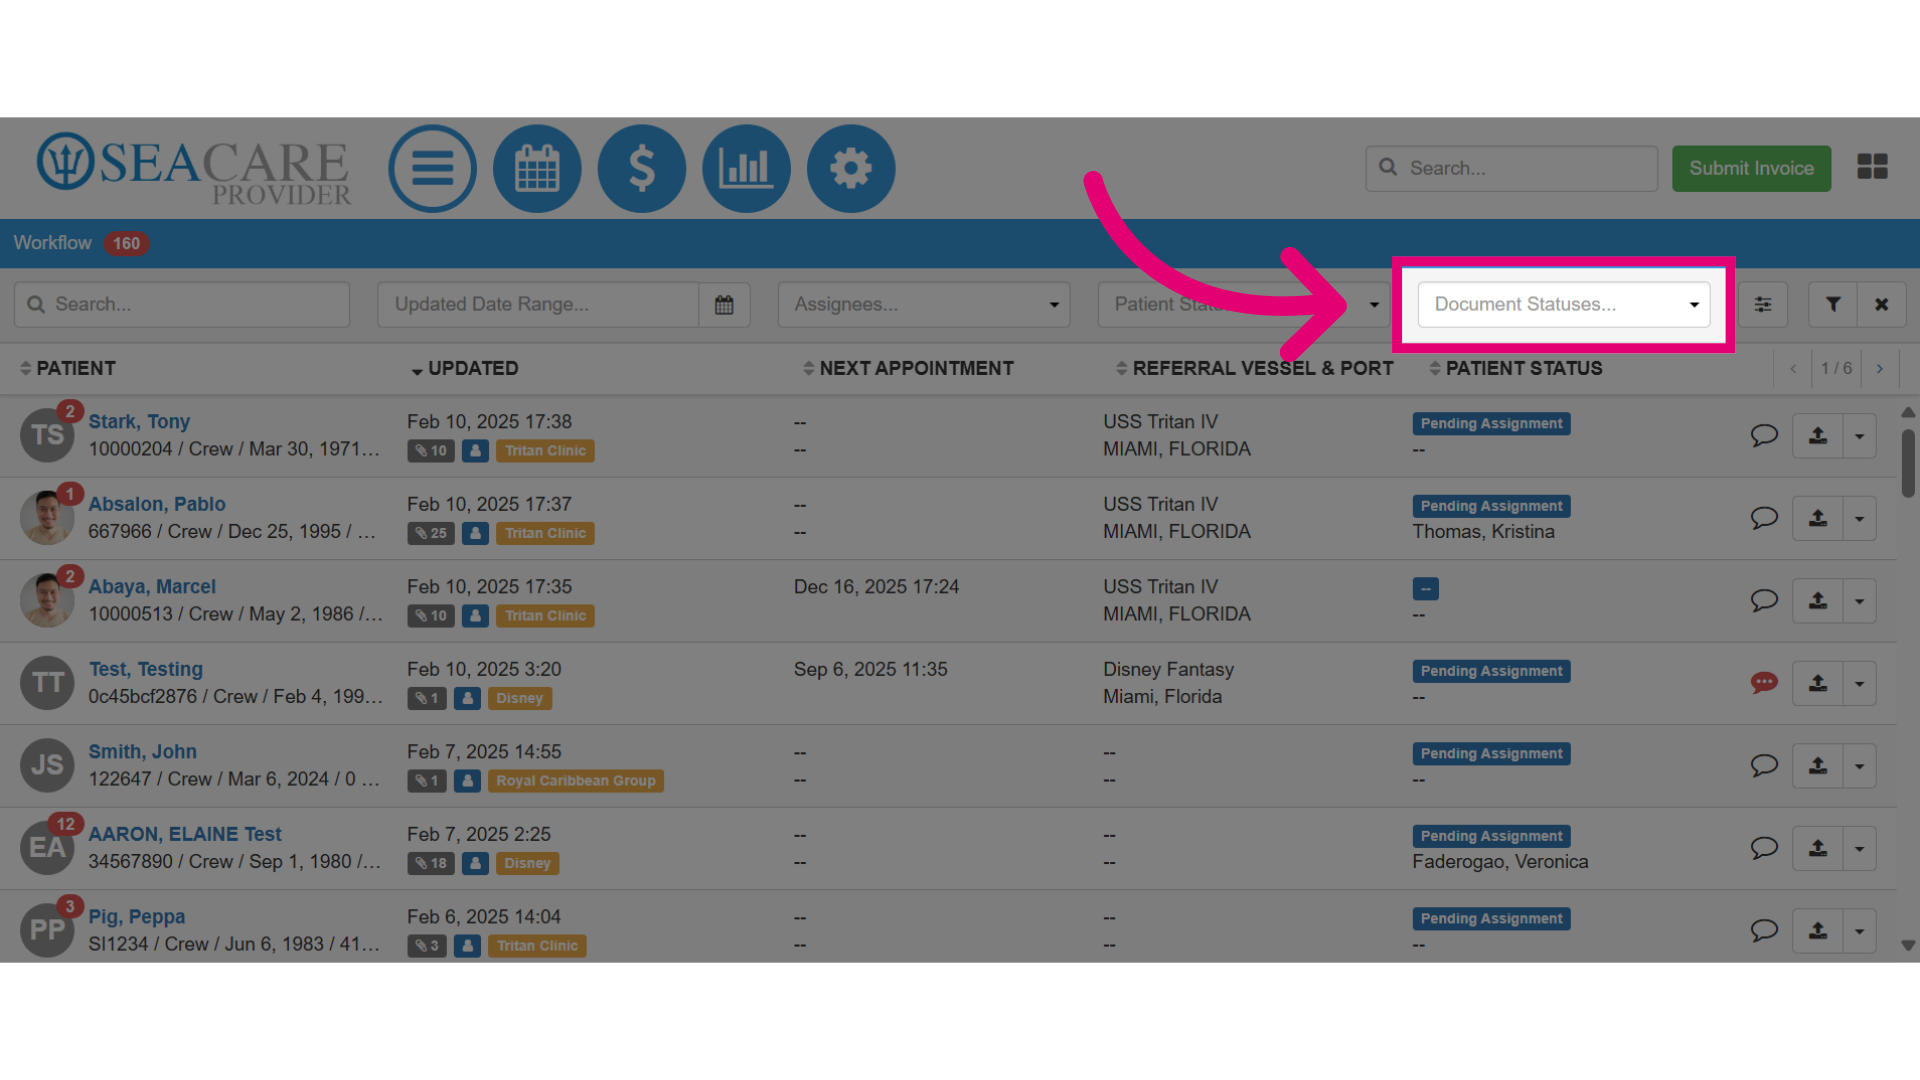
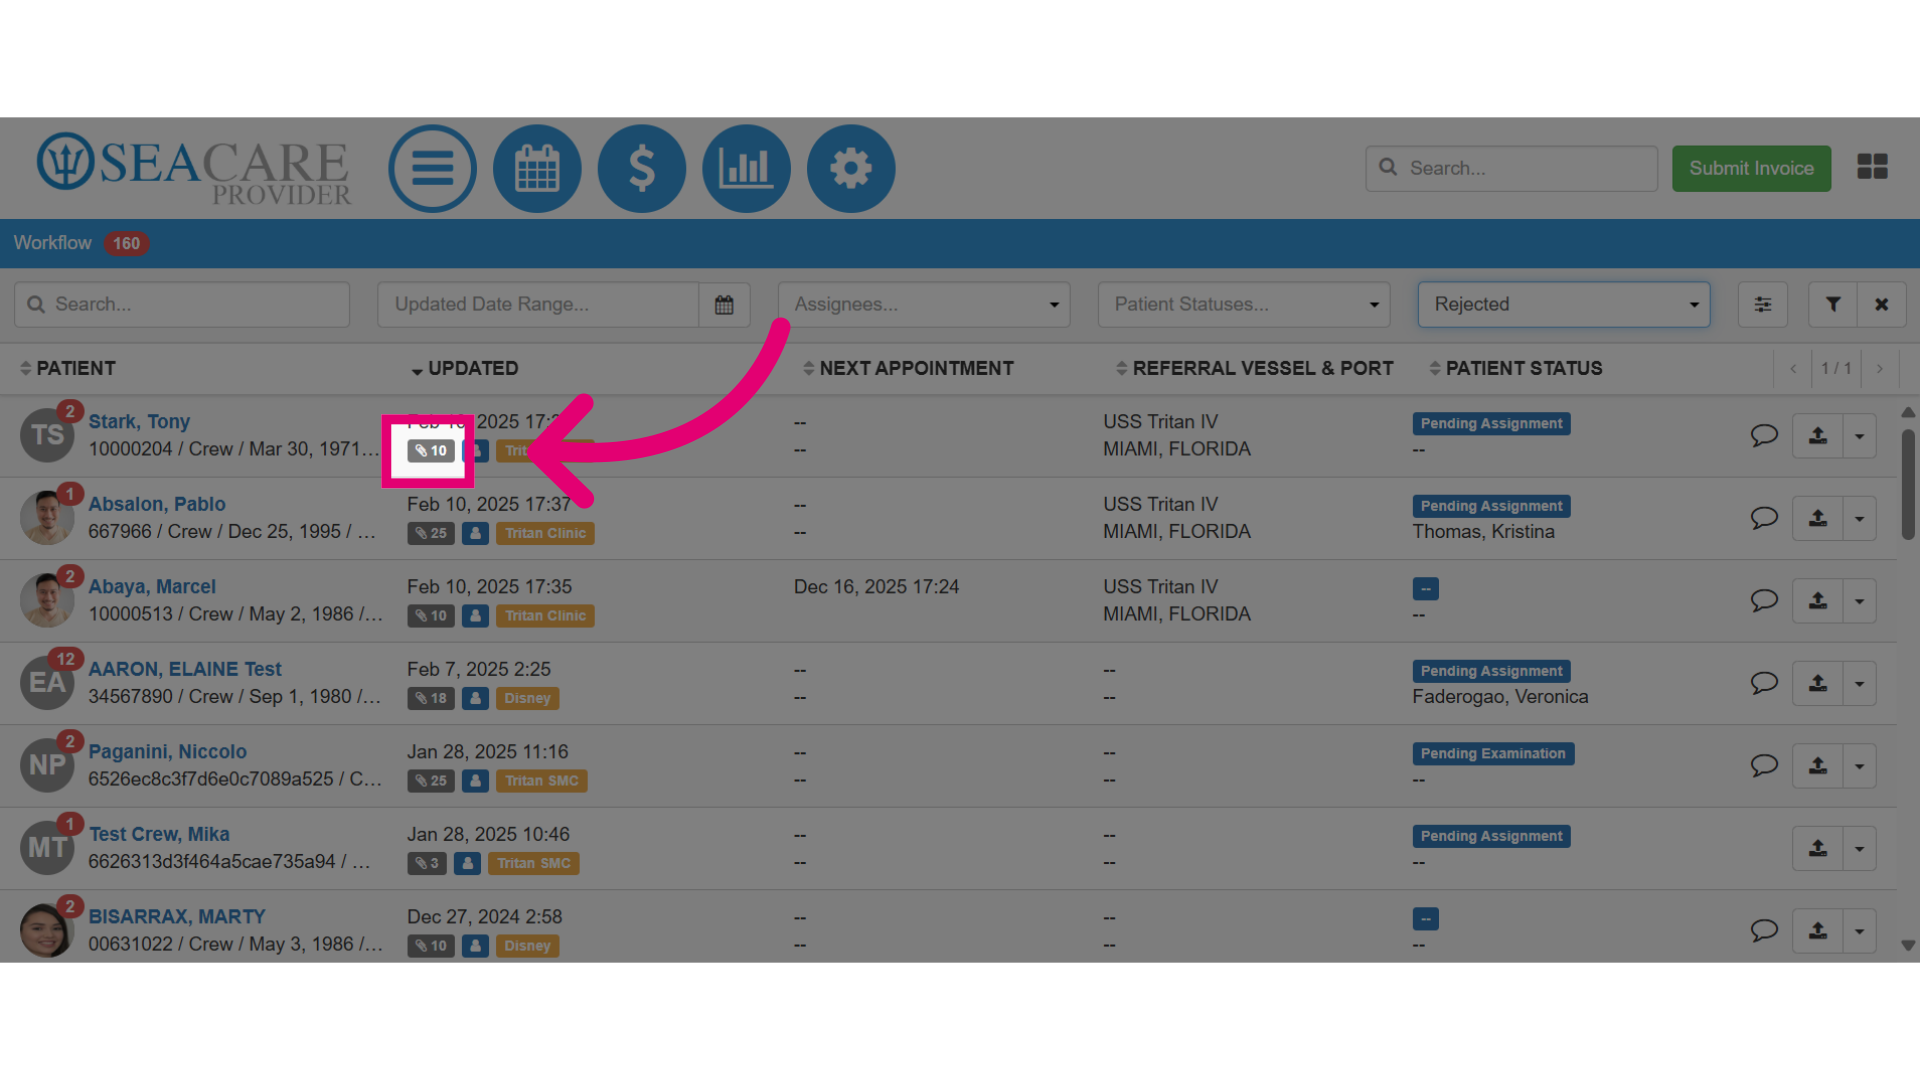
- First, locate rejected documents by clicking on the Document Statuses filter.
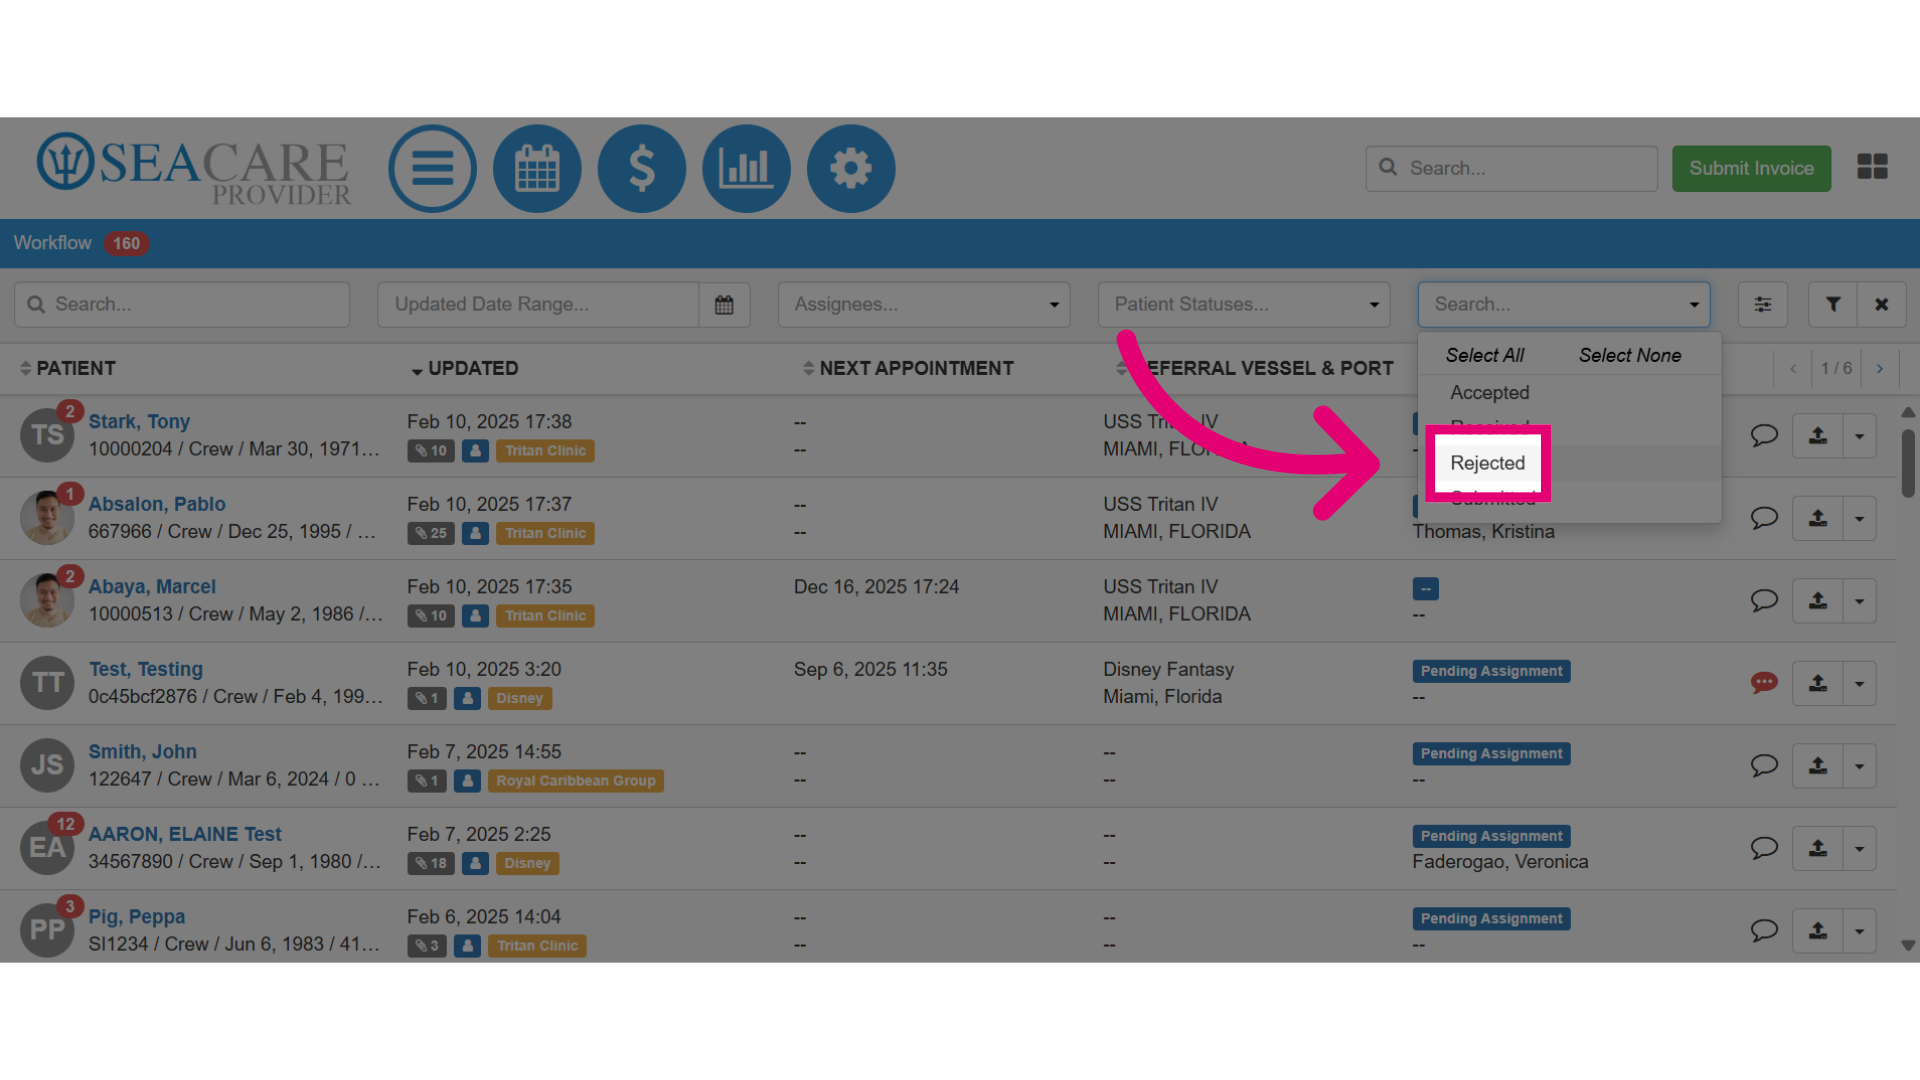
2. Select Rejected to view all rejected documents.
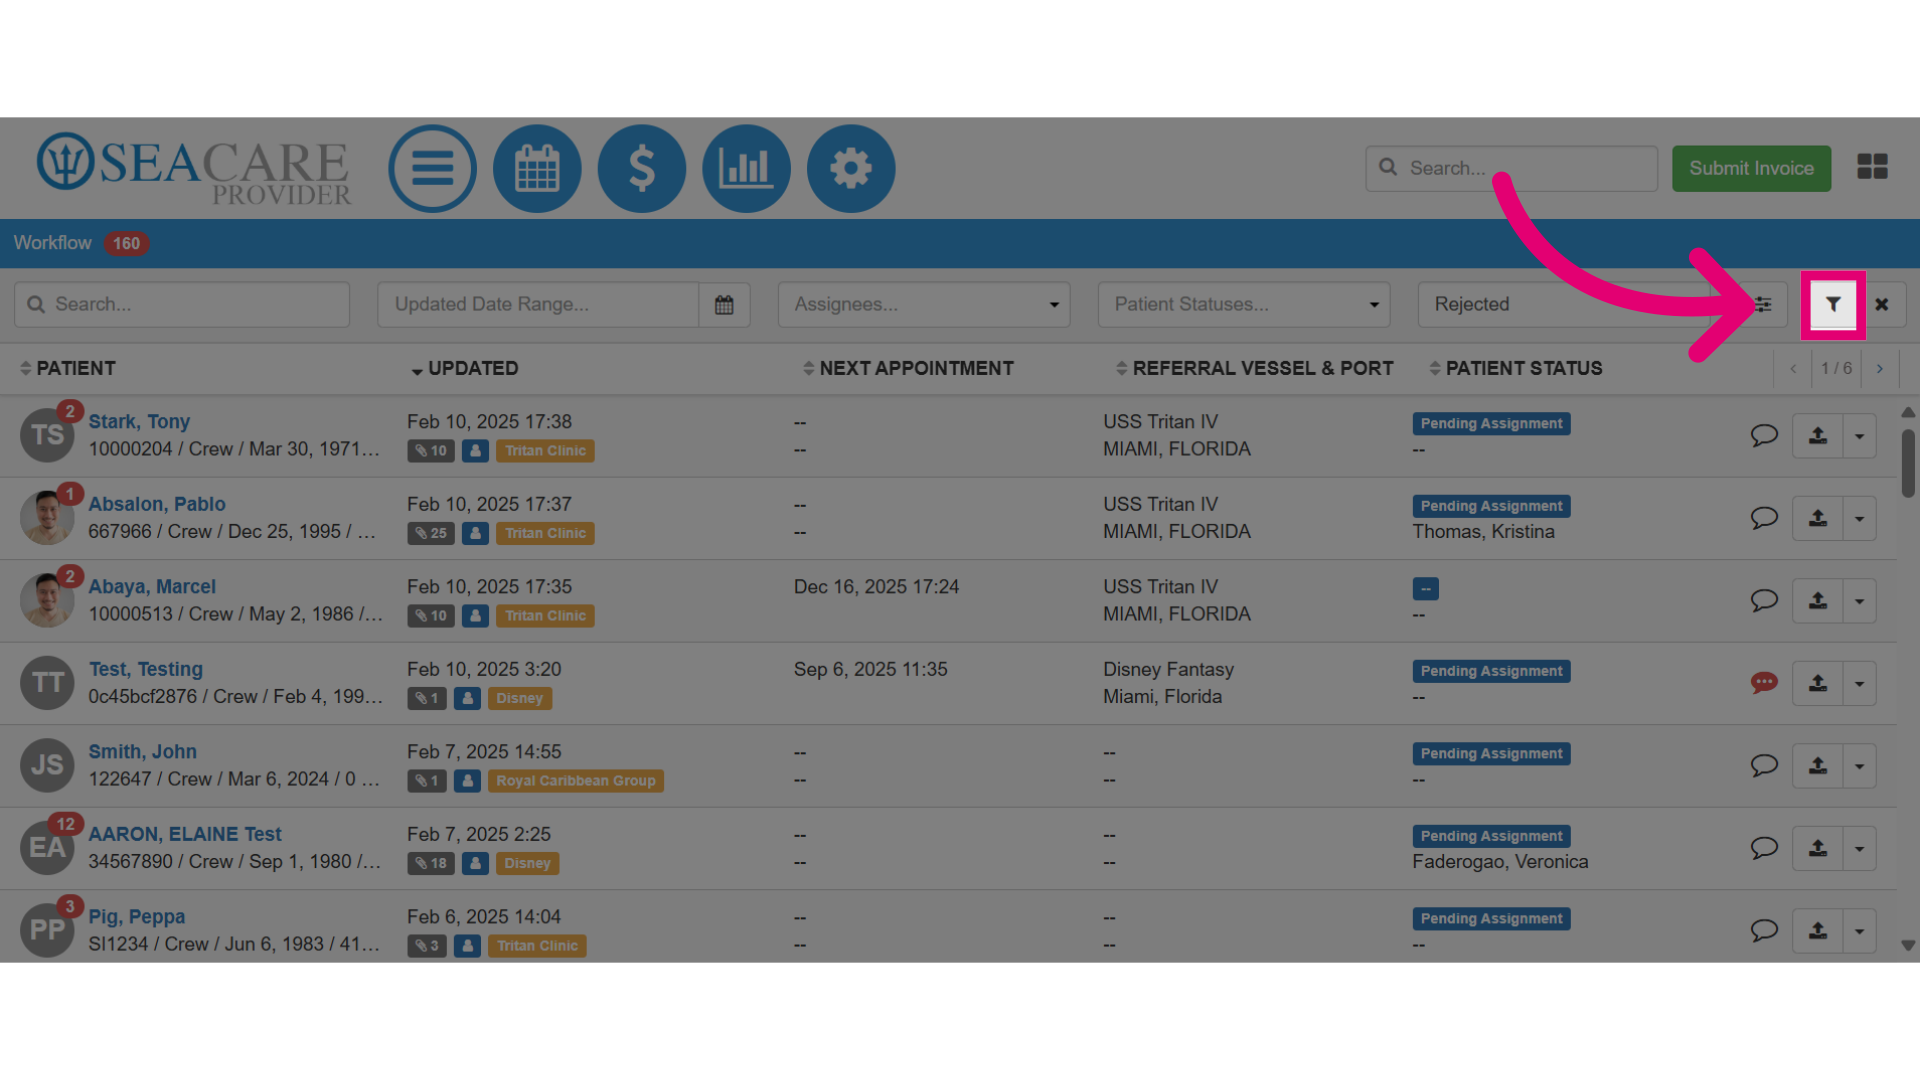
3. Then, select the filter button to generate results.
4. The list will contain patients with documents that have been rejected and are currently in that status, follow these next steps:
-
-
- Locate the patient.
- Select the documents button represented by the paperclip icon.
-
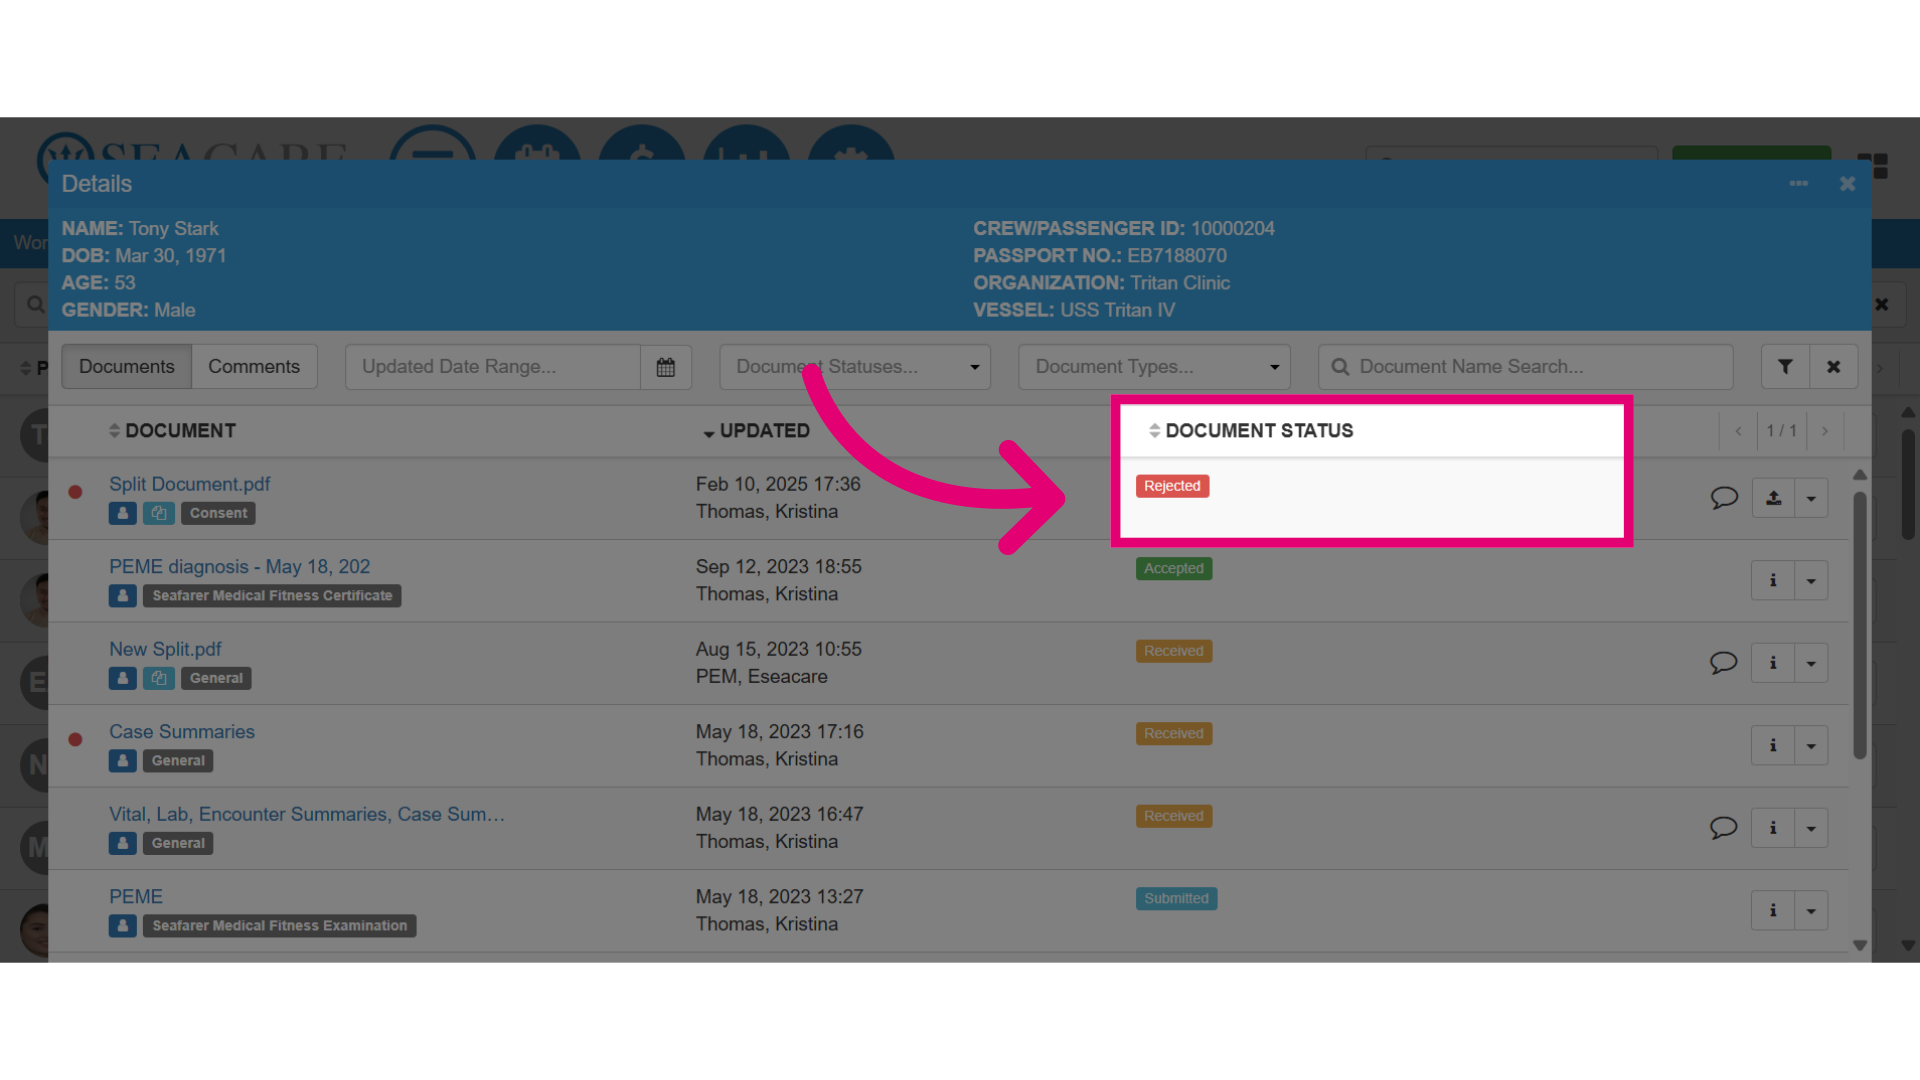
5. After the document details window opens, locate the rejected document(s) indicated by the red Rejected status label under the Document Status column.
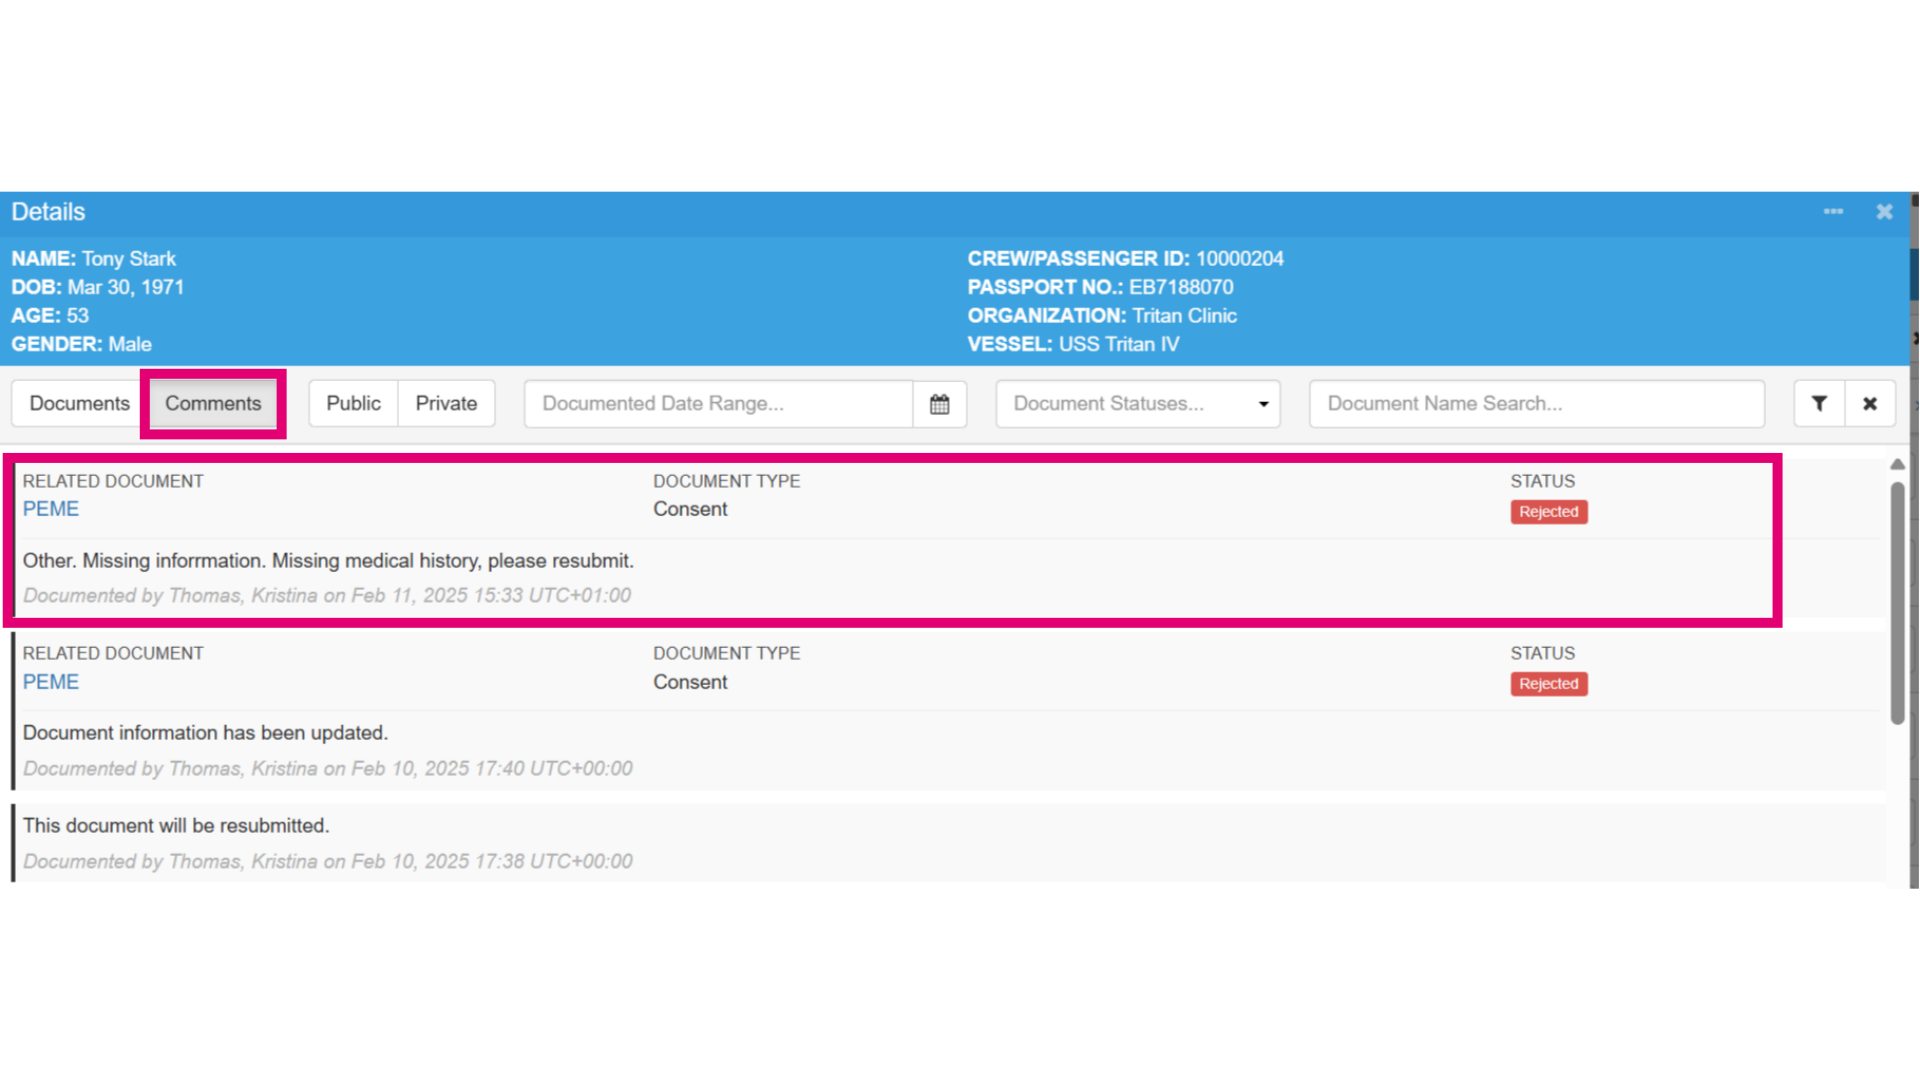
6. Visit the Comments tab to see any feedback on the rejected document, including company requests or requirements to address before resubmitting the document.
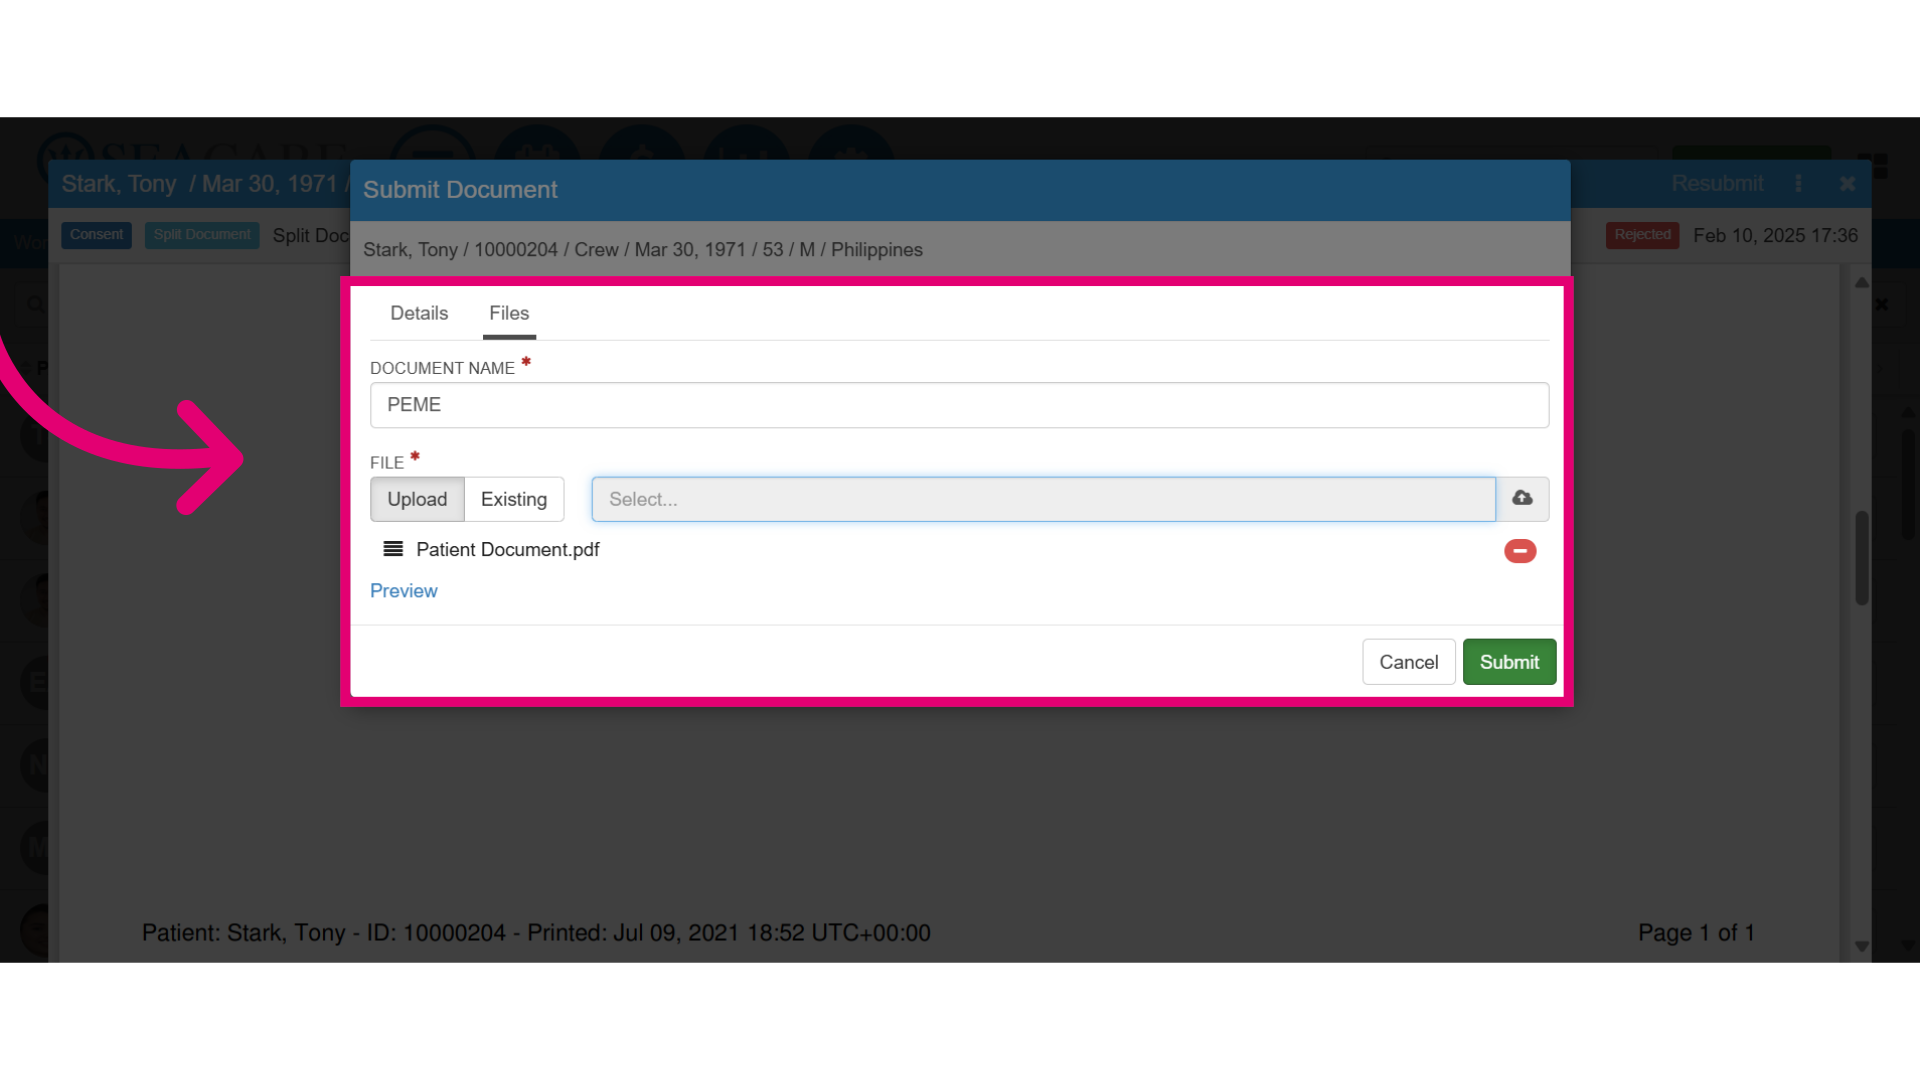
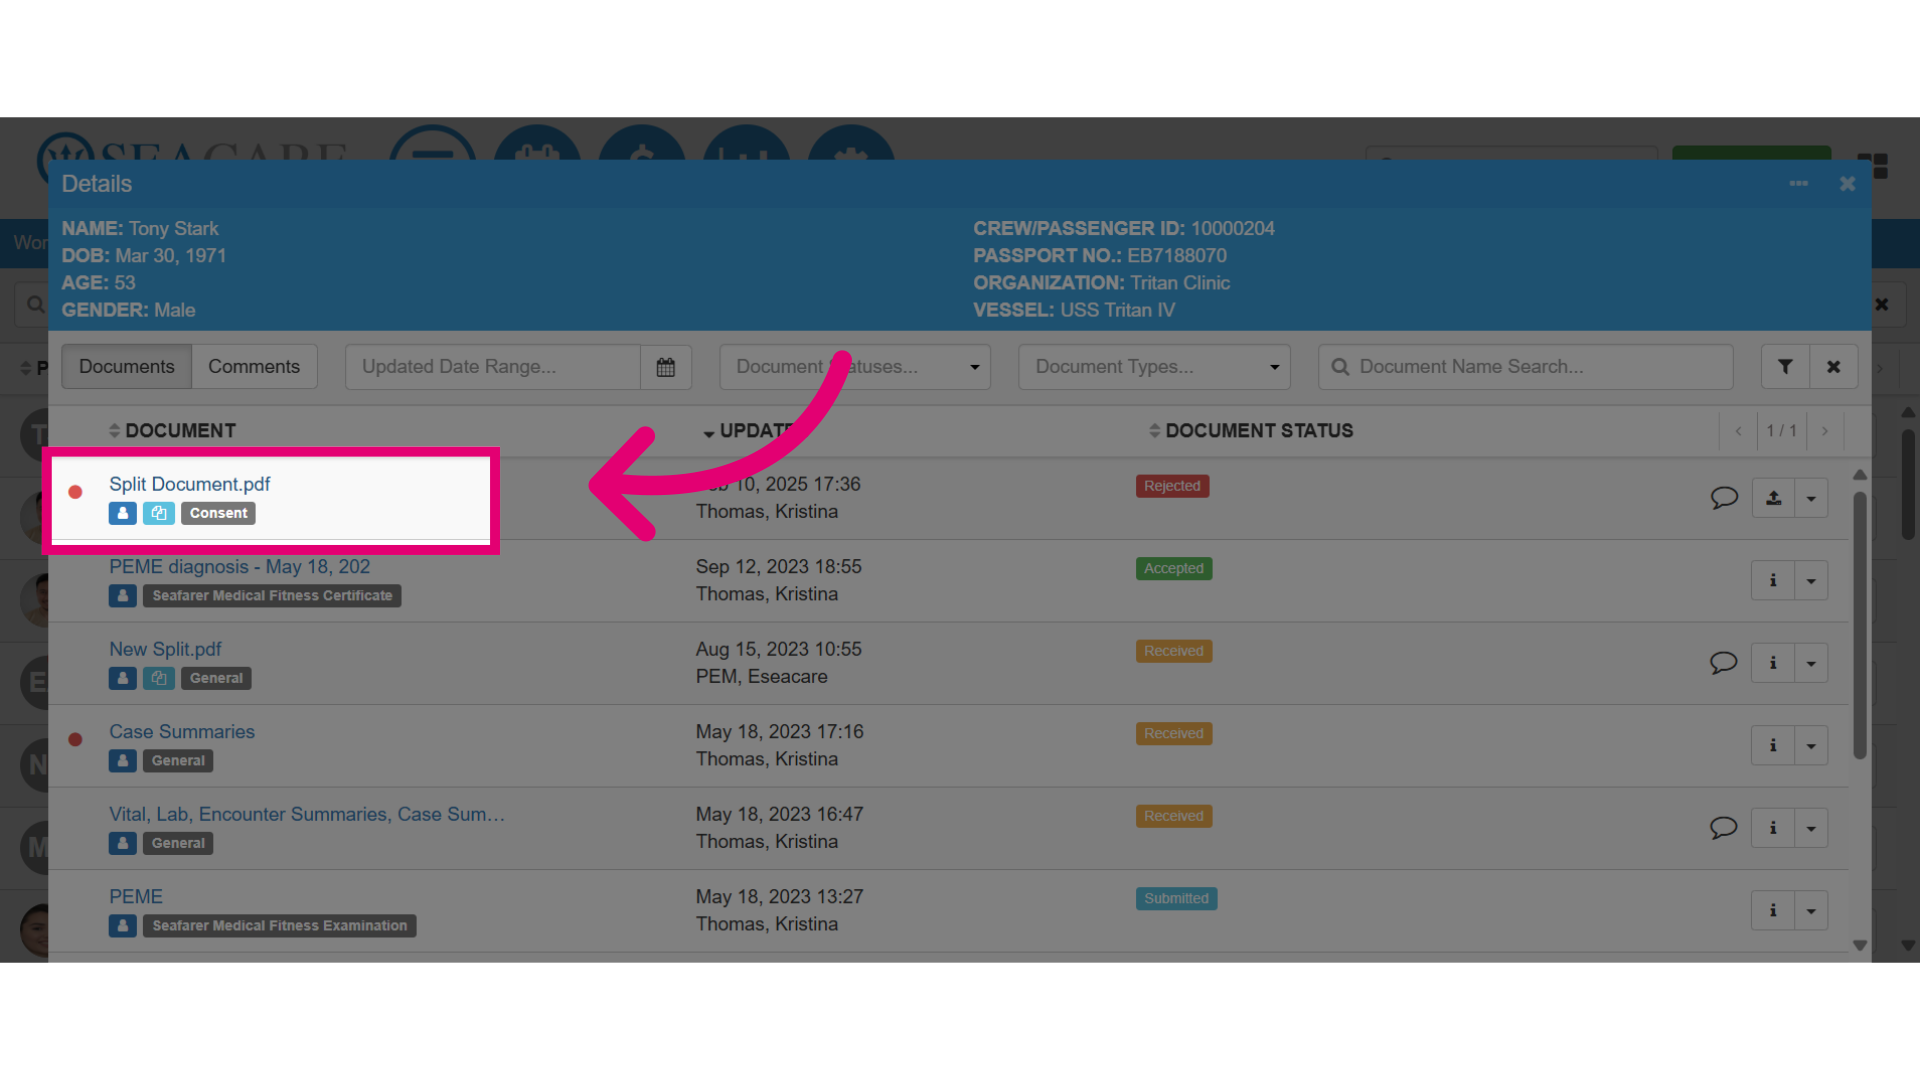
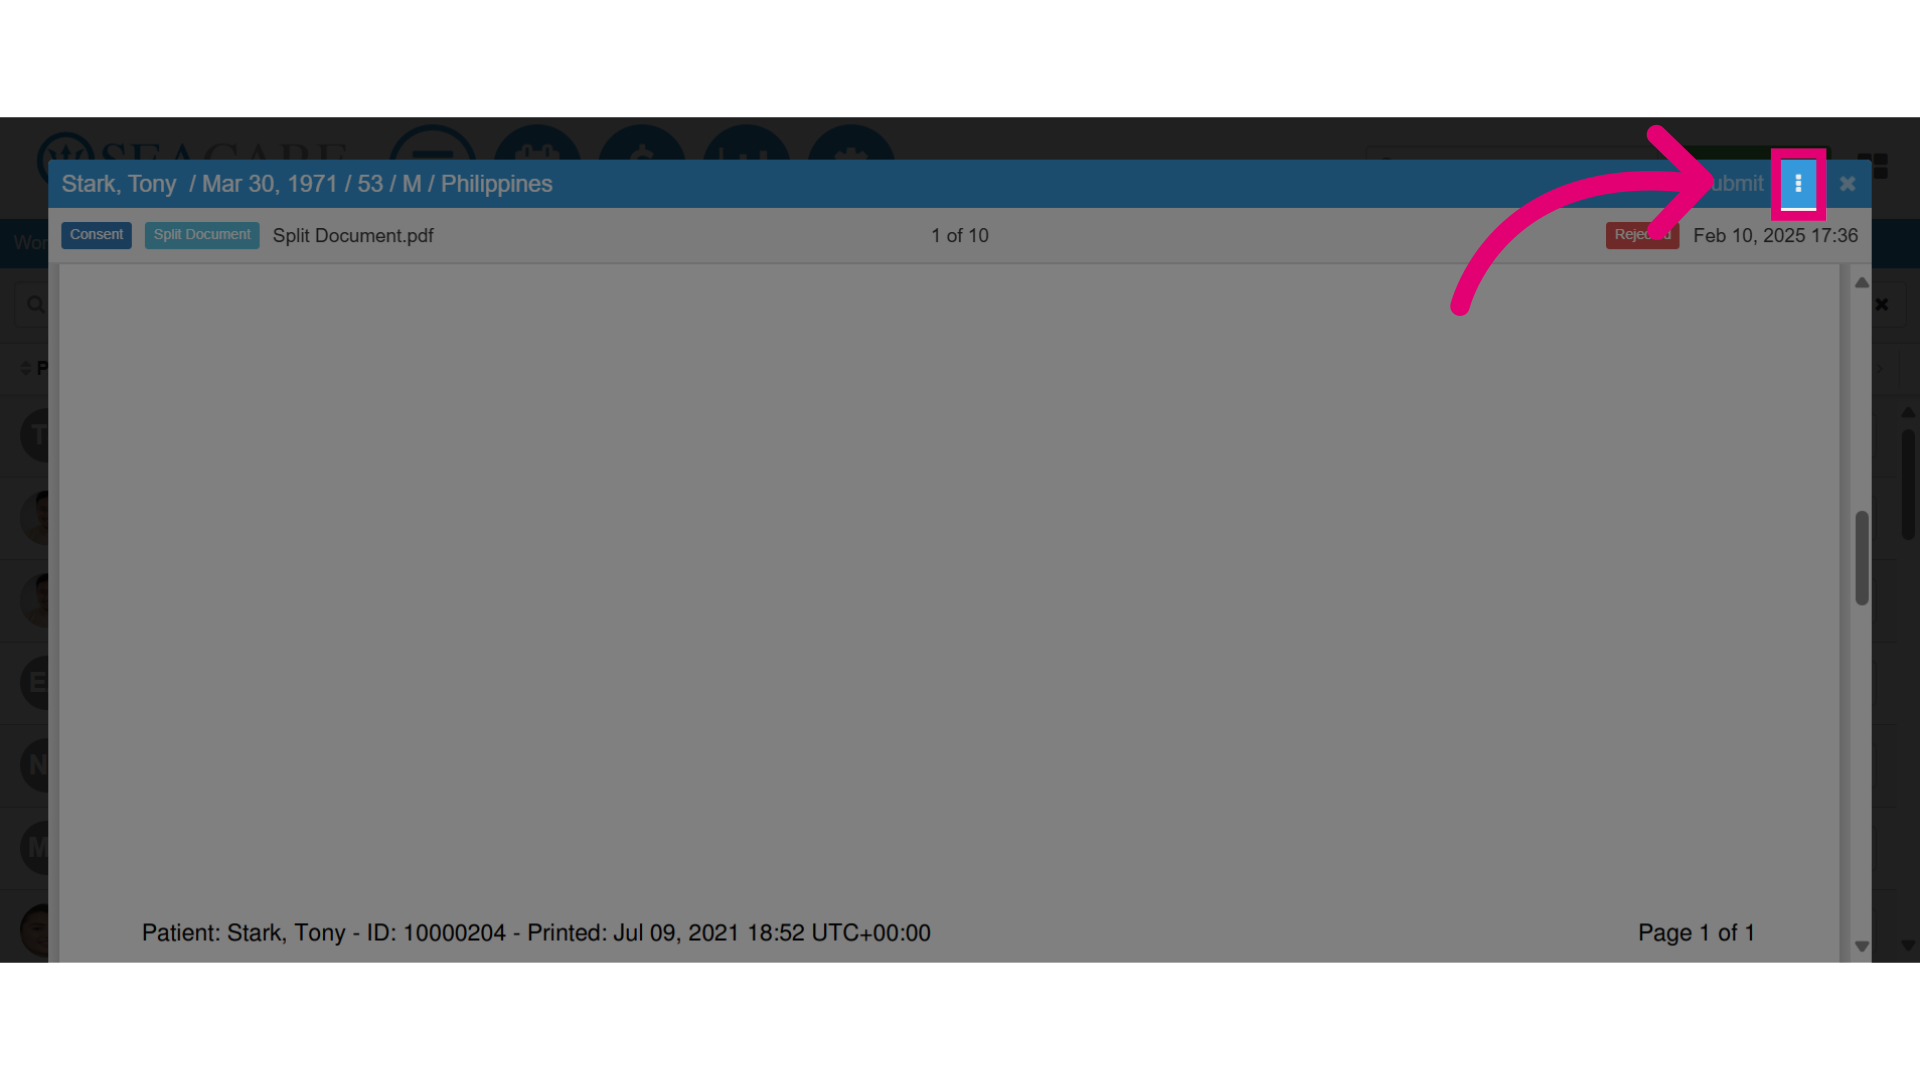
7. Then, when you are ready to resubmit the document, go back into the Documents tab, and click on the document link to open the document.
8. Next, select the More Options button.
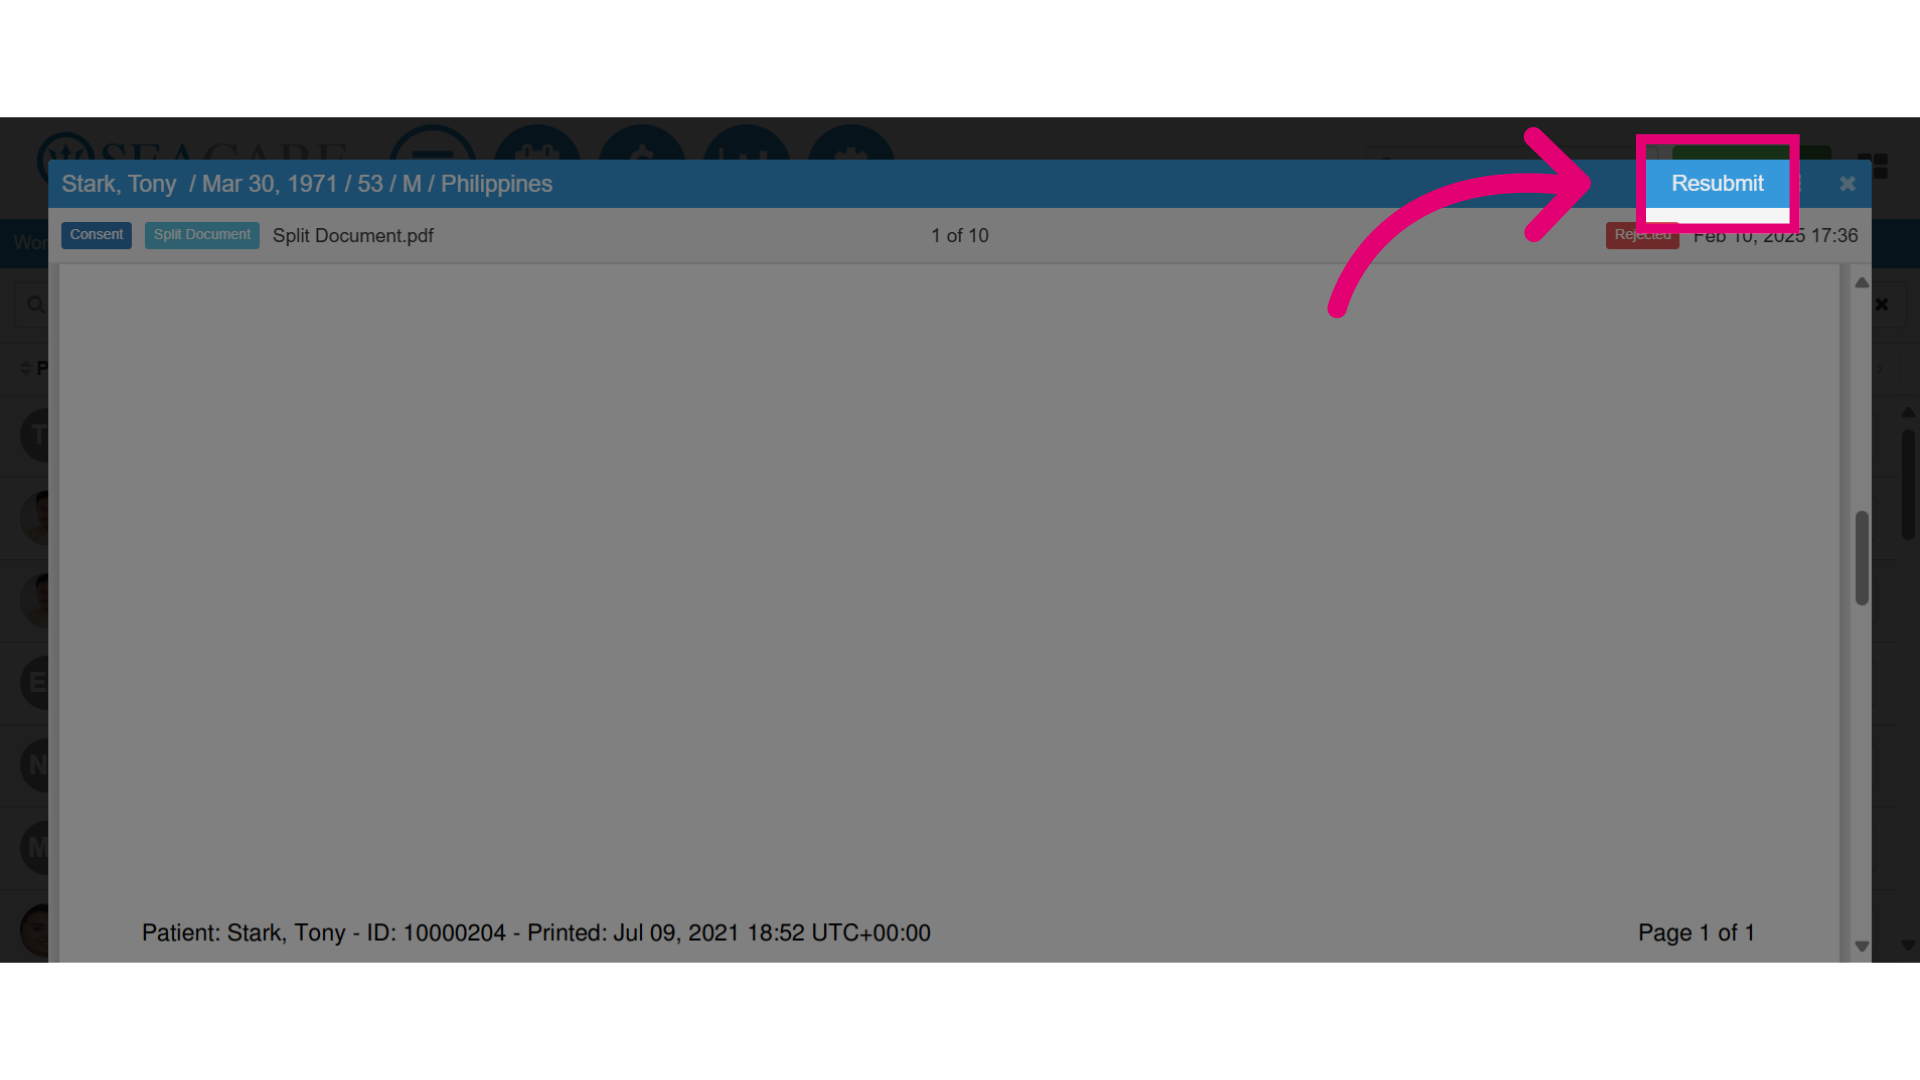
9, Then, select Resubmit.
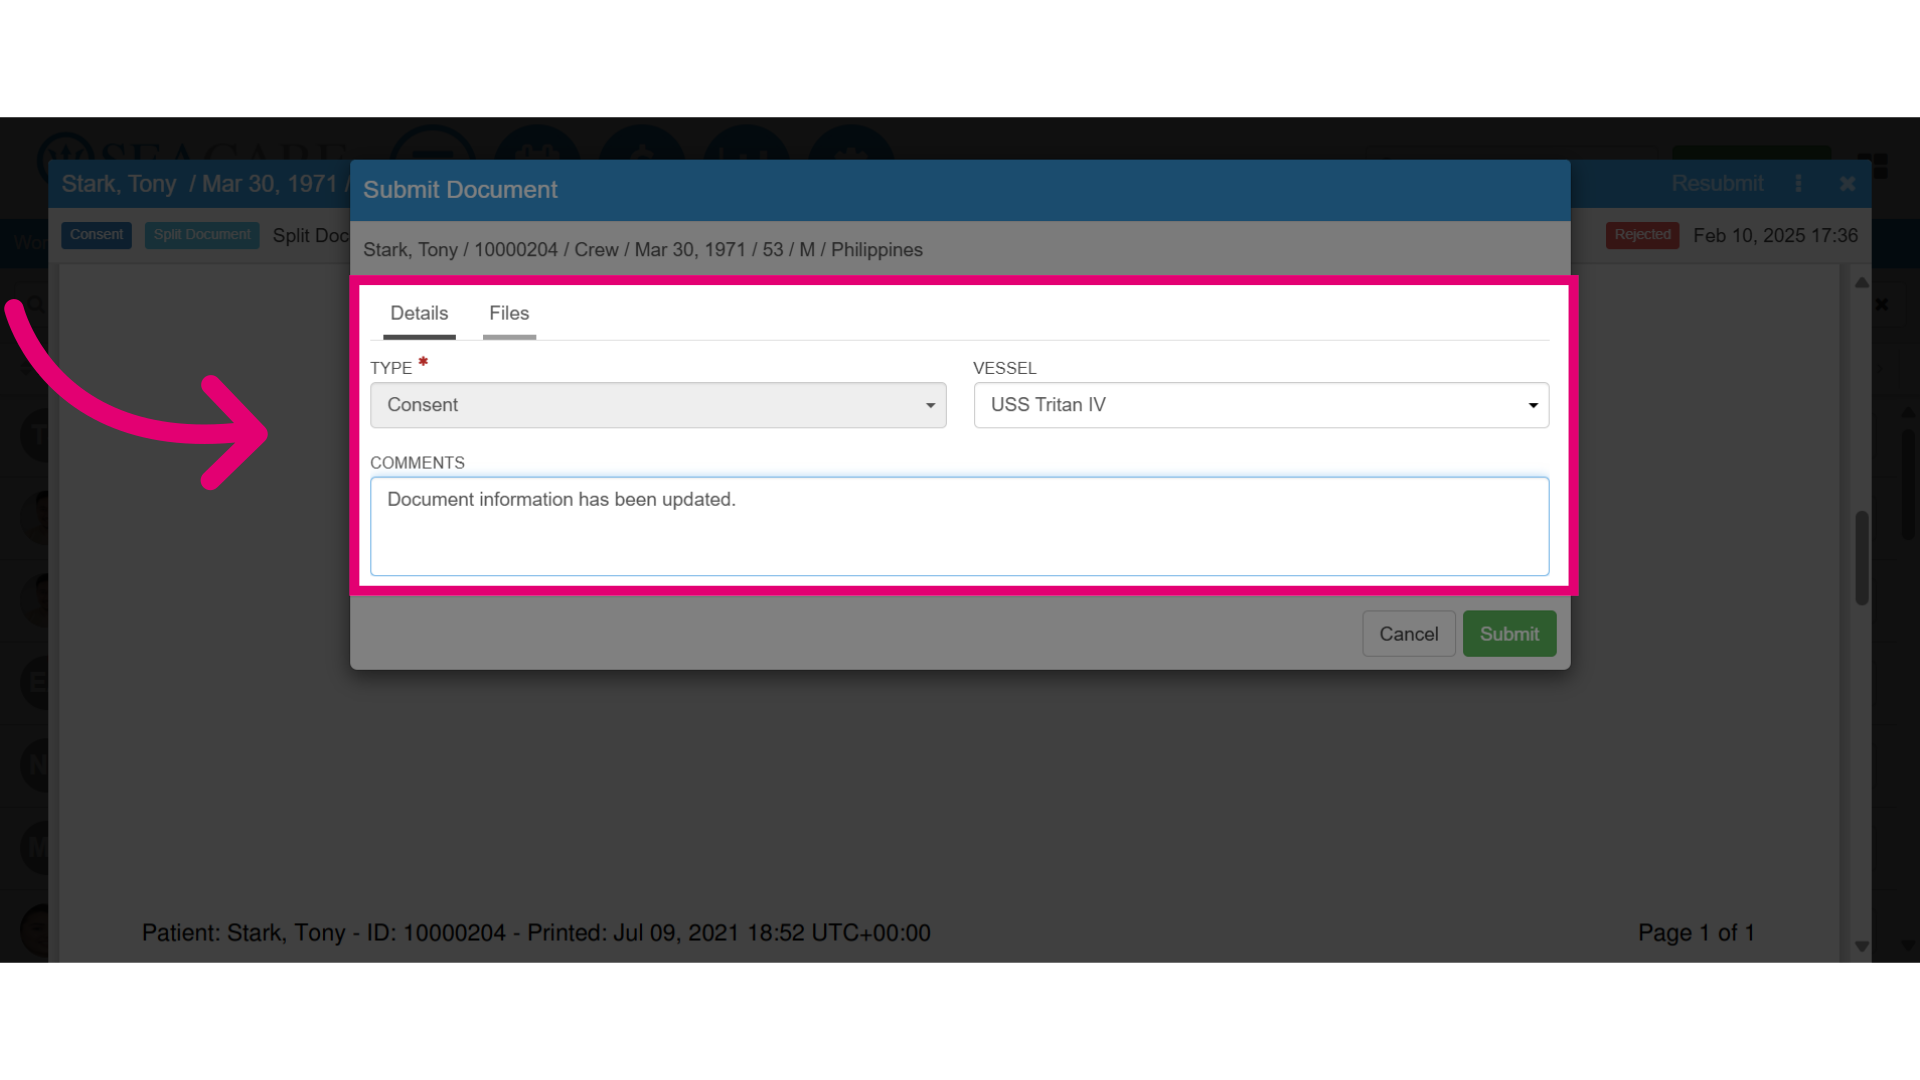
10. Complete the Details section:
-
-
- Ensure the correct vessel for the patient is selected.
- Add any necessary comments regarding the document for the recipient(s).
- Tile which will be pre-selected so confirm its accurate.
-
11. Then, go to the File tab to attach the document.
-
-
- Add the document name.
- Attach the file by uploaded it from your device.
- Or, select the existing file if you are resubmitting the same one.
-