New article
Recently updated
Setting up Patient Self-Booking Availability in Provider

Who is this article for?Users who want to learn to set up the patient self-booking availability in Ideagen Maritime Health Provider.
No elevated permissions are required.
This guide provides detailed instructions for setting up Patient Self-Booking Availability in the Scheduler module within the Ideagen Maritime Health Provider application. The following instructions will allow you to set up open slots in the Scheduler in Ideagen Maritime Health Provider. This configuration allows other Clinical, Onboard, Operations, and Crew Health users to schedule appointments with your clinic.
1. Setting up Patient Self-Booking Availability in Provider
1.1. Video
1.2. Steps
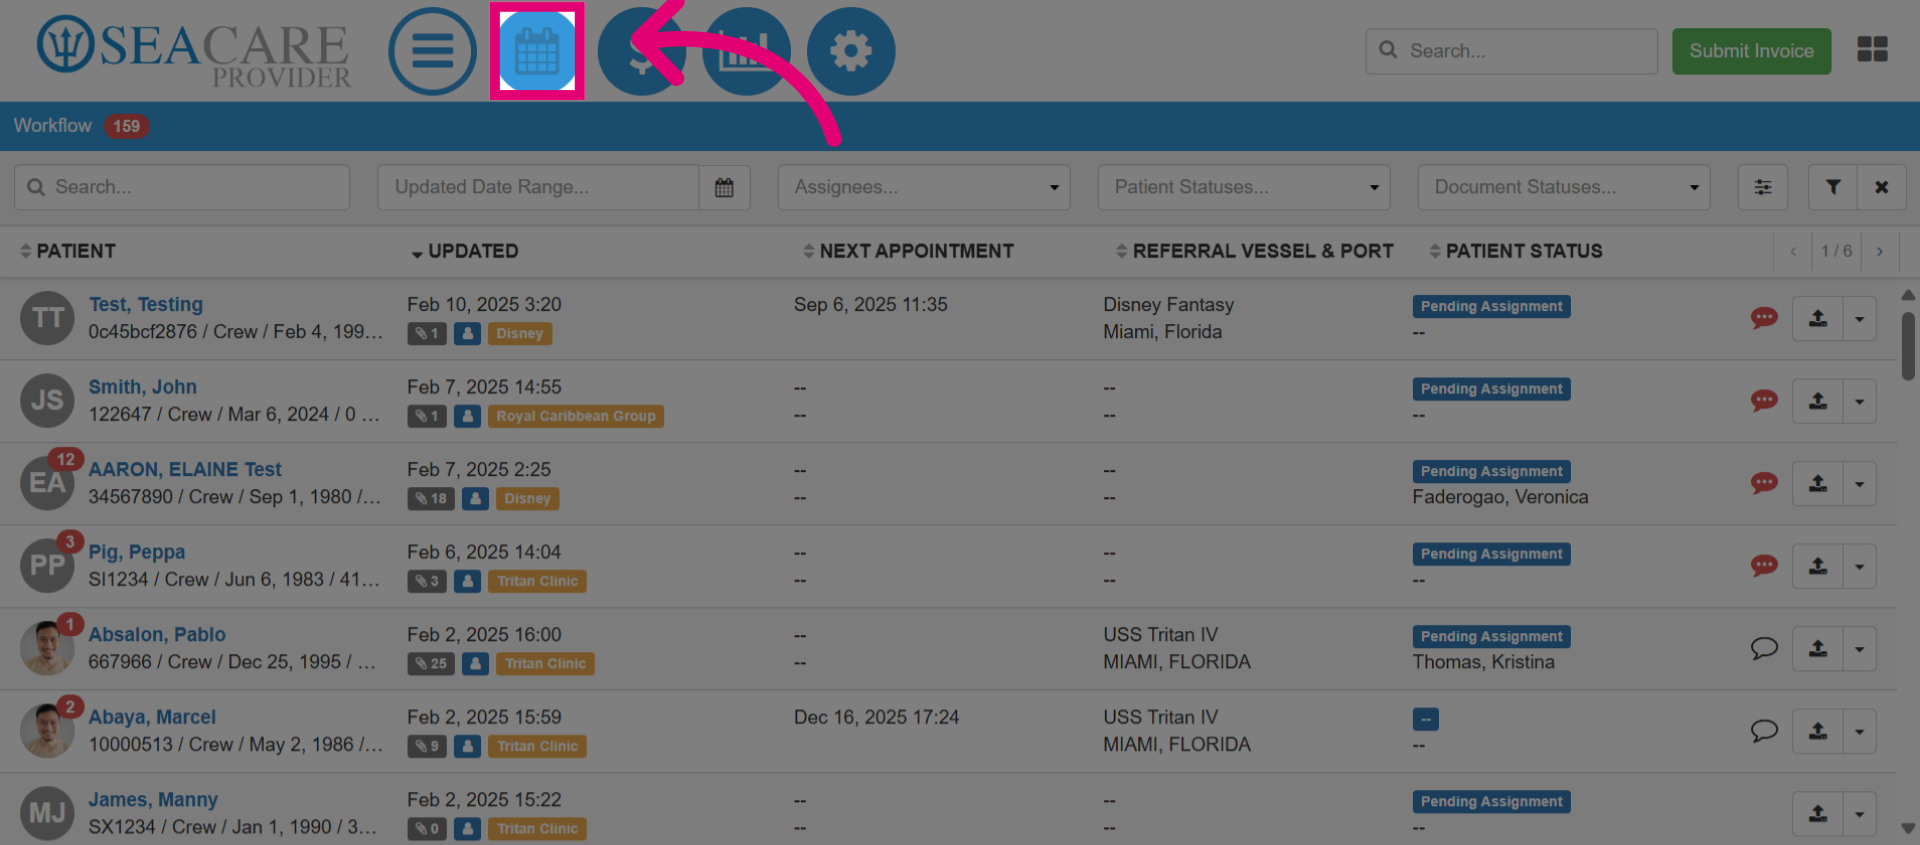
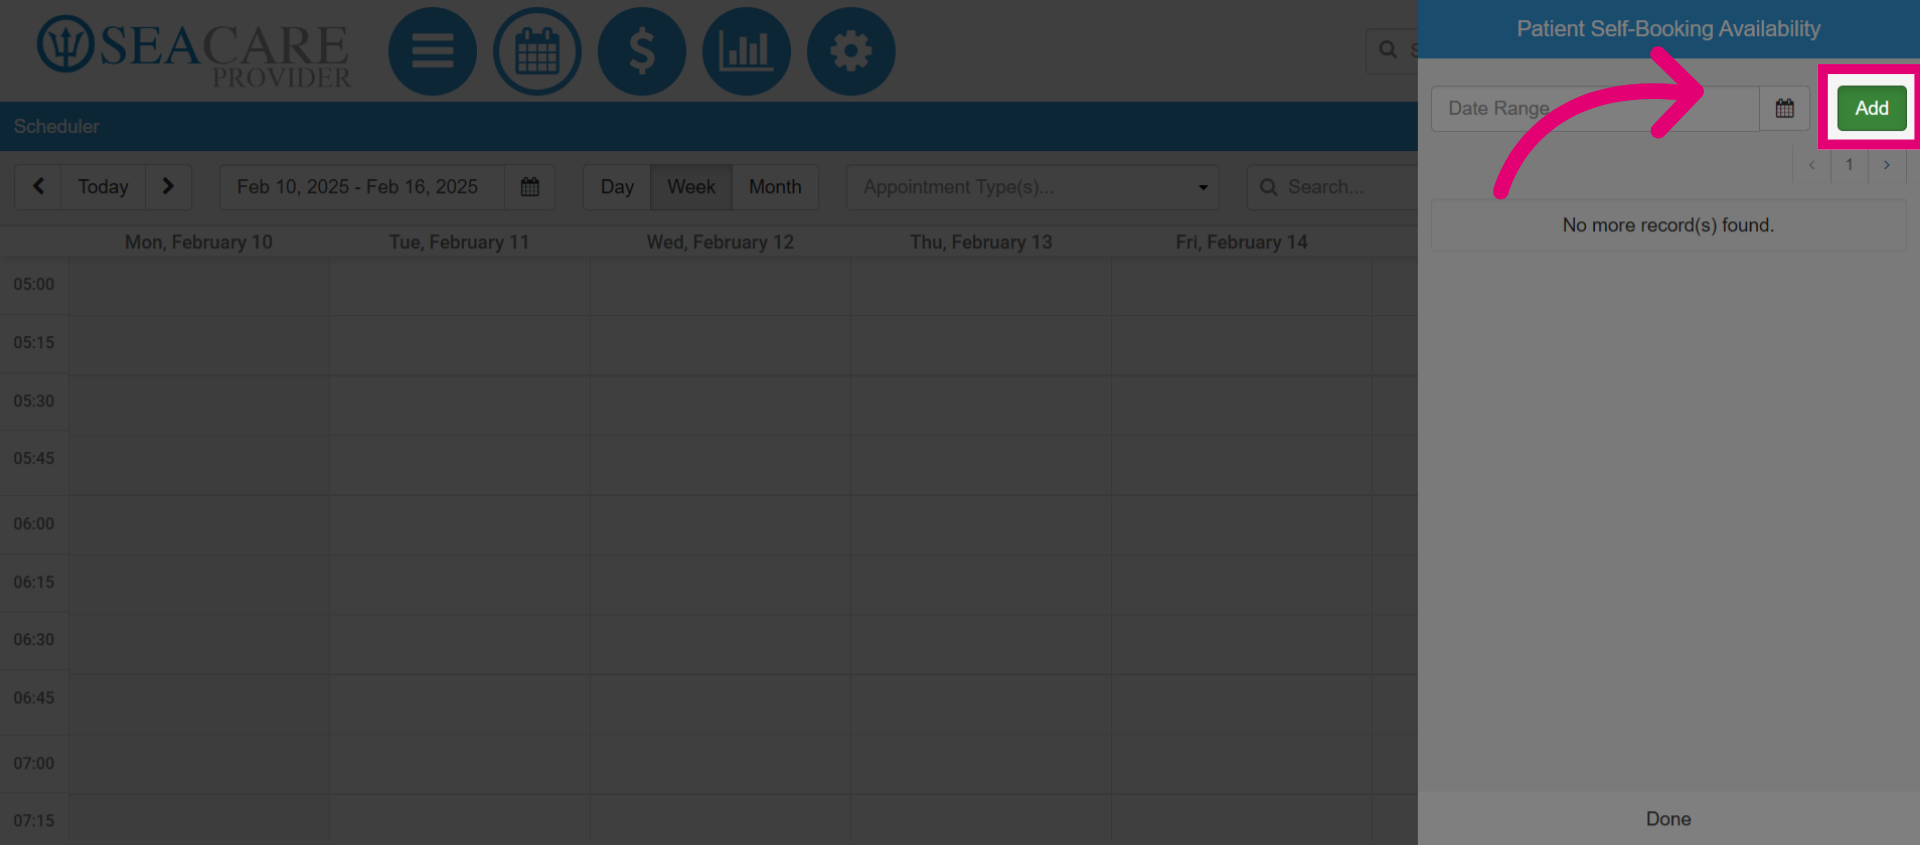
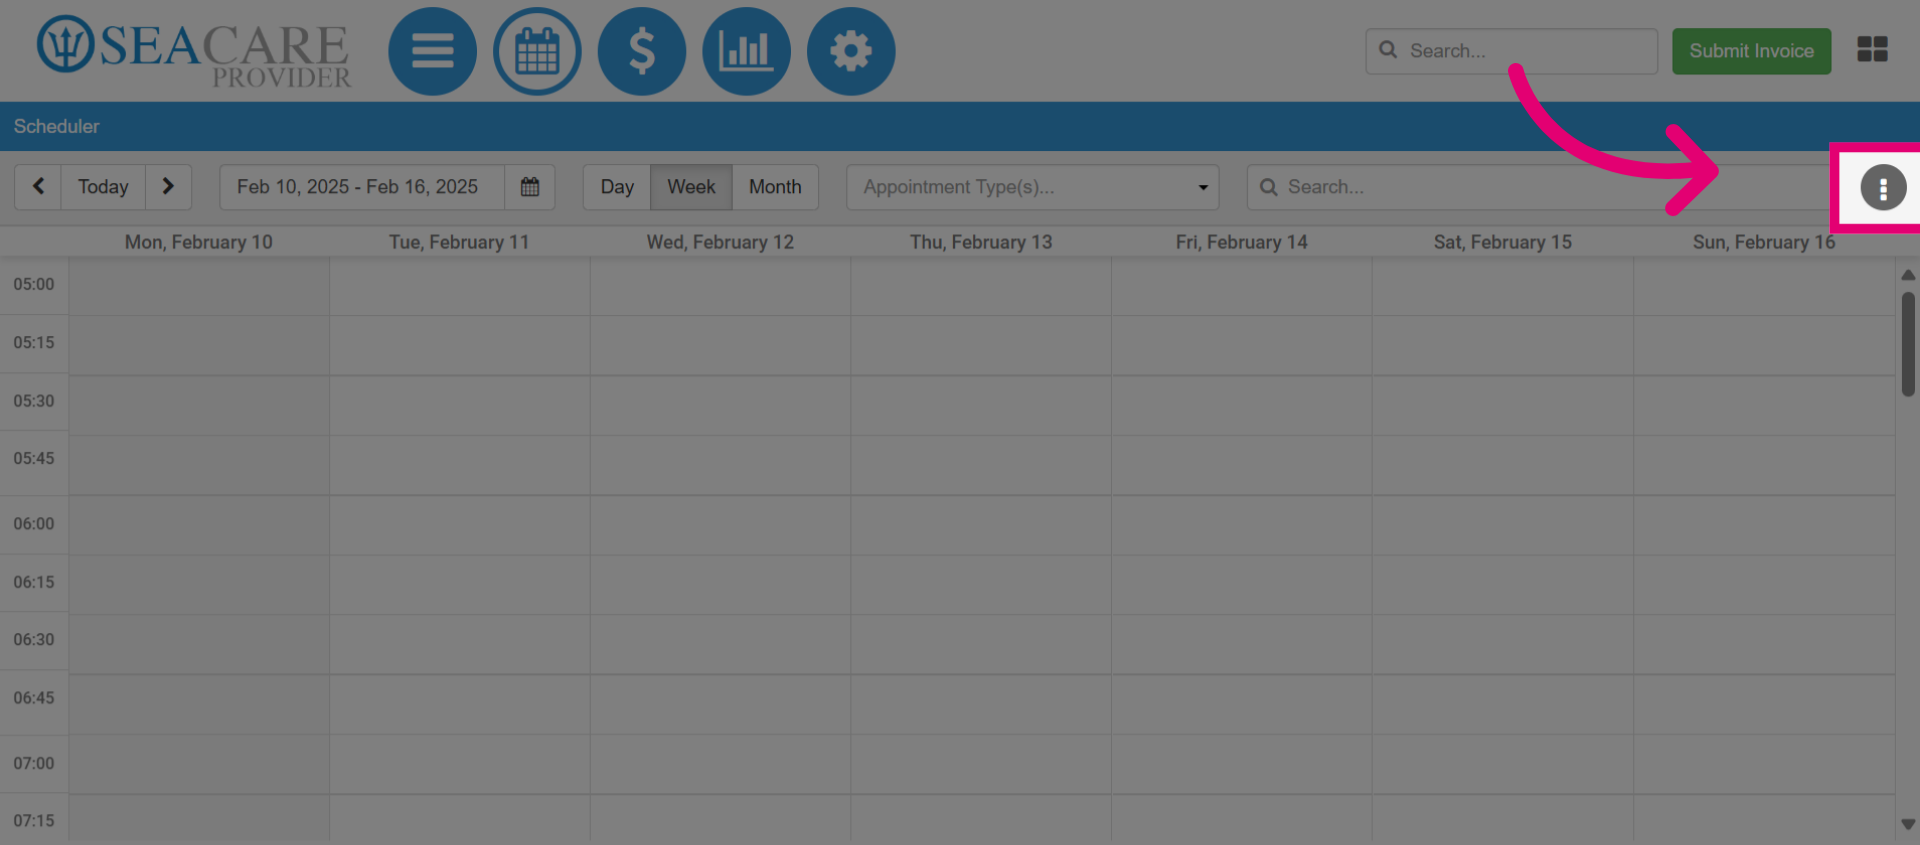
- To create your patient self-booking appointment availability slots, start by selecting the Scheduler Module in Ideagen Maritime Health Provider.
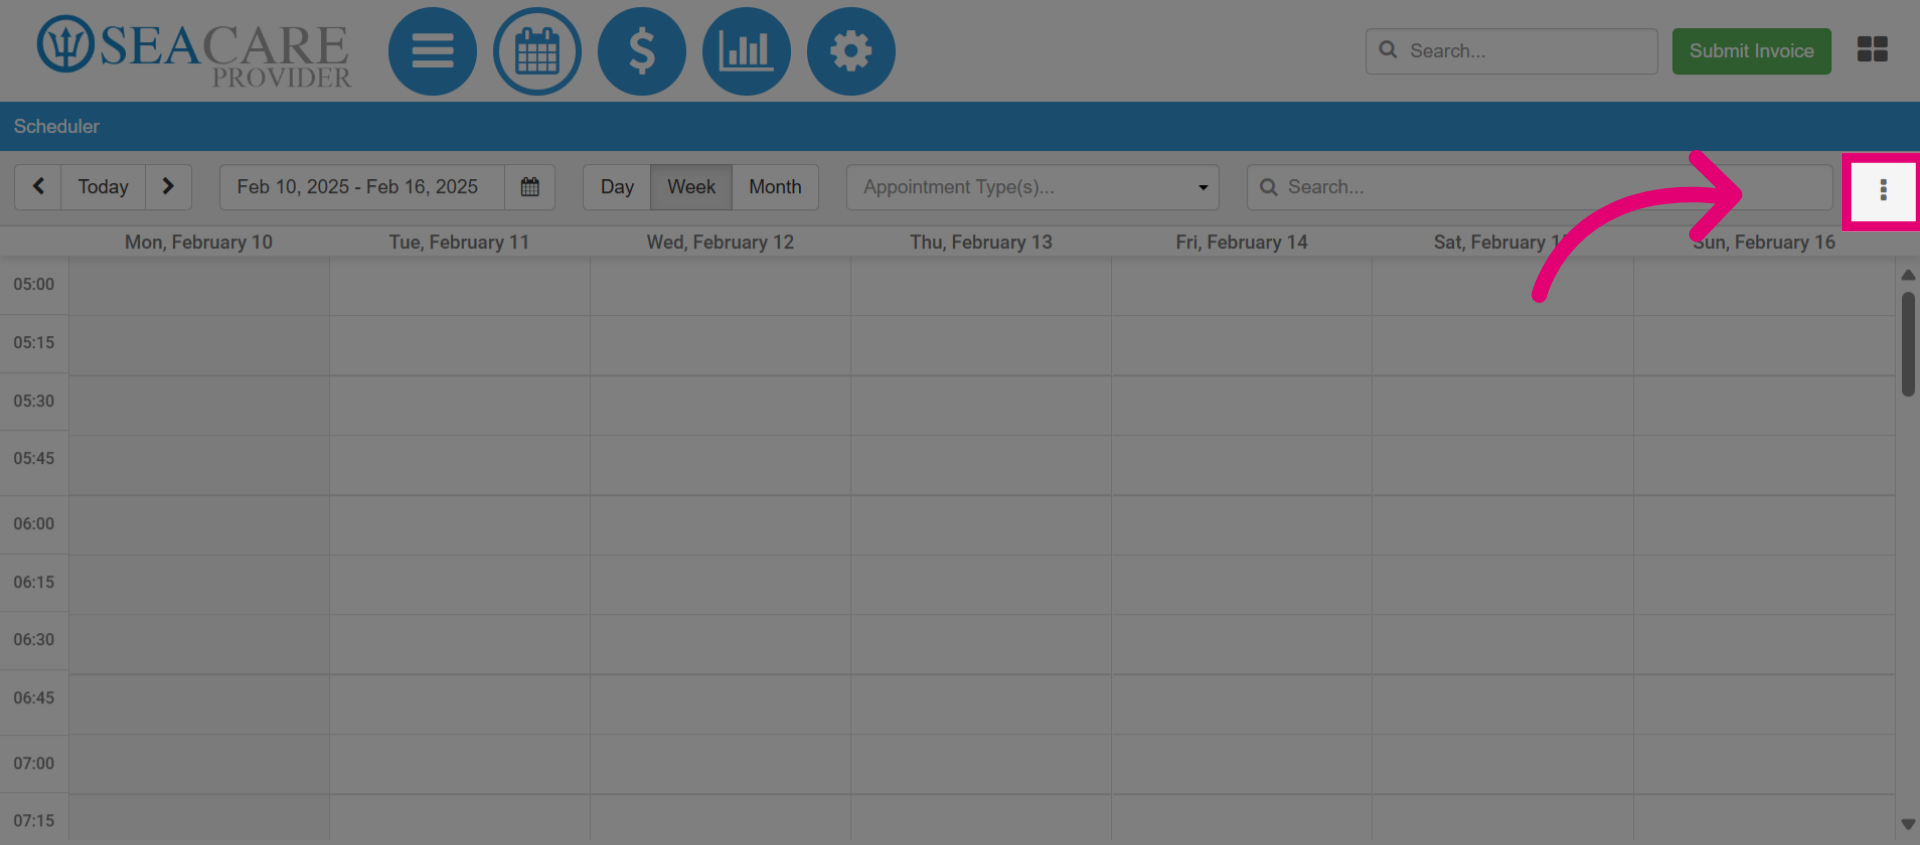
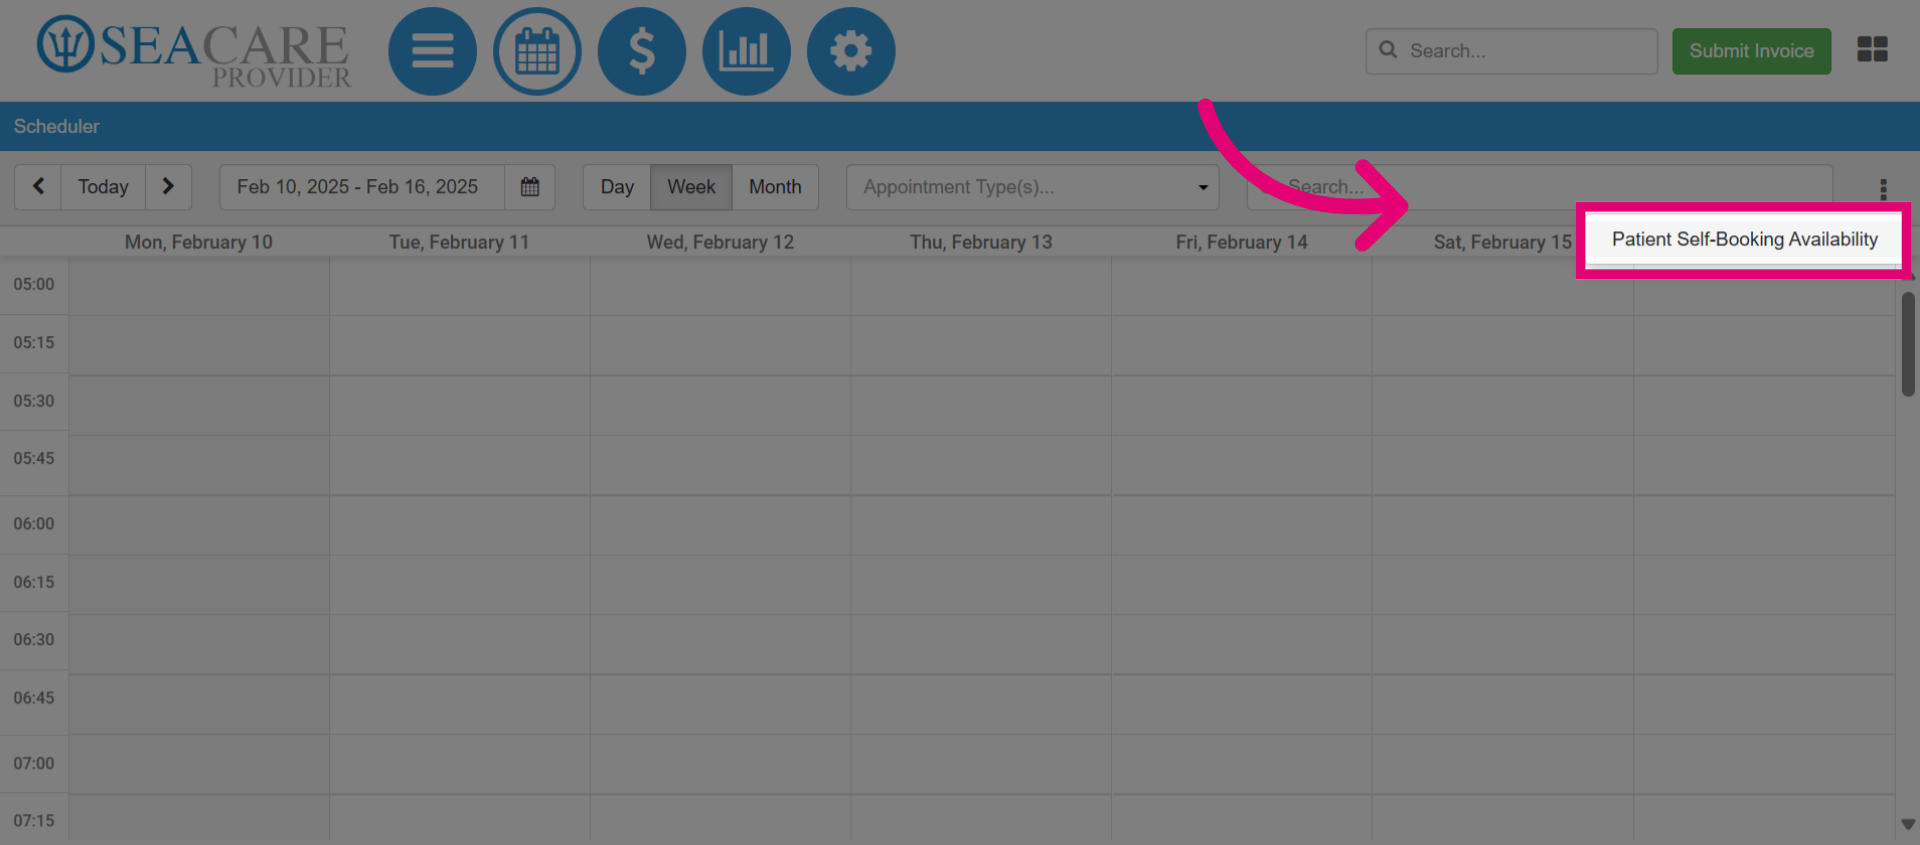
- Then, select this More Actions button.
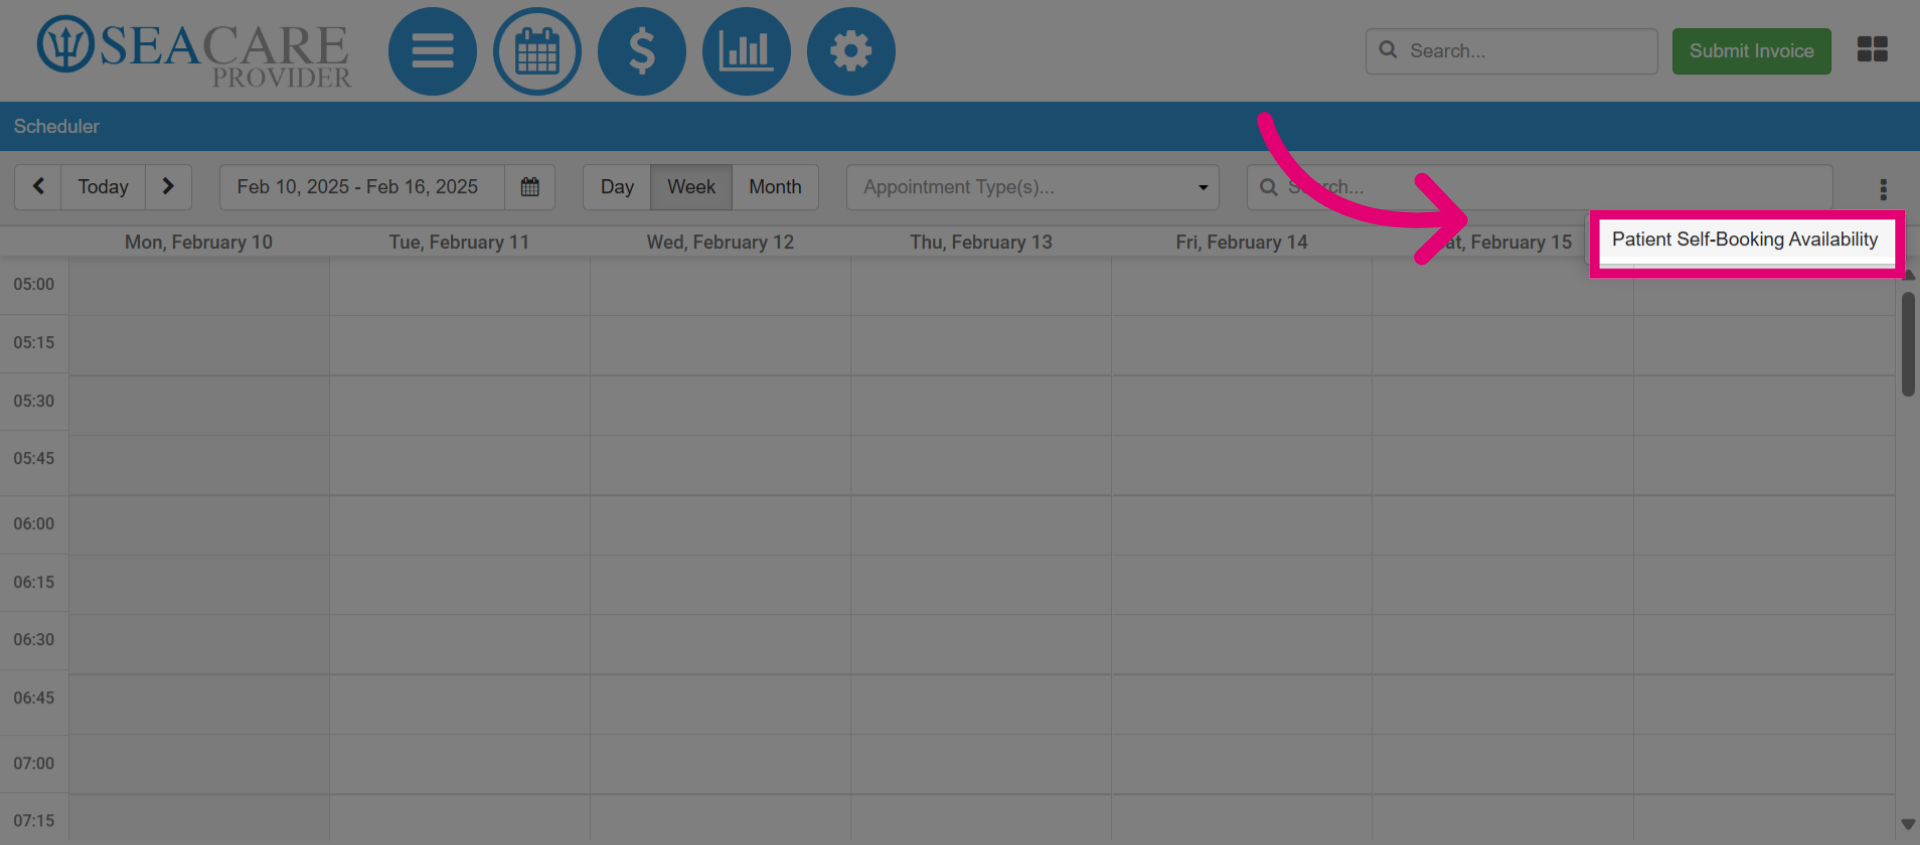
- Click on the Patient Self-booking Availability button to access the scheduling options.
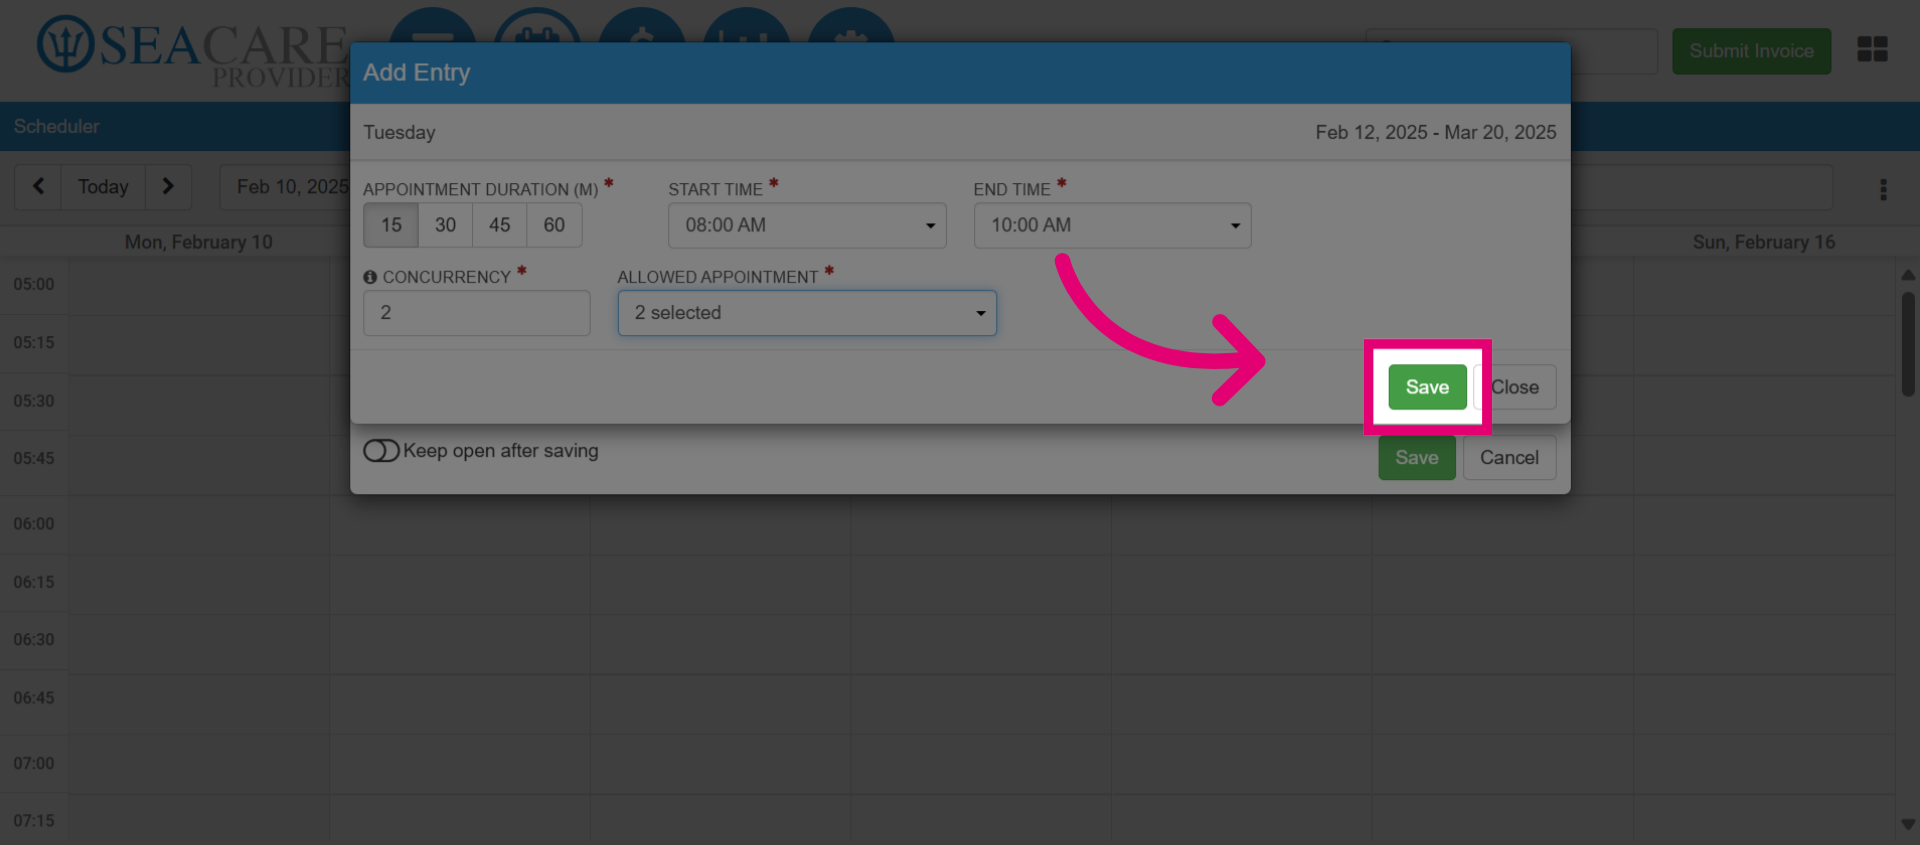
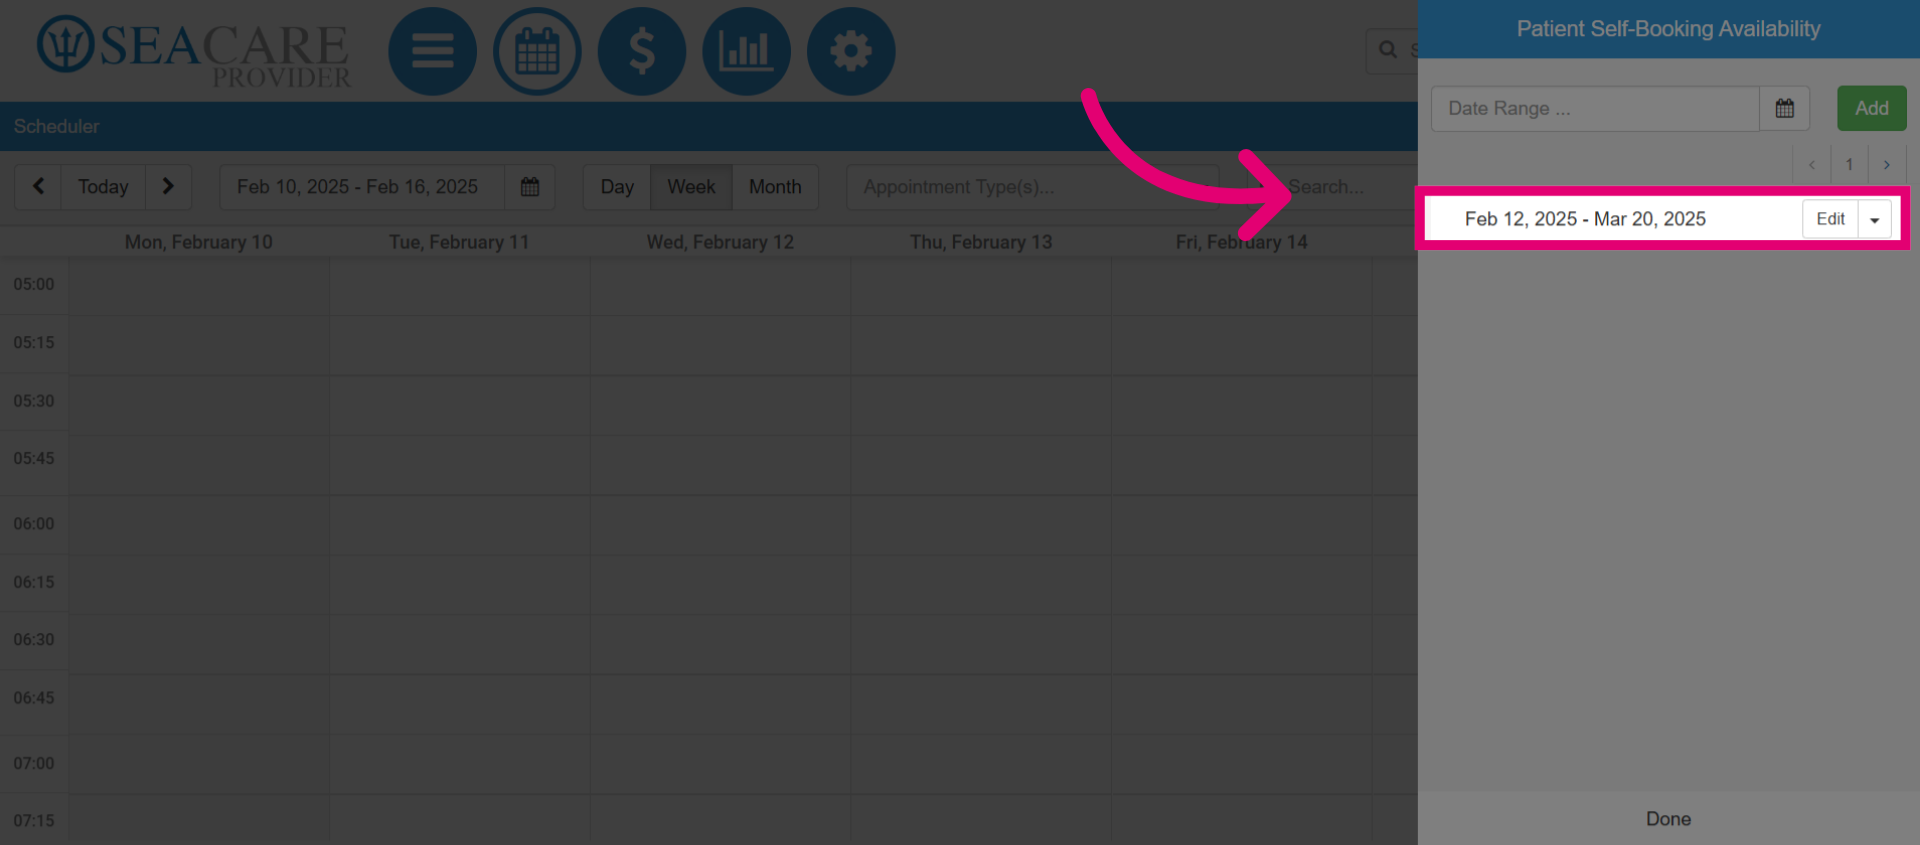
- Next, click Add to create a new open time slots for patients to book appointments.
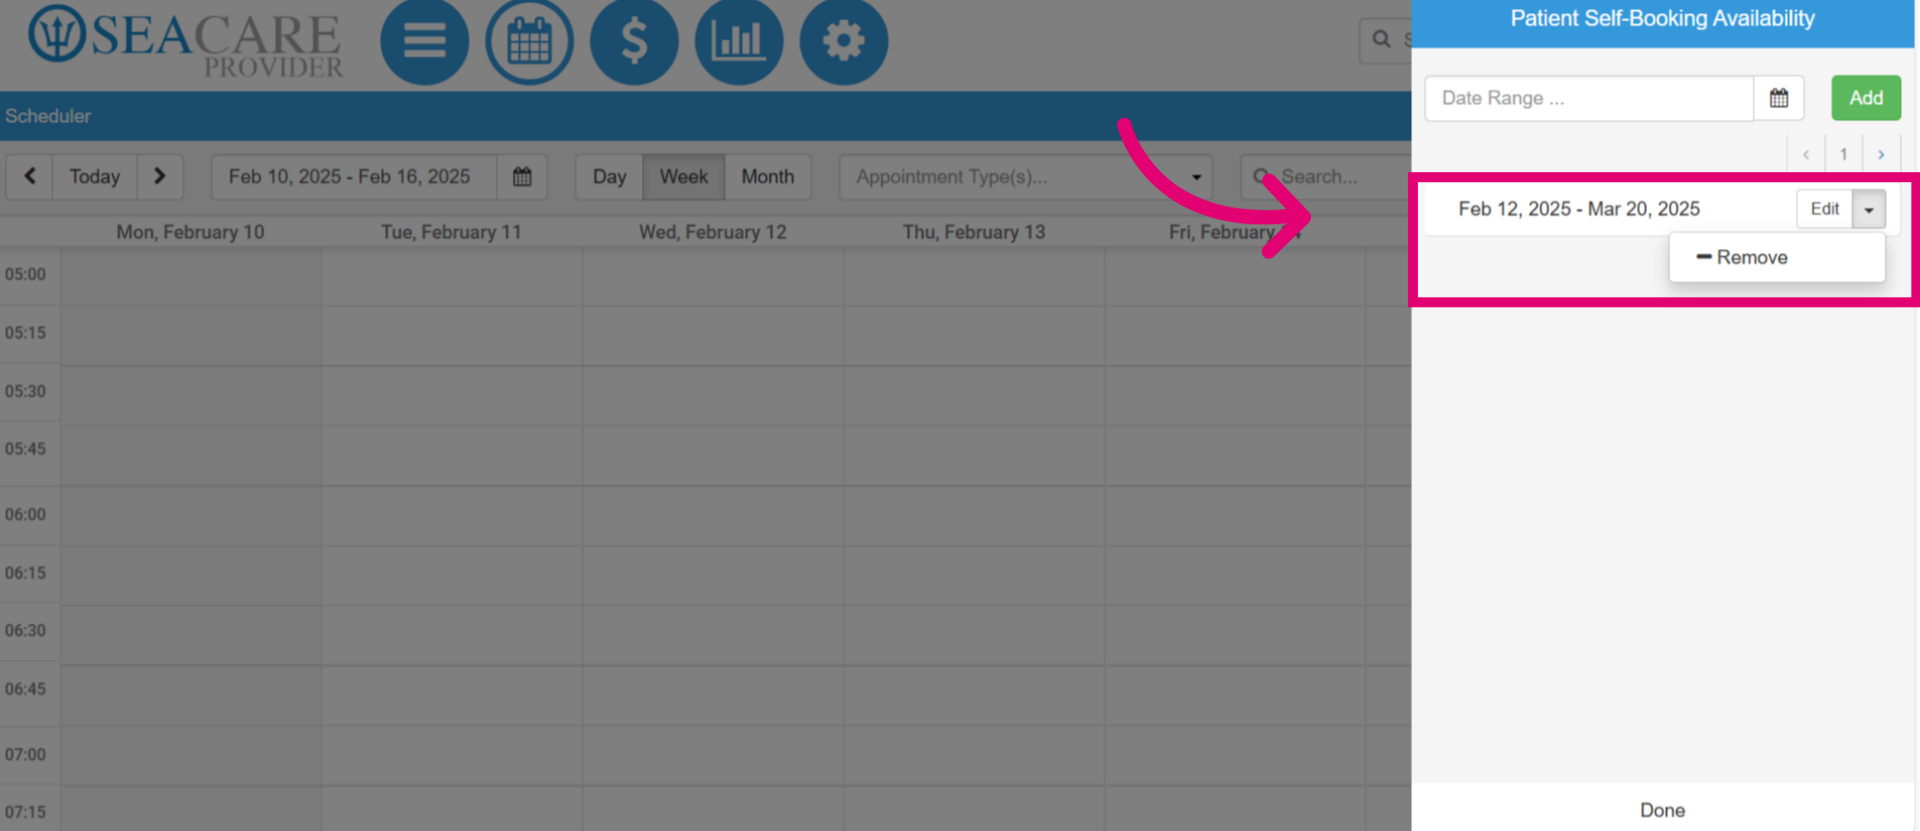
- Set the appointment timeframe From and To dates, that dictates when open slots are available for booking. For example, from February 12, 2025 to March 20, 2025.
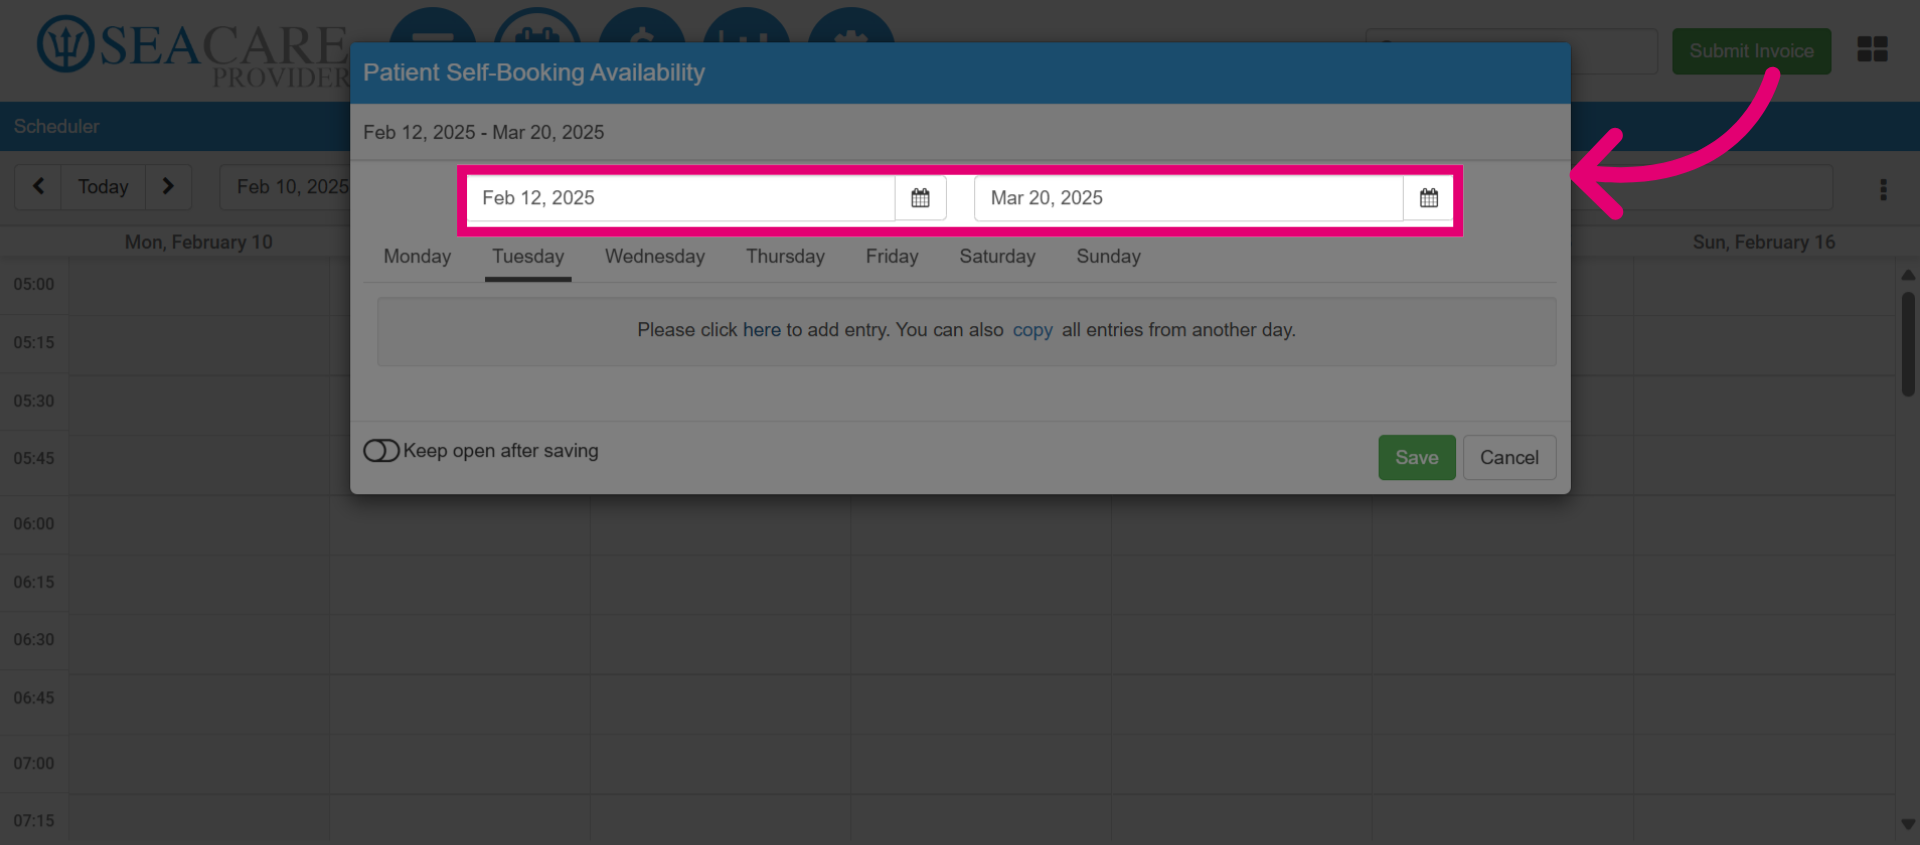
- In this step, you need to select the day of the week for accepting appointments. For example, on Tuesday.

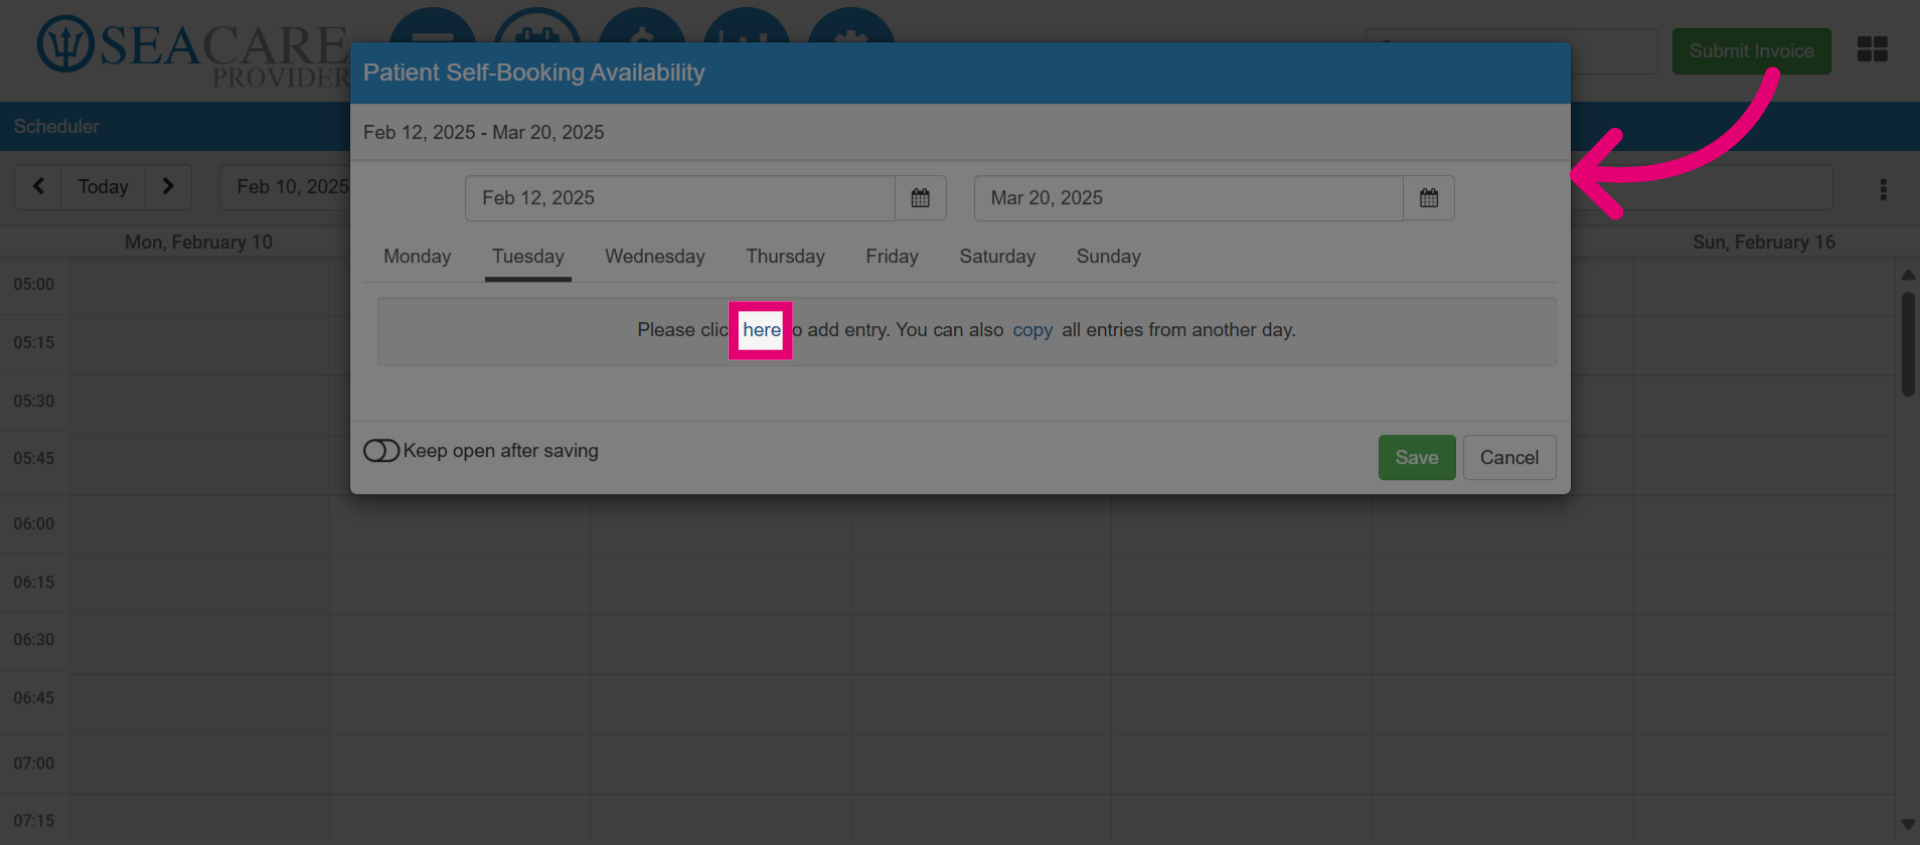
- Next, click here to add the availability details.
- Next, add the Appointment Duration, which specifies the length of each appointment in minutes. For instance, each appointment will be either 15 minutes, 30 minutes, 45 minutes or 60 minutes.
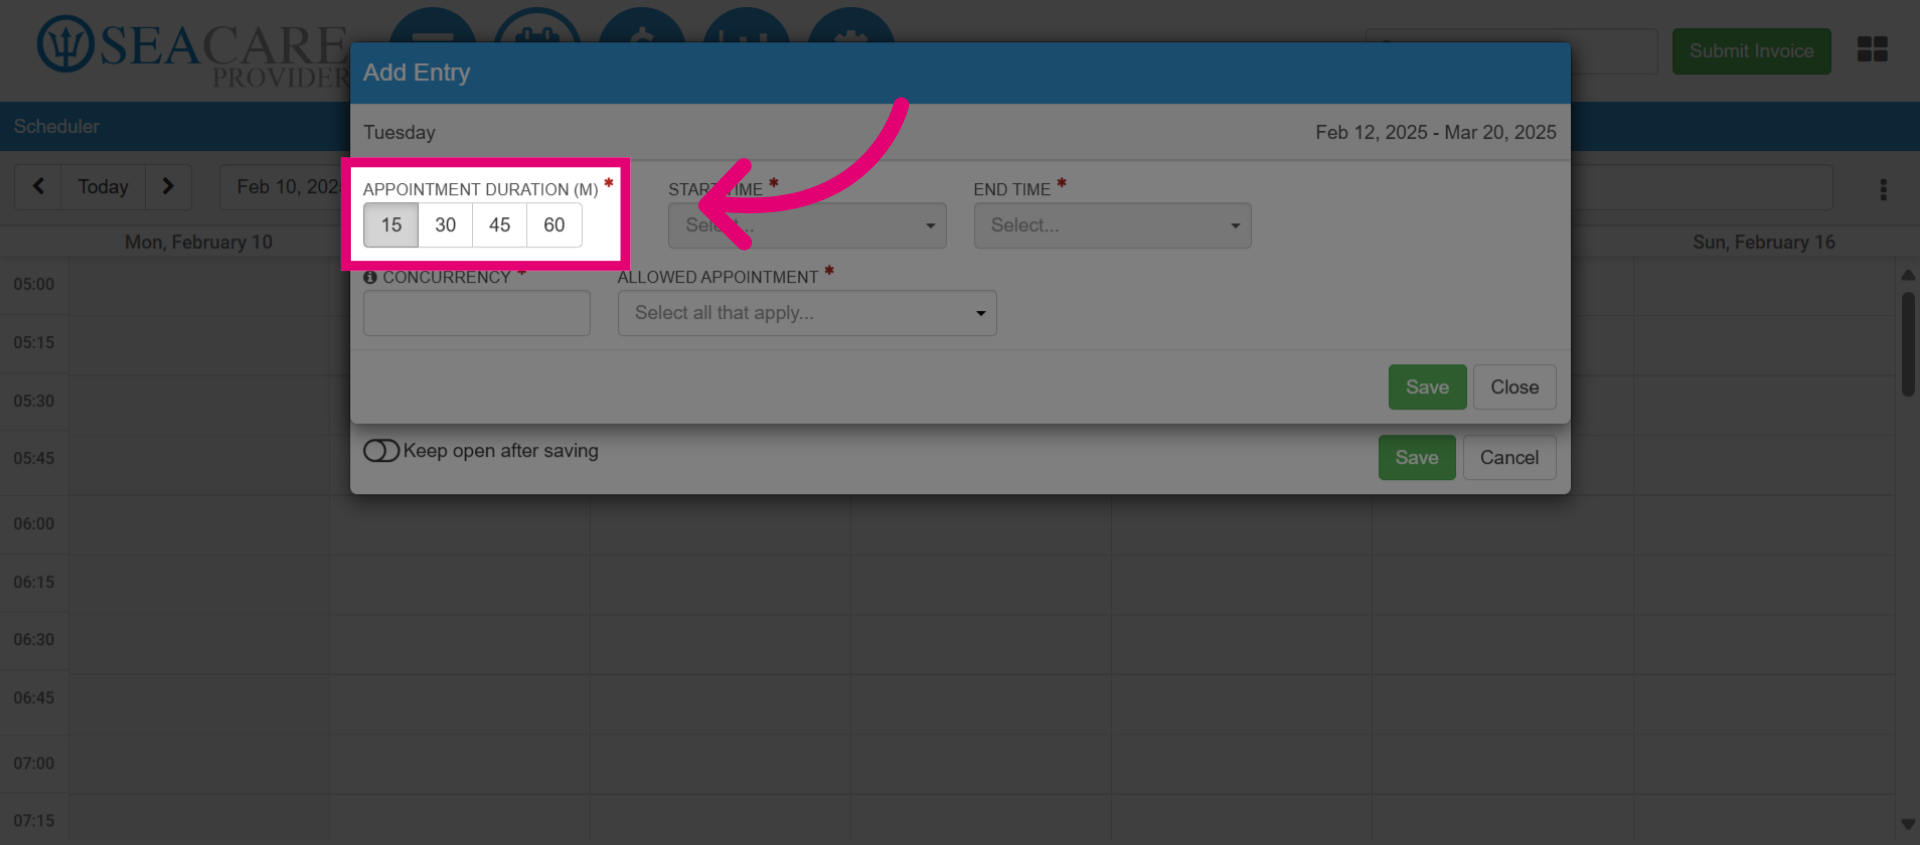
- Then, add the appointment Start Time, which indicates the time of day the clinic begins taking appointments for this time slot.
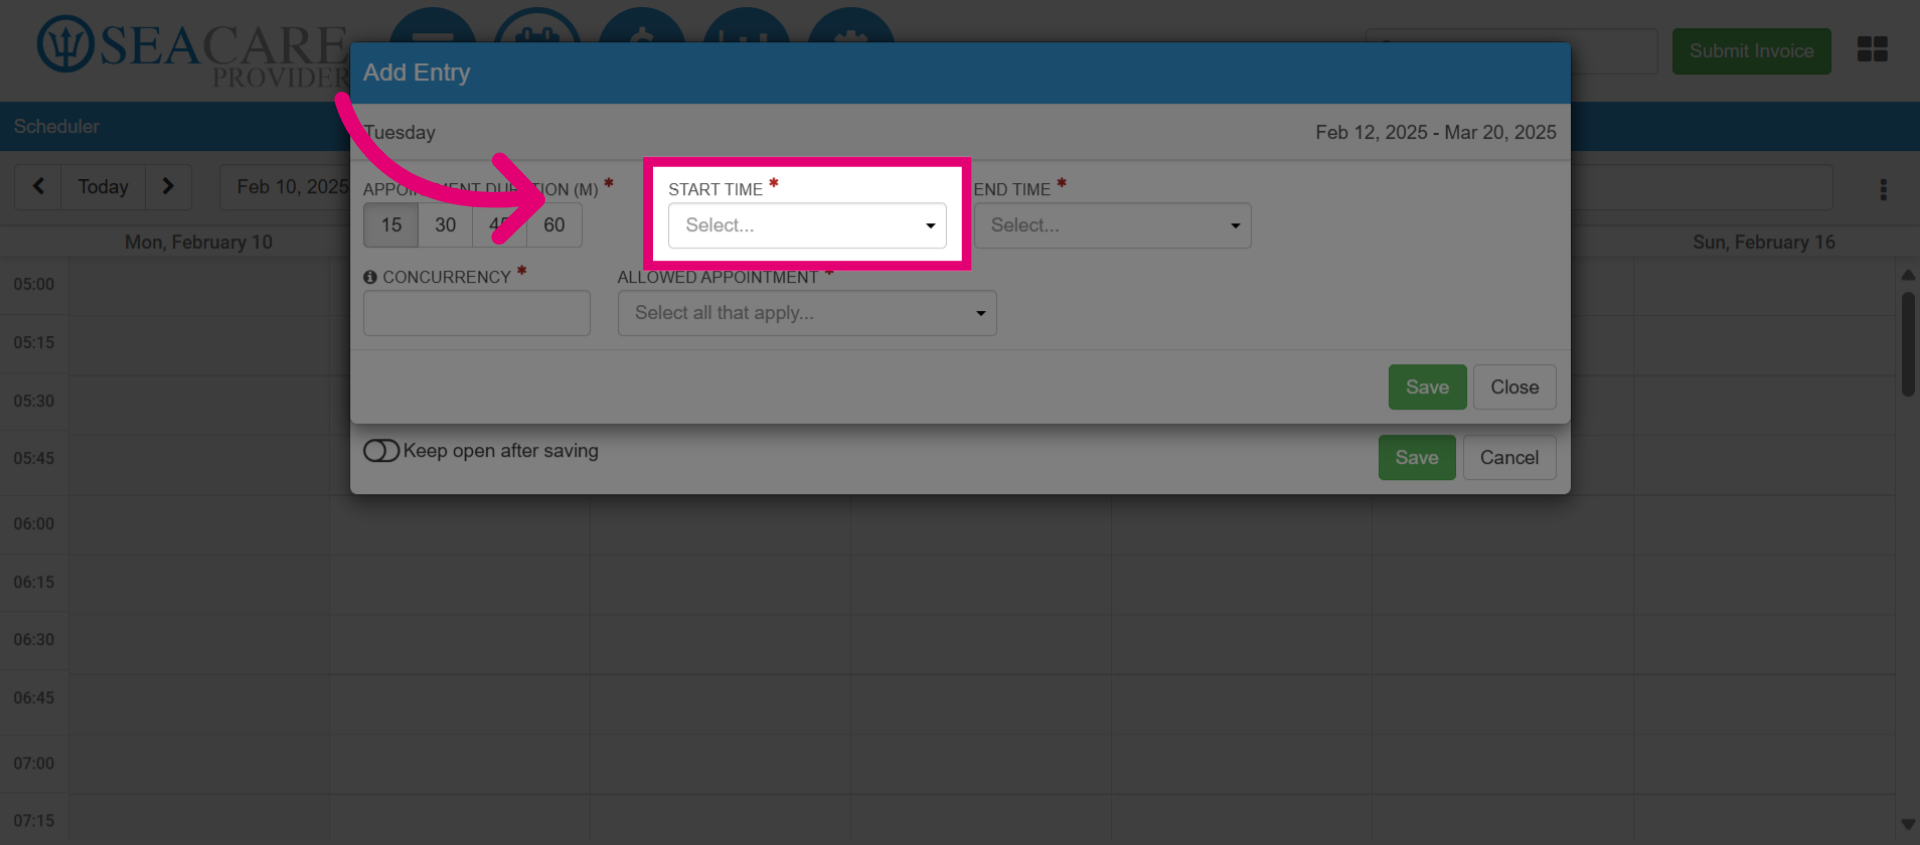
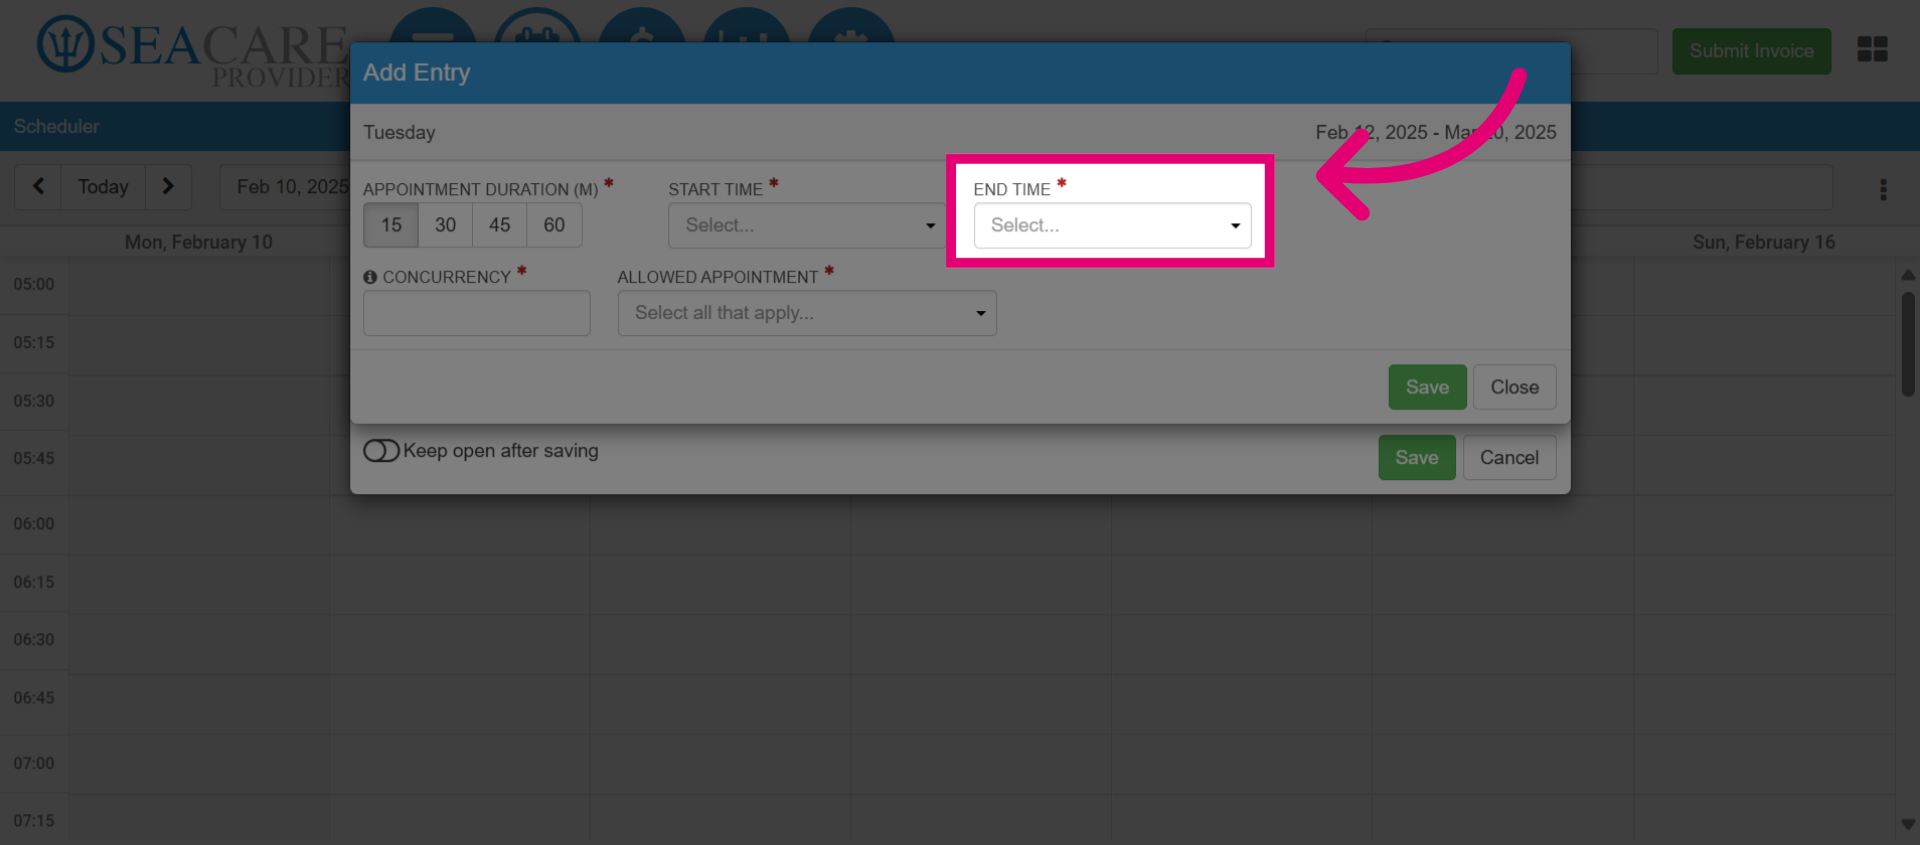
- Then, add the appointment End Time, which indicates the time of day the clinic stops taking appointments for this time slot.
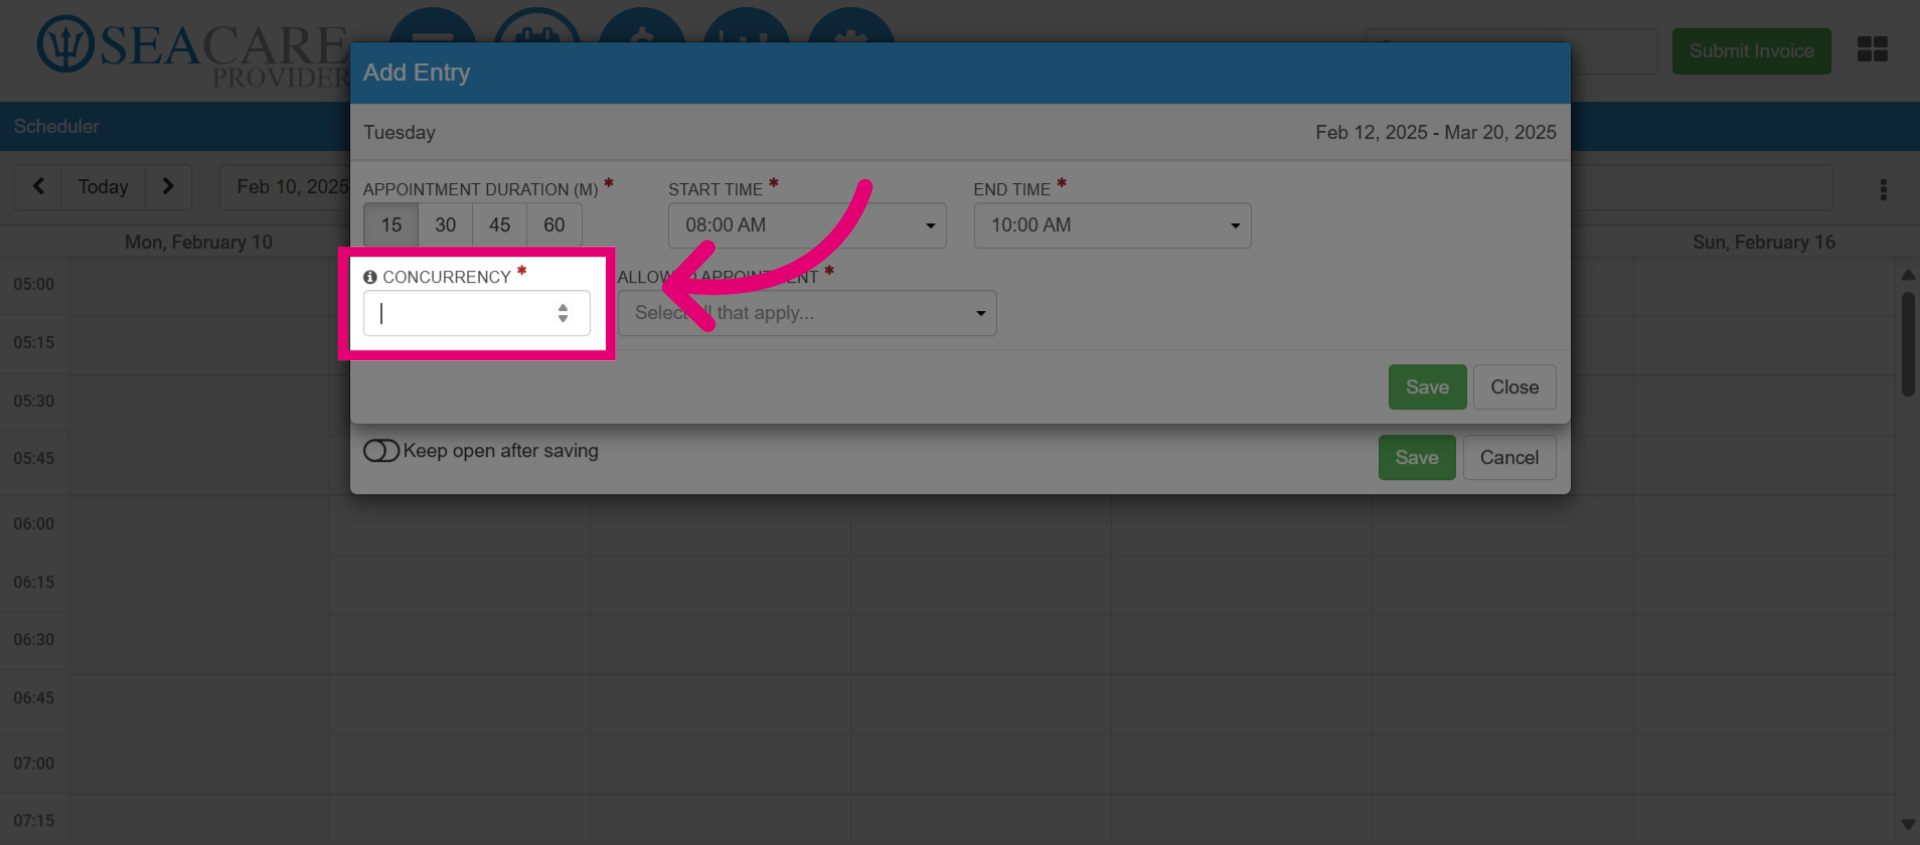
- Enter the number of concurrent appointments which indicates how many appointments can be booked and held simultaneously during this time slot.
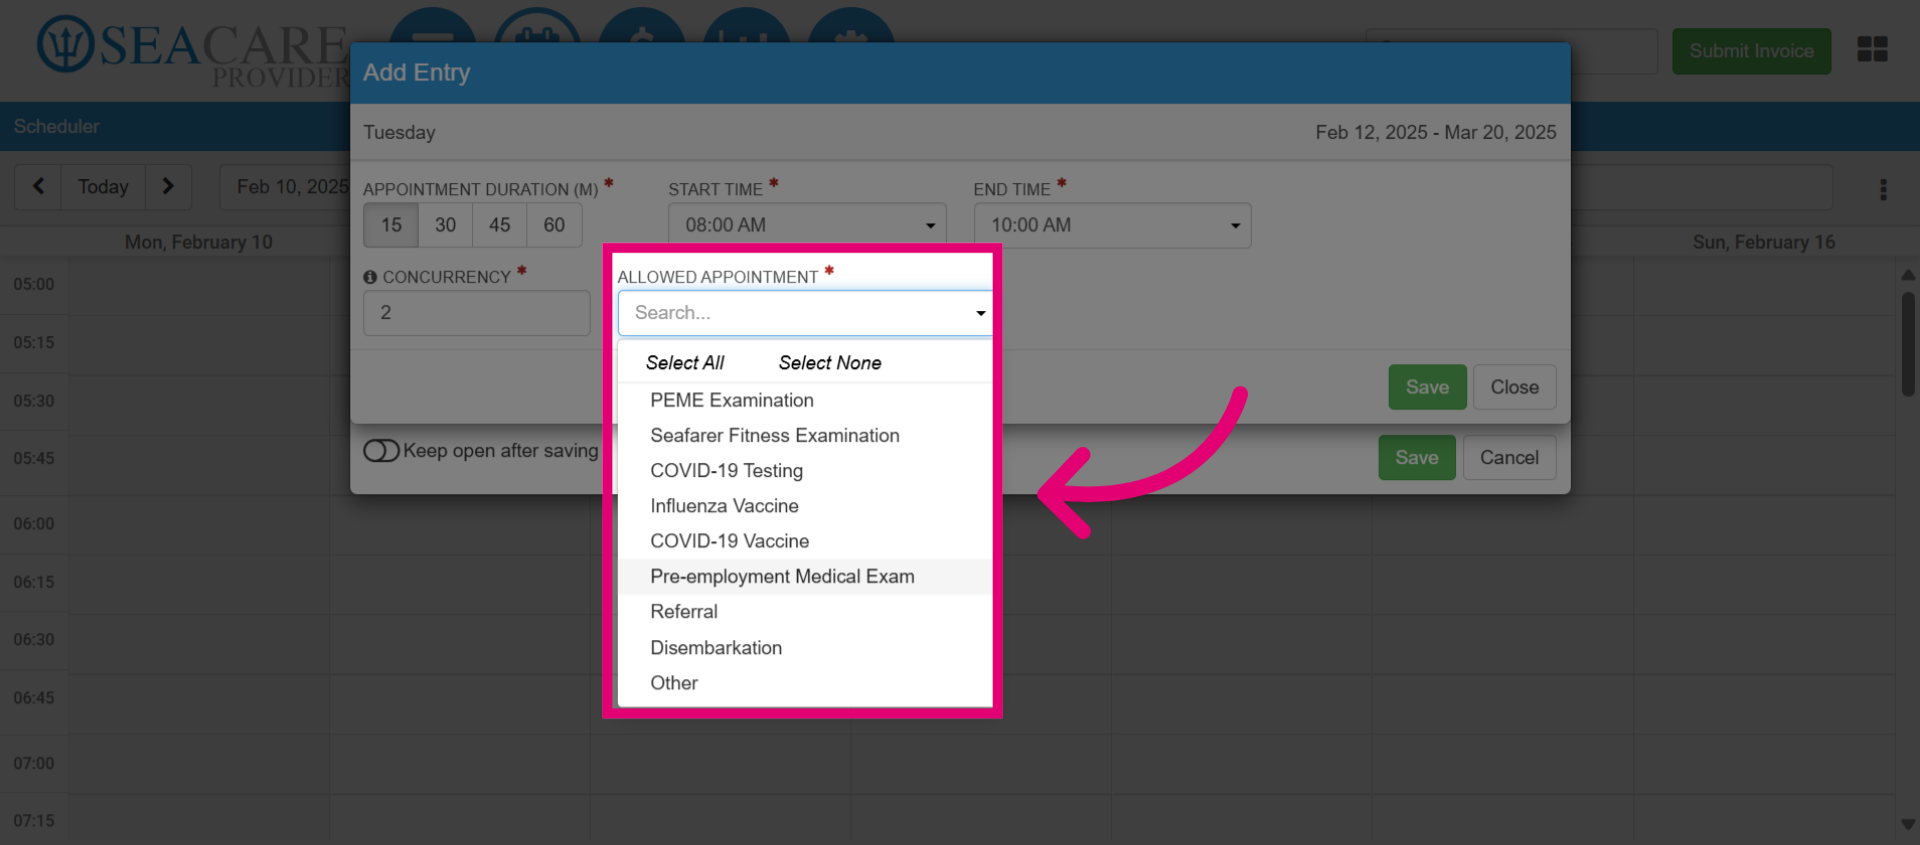
- Next, select the Allowed Appointments types to accept for the time slot such as Pre-employment Medical Examinations. You may select multiple appointment types.
- When you are done, Save the changes made.
- Then, view the appointment availability details including the day, time, number of booking types and concurrencies.
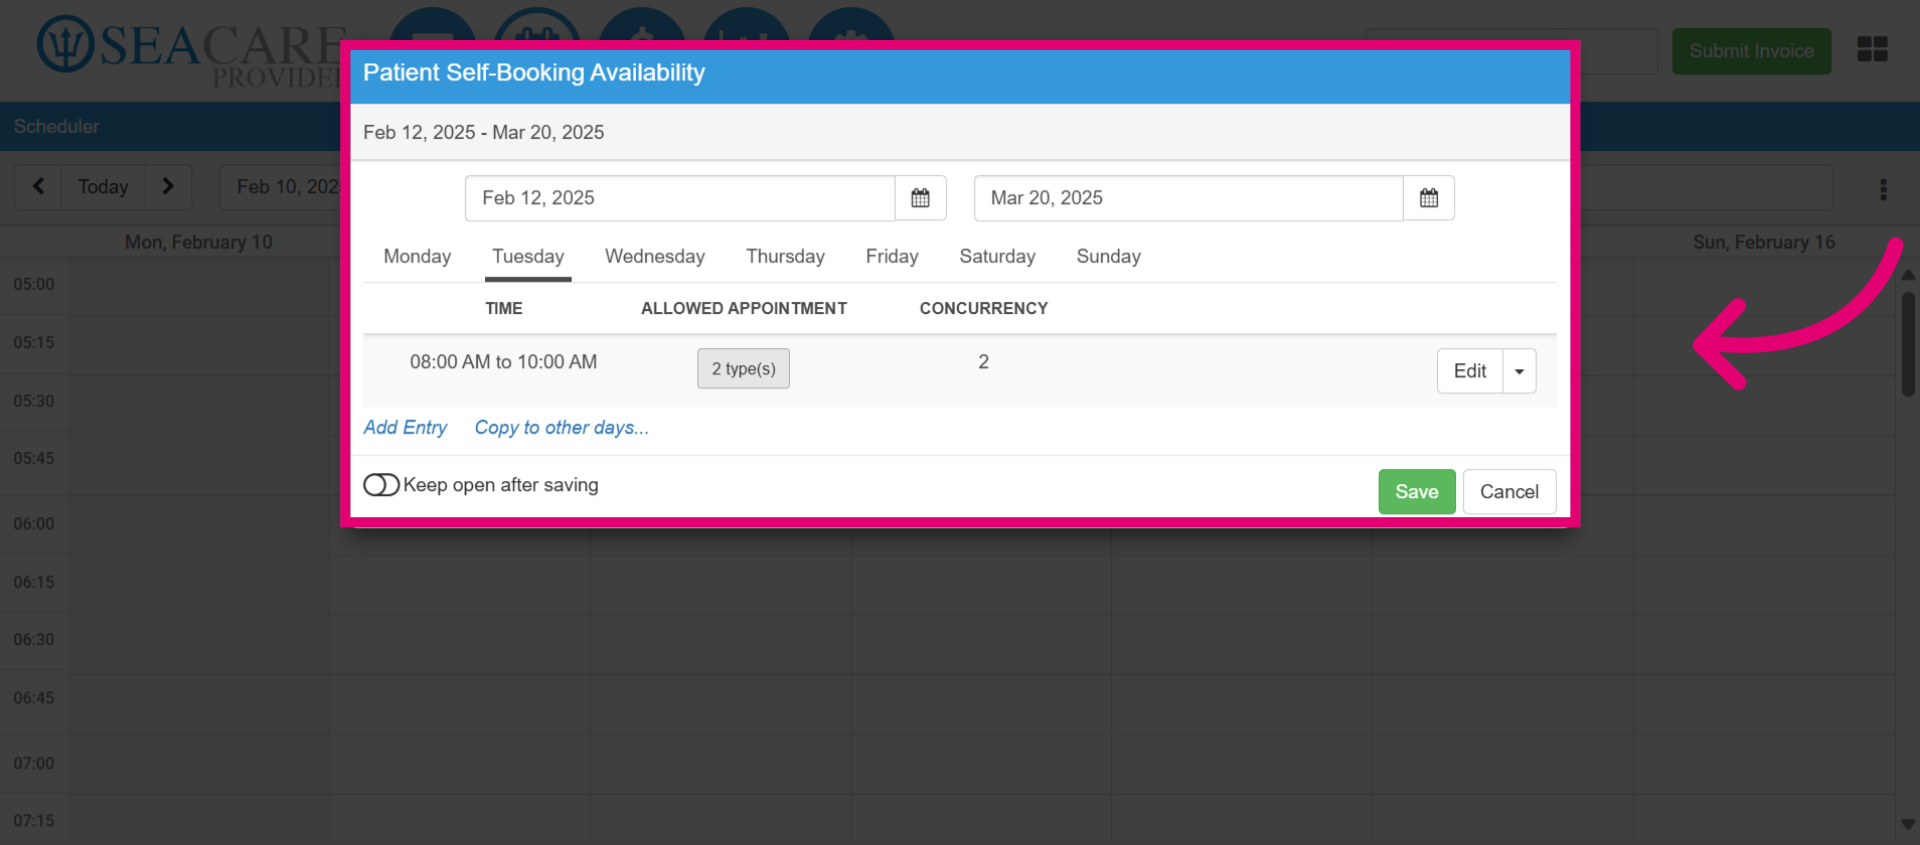
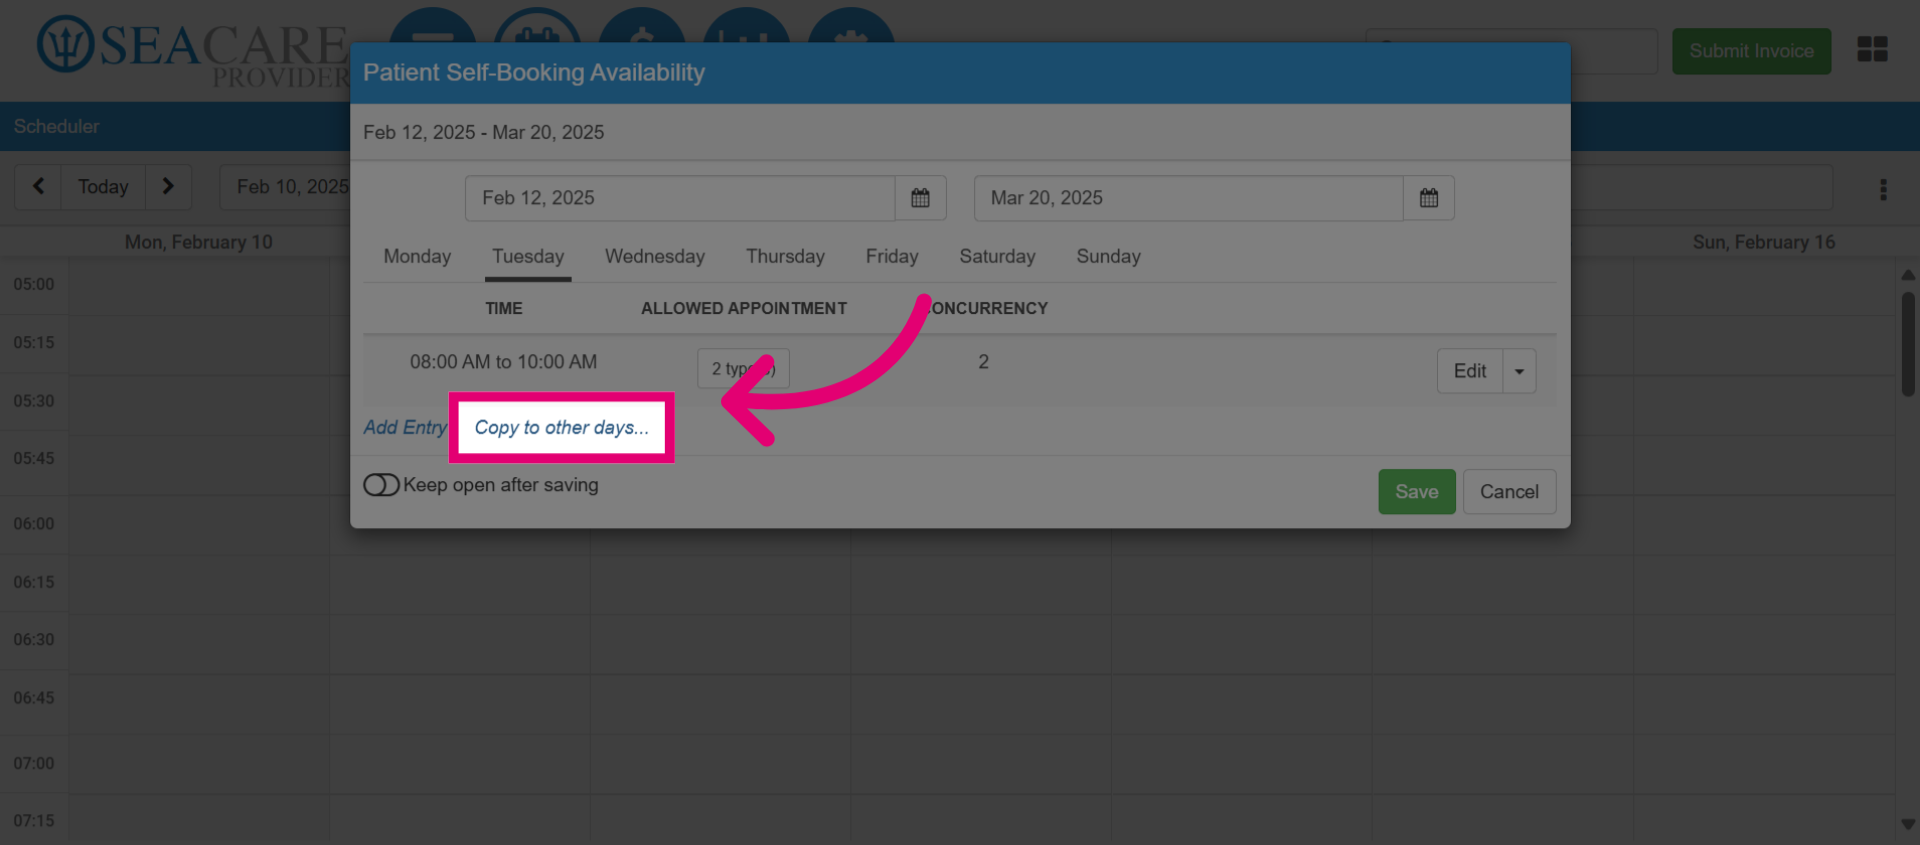
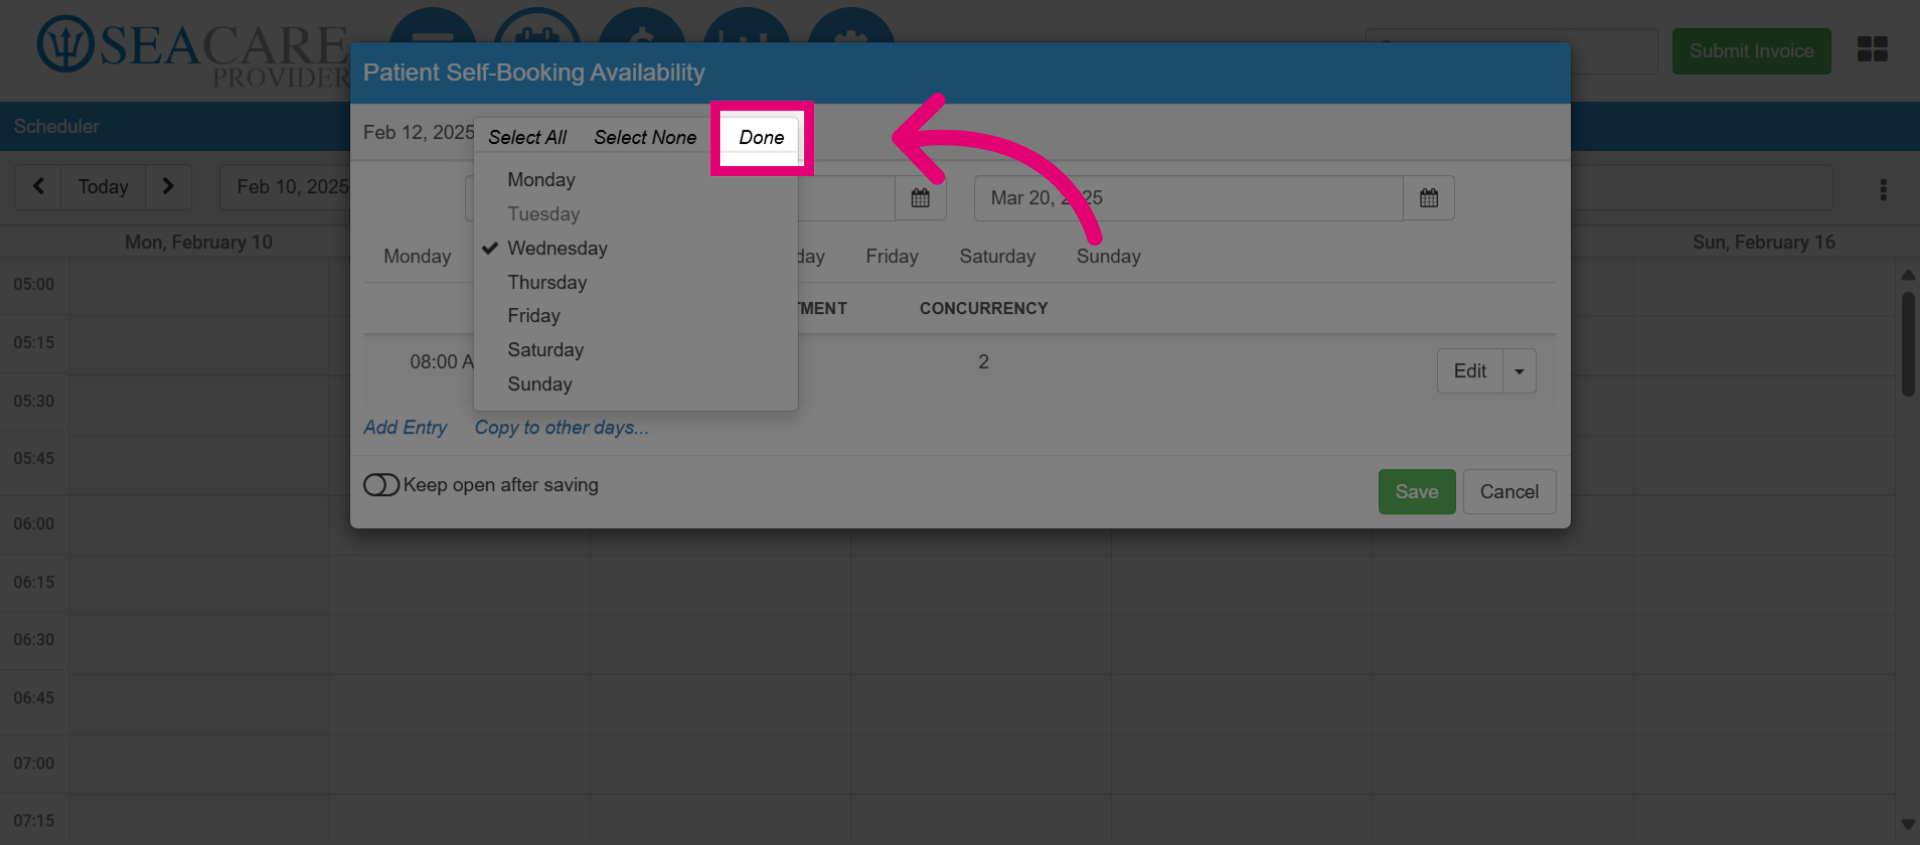
- To offer this appointment slot on other days during the week, select Copy to other days.
- Use this option to copy your appointment availability to other days without re-entering details. Select any available day; a checkmark will indicate your selection, while a grayed-out day shows that a time slot has already been added. Click on each day(s) you wish to add.
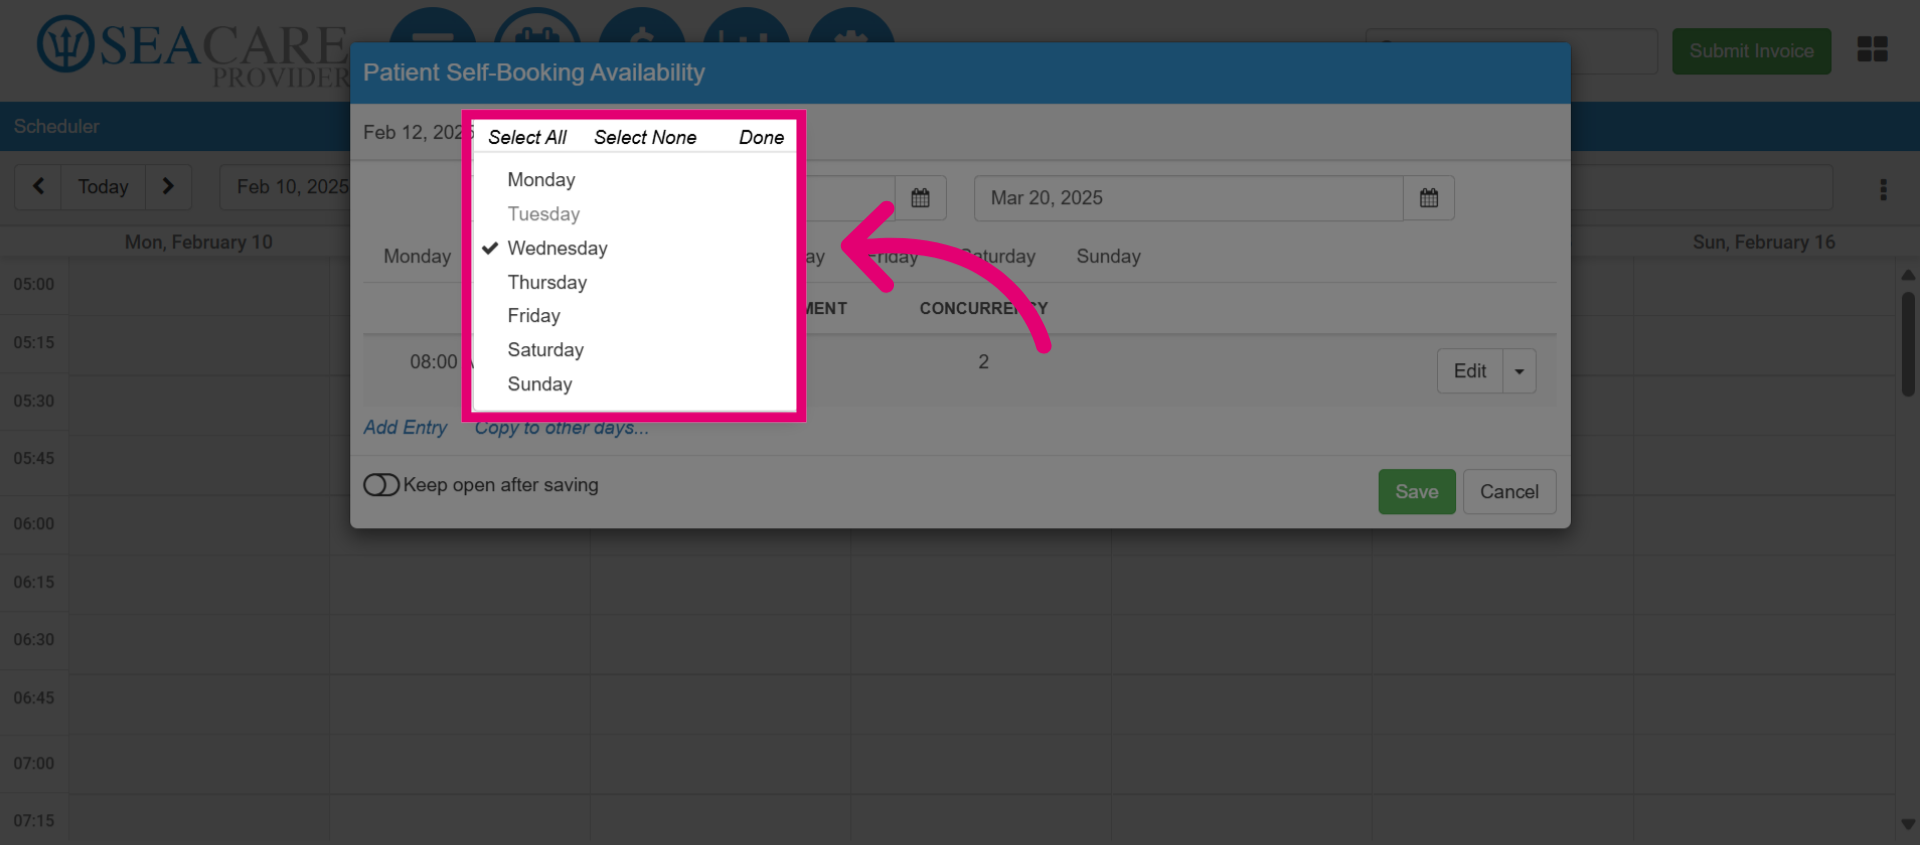
- When you have selected all of the required days for the appointment, select Done.
- Click Save to complete the booking availability.

- Then, click the Actions button again to view the new entry appointment details.
- Navigate back to Patient Self-Booking Availability.
- Then, view the appointment that was created.
- From here you can select the Edit button to edit the entry, or select the dropdown options and select Remove to delete the entry.