New article
Recently updated
Managing communicable disease follow ups for Index Cases

Who is this article for?Users who want to learn to manage communicable disease follow ups for Index Cases.
No elevated permissions are required.
This guide provides a walkthrough to manage communicable disease follow-ups, focusing on Index Cases.
1. Managing communicable disease follow ups for Index Cases
1.1. Video
1.2. Steps
- To process index case follow-ups, start in the clinic under the public health tab. Here, you can manage all follow-up aspects, including updating temperature, testing, isolation, and more.
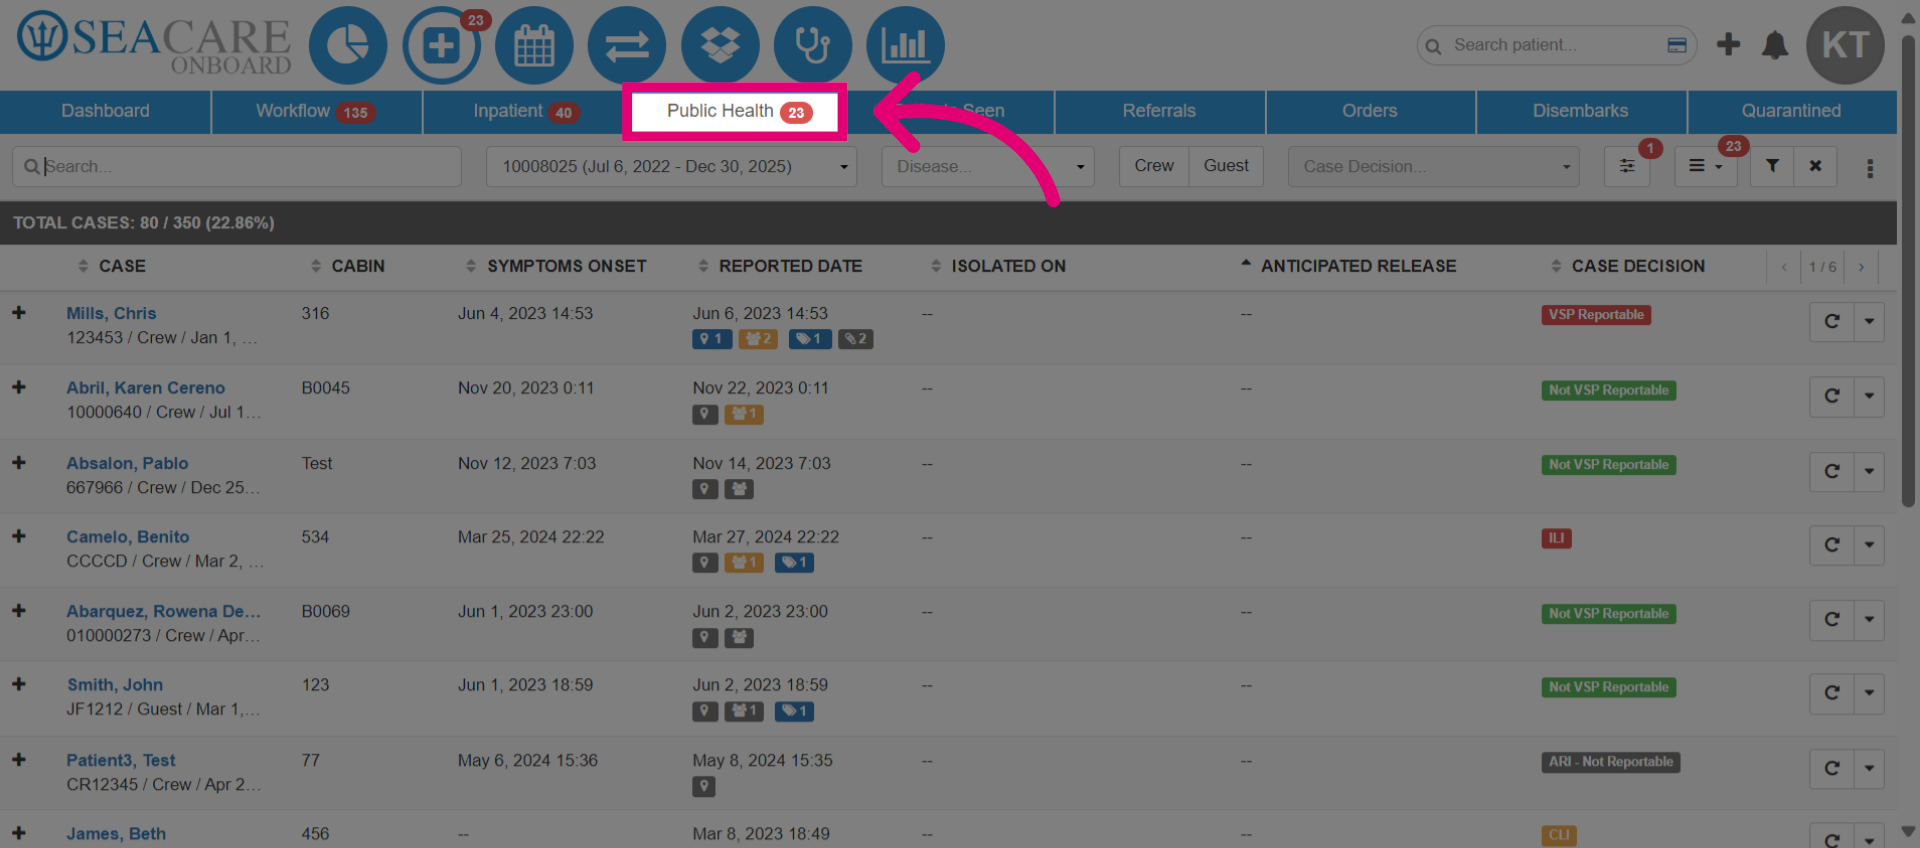
- Use the filters to locate a patient by searching their name, voyage date, communicable disease type (such as AGE or ARD), crew or guest status, or case decision.
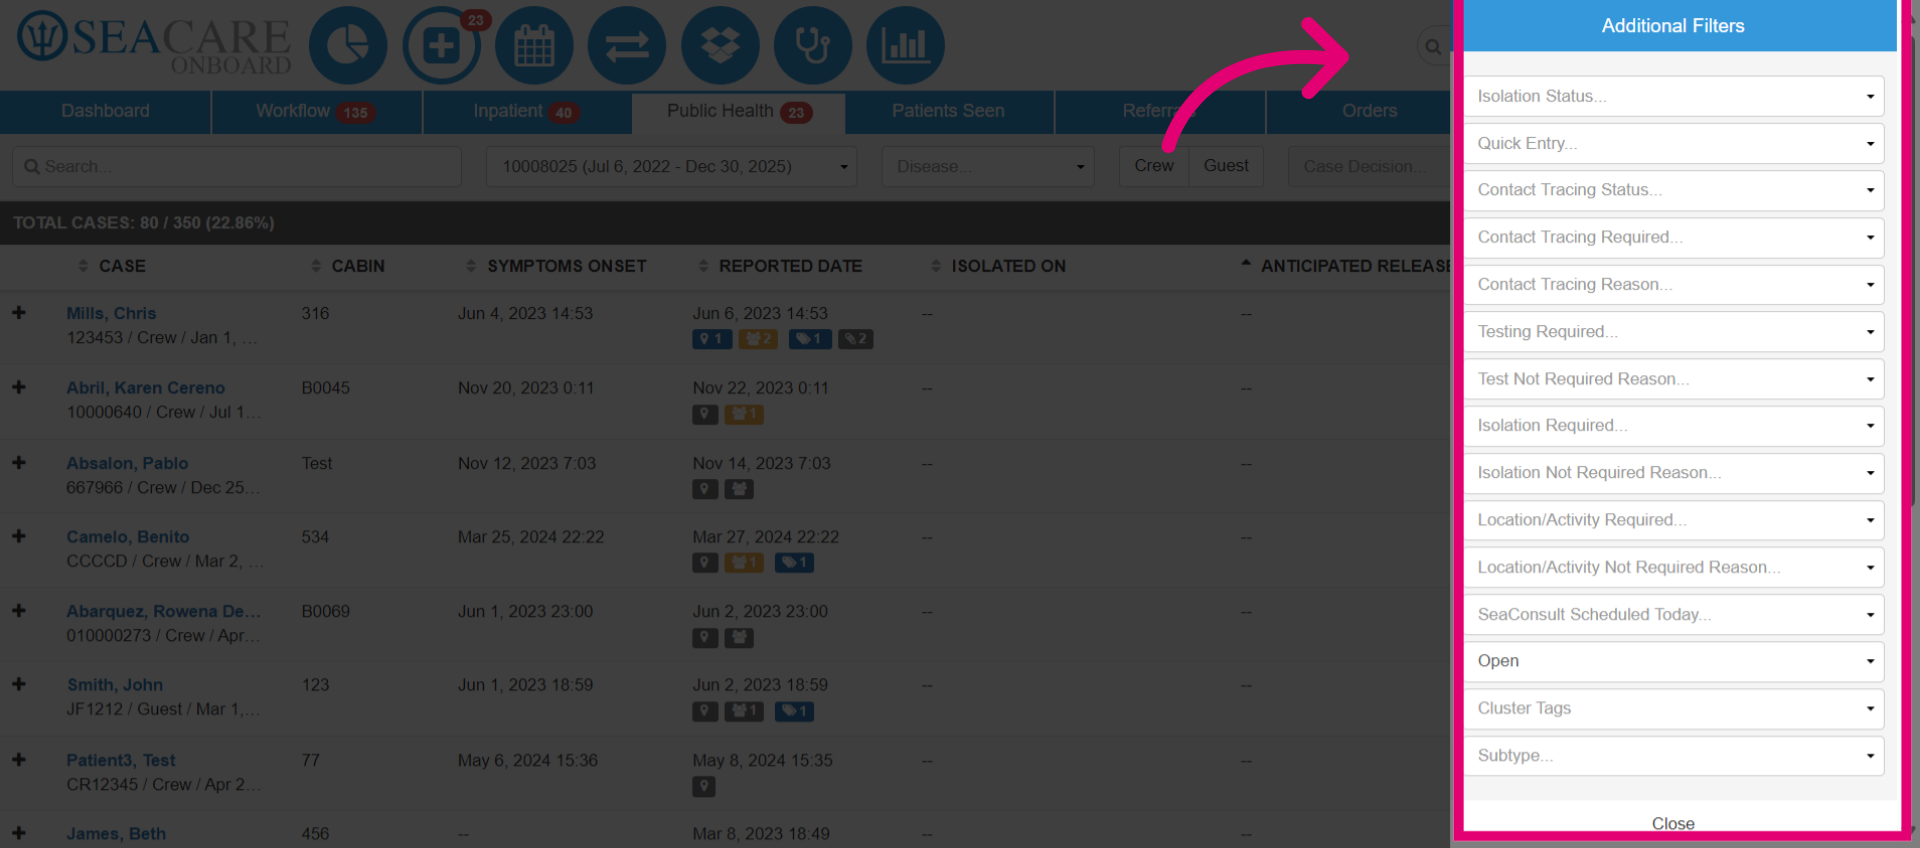
- Select Additional Filters option to view more.

- If needed, choose any Additional Filters.
- Next, click Save Filters. This way, you can leave the module and return with the same filters already set, avoiding the need to reset them.
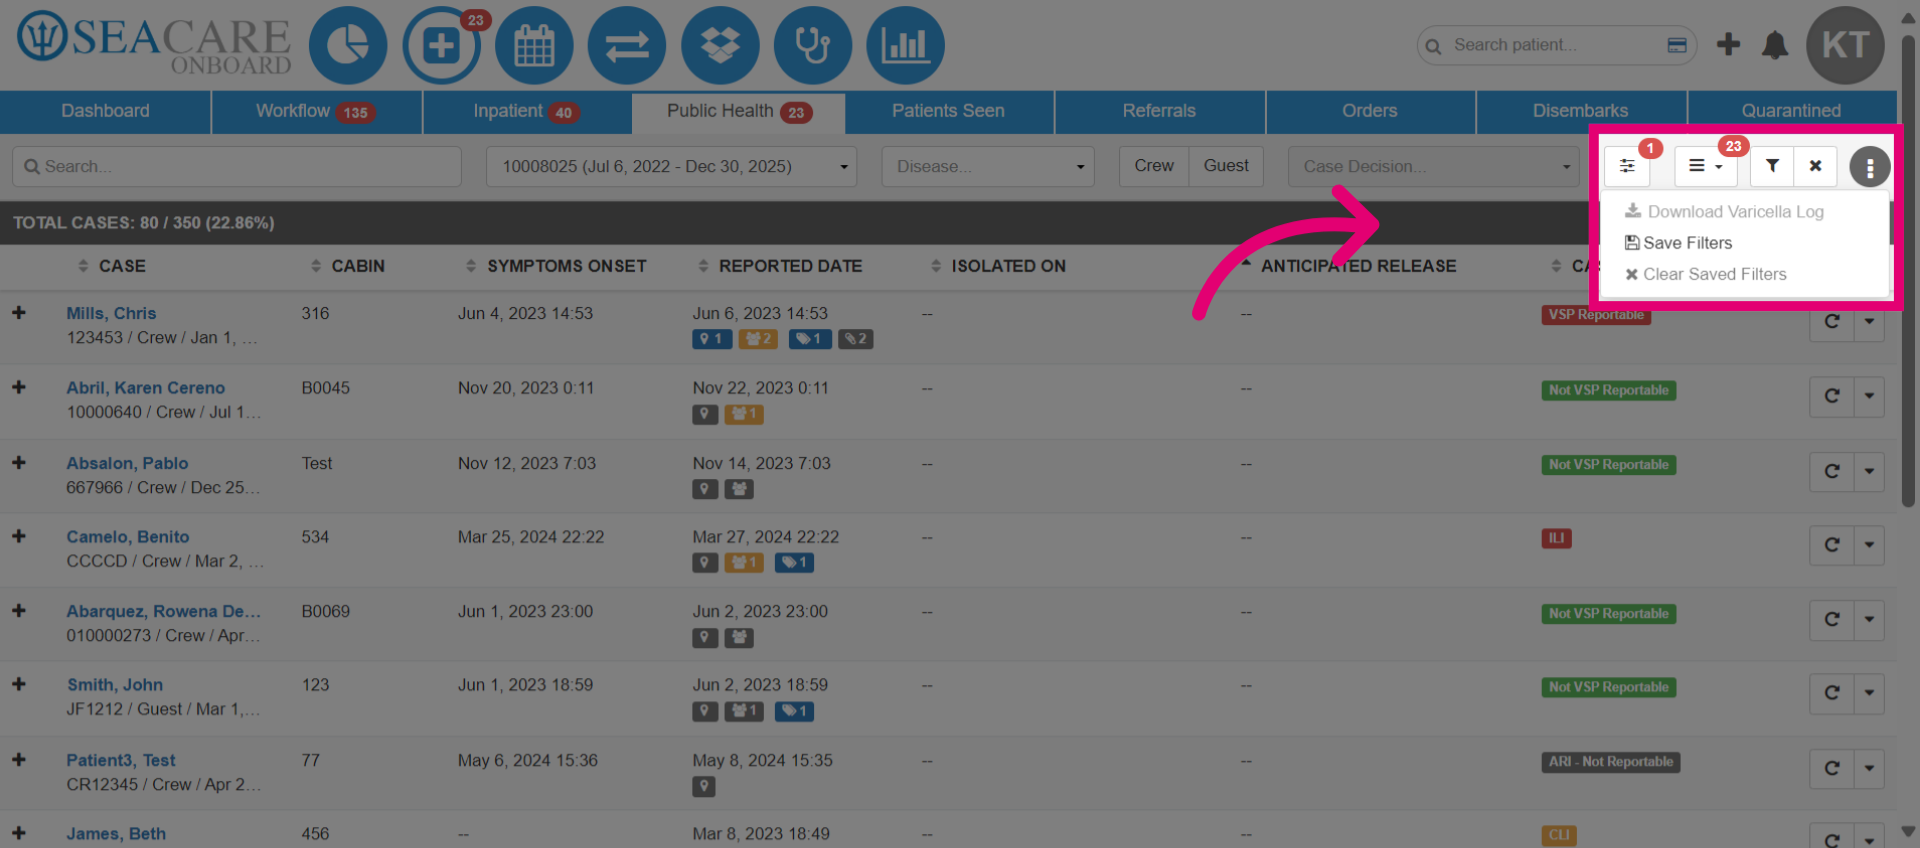
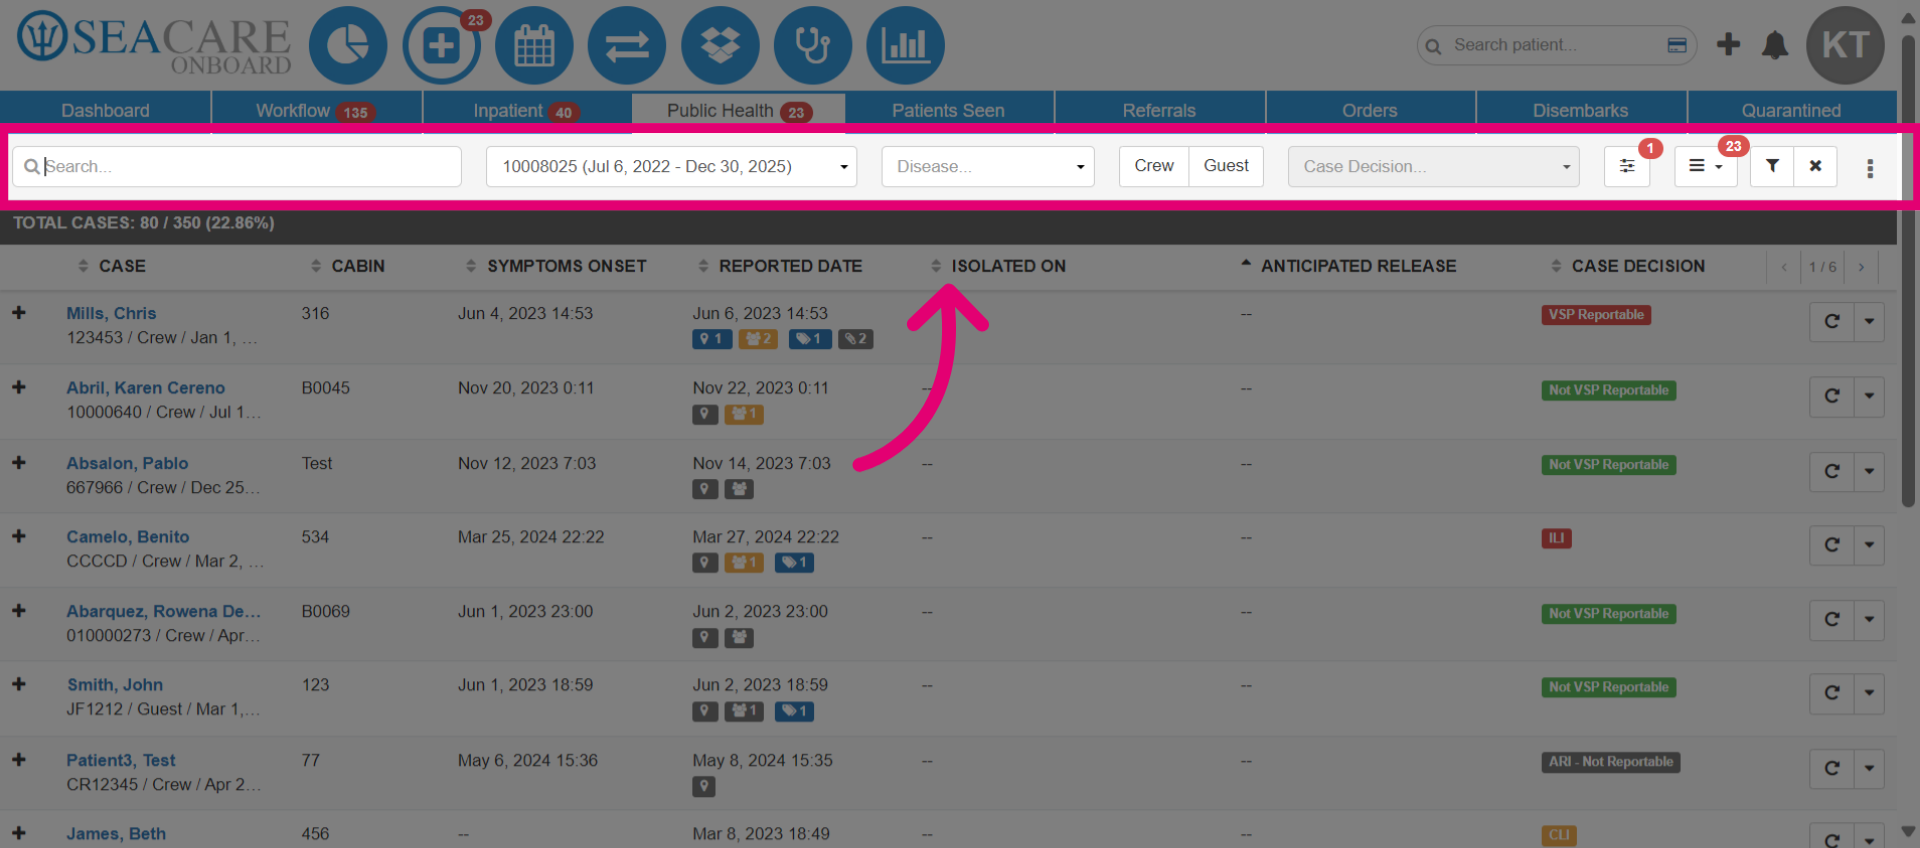
- View the total case list to see index cases and their details related to the communicable disease. Users can check the case, cabin, symptom onset, report date, isolation start date, anticipated release date, and the case decision.
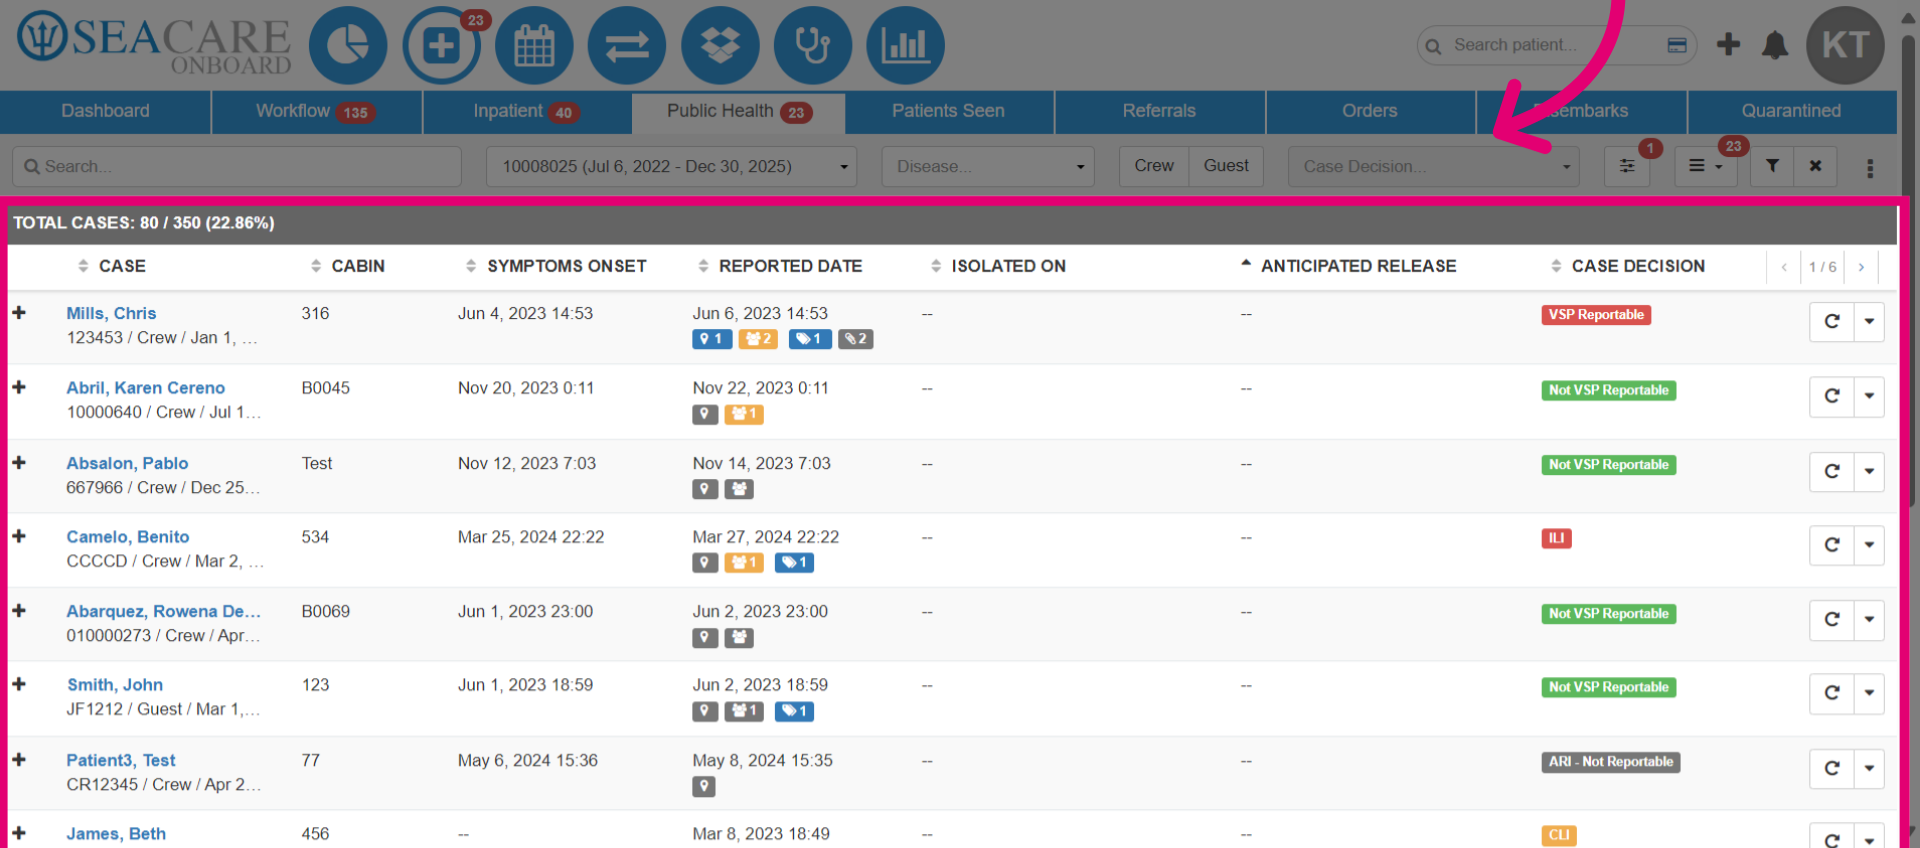
- Uncover further details regarding the case by expanding the plus sign.
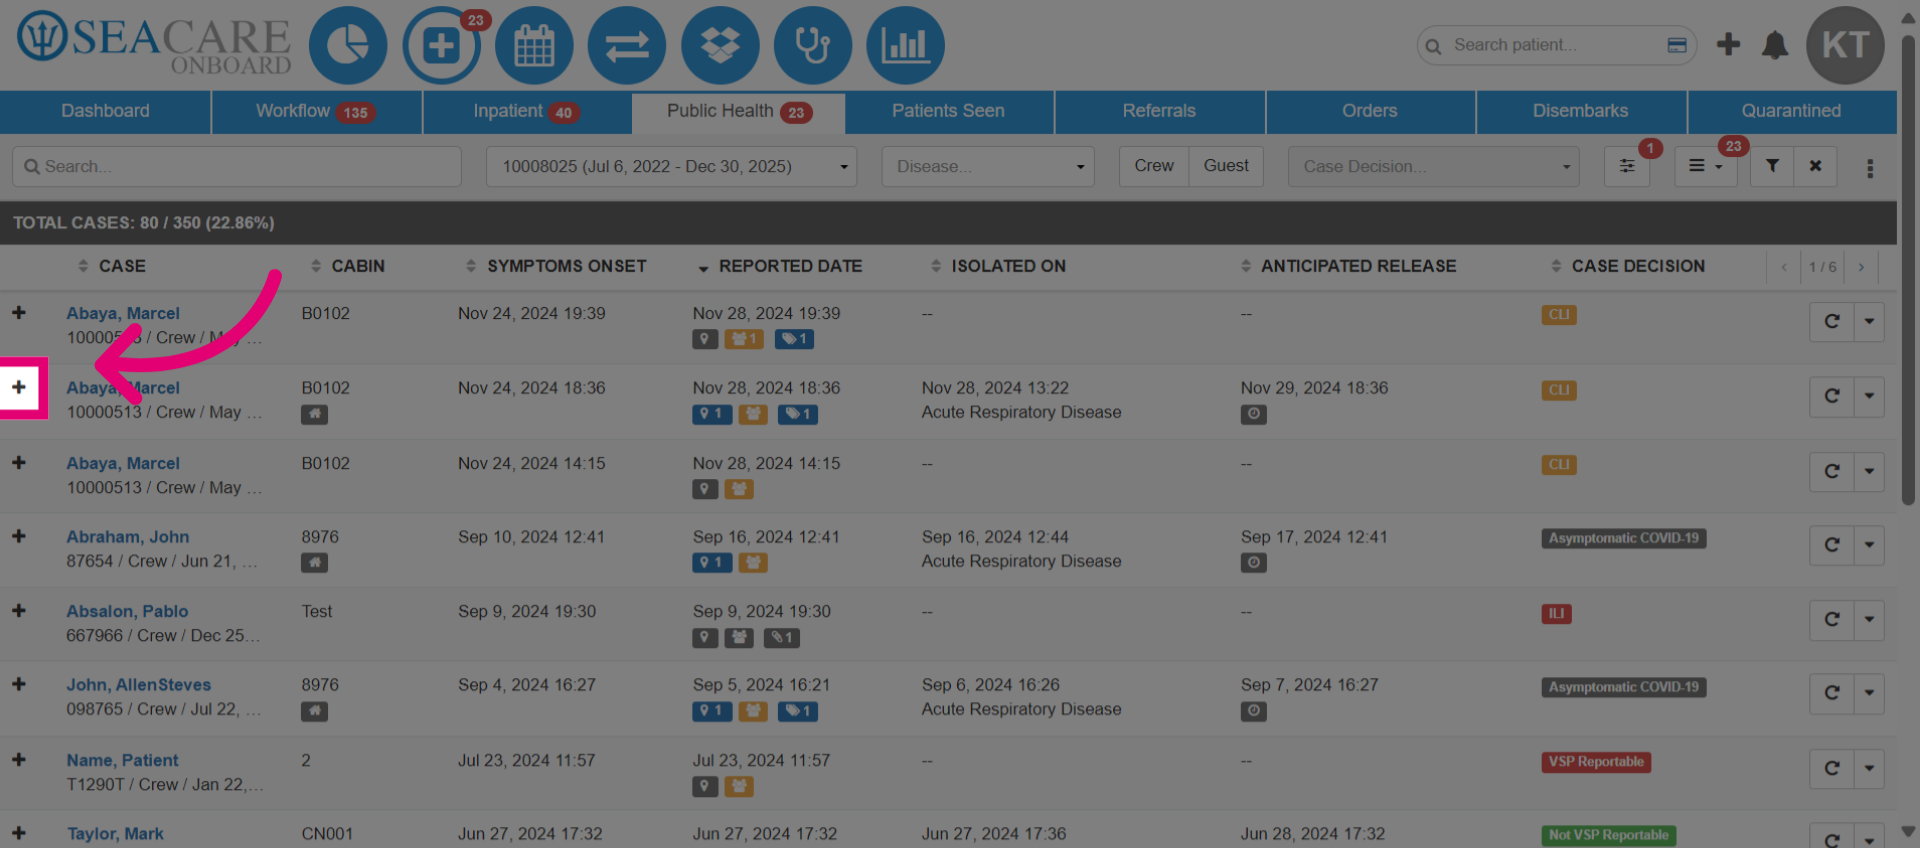
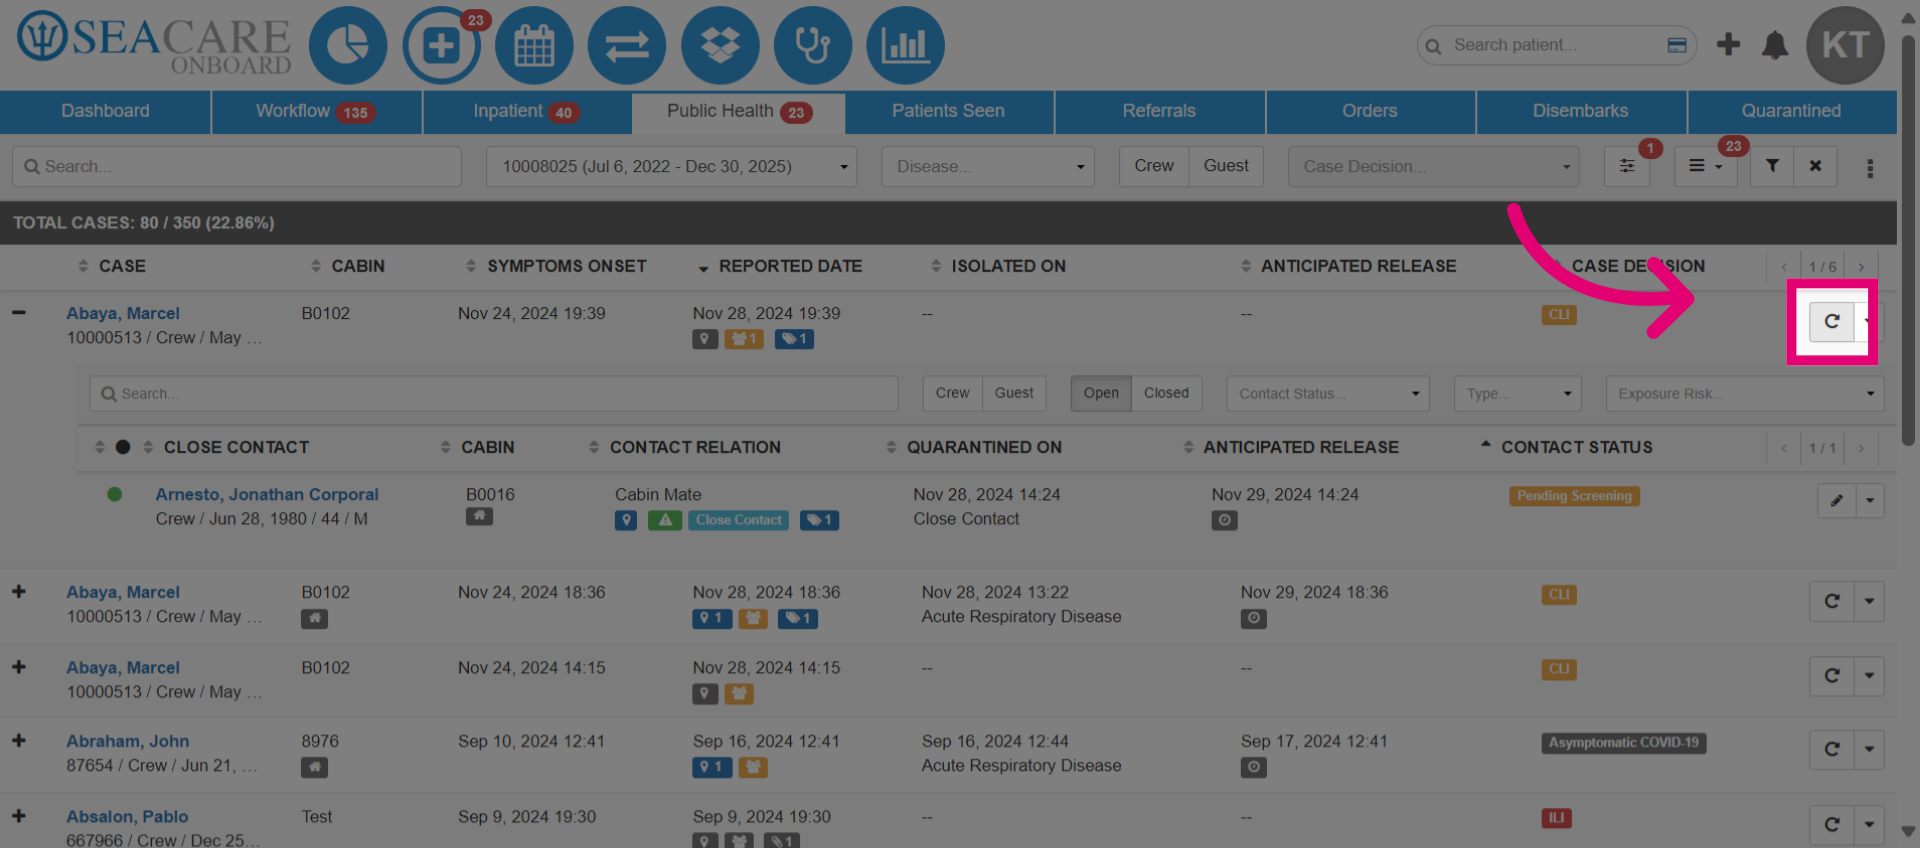
- All close contacts added for the index case will be listed under the case. You can view their demographic information, cabin, contact relation, quarantine date, anticipated release, and contact type.
- You can take more actions to update the case. Conduct a follow-up by selecting the follow-up button. In the actions menu next to it, you can edit the close contact list, cluster tags, location or activity list, view follow-up history and testing details, complete consents or forms, upload documents, send emails, schedule SeaConsults, or close the case.
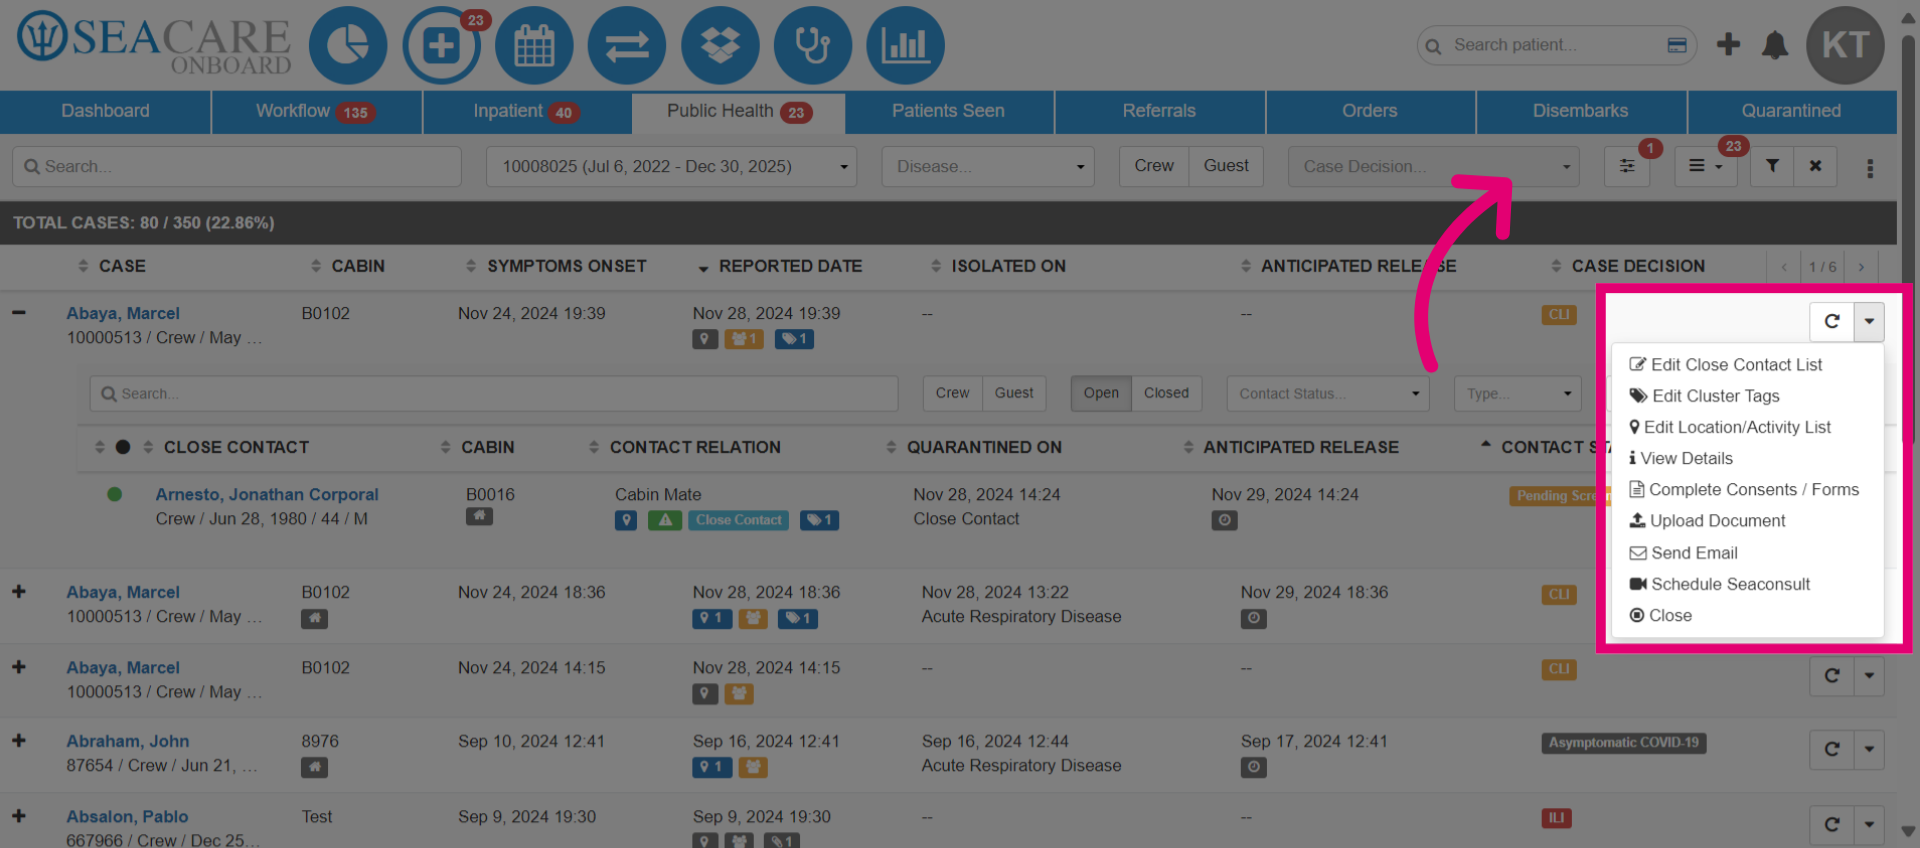
- Then, select the Follow Up button.
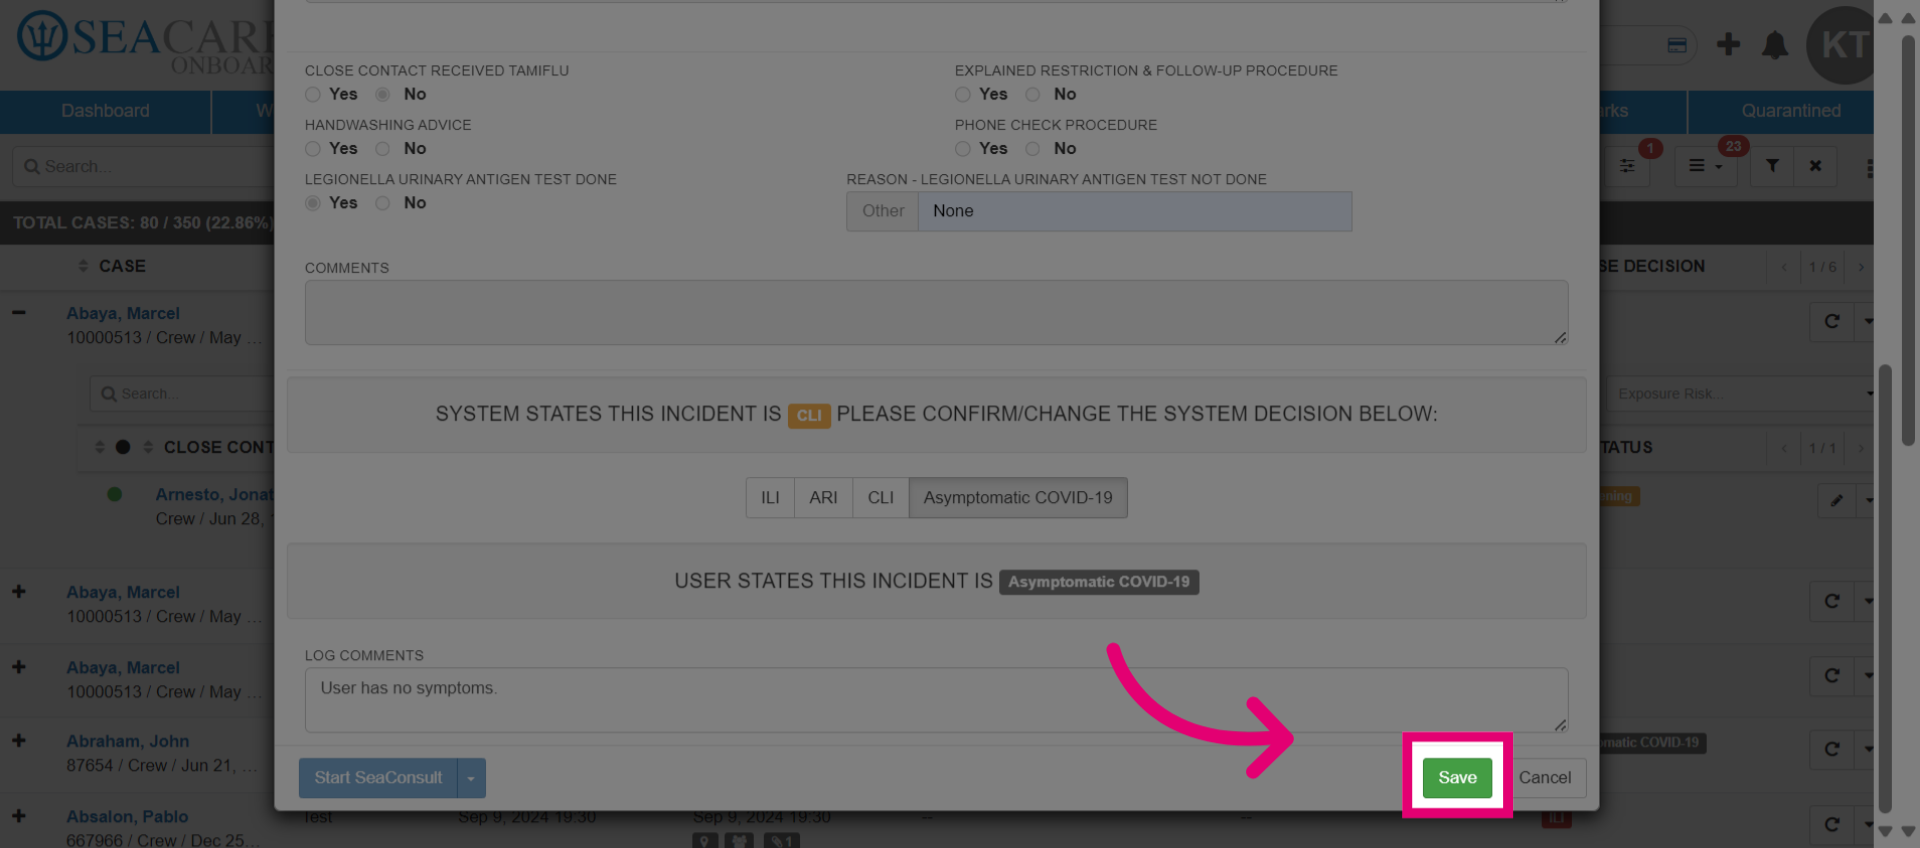
- In the Follow Up tab, enter the details for the follow-up. This helps you track and document any symptom progression. Indicate if the case is asymptomatic by selecting Yes or No. Confirm the date when the symptoms appeared.
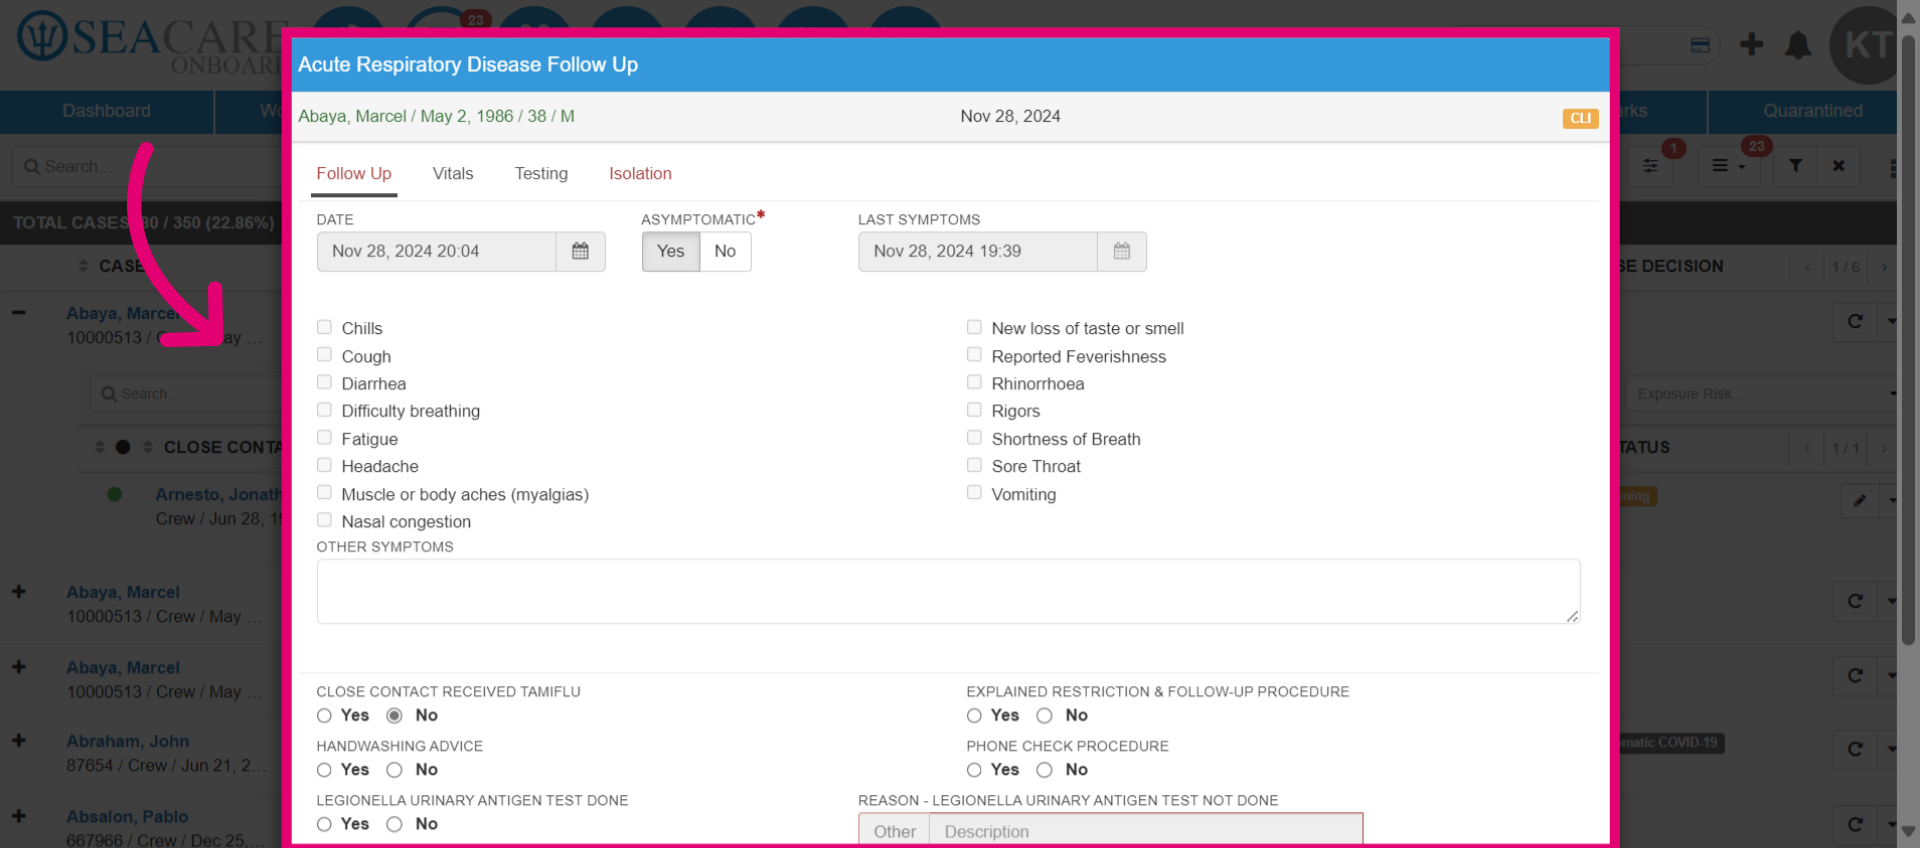
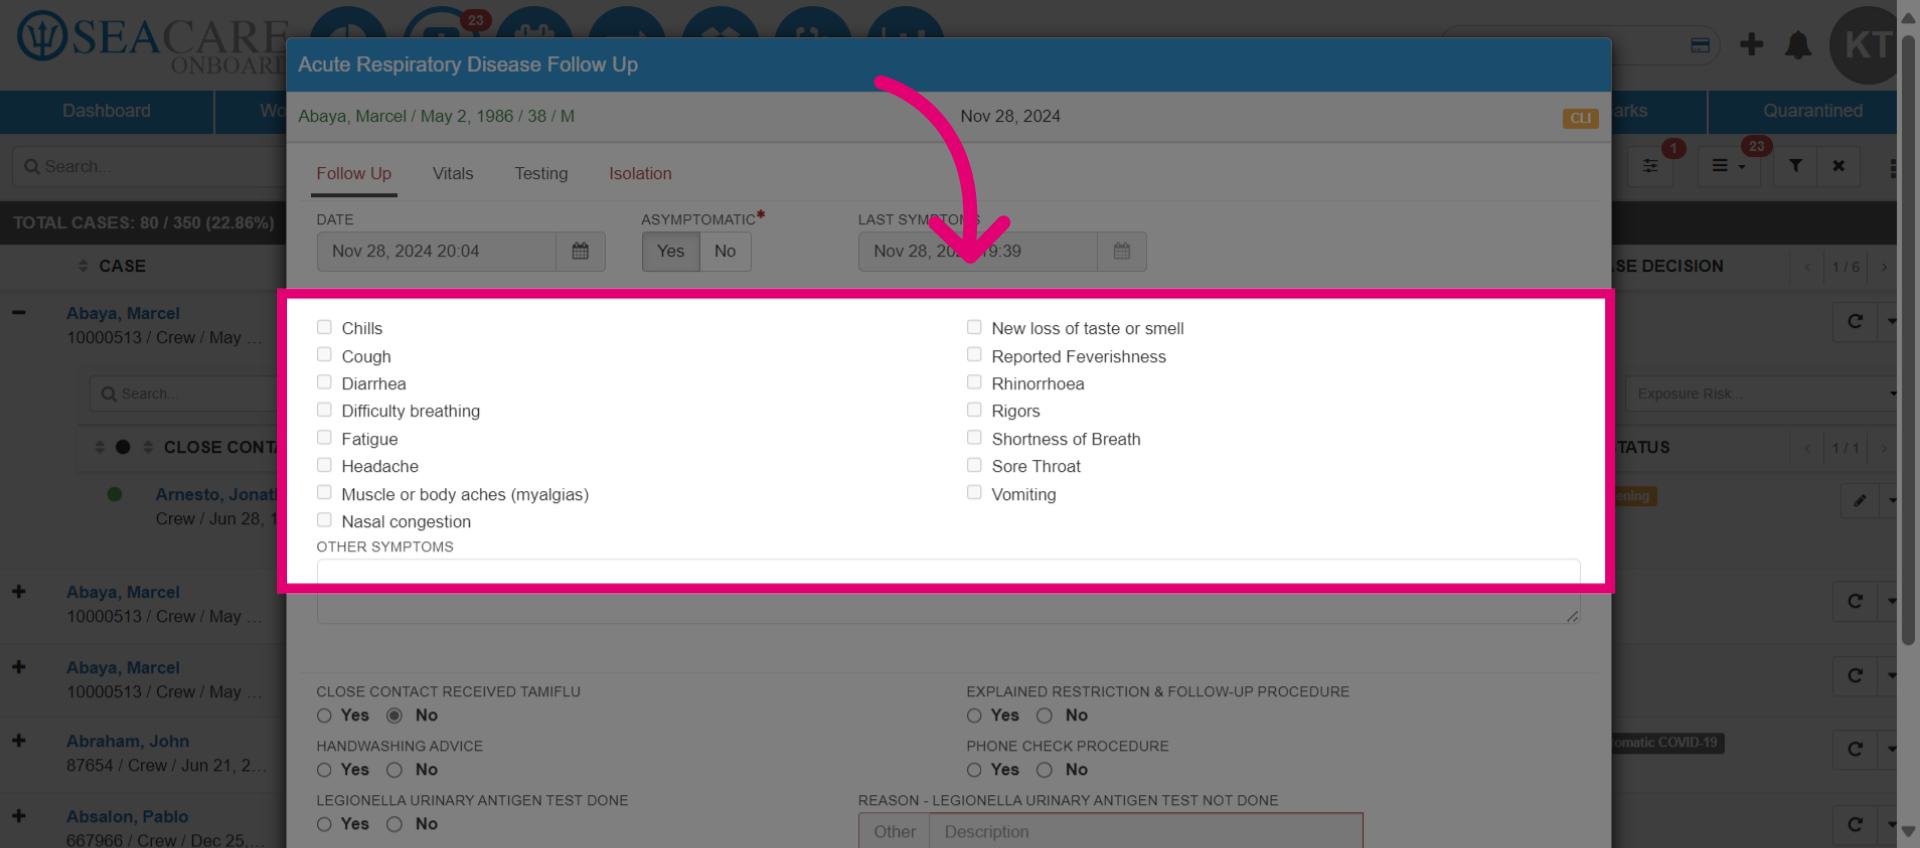
- Click the checkboxes to mark the symptoms that the Index Case is experiencing.
- Answer additional questions related to actions taken for the case. For example, indicate if handwashing advice was given, if the restrictions and follow-up procedure were explained, or if a phone check procedure was performed.
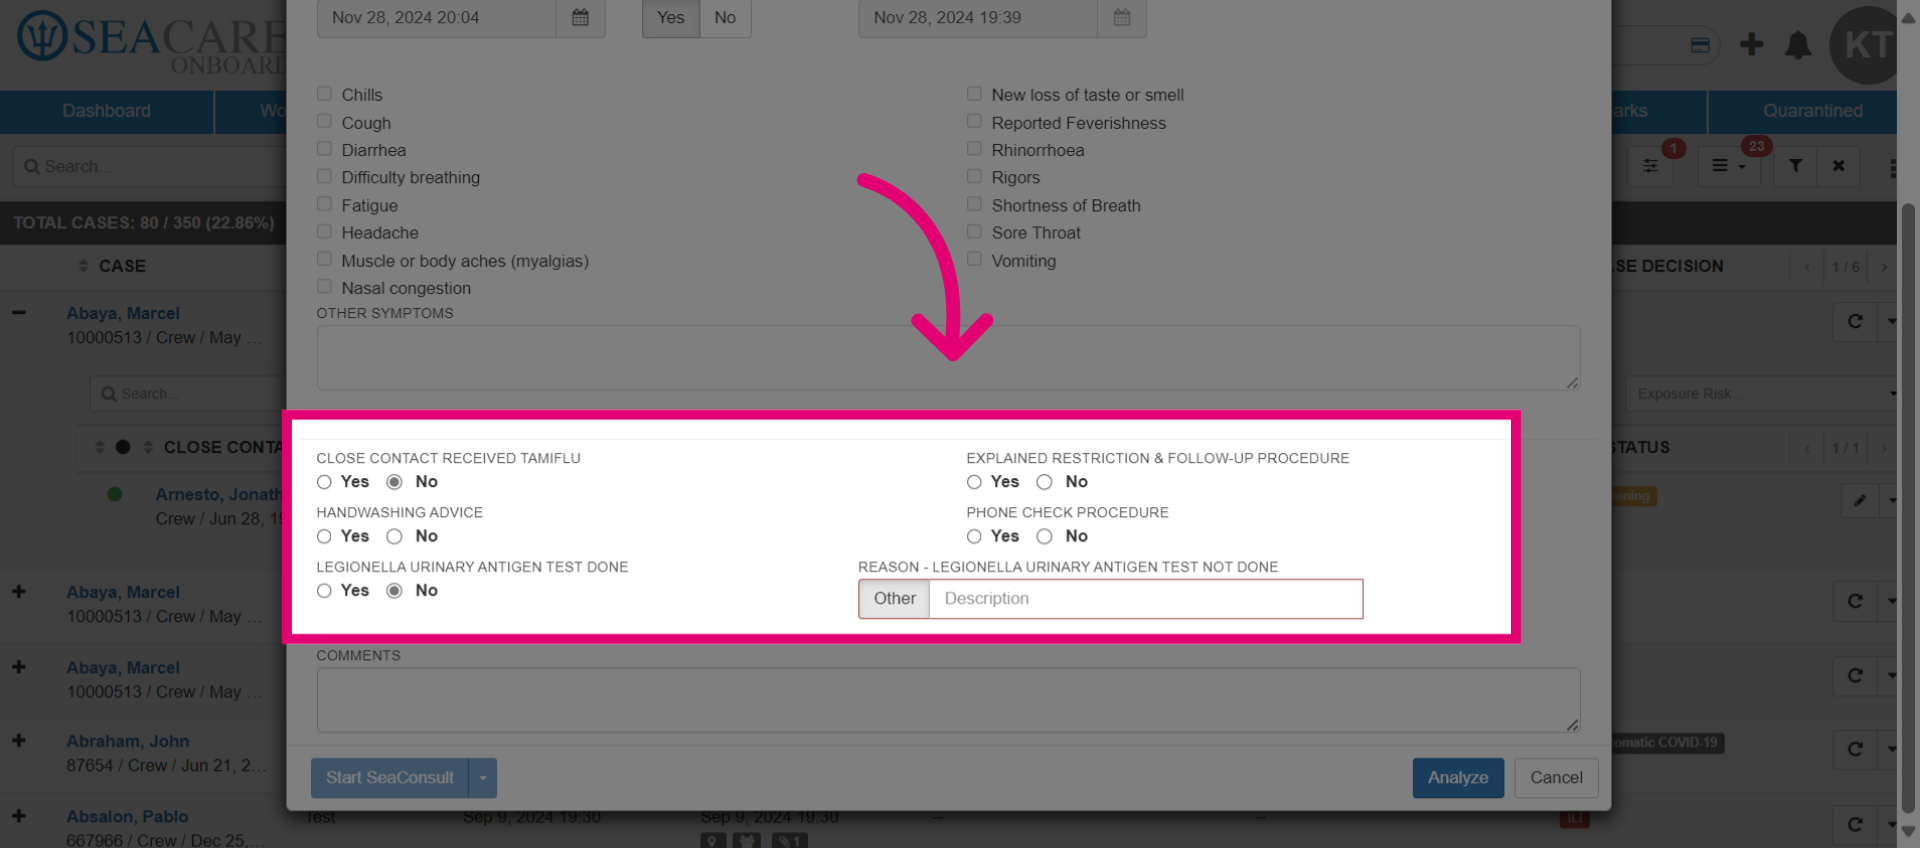
- Include a detailed description. For instance, specify whether a legionella test was administered and, if not, the reason why. This test is for a respiratory disease.
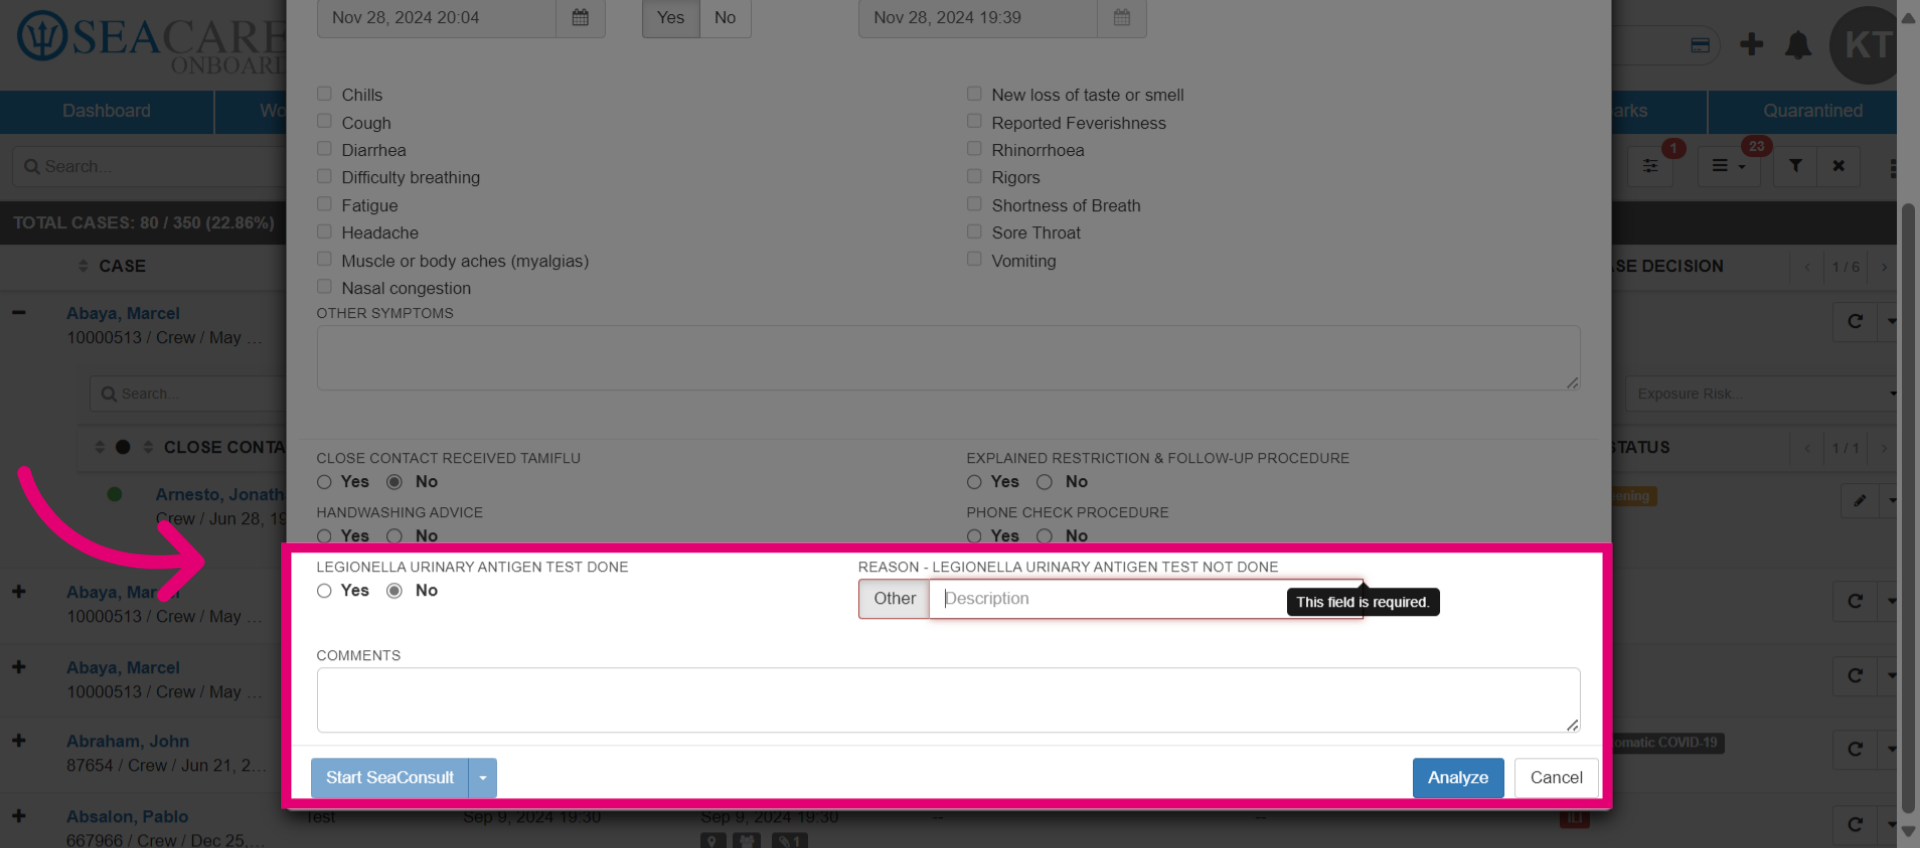
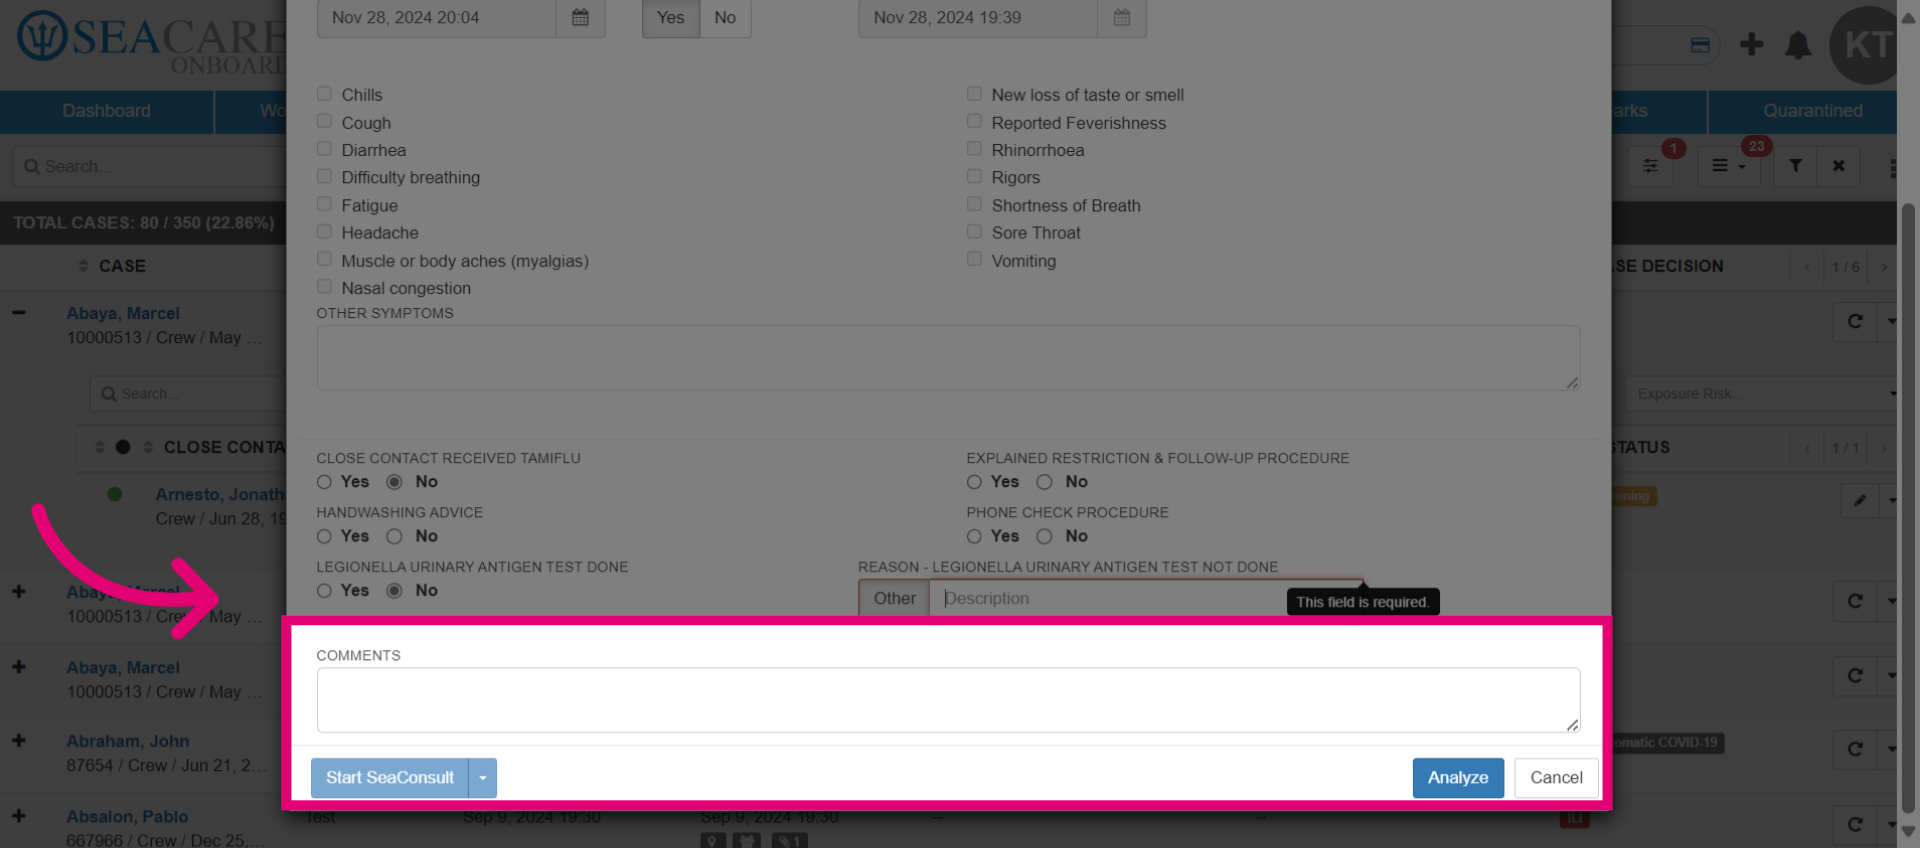
- Now, add in some comments. If a SeaConsult appointment has been scheduled, the SeaConsult option should become active, allowing you to start the call. During the call, you can conduct the follow-up and record any symptoms or updates for the case.
- Check the vital signs for key health metrics and record them for the index case. Include temperature, blood pressure, heart rate, and any other necessary details. Ensure that you document everything accurately.
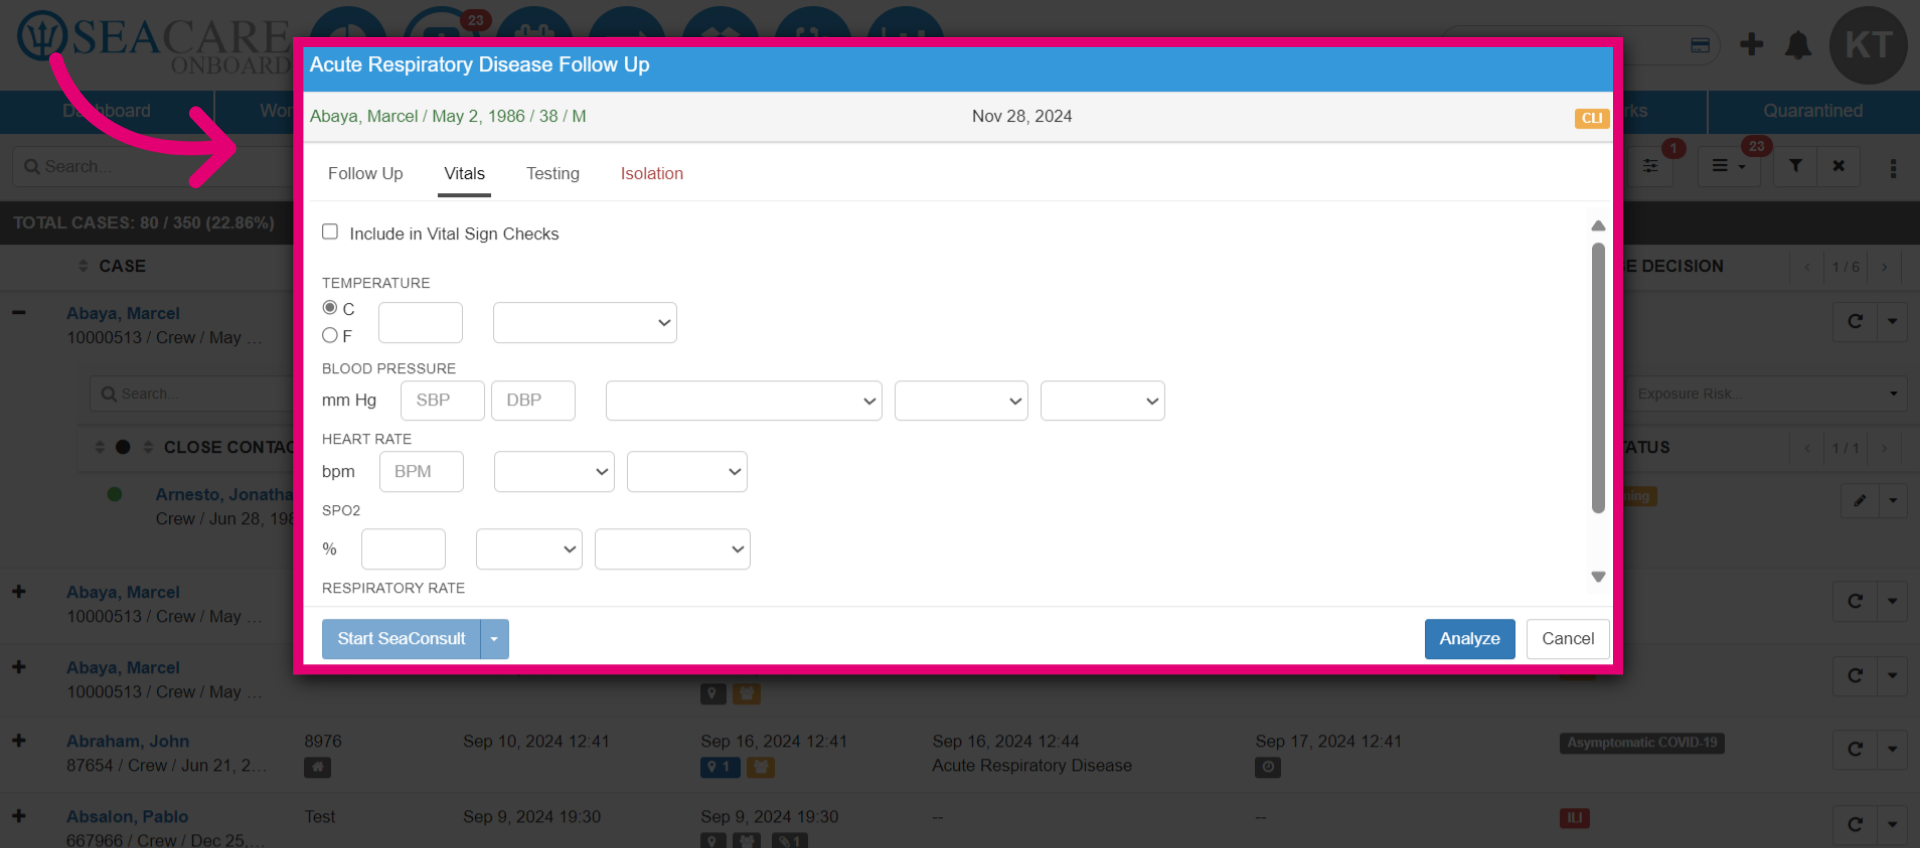
- Select the checkbox to add the recorded vitals to the vital sign checks, which will be displayed in the patient's chart.

- Go to the testing tab section for further evaluations. Here, you can collect a testing sample from the case to check for the presence of a communicable disease. If testing is required, select Yes. If not, select No and provide a reason.
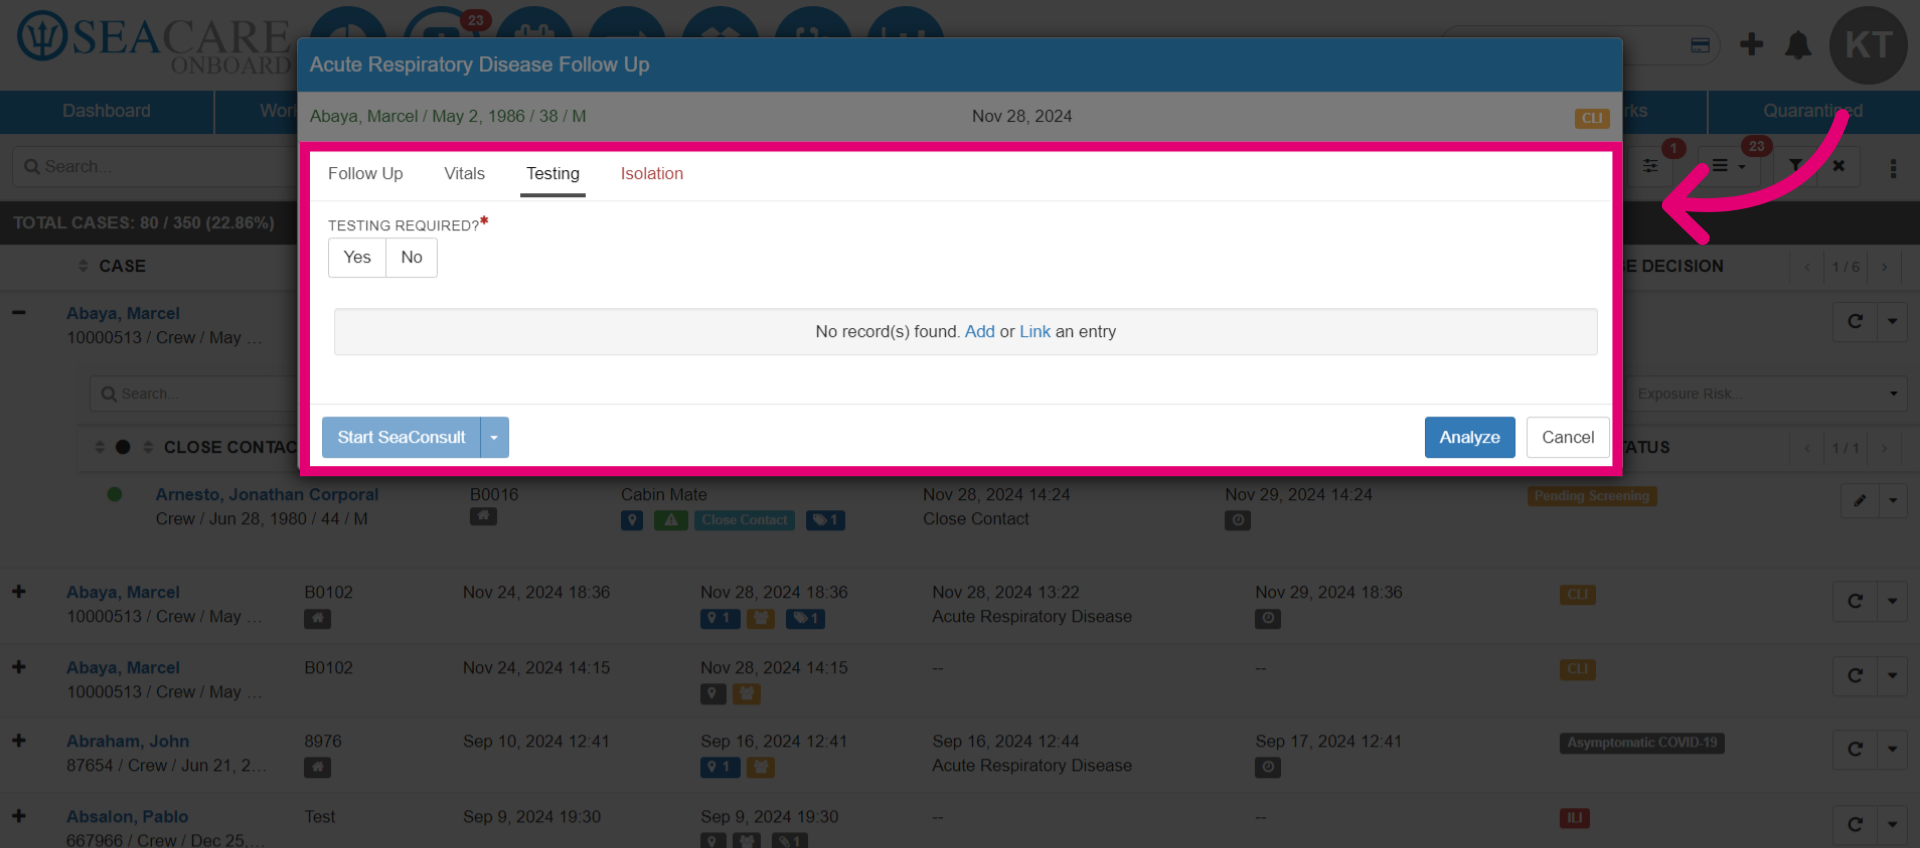
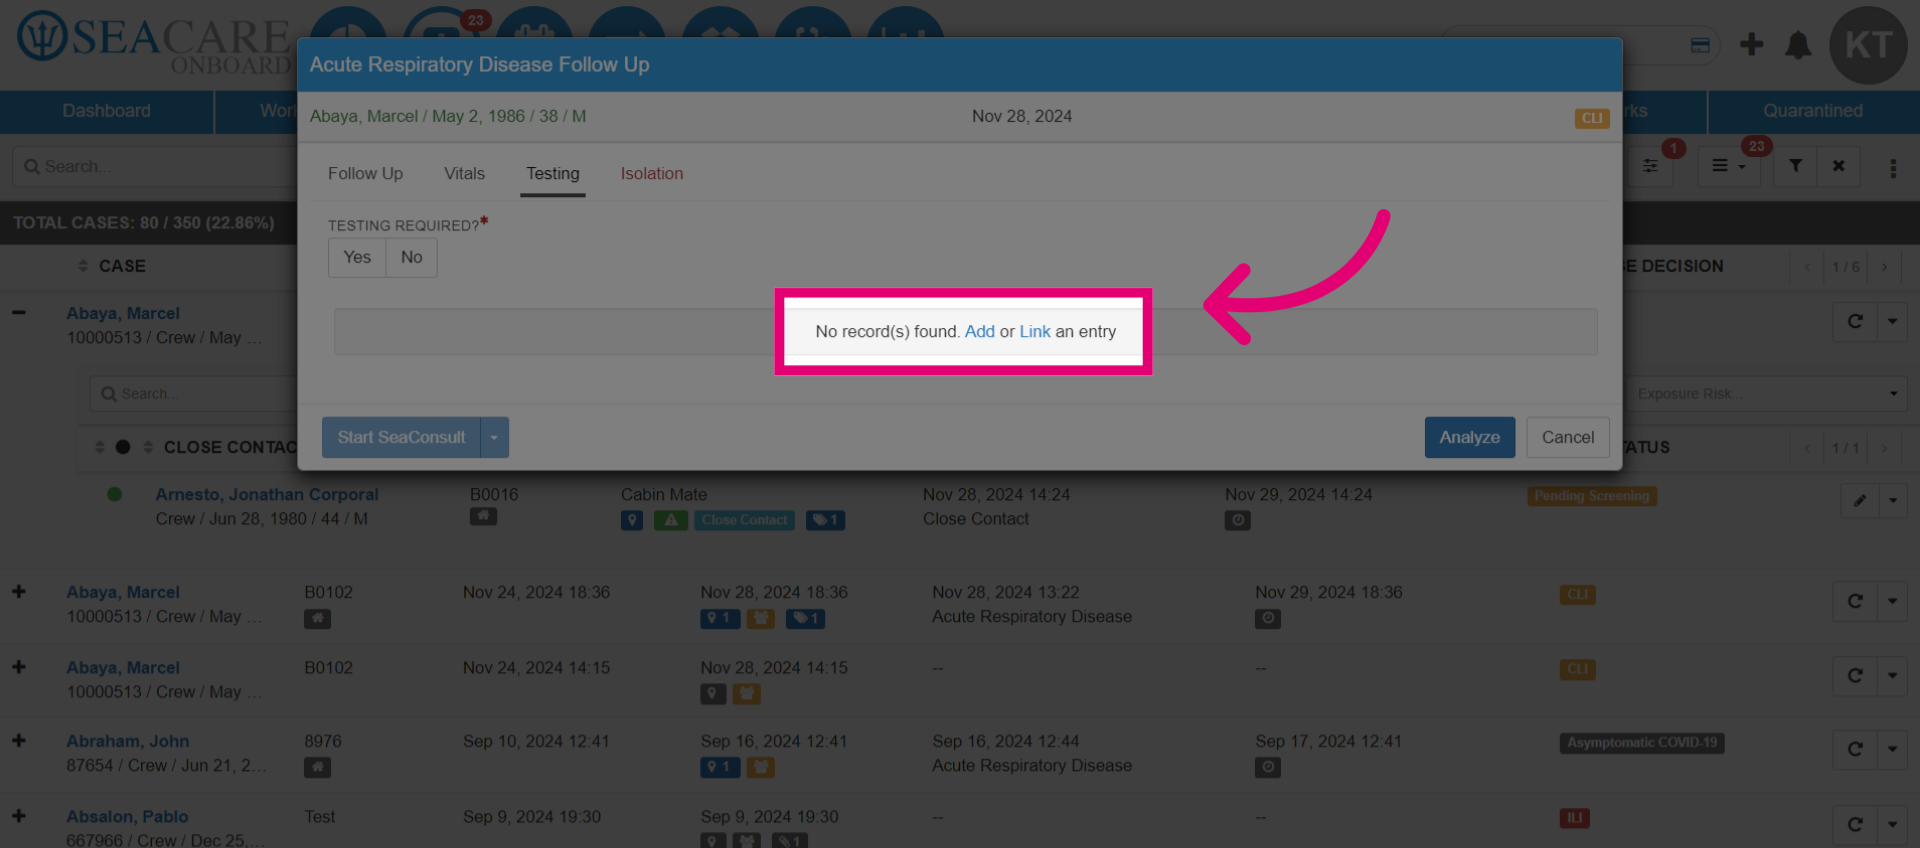
- Choose Add to include a new test. If there is already a pending test for the case, select Link to connect the test and post the results. For now, we will demonstrate linking a test, so select Link.
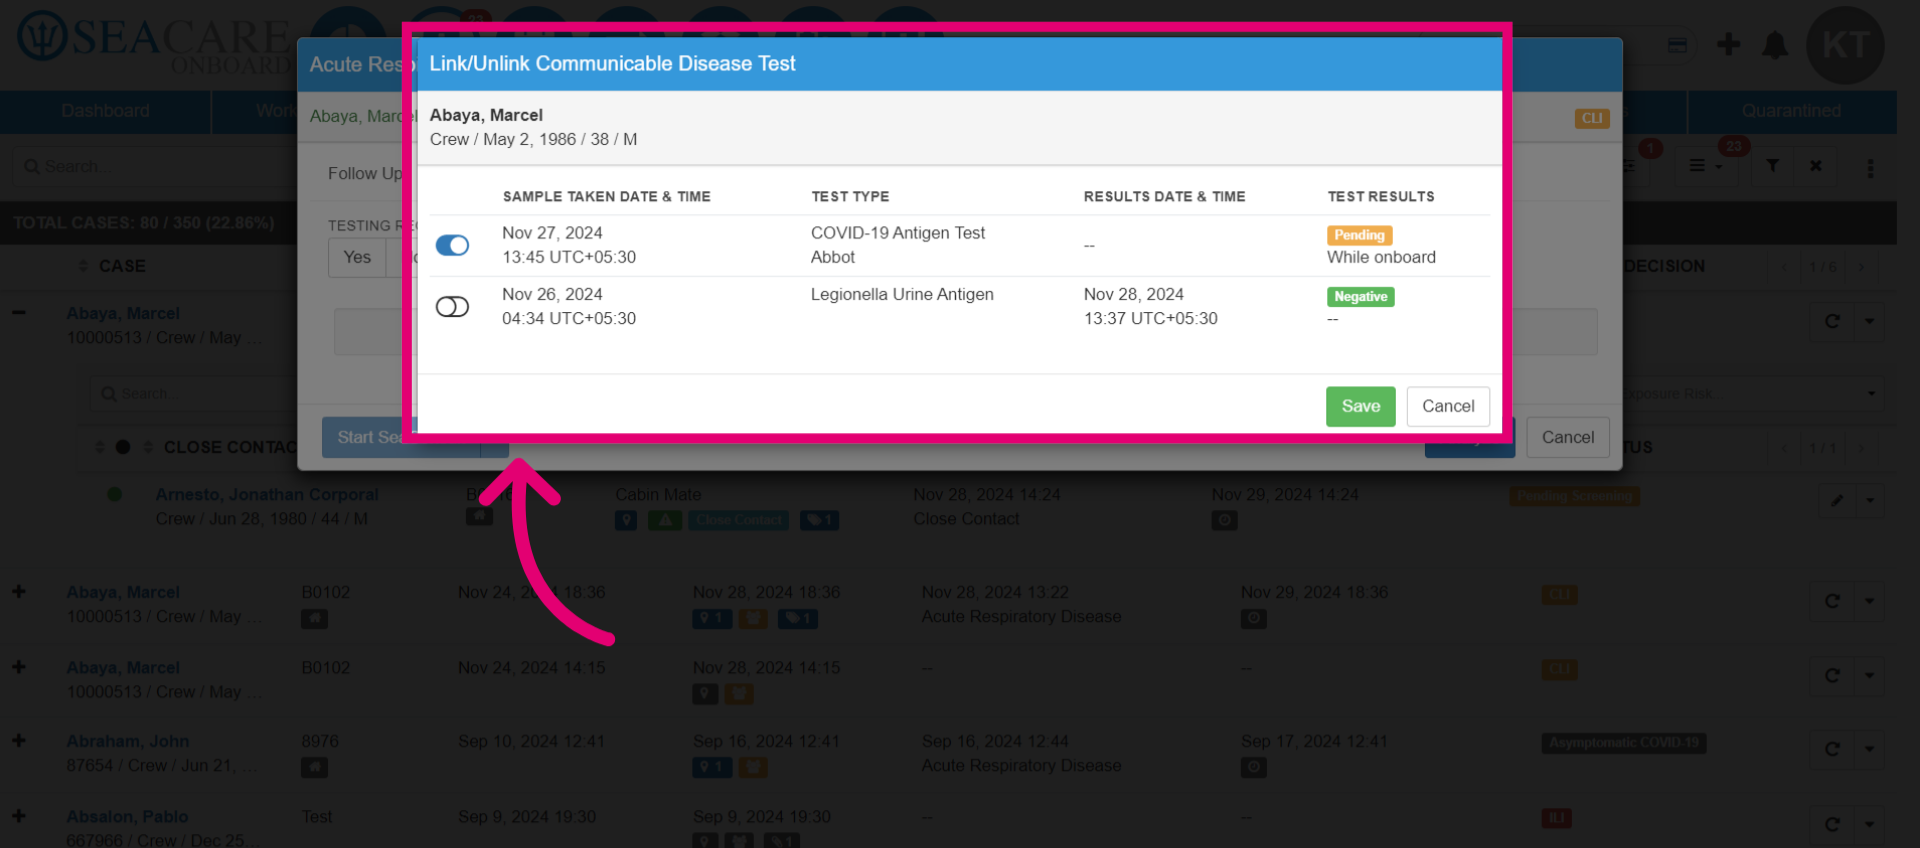
- To post the test results, use the toggle button for the test that is still pending and select Save. This will ensure the results are properly recorded.
- Enter the testing results in this window. Some fields will already be filled in since the test was previously created.
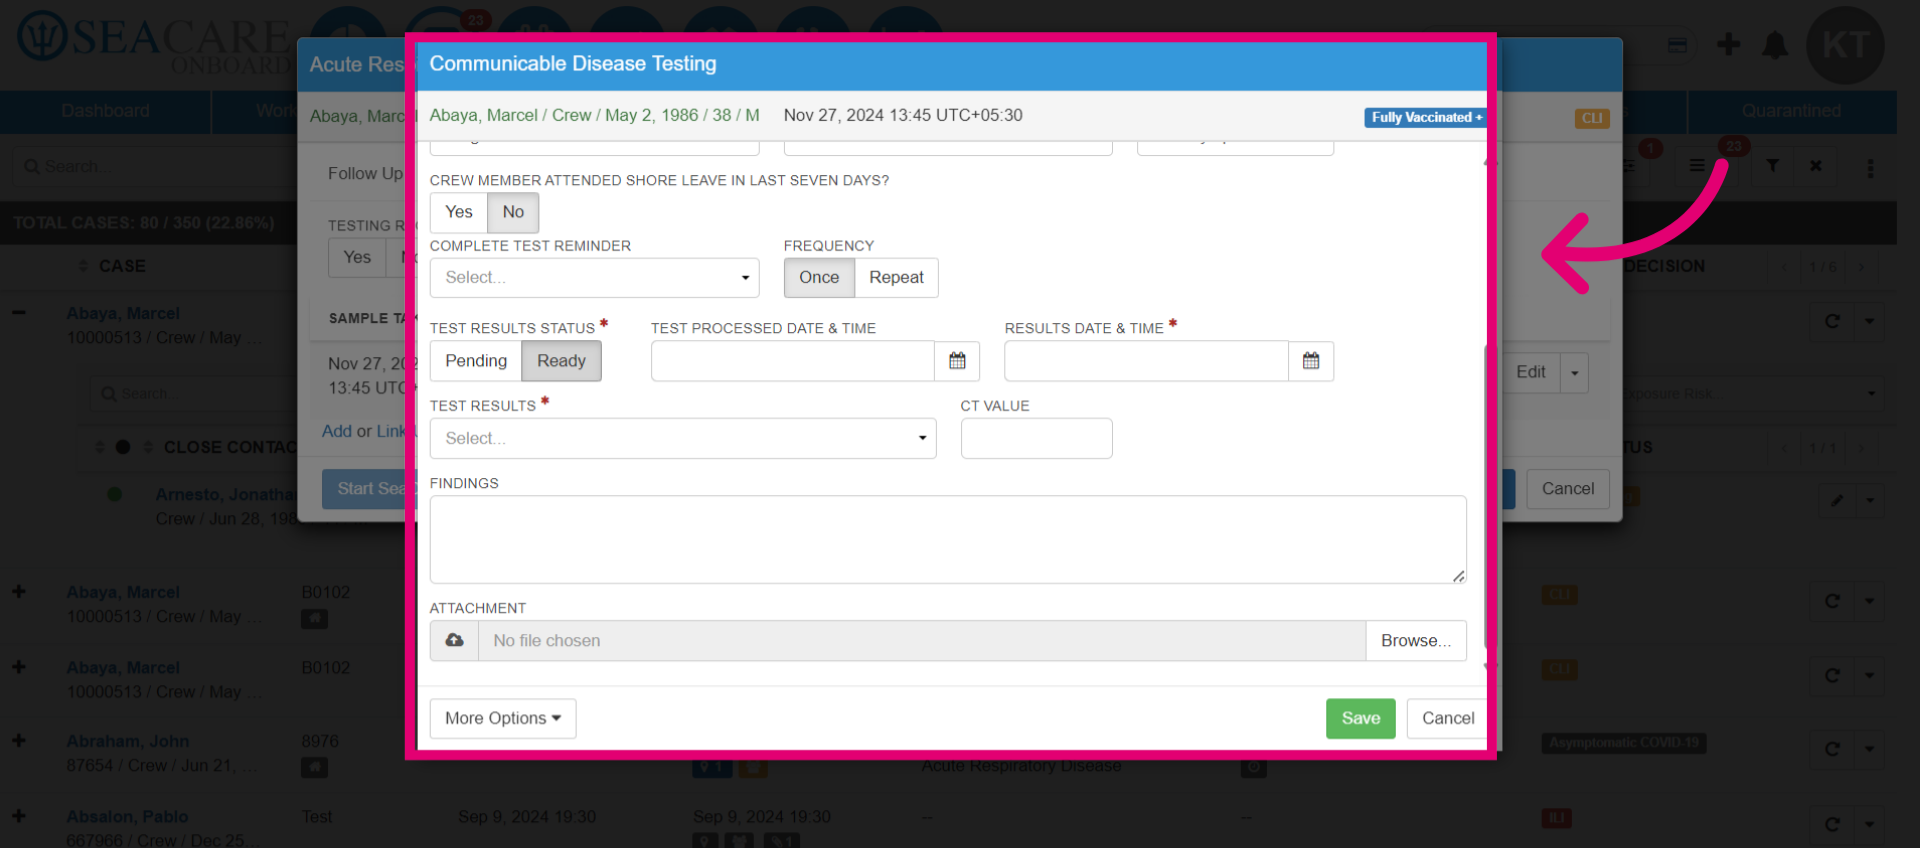
- Select the Test Result Status as Pending if the test results are not ready. Select Ready if the results are available.
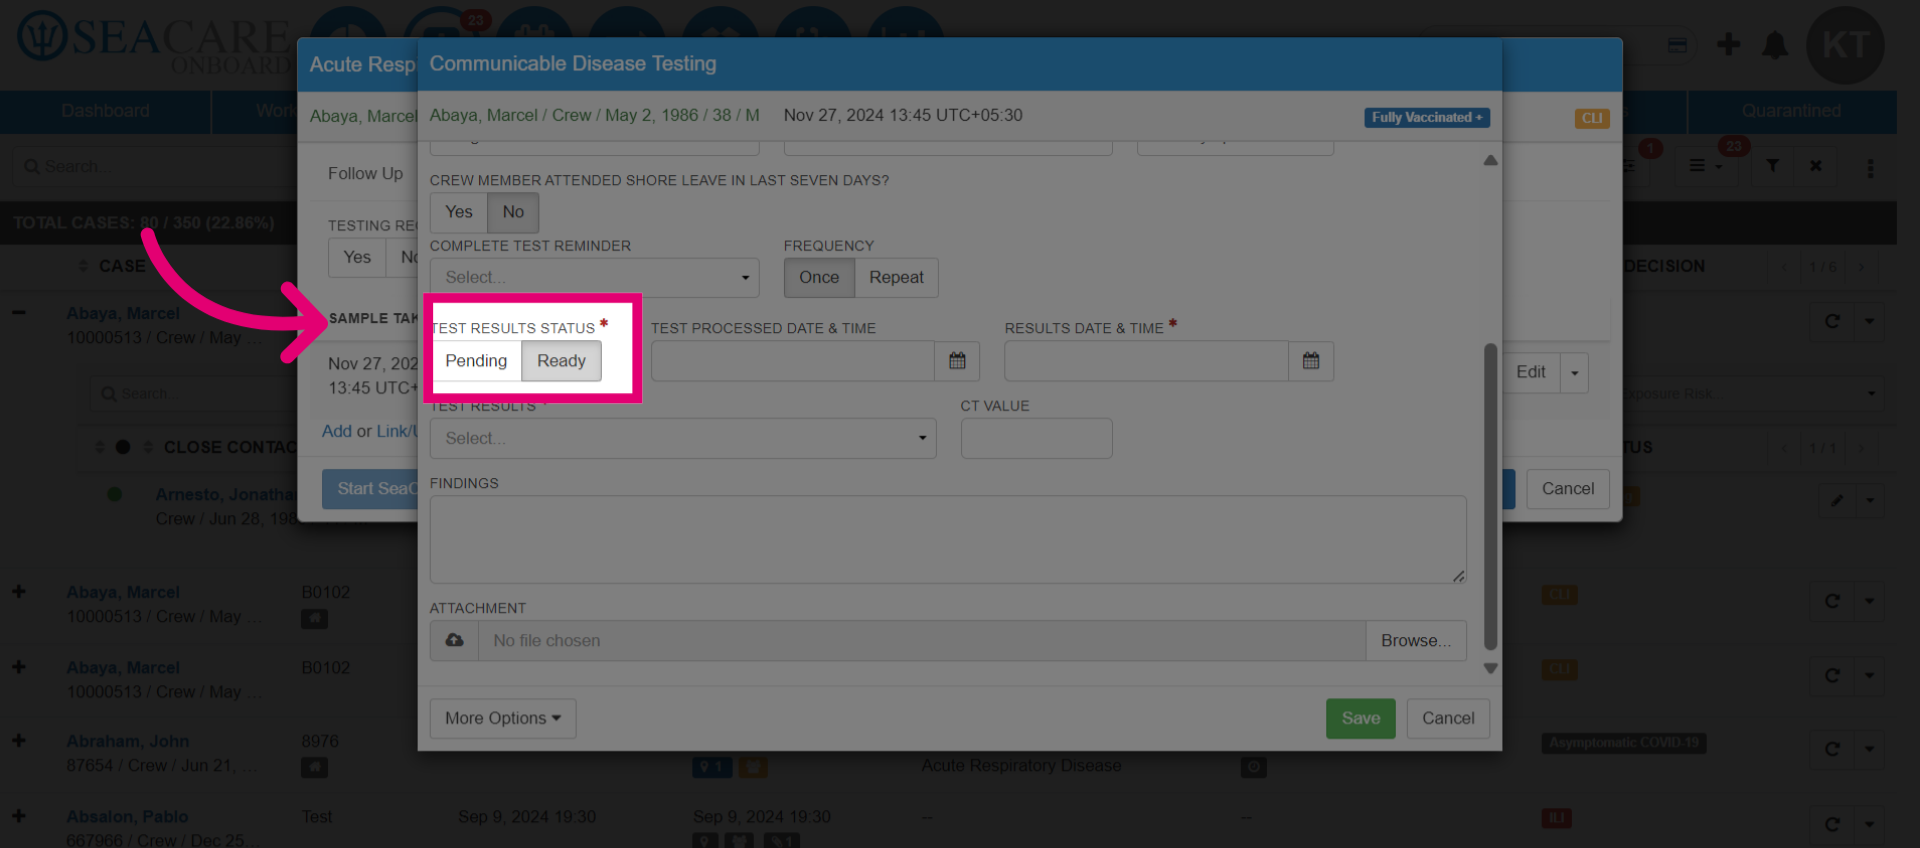
- Choose the Test Processed and Results dates.
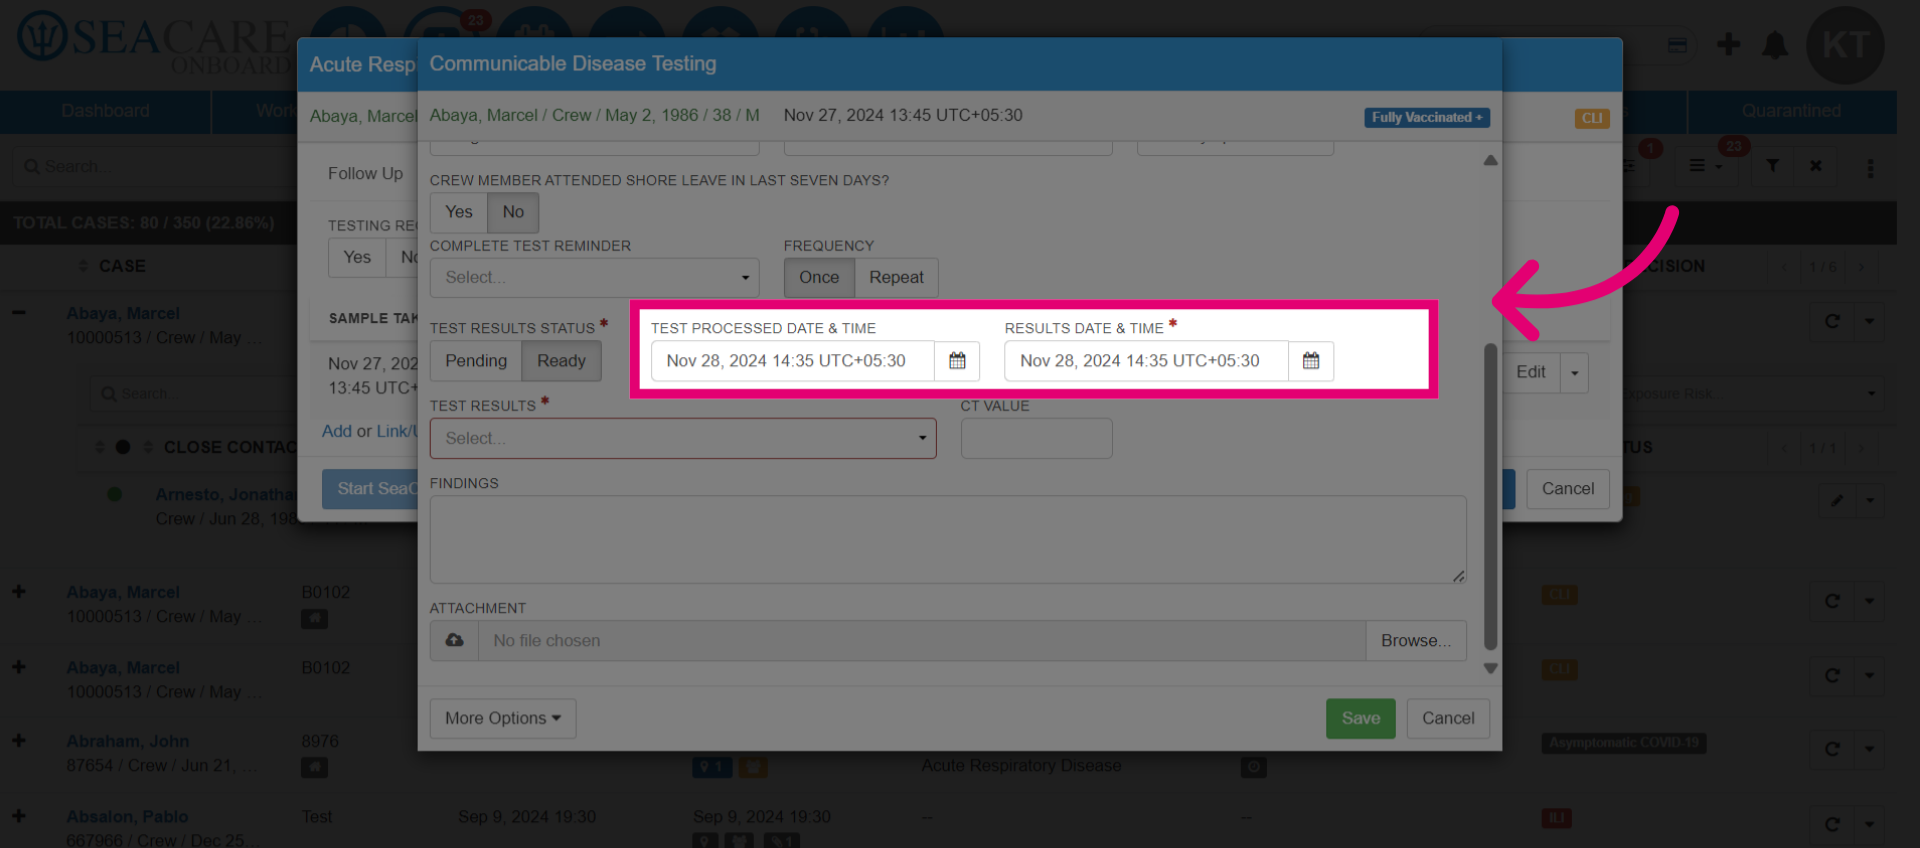
- Enter whether the test result is Negative or Positive. Add a CT Value if applicable, and include notes for any findings. Upload any relevant documents, such as the test result, to be saved in the patient chart.

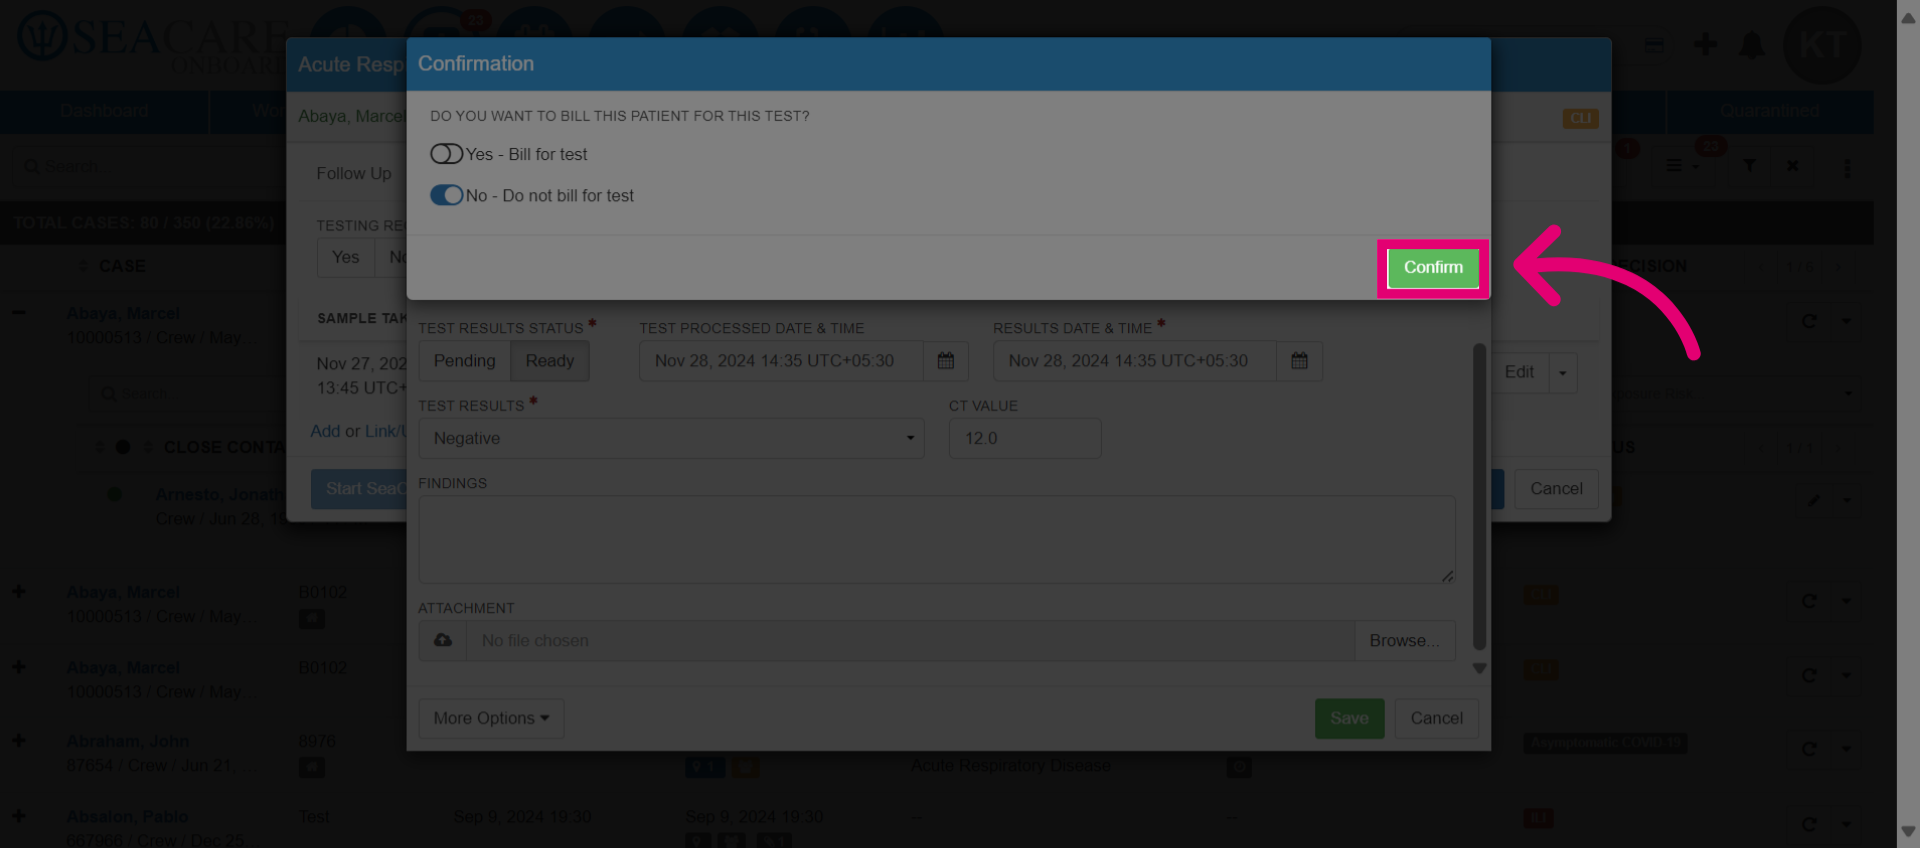
- Enable the billing options by toggling the button. This allows you to charge the patient for testing. Note that crew members are not charged for testing, but guests may be. Ensure you review the billing details before finalising.
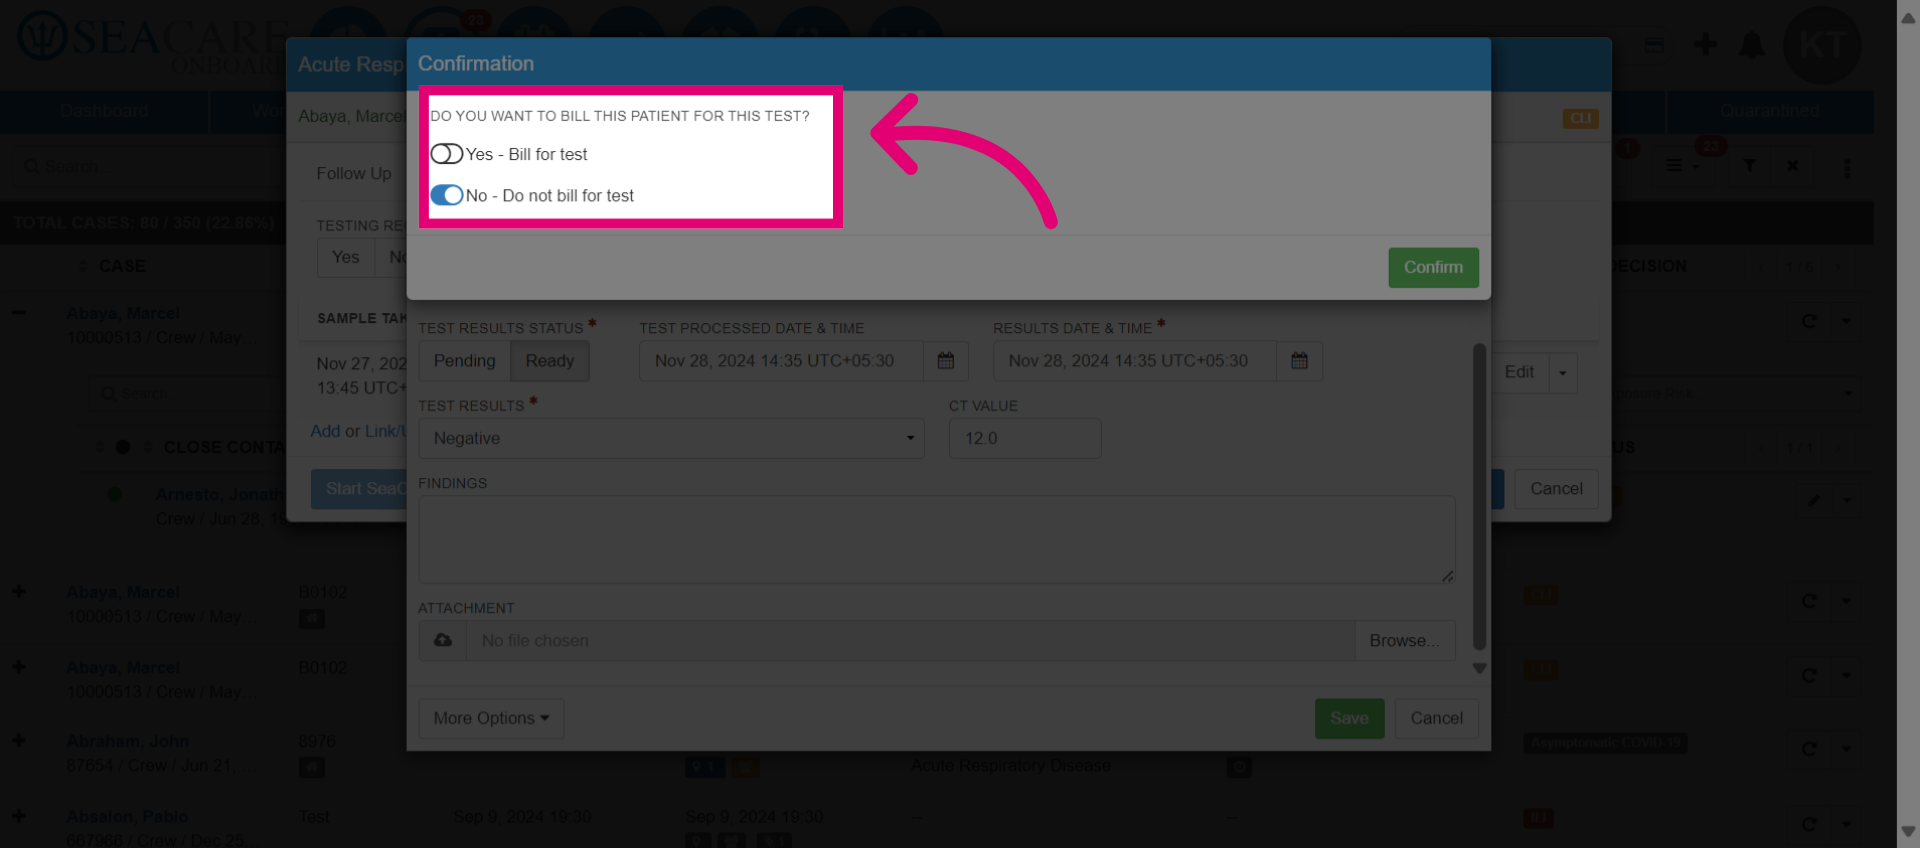
- Click Confirm once you've finished.
- Next, go to the Isolation tab to manage Isolation updates for the case.
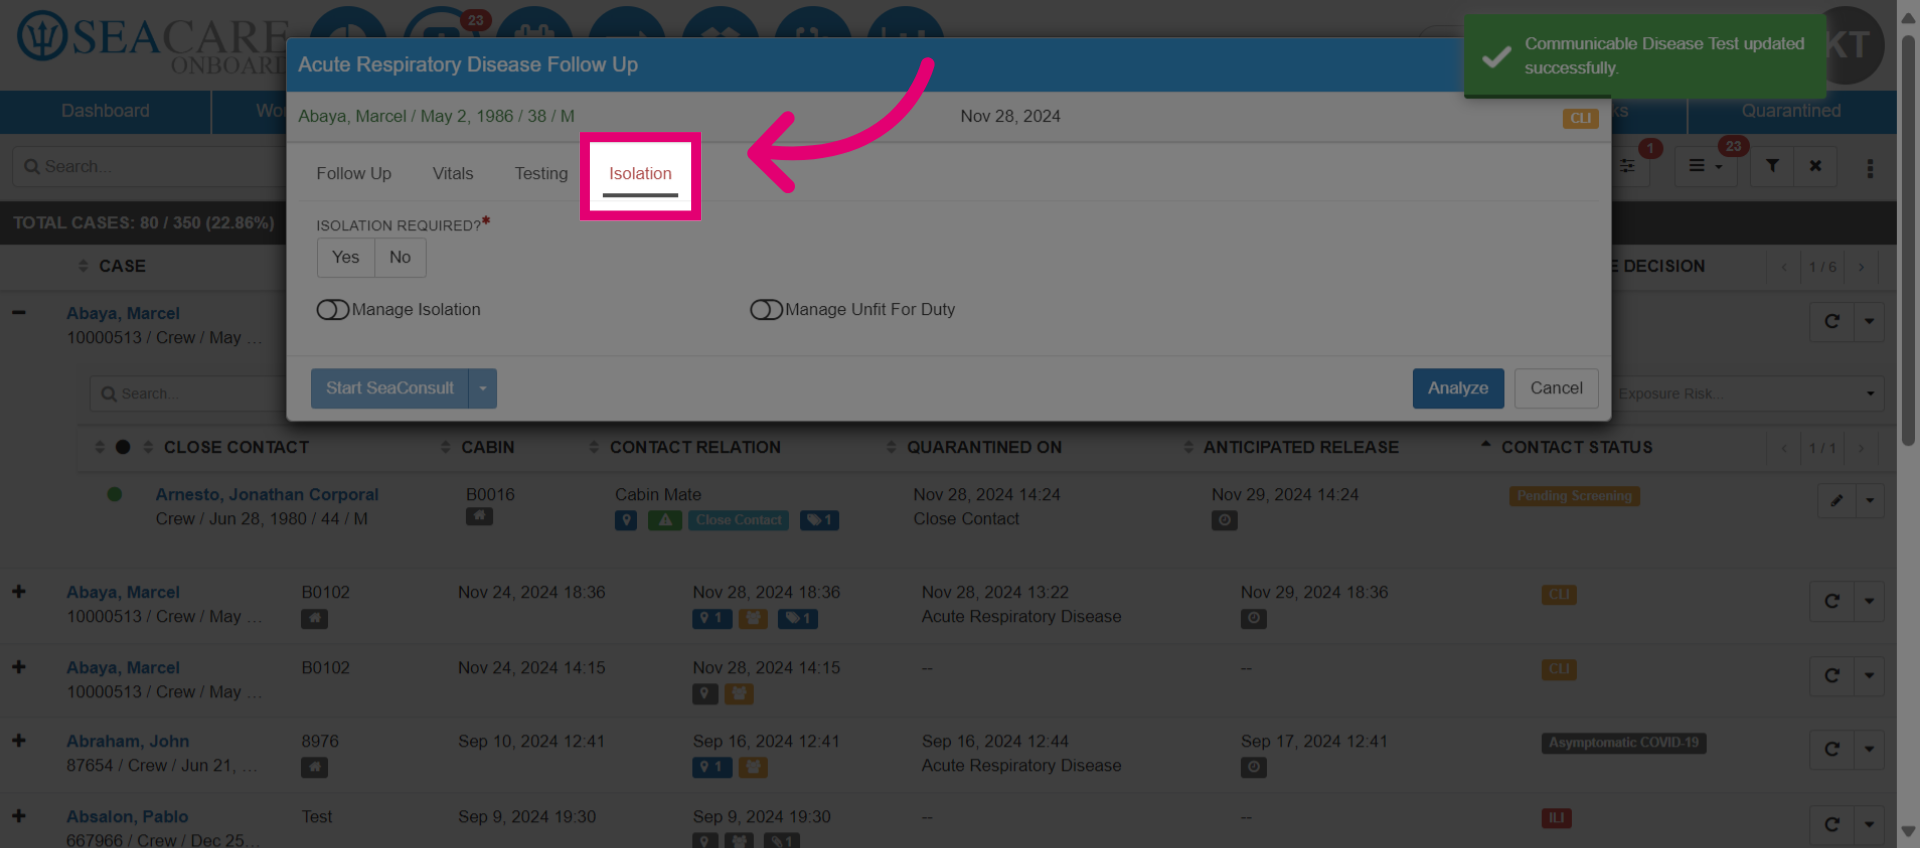
- Choose whether Isolation is required.

- Toggle on the options to manage Isolation and Unfit for Duty.
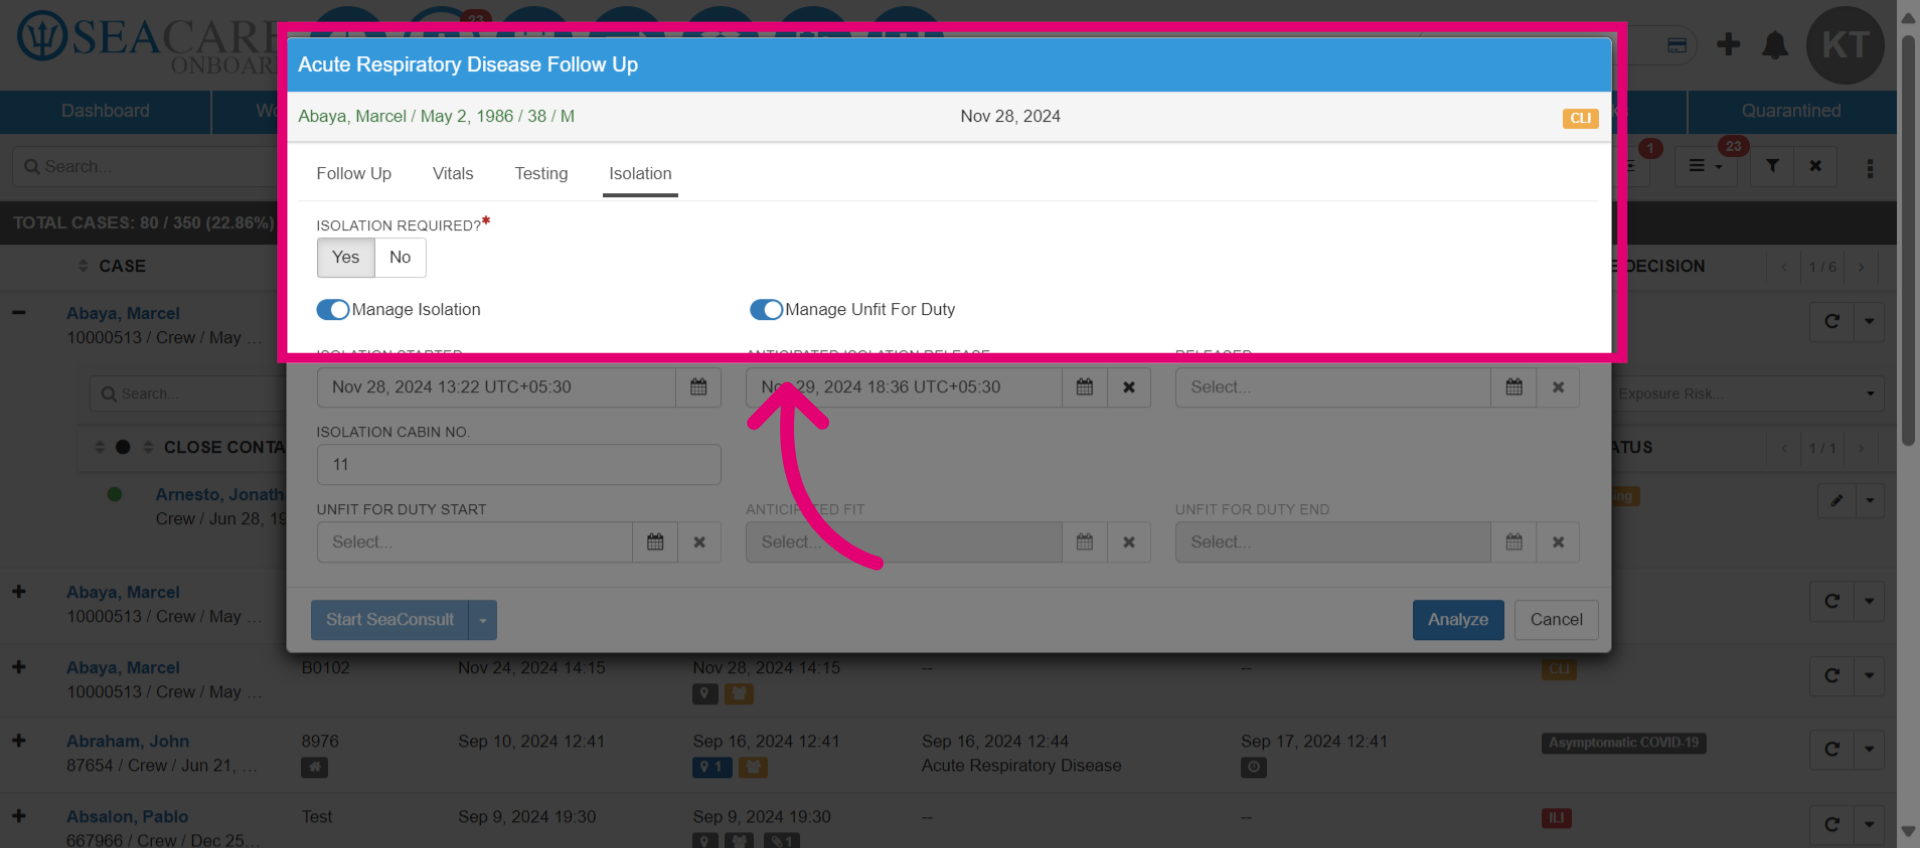
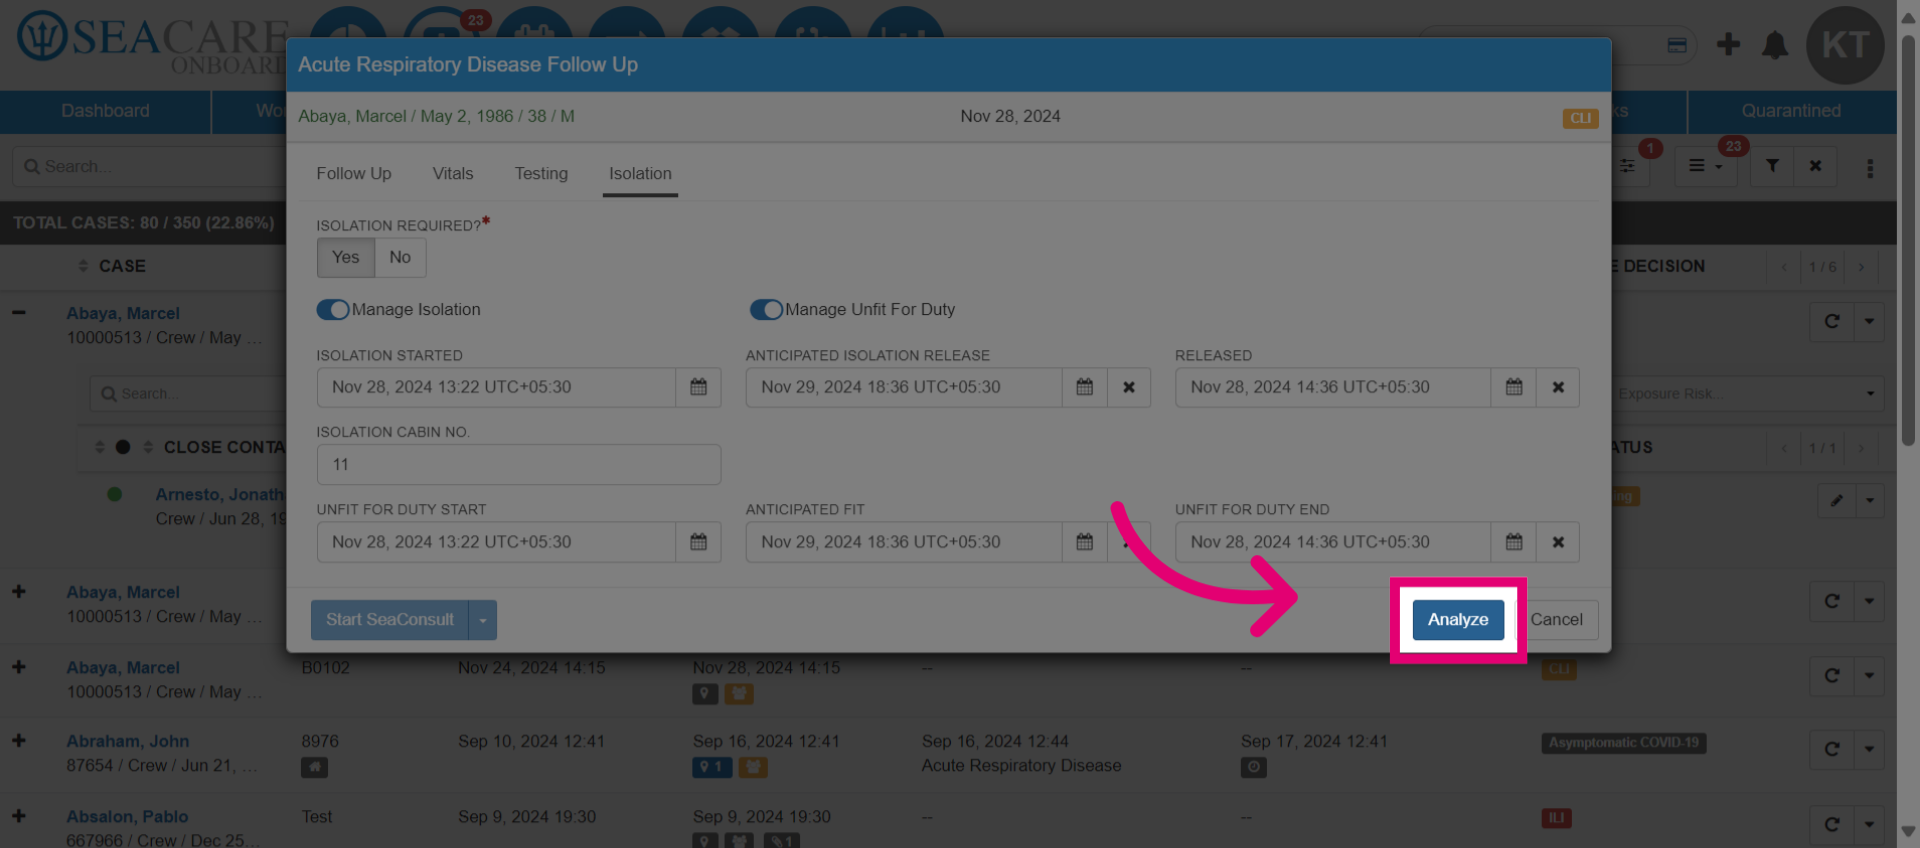
- Choose the Isolation start and end dates.

- Click Analyze once you've added in all of the Isolation details.
- Finally, click Save.