New article
Recently updated
Documenting communicable disease Quick Entries

Who is this article for?Users who want to learn to document communicable disease quick entries.
No elevated permissions are required.
This guide offers a step-by-step walkthrough for documenting one or more communicable disease cases using Quick Entry.
1. Documenting communicable disease Quick Entries
1.1. Video
1.2. Steps
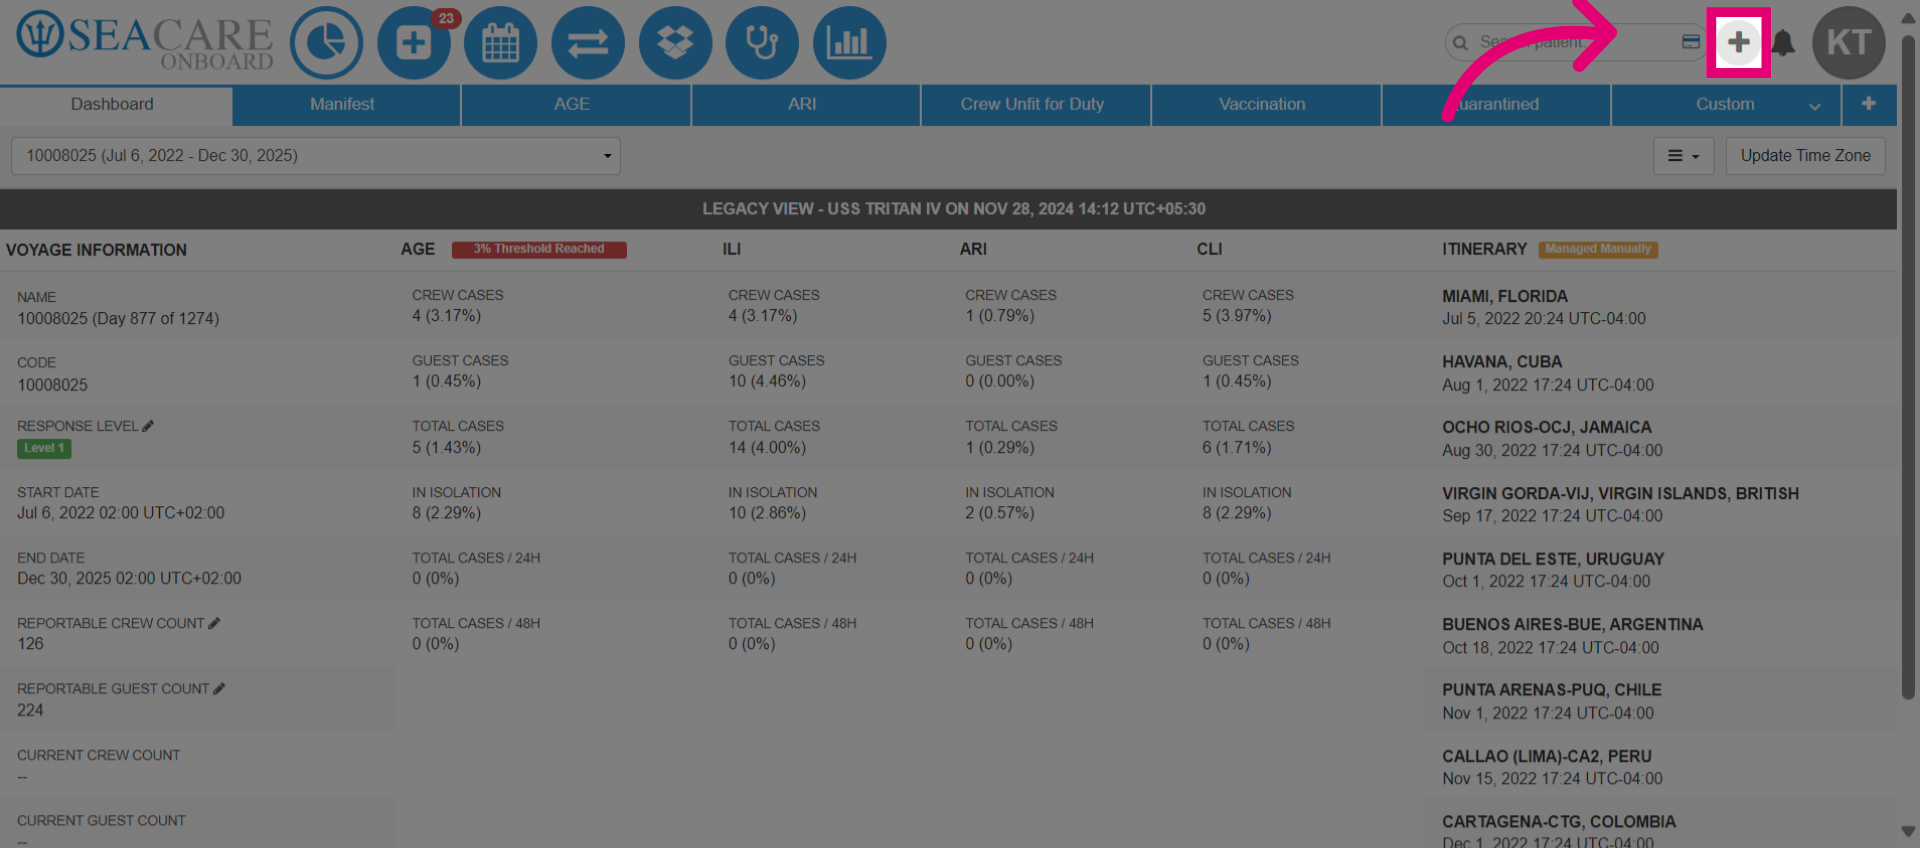
- Select the plus sign button and access Quick Entry section.
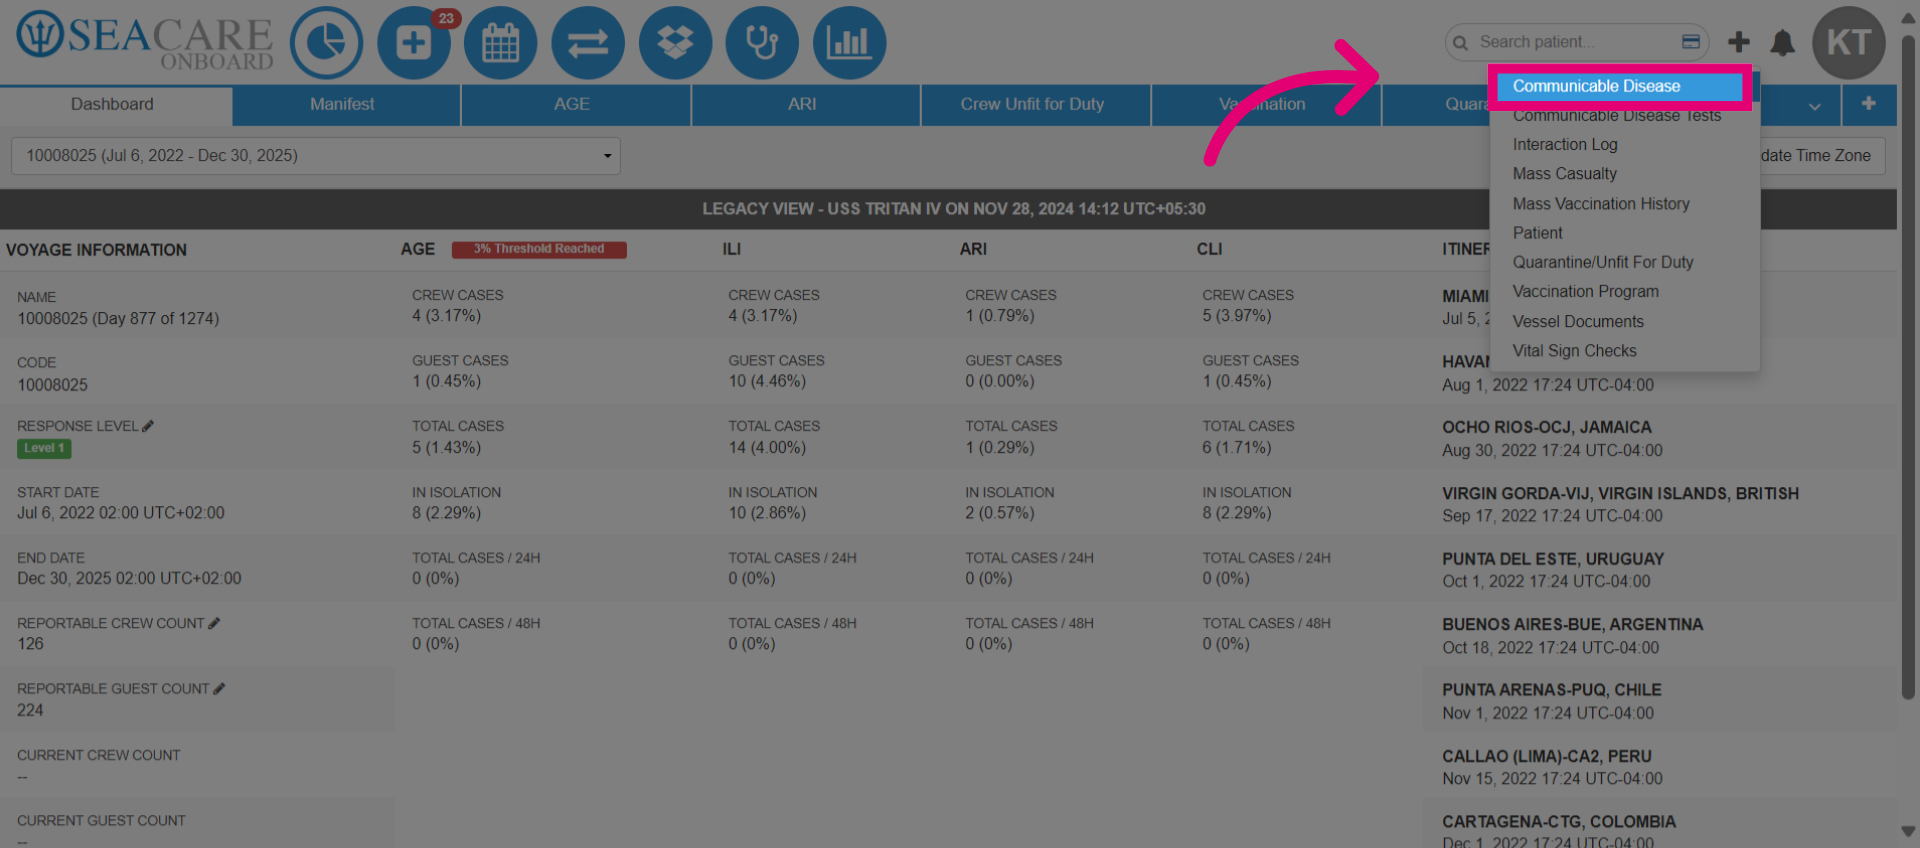
- Navigate to the Communicable Disease section.
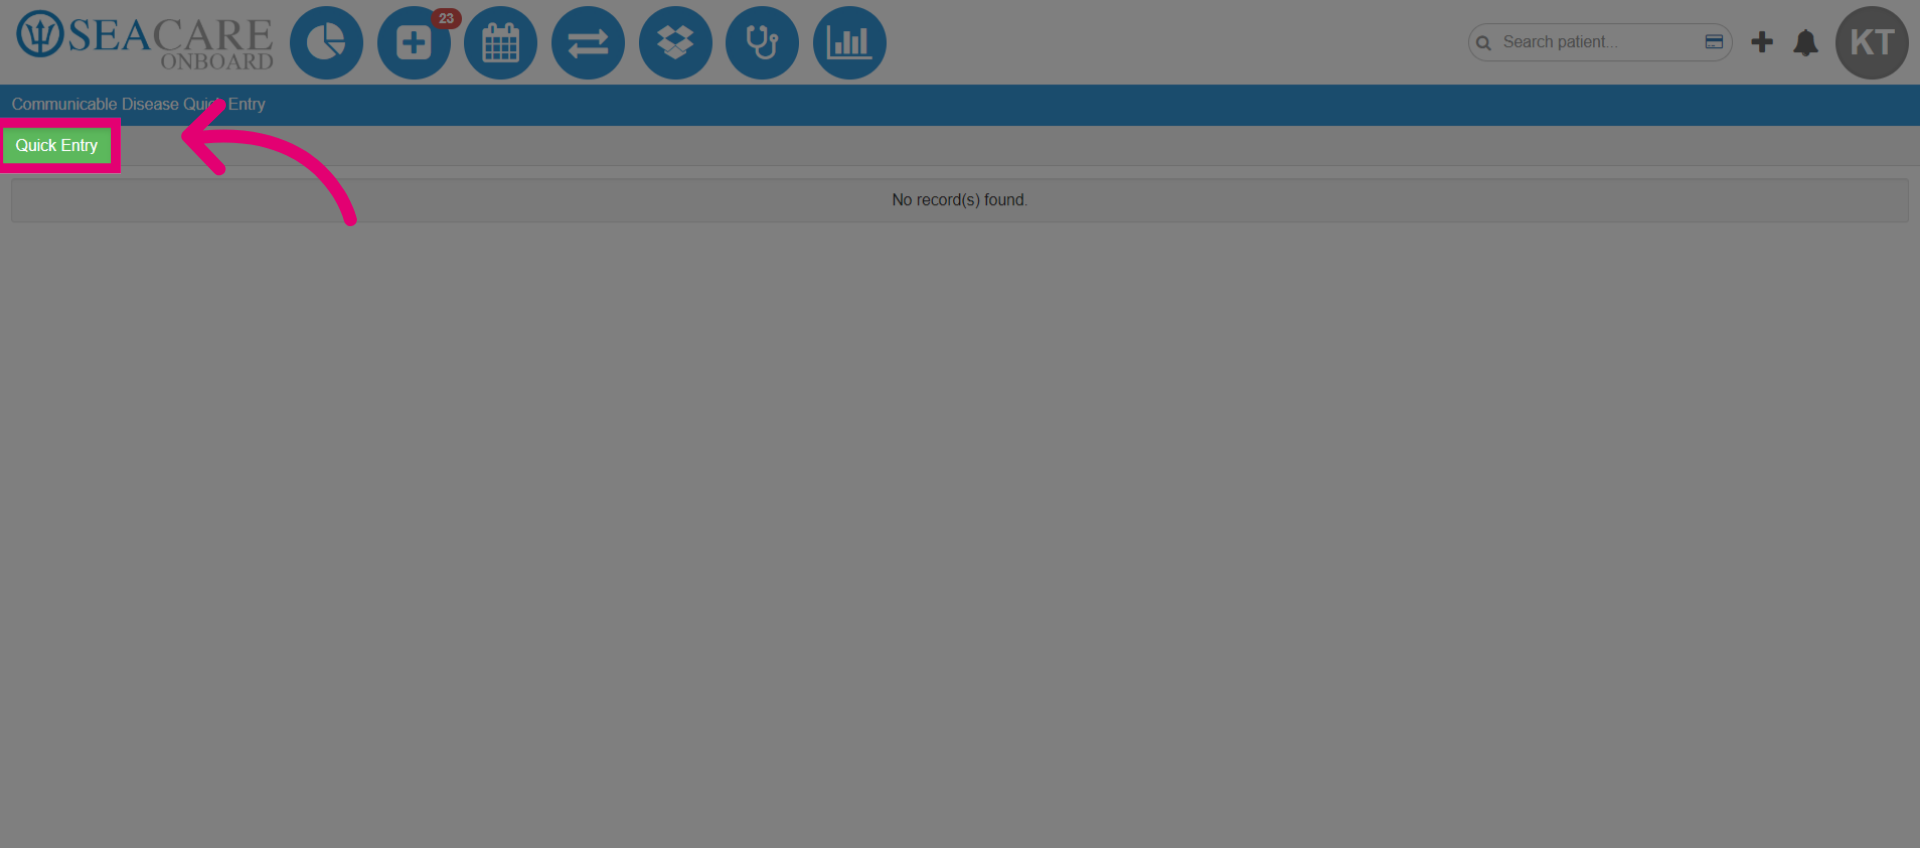
- Select the green Quick Entry tab to open the Communicable Disease section.
- Make sure you are in the Details sub-tab. Then, select the relevant communicable disease from the list: acute gastroenteritis (AGE), acute respiratory disease (ARD), or varicella (viral rash).
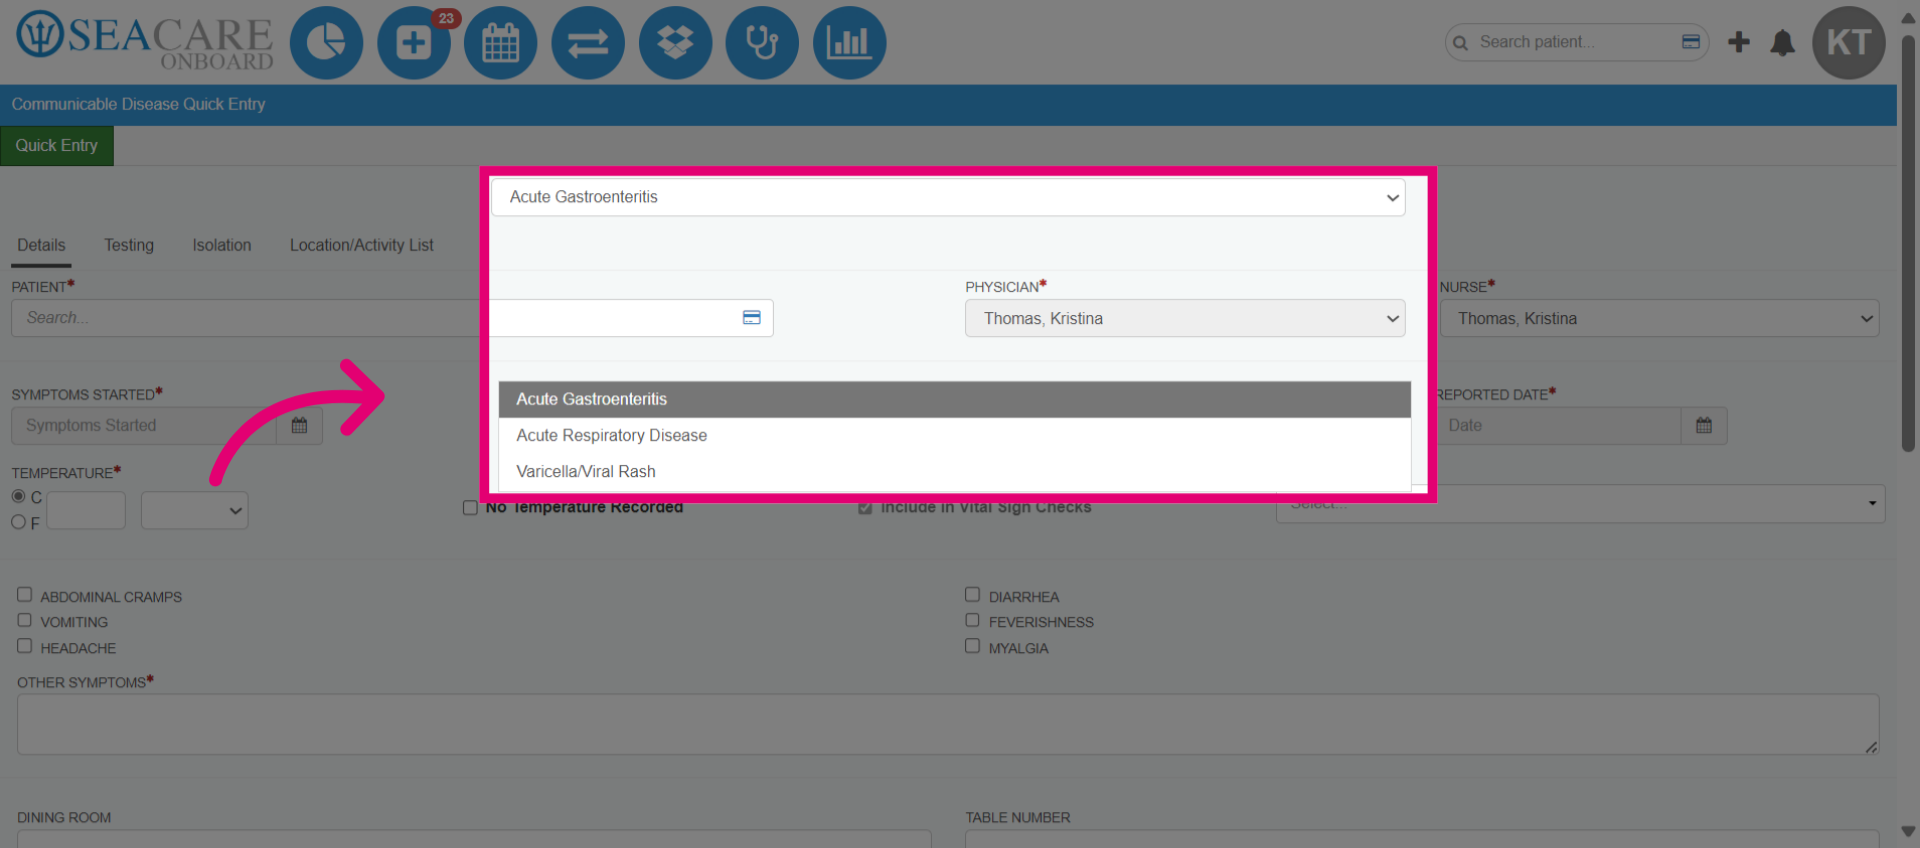
- The communicable disease quick entry module will prompt the user with questions related to the onset of symptoms that will be filled in under the Details tab.
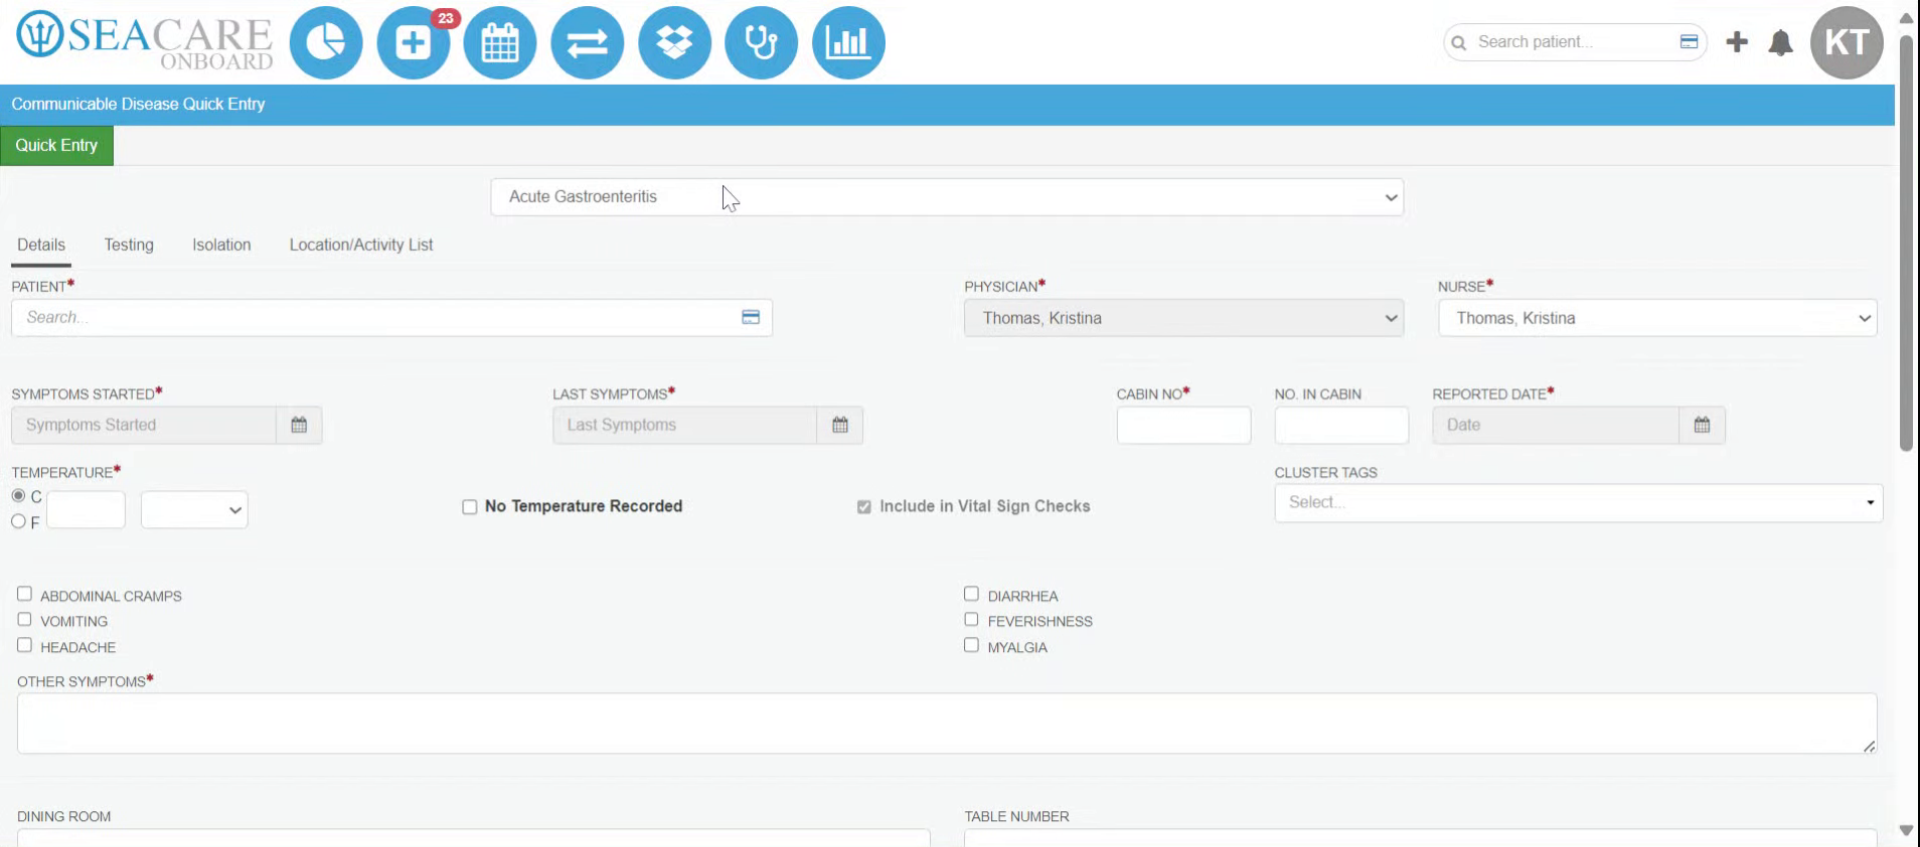
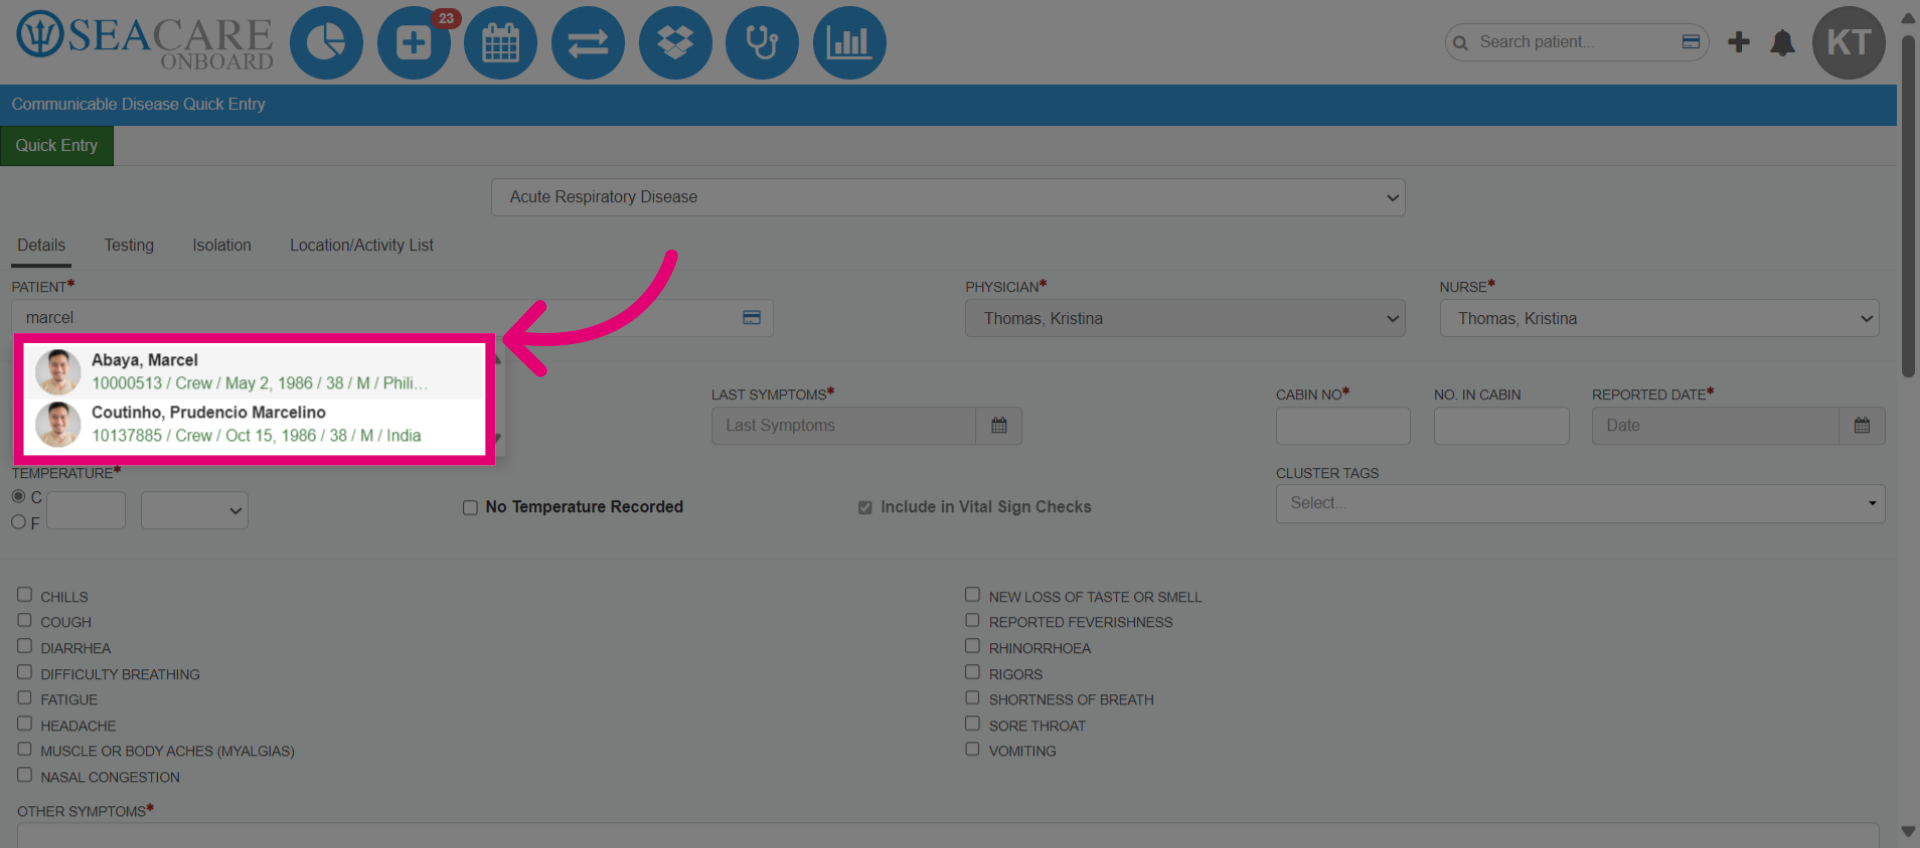
- The Physician and Nurse name is pre-populated. Enter the patient name into the smart search then, select the patient from the list to beginning documenting the case details.
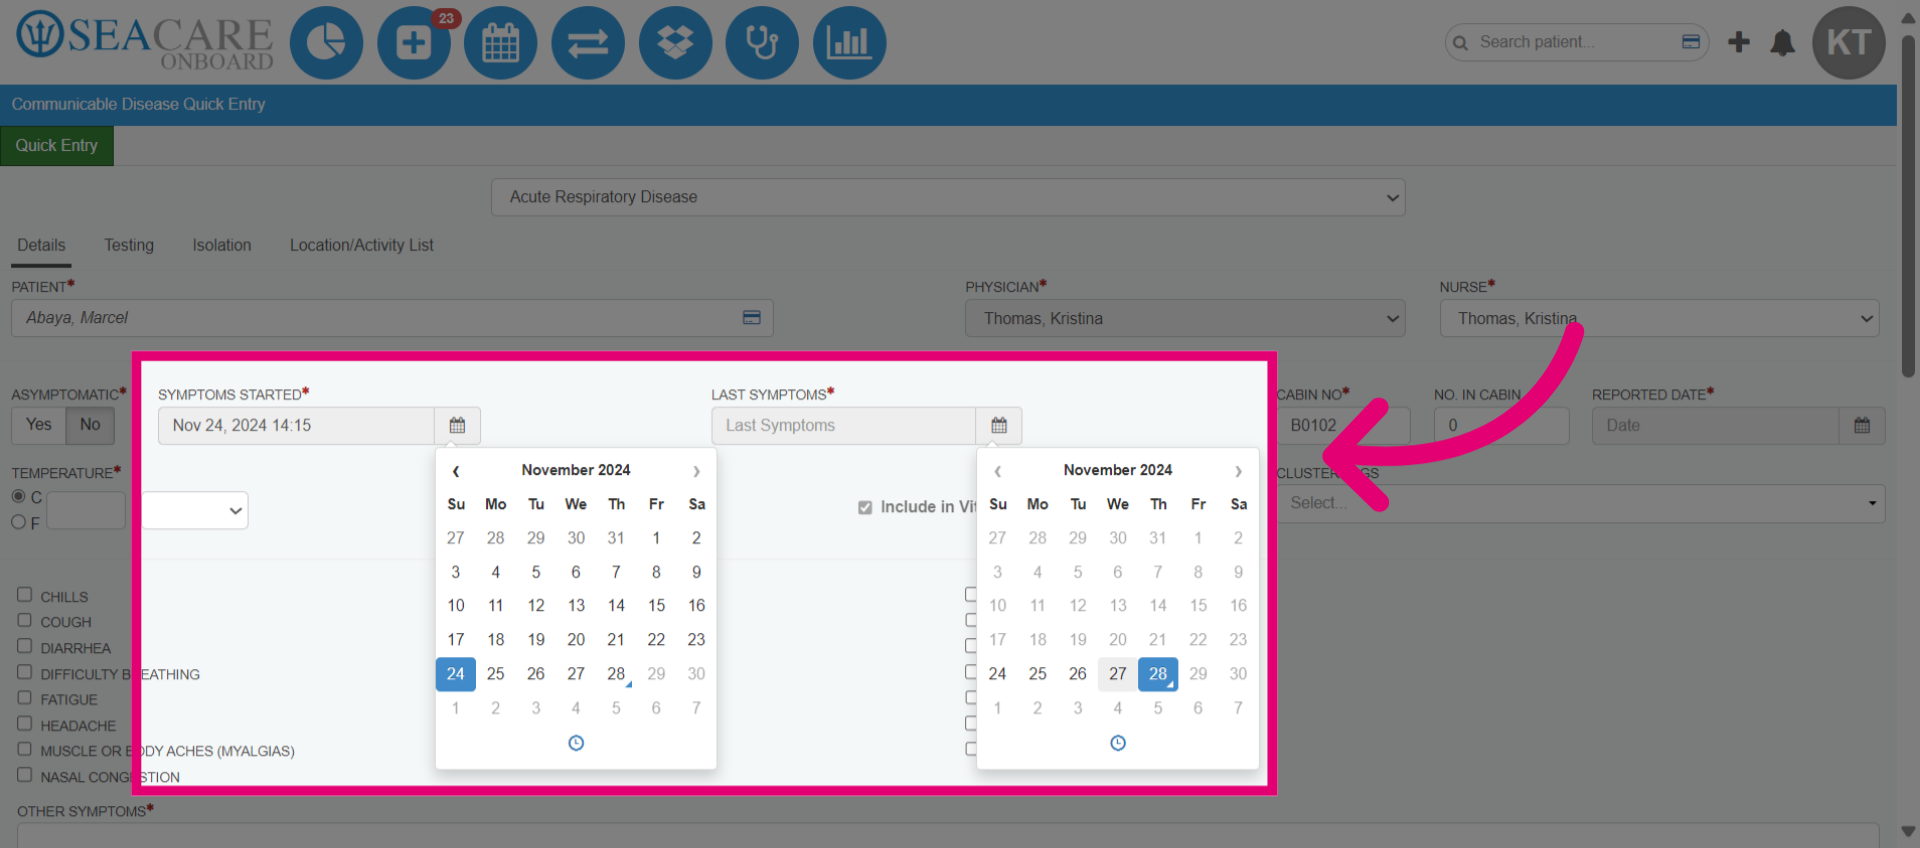
- Begin adding case details. Fill in as many details as desired. Required fields have an asterisk. Indicate whether the patient is asymptomatic or experiencing symptoms.
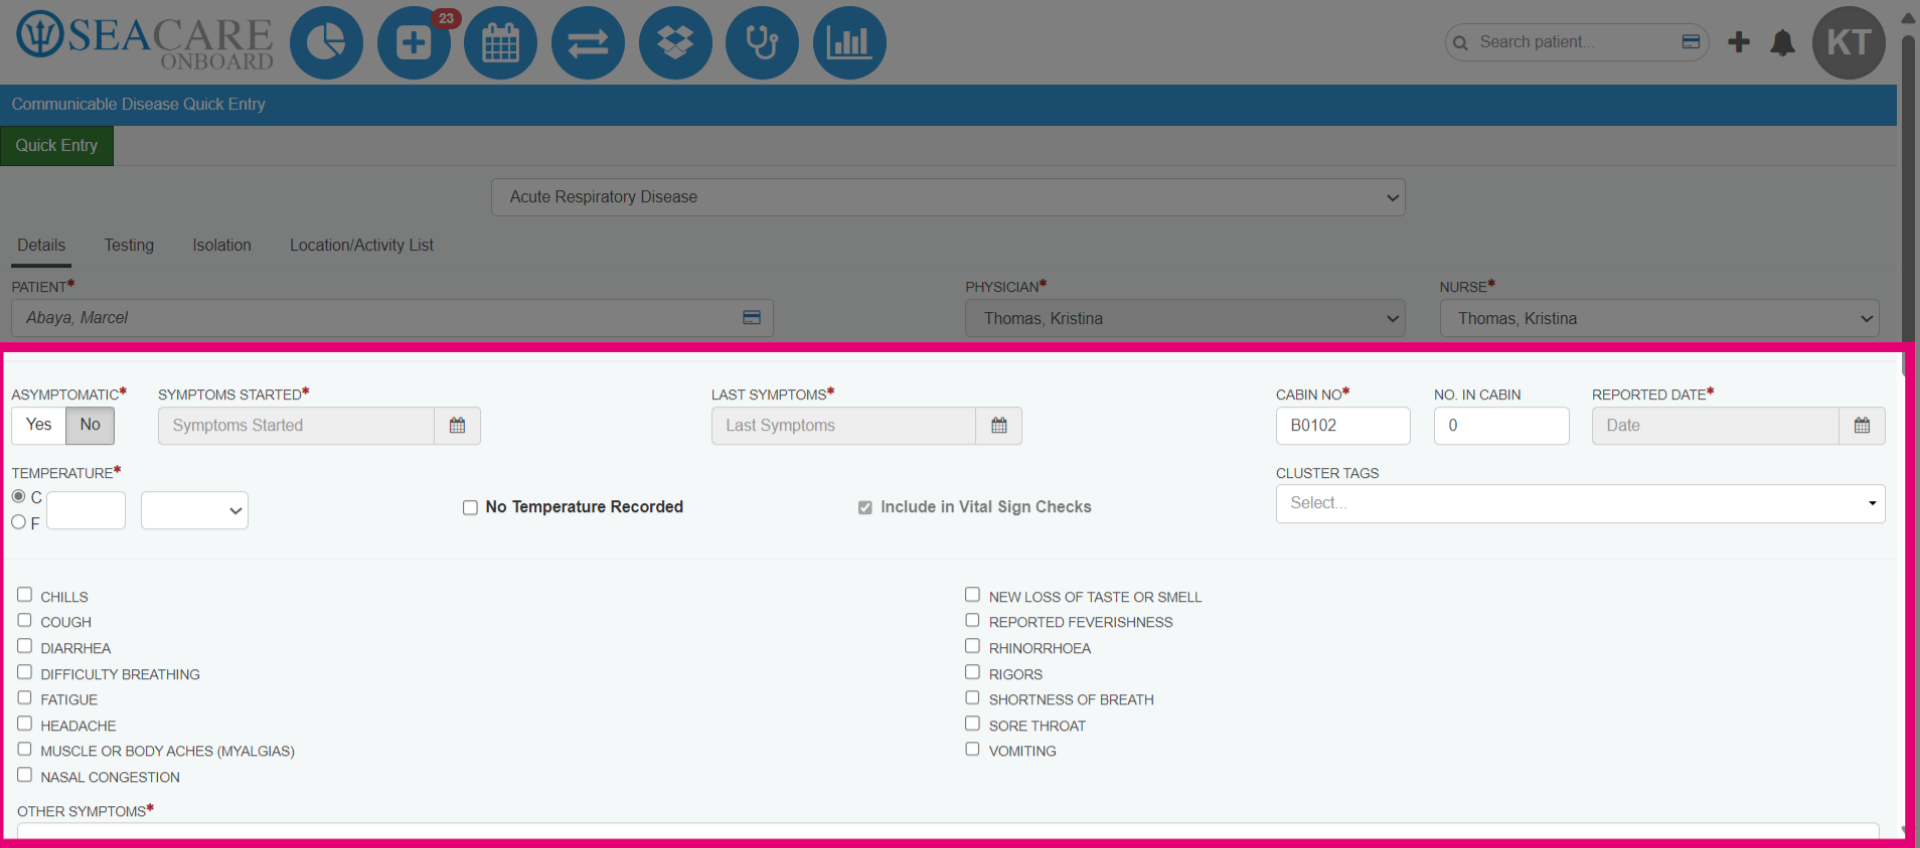
- Enter the date the symptoms started and the date of the last symptoms the patient experienced.
- Fill in the required fields for cabin number, number of people in the cabin and the date the symptoms were reported.
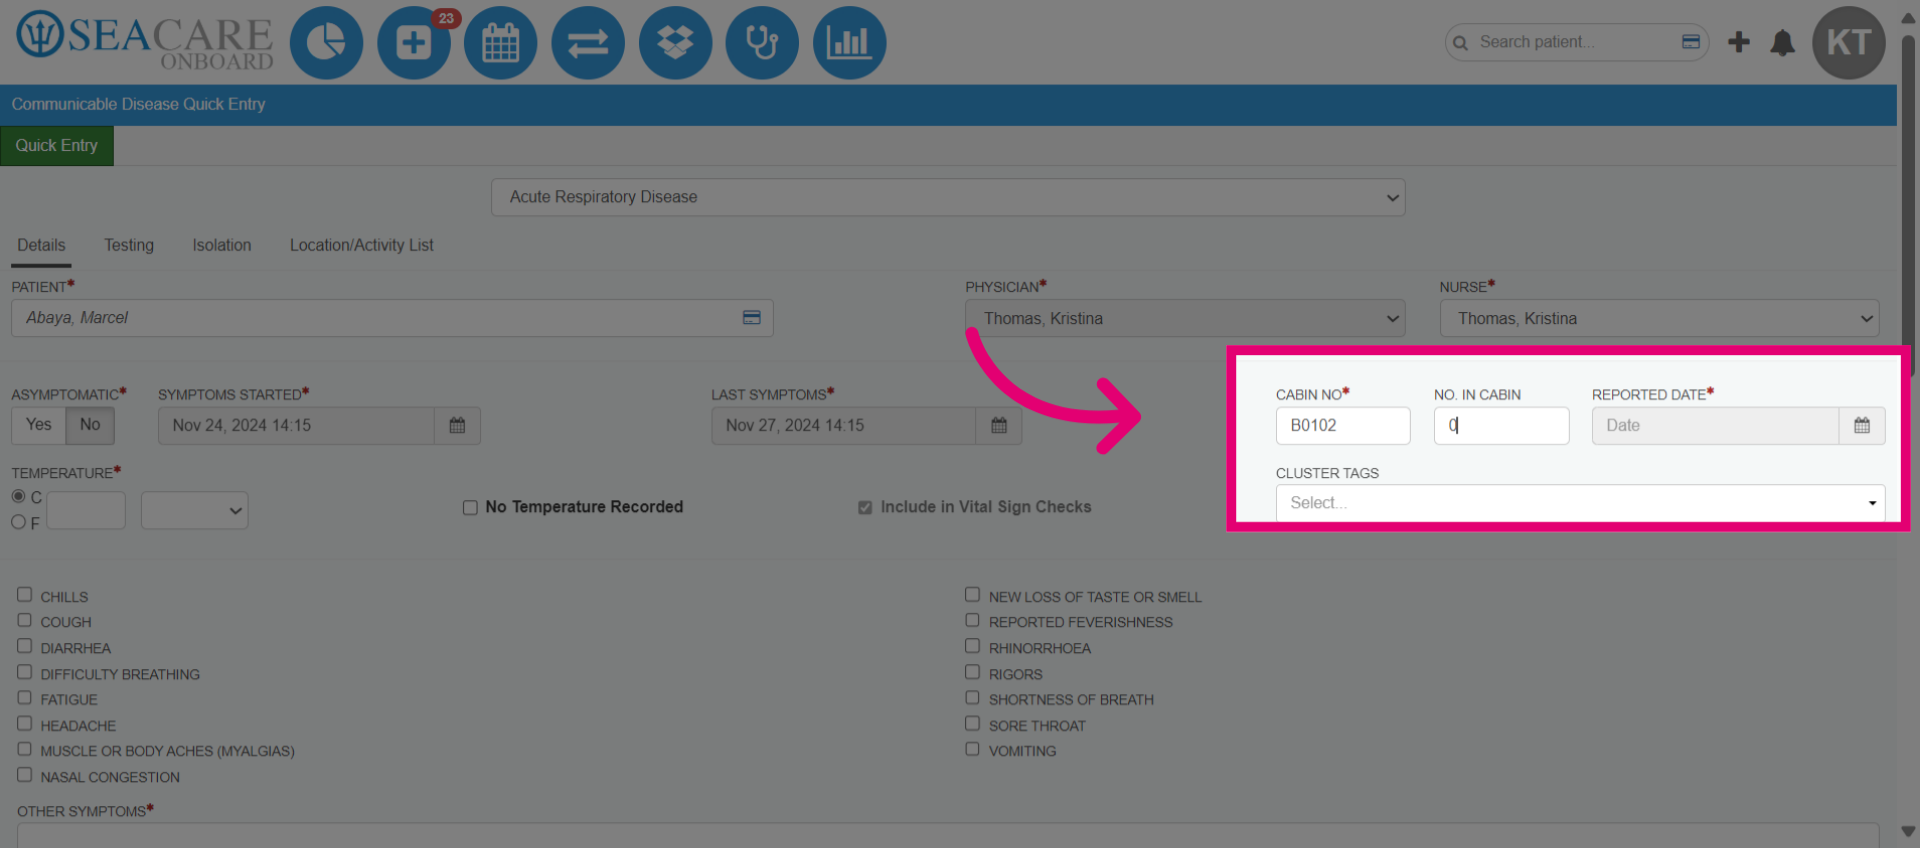
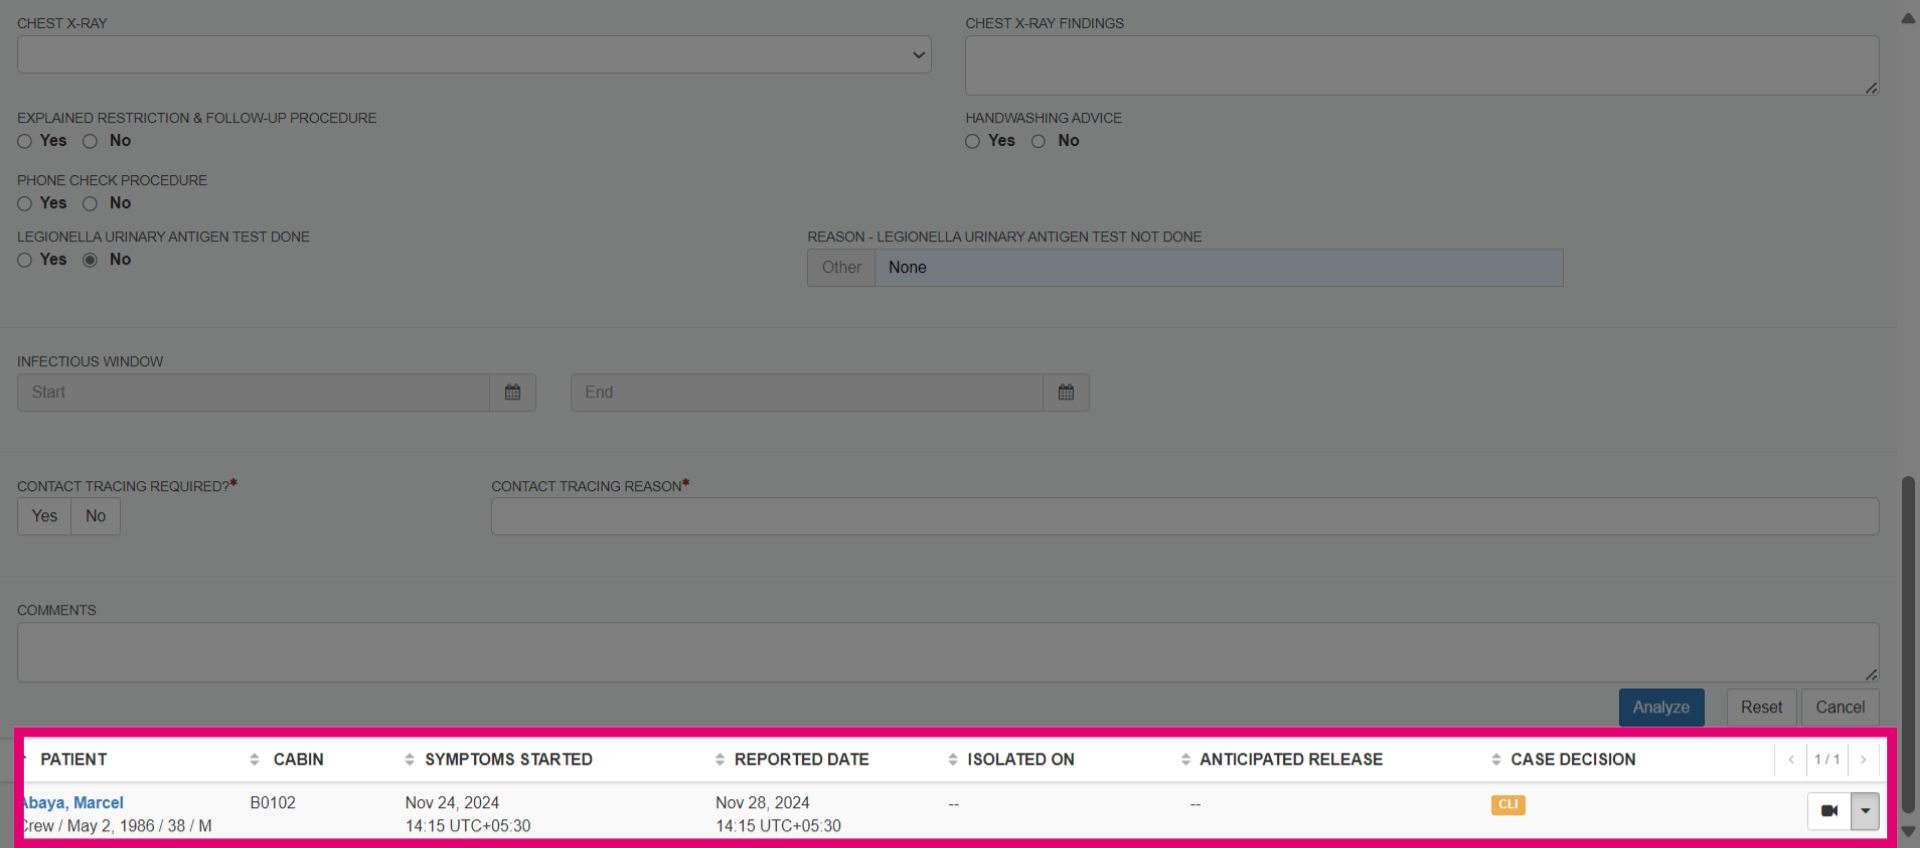
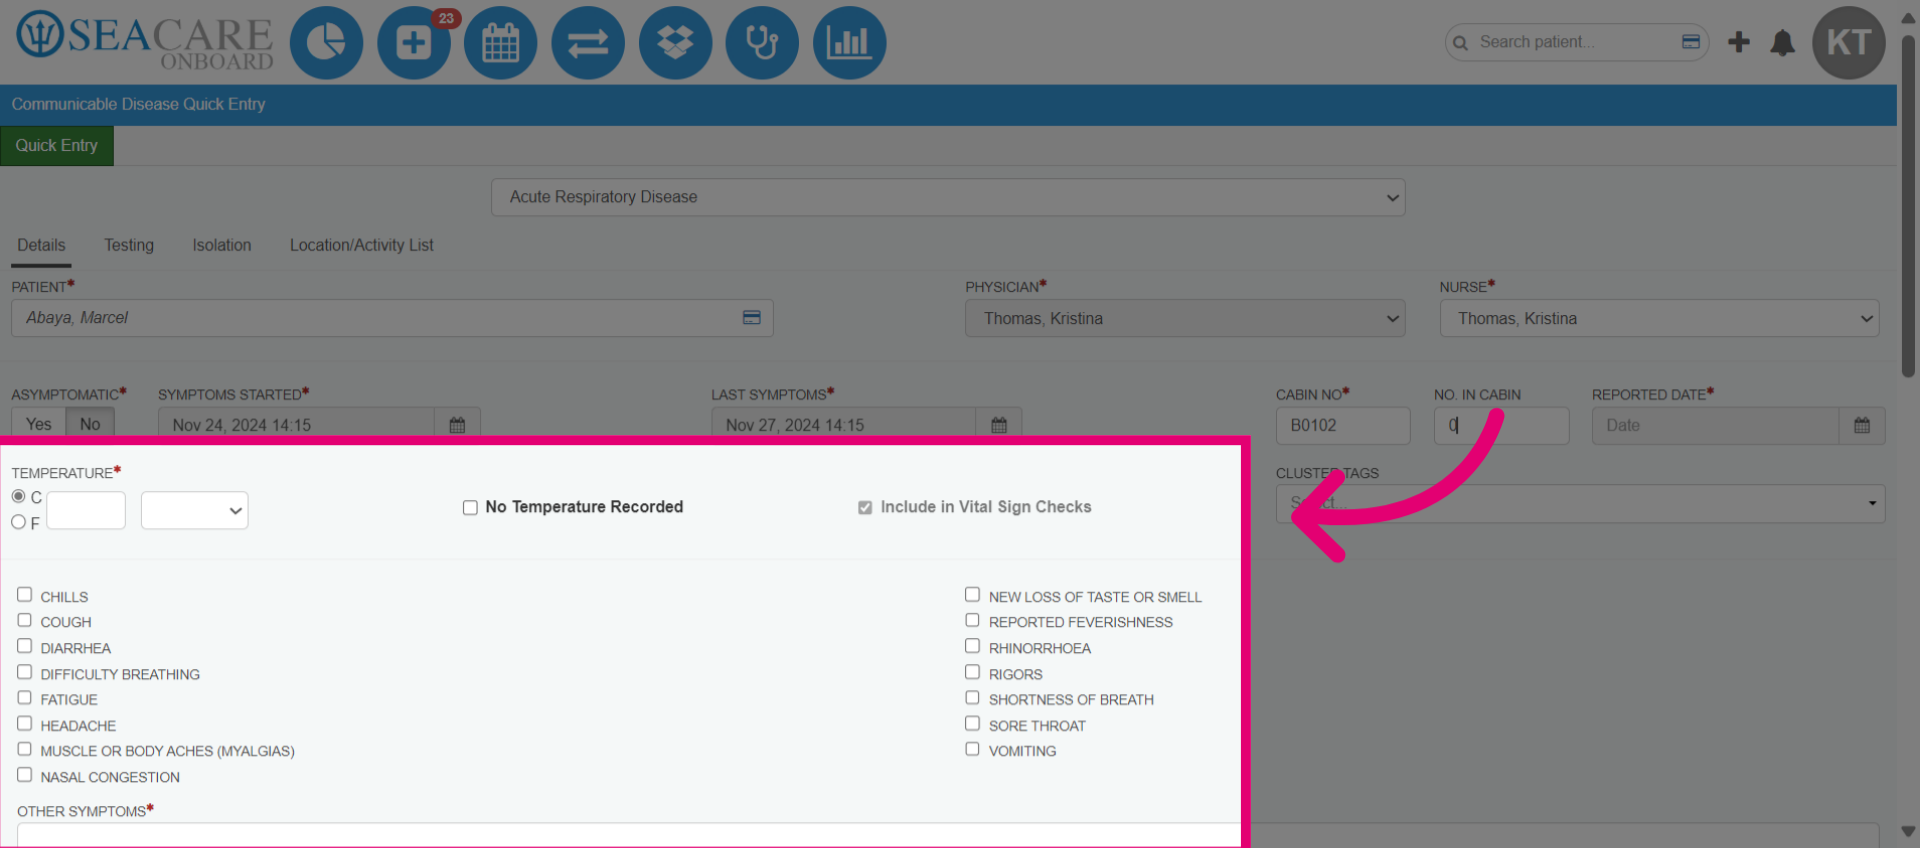
- Add the patient's temperature or check the "No temperature recorded" box if none was taken. By default, temperature is included in vital sign checks but is optional. Add cluster tags if the patient was at any events with other cases, and use checkboxes to mark symptoms.
- Confirm that no symptoms are present in the Other Symptoms field, then answer the questions in this section. Required fields include specimen requested and food handler. If a specimen was requested, indicate whether it has been received.
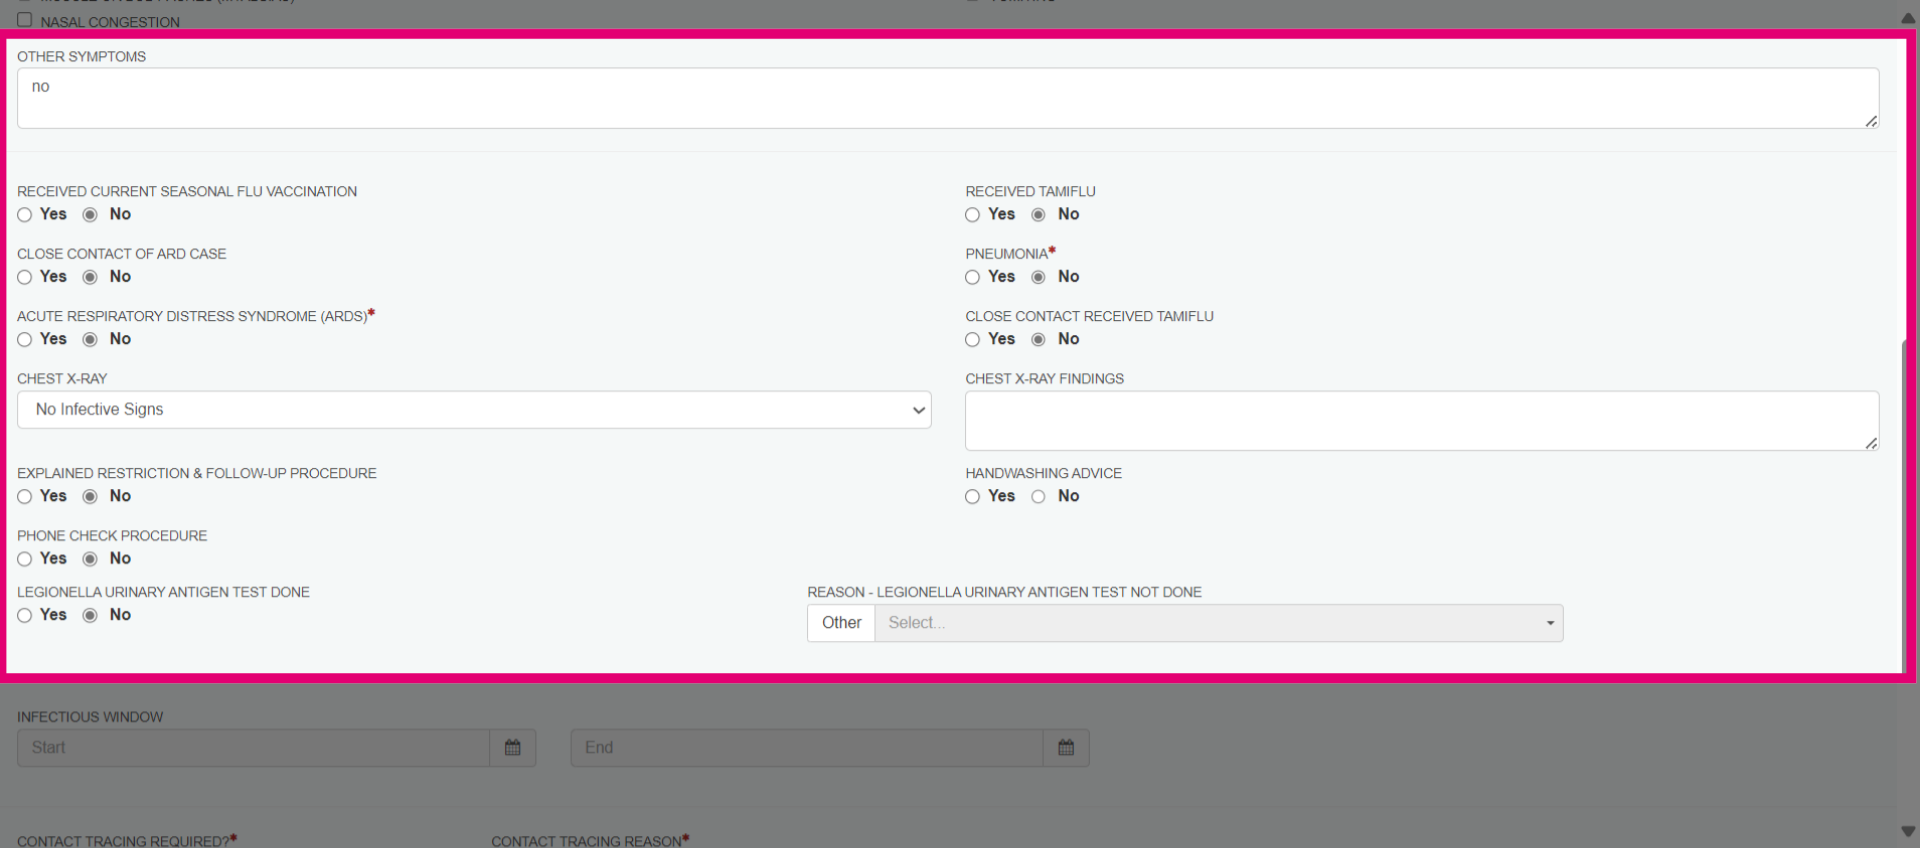
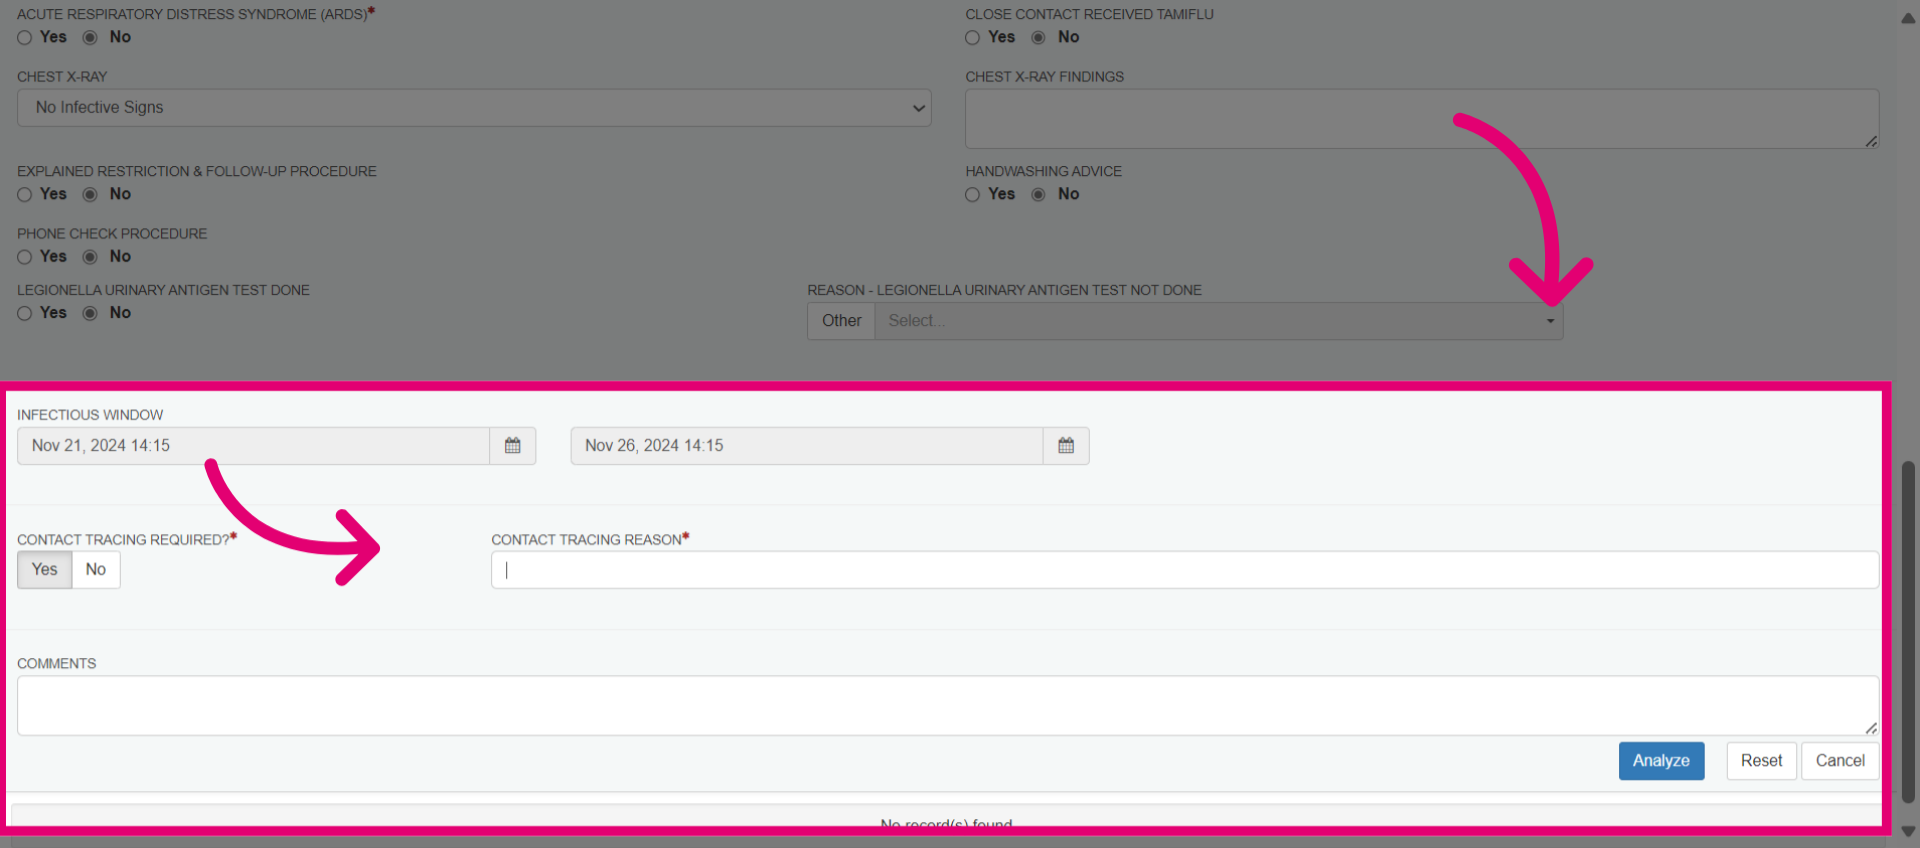
- If you select yes to Legionella Urinary Antigen Test Done, then this pop up window will initiate for you to add the results of the test. And add a reason if it was not done.
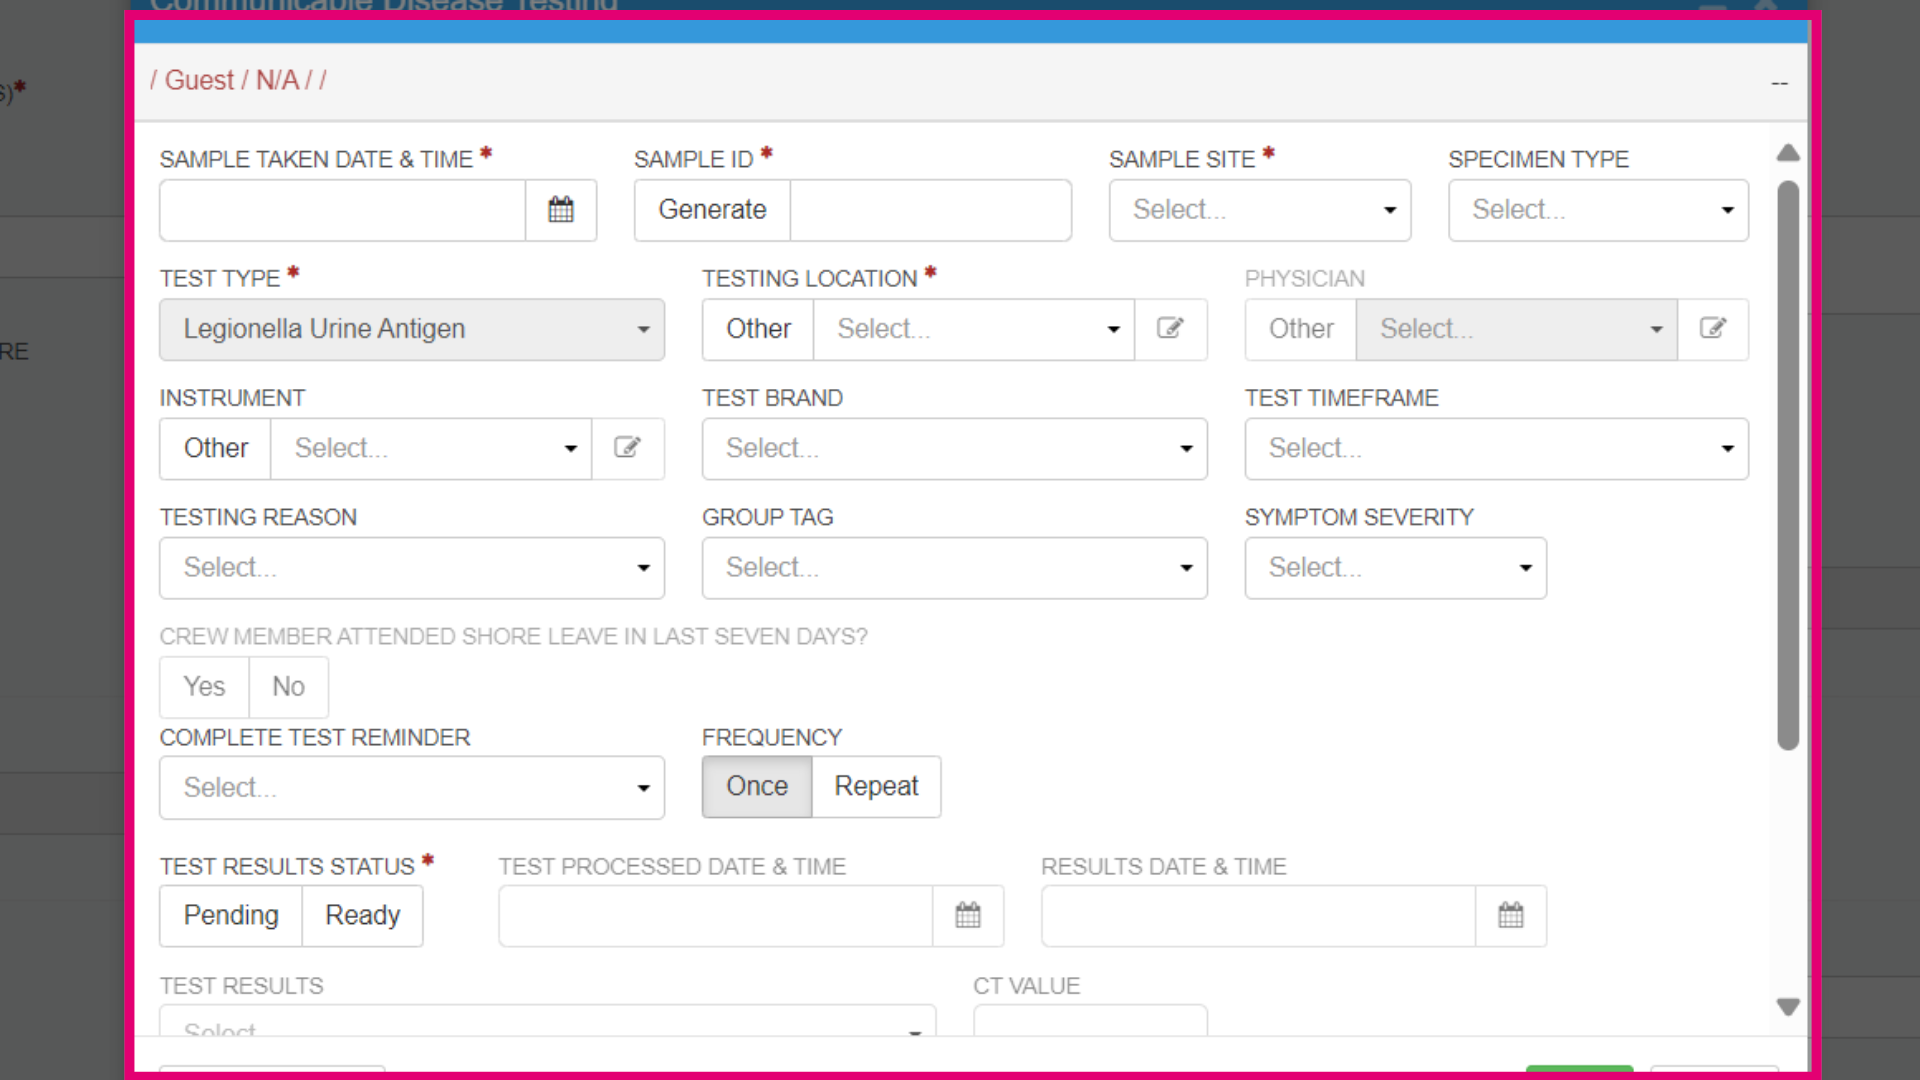
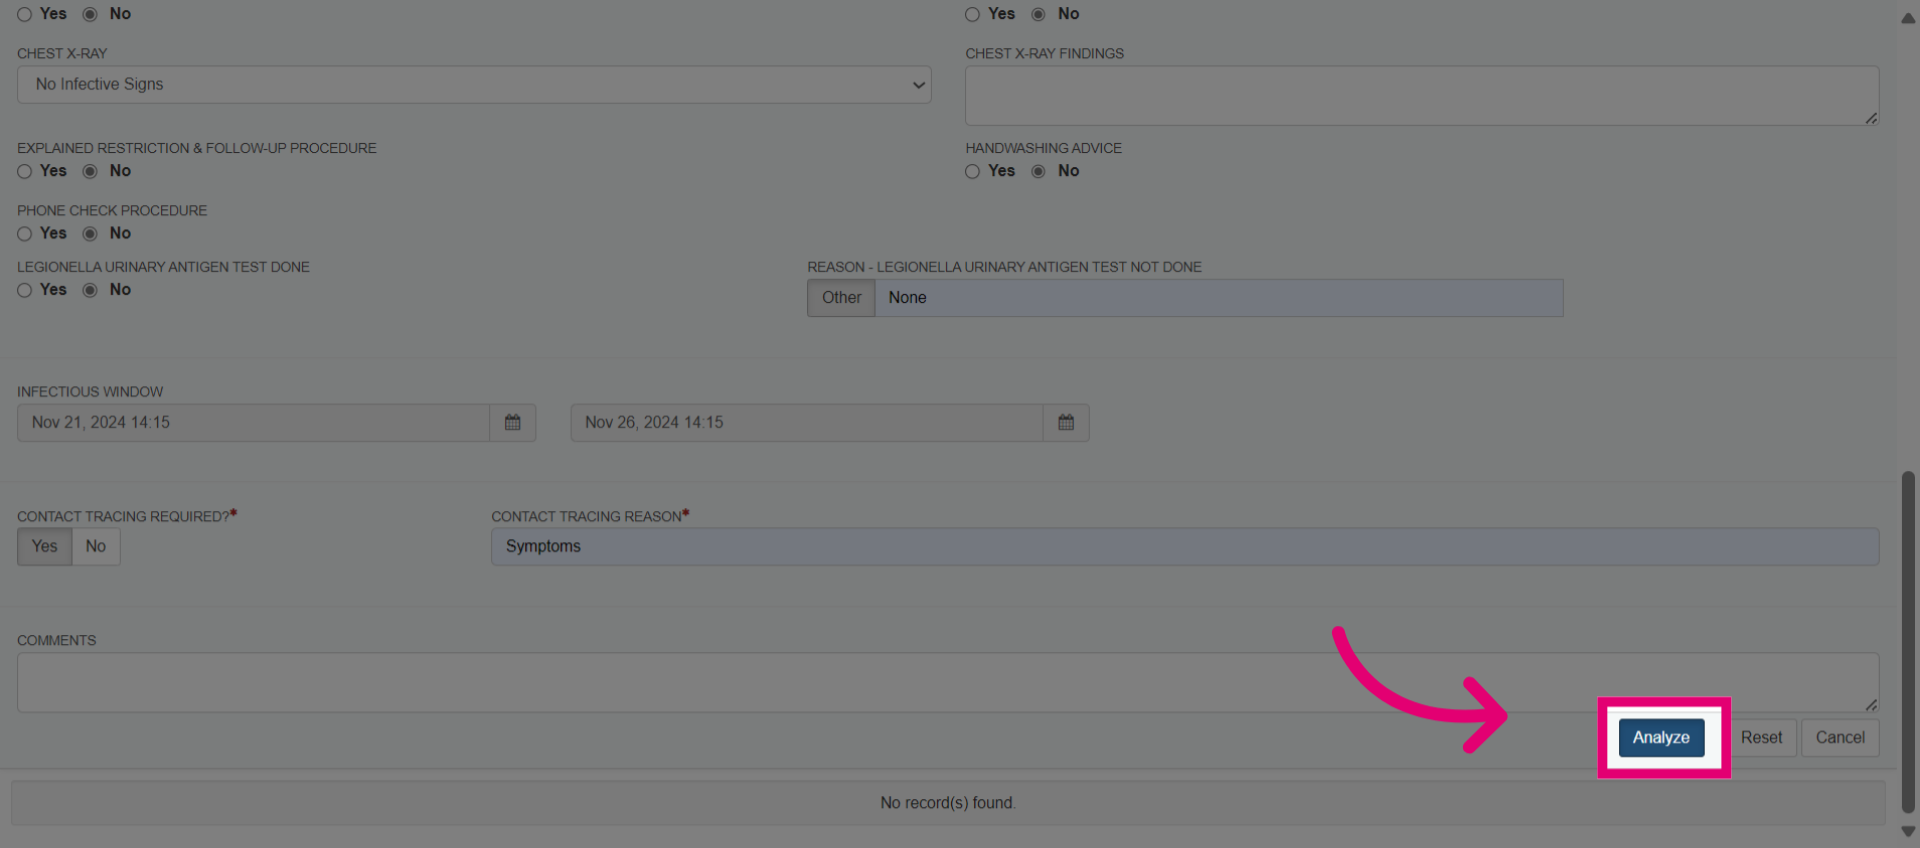
- Proceed to the next questions. Enter the infectious window start and end dates, typically 2-5 days before symptom onset when the patient is most infectious. Check company policies regarding contact tracing and specify if required and the reason. Add any notes in the comment section.
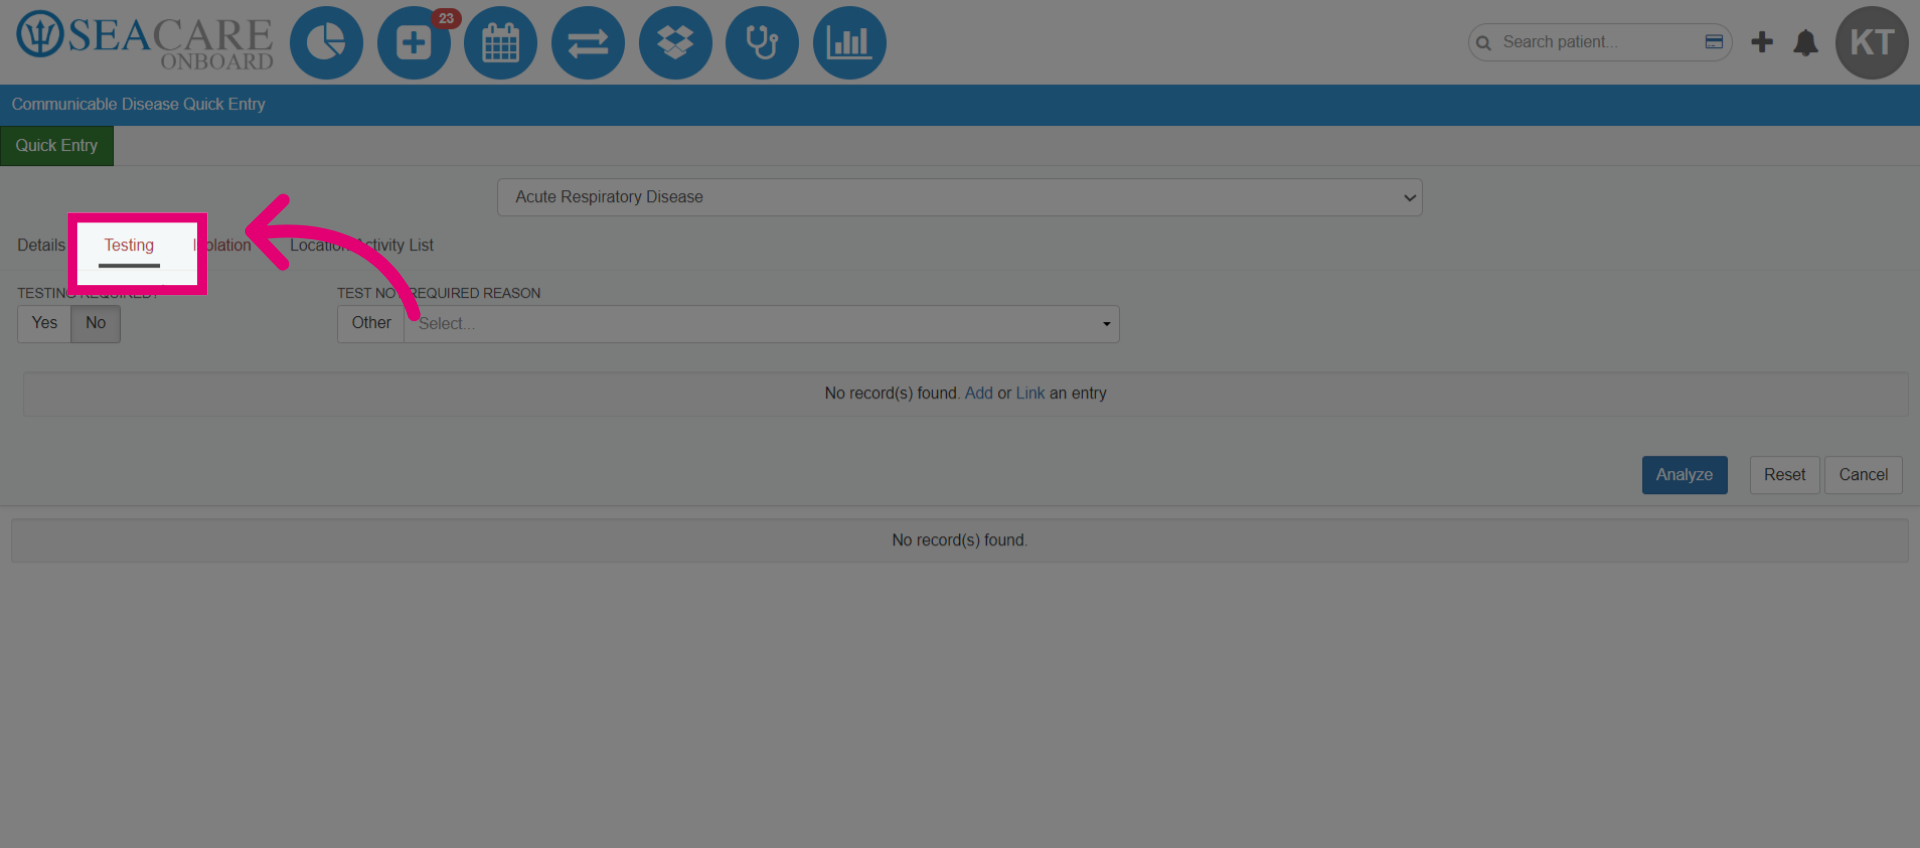
- Add relevant information in the Testing, Isolation, and Location and Activity tabs. This information may be optional or unavailable. In the Testing tab, select No and choose a reason from the list of options for no test required.
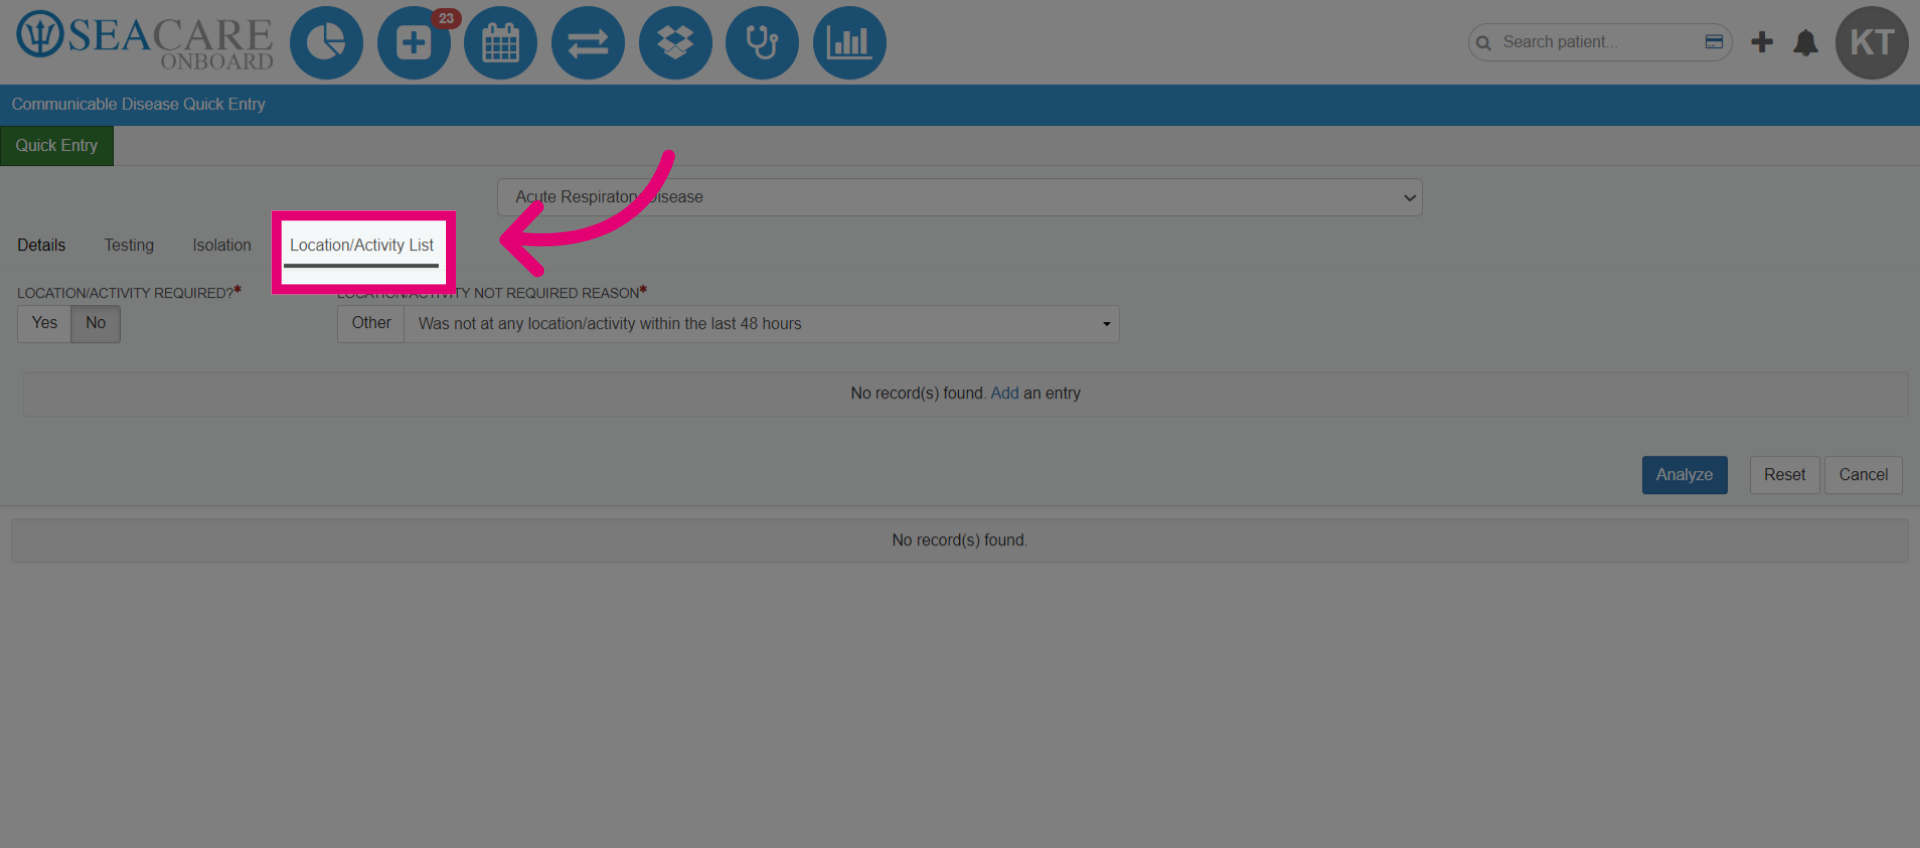
- Click the Location/Activity tab. Select No, and choose a reason from the list of options for no location or activity required.
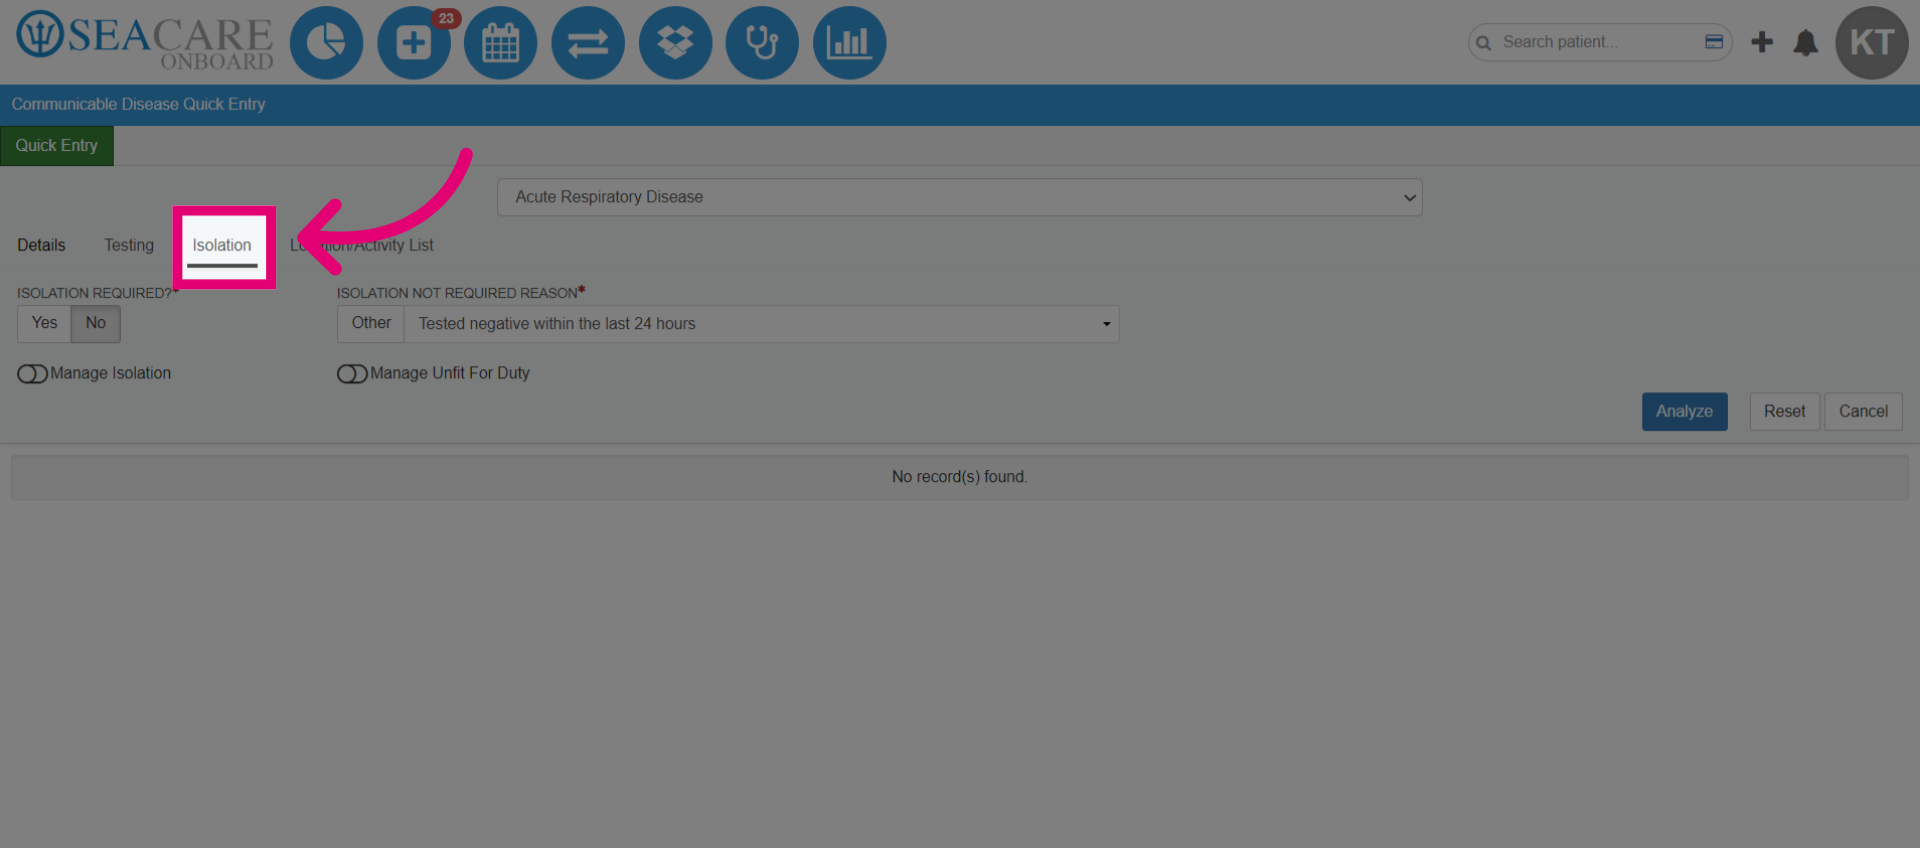
- Go to the Isolation tab. Select the isolation status for the case, then choose No and select a reason from the list of options for Isolation required.
- After filling out all relevant information, click Analyze, for the system to do an analysis on the entered data.
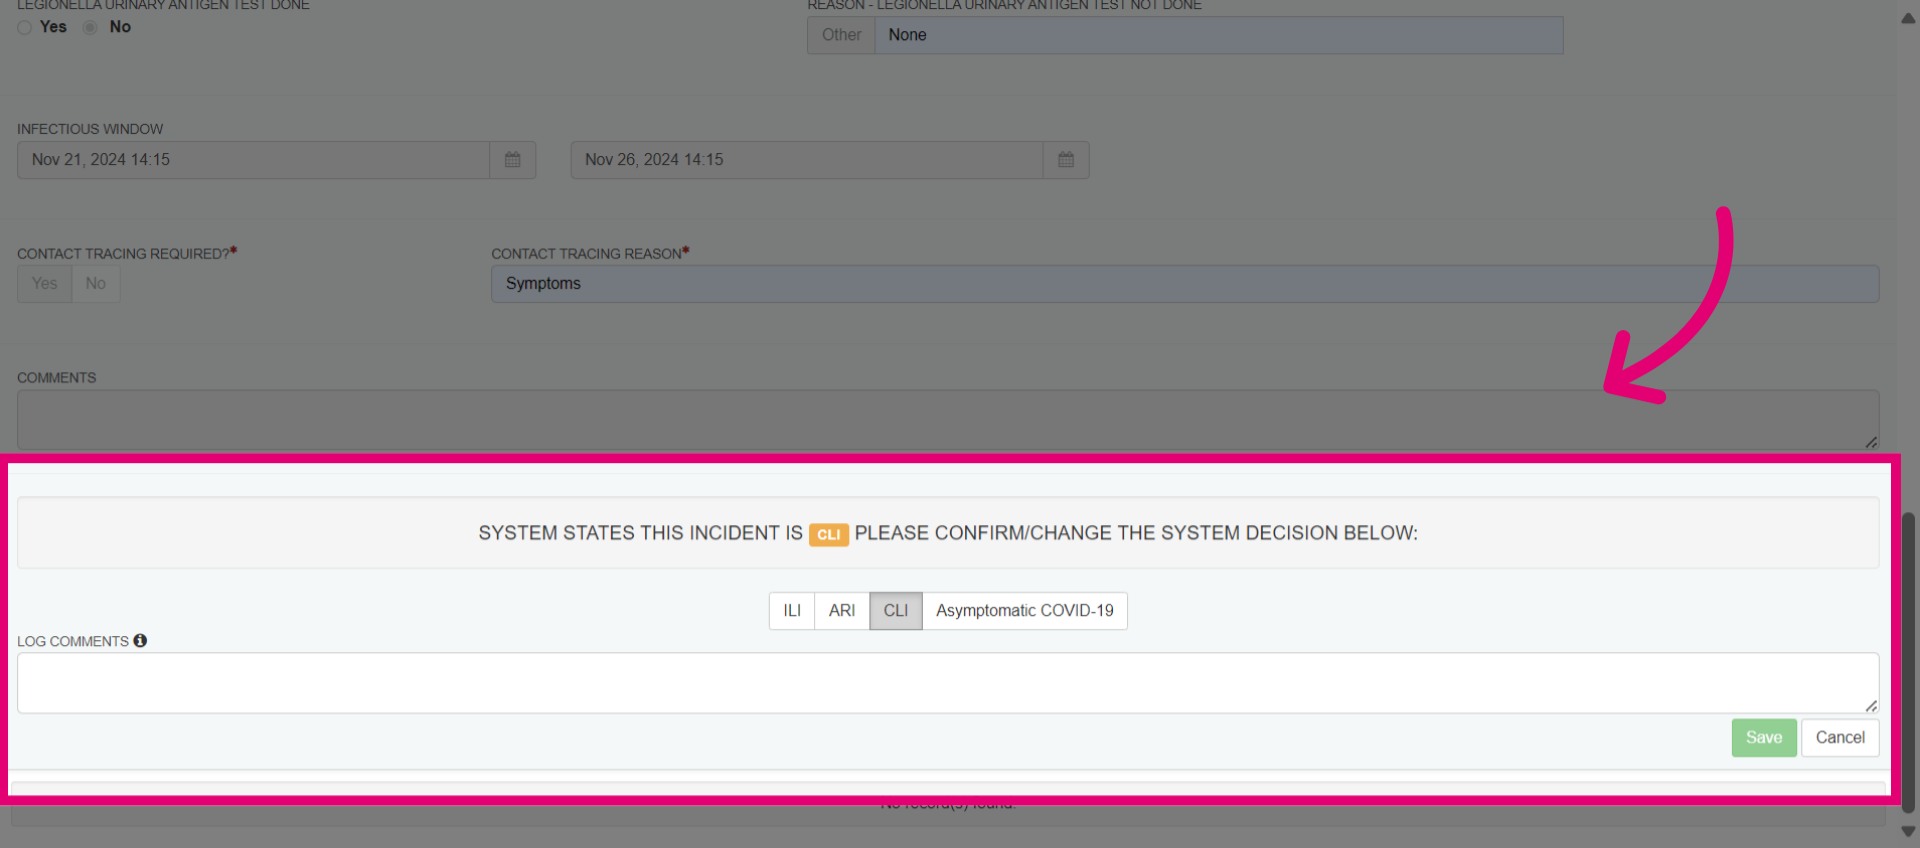
- The system analyzes case data and suggests a reporting category. Medical experts can agree or override the system’s recommendation to define the final reporting outcome.
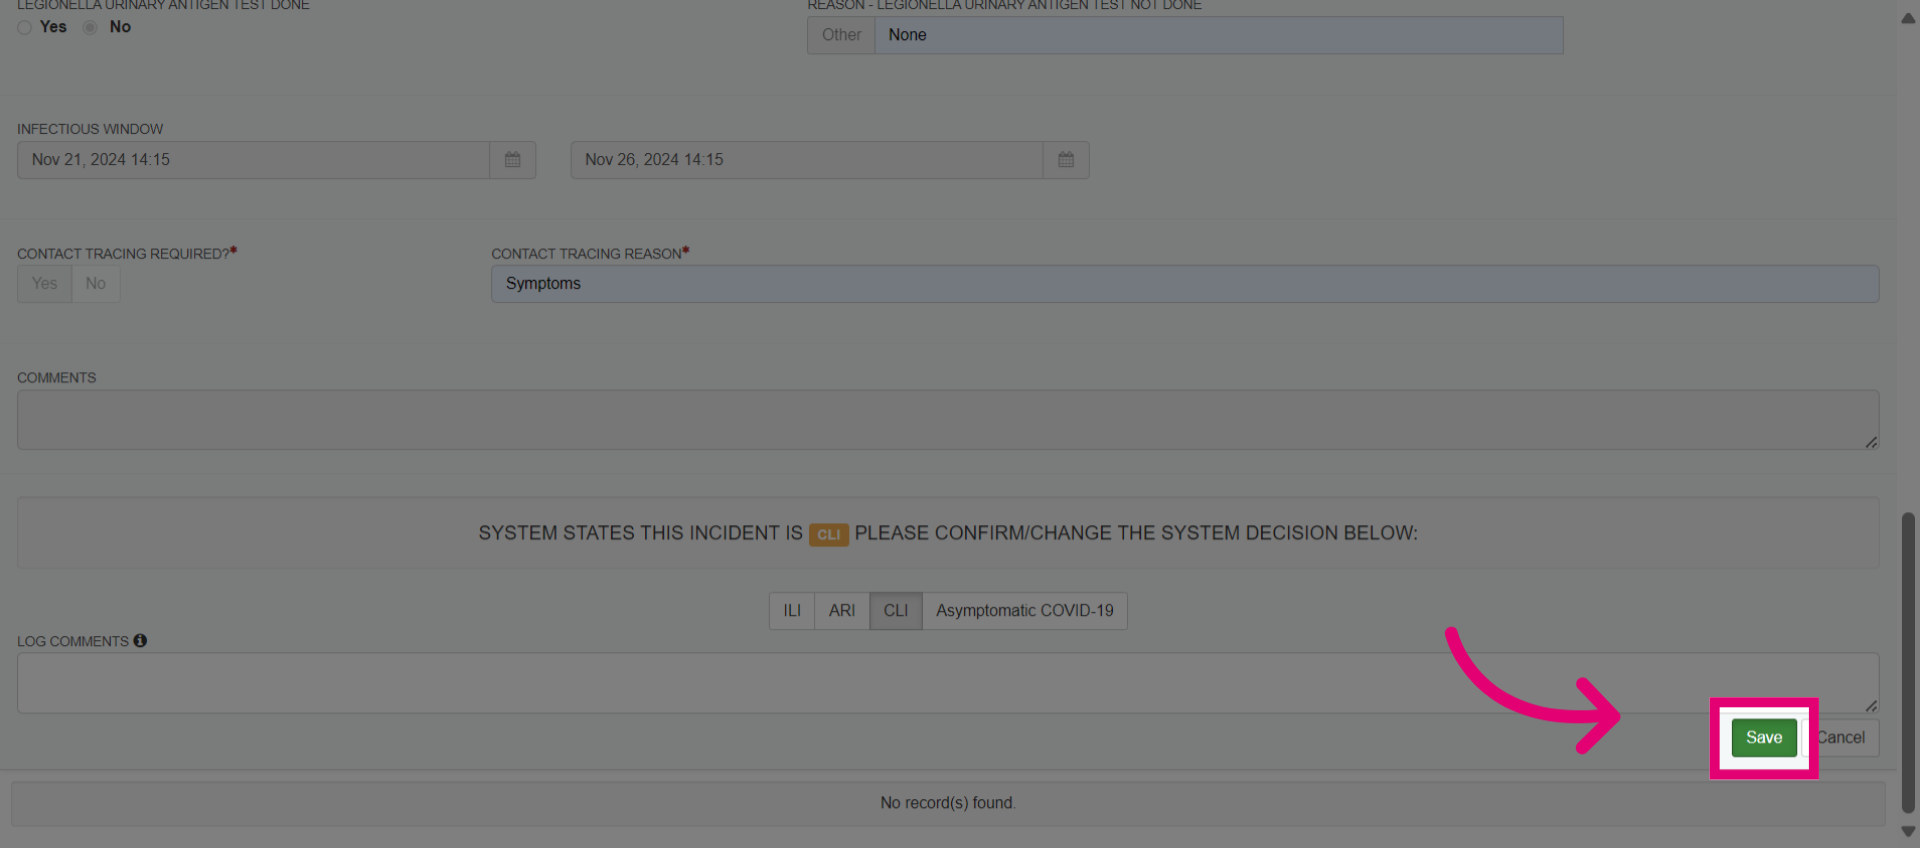
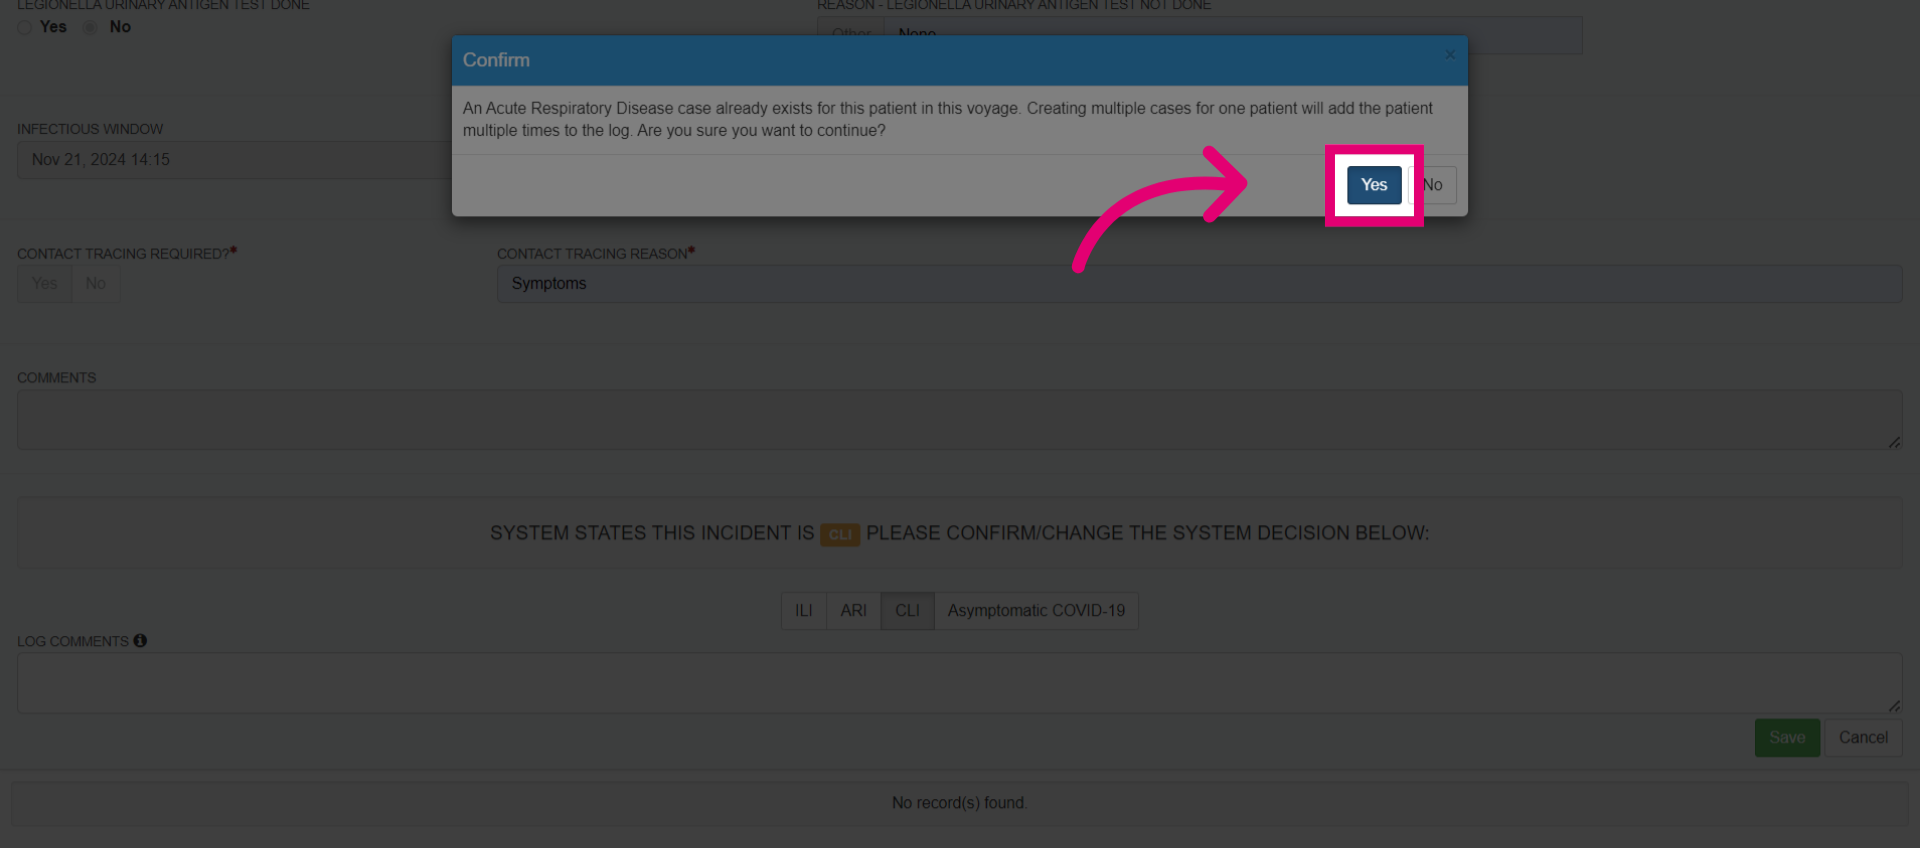
- Click Save once finished.
- Select Yes to confirm.
- The case will be saved in the list. To add more quick entries, follow the same steps to add additional cases, allowing for mass quick entries at once.