New article
Recently updated
Posting MSB for Outpatient Encounters

Who is this article for?
Users who want to post MSB for Outpatient Encounters.
No elevated permissions are required.
This guide provides a walkthrough for posting the Master Service Bill (MSB) for outpatient encounters.
1. Posting MSB for Outpatient Encounters
This walkthrough will demonstrate posting the Master Service Bill (MSB) for patient encounters in the patient chart. Before you can post the MSB, the patient's diagnosis and disposition must be added first. Start by going to the diagnosis module.
1. Introduction
Click to open up the Admin section to close the MSB. Then, select the Master Service Bill tab
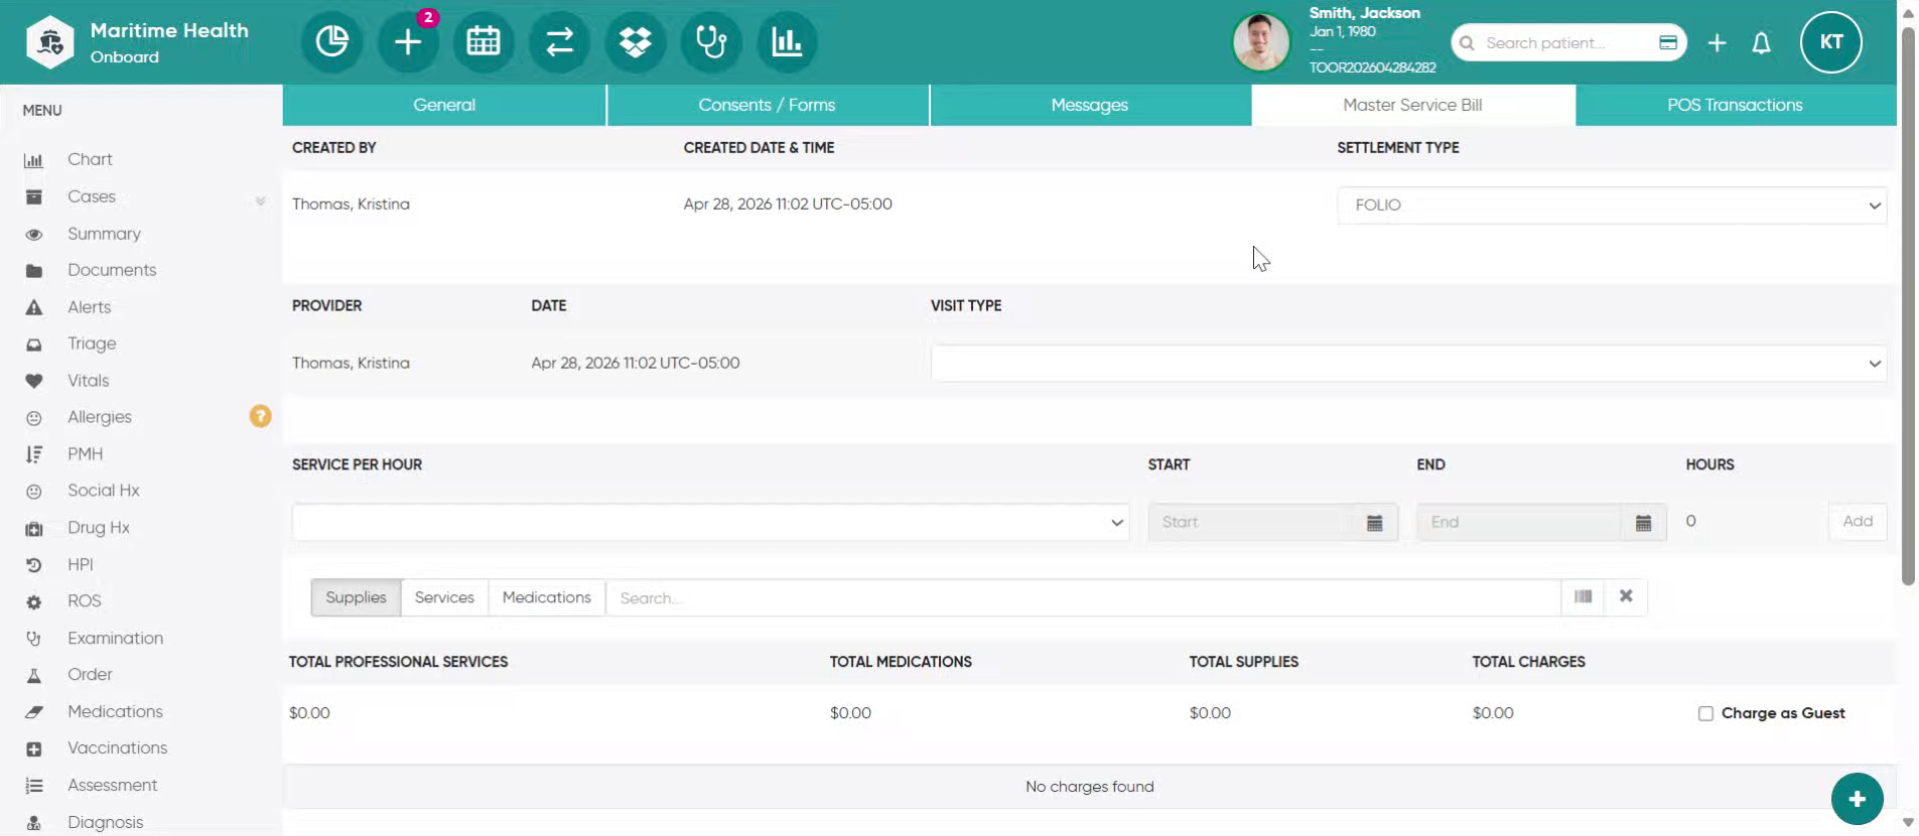
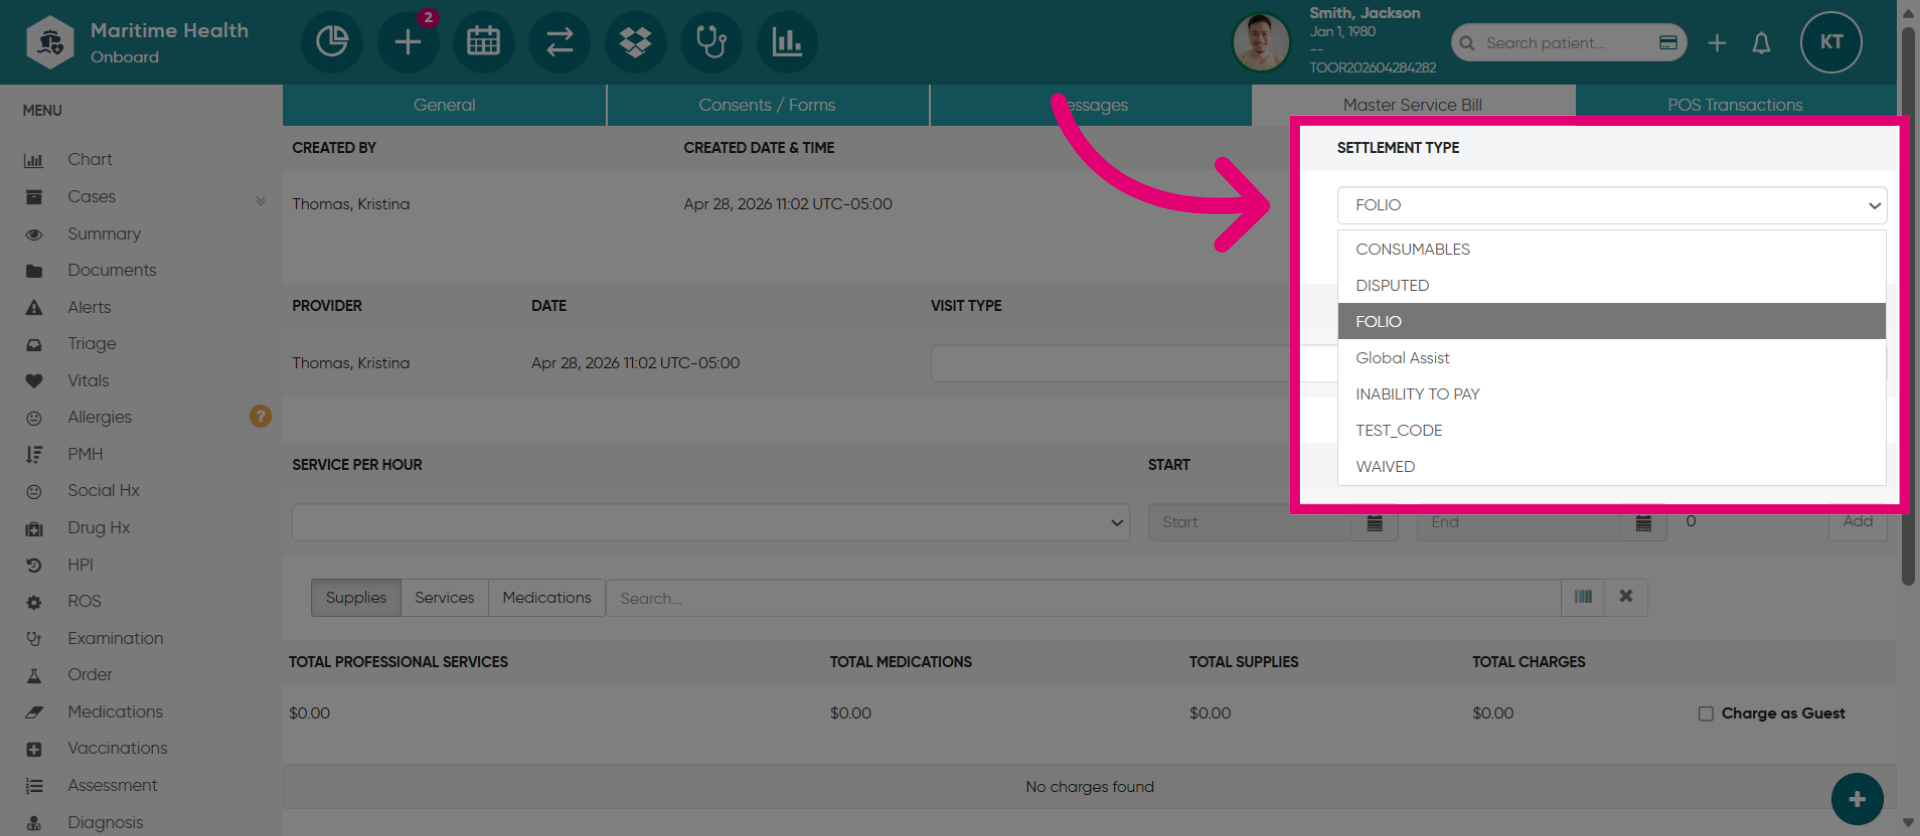
2. Select the "Settlement Type"
Select the relevant Settlement Type for the charges. It is usually Folio for standard MSB transactions.
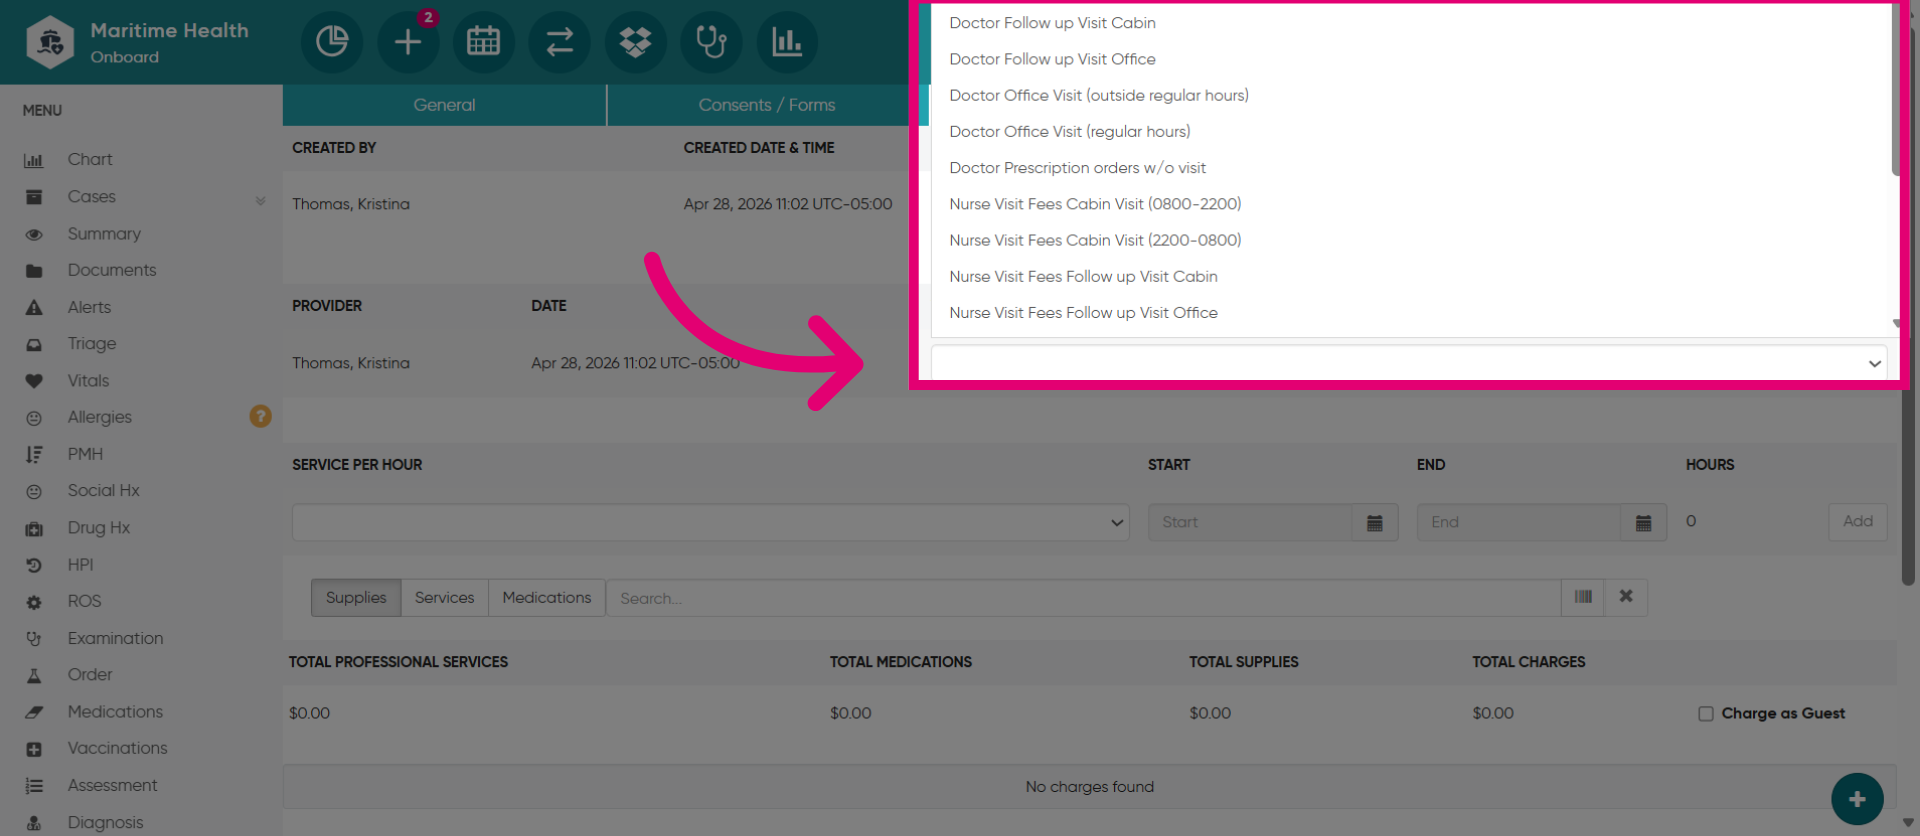
3. Select the "Visit Type"
Then, choose the Visit Type from the list, which is how the transaction will be charged. Crew members usually pay no fees but guests typically pay. Select an option from the menu, like Doctor's Visit. Shoreside Admin adds these services with associated fees.
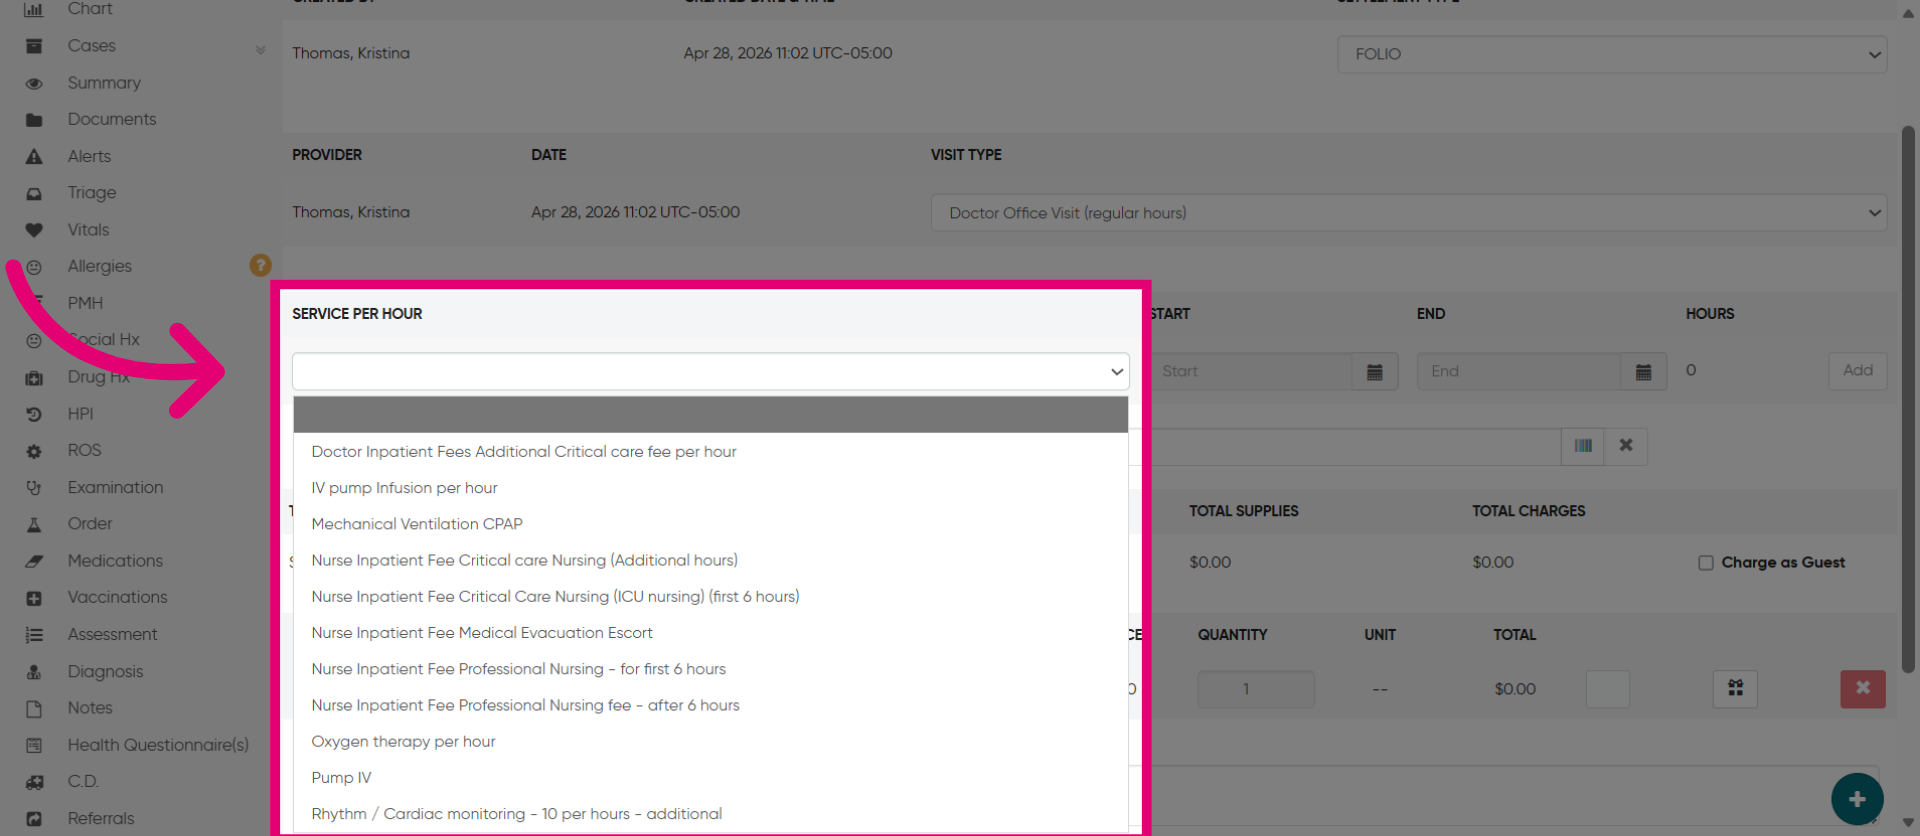
4. Add Additional "Services Per Hour"
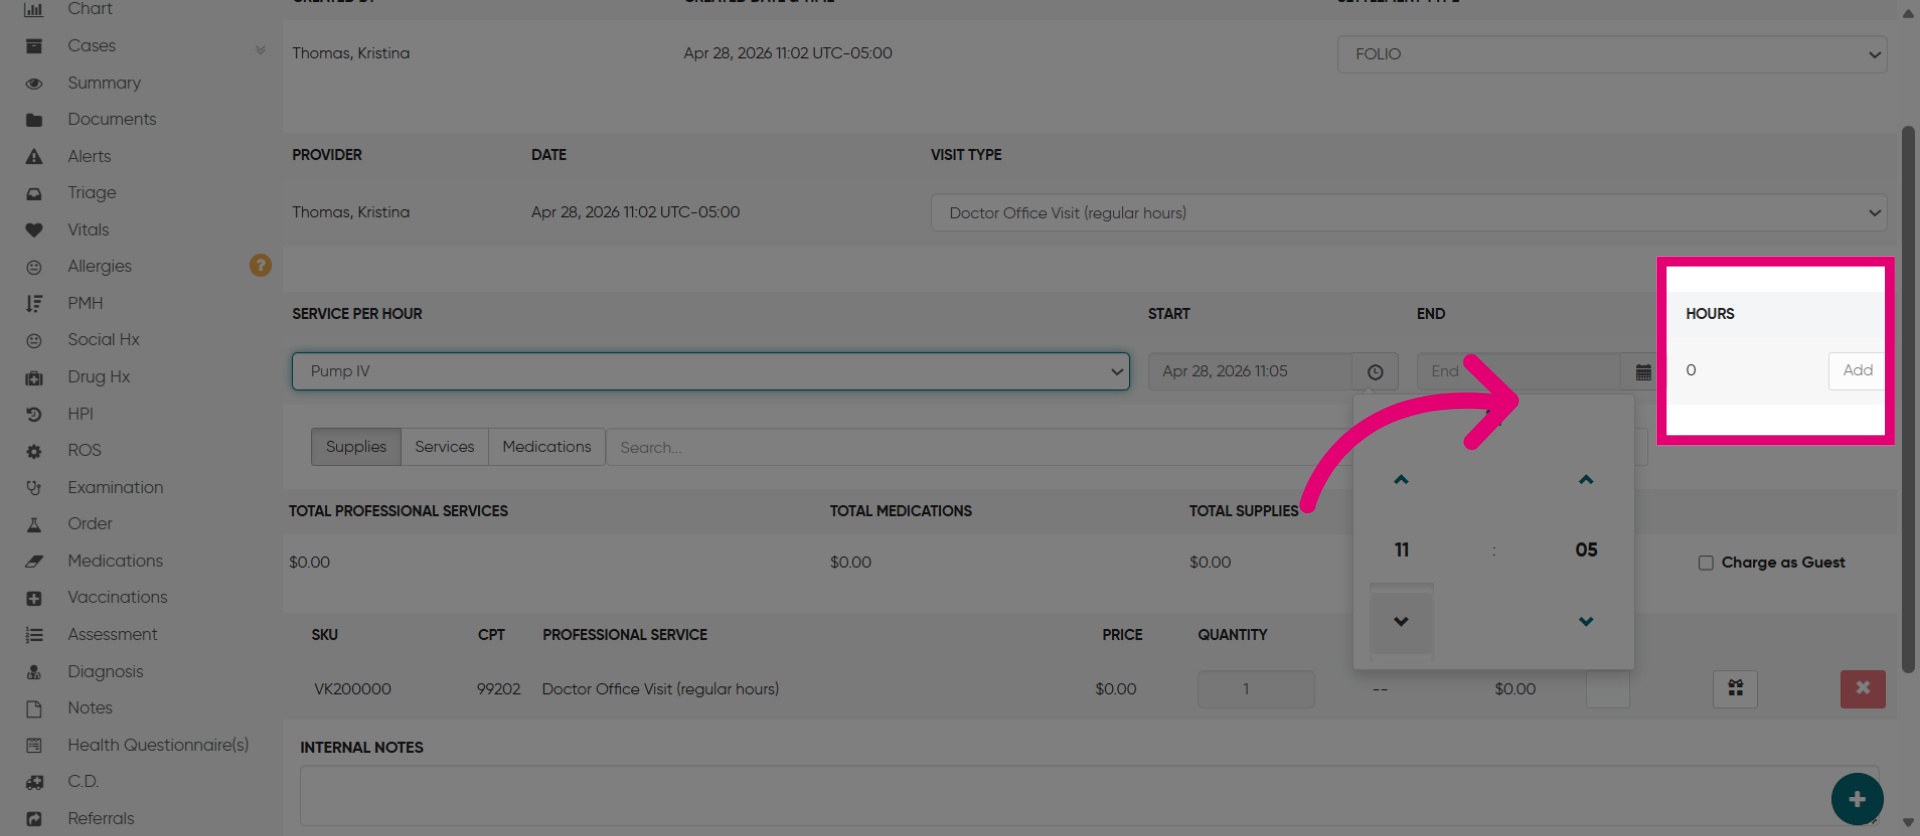
Add additional services per hour such as additional critical care fees, infusion rates, and IV pumps, etc. Add the services per hour that were provided for the patient during the visit.
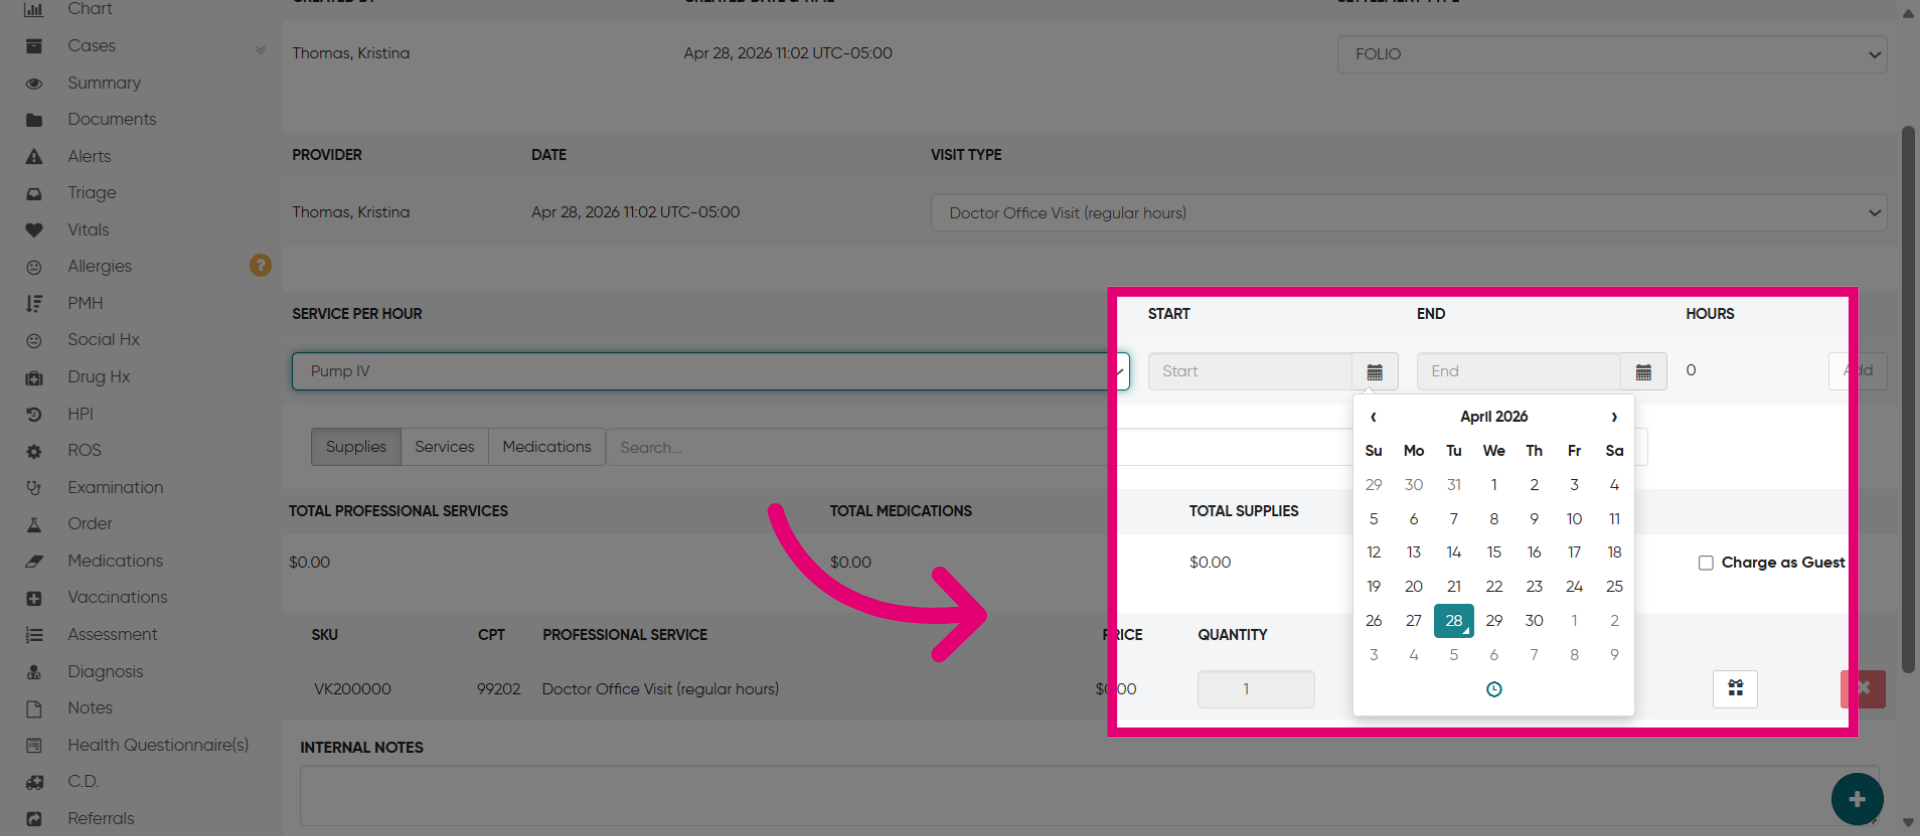
5. Then, open the Calendar
Then, open the calendar.

6. Select the "Start" and "End" times
Select the "Start" and "End" of the per hour service. Choose to select the day of the month.
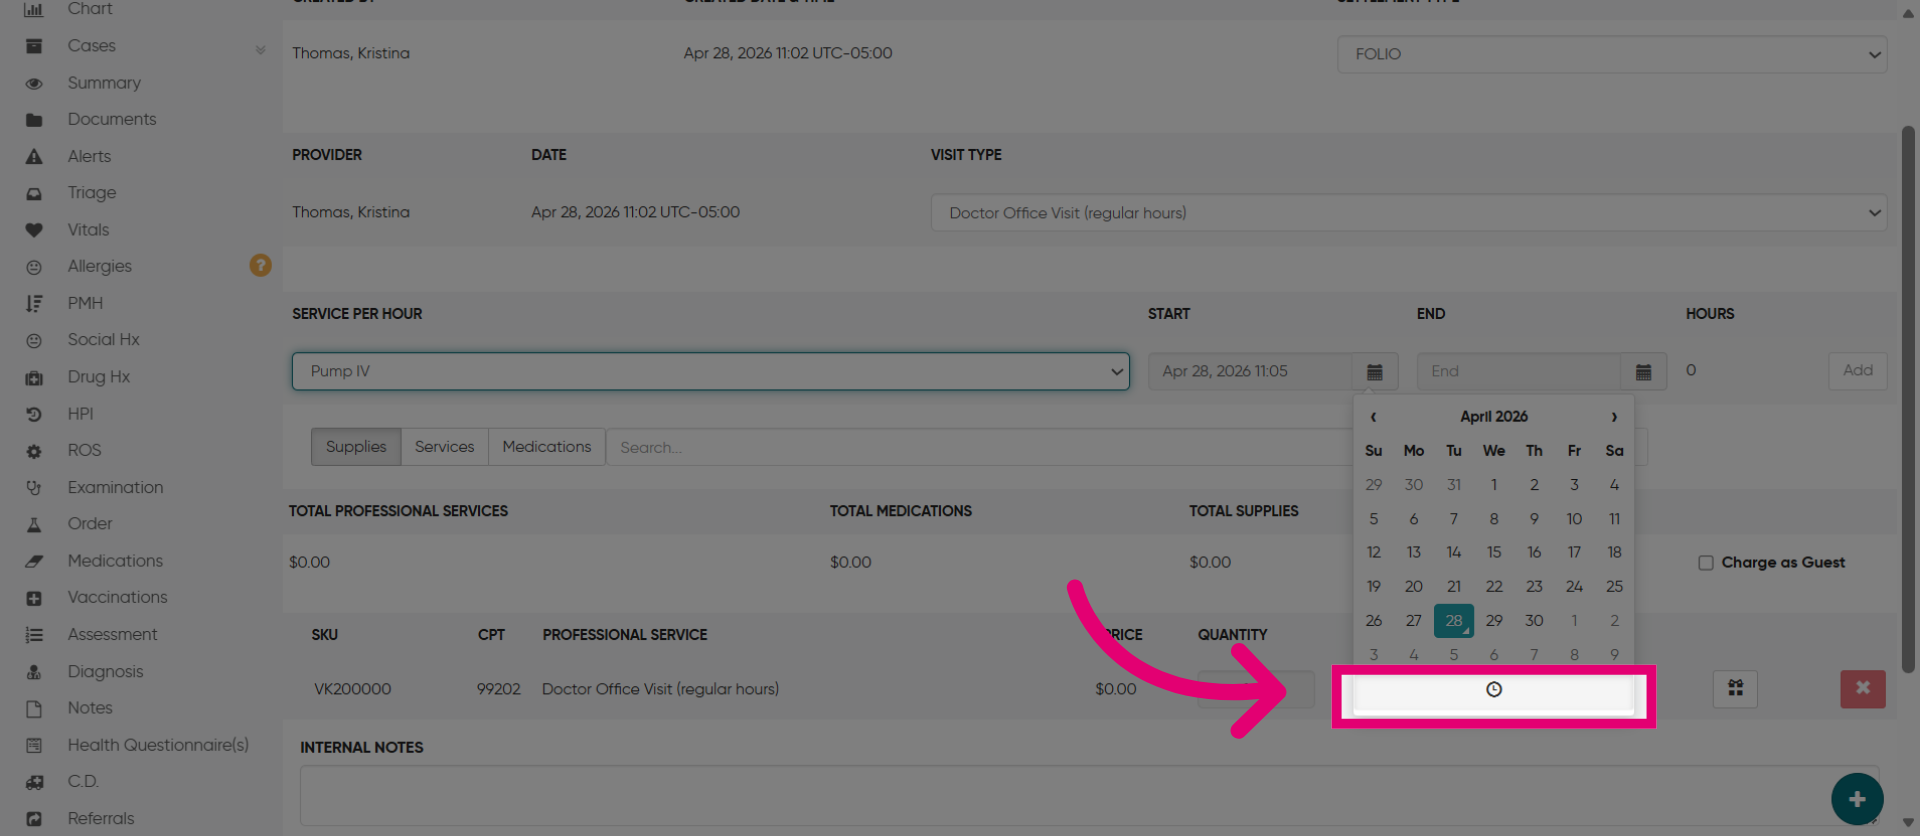
7. Select the Time
Next, click this button to specify the time duration for the service provided.
8. Scroll to Add or Subtract the hour(s)
Next, scroll up or down to adjust the hour. The duration displayed to the right will automatically update, reflecting changes such as 1 hour or 2 hours.
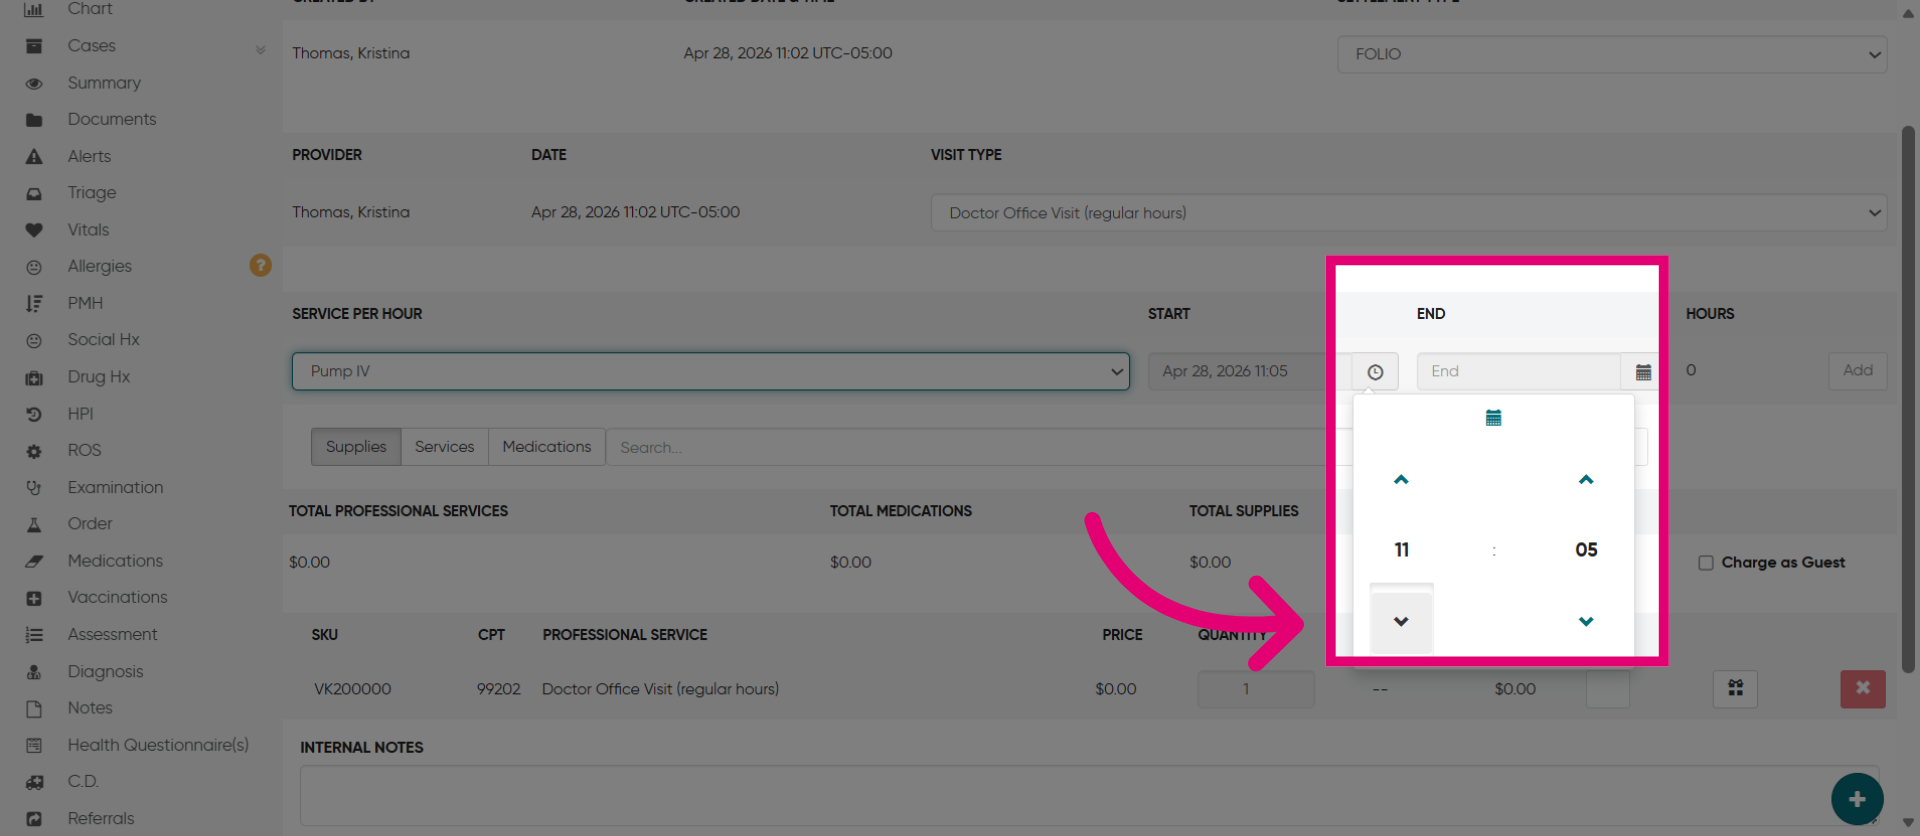
9. Observe the hour(s) being added
The duration displayed to the right will automatically update, reflecting changes such as 1 hour or 2 hours.
10. Add New Entry
Click "Add" to create a new billing or service entry in the system.
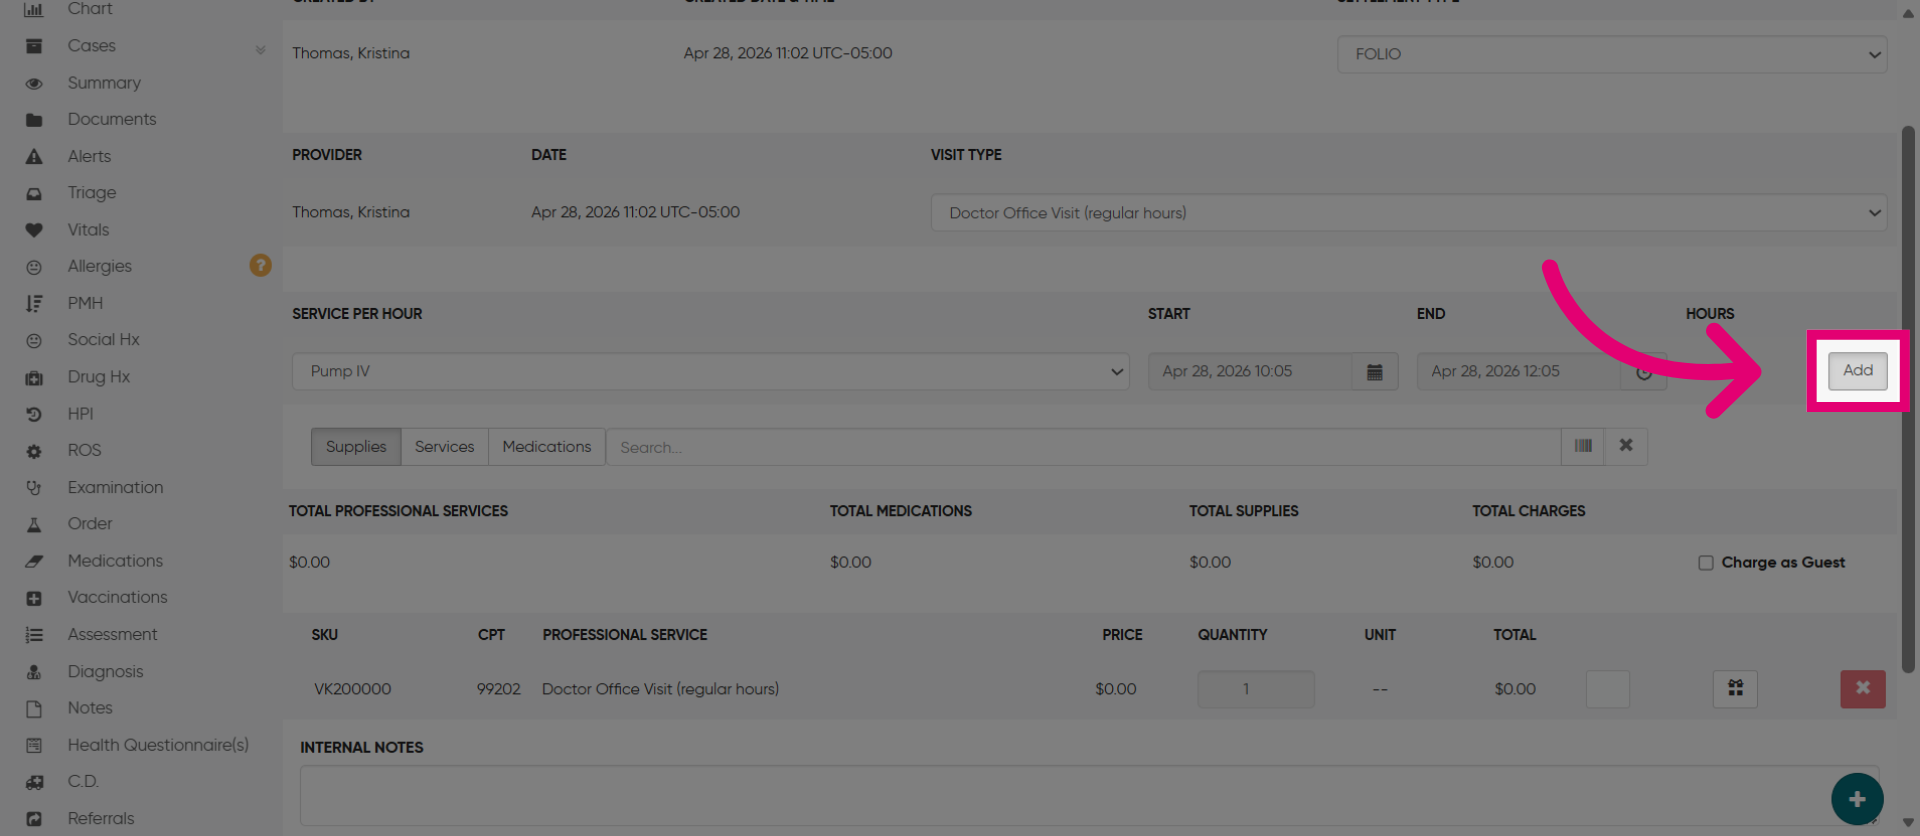
11. Ensure accuracy
Review the services added to the bill to ensure accuracy.
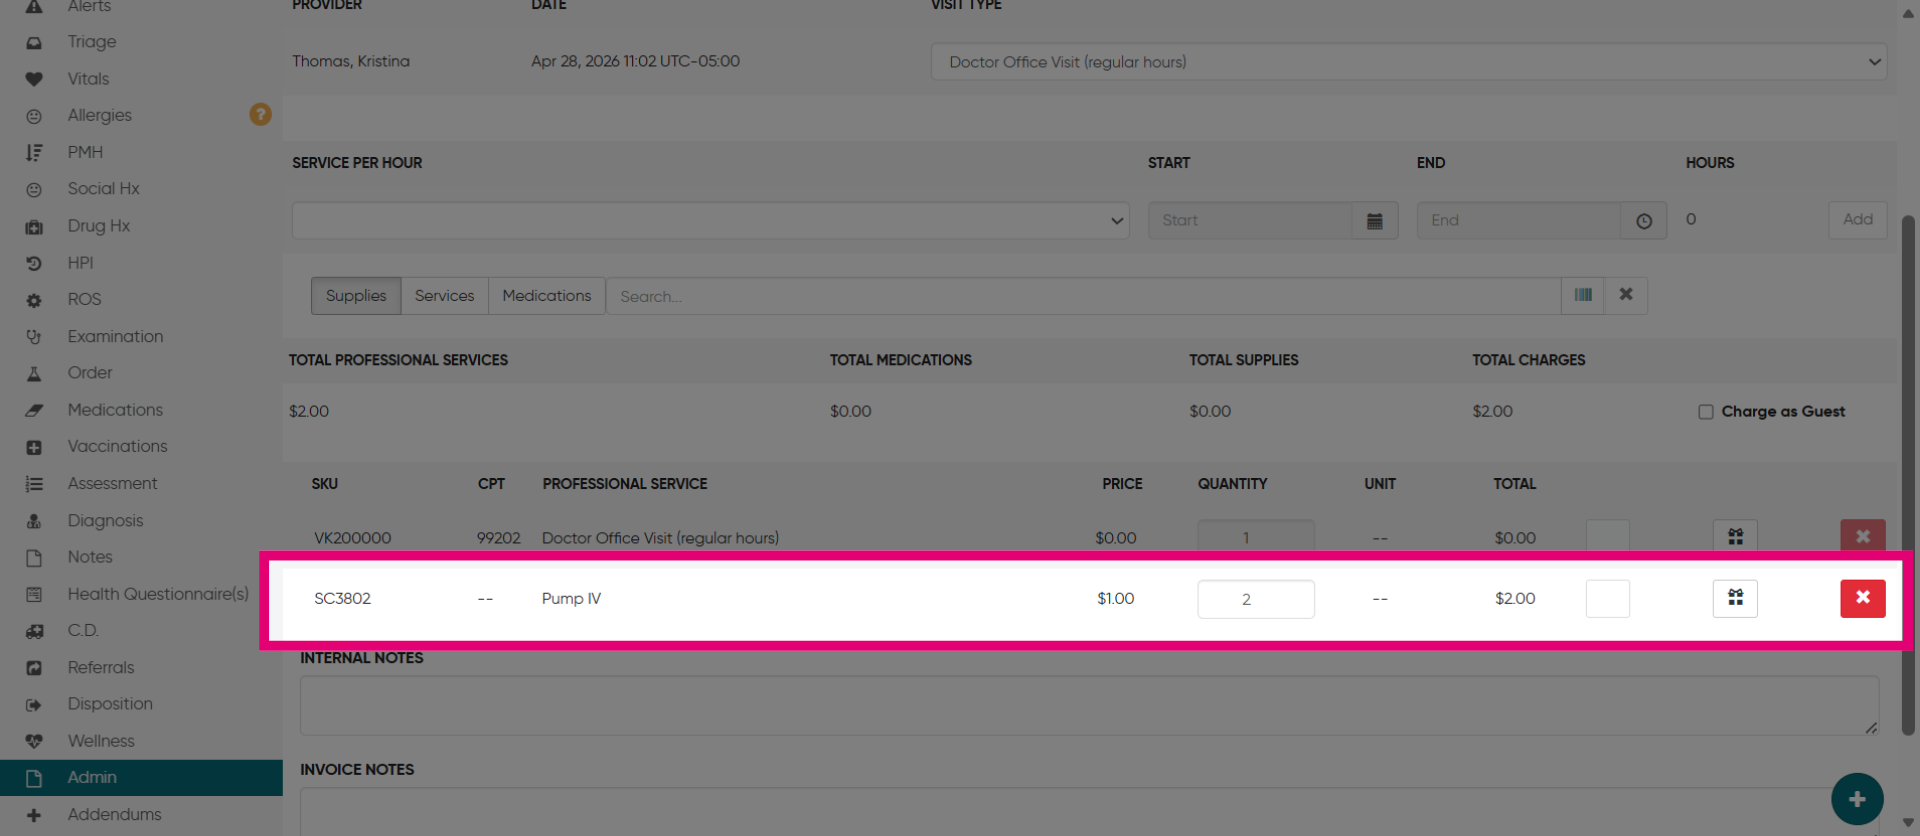
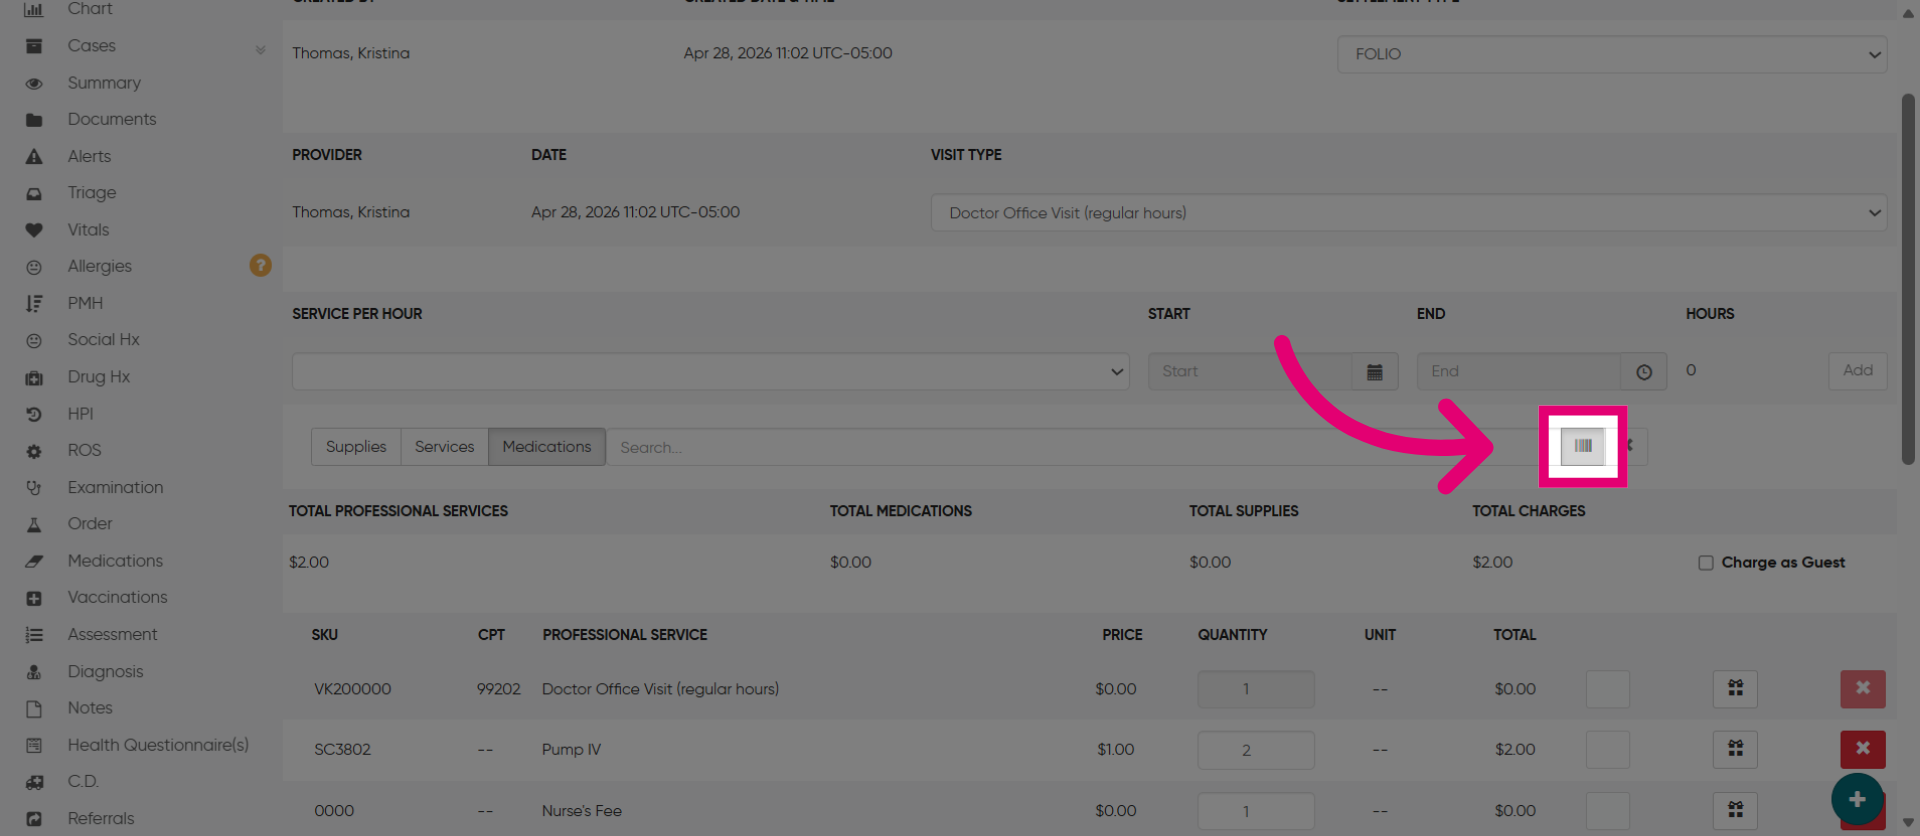
12. Add services, supplies, or medication
Add additional services like Nurse's Fee, supplies such as band-aids, or medications such as Tylenol- that was used during the visit or needed for the patient when discharged.
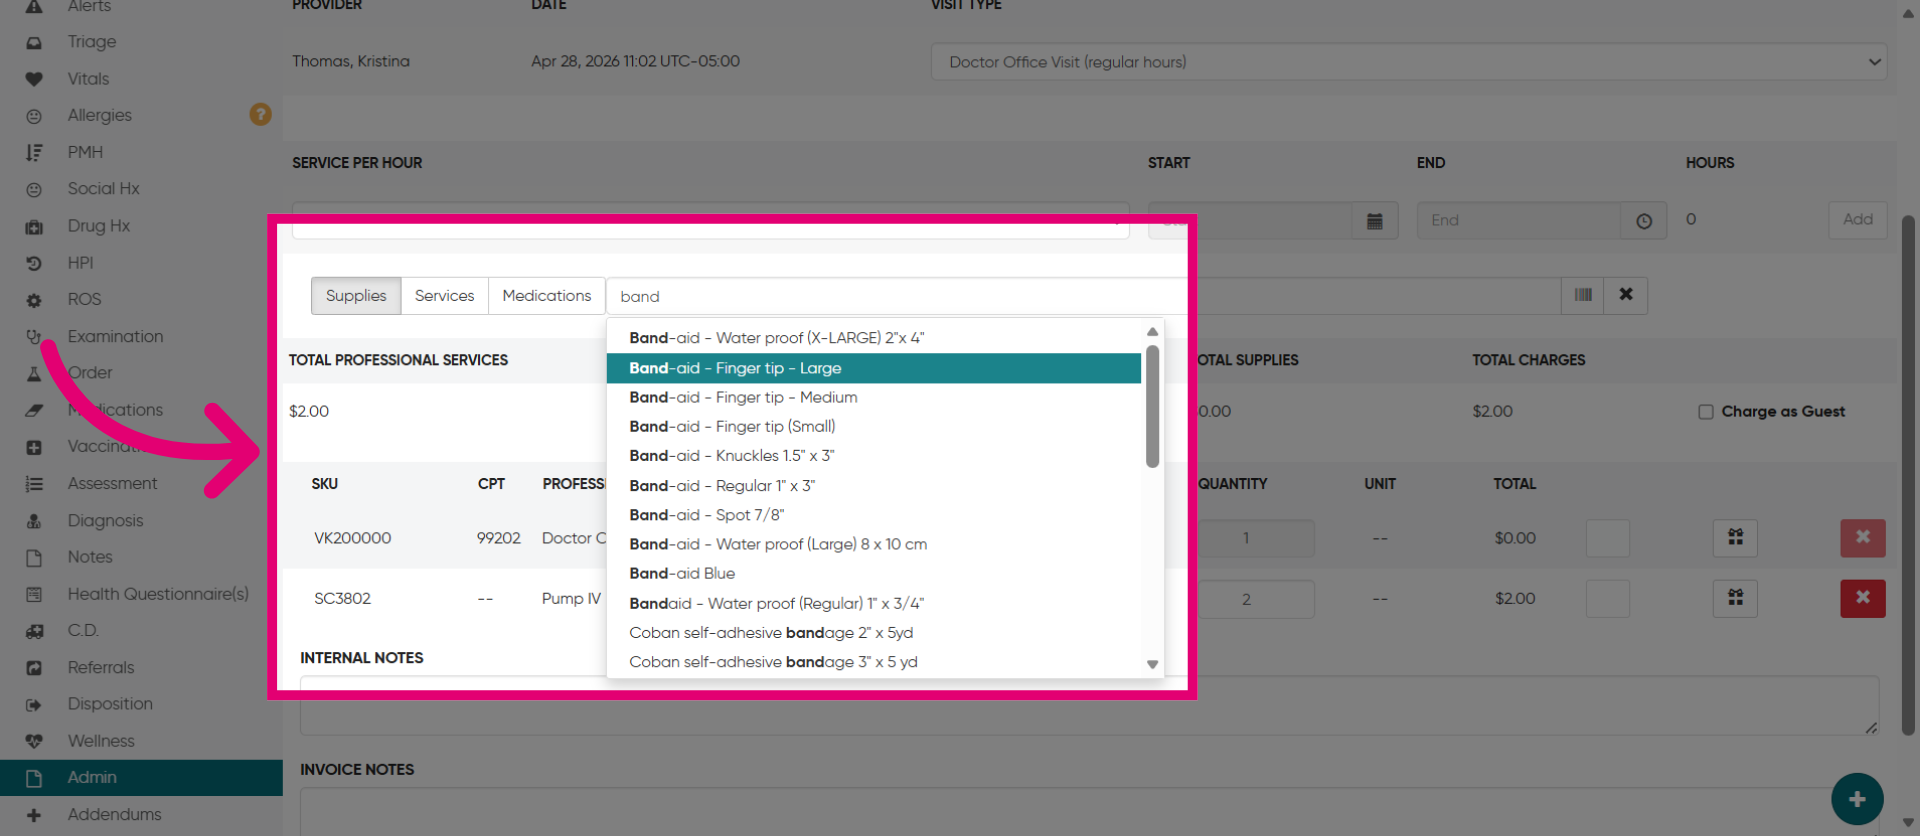
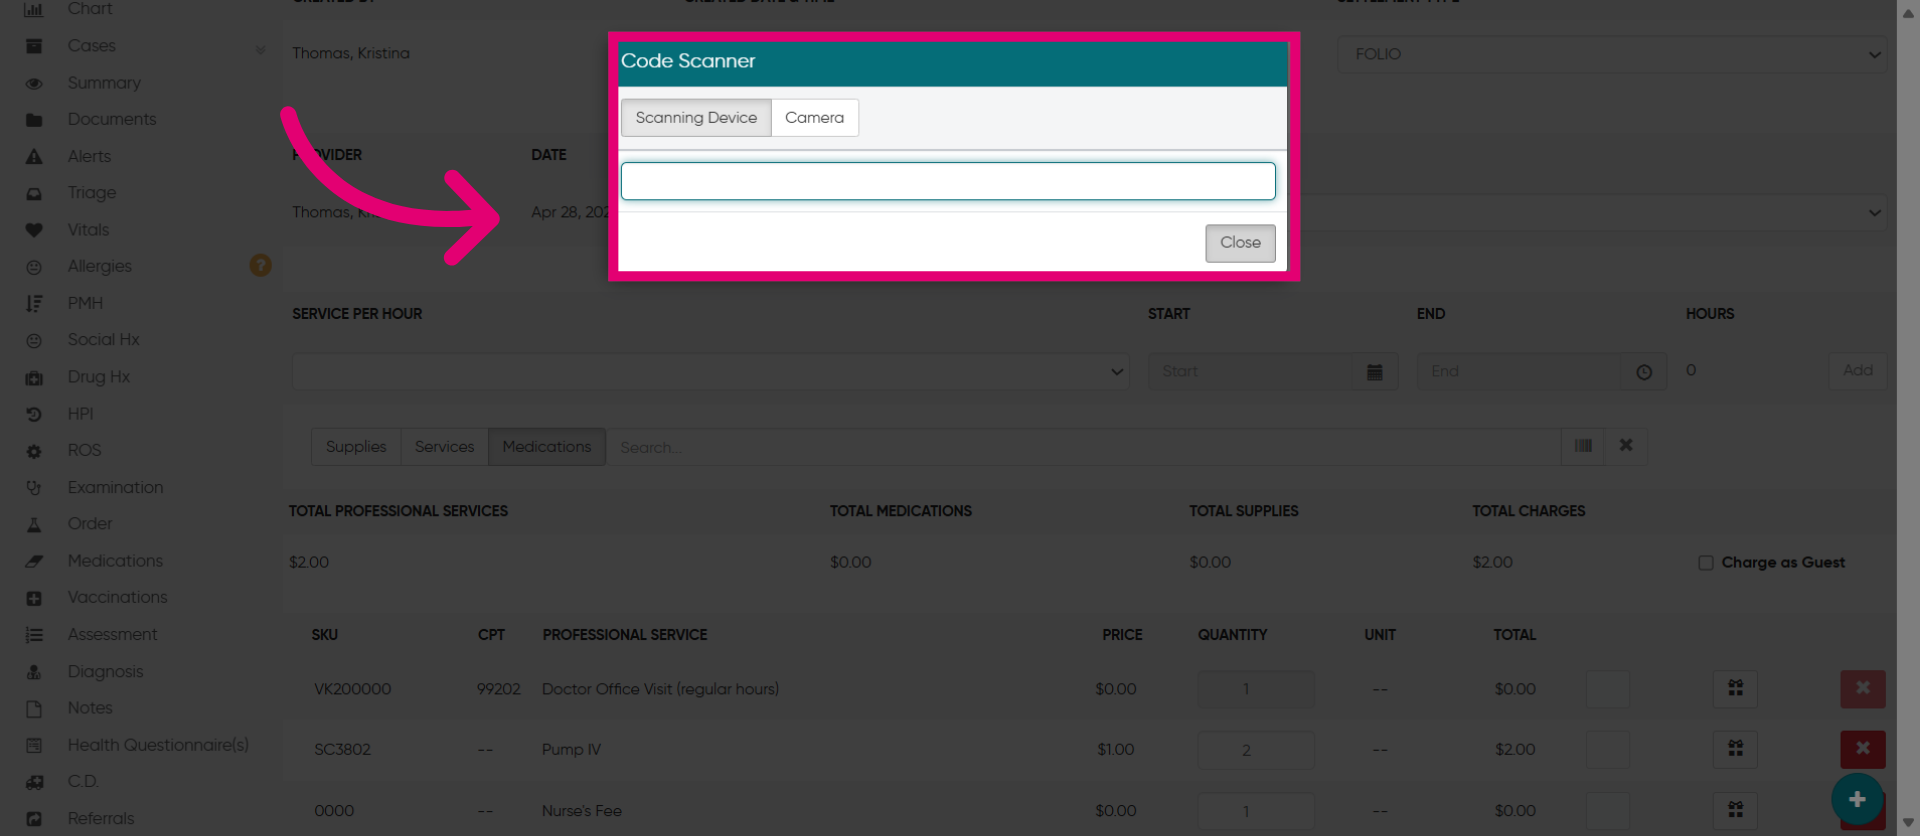
13. Use a scanning device
If you are using a scanning device, click on the barcode to scan the item.
14. Scan the barcode
Next, scan the item's barcode or use the "Camera" function to capture the barcode.
15. Review the Items
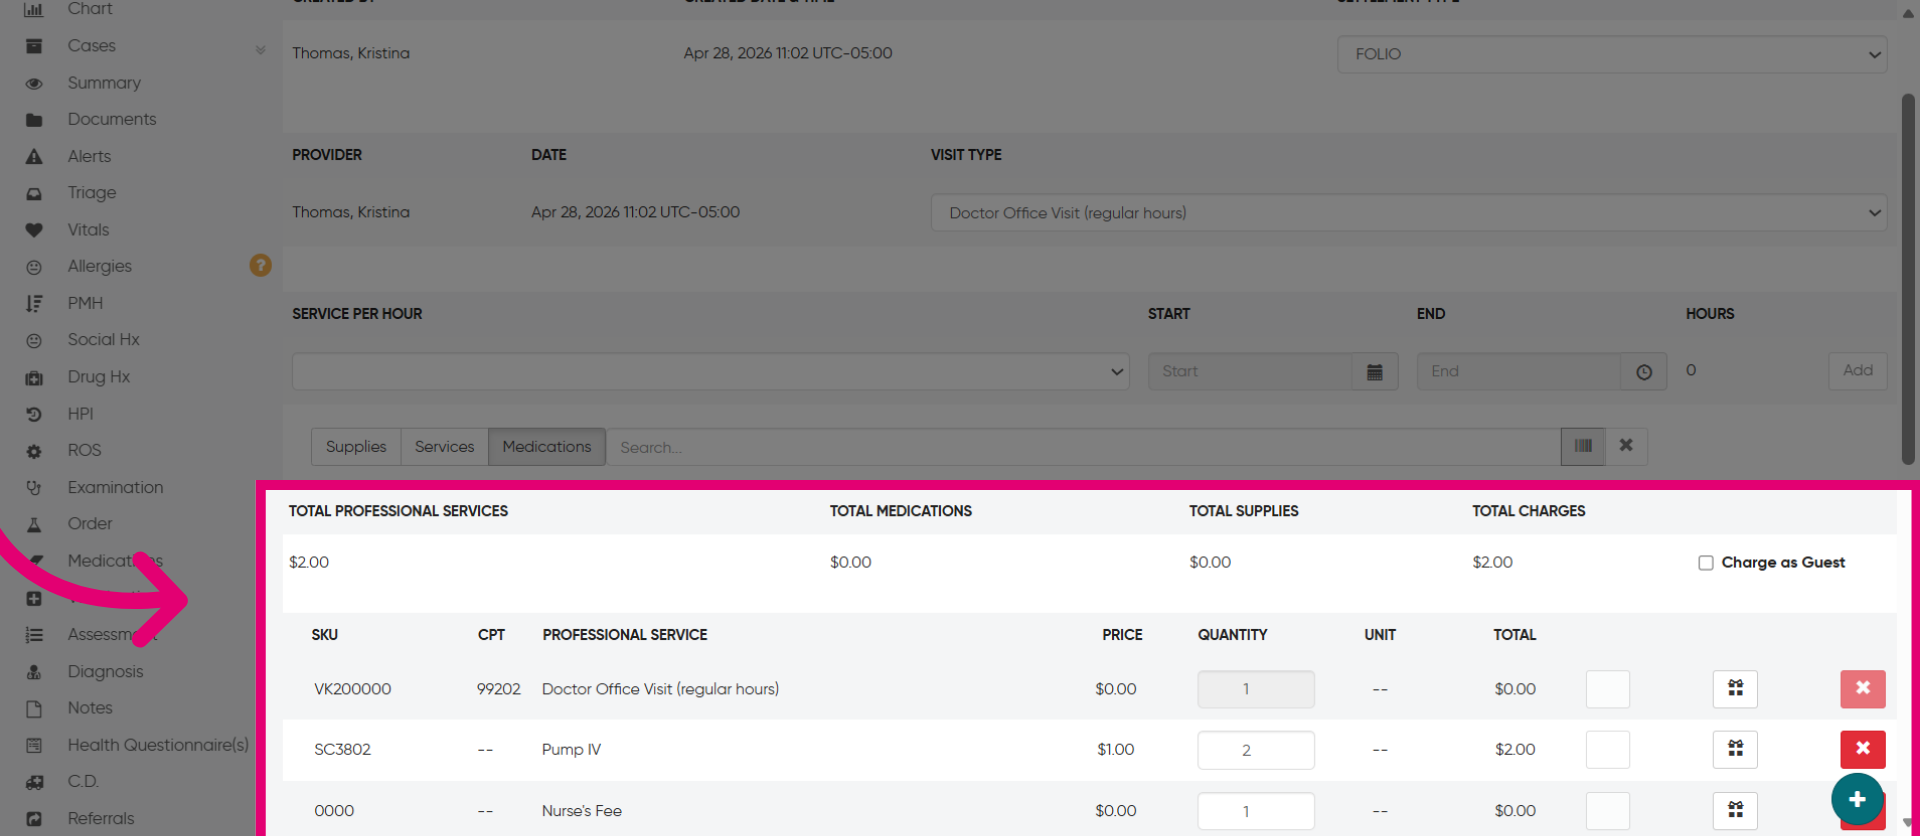
Your final bill includes items such as visit charges, hourly services, supplies, and medication, listing SKU, CPT, name, category, price, quantity, unit, and total costs. If an item is out of stock, a warning will appear under quantity, allowing you to choose a replacement. You can delete items from the list, except for dispensed medication.
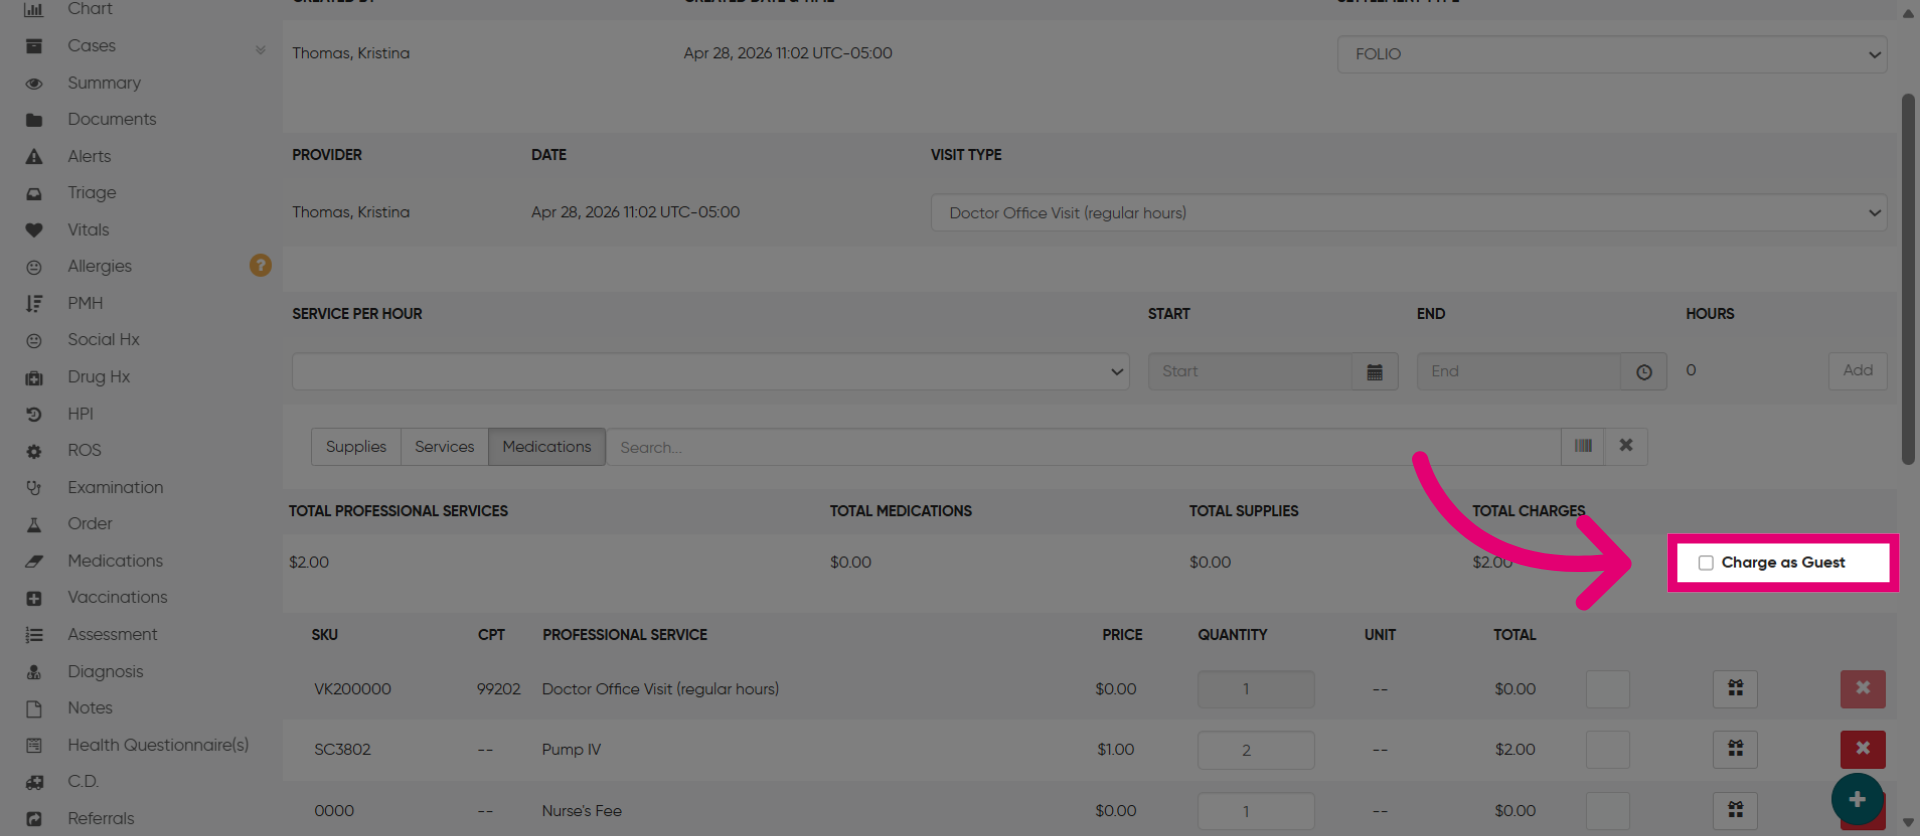
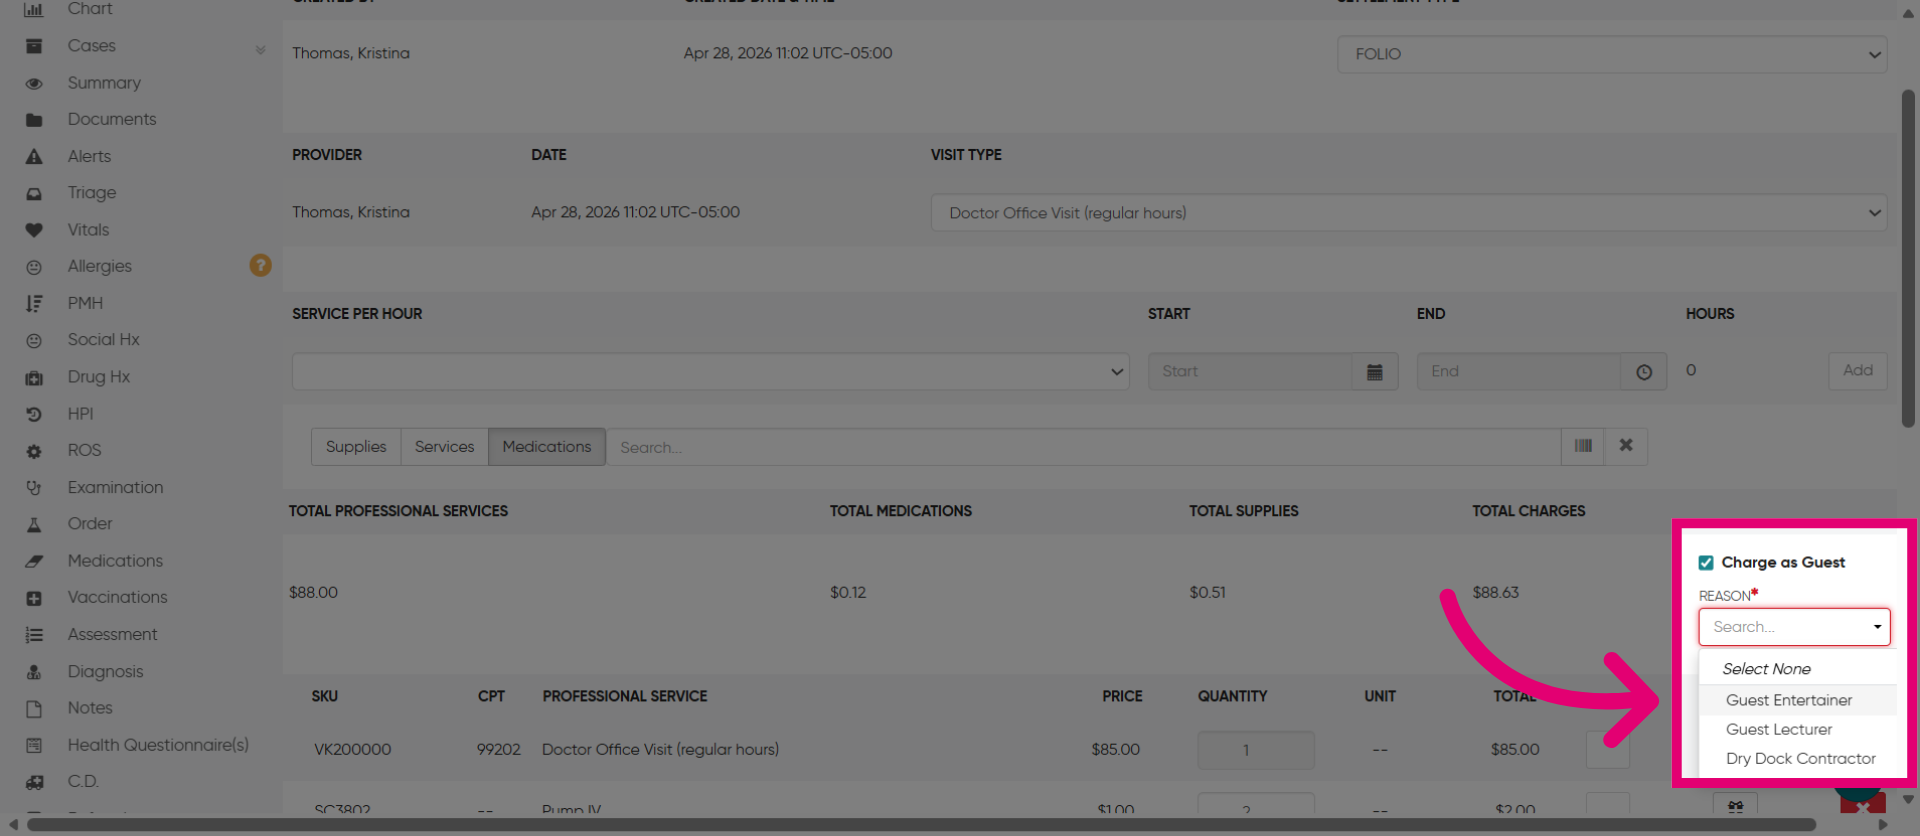
16. Enable Guest Charging
Next, click "Charge as Guest" to enable charging for guest patients.
17. Select Guest "Reason"
Then, click the "Reason" such as "Guest Entertainer" to assign charges to a guest entertainer.
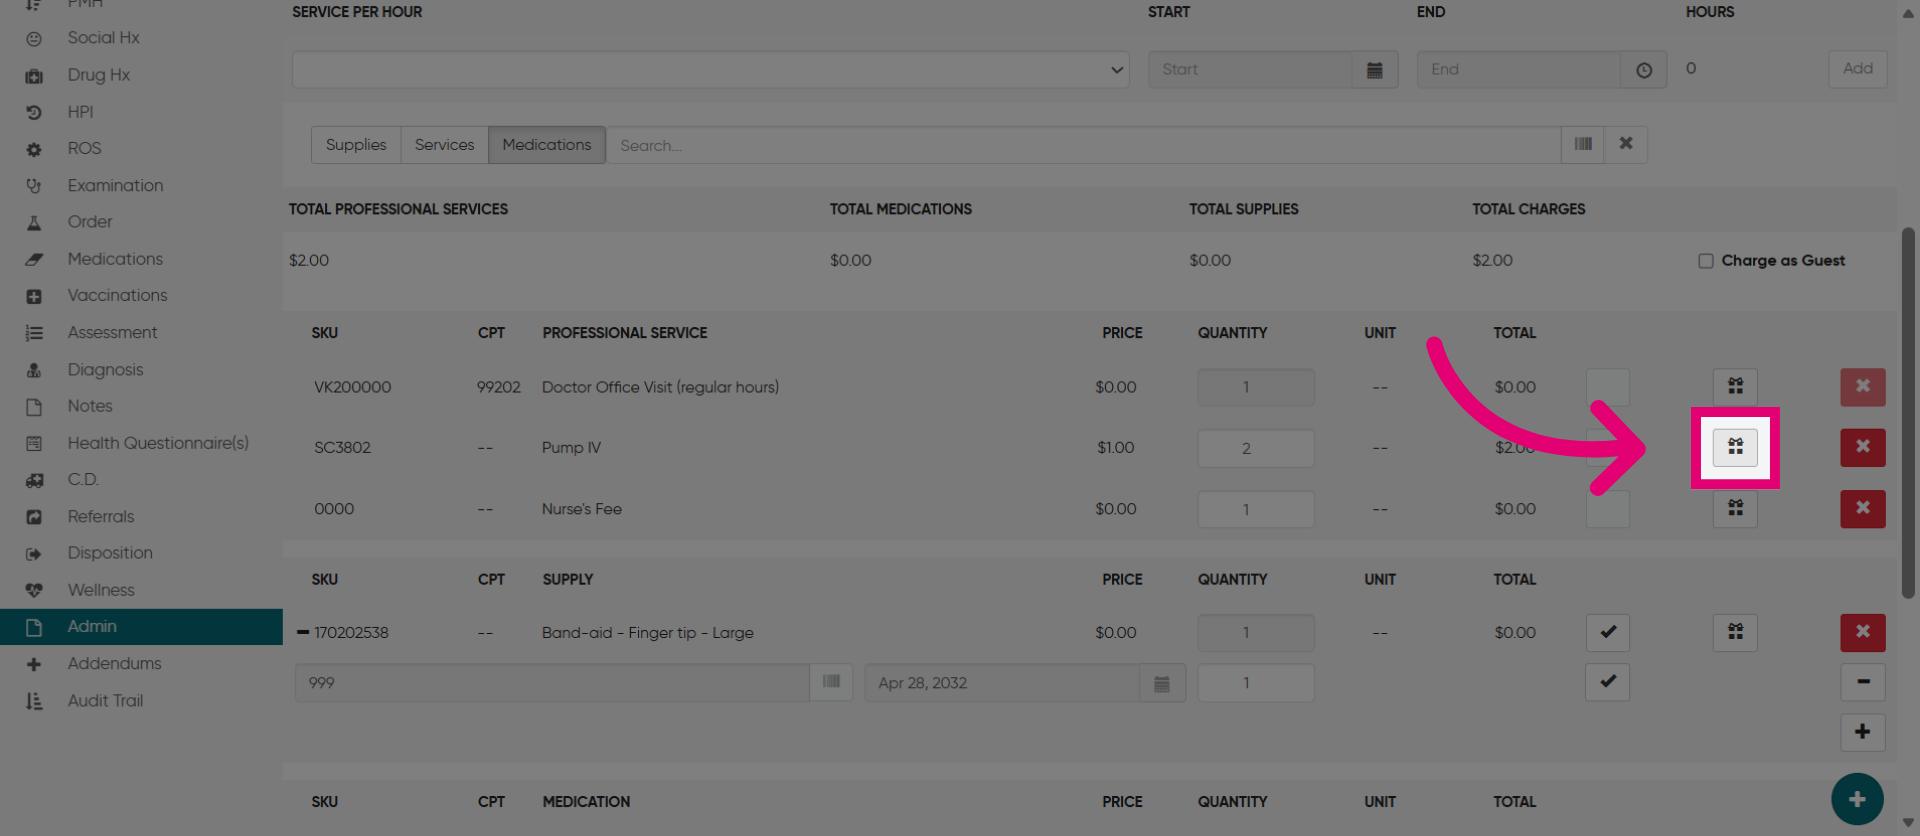
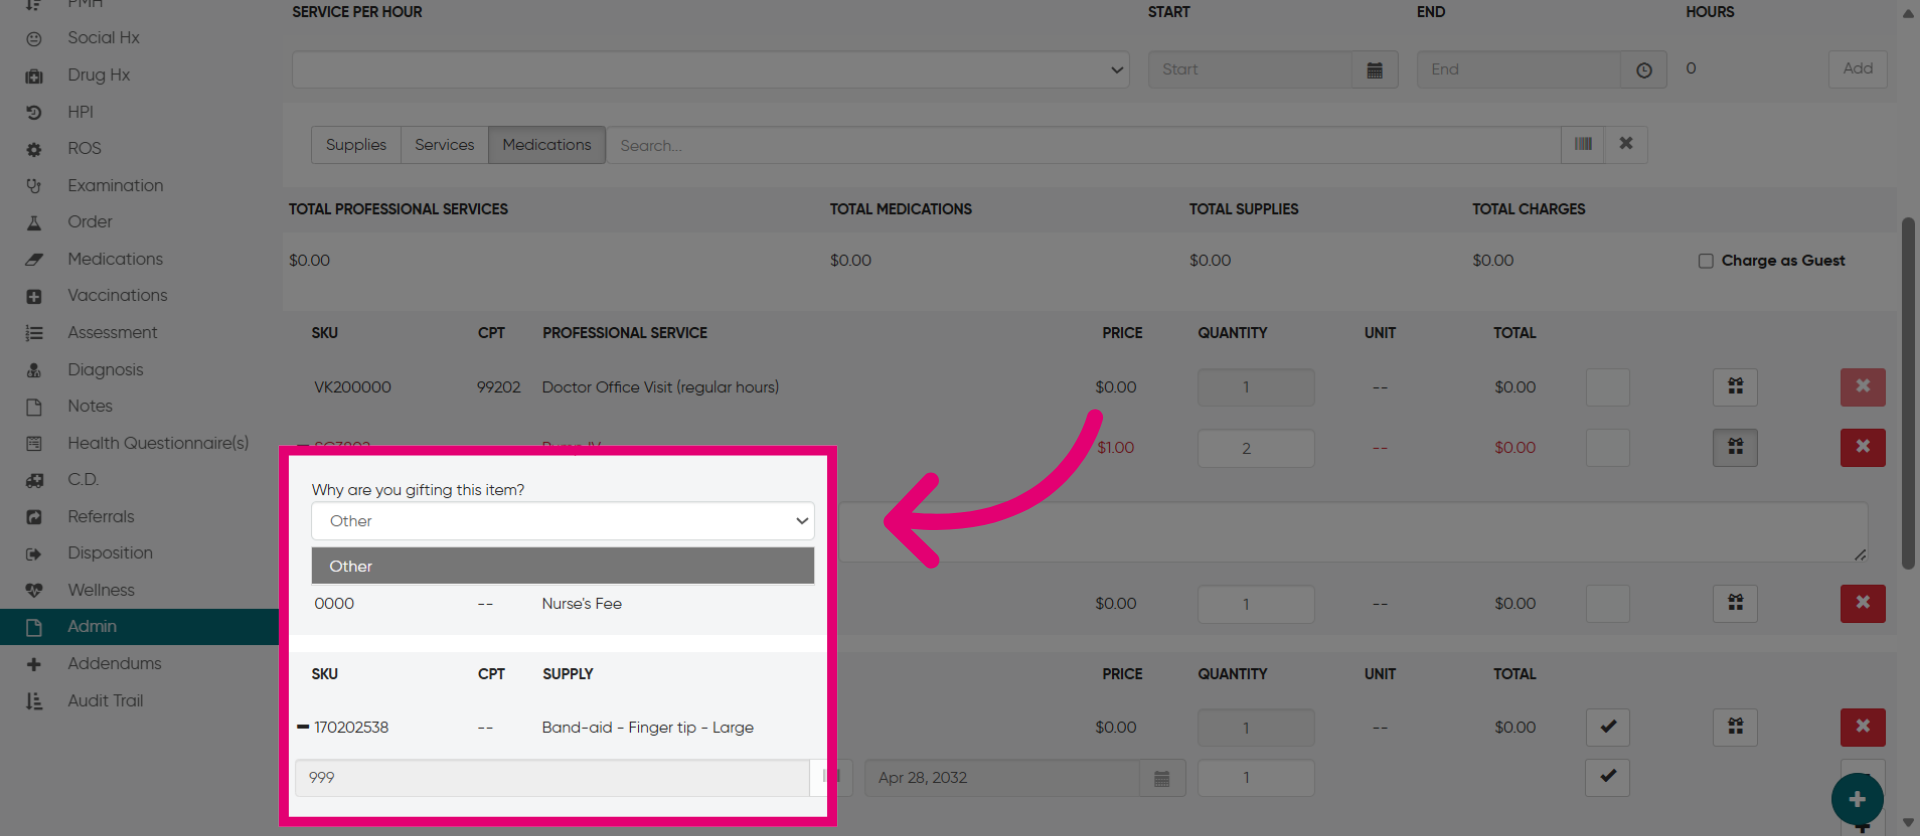
18. Gift an Item
You can gift an item to a patient by selecting the gift box option. There will not be a charge for that person.
19. Add "Gift" Reason
You must enter a reason for the gift.
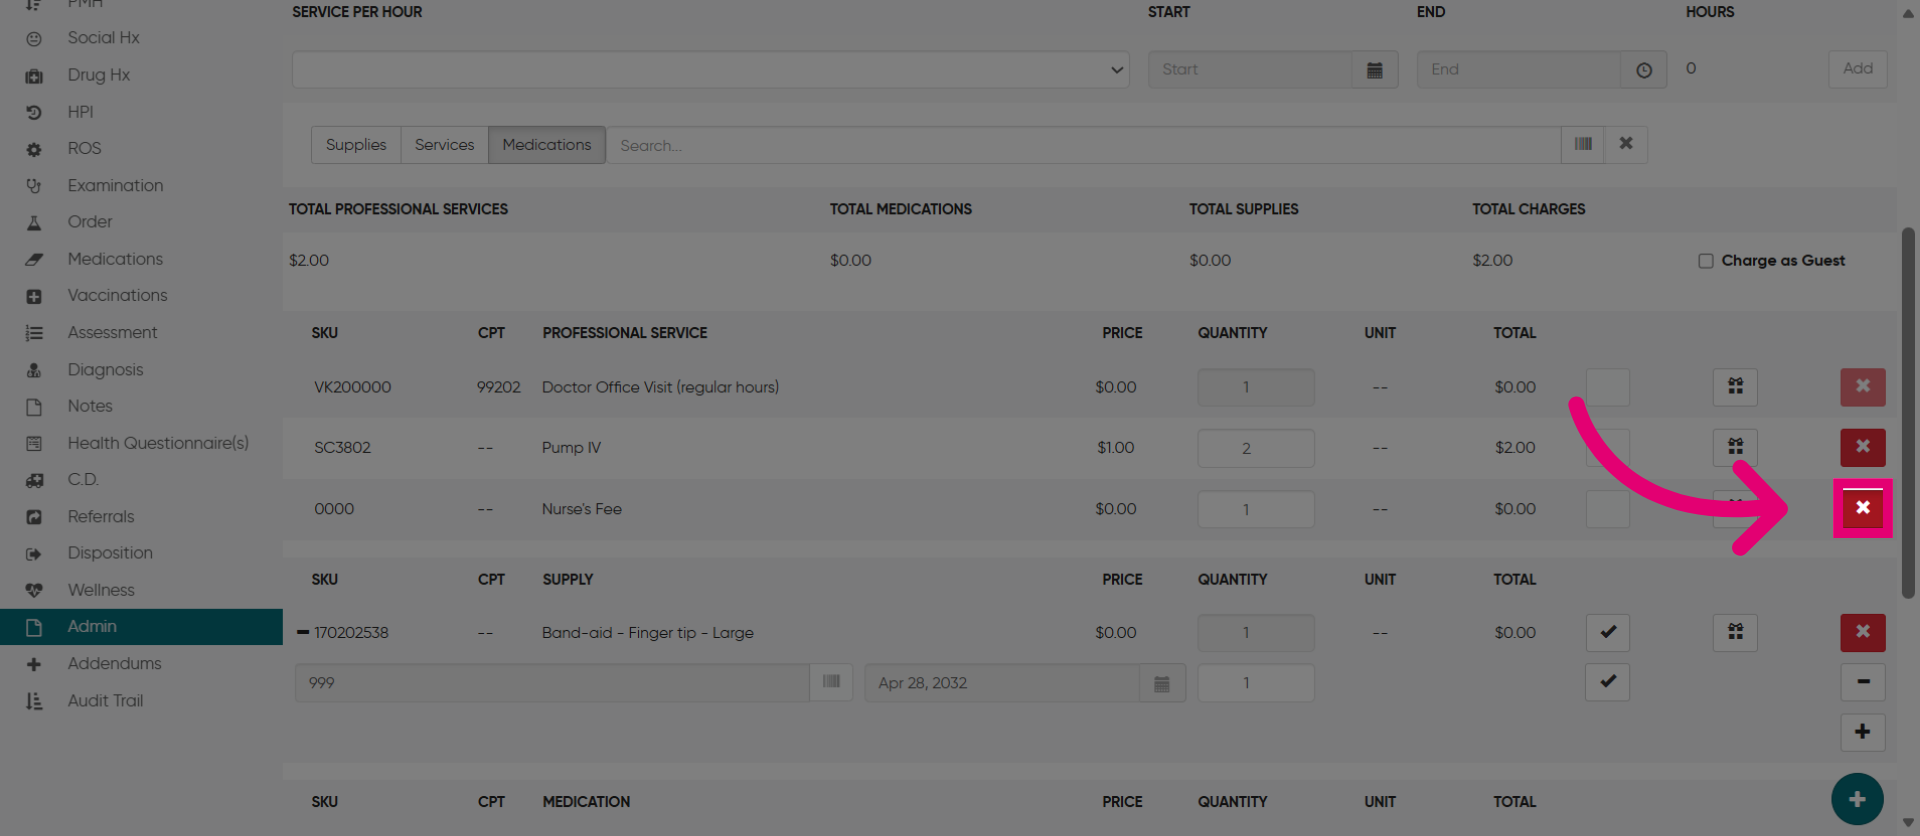
20. Remove an Item
You can also remove an item using the X button, or add a new lot with the plus button. Adding a lot introduces new inventory for items not previously in the system. This occurs when you're providing an item for which new inventory has not yet been added.
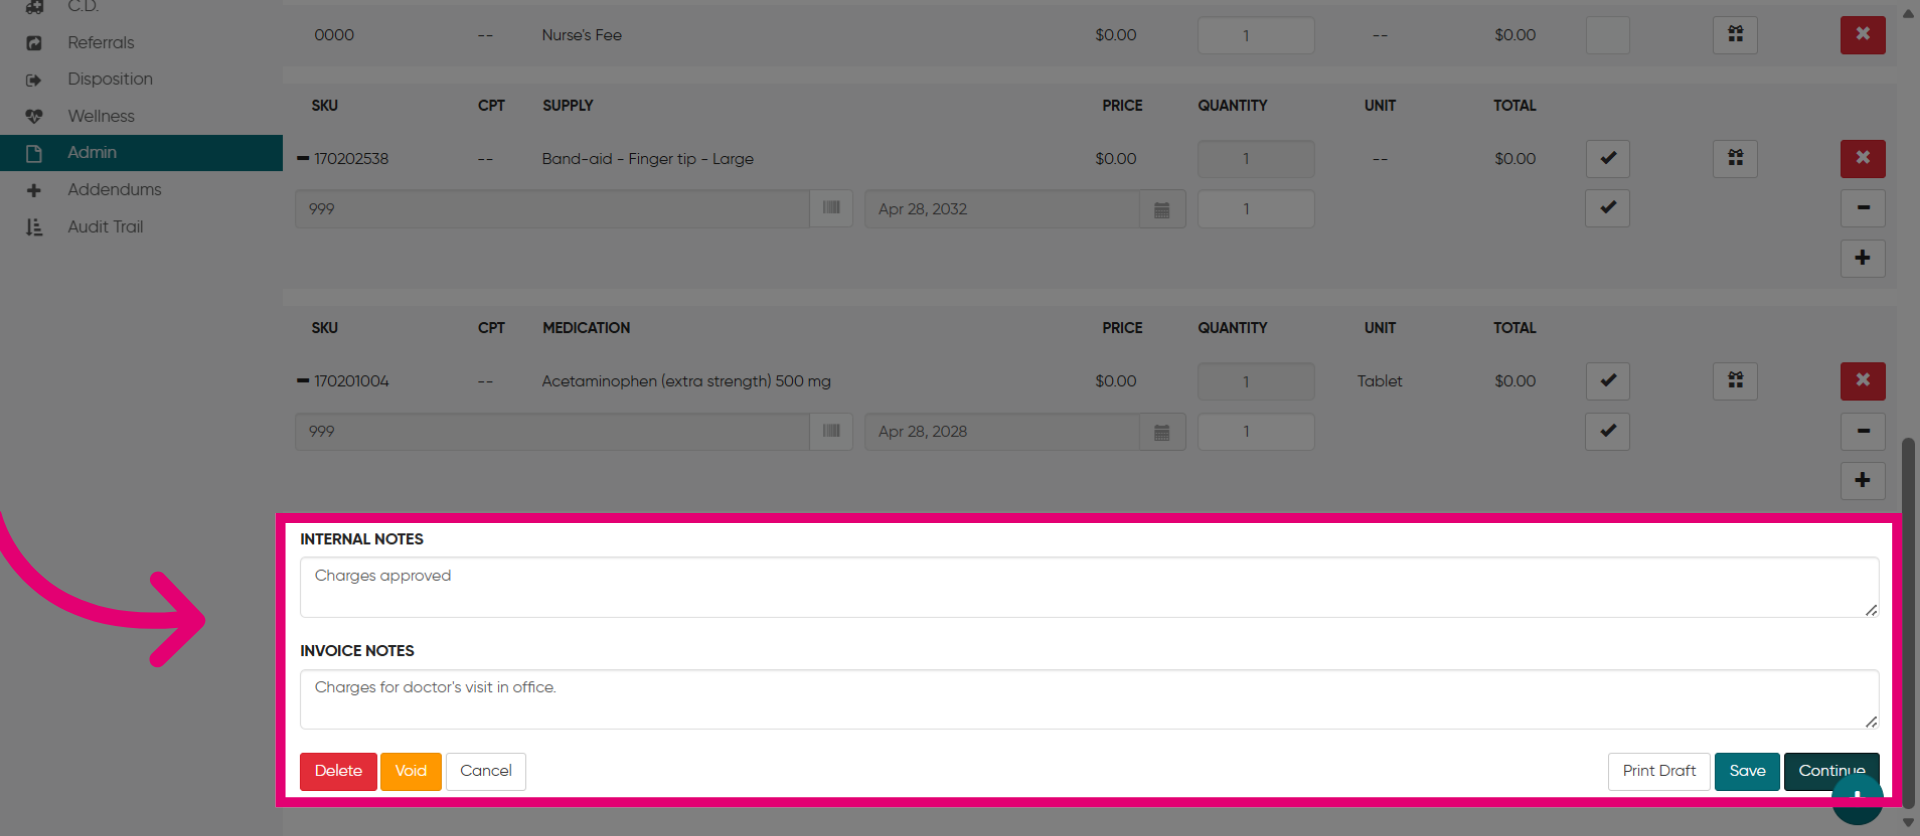
21. Add Internal or Invoice Notes
Add notes in this section for the internal team in the Internal Notes area or for the customer in the Invoice section.
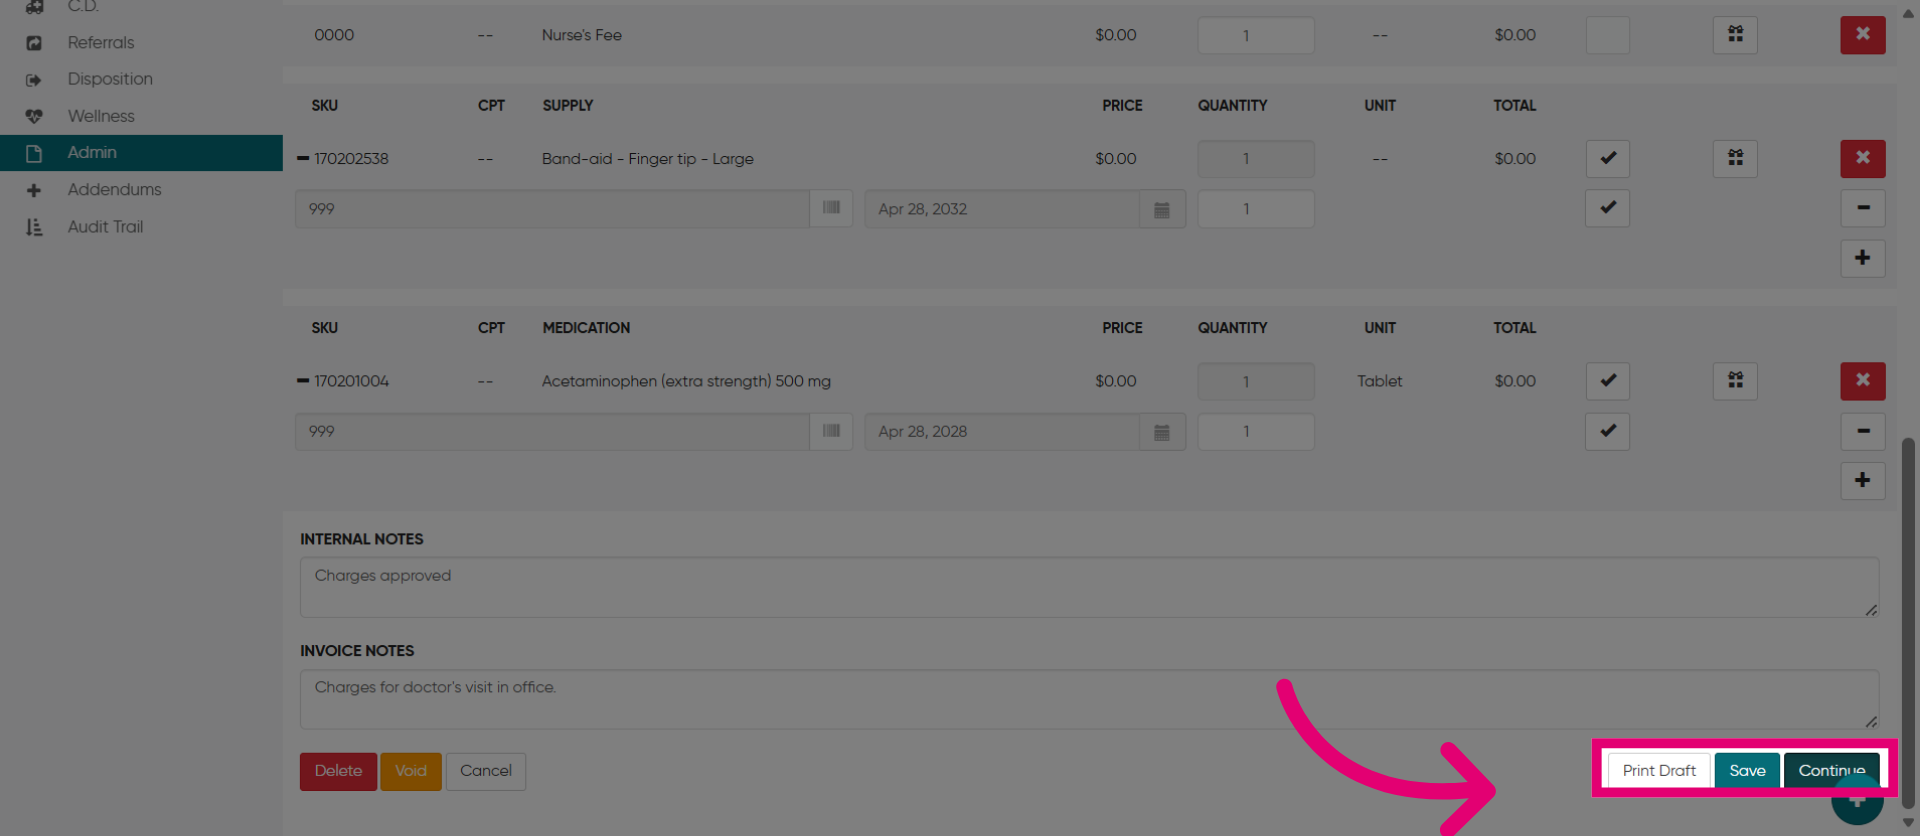
22. Continue to Next Step
You can print a draft of the bill or save it before submitting it. When you are ready to submit the bill, click "Continue" to proceed with the billing process.
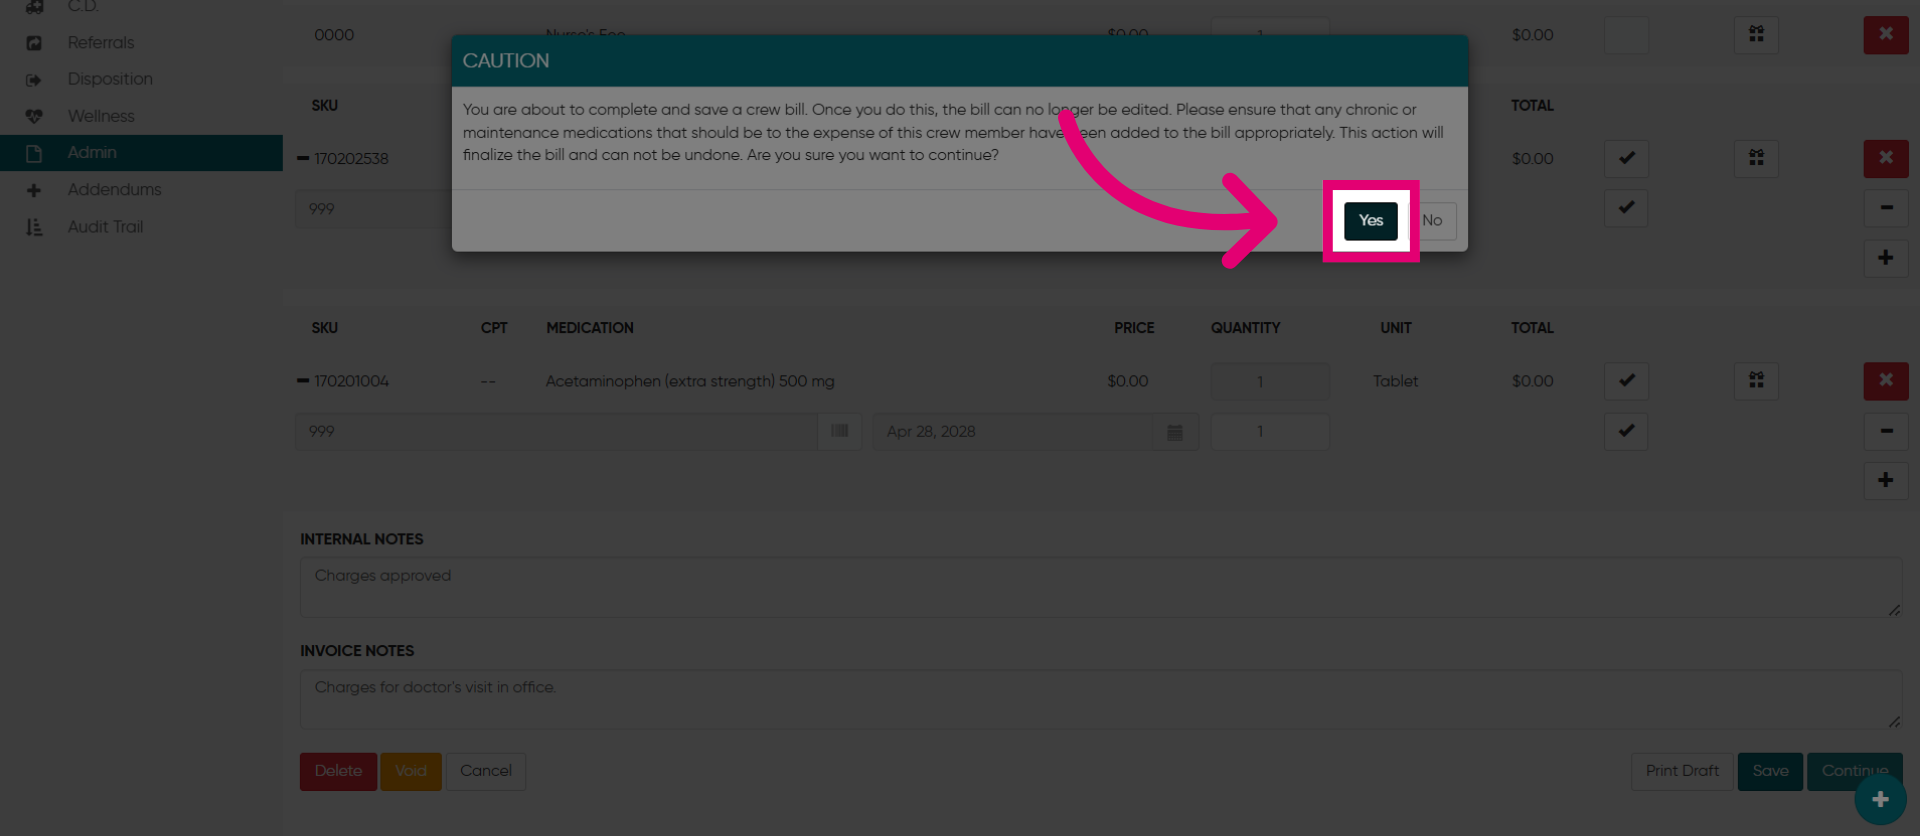
23. Confirm Action
Then, click "Yes" to confirm.
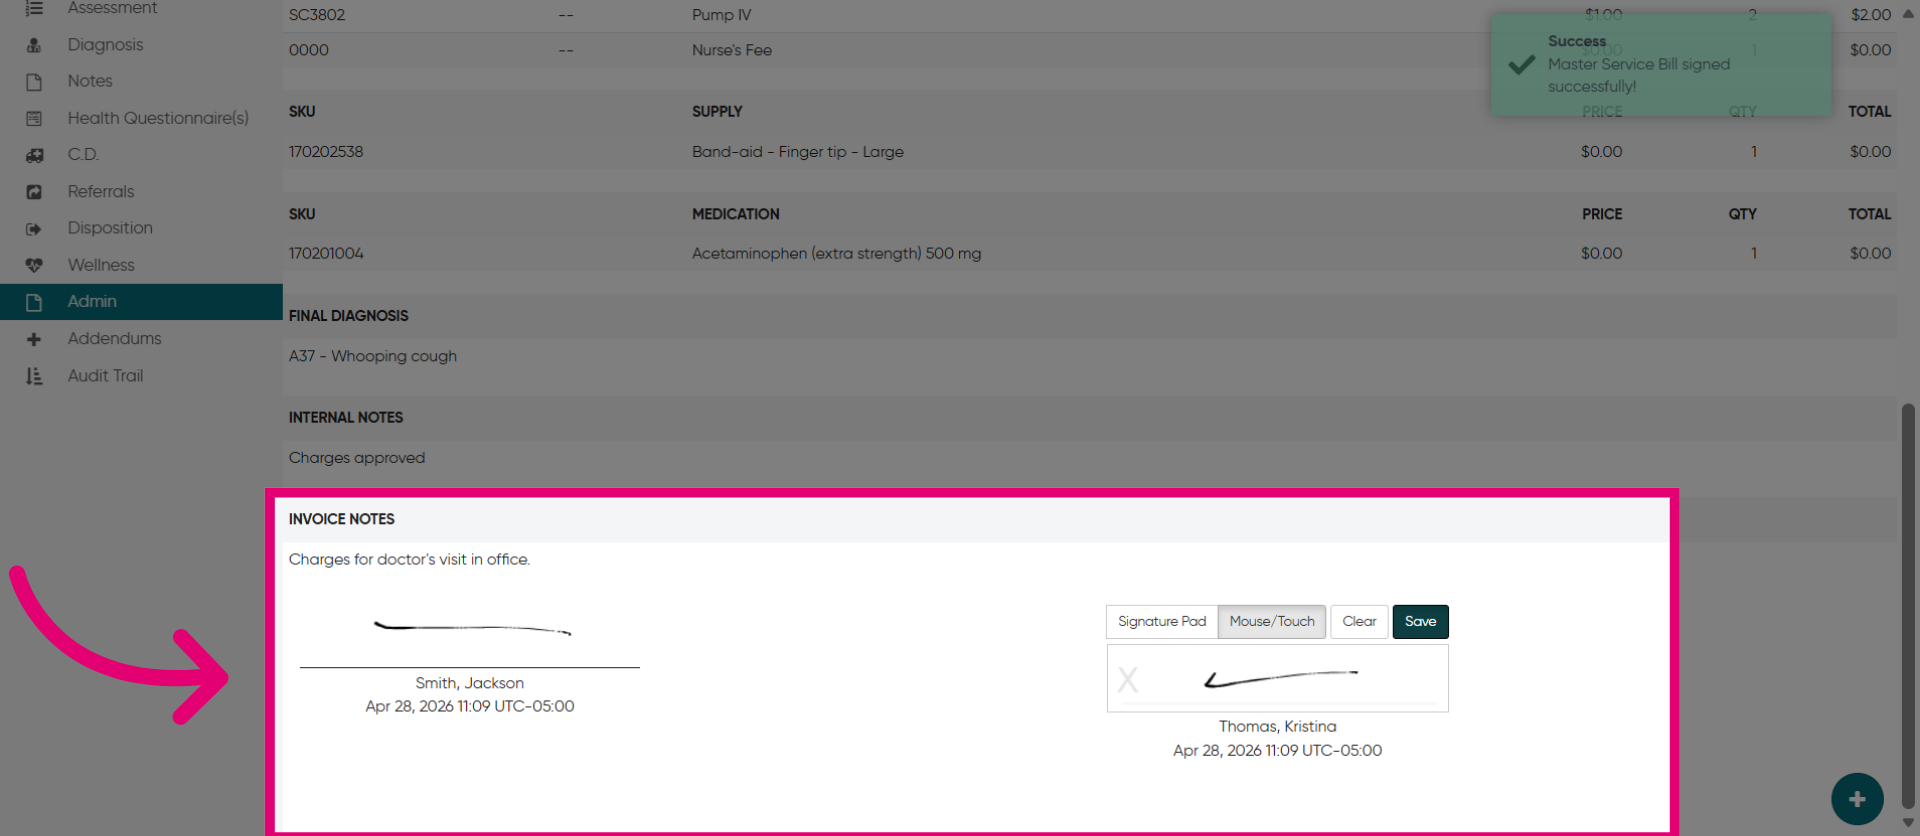
24. Add Signatures
The final step is to add signatures, usually by the patient and the physician and then click Save.
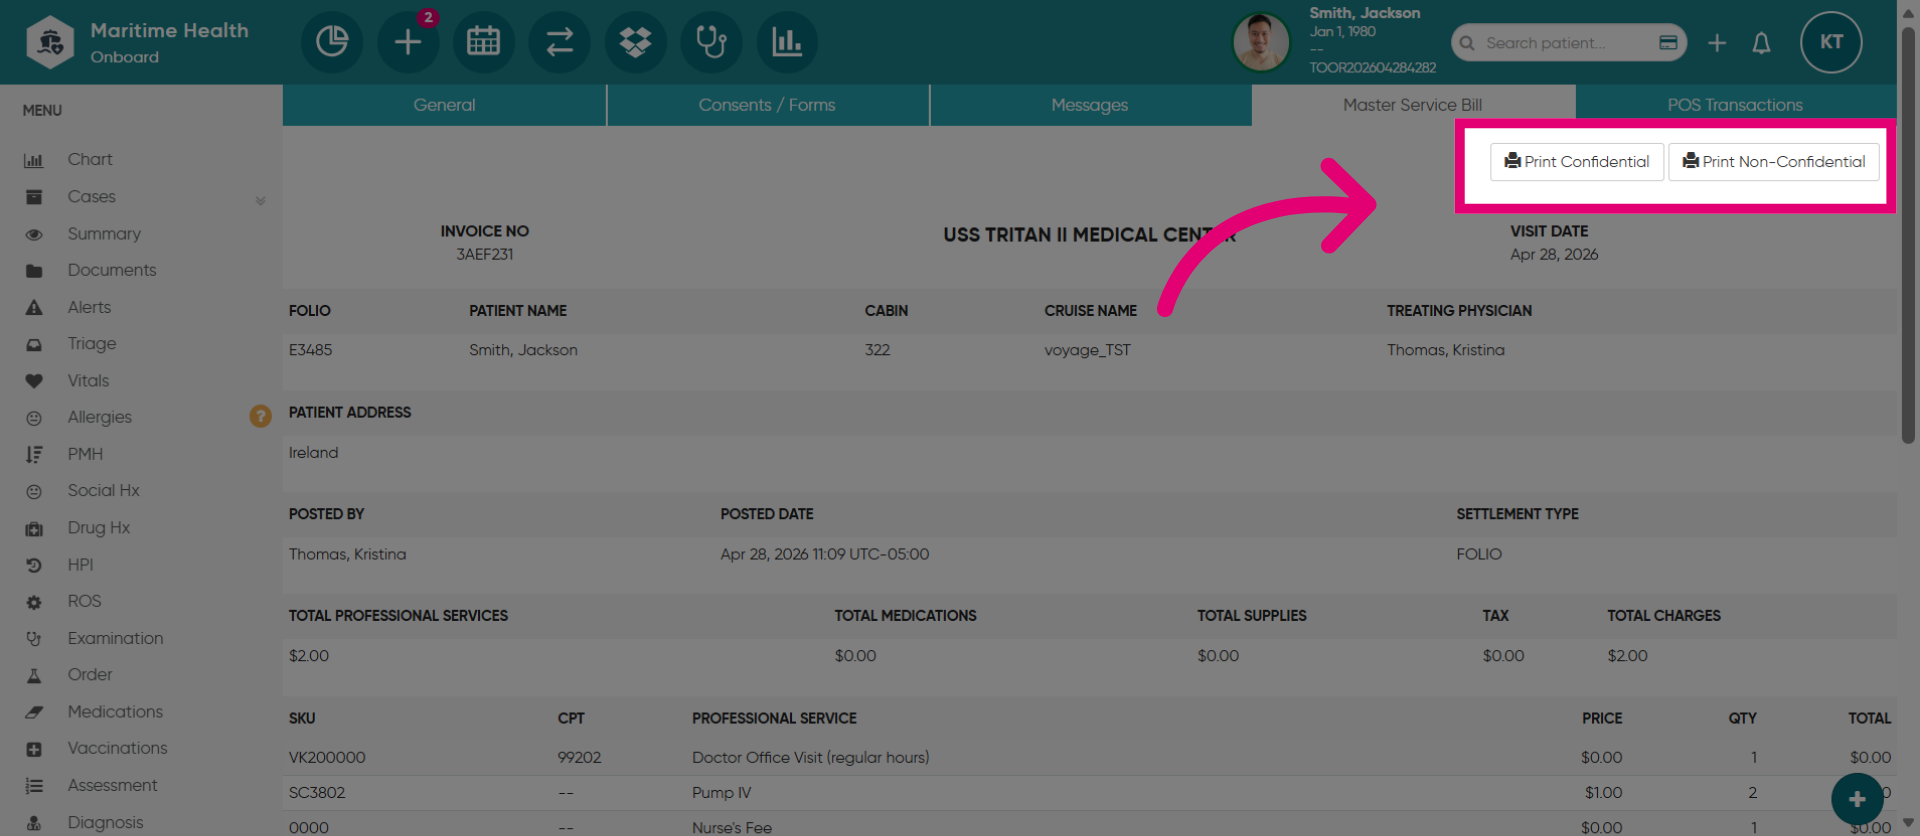
25. Access Print Options
Print confidential documents, which include patient demographic information. Non-confidential documents do not include this.
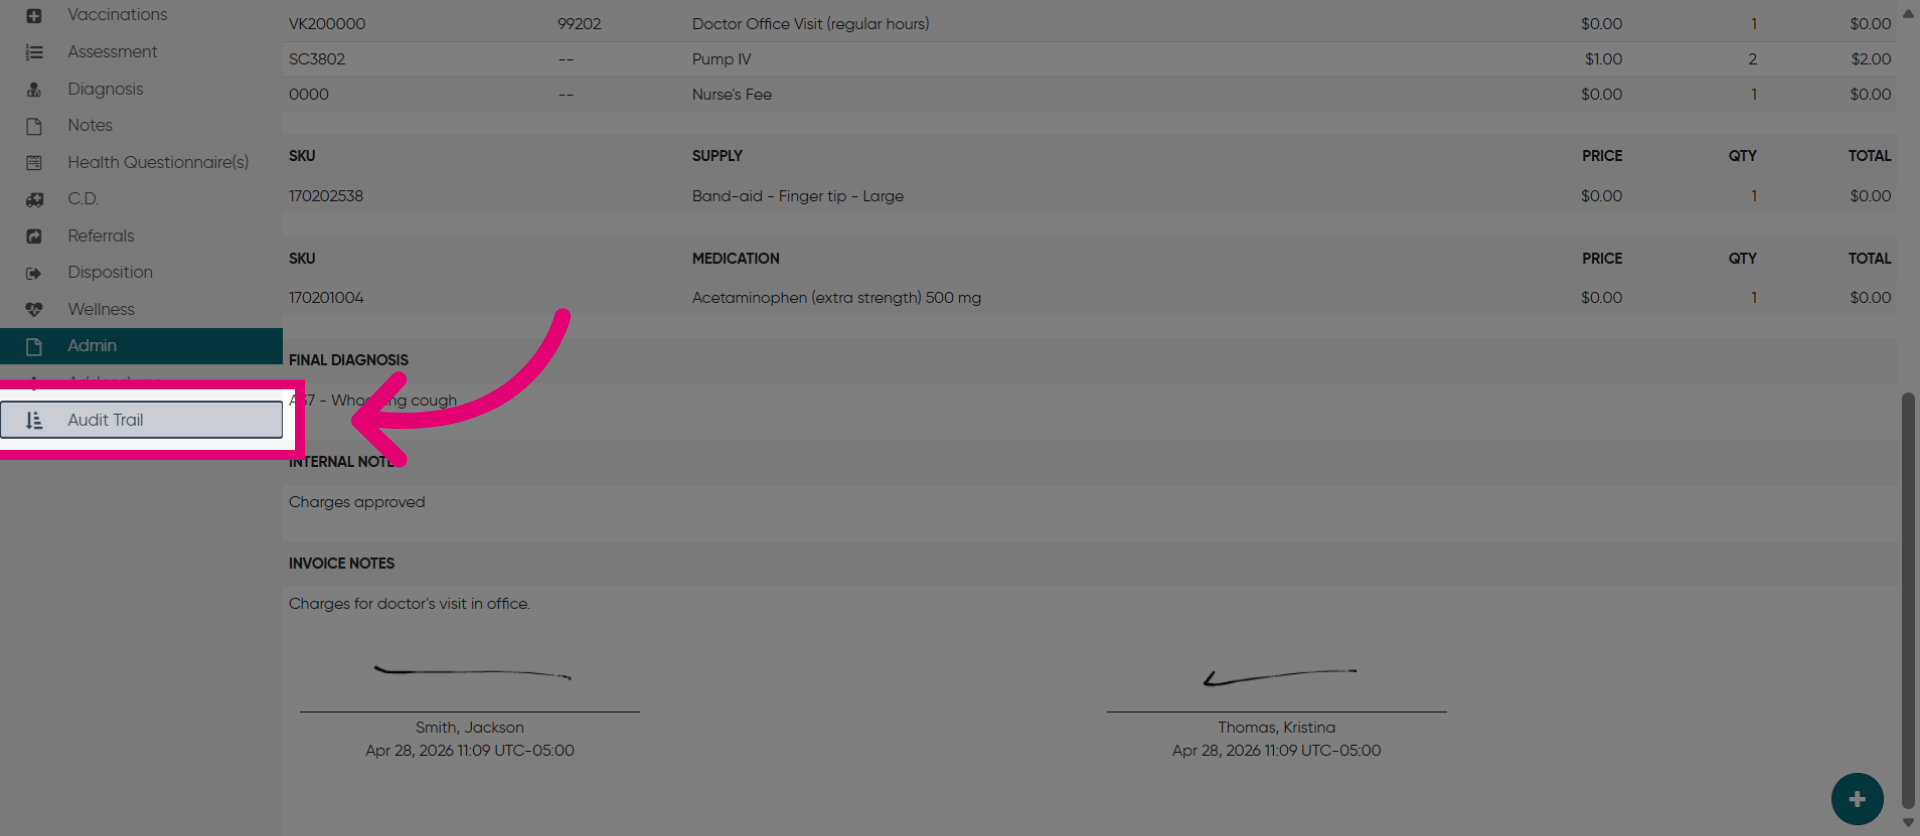
26. View Audit Trail
Then, click "Audit Trail" to review the history of changes made to the billing record.
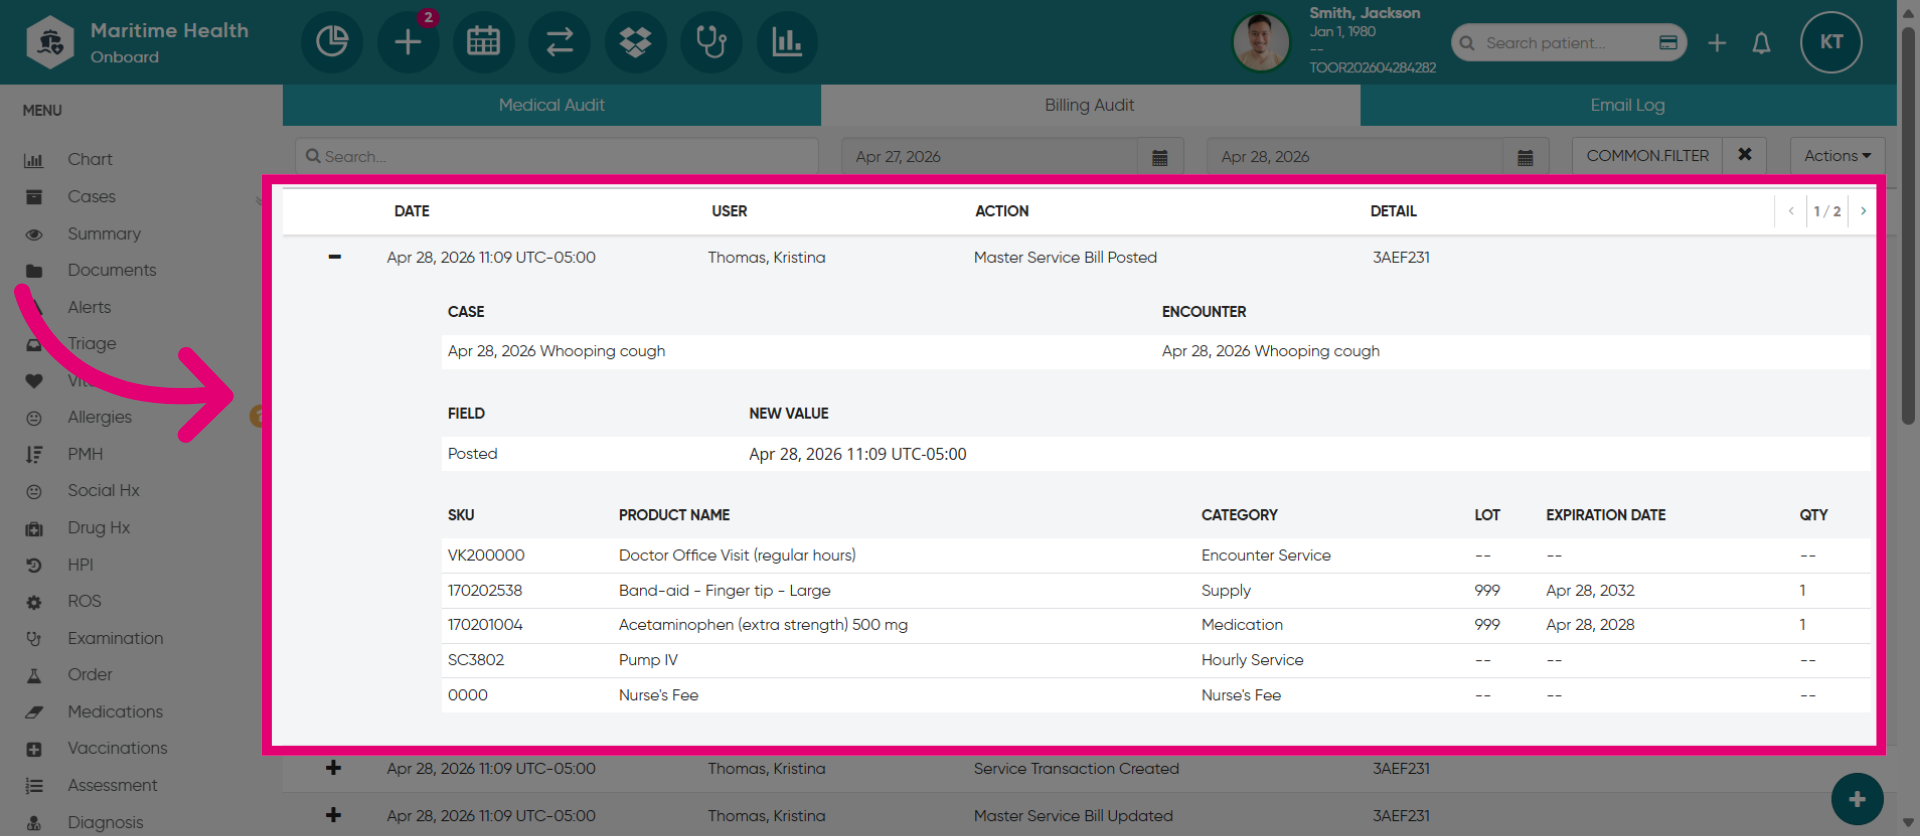
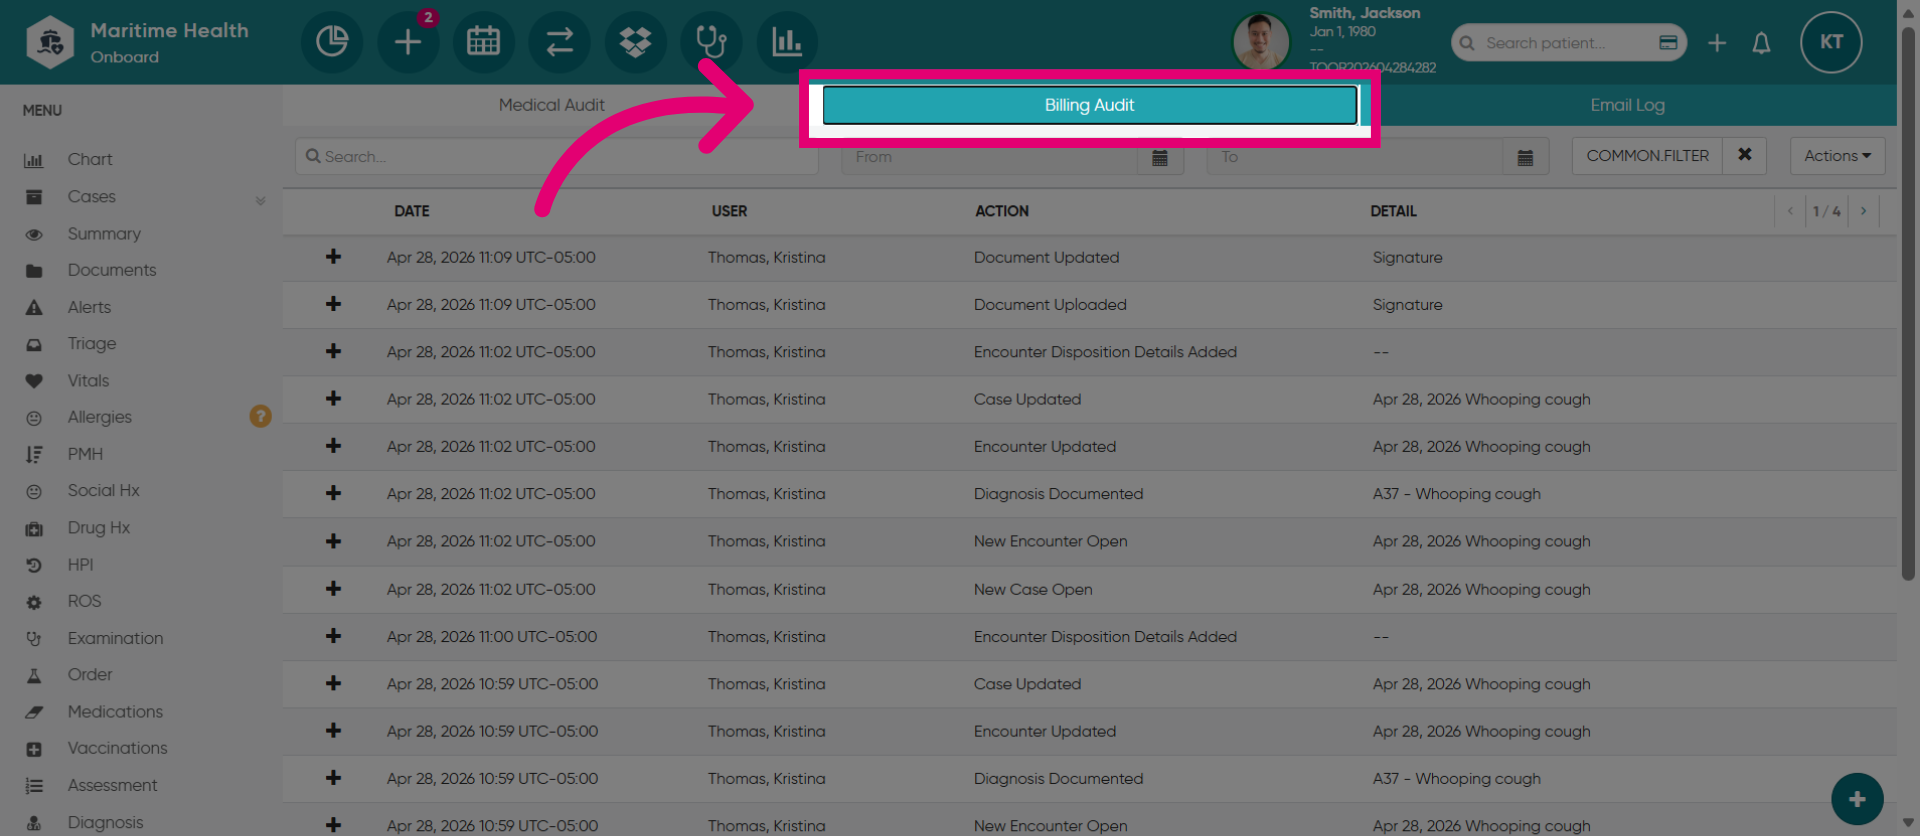
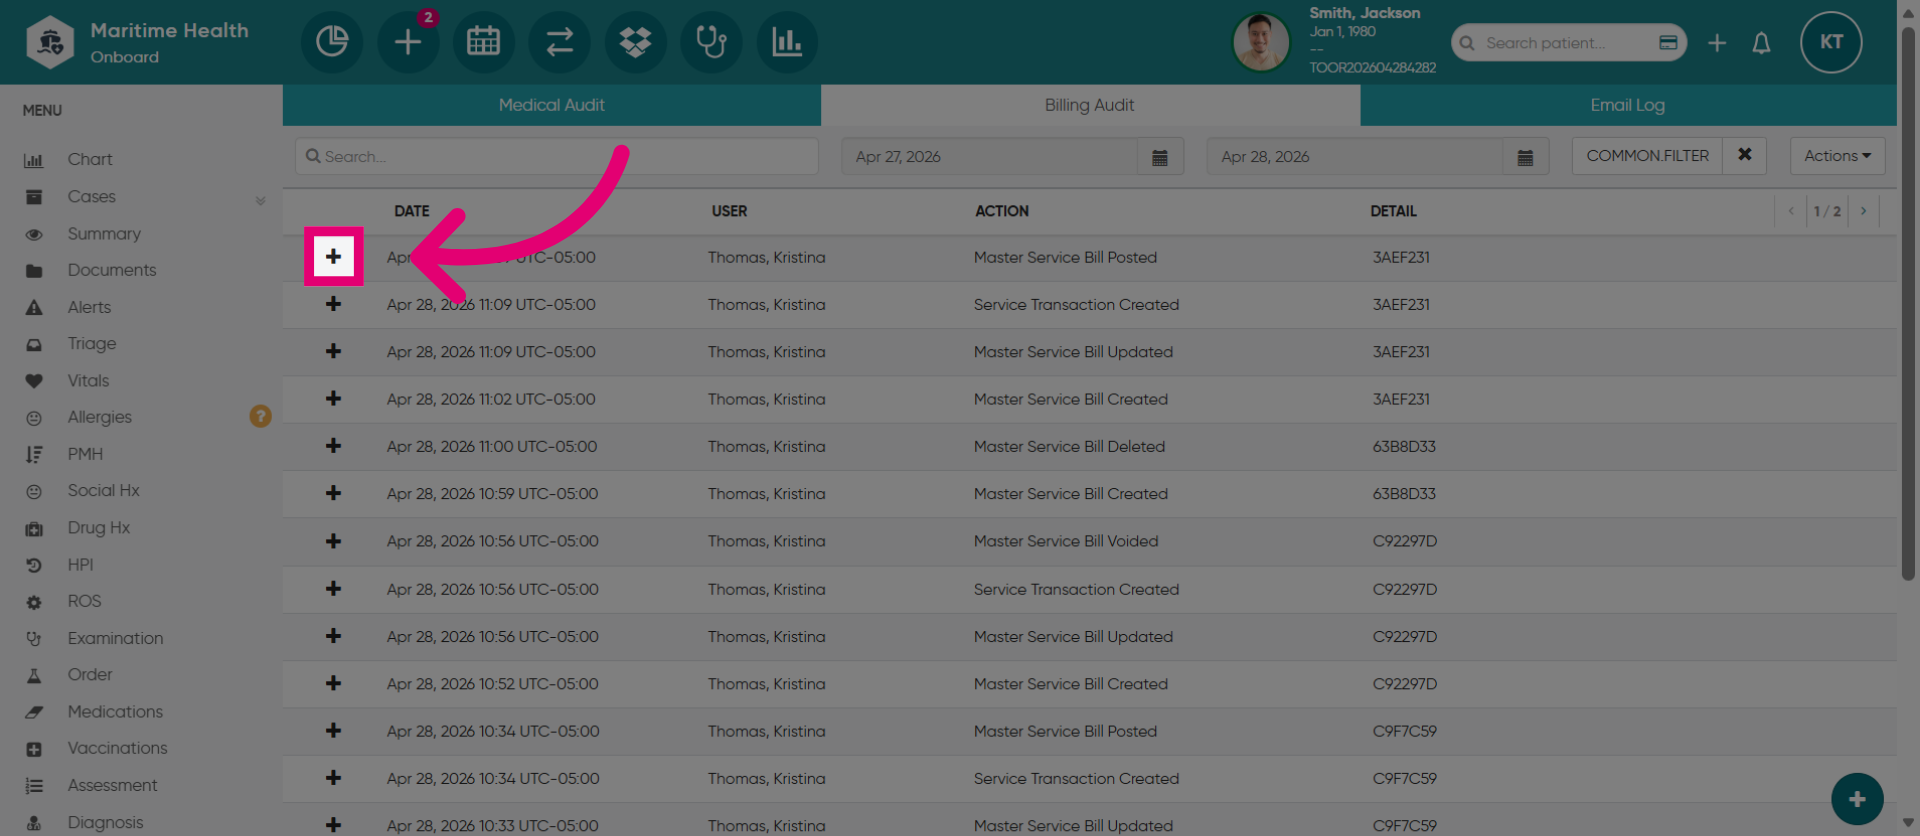
27. Access Billing Audit
Next, lick "Billing Audit" to examine detailed billing audit information.
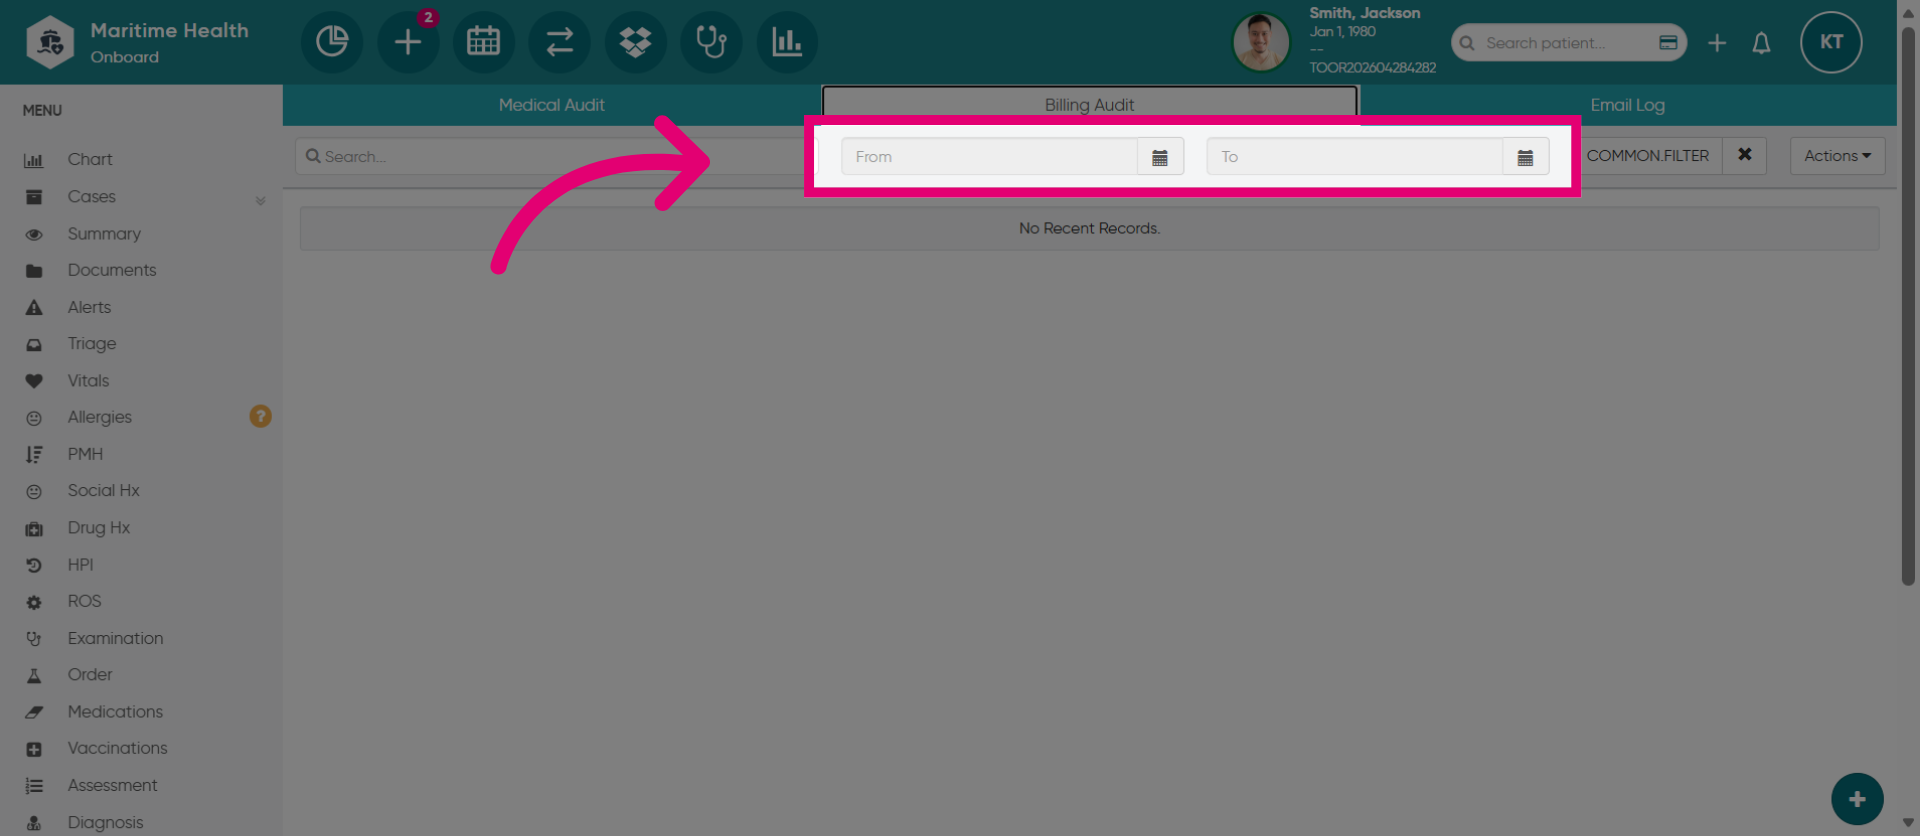
28. Add the Date Range
Then, add the date range.
29. View the billing details
Locate the bill in the list of results. Then, click on the plus sign to view the billing details.
30. View the MSB Log
Then, you are able to review the MSB log.