New article
Recently updated
Scheduling appointment quick actions

Who is this article for?Administrators configuring the encounter process.
No elevated permissions are required.
This guide provides a step-by-step walkthrough for scheduling appointments directly from a patient chart in SeaCare using the Quick Action feature. This streamlined process allows authorized users to quickly access the scheduling interface, select available time slots, and confirm appointments—all without navigating away from the patient’s record. It’s designed to improve efficiency, reduce clicks, and ensure a smoother workflow for clinical and administrative staff.
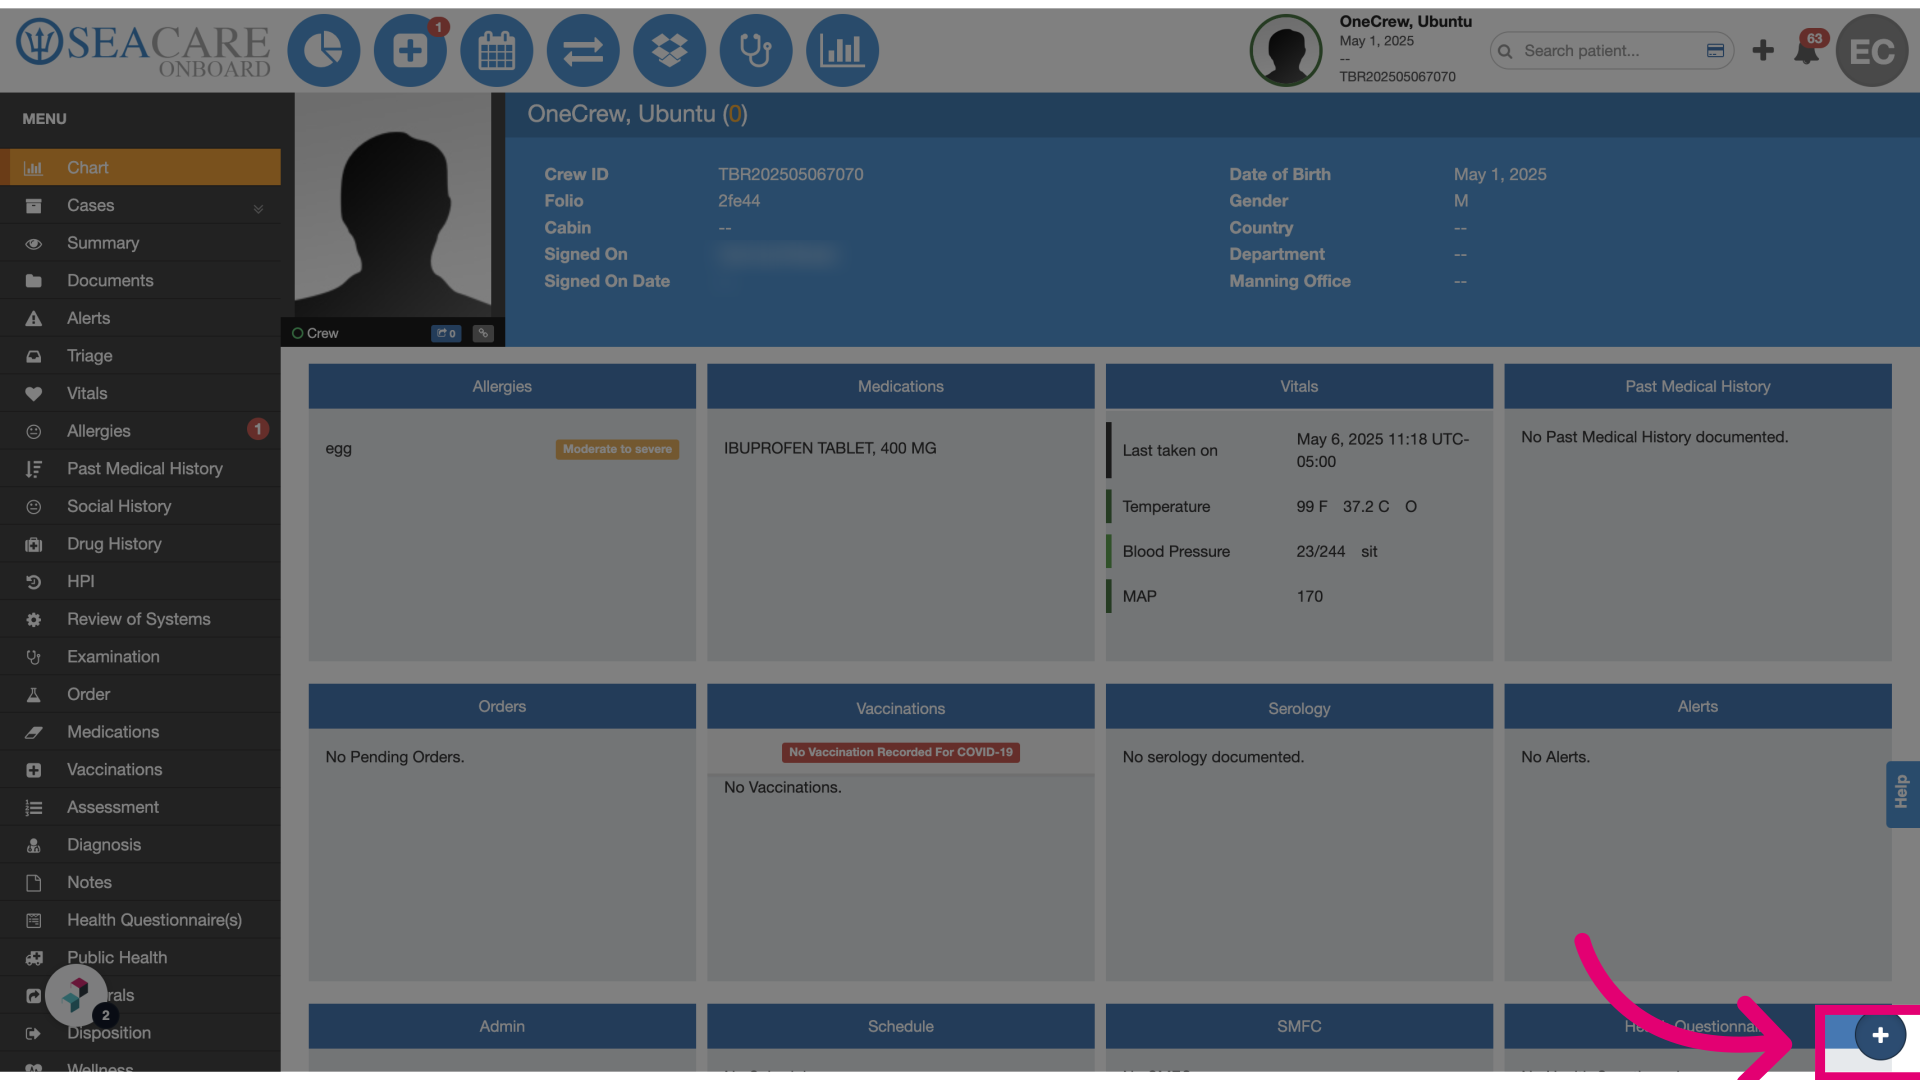
- Select the quick action + icon: From the patient chart, click the Quick Action button to begin scheduling. Note that this feature is permission-based, so ensure the user has the appropriate Schedule Appointment permission enabled.
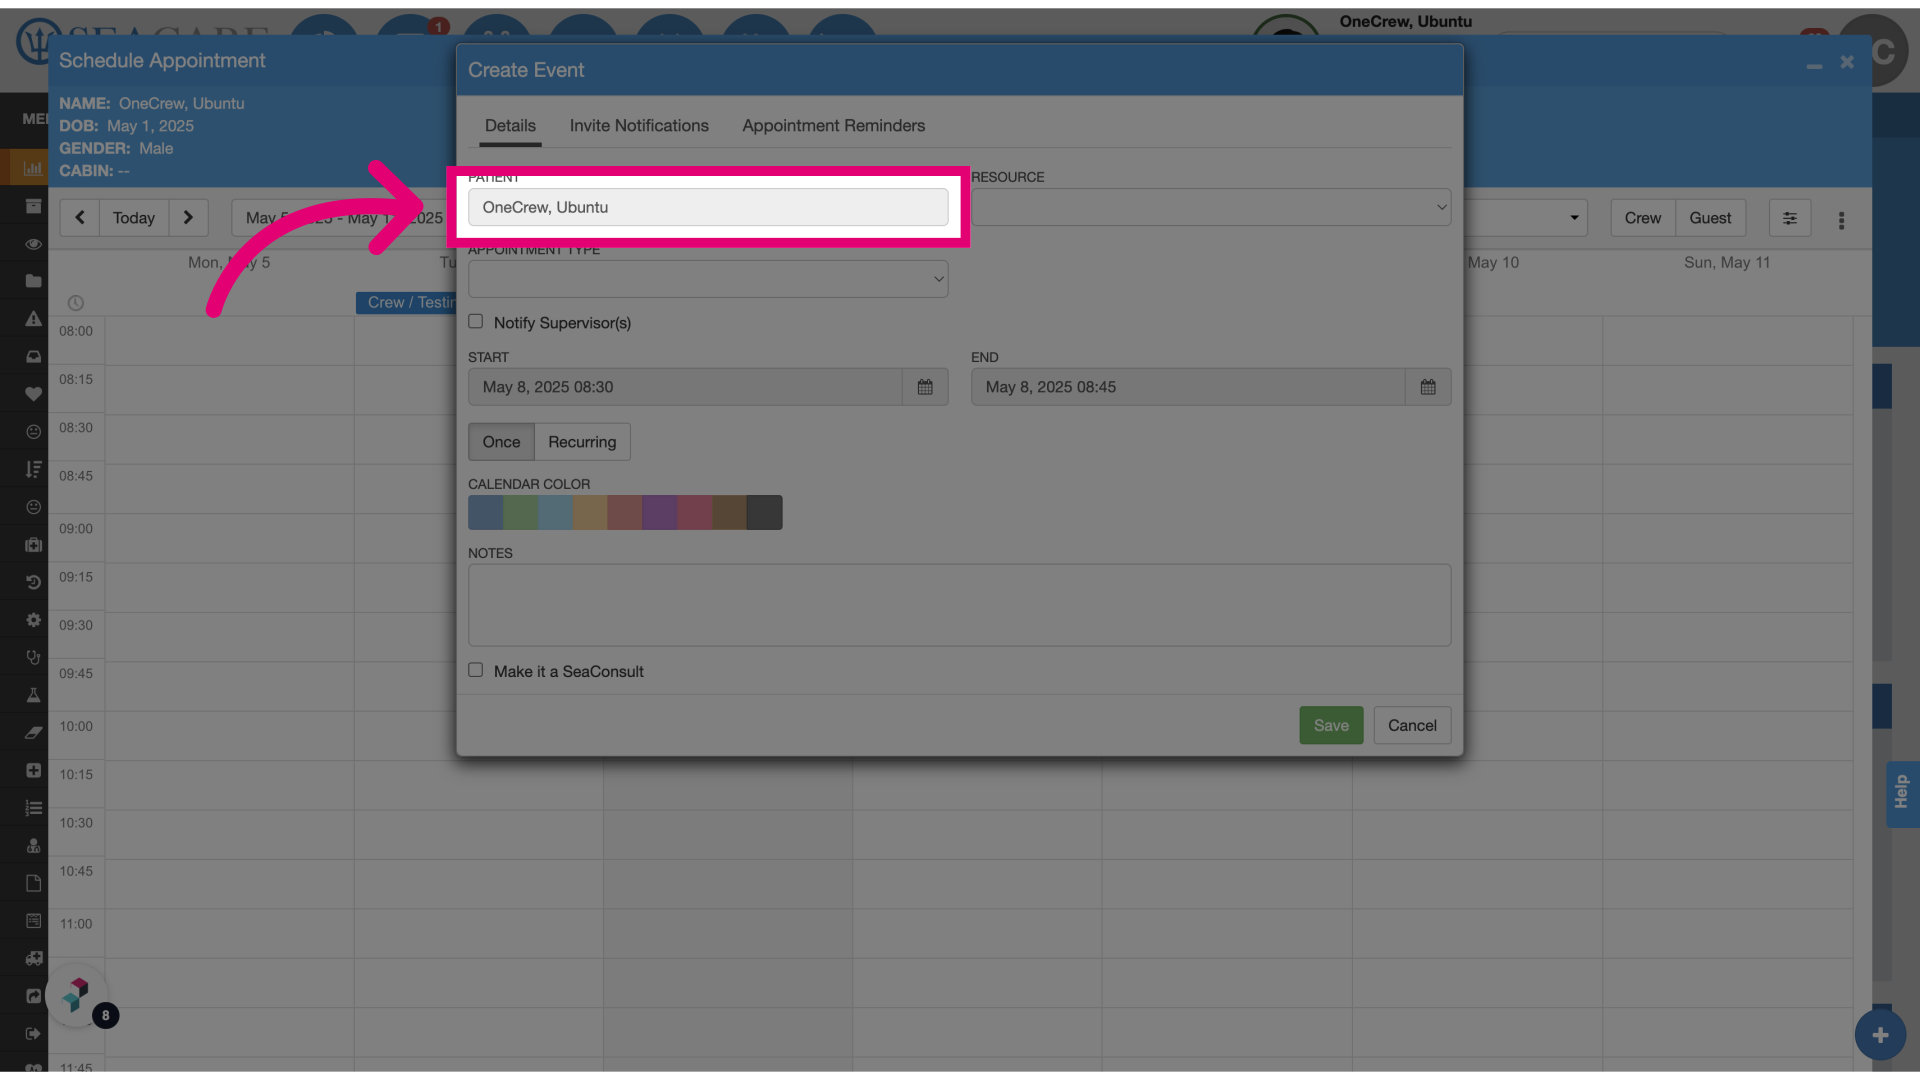
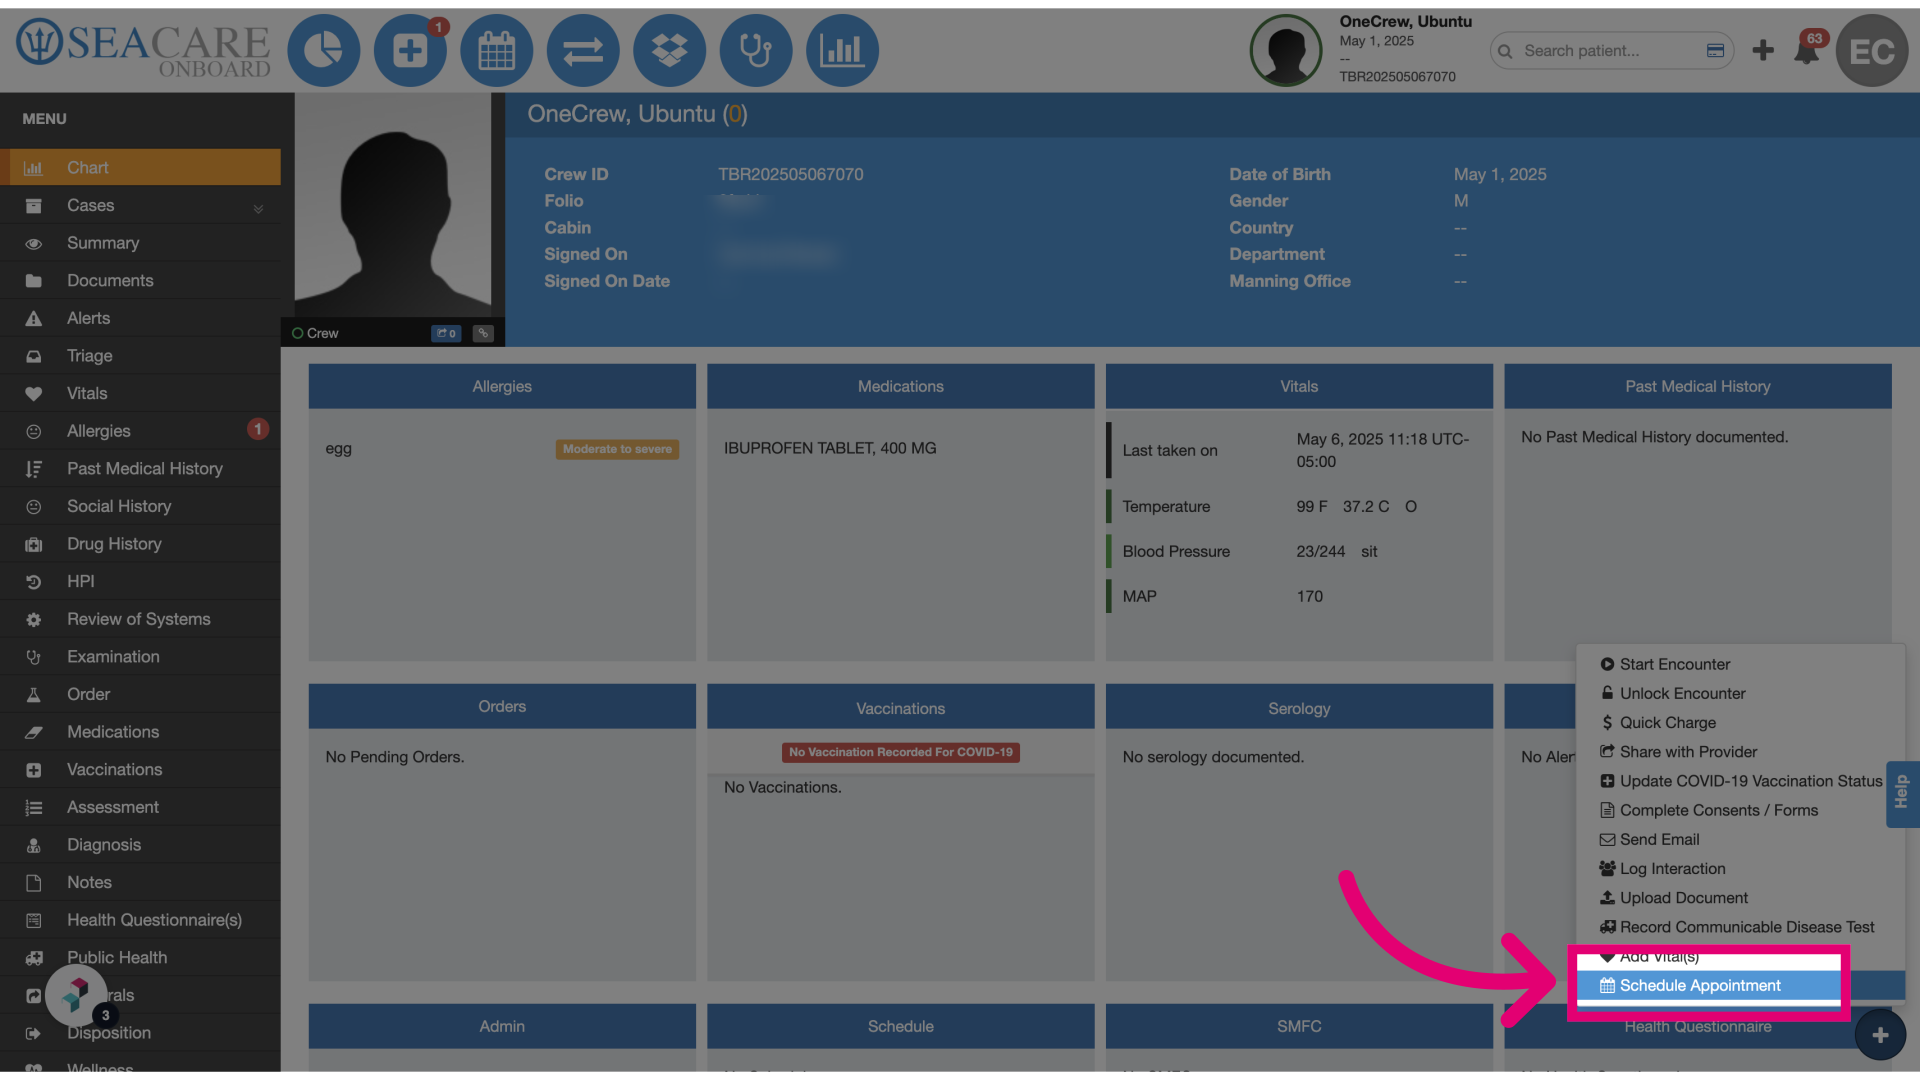
- Click Schedule Appointment: This opens the appointment scheduling interface where you can begin selecting details.
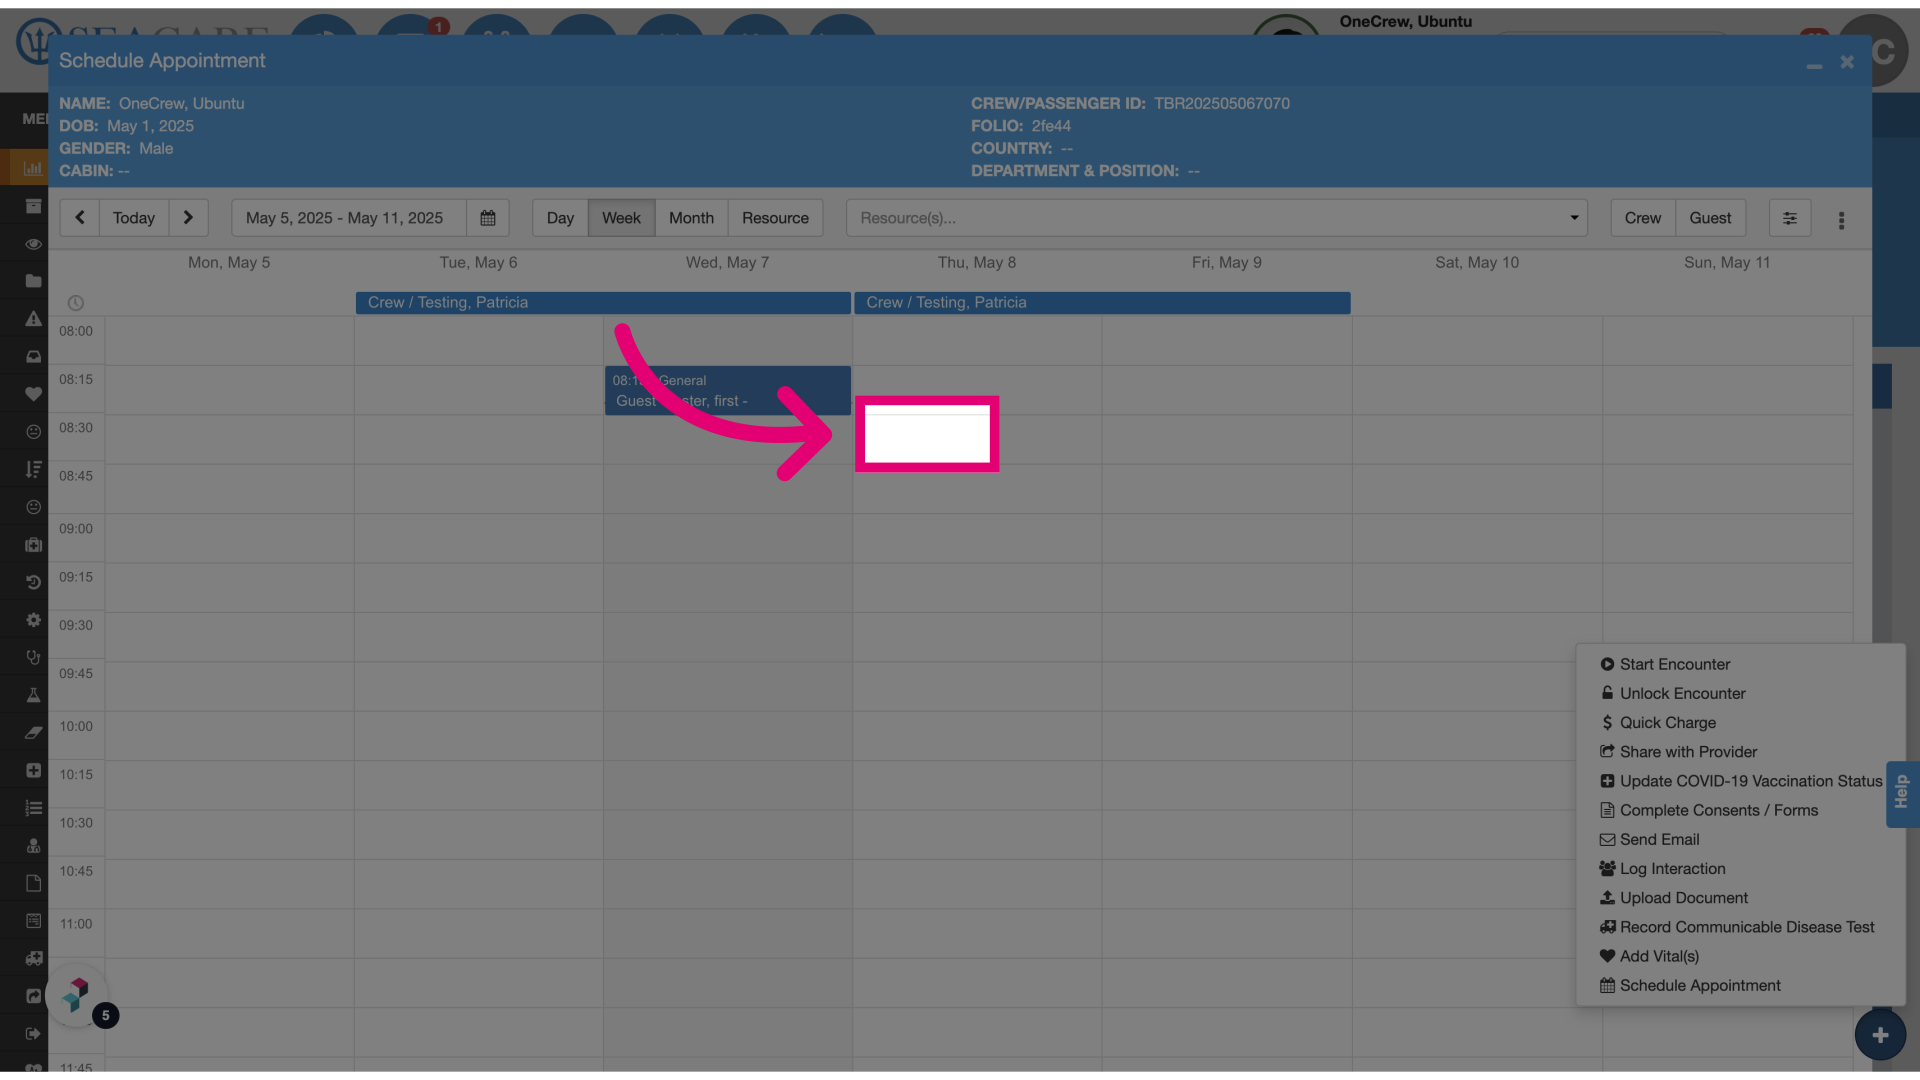
- Select the date and time slot: A scheduling modal will appear showing the clinic’s calendar. Choose the appropriate date and time for the appointment.
- Review the patient's name: The patient's name will auto-populate in the event creation window. After verifying the details, click Save to finalize the appointment. It will then appear on the clinic’s calendar.