New article
Recently updated
Adding Users and Permissions in Ideagen Maritime Health Provider

Who is this article for?Users who want to learn to add users and their permissions in Ideagen Maritime Health Provider.
No elevated permissions are required.
This guide provides detailed instructions for adding users in Ideagen Maritime Health Provider. You will learn how to navigate the interface, input necessary information, and ensure that each user is set up correctly and with the appropriate permissions to access the features they require.
1. Adding Users and Permissions in Ideagen Maritime Health Provider
1.1. Video
1.2. Steps
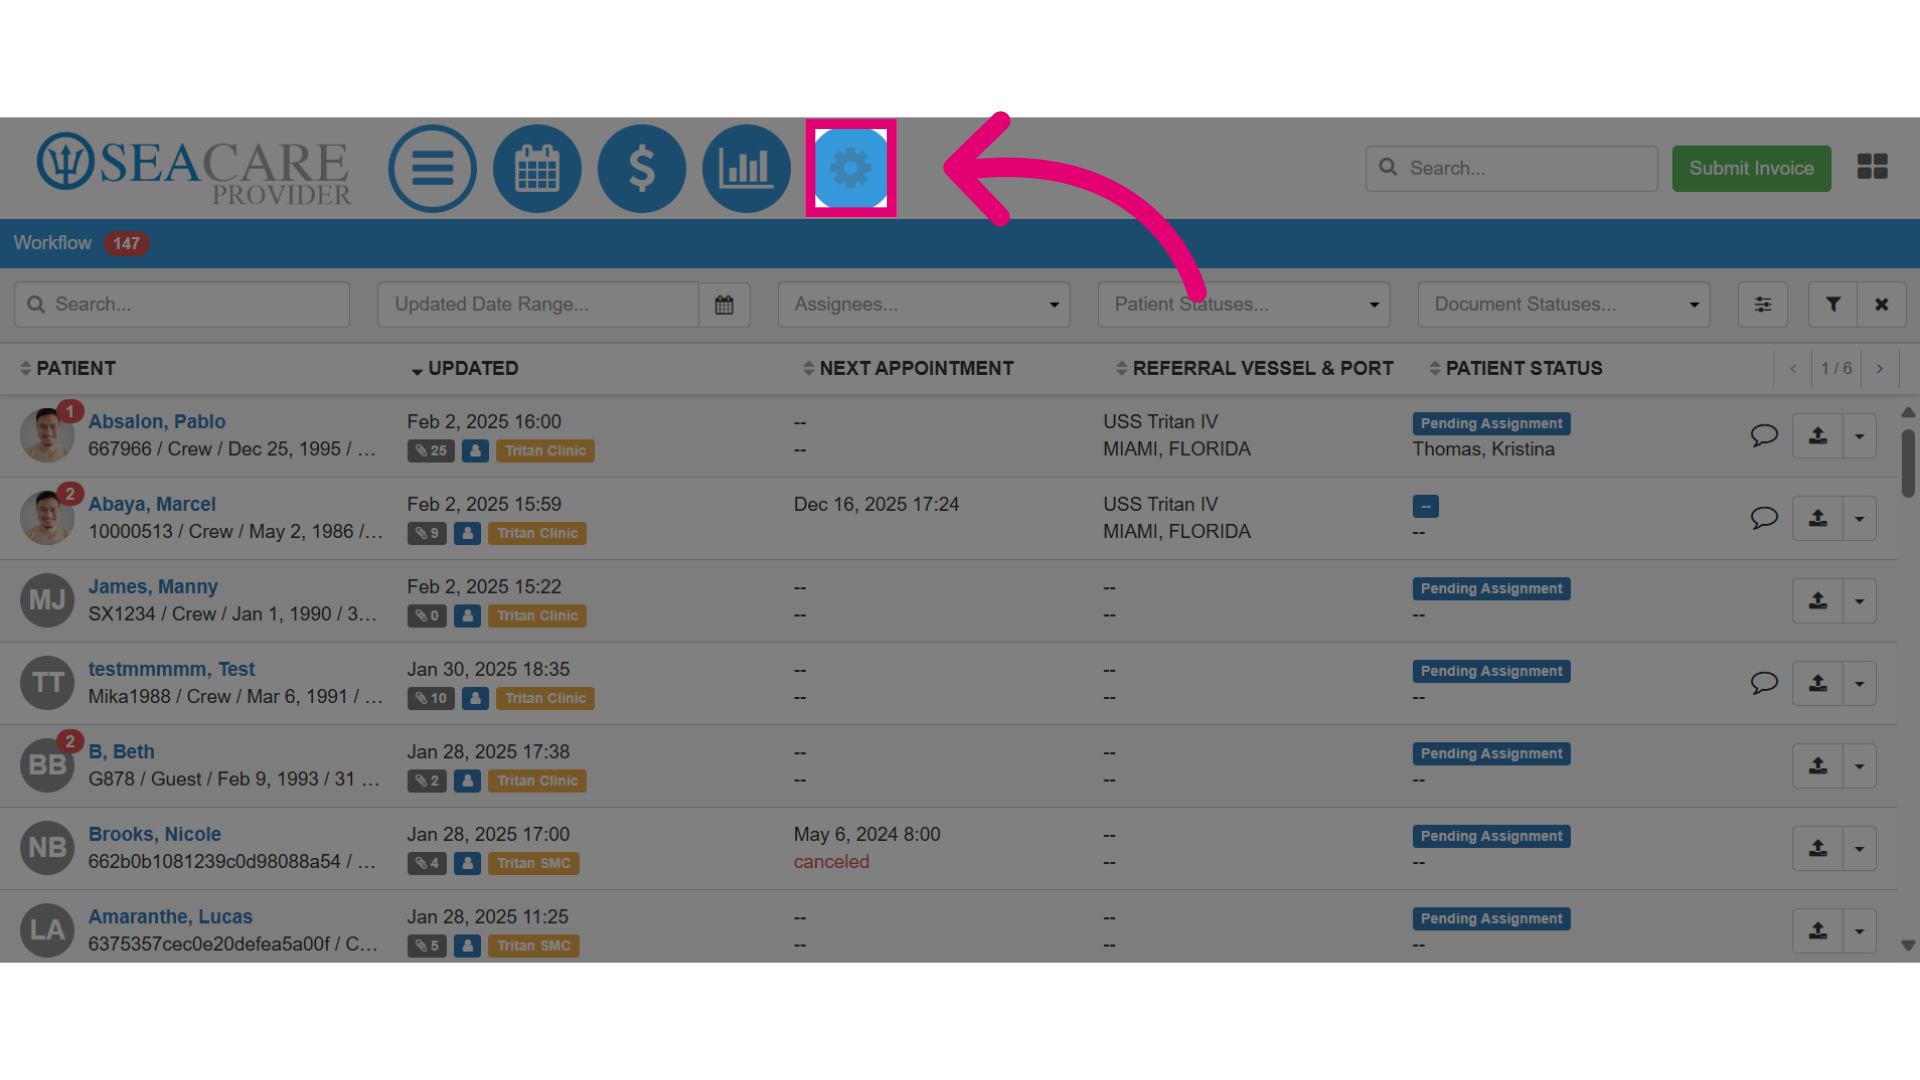
- Start by selecting the Admin Settings menu.
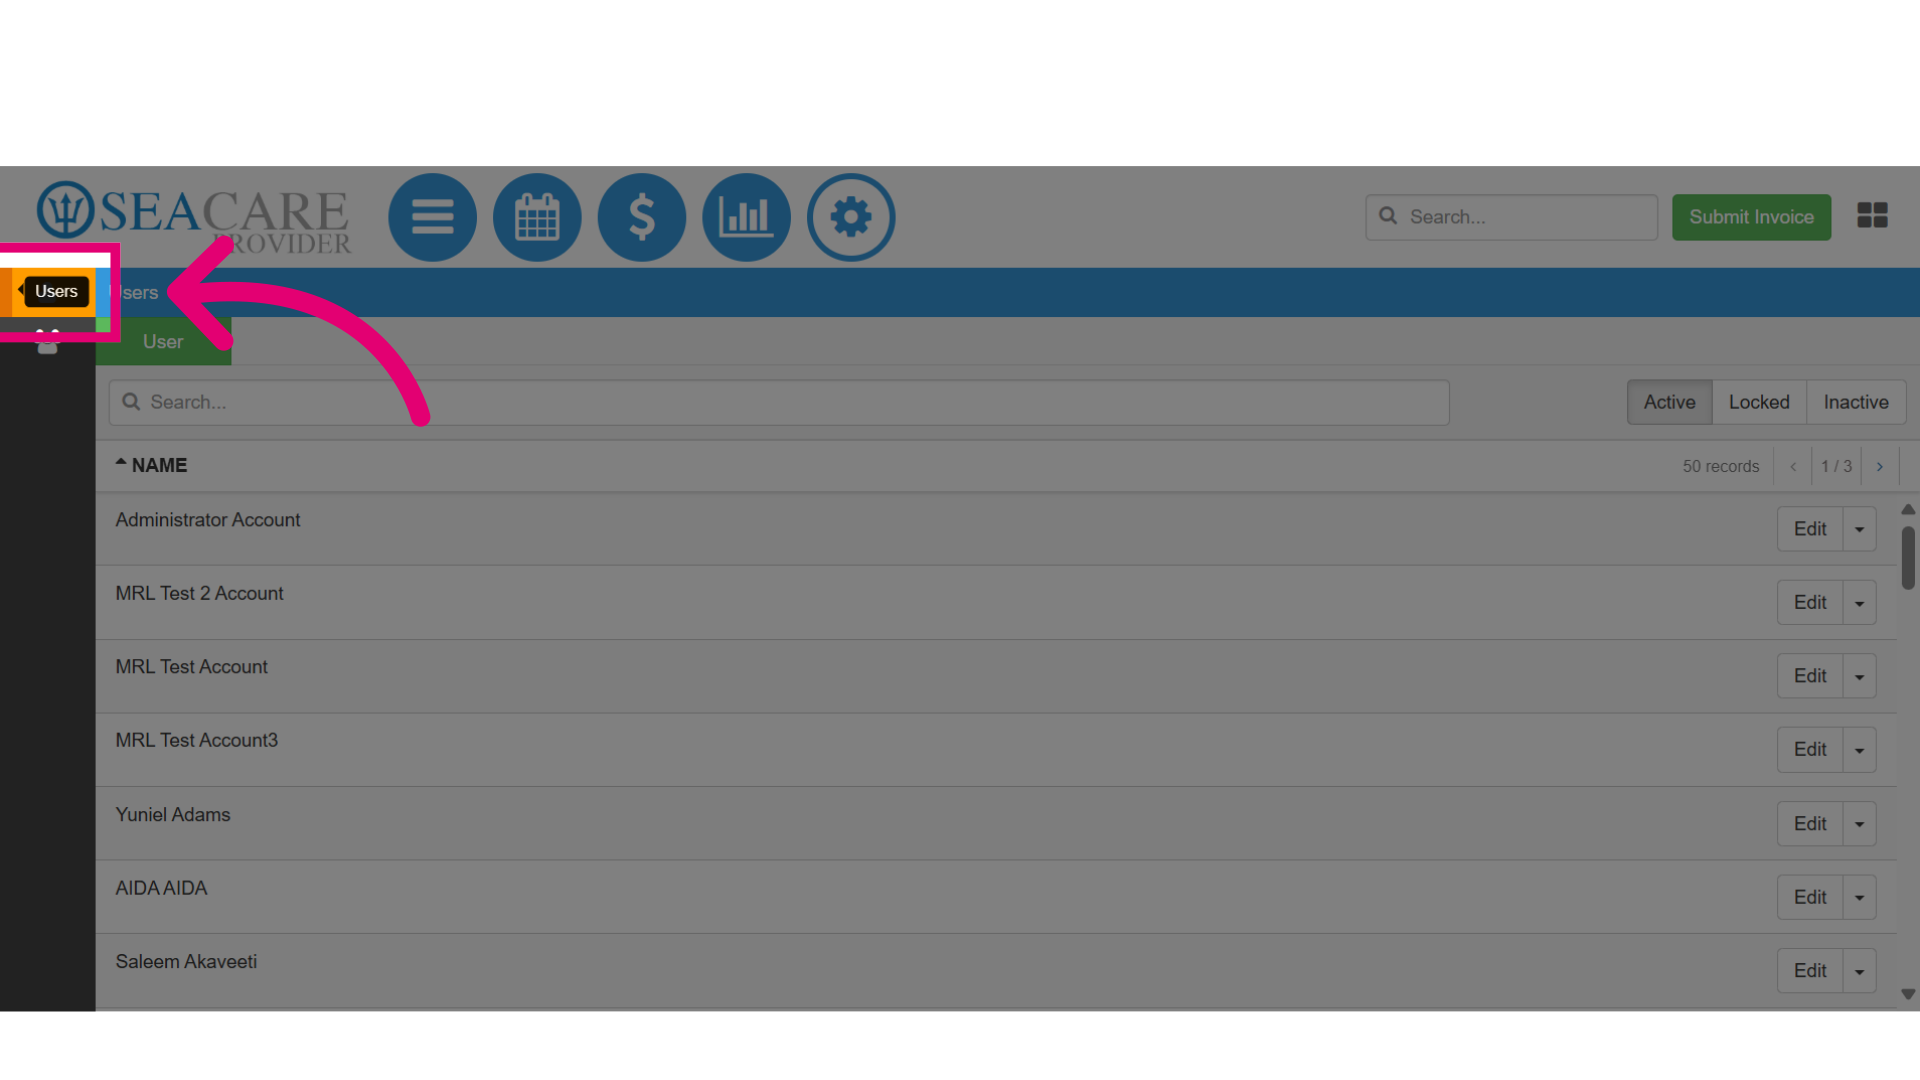
- Then, select the Users section.
- Click on the green User button.
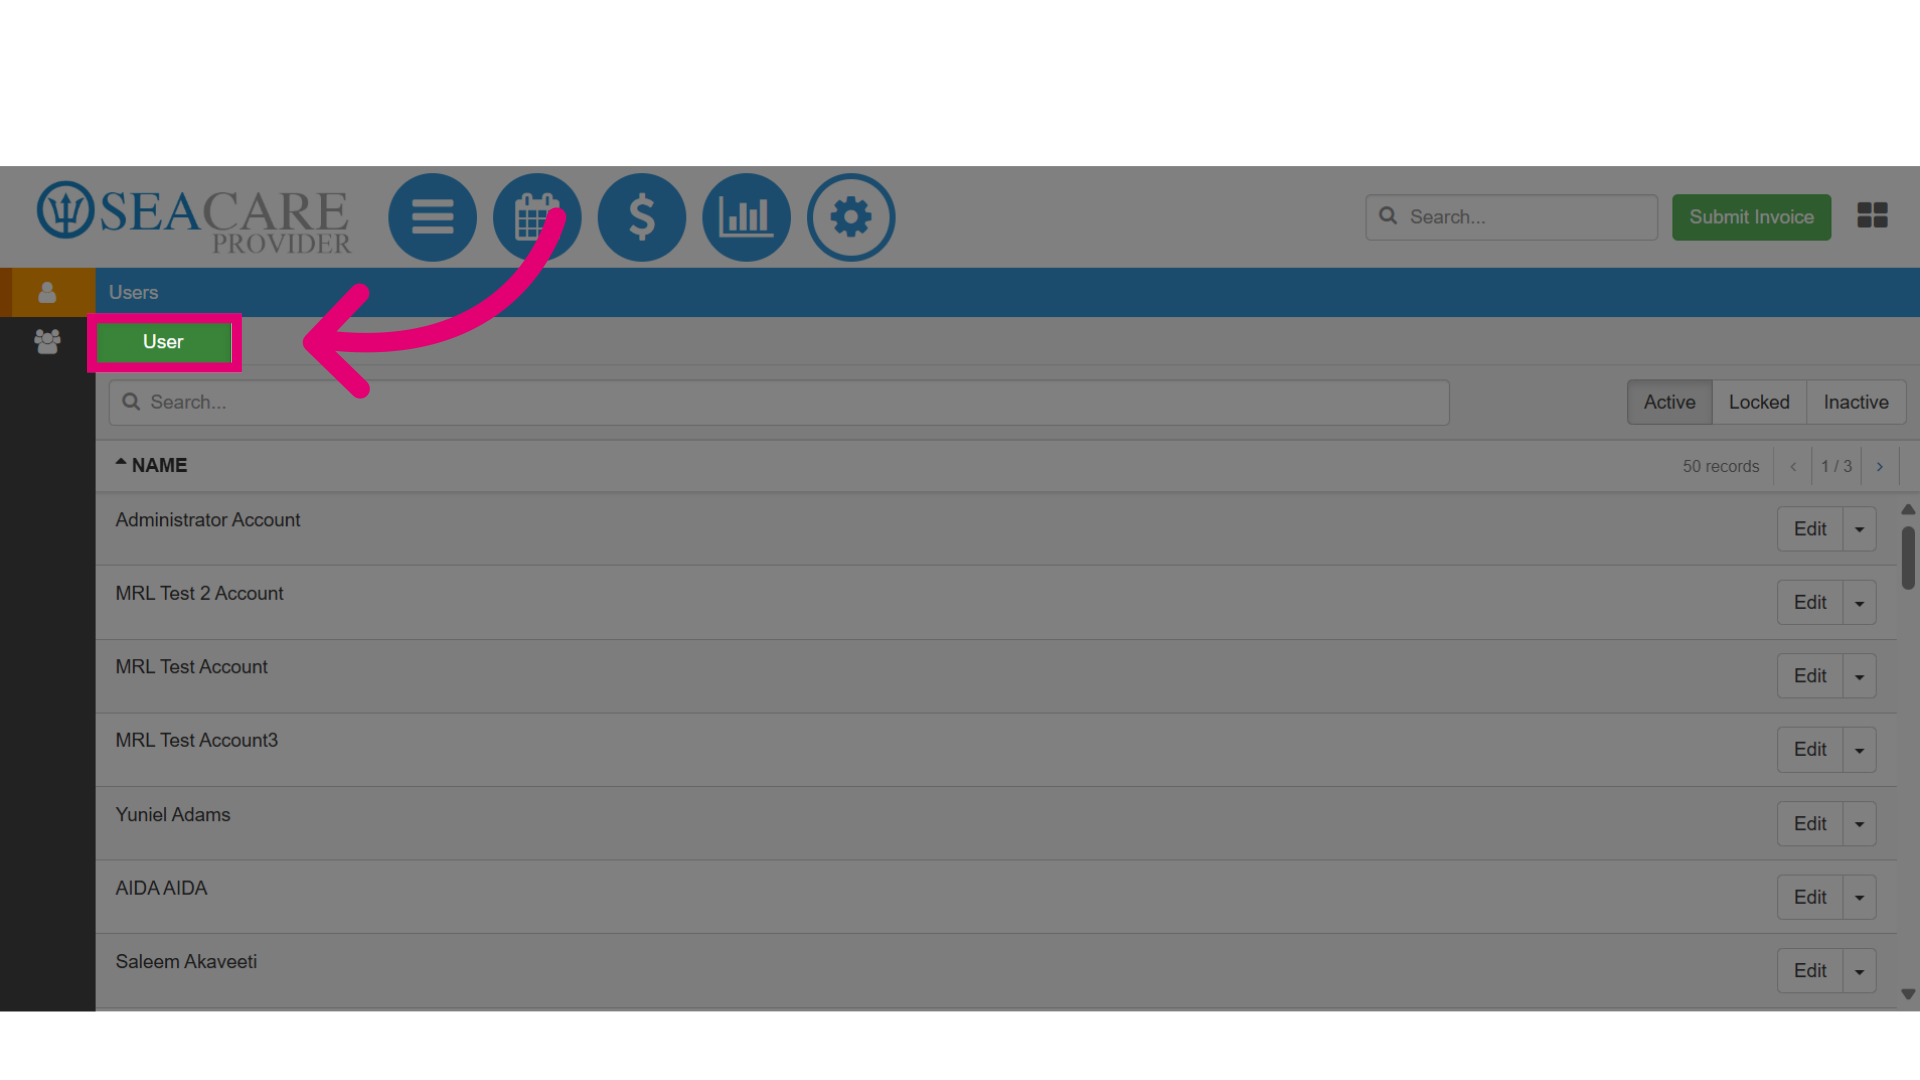
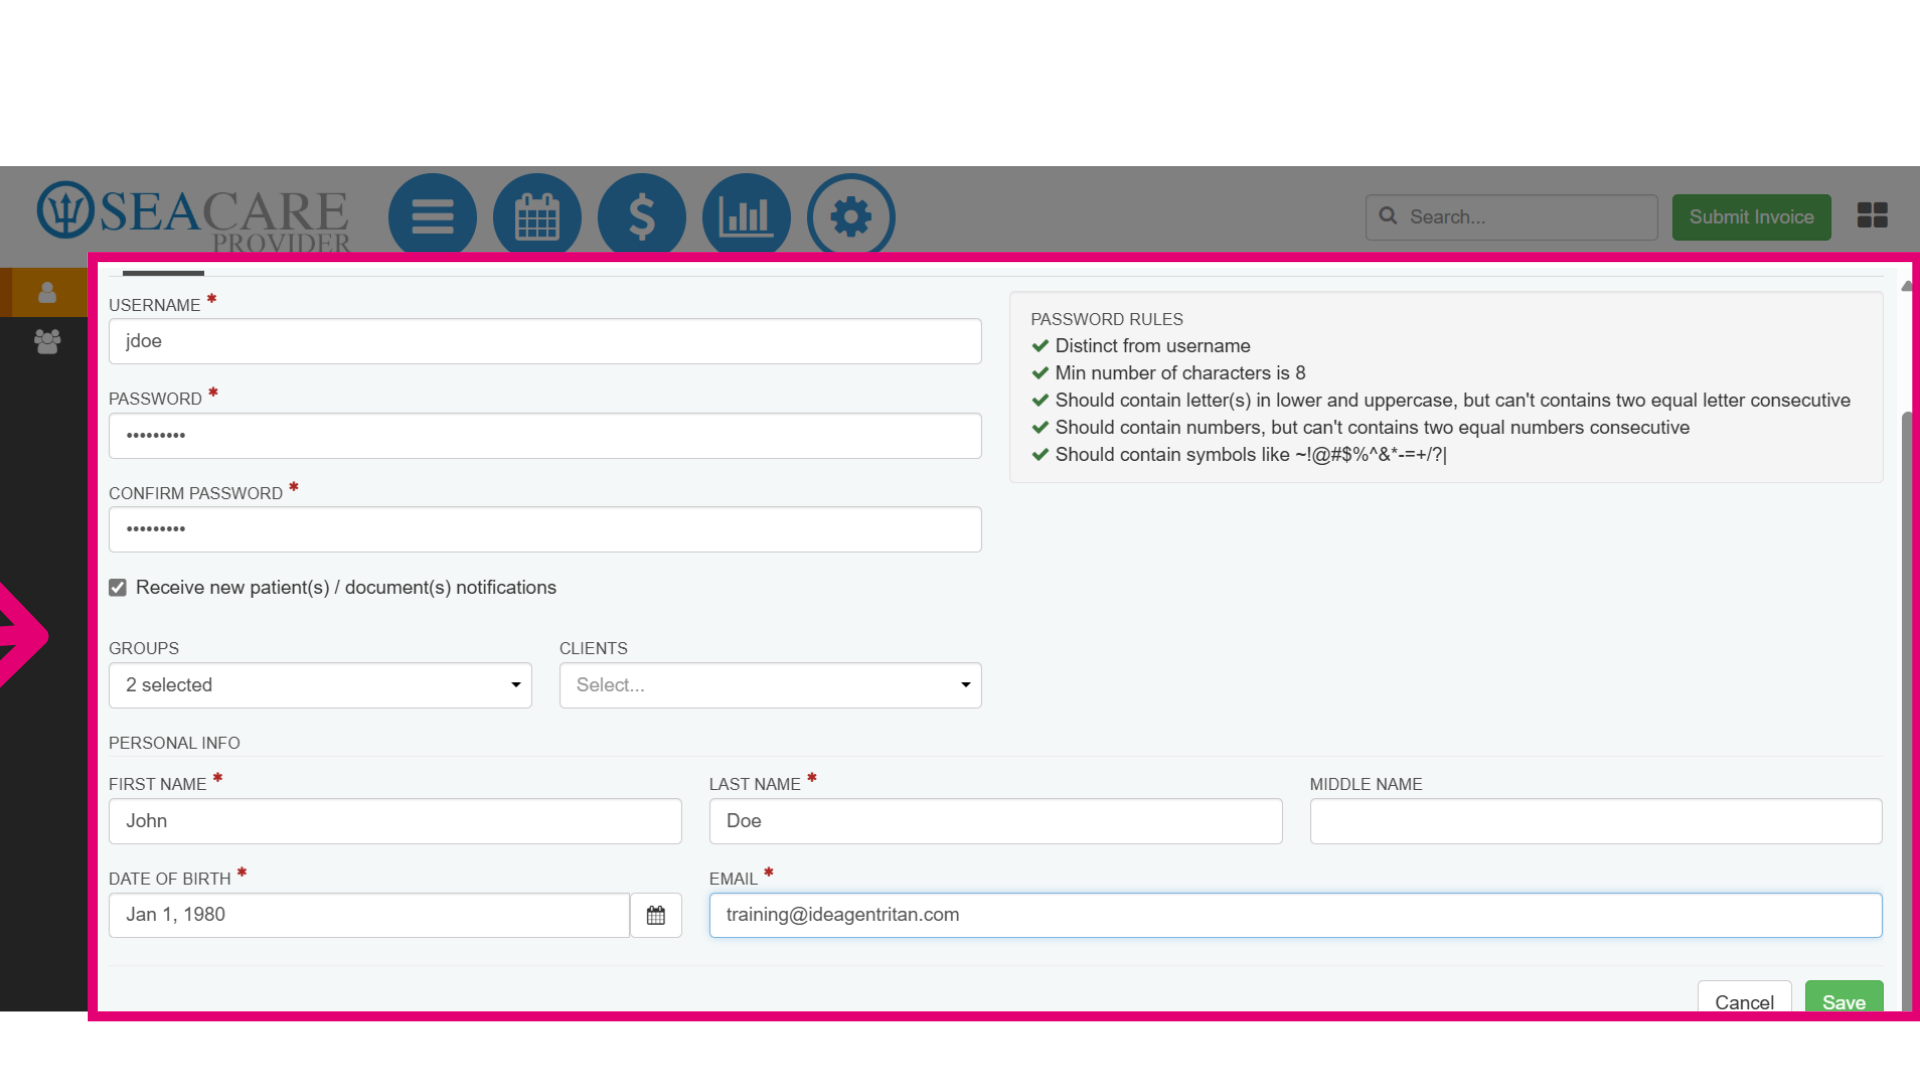
- This opens up the new user section to enter the user information including:
- Username - Create a username for the new user.
- Password - Add a password following the password rules.
- Notifications - Select the checkbox to specify if the user receives new patient document notifications by email.
- Groups - Select the groups the user will have access to.
- Clients - Choose the clients the user will have access to.
- User Demographics - Enter the user's name, date of birth, and email address.
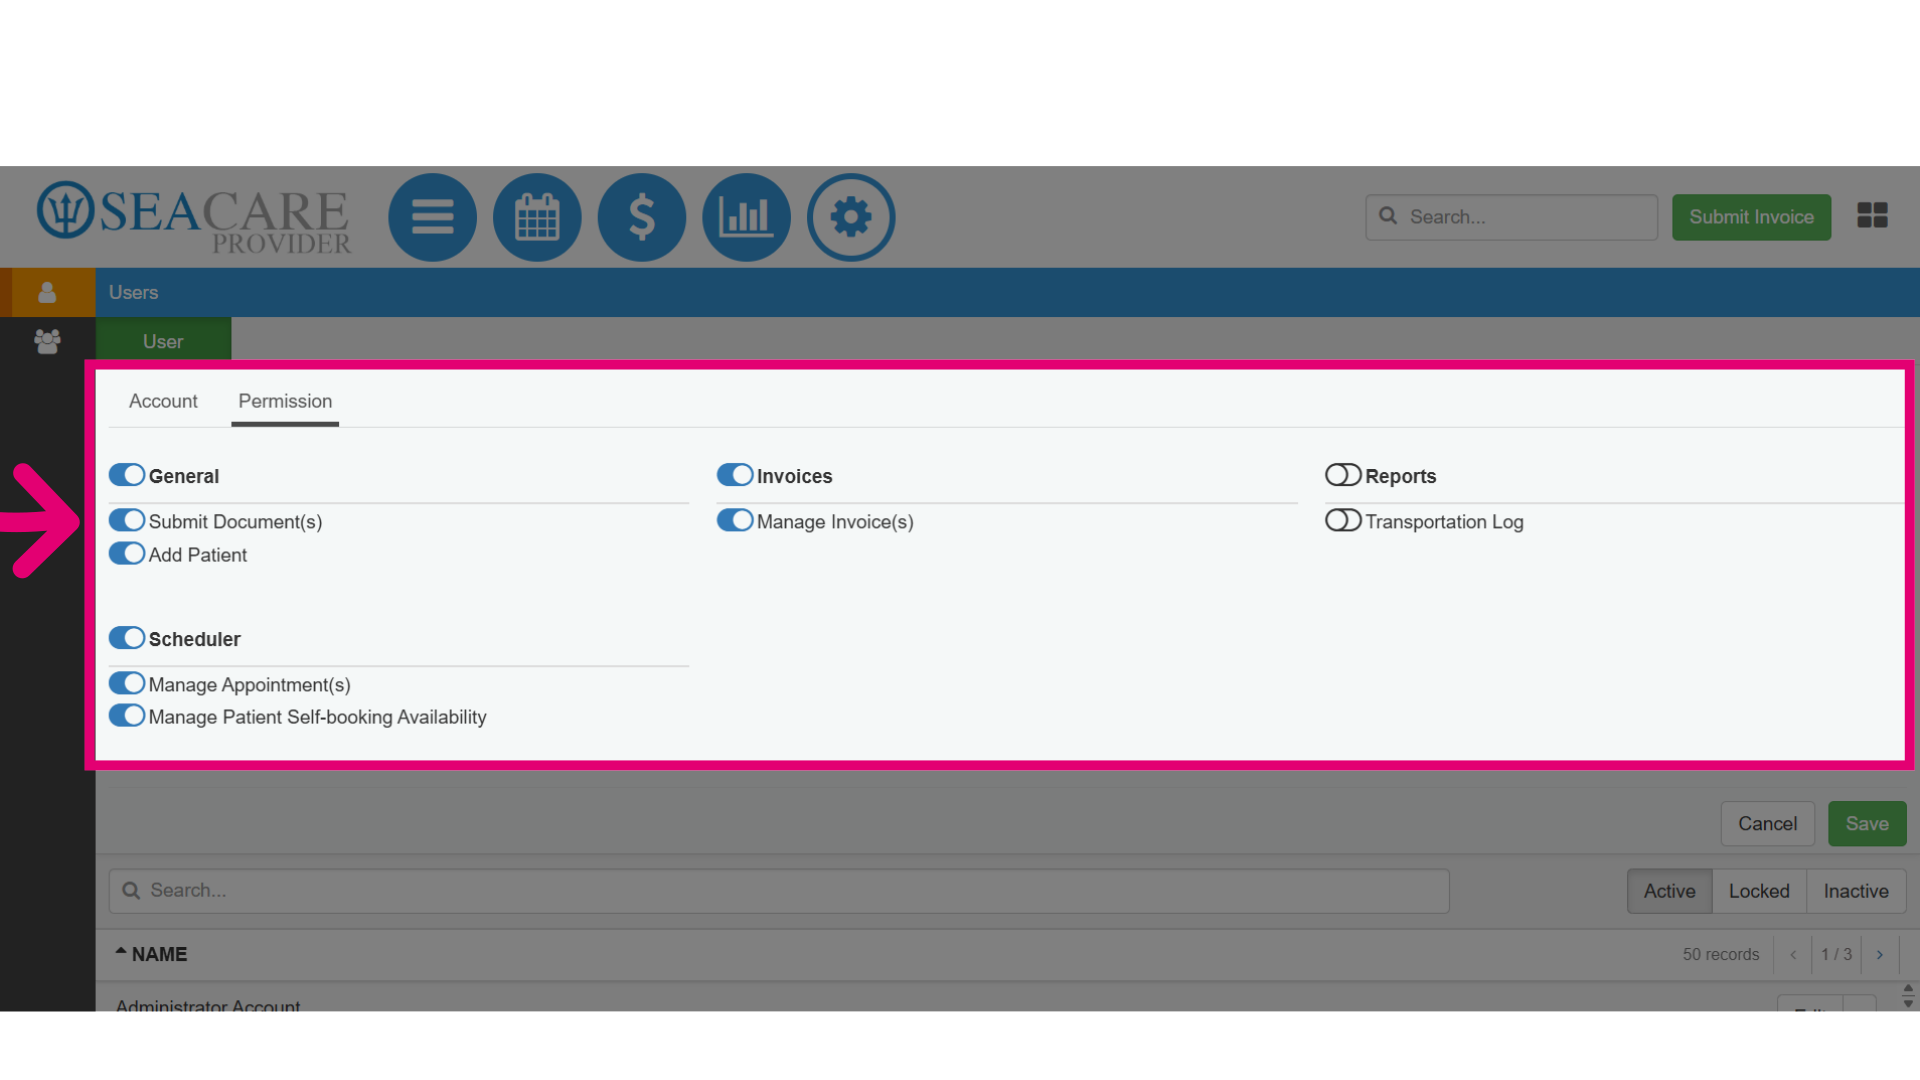
- When creating new users, you must ensure that they have the appropriate permissions and access by toggling on permissions from these permission categories:
- General - Includes options for specific permissions that grant access to Submit Documents and Add Patient.
- Invoice(s) - Includes an option that allows the user to Manage Invoice(s).
- Reports - Include a permission that grants the user access to the Transportation Log.
- Scheduler - Includes permissions that allows access to the scheduler to Manage Appointment(s) and Manage Patient Self-booking Availability.
- To remove a permission for a user, toggle off an option that was toggled on.
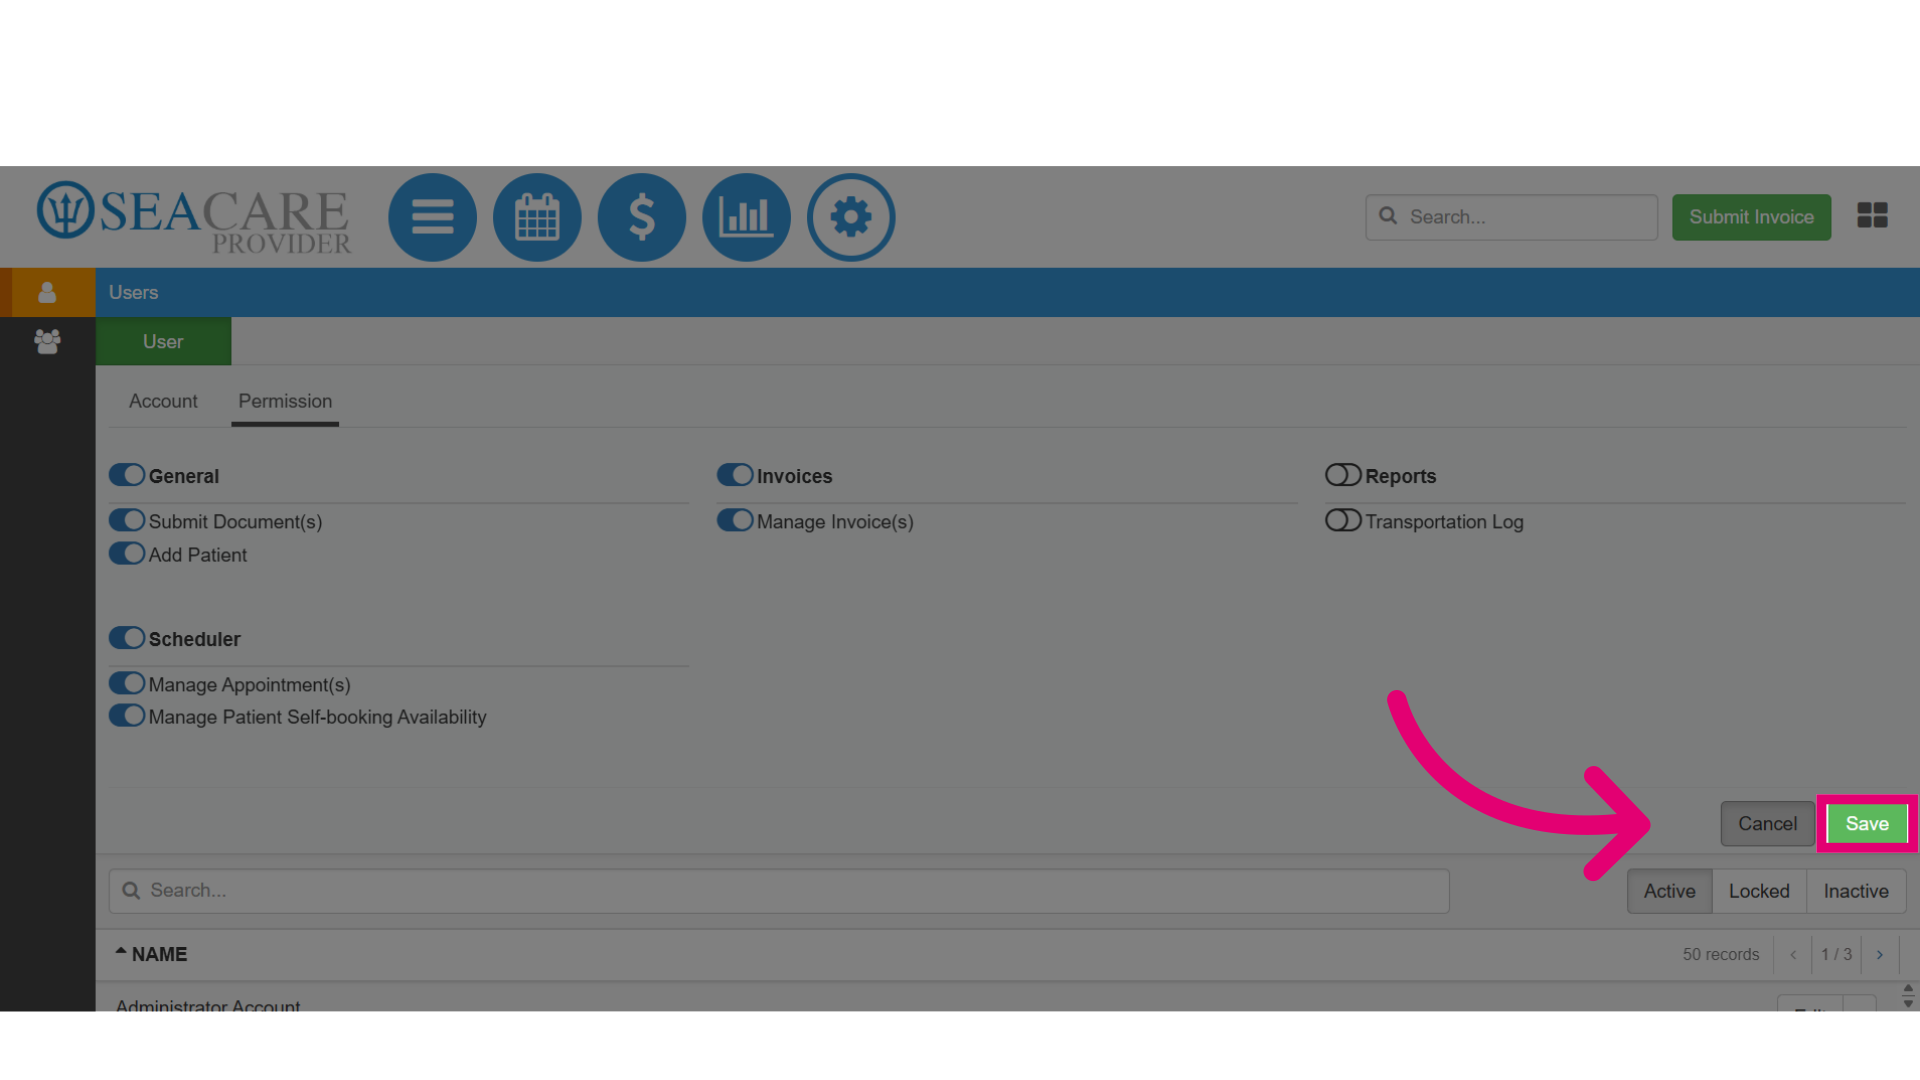
- Then, select Save when you are done to save the user information and assigned permissions.
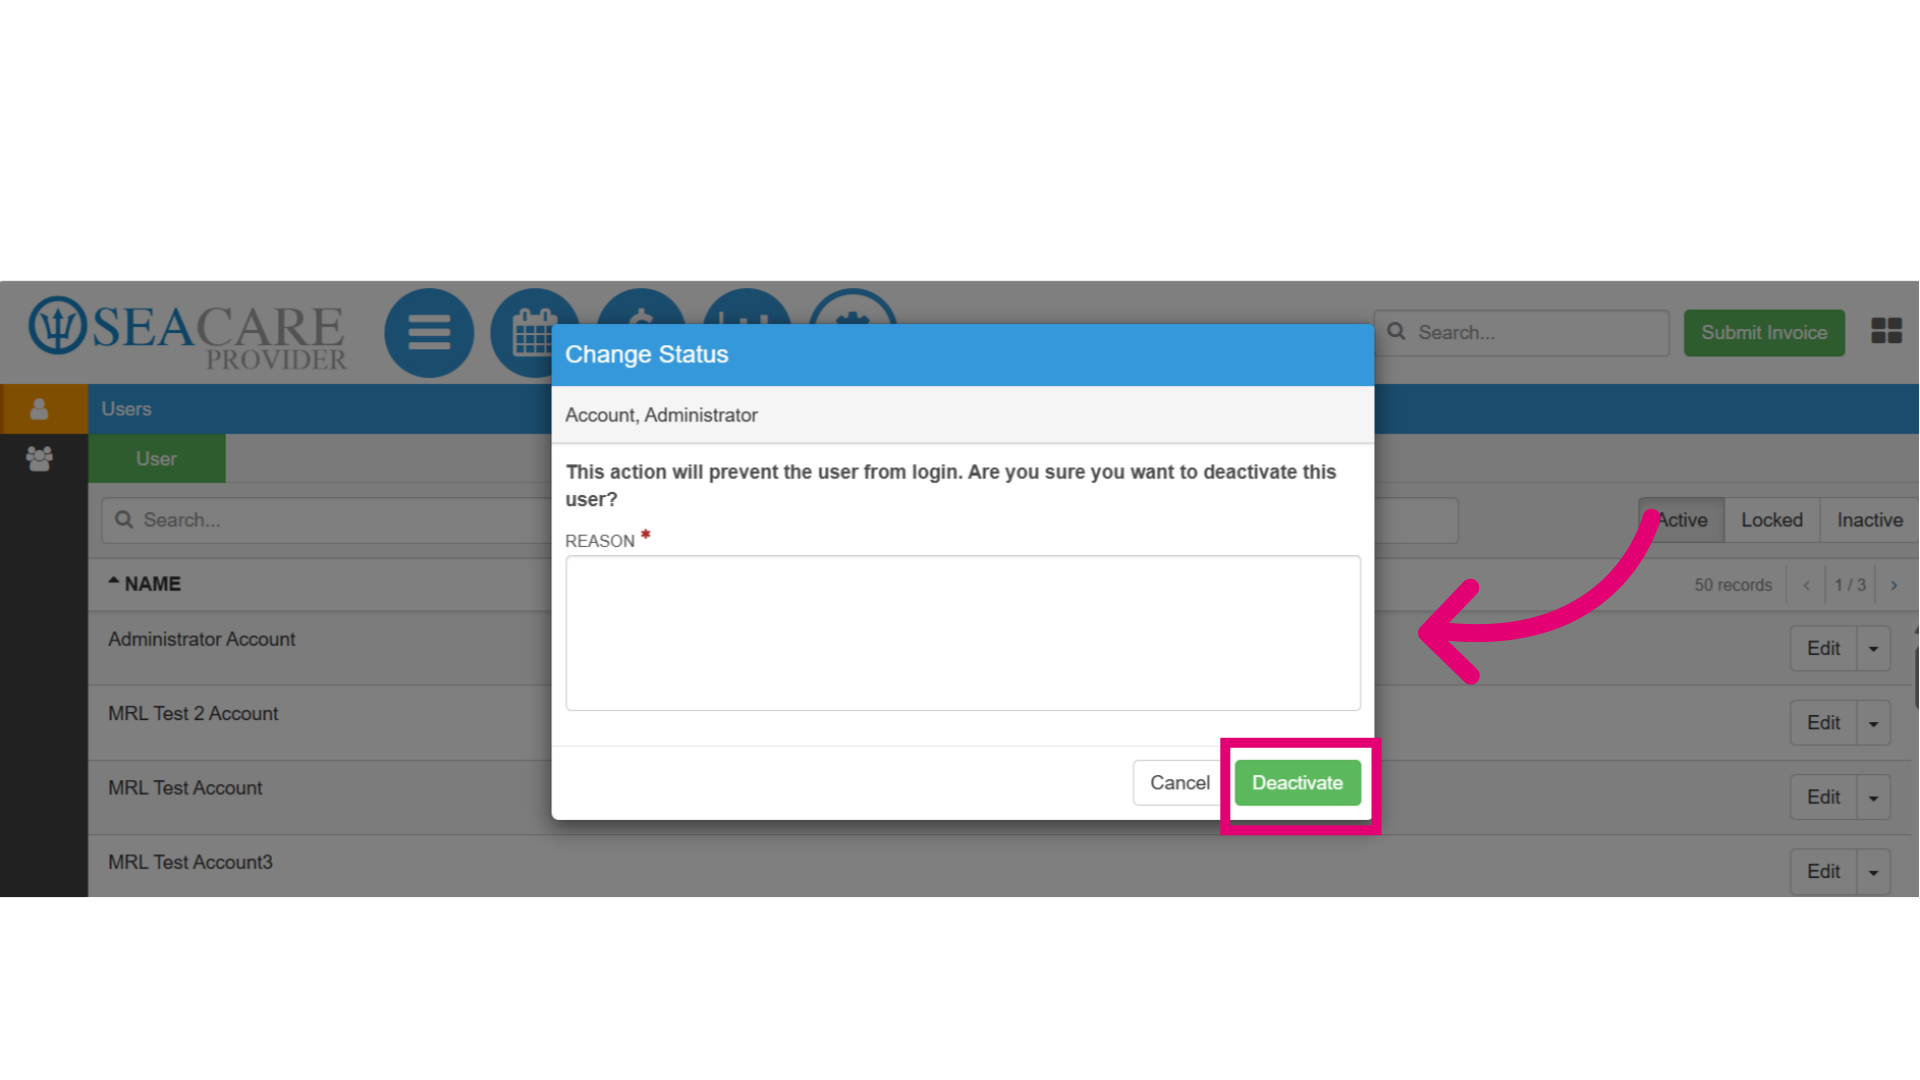
- Once the user is created you can review the user in the list of users, where you can also make updates to Edit or Deactivate the user.
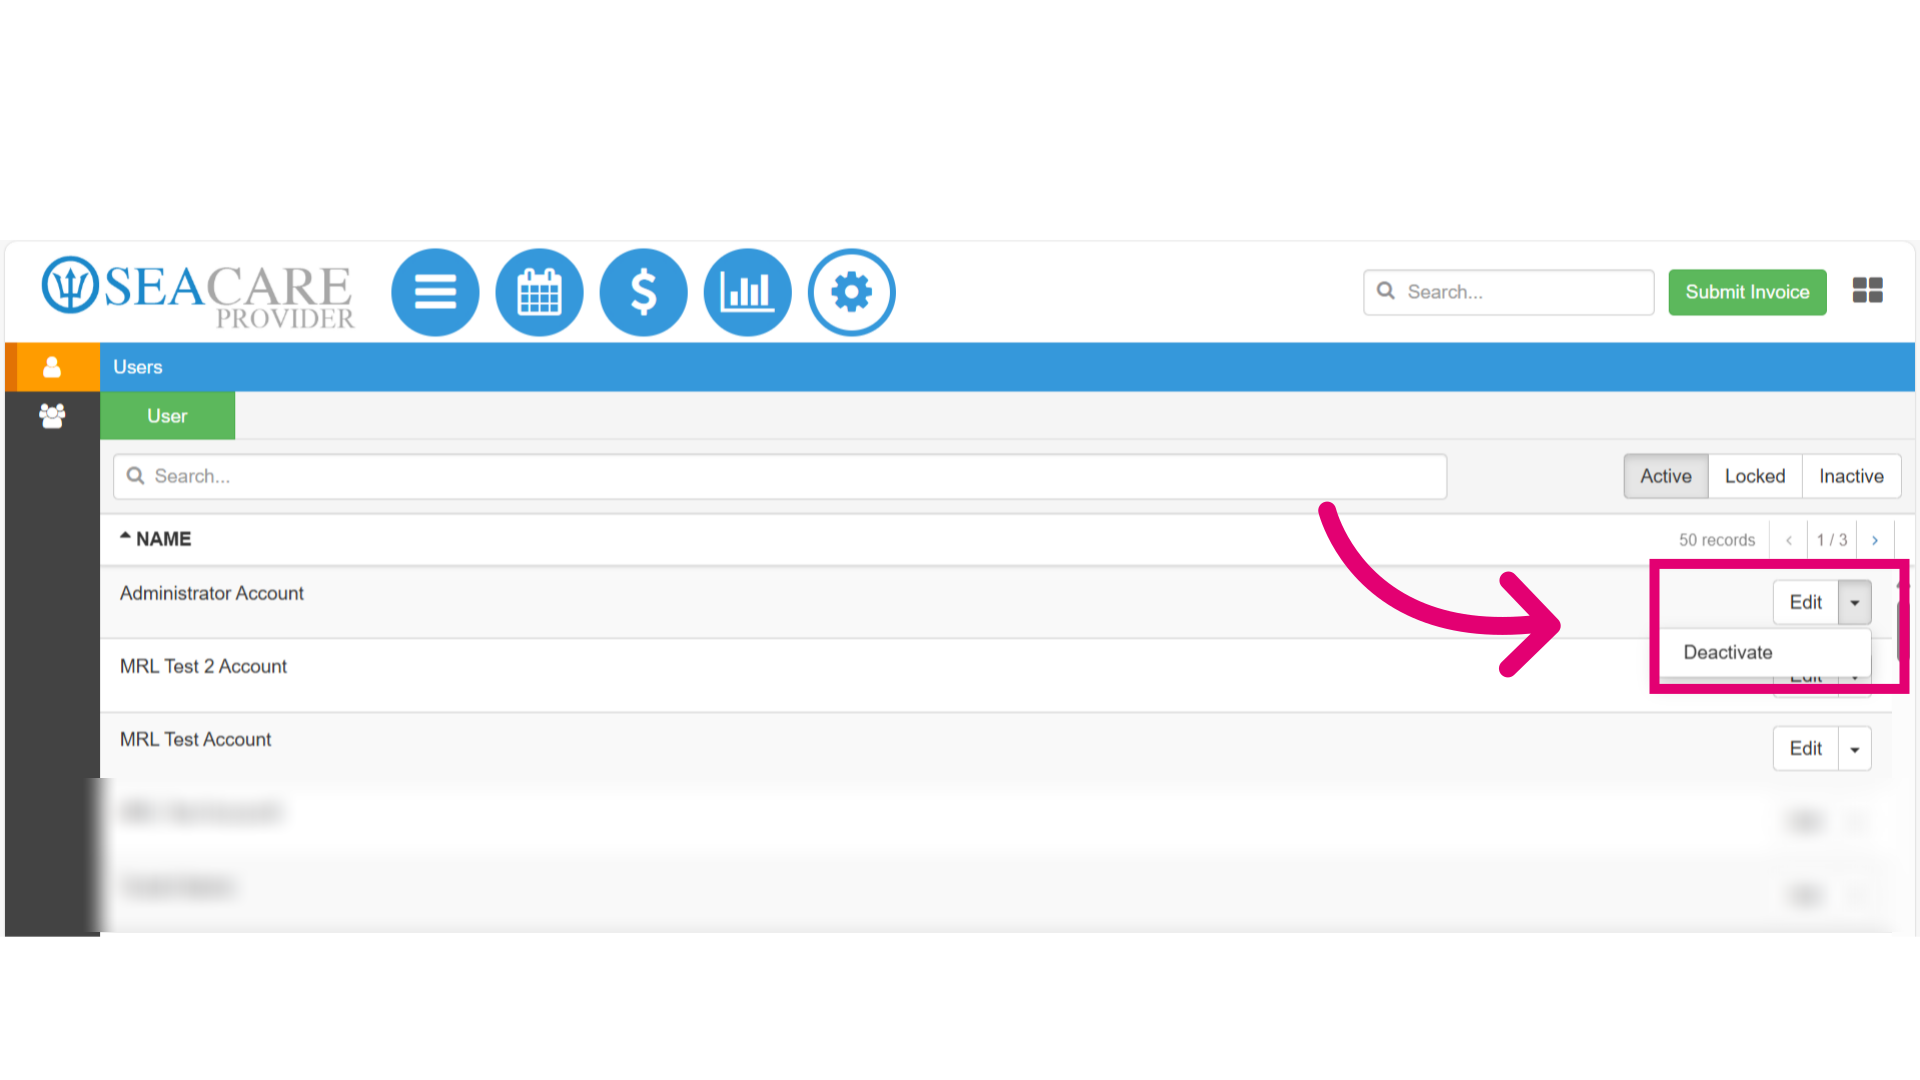
- To deactivate a user, a window will appear prompting you to provide a reason for the deactivation. Then, select Deactivate.